

Page 1
Wireless
Wireless
LAN
LAN
3G / UMTS WLAN LAN Gateway
User Manual
Page 2

Contents
Welcome
Overview 3
LCD display 4
Side panel 5
Wall mounting 6
Safety guidelines 7
Installation
Step 1: Insert the SIM 9
Step 2: Connect the power 10
Step 3: Connect your computer 11
Step 4: Connect to the Internet 13
Internet Settings
Opening the Tools 17
Change your UMTS PIN code 18
Disconnect automatically 19
Reconnect automatically 20
Monitor usage 21
Disconnect from the Internet 22
Adjust the time 23
Administration Settings
Change your password 25
Back up your settings 26
Restore your settings 27
Upgrade the Ovation firmware 28
Restore Factory Default Settings 31
SMS
Send messages 33
Read messages 33
Delete messages 34
Set up options 34
1
Page 3

Wireless Security Settings
Review the basics 35
Determine the exposure 36
Protect your data 37
Rename your network 40
Restrict access 41
Hide your network 42
Control the traffic 43
Block content 44
Monitor activity 45
Advanced Network Settings
DMZ server 47
WLAN Mode 48
Reboot 49
Troubleshooting 51
Glossary 55
Specifications 59
2
Page 4

Welcome
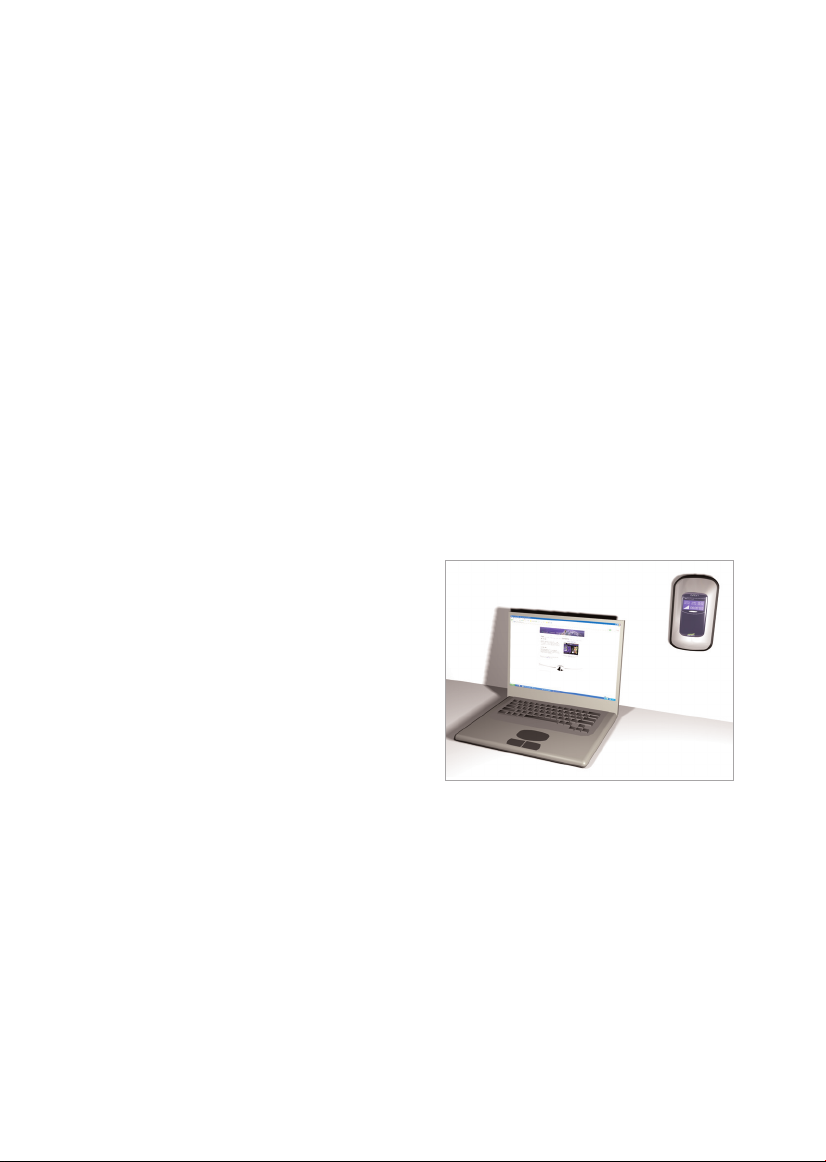
Within minutes, all of the computers in your home can be sharing a wireless
connection to the Internet through the 3G/UMTS mobile network.
Tip: To achieve the best possible reception, check the signal strength (the more
bars the better the reception) on the LCD on your Ovation. You may find that
placing your Ovation near a window provides the best reception.
Simple setup
Your Ovation is designed to provide you with a quick and troublefree
installation. You can install, set up, and be connected to the Internet in just a
few short steps. The webbased interface lets you set up your Ovation from
almost any personal computer, including Windows, Macintosh, or Linux, using
an Internet browser (e.g. Internet Explorer 6.0 or Netscape 6.2). Once you are
set up, you can review and enable customized wireless security settings.
Instant protection
Your Ovation supports Network Address Translation (NAT). This network service
hides the computers in your network so they can't be found or directly accessed
by anyone outside of your network. Also included is a true firewall that blocks
all incoming traffic and allows all outgoing traffic by default.
Additional security
Disabled by default, your Ovation supports both Wired Equivalent Protection
(WEP) and WiFi Protected Access (WPAPSK) to protect your network data.
Parents can set up content filtering to monitor or restrict Internet access.
Security logs keep you aware of potential security risks and attempted access.
You can view logs online.
Stay in touch
You can use your Ovation to send and receive SMS text messages. The LCD on
the front of the device lets you know when you have new messages.
Important note
To protect your network from unauthorized access, and to make it more
difficult for hackers to analyze your data, please check the WLAN security
settings and enable either WEP or WPAPSK encryption on your Ovation.
3
Page 5

Welcome
LCD display
1
32
4
5
1 UMTS
Online when you are connected to the 3G/UMTS mobile network. Offline
when you are not connected to the 3G/UMTS mobile network.
2 LAN
Online when a computer is turned on and connected with an Ethernet
cable. 10 (Mbps) or 100 (Mbps) indicates the connection speed.
6
7
3 WLAN
Online when the WLAN module is enabled.
4 UMTS signal indicator
Six bars represents the strongest signal. The stronger the signal, the better
your 3G/UMTS mobile network connection.
5 Clock
Displays the current time in hours and minutes.
6 SMS
An envelope symbol appears when you receive an SMS text message.
7 LCD lighting
Press this button to turn the LCD backlight on or off.
4
Page 6
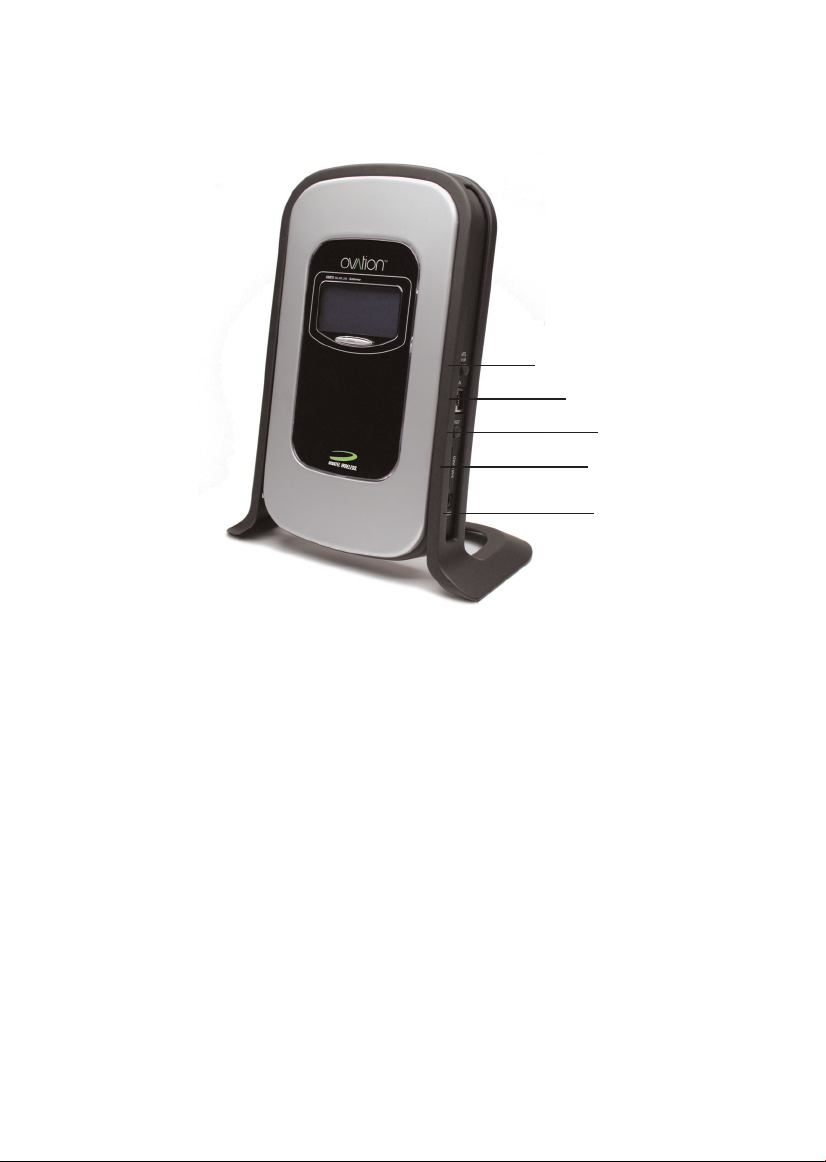
Side panel
1
1 UMTS on/off
Press this button to connect or disconnect from the 3G/UMTS
mobile network.
Welcome
2
3
4
5
2 LAN
To connect your Ovation to a computer using an Ethernet cable.
3 Reset
Press this button to reboot or reset your Ovation.
4 SIM card slot
To insert or remove the SIM card, carefully press the yellow eject button
with a pointed object.
5 Power connection
To turn your Ovation on, plug the power adapter into this connection.
Note: You should leave your Ovation turned on at all times to provide a
faster connection. Leaving the power on is not the same as staying
connected to the 3G/UMTS mobile network. You are only connected when
the UMTS indicator on the LCD displays ONLINE.
5
Page 7
Welcome
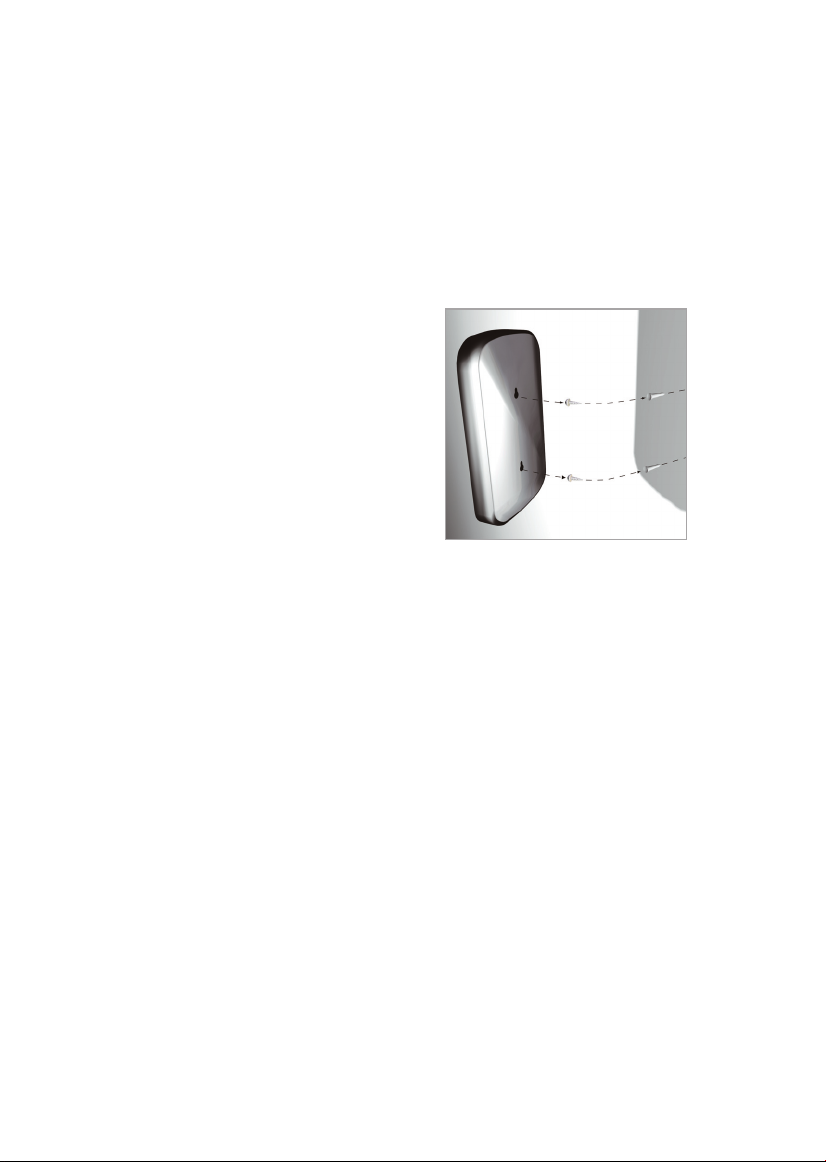
Wall mounting
You can mount your Ovation on a wall or other vertical surface. If the wall is
drywall, use two hollow wallanchors to secure the screws. Make sure you
mount your Ovation vertically so that the LCD is facing upward.
• Remove your Ovation
from the stand.
• Use the mounting template
to mark the holes.
• Secure the screws in the
wall.
• Hang your Ovation on the
screws.
6
Page 8

Welcome
Safety guidelines
Your Ovation is a sensitive electronic device. It is based on the same principles
as cell phones and other wireless devices. To use your device securely and
efficiently, please follow the following guidelines:
• Always handle it carefully and store it in a clean and dustfree place.
• Do not expose it to liquid, moisture, or humidity.
• Do not expose it to extreme temperatures, either high or low.
• Do not expose it to open flames or lit tobacco products.
• Do not drop, throw, or try to bend it.
• Do not paint or place stickers on it.
• Do not use it near medical equipment without prior permission.
• Do not use it in areas that display the posting “turn off twoway radio”.
• Do not use it in areas with a potentially explosive atmosphere.
• Do not take it apart.
7
Page 9

8
Page 10

Installation
Encryption is disabled by default on your Ovation and should be set up as the
final step in your installation. See page 37 for stepbystep instructions. To
ensure the highest level of protection, you should complete your initial setup
using a LAN connection.
Step 1: Insert the SIM card
You must insert the SIM card before you can access the Internet. Please insert
the SIM before you connect the power adapter. Take care not to touch or
damage the contact points on the SIM card. Use the notch in the tray as a
guide to properly insert the SIM card.
Important: If you need to remove or replace your SIM card, make sure you are
disconnected from the Internet and that the power adapter is unplugged.
• Push the eject button using
a pointed object, such as a
pen or pencil, and then
remove the SIM tray from
the card slot.
• Align the orientation notch
on the SIM card with
the orientation notch on the
tray.
• Insert the SIM card into the
tray.
• Reinsert the SIM tray into
the card slot.
9
Page 11
Installation
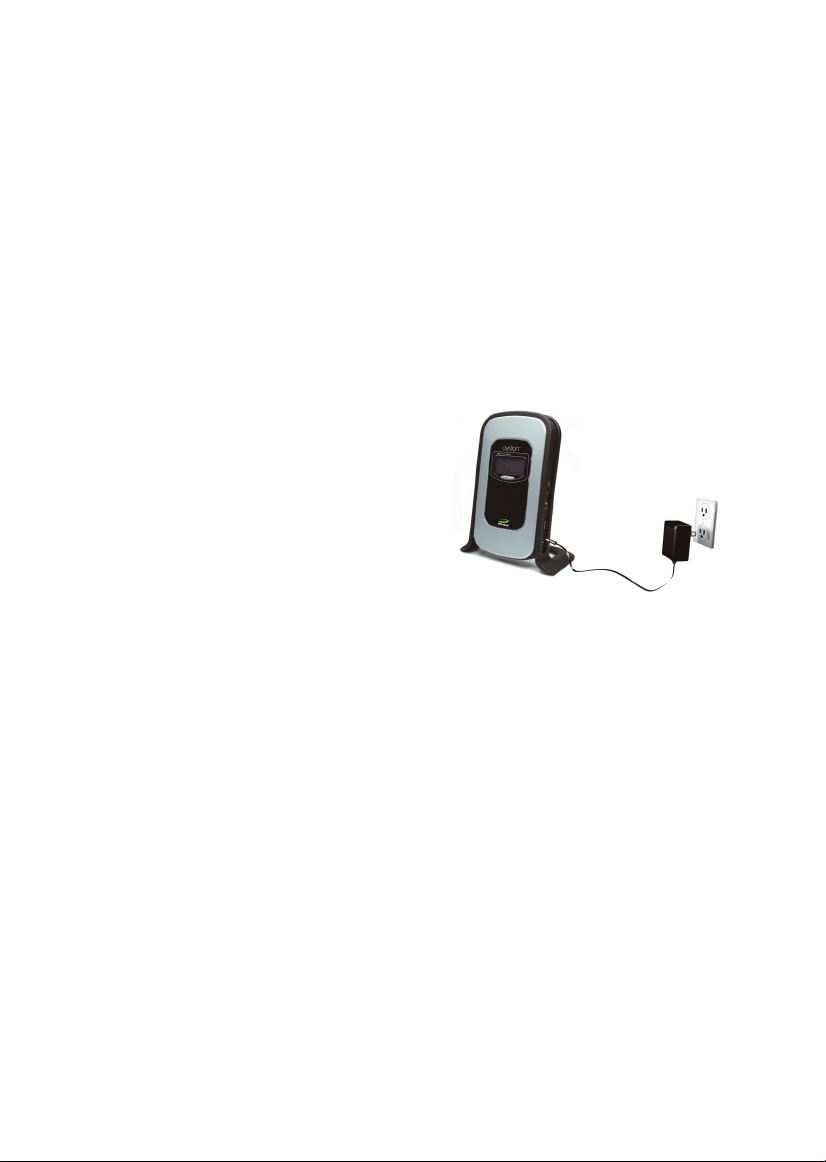
Step 2: Connect the power
Only use the power adapter you received with your Ovation. Using a different
power adapter could cause damage. After you connect the power, a startup
process begins. This process takes about 60 to 90 seconds. Please wait until you
see the message “Enter PIN Code” on the LCD before proceeding to Step 3.
If you see the message “SIM Failure” or “Insert SIM” on the LCD, then the SIM
card is defective, was inserted incorrectly, or was not inserted at all. Unplug the
power adapter and check the SIM card.
• Plug the power adapter into
your Ovation.
• Plug the power adapter into
an outlet.
10
Page 12
Installation
Step 3: Connect your computer
You can connect your computer to your Ovation using either a WLAN (wireless)
connection or a LAN cable.
Wireless connection
Your computer must support IEEE 802.11 b/g to set up a wireless connection.
If your computer does not support this, you can upgrade your computer with a
WLAN adapter or WLAN PC card.
The following instructions show you how to connect your computer to your
Ovation using Windows XP (SP2). If you are using another operating system,
refer to the manufacturer’s documentation.
• Turn on your computer.
• Enable the WLAN adapter.
• Choose StartControl Panel
and then select Network
Connections.
• Select ovation (default SSID
name) and click Connect .
The first time you connect,
wait about 60 seconds until
the wireless connection is
established. The message
“Connected” will display on
your computer.
Your computer should
automatically connect to
your Ovation during future
sessions.
11
Page 13
Installation
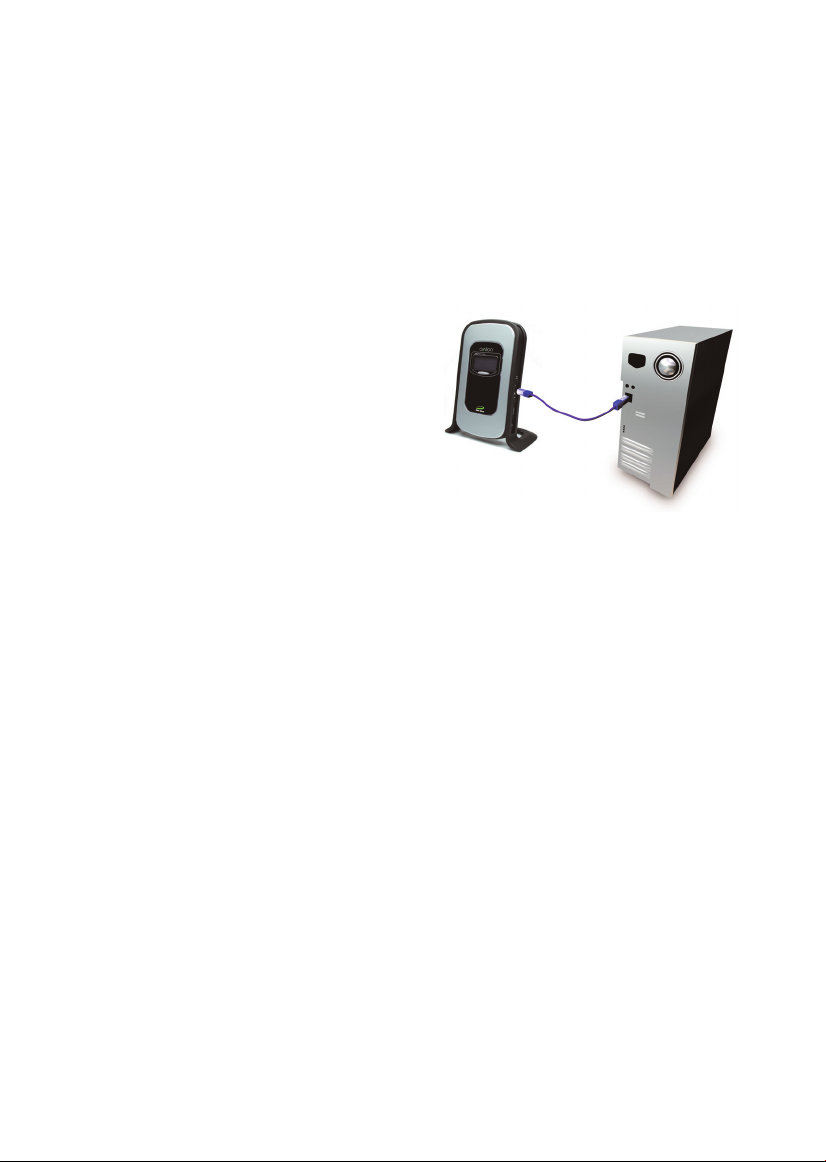
LAN connection
Your Ovation box contains a LAN cable (Ethernet cable). Use this cable to
establish a LAN connection between your computer and your Ovation.
• Connect your computer to
your Ovation using
the LAN cable.
12
Page 14

Installation
Step 5: Connect to the Internet
Your final step is to connect to the Internet. You will need the PIN code that
came with your Ovation.
• Open your
Internet browser.
• If your proxy server is
enabled, please disable it.
For Internet Explorer 6.0
(SP2), choose Tools and
then Internet Options.
Select the Connections tab
and click Settings.
Disable the proxy server and
automatic script search.
• Make sure that JavaScript is
enabled.
• If you are using popup
blocking software, please
disable it.
For Internet Explorer 6.0
(SP2) choose Tools and then
PopUp Blocker. Select
Turn Off Popup Blocker.
• Type http://192.168.0.1
in the browser address bar
and press Enter.
13
Page 15
Installation
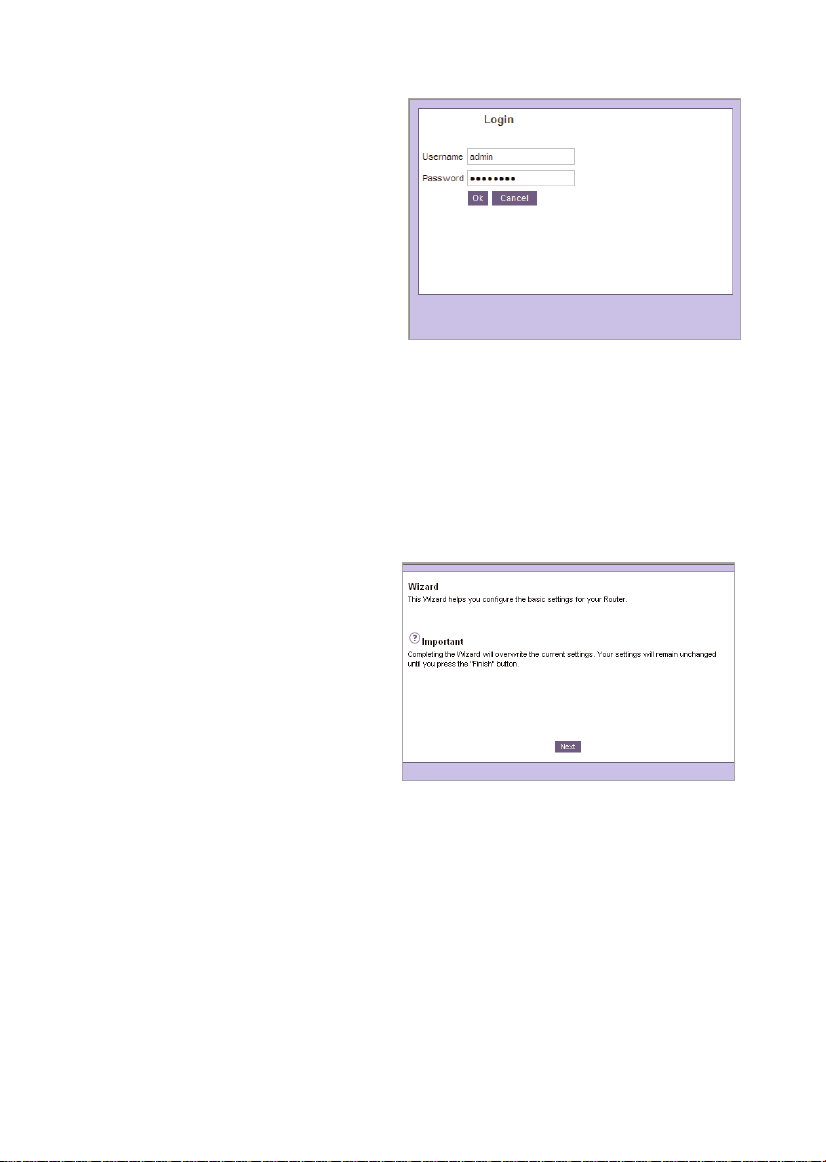
• Enter your user name in
the Username box. The
default user name is admin.
• Enter your password in
the Password box. The
default password is
password.
Note: Note that the user
name and password are
case sensitive. For example:
ADMIN is not the same as
admin.
• Click OK.
• The first time you use your
Ovation, the Setup Wizard
will appear. Follow the four
installation steps by clicking
Next and at the end
Finish.
• Your Ovation will now
restart.
14
Page 16
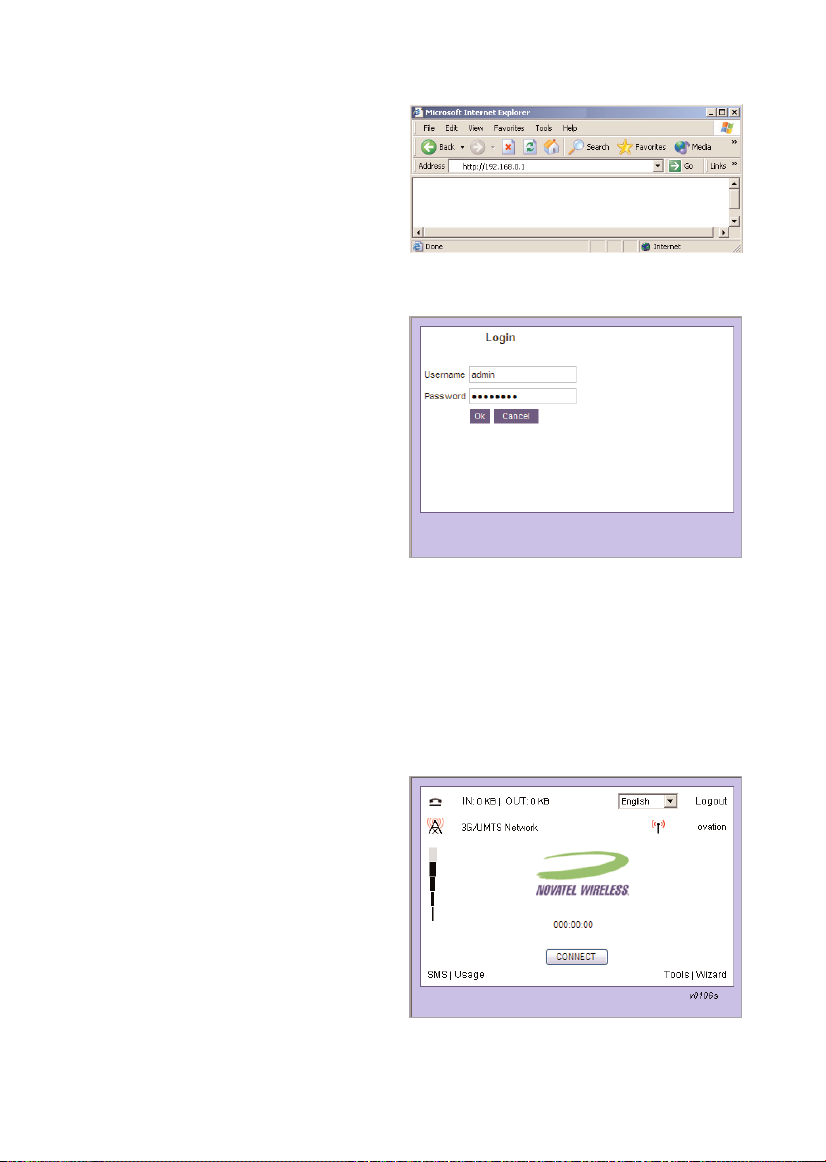
• Open your
Internet browser.
• Type http://192.168.0.1
in the browser address bar
and press Enter.
• Enter your user name in
the Username box. The
default user name is admin.
• Enter your password in
the Password box. The
default password is
password.
Note: Note that the user
name and password are
case sensitive. For example:
ADMIN is not the same as
admin.
Installation
• Click OK.
• Click the Connect button
on the Connection
Manager.
• When the message appears,
letting you know you are
being redirected to the PIN
page, click OK.
15
Page 17
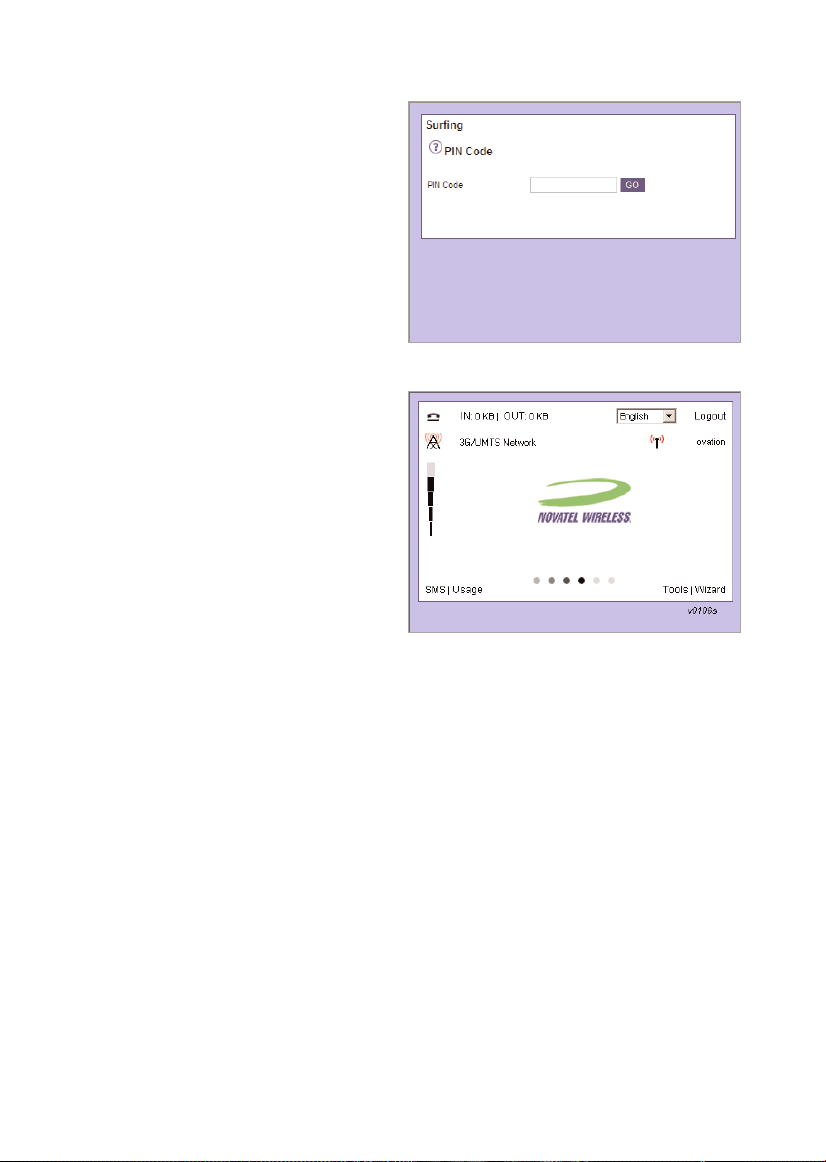
• Type your PIN code in
the PIN Code box.
• Click Go.
• Wait for the connection.
• Once you are connected,
you can surf the Internet,
access your email, and
send and receive SMS text
messages.
Please review the
information in the
remaining chapters to learn
about your Ovation default
settings and how you can
adjust them.
1616
Page 18

Internet Settings
You can change or customize your Internet settings. You must open the Tools
before you can change these settings.
Opening the Tools
Once your Ovation is set up for first time use, you can use the Tools to change
your settings.
• Enter your user name in
the Username box. The
default user name is admin.
• Enter your password in
the Password box. The
default password is
password.
Note: Note that the user
name and password are
case sensitive. For example:
ADMIN is not the same as
admin.
• Click OK.
• Click Tools on the
Connection Manager.
• You can then adjust
your Ovation settings.
17
Page 19
Internet Settings
Changing your PIN code
For security reasons, you should change your preset PIN code. The length of
your PIN code will vary, depending on your service provider. You cannot change
the user name admin.
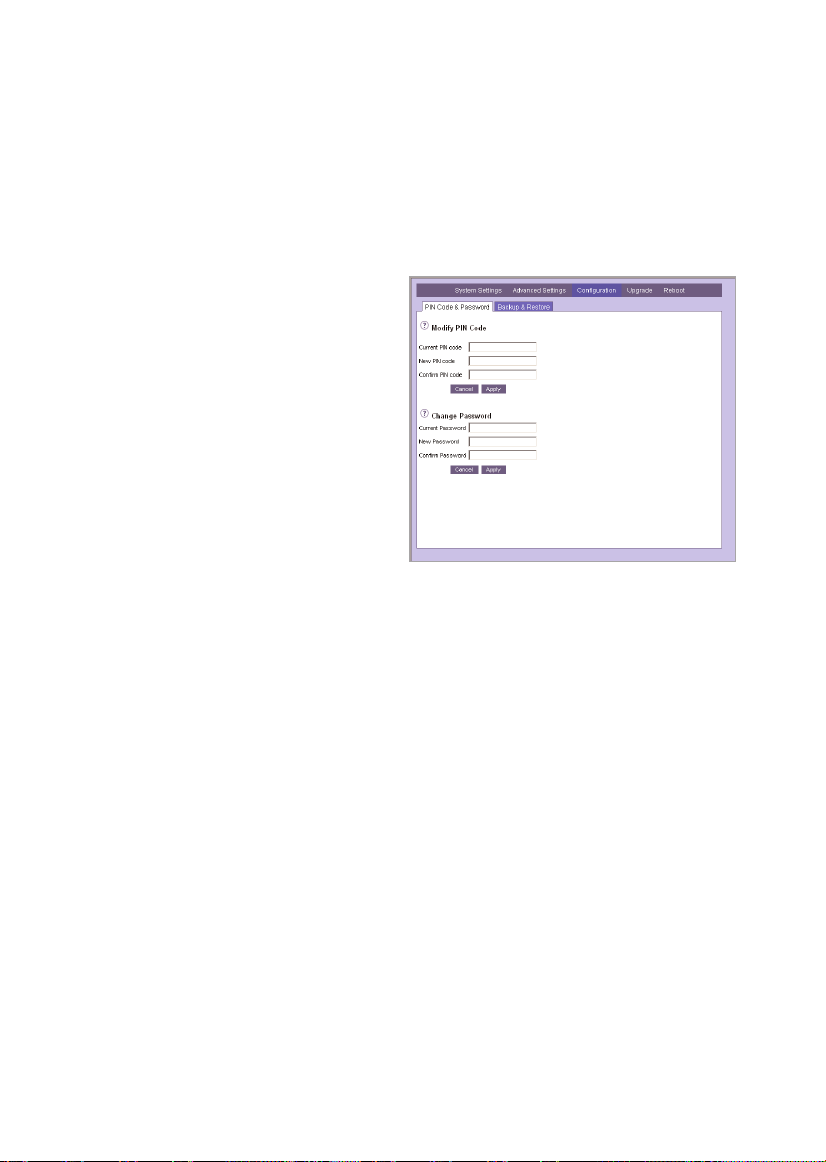
• Click Configuration, then
PIN Code & Password.
• Type your current PIN code
in the Current PIN Code box.
• Type your new PIN code in
the New PIN Code box.
• Type your new PIN code
again in the Confirm PIN
Code box.
• Click Apply.
18
Page 20

Internet Settings
Disconnect automatically
Your Ovation was set up at the factory to automatically disconnect from the
Internet when your session is inactive for 60 minutes.
Note: The Internet connection will not be disconnected if programs on your
computer generate data traffic between your Ovation and the Internet in the
background.
This is intended for your protection so that no costs are incurred if you
accidentally forget to disconnect the 3G/UMTS connection manually after your
session. You can change this default setting so that the connection will
automatically be interrupted after a period of time defined by you.
• Click System Settings then
UMTS Conn.
• Select the amount of
minutes to elapse before
disconnecting from the Idle
time before disconnecting
box.
• Click Apply.
19
Page 21

Internet Settings
Reconnect automatically
Enable automatic reconnect to minimize Internet connection disruptions. If your
Ovation automatically disconnects from the Internet either because you set up
an automatic disconnect or your network dropped your connection your
Ovation will automatically attempt to reestablish your Internet connection
when your Internet activity resumes.
• Click System Settings then
UMTS Conn.
• Check the Reconnect if
connection is dropped box.
• Click Apply.
20
Page 22

Internet Settings
Monitor usage
To monitor the duration of your connection you can view your connection
statistics throughout the month. Please note that the usage information shown
on your device may be different from that shown on your bill.
• Click Usage on the
Connection Manager
window.
• To refresh the statistics
click Update.
21
Page 23

Internet Settings
Disconnect from the Internet
There are two methods you can use to disconnect from the Internet. Maximize
or enable the Connection Manager window and click Disconnect, or press the
UMTS on/off button on the side of your Ovation.
The UMTS indicator on the LCD shows UMTS OFFLINE when your Ovation is
disconnected from the Internet.
Connection Status window
• Click Disconnect on the
Connection Manager
window.
UMTS on/off
• Press the UMTS on/off
button on the side of your
Ovation.
22
Page 24

Internet Settings
Adjust the time
The LCD on your Ovation displays the current time. By default, the time is set
up to synchronize with the time on your computer. You must unselect Adjust
for Daylight Savings Time and click Apply before the time will display on the
LCD.
You can change this default and set it manually or synchronize it with the
Network Time Protocol (NTP). If you set the time manually, you should disable
the Adjust for Daylight Savings Time feature.
• Click Advanced Settings,
then Date & Time.
• Select the required options.
• Click Apply.
23
Page 25

24
Page 26

Administration Settings
You can change common administration settings for your Ovation. You must
open the Tools before you can change these settings.
Change your password
The password is your security code for your Ovation. Change the default
password to limit access to these settings.
If you change the default password and you can't remember what the new
password is, you'll have to reset your Ovation to the default factory settings.
This resets the password back to password. It also resets all of the other
settings which is why it's a good idea to back up your settings.
For information about creating a backup, see “Back up your settings” in this
user guide.
• Click Configuration then
PIN Code & Password.
• Type your existing password
in the Current Password
box.
• Type your new password in
the New Password
and Confirm New Password
boxes.
• Click Apply.
25
Page 27

Administration Settings
Back up your settings
Create a backup file to save your user specific settings. Use it to restore your
settings.
When you create a backup file, the password is saved with the file. When you
restore your settings from the backup file you will have to use the password you
were using when you created the backup file.
• Click Configuration then
Backup & Restore.
• Click Backup.
• If a browser request appears,
select Save on Disk/Hard
Drive and then click OK.
• Select a location to save the
file and enter a file name in
the File Name box.
• Click Save.
26
Page 28

Administration Settings
Restore your settings
If you previously created a backup file, you can use the file to restore your
Ovation to your custom settings.
• Click Configuration then
Backup & Restore.
• Type either the complete path
to the backup file in the
Restore from File box or
click the Browse field to find
the file.
• Click Restore.
• A status message appears.
Wait until the restore process
is complete.
27
Page 29

Administration Settings
Upgrade the Ovation firmware
Contact your service provider to find out where you can download the most
current version of the Ovation firmware.
Before you install a new version of the firmware, you should create a backup
file of your settings.
• Open an Internet browser,
connect to the Internet, and
go to your service providers
web site.
• Download the firmware
upgrade and save it on your
hard drive.
• If necessary, extract the
compressed or zipped file.
28
Page 30

• Click Upgrade.
• Enter either a complete path
to the upgrade file in the
Upgrade Router field or
click Browse to find the
downloaded file.
• Click Upgrade and wait
until the upgrade is complete.
Note: Do not push buttons or
insert or remove cables during
the upgrade. Please wait until
a message appears, letting
you know that the upgrade
is complete.
• Clear your browser cache.
See page 52 for instructions.
Administration Settings
29
Page 31

30
Page 32

Restore Factory Default
Settings
You can restore your Ovation to the factory default settings. This resets the
password back to password. It also erases all of your custom settings. If you
want to restore your custom settings after you reset the device, create a backup
file first.
You can reset your Ovation to the factory defaults as follows:
• Unplug the power adapter.
• Then plug the power adapter back in to turn the device back on.
• Wait until the Welcome message appears on the LCD and press the Reset
button for 30 seconds.
• Then remove the power adapter and then turn the device back on.
or
• From the Tools, click Configuration, then Backup & Restore.
• Click Restore.
31
Page 33

32
Page 34

SMS
Your Ovation is equipped to send and receive SMS text messages. This feature
may or may not be available, depending on your service provider.
Send messages
You can send SMS text messages from your Ovation. The length of outgoing
messages is limited to 160 characters.
• Click SMS on the
Connection Manager
window then Send SMS.
• Enter the text and phone
number that you want to
send the message to.
Read messages
You can read SMS text messages on your Ovation. An envelope symbol will
appear on the LCD when you receive a new message.
• Click SMS on the
Connection Manager
window then Inbox.
• Select the message in the
inbox that you want to read.
33
Page 35

SMS
Delete messages
SMS text messages are stored on your SIM card. The number of messages you
can store varies, depending on your service provider. When your SIM card
memory is full, you will not be able to receive any new messages. You should
delete messages after you read them.
• Select the message in the
inbox that you want to
delete.
• Click Delete.
Setup options
To receive SMS messages on your Ovation, you need the number of your SMS
Center (SMSC). This number should be set up automatically. If it isn’t, you can
enter it manually. Please contact your service provider if you are not sure what
the number is.
• Click SMS on the
Connection Manager
window then Settings.
• Enter the number for your
SMS Center in the SMSC
field.
• Click Apply.
34
Page 36

Wireless Security Settings
Review the basics
Simply connecting your computer to your Ovation provides a basic level of
protection.
Network Address Translation
Your Ovation supports Network Address Translation (NAT). This network service
makes it possible for all of the computers in your network to share a single IP
address. This IP address is assigned to your Ovation. It is the only address that is
visible to the outside world. The private addresses that DHCP assigns to computers
in your network remain private and cannot be reached from the Internet.
Firewall
Your Ovation has a true firewall that uses rules to determine which traffic comes
in and which traffic goes out. By default, all traffic is allowed out and no traffic is
allowed in. This is the only security setting that is enabled by default.
Determine the exposure
If you live in a rural area far away from your neighbor, the likelihood that someone
will break into your wireless network is very low. On the other hand, if you live in
a densely populated area in the city next to an office building, there is a potential
danger that a third party could connect to your wireless network.
Based on your own security needs, decide which security settings you want to
implement. The following table shows you which settings protect your network
access and which settings protect your data.
Wireless Security Network Access Network Data
Change SSID Yes
Restrict access by MAC address Yes
Enable WEP Open System encryption Yes
Enable WEP Shared System encryption Yes Yes
Enable WPAPSK encryption Yes Yes
Disable SSID broadcast Yes
35
Page 37

Wireless Security Settings
Protect your data
Data sent through a wired or wireless network is transmitted as plain text.
Anyone able to break into your network can intercept and read the data.
Encryption minimizes this security risk because the data is converted into a
nonreadable format.
Your Ovation supports Wired Equivalent Protection (WEP) and WiFi Protected
Access (WPAPSK) encryption. Encryption is disabled on your Ovation by default.
Wired Equivalent Protection (WEP)
This type of encryption is based on the RC4 encryption algorithm. The algorithm
is generated based on a key that everyone in the network shares to encode and
decode data.
The network card in your computer uses the encryption key to encode data that
leaves the computer. When the data arrives at your Ovation, the encryption key
is used again to decode the data into its original form.
You can set up your Ovation to provide encryptiononly protection using
opensystem mode or you can add authentication using sharedkey mode.
You should change the WEP encryption key on a regular basis to maintain the
effectiveness of WEP.
Setting up WEP on your Ovation
To set up a WEP encryption code for your network, manually enter a key using
the following characters (a number combination between 0 and 9 and letters
between a and f). This code is not case sensitive. For example: AA is the same
as aa. The encryption code can contain up to 26 characters and may not
contain any spaces.
36
Page 38

Wireless Security Settings
• Click System Settings then
WLAN AP Security.
• Select the type of
authentication from the
Authentication list.
• Select WEP as Encryption.
• Select the length of the key
from the WEP Encryption list.
• Enter your key
For example:
abcdef12345678901234567890.
• Click Apply and wait until your
Ovation restarts. This startup
process takes about 60 seconds.
Repeat the “Initial Connection Process” and enter the key when asked. Your
Ovation is now secure.
Reconnecting your computer
When you click Apply after you set up the WEP encryption, computers with
wireless connections to your Ovation will disconnect. It can take 2 to 3 minutes
before your Ovation reappears on the list of available wireless networks. As
soon as your computer finds your Ovation, you must reconnect manually.
For instructions on how to reestablish the wireless connection between your
computer and your Ovation, please refer to the manufacturer’s documentation.
37
Page 39

Wireless Security Settings
WiFi Protected Access (WPAPSK)
This type of encryption helps protect your network from unauthorized access
and eavesdroppers. Like WEP, an encryption key scrambles the data between
your computers and your Ovation. Like WEP SharedKey, computers must
authenticate with your Ovation to join the network. This is where the similarities
end.
With WEP the encryption key is static – it stays the same until you change it.
With WPAPSK, you enter a single passphrase once on your Ovation and then
again on each computer you want to connect to your network. Then the WPA
Temporal Key Integrity Protocol (TKIP) takes over.
TKIP mathematically derives encryption keys based on your initial passphrase.
Keys are automatically changed, rotated and authenticated among devices in
your network. The same key is never used twice. WPAPSK is sometimes
referred to as extrastrength encryption.
What are the drawbacks?
To use WPAPSK on your network, every device you connect to your network
must support WPA. Older devices – those manufactured before August 2003 –
might not support this new standard. Check with your manufacturer to see if a
software upgrade is available.
Setting up WPAPSK on your Ovation
Your WPAPSK passphrase can contain between 8 and 63 characters. It can
contain special characters and spaces. Ideally, a passphrase should consist of 20
characters, be a mixture of uppercase and lowercase letters, and contain
numbers and punctuation marks.
Since your passphrase provides the starting point for the rekeying process, using
a passphrase that is difficult to crack strengthens your network security.
38
Page 40

• Click Setup then
WLAN Security.
• Select WPAPSK as Security
System.
• Enter your passphrase in the
PSK field.
Write down your passphrase.
You must enter it on every
computer that you want to
connect to your network.
• Click Apply.
• WPAPSK encryption has
now been enabled and
security within your wireless
network is significantly
higher.
Wireless Security Settings
Reconnecting your computer
When you click Apply after you set up the WPAPSK encryption, computers
with wireless connections to your Ovation will disconnect. It can take 2 to 3
minutes before your Ovation reappears on the list of available wireless
networks. As soon as your computer finds your Ovation, you must reconnect
manually.
For instructions on how to reestablish the wireless connection between your
computer and your Ovation, please refer to the manufacturer’s documentation.
39
Page 41

Wireless Security Settings
Rename your network
The default Service Set Identifier (SSID) for your Ovation is ovation. In some
operating systems, the SSID is also used as the network name. If you keep the
default SSID, confusion could occur if one of your neighbors sets up a wireless
network with the same name.
If you and your neighbor have disabled the security settings and you live within
150 meters of each other, your computer could accidentally connect to your
neighbor’s wireless network (and viceversa).
To solve this problem, you should change the default SSID. An SSID can contain
a maximum of 32 alphanumerical characters (letters or numbers) and is case
sensitive. For example, NEWNAME is not the same as newname.
• Click System Settings then
WLAN AP.
• Enter a new name in the
SSID box.
• Click Apply.
Reconnecting your computer
When you click Apply after you change the SSID, computers with wireless
connections to your Ovation will disconnect. It can take 2 to 3 minutes before
the Ovation reappears in the list of available wireless networks. As soon as your
computer finds your Ovation, it should reconnect automatically. If not, you must
reconnect manually.
For instructions on how to reestablish the wireless connection between your
computer and your Ovation, please refer to the manufacturer’s documentation.
40
Page 42

Wireless Security Settings
Restrict access
A common method of restricting network access is to specify the Media Access
Control (MAC) address. Every network adapter is identified by its MAC address.
Specifying which computers can connect to your network can limit network
access to trusted computers.
Your Ovation automatically detects a list of devices that are attached to your
network and their corresponding MAC addresses. Enable the access control list
(ACL) to limit network access to this list of attached devices.
• Click System Settings then
WLAN ACL.
• Check Enable ACL.
• Click Apply.
41
Page 43

Wireless Security Settings
Hide your network
By default, your Ovation broadcasts the Service Set Identifier (SSID). In some
operating systems, the SSID is referred to as the network name. This makes it
easy for computers in your network to find and connect to your Ovation. It also
makes it easy for computers outside of your network to find you.
Consider disabling the SSID broadcast as a final step after you have set up all
of your security settings and after all of the devices in your network are
connected and tested.
After you disable the SSID broadcast, new computers you add to your wireless
network might not be able to communicate with your Ovation. If this happens,
enable the SSID broadcast to allow the new computers to connect wirelessly.
Once the computers have connected, you can disable the SSID broadcast again.
• Click System Settings then
WLAN AP.
• Uncheck Broadcast SSID.
• Click Apply.
42
Page 44

Wireless Security Settings
Control the traffic
A firewall blocks Internet traffic that might cause damage to the computers in
your network. Before traffic is allowed in or out of your network, it has to pass
through the firewall. Incoming traffic is examined to see whether it meets the
conditions of incoming rules. If the conditions are met, the traffic is allowed in.
Outgoing traffic is also examined and compared to outgoing rules before it is
allowed out. Rules are based on Internet services, such as FTP, Telnet, and
NetMeeting.
Do I have to change the default firewall rules or add new rules?
By default, all incoming traffic is blocked and all outgoing traffic is allowed. For
normal household use, you should not have to add new rules or change the
default rules.
What happens in case of a “Denial of Service” attack?
Some hackers choose to flood your network with more requests than it can
handle. This is known as a Denial of Service (DoS) attack. While this type of
attack cannot harm the computers in your network, it can slow down or stop
your network operations. Your Ovation blocks these attacks automatically. You
do not need to set up an incoming firewall rule.
43
Page 45

Wireless Security Settings
Block content
If you have children in your household, you might want to protect them from
web sites that contain inappropriate content. Using URL filtering, you can block
content based on a keyword, a domain name, or domain suffix.
URL filtering does not have to apply to every computer in your network. You
can allow a trusted computer in your network to access all web sites at all
times.
• Click Advanced Settings
then Internet.
• Click Enable
under URL Filter.
• Click Edit URL Filter
List.
• Enter the URL to be blocked
in the Add Filter String
field.
(e.g. www.blocksite.com).
• Click Add.
• Repeat the process for as
many URLs as you want.
• Click Apply.
44
Page 46

Wireless Security Settings
Monitor activity
Logging security events keeps you aware of potential security risks and
attempted attacks. You control which events are included in the log. You can
monitor attempted DoS attacks and port scans. You can keep track of logins or
find out if someone in your household is trying to access a blocked URL. You
can also log basic router operations, such as the startup.
• Click Advanced Settings
then Logs.
• Select the logs you want
to monitor.
• Click Apply.
45
Page 47

46
Page 48

Advanced Network Settings
As a rule, you do not have to enter any other settings. The possible
configurations described in this section mainly apply to network administrators.
You must open the Tools to change these settings.
DMZ server
You can set up a computer in your local network to act as a DMZ server. You
might want to do this if you are having problems with an Internet service. Using
DMZ can help you decide if a closed port is causing your connection problem.
Some online games and videoconferencing applications are not compatible with
NAT. In this instance, you can use DMZ to access the application.
Is it safe?
Since a DMZ server operates outside of the natural firewall protection NAT
provides, and it receives all unknown connections and data, your network is
exposed to possible attacks. You should only enable DMZ when necessary.
How do I set up a DMZ server?
To set up a DMZ server, the computer must be part of your local network. If you
are using DHCP for your local network, the computer should automatically
display in the Select a PC list.
• Click Advanced Settings then
Internet.
• Select Enable DMZ, using.
• Select a computer from the list.
• Click Apply.
47
Page 49

Advanced Network Settings
WLAN Mode
By default, your Ovation is set to “802.11b and 802.11g”. This setting enables
you to connect a mix of 802.11b/g compatible devices to your wireless
network. You should not have to change the mode.
• Click System Settings then
WLAN AP.
• Select the required mode in
the Mode field.
• Click Apply.
48
Page 50

Advanced Network Settings
Reboot
Reboot your Ovation to resolve existing connection problems or enable new
network configurations.
• Click Reboot.
• Click the Reboot button.
49
Page 51

50
Page 52

Troubleshooting
Why doesn’t the Connection Manager window appear?
If the Connection Manager window does not appear, you may be using
software that is blocking popup windows. Click the Connection Manager link
on the main window.
If the window still does not appear or you are not using popup blocking
software, try one or more of the following suggestions.
Is JavaScript enabled for your browser?
Microsoft Internet Explorer 6 or later versions
• Select ToolsInternet Options.
• Click Internet on the Security tab.
• Click Custom Level … .
• under Scripting click Enable.
• Click OK twice.
Netscape Navigator 6.2
• Select EditSettings.
• Click Extended.
• Select Enable JavaScript for Navigator.
• Click OK.
51
Page 53

Troubleshooting
Did you clear the browser cache?
Microsoft Internet Explorer 6.0 or later versions
• Select ToolsInternet Options.
• Click General information Click Delete Files
under Temporary Internet Files.
• Click OK.
Netscape Navigator 6.2
• Select EditSettings.
• Double click Extended.
• Click Cache.
• Click Empty Cache.
• Click OK.
Is your WiFi card installed properly? *
• Choose StartControl Panel.
• Doubleclick the System icon to open the System Properties dialog.
• Click the Hardware tab.
• Click the Device Manager button.
• Doubleclick the Network Adapters icon.
• Doubleclick the icon for your WiFi card.
• Click the General tab. If your WiFi card is installed properly
you should see the message “The device is working properly.”
Is your computer set up to obtain IP addresses automatically? *
• Choose StartSettingsNetwork Connections.
• Doubleclick the Local Area Connection icon.
• Click the Properties button.
• Select Internet Protocol (TCP/IP).
• Click the Properties button.
• Select Obtain an IP address automatically.
• Select Obtain DNS server addresses automatically.
• Click OK twice.
• Restart your computer.
Is the IP address for your computer within the range of 192.168.0.2 to
192.168.0.254? *
• Choose StartProgramsAccessoriesCommand Prompt.
• When the Command Prompt window opens, type ipconfig and press Enter.
• If the IP address is not within the range, restart your computer.
*
Instructions are provided for Windows XP Service Pack 2 (SP2). If you are not using Windows XP,
refer to the manufacturer’s documentation for instructions.
52
Page 54

Troubleshooting
How can I tell if I am connected?
The UMTS indicator on the LCD shows UMTS ONLINE when your Ovation is
connected to the Internet. The LAN indicator on the LCD shows LAN ONLINE
when your computer is properly connected to your Ovation using an Ethernet
connection. The number 10 or 100 will also appear. It indicates the connection
speed, either 10 Mbps or 100 Mbps. The WLAN indicator on the LCD shows
WLAN ONLINE if the WLAN module is enabled.
Why doesn’t my default home page appear?
If you entered a home page in your browser (e.g. http://www.google.com) and
you wish to access it, you must either close the opened browser window and
reopen it again, or open a second browser window. We recommend selecting
the Ovation site (http://192.168.0.1) as your home page and saving all other
pages under Favorites or Bookmarks.
How do I disconnect from the Internet?
If you want to disconnect the connection between your Ovation and the
Internet, click Disconnect on the Connection Manager window or click the
UMTS on/off button on the right side of your Ovation.
How do I reopen the Connection Manager window?
To reopen the Connection Manager window, type http://192.168.0.1 in the
browser address bar.
53
Page 55

54
Page 56

Glossary
802.11b WLAN standard. Provides a transmission speed
of 11 Mbps in the 2.4 GHz band.
802.11g WLAN standard. Provides transmission speeds
of up to 54 Mbps (typically 22 Mbps) in the
2.4 GHz band. Is considered a successor of, and
is compatible with, 802.11b. Enables high
speed data access from up to 100 meters
distance from the base station.
DHCP Dynamic Host Configuration Protocol (DHCP).
The Dynamic Host Configuration Protocol is used
to configure IP addresses and applicable
information dynamically. Instead of a static (fixed)
IP address, DHCP clients receive their IP address
from a central DHCP server.
DMZ DeMilitarized Zone (DMZ) is a decoupled isolated
partial network that is switched between the
network to be protected and the unsecured
network.
DNS Domain Name System (DNS) Internet service that
is used to assign IP addresses to the corresponding
readable domain names and viceversa.
Firewall Technology in the form of hardware and/or
software that controls the flow of data between
a private and an unprotected network (which is
LAN and Internet) or protects an internal
network from attacks from the Internet.
Firmware Preinstalled software to operate your Ovation.
FTP File Transfer Protocol (FTP) regulates file transfers
on the Internet.
55
Page 57

Glossary
HTTP Hypertext Transfer Protocol (HTTP); a service
protocol to transmit documents between servers
or from a server to a client. Is almost
only used on the Internet, especially the
World Wide Web.
IP address The IP address identifies every device connected to
the Internet through an address that is unique
worldwide.
Passphrase A passphrase is generally longer than a password
and may contain letters and numbers.
LAN Local Area Network; Local computer connection
that has few connections to the outside world
or none at all.
MAC address Abbreviation for Media Access Control; 48 bit
identification number of a network card that
generally cannot be changed shown as
hexadecimal numbers.
NAT Abbreviation for Network Address Translation.
Method to convert (mostly private) IP addresses of
a network to other (mostly public) IP addresses
of another network.
Network adapter Another word for Network Card. The network
card is the device that establishes the connection
between the network (wireless or wired) and the
computer.
Network name Also called SSID. Service Set Identifier; network
name in WLAN, allows stations in the WLAN to
find the correct access point.
Port forwarding Is a technology to enable implementation of ports
on IP addresses in NAT networks
(Network Address Translation).
56
Page 58

Glossary
Port Describes an interface between the operating
system, applications, and Internet.
SMTP Email programs use Simple Mail Transfer Protocol
(SMTP) to transmit data to the provider's mail
server It then forwards the email via intermediate
stations to the recipient’s mail server.
SSID Service Set Identifier; network name in WLAN,
allows stations in the WLAN to find the correct
access point.
TCP/IP Transmission Control Protocol / Internet Protocol;
this is the transport protocol on which the data
transmission on the Internet is based.
WAN A Wide Area Network is a network mainly
working across great distances.
WEP Wired Equivalent Privacy; Describes a 128 bit
encryption process used for wireless LANs.
WLAN Wireless Local Area Network is a remote
technology for wireless networking.
WPAPSK WiFi Protected Access is an encryption method
for a WLAN.
57
Page 59

58
Page 60

Specifications
3G/UMTS 2100 MHz UMTS
LAN 10BaseT/100BaseT LAN
WLAN 802.11 b/g WLAN
Speed Up to 384 Kbps
Security 128 bit WEP Encryption
Port and URL Filter
DMZ Support
Dimensions 265 x 154 x 37 (H x W x D in mm)
Weight 754g with stand
Color Display LCD, Monochrome 128 x 64 Pixel
Lighting can be switched on and off
Display UMTS • LAN • WLAN Status
Time (Hours/Minutes)
Signal strength
Operating Environment Operating Temperature 0°C to 50°C
Humidity Range 10% to 80%
noncondensing
User Interface Device configuration with local
browser on computer
(no additional installation software
required)
Power Input 100 to 230 volts
50 to 60 Hz
Power Output 5Vdc @ 2.8 Amps
59
Page 61

 Loading...