

Page 1
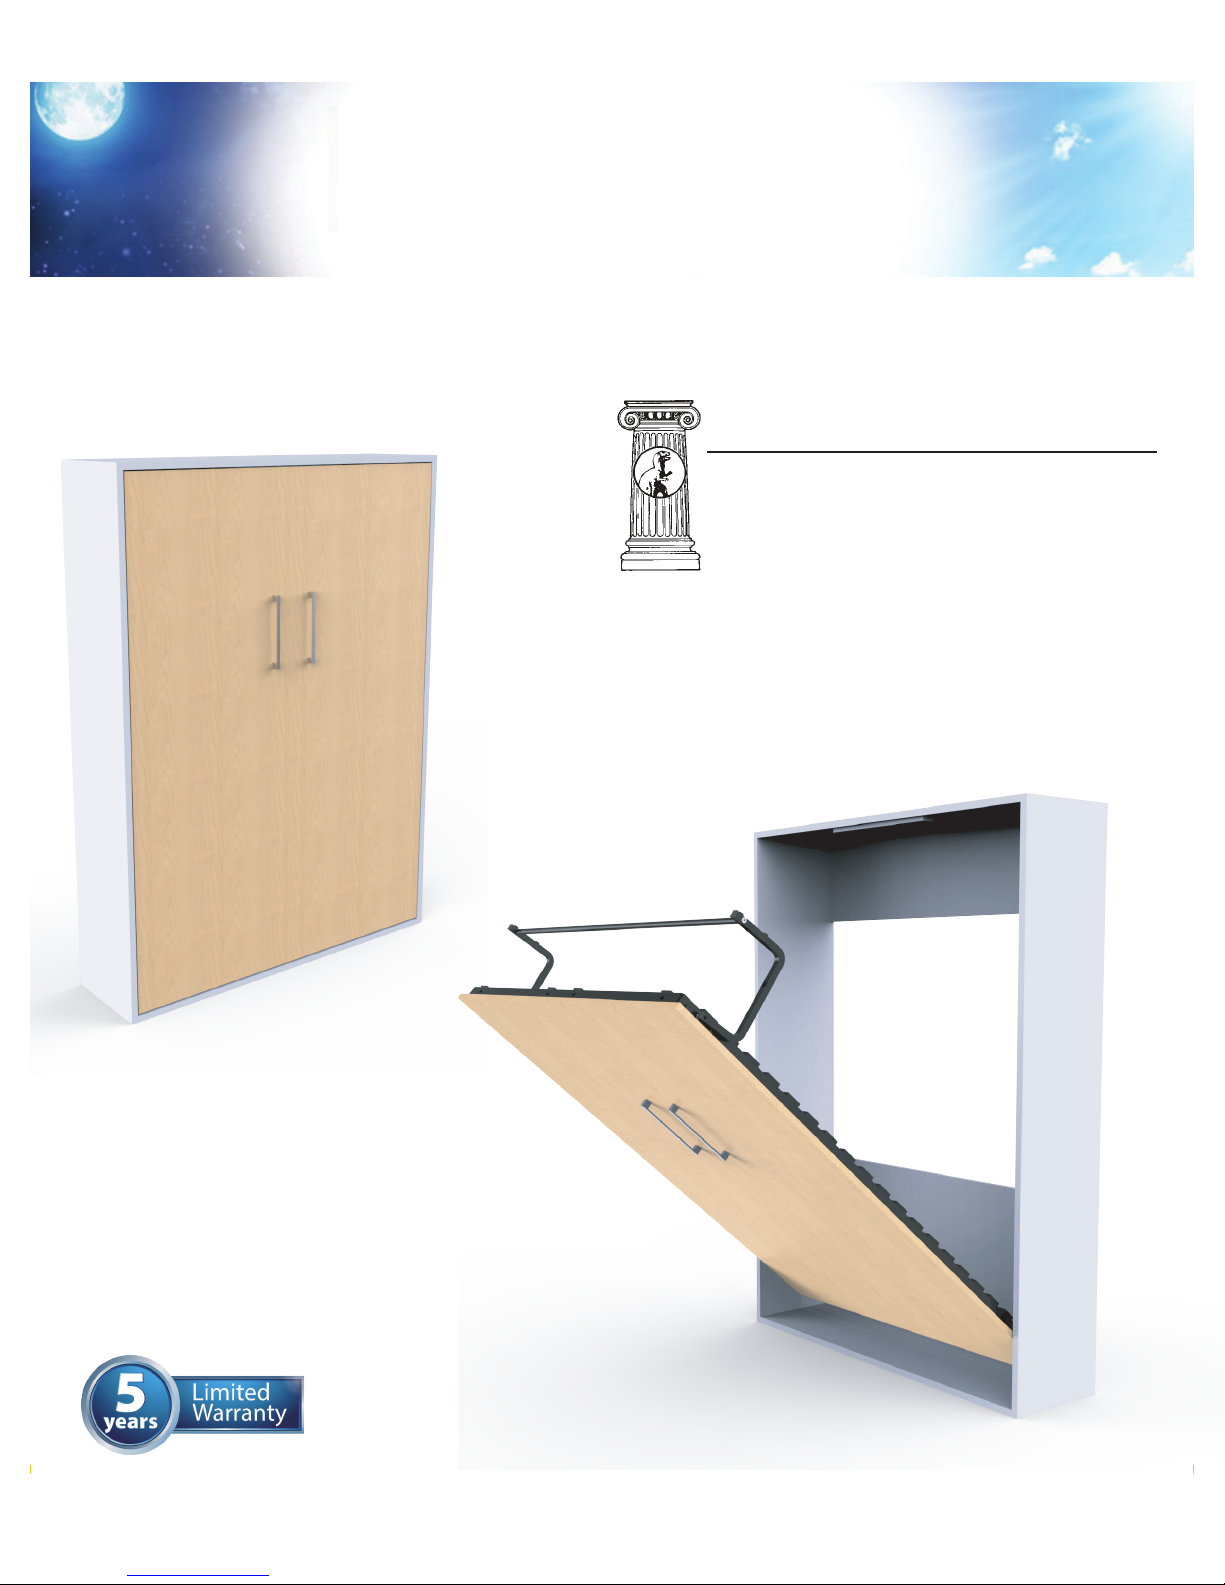
EVOLVE
VERTICAL / HORIZONTAL
WALL BED HARDWARE
INSTALLATION INSTRUCTIONS
Architectural Products by Outwater, LLC.
24 River Road, P.O. Box 387, Bogota, NJ 07603-0387
Phone: 1-800-835-4400 • Fax: 1-800-835-4403
www.outwater.com
Architectural Products by Outwater LLC | 1-800-835-4400 | outwater.com
Page 2
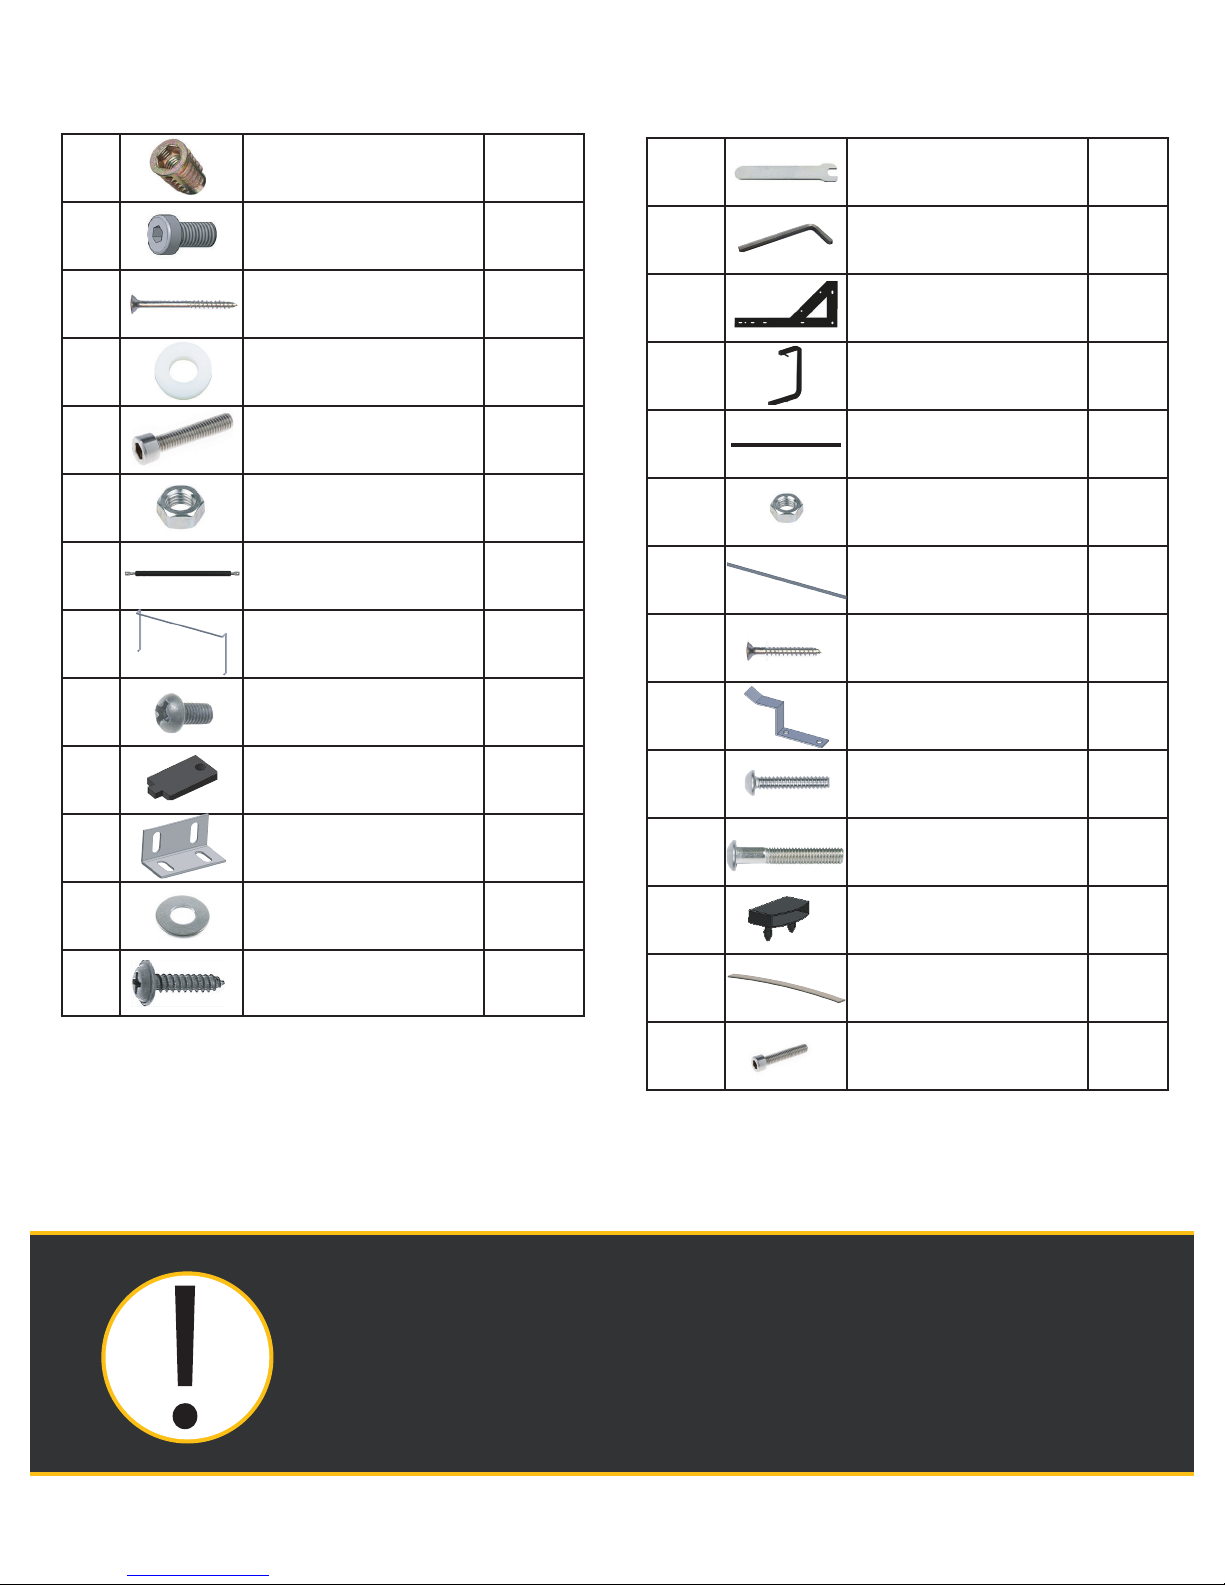
HARDWARE
A
B
C
D
E
F
G
H
I
Threaded Insert
M8 x 16 Screw
M5 x 55 Screw
Nylon Washer
M8 x 40 Bolt
M8 Nut
Piston
Mattress Support
M5 x 10 Screw
x16
x16
x8
x4
x2
x6
x2
x2
x2
N
O
P
Q
R
S
T
U
V
Wrench
Allen Key
Plate
Leg
Tube
M5 Nut
Flat Bar
5/8in x 15mm Screw
Door Bracket
x1
x1
x2
x2
x1
x4
x2
x20
x12
J
K
L
M
Fastener
Bracket
Washer
M6 x 20 Screw
x2
x2
x8
x8
W
X
Y
Z
AA
Architetural Products by Outwater LLC oers a 5 year limited warranty on slat bases used in the wall bed
as well as the mechanisms. The warranty covers the replacement of parts with manufacturing defects
and/or breakage caused by regular use. It does not cover damages caused by a poor installation or misuse
of the product. Professional installation suggested. The bed must be secured to the wall into wood or
metal studs.
1 3/4in x 44mm Bolt
2 3/4in x 70mm Bolt
Slat Cap
Slat
M5 x 30 Bolt
x8
x3
x8
x4
x2
1
Page 3
28.50
64
64
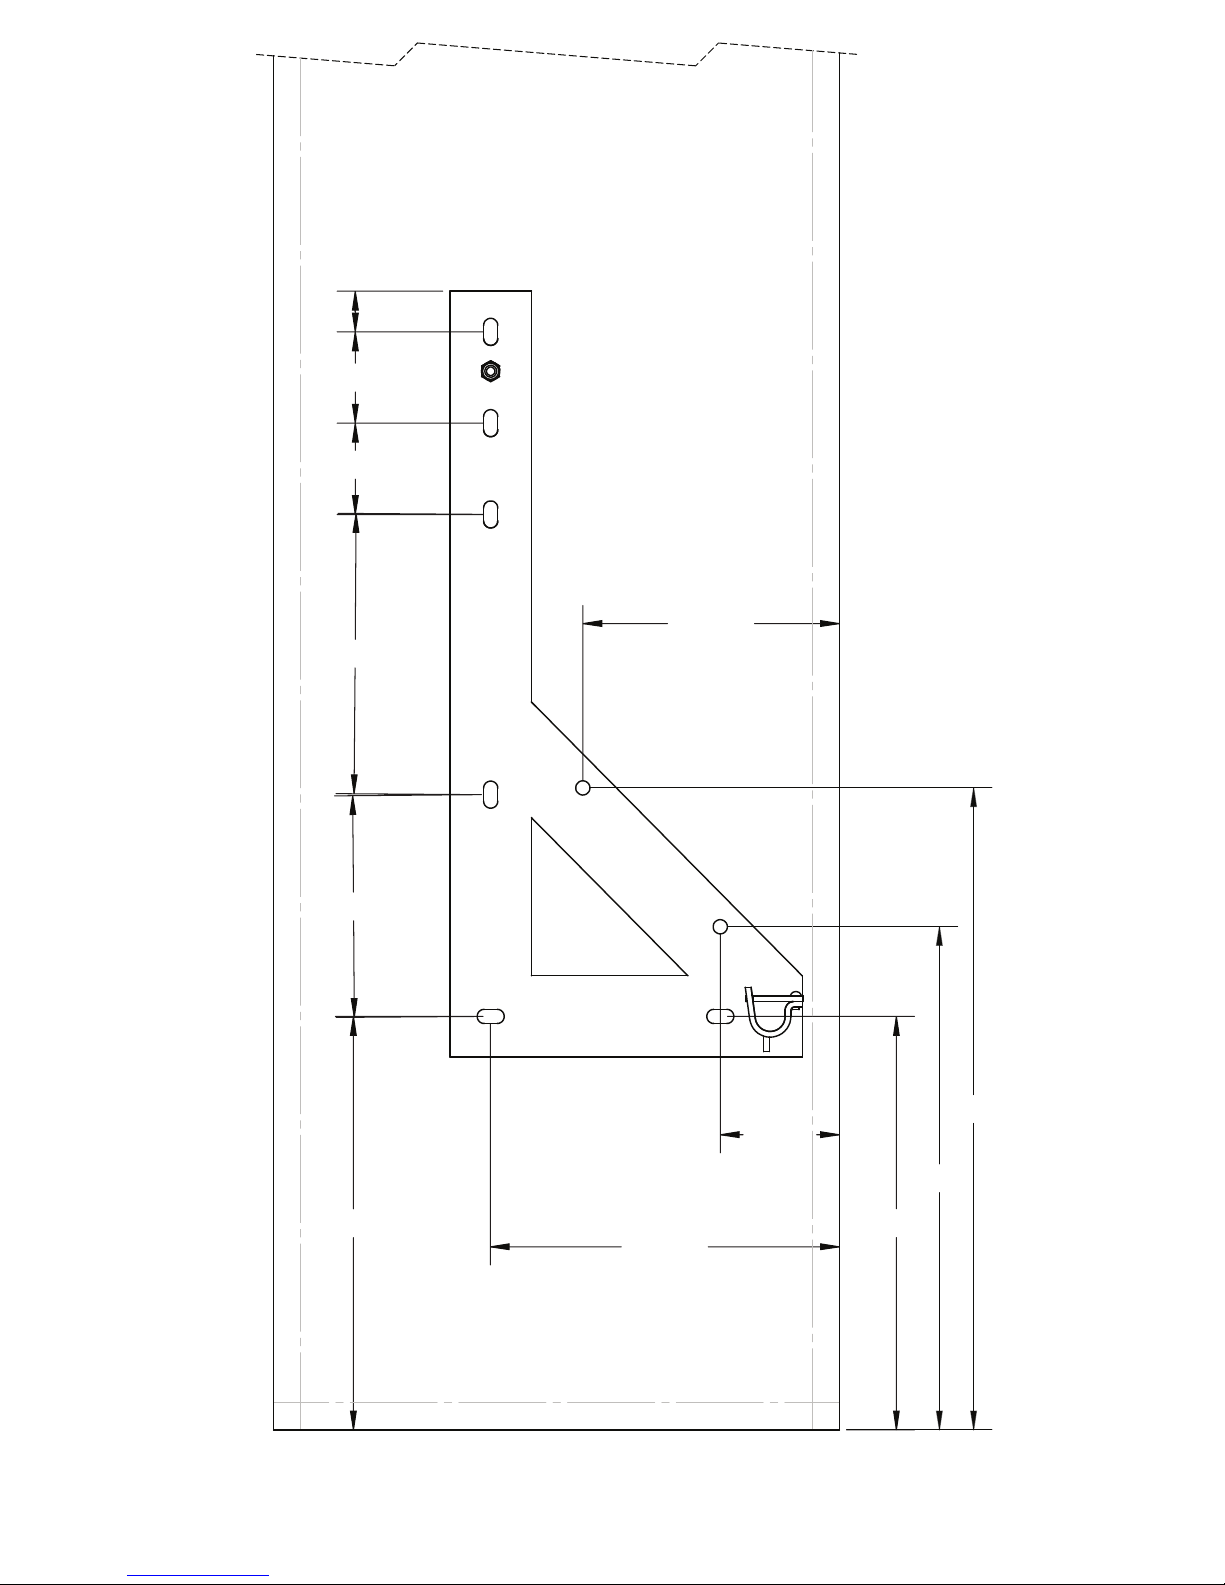
DRILLING GUIDE
Back
Front
179.50
196.50
155.50
450
83.50
290
All measurements are for 19mm (3/4’’) board.
354
290
244.50
Bottom
2
Page 4
1
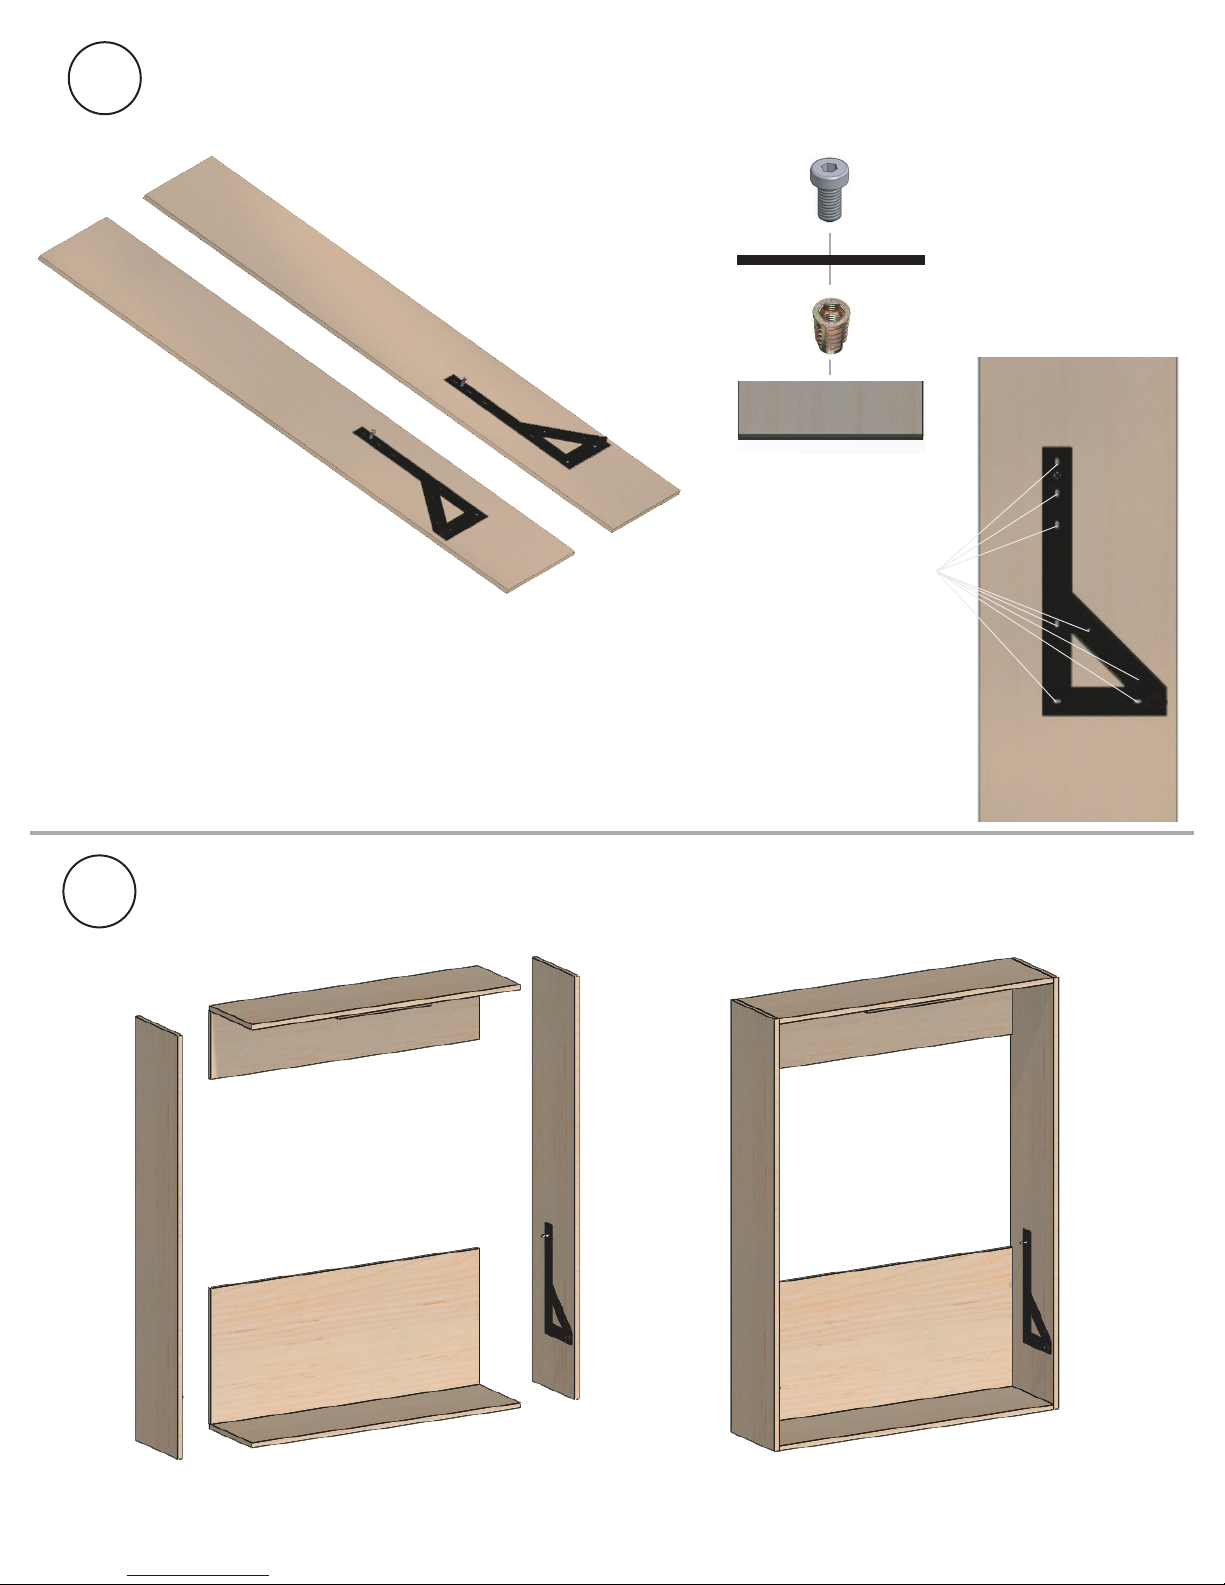
INSTALLING THE MOUNTING BRACKETS
Left side
Front
Front
Right side
A
P
B
Wood
P
Bottom
A + B
2
ASSEMBLING THE CABINET
See conversion guide for suggested cabinet dimensions.
*
3
Page 5
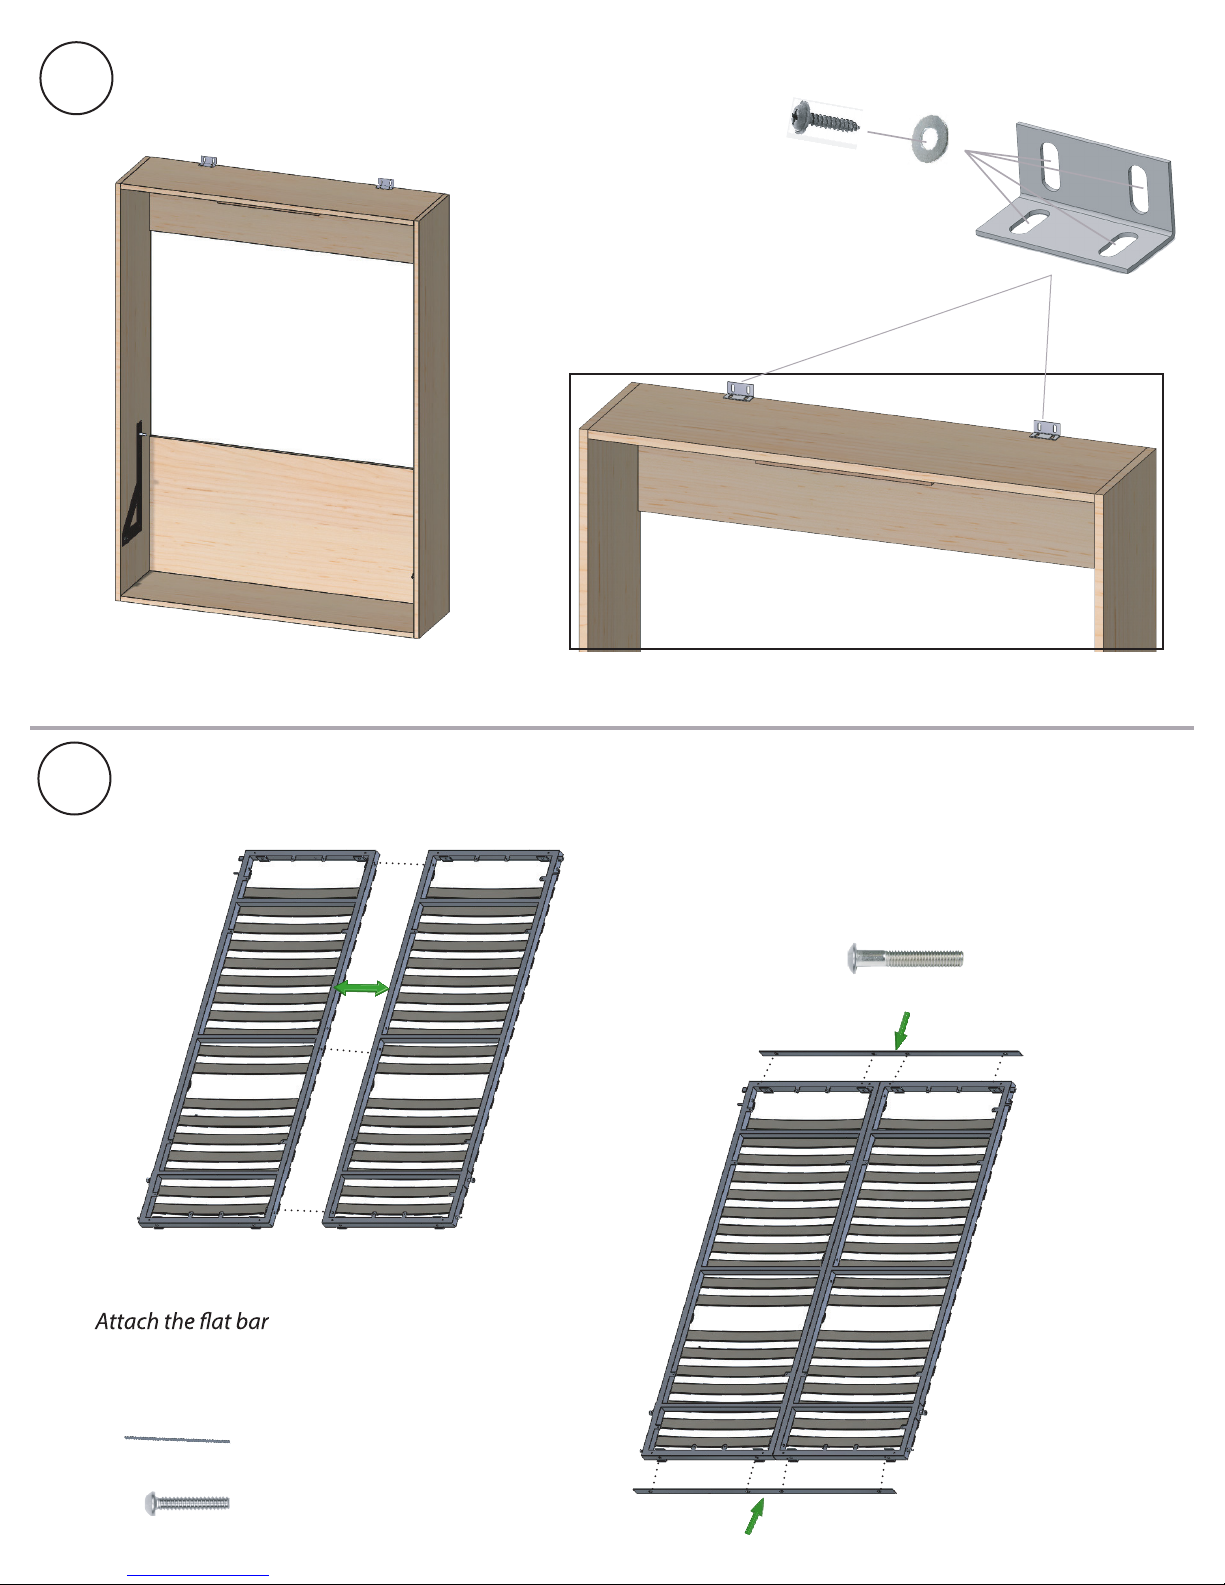
3
SECURING TO THE WALL
L + M
Needs to be secured into at least
*
two wood or metal studs.
K
Professional installation recommended.
*
4
ASSEMBLING THE FRAME
4.1-
Attach the two half frames with X
X
x3
T
4.2-
T
W
T to the frame with W
x2
x8
4
Page 6
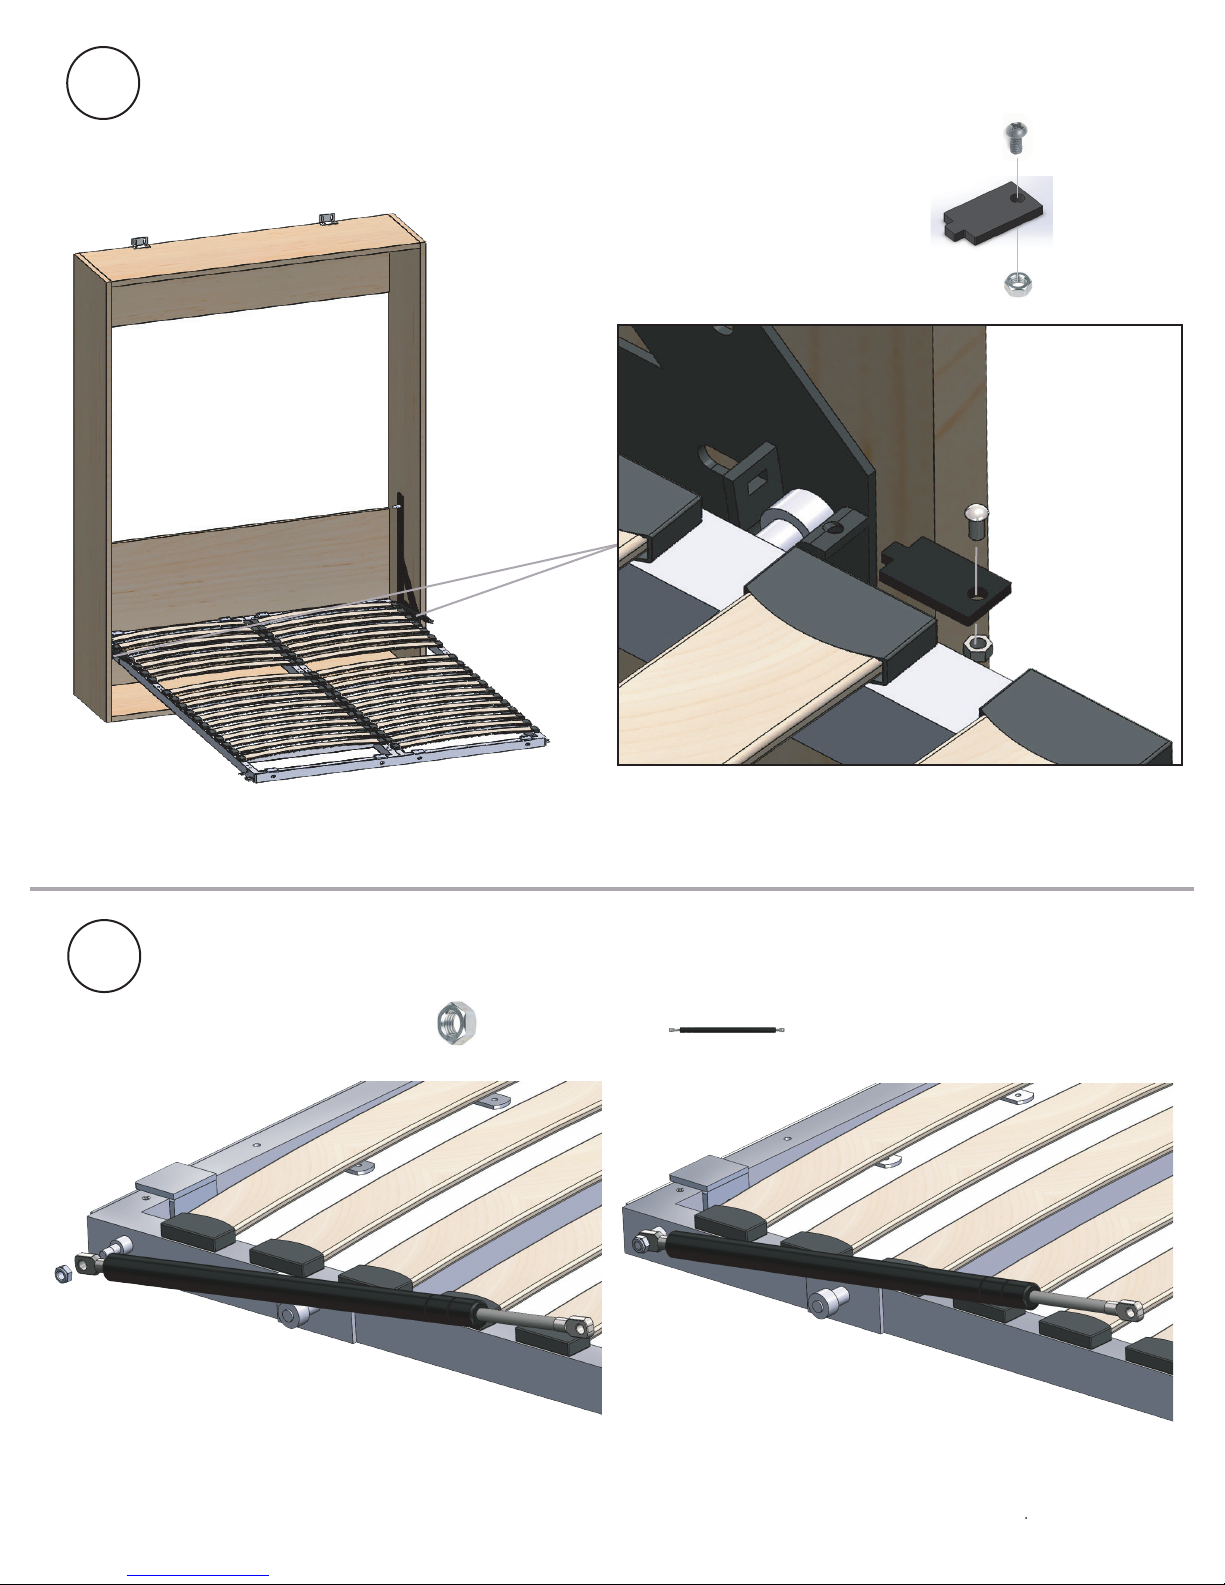
5
MOUNTING THE FRAME ONTO THE MOUNTING BRACKET
J
S
I
x2
x2
x2
ATTACHING THE PISTONS TO THE FRAME
6
F=
Secure the shorter ends of the pistons to the frame
x2
G=
x2
5
Page 7
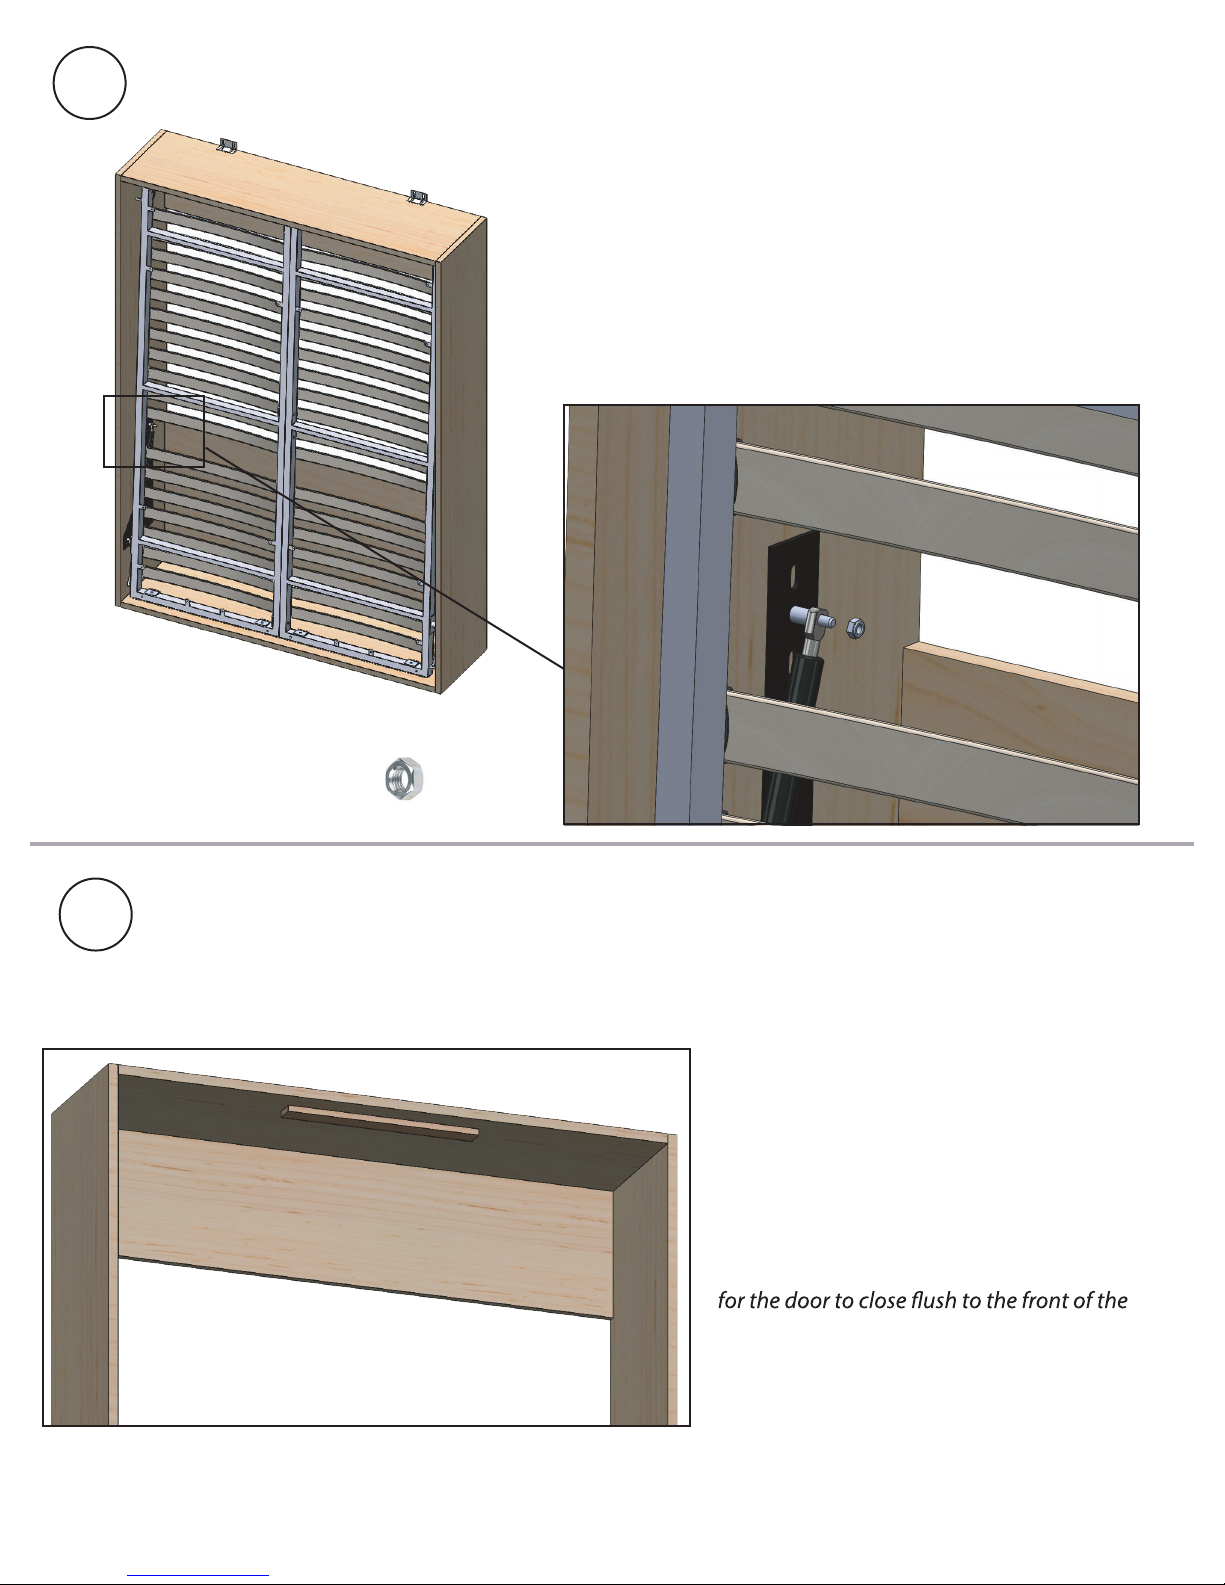
7
INSTALLING THE PISTONS TO THE CABINET
Tilt the frame past the cabinet edge to mount the pistons on
the mounting brackets through the opening between the
slats
8
F
x2
INSTALLING THE STOPPER
Install the stopper (not included) on the
inside top of the cabinet where it will allow
cabinet.
6
Page 8
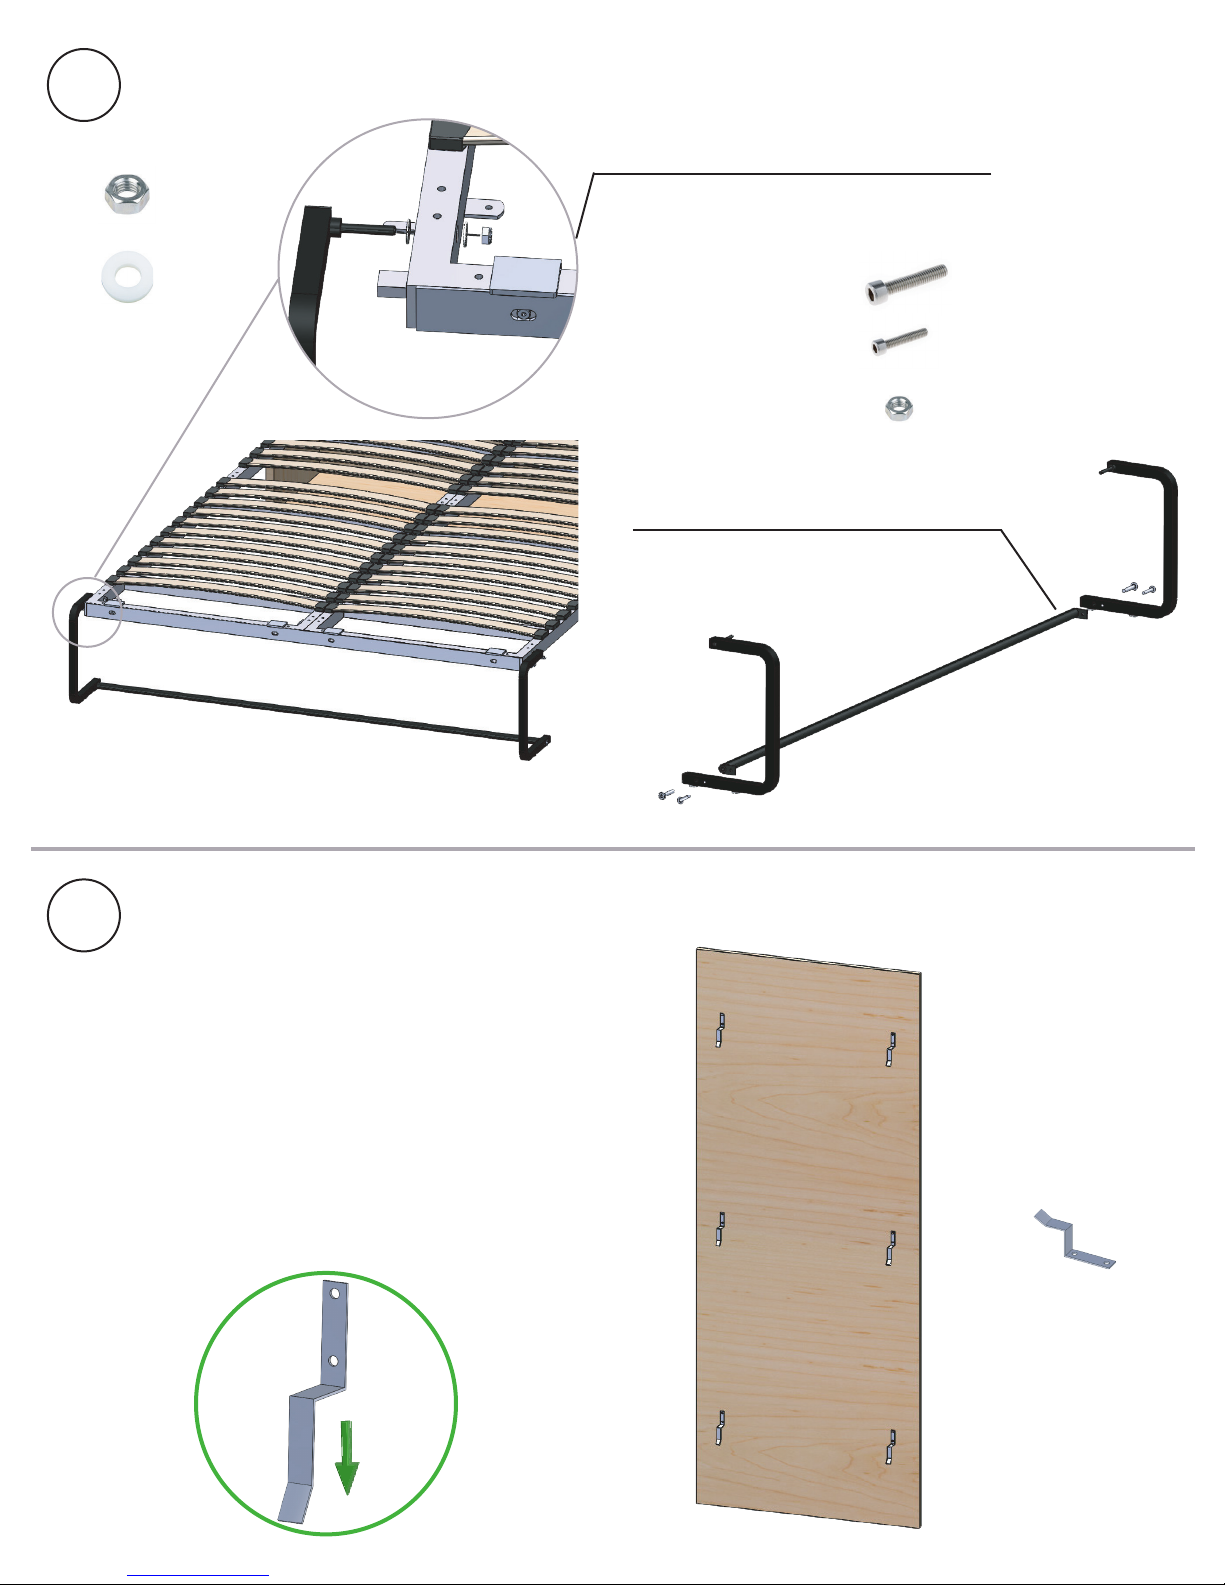
9
INSTALLING THE LEGS
Install legs to bed frame.
6.1
F
D
x2
x4
Do not overtighten.
Install tube to both legs.
6.2
E
AA
S
x2
x2
x2
Q
R
10
Install the door brackets in alignment with the support
bars on the bed frame.
The door brackets must point downward
E
Q
AA
INSTALLING THE DOOR BRACKETS
V
x12
7
Page 9
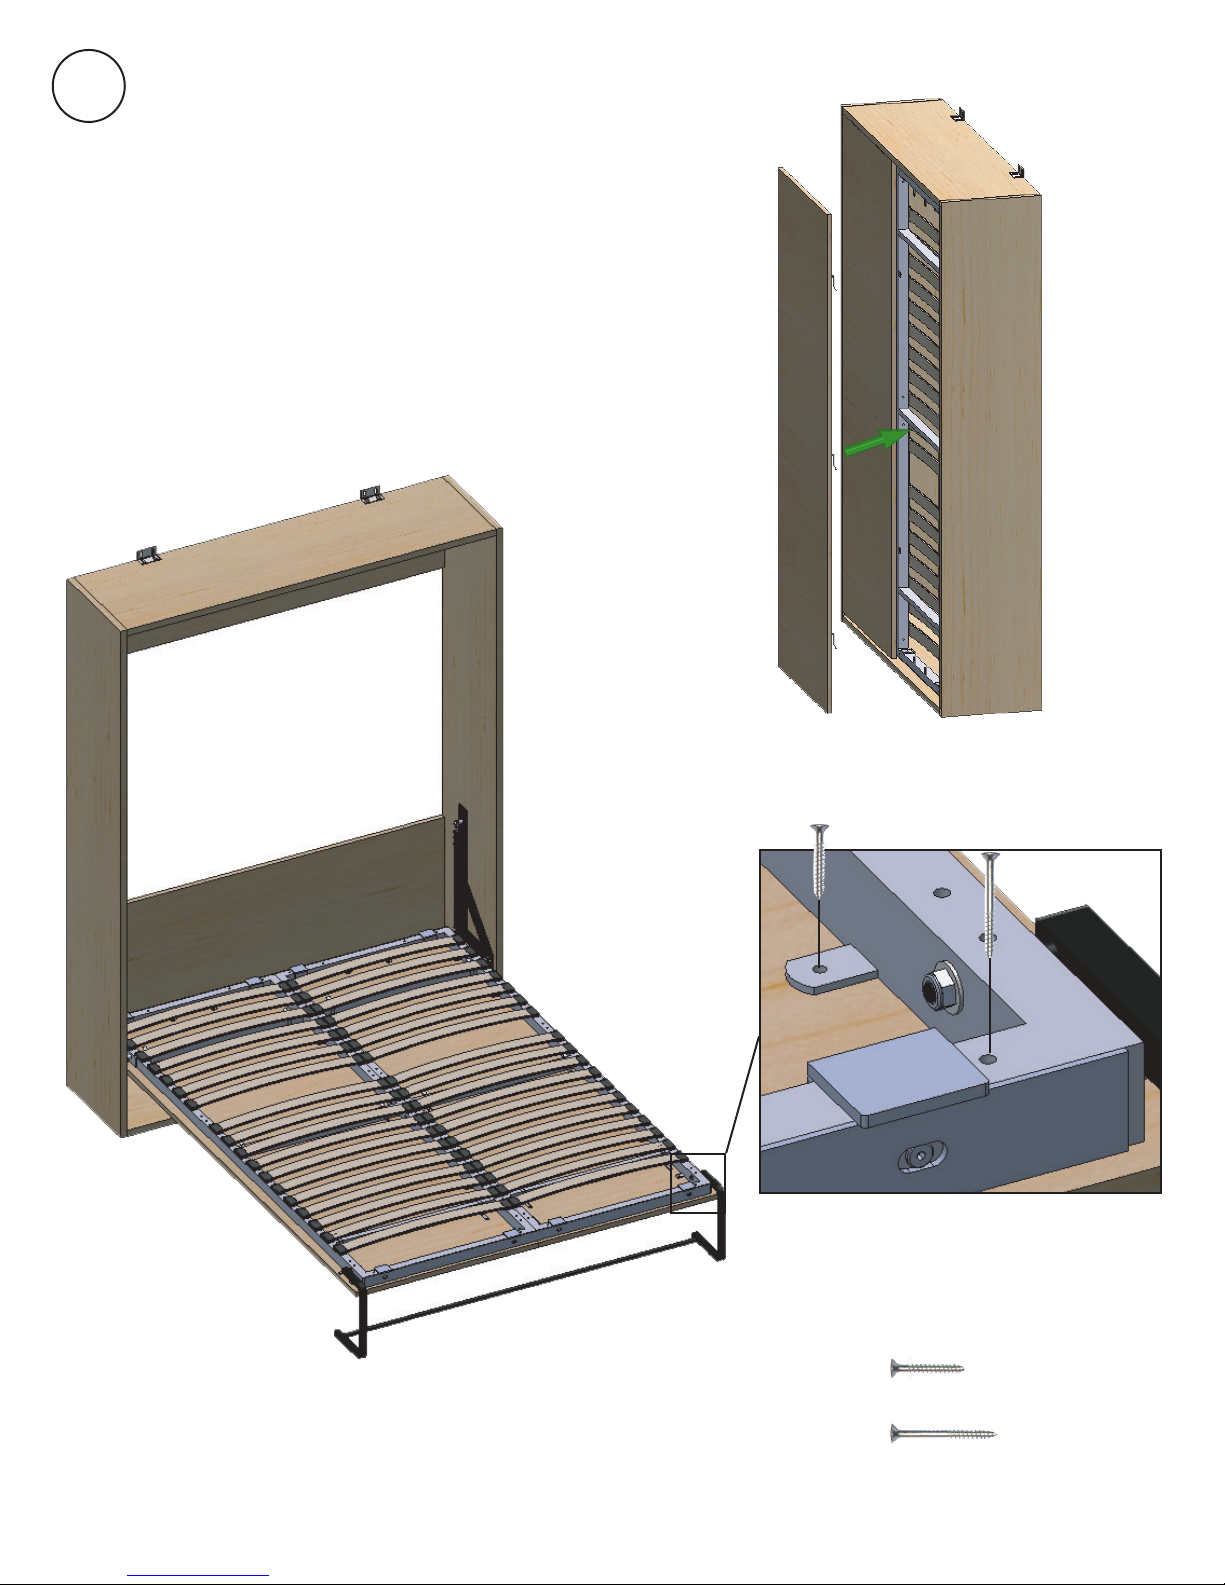
11
INSTALLING THE DOORS
11.1
Hook the door brackets onto the frame and push down until
they click.
11.2
U
U
C
x 20
Attach the doors to the frame while putting weight on the frame to keep
the bed open.
C
x 8
8
Page 10
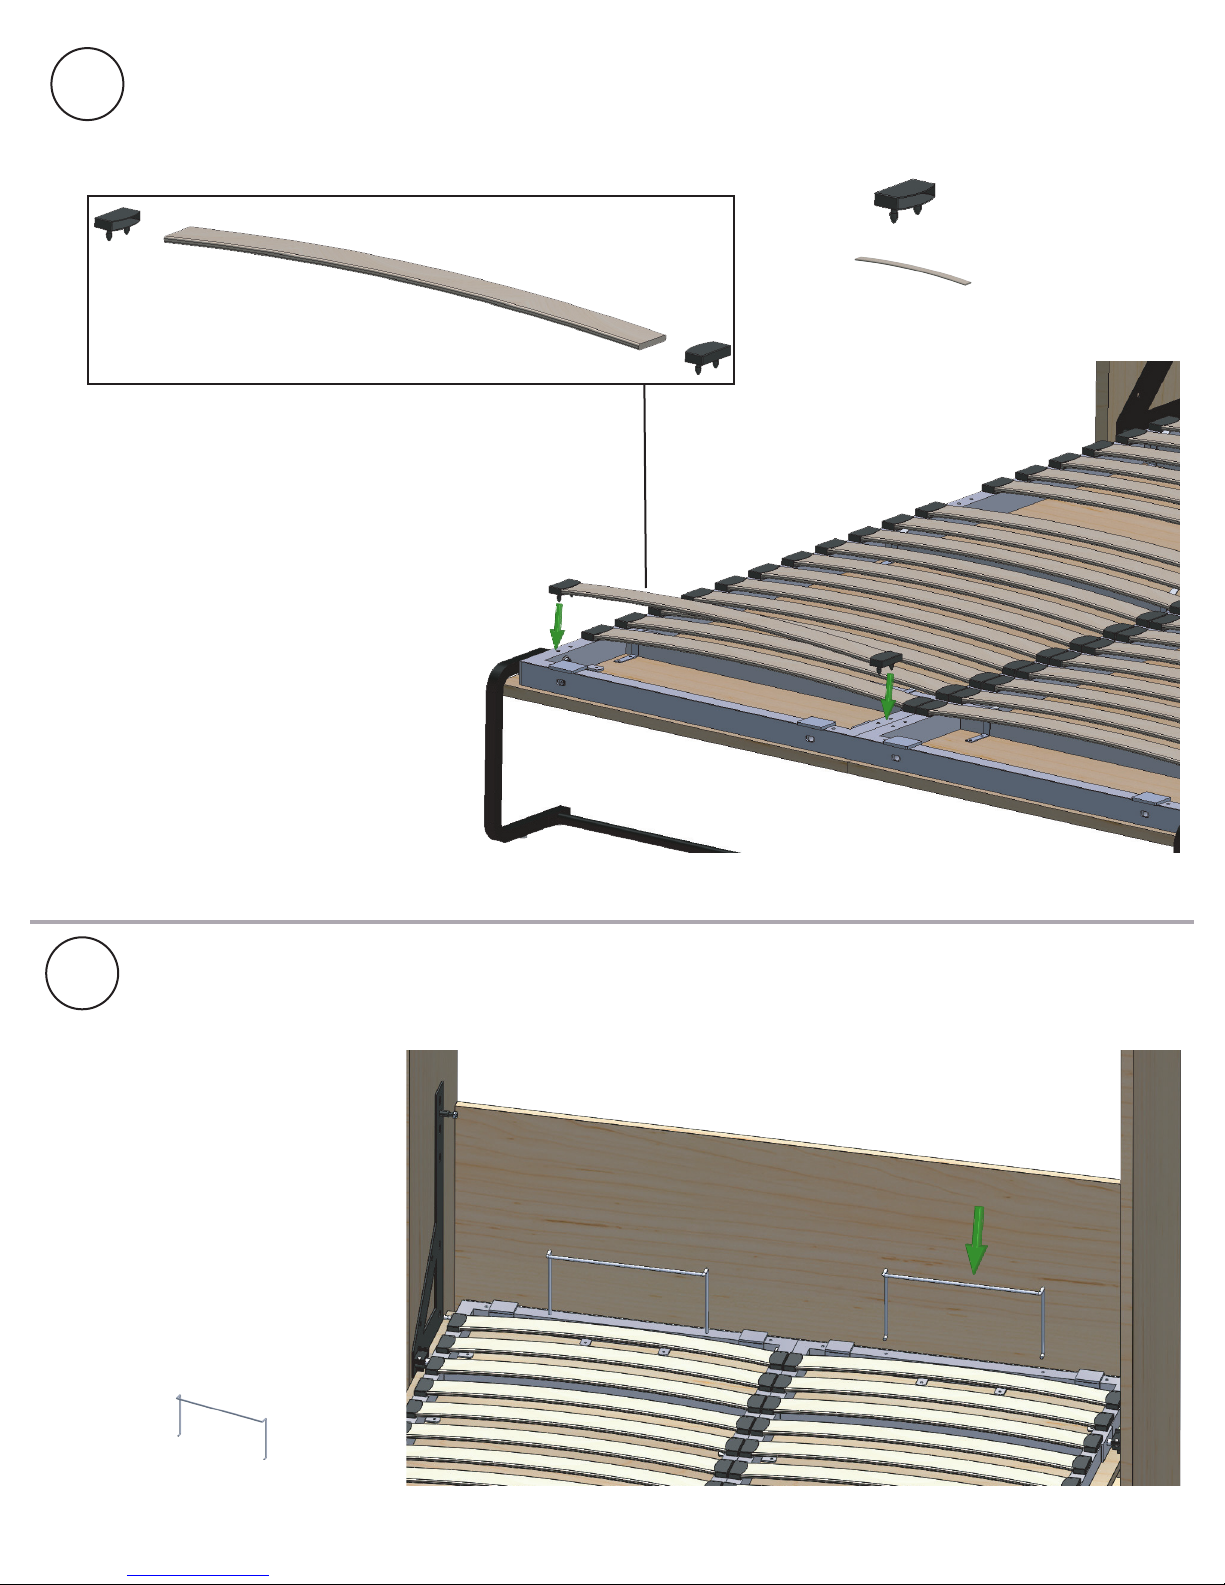
12
INSTALLING THE SLATS
x8
Y
Z
Place a cap on both ends of the slats. Insert
the slats into their designated holes along
the frame.
Y
Z
x4
13
Insert the mattress supports into the
predrilled holes in the bed frame.
H
x 2
INSTALLING THE MATTRESS SUPPORT
H
9
Page 11
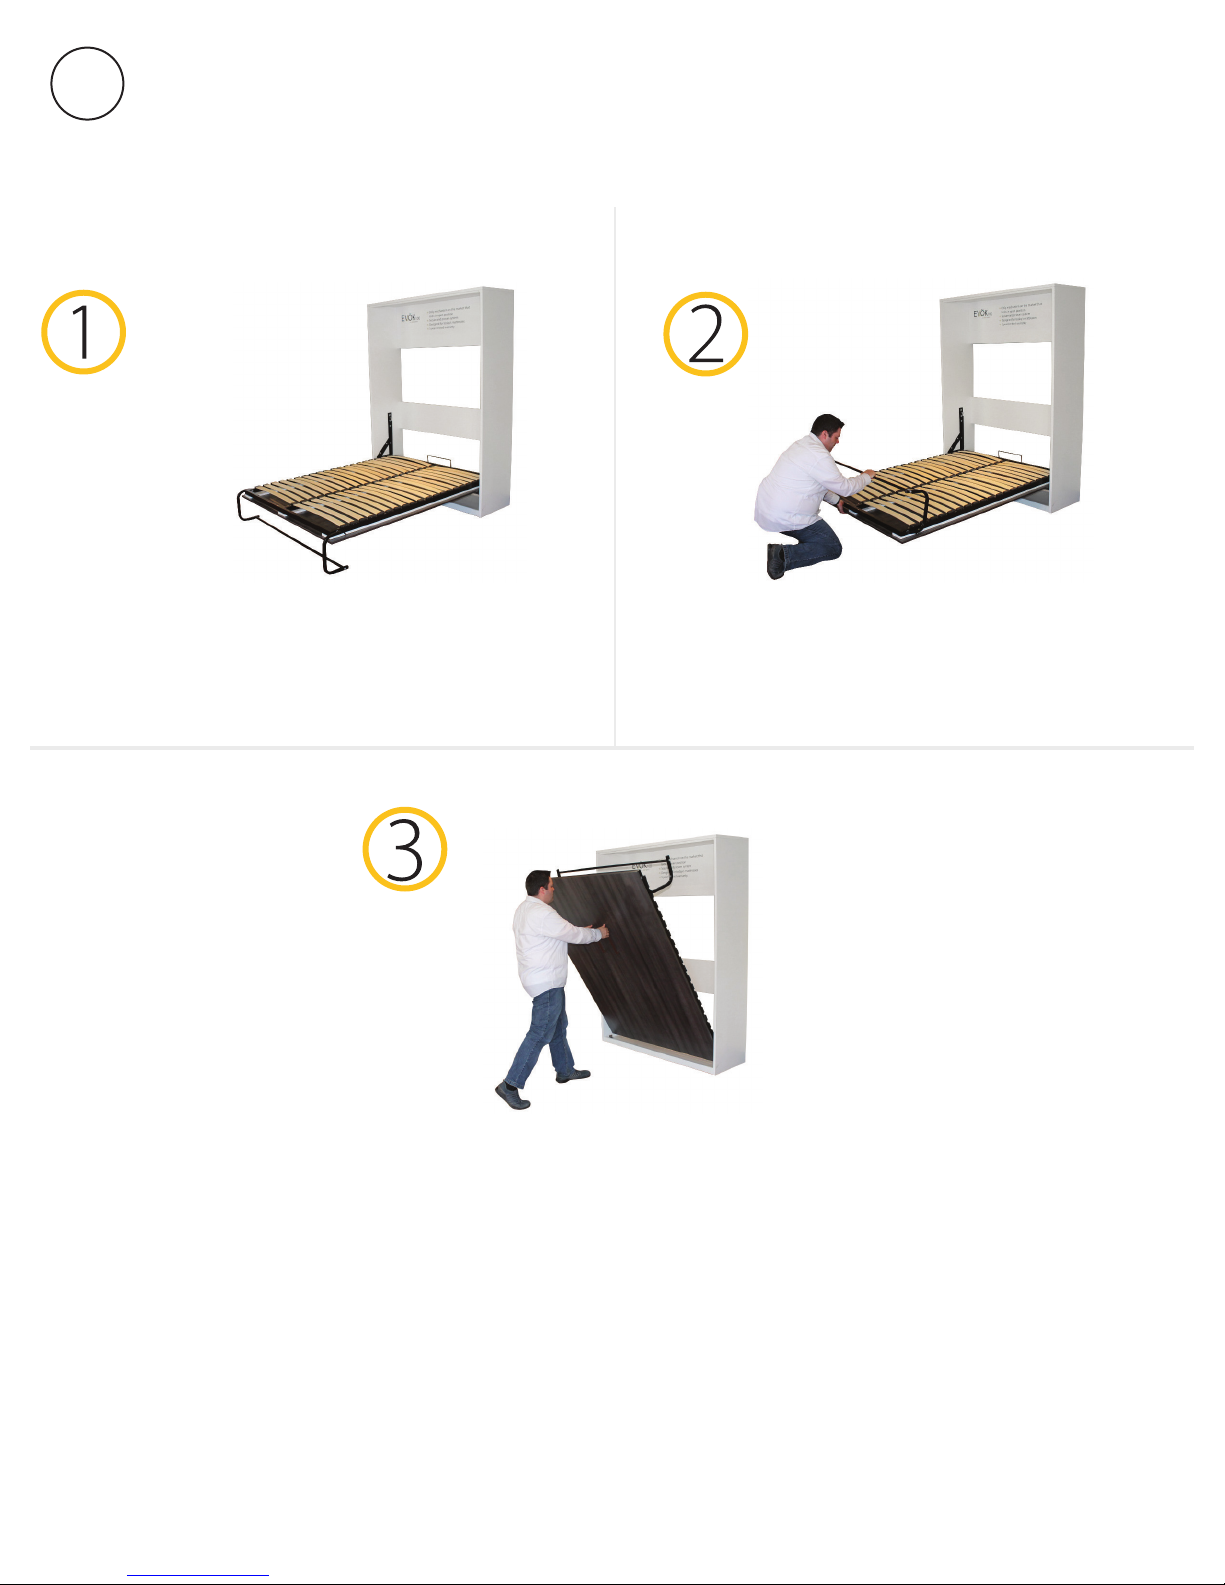
14
USING THE WALL BED
The wall bed is assembled and shown in lowered position.
.
Pivot the leg towards the inside of the unit.
Make sure leg is fully closed.
Pull up gently to close. Leg serves as mattress retaining system.
Pistons insure that door closes properly and remains closed.
.
10
 Loading...