

Outdoor Solutions Guardian Installation Instructions Manual

The Guardian !
Part Identification
• (12) Flat Washers
• (6) hex nuts
• (6) Hex Screws
• (1) adjustment Knob
• (1) hex wrench
• (1) upper Rail
• (1) mid rail
• (1) lower rail
• (2) support arms
(see figure 2)
Please email
osiorders@gmail.com
with any questions or missing parts.
Handrail!by!Outdoor!Solutions!Inc!
Installation Instructions
Tools needed: power drill, #2 Philips screw driver bit
Part Identification
!
!
1. Attach lower rail to four threaded stud in the base using (4) flat washers and (4) hex nuts as shown in fig
1. Do not tighten until step 2.
2. Attach (2) support arms; using (4) flat washers,(2) hex screws and (2) hex nuts as shown in figure 2.
Tighten all (6) hex nuts with the 7/16” wrench and both hex screws using the hex wrench provided.
3. Attach the mid rail to the lower rail using (4) flat washers and (4) hex screws as shown in figure 3. Tighten
using hex wrench supplied. Thread adjustment knob into mid rail as shown in fig 3. Hand tighten only.
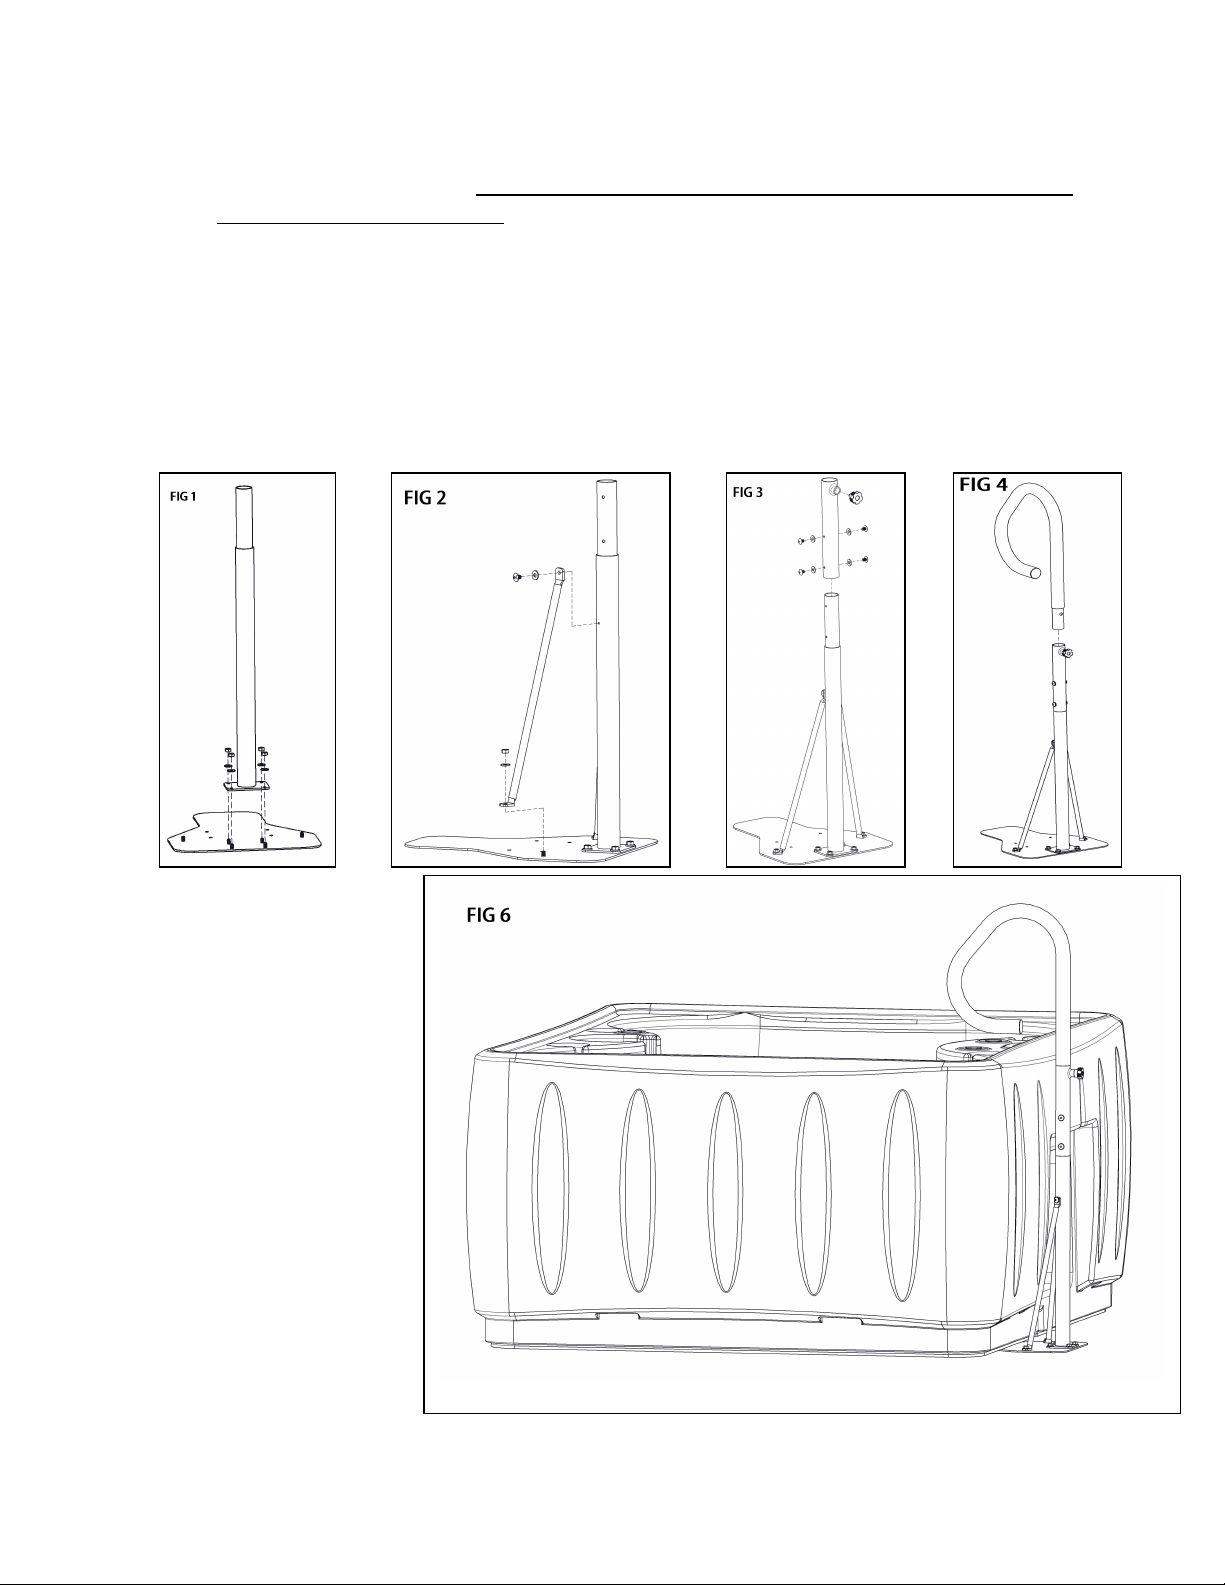
4. Insert upper rail into mid rail while pulling back on the adjustment knob, as shown in figure 4. This allows
**Make sure Spa is empty
(containing no water) and
unplugged for your safety**
FIG 5
the Upper Rail to rotate freely. Letting you determine whether the upper rail faces the spa or the stairs to
assist in entering or exiting the spa. When the adjustment knob is released, it will pin the rail in position.
If the upper rail is not stationary, gently rotate the upper rail until the adjustment knob’s alignment pin
snaps into place.
5. Slip the base under the spa, in your desired location, as shown in fig 5. Push the rail toward the spa.
Make sure the foot plate is secure on a flat surface.
 Loading...