


1
Renegade Fire Table
Installation Instructions for RNG-32

2

3
Contents
Required Tools…………………………….…..2
Included with your Fire Pit……………….3
Assembly Instructions………………….………4
Gas Connections………………………….…….6
Igniter Installation…………….……………...8
Position Your Tank………………………7
Finishing Touches……………………………7
Required Tools
Utility Knife
To cut and remove packaging
2 Open Ended Wrenches
Required Tools
Utility Knife
To cut and remove packaging
2 Open Ended Wrenches
To secure gas connections
One AAA Battery (not included)
Required for electric spark igniter installation
Phillips Screwdriver
To attach mounting screws to control panel
Contents
Required Tools………………………………….........3
Included with your Fire Pit………………………..4
Assembly Instructions……………………………….5
Gas Connections……………………………………….7
CF-SPARKER Installation…………………….….….9
Install Fire Media…………………………………….10
Position Your Tank…………………………………..11
Storage…………………………………………………...12
IMPORTANT
Please consult your Crystal Fire instruction manual for detailed
instructions and important information related to the burner
installation including: lighting and operating instructions, safety
information, and proper tightening of connections with two wrenches.
DO NOT ATTEMPT TO INSTALL CRYSTAL FIRE BURNER WITHOUT
FIRST CONSULTING THE CRYSTAL FIRE OWNER’S MANUAL.
REV A 12-19-17

4
Included with your Fire Pit
TOUCH
UP
PAINT
Gas Valve [1X]
Mounting
screws [2X]
Control knob
[1X]
NF-16-RD Burner [1X]
Burner Cover [1X]
Part #: RNG-4
Media Retention Pad [1X]
Part #: RNG-PAD
Leg [3X]
Part #: RNG-2
Base [1X]
Carrying Bag [1X]
Part #: CB-REN
Gas Valve Kit
GM-KV
5
Included with your Fire Pit
A. 4 Fasteners
B. 4 B-Bolts
C. 4 C-Bolts
D. 4 Bolt Caps
E. Touch-Up Paint Bottle
Assembly Instructions
55
Assembly Instructions
NOTE: Before assembly, check for damage. Do not use damaged components.
1. Unpack all the contents from the box and remove the individual
packaging from each component.
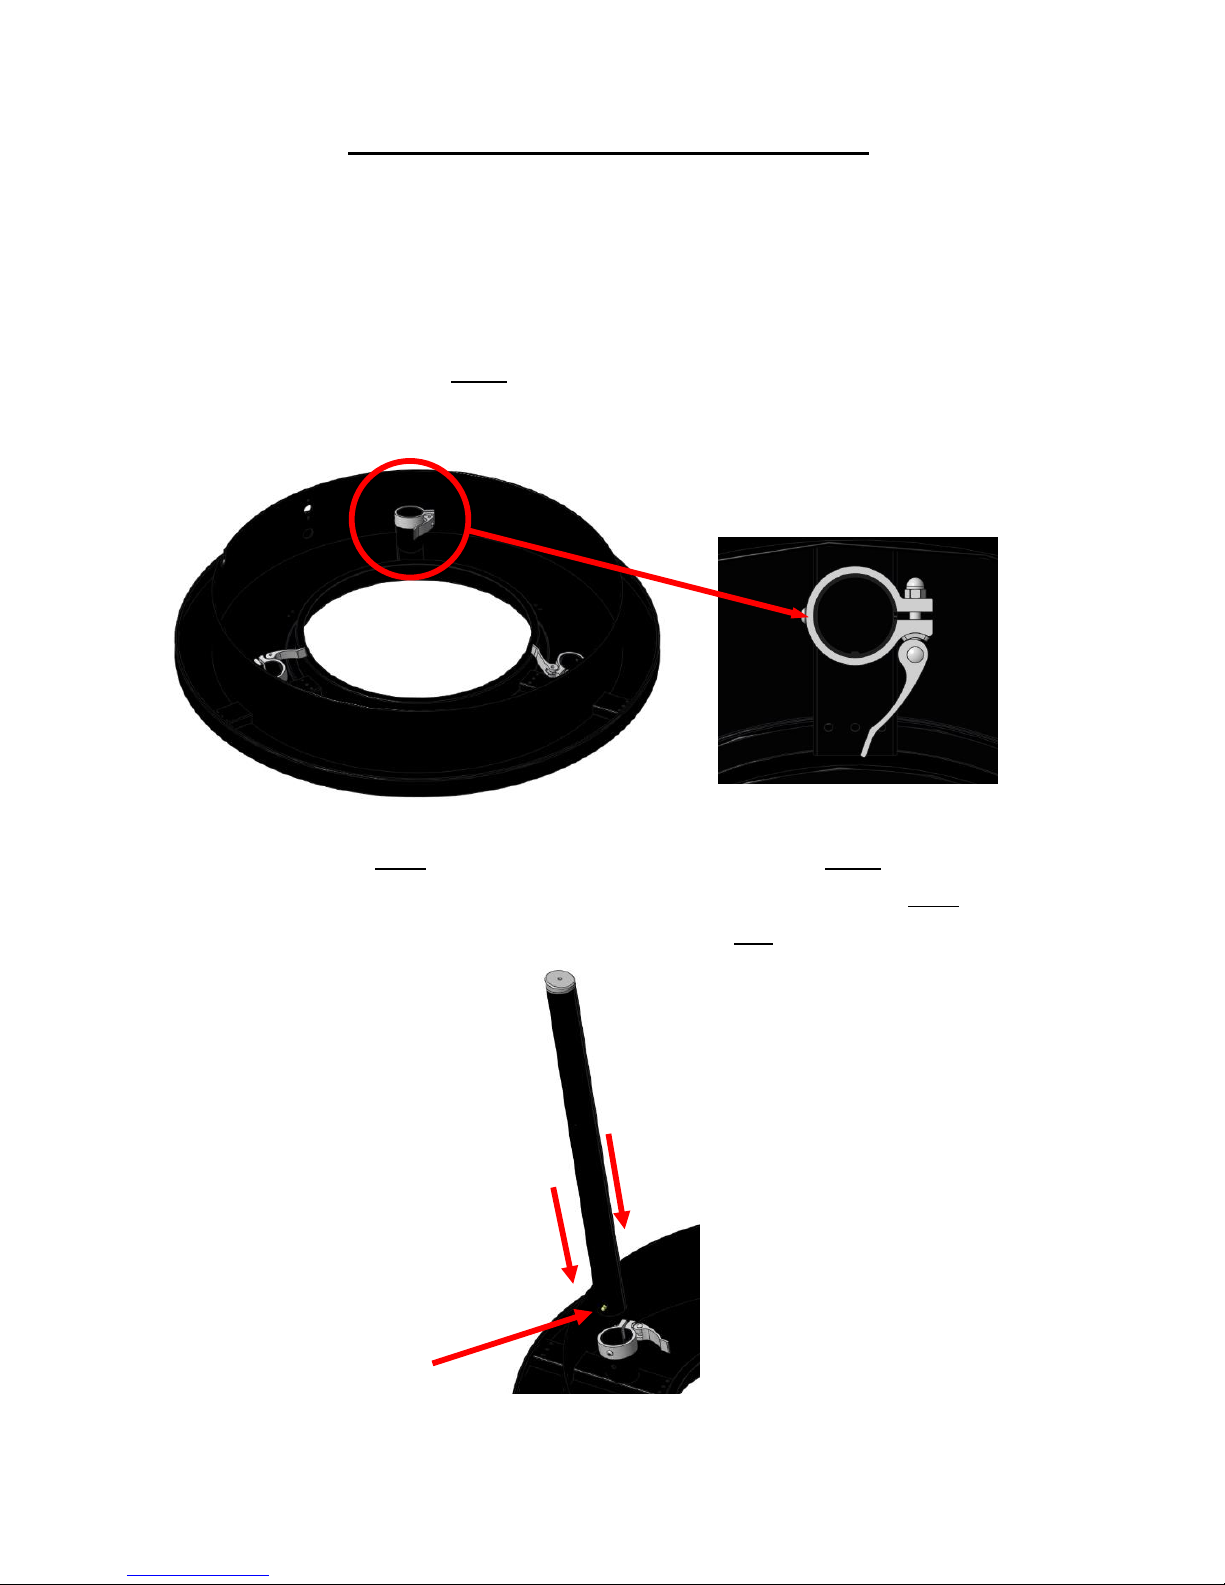
2. Carefully lay the Base, with underside facing upwards. Check to make
sure that clasps are in the open position.
3. Insert the Legs into the openings attached to the Base. Listen
for a click. This ensures that the securement pin on the Legs
is in place. Repeat this process for each Leg.
Securement Pin
 Loading...