

Outdoor GreatRoom Company Hudson Stone DIY-38 Crystal Fire Installation Instructions Manual
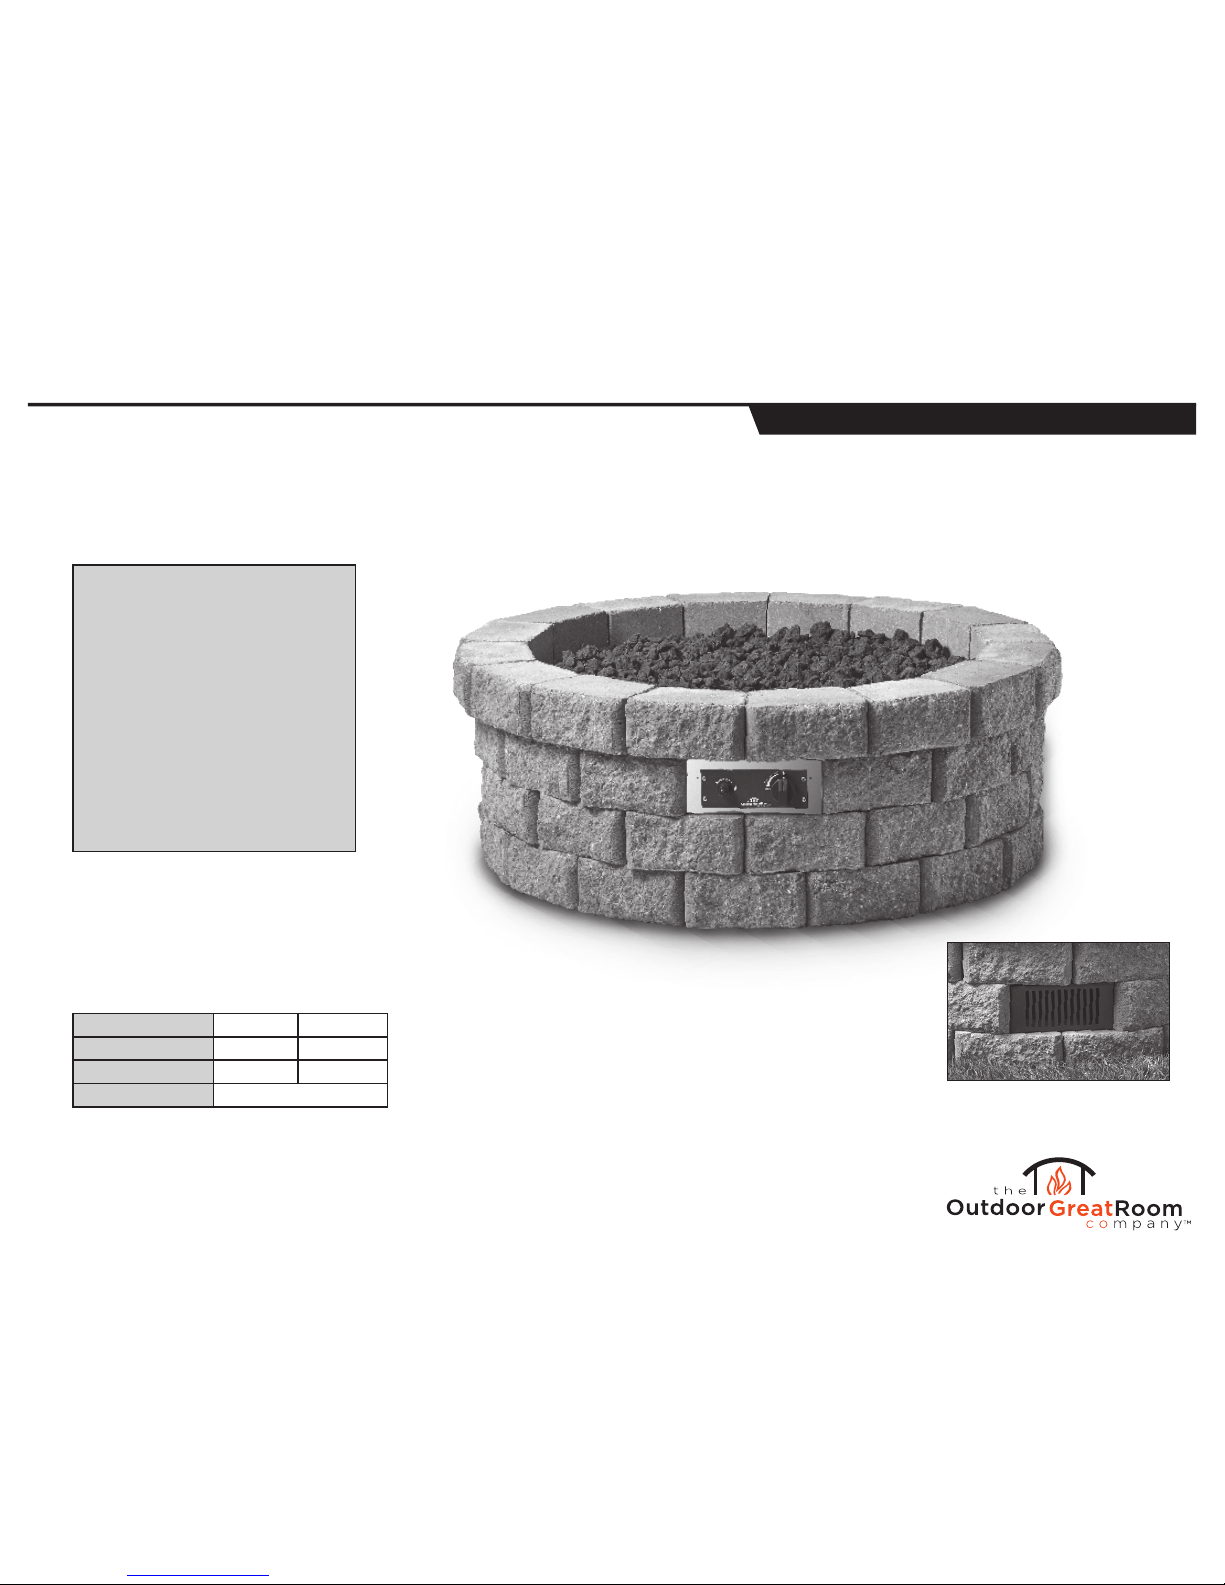
Hudson Stone™ Gas Fire Pit Kit
Installation Instructions
Refer to The Outdoor GreatRoom Company user manual for
DIY-38 installation and gas connection instructions.
The Outdoor GreatRoom Company DIY-38 Crystal Fire™ box contains:
4 piece burner support & hardware, electronic ignition, gas burner, metal
flex hose, NG orifice, control panel with knob & mounting bracket,
grounding wire with extension, user manual.
Questions? Call The Outdoor GreatRoom Company at 866-303-4028
Actual product dimensions and
weights may vary from these
nominal values.
* includes 52-lb. pallet
Control panel side shown
Side not shown—vent (Layer 2)
Keep debris or objects
from blocking vent
Installation Tools Needed for Surround
•
Exterior-grade concrete adhesive
•
Caulk gun
• Level
• Mallet
Materials List
•
1 Crystal Fire™ box
•
1 Vent
•
1 Control panel
•
59 Hudson Stone™ block units
•
Lava Rock
Overall Dimensions
Outer dimension 50" 56"
Inner dimension 24" 32"
Height 18" 4"
Weight 1,090 lbs.*
Lower
3 Rows
Top
Row
OutdoorRooms.com
Hudson Stone™ Gas Fire Pit Kit
Refer to The Outdoor GreatRoom Company user manual for
DIY-38 installation and gas connection instructions.
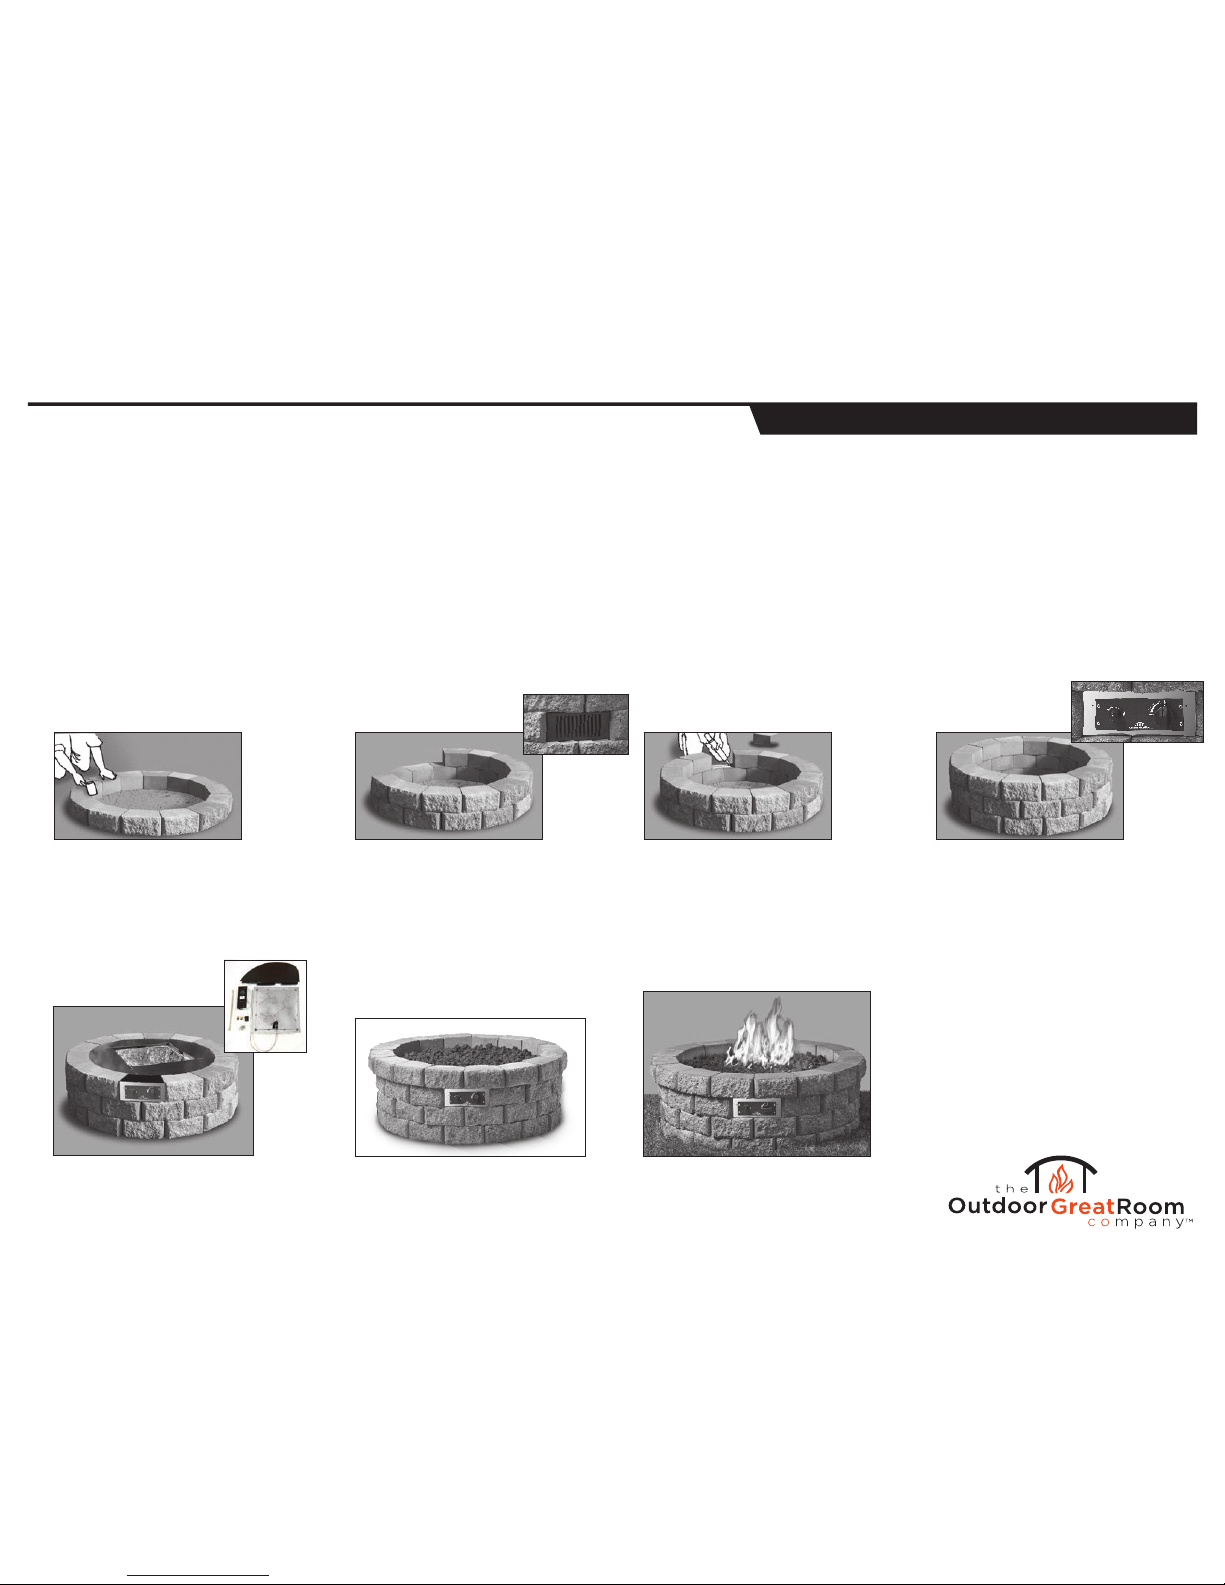
Installation Instructions
1. Layer 1 (15 block units)
Start by placing 15 wall block units on top
of base. Lay them tightly together to form
the circle. Level each stone front-to-back
and side-to-side. Make sure each stone is
even with the previously leveled block. Use
a rubber mallet to level.
2. Layer 2 (14 block units)
After the 1st course is set and leveled,
start the 2nd course by placing 14 wall
block units, center of the top block in
alignment with the joint between the
blocks below. Insert vent in place of one
block anywhere in row 2. Continue this
all the way around the circle.
3. Gluing
Once the 2nd course is all lined up, carefully
remove one block at a time and apply two
thick beads of concrete adhesive to the
center of the blocks. Reinstall the block
and push down firmly. Continue for all
remaining blocks on 2nd course—repeat
this step for each course.
4. Layer 3 (14 block units)
After the 2nd layer is finished, install the
3rd by placing 14 wall block units the
center of each block in line with the joint
of the blocks below. Insert control panel in
place of one block (typically the opposite
side of the vent). Repeat step 3 for gluing.
7. Finishing
After the adhesive cure time has lapsed,
pour lava rock into the fire burner until
covered completely, roughly 2-3 inches.
Enjoy!
6. Layer 4 (16 block units)
After the 3rd layer is finished and gas lines
connected, install the 4th layer by placing
16 wall block units center of each block
in line with the joint of the blocks below.
There will be a 1-inch overhang of this
layer. Repeat step 3 for gluing. Plastic and
rubber spacer may be needed to offset the
metal flange of the burner shield.
READ ALL INSTRUCTIONS AND USER MANUAL PRIOR TO
ASSEMBLY. If considering placement on wood or composite deck confirm
weight restrictions. If placing in grass see instructions on page 3 before
assembly. Ensure area is clean and level. Be sure to check city and county
codes and home association covenants prior to installation.
5. Placing the burner unit
Place burner with shield insert on top of
layer 3. Center on blocks with a overhang
of roughly
1
/
2
inch all around. Refer to
DIY-38 Crystal Fire™ box user manual
included in box for gas connection.
Be sure to check city and county codes and home association covenants prior to installation
Vent Block
Control
Panel
DIY-38
Kit
OutdoorRooms.com
 Loading...