

Outdoor GreatRoom Company Colonial, Grand Colonial Installation Instructions Manual
1 | P a g e
Colonial and Grand Colonial Fire Pit Tables
Installation Instructions
2 | P a g e
Contents
Contents………………………………………………………………………………..2
Required Tools……………………………………………………………..……..2
Assembling the Grand Colonial…………………………….………4
Assembling the Colonial…………………………………..………………6
Gas Connections…………….…………………………………………..……...7
Installing Igniter……………………………………………………………………8
Placing propane tank and finishing touches……………..12
Required Tools
Utility Knife
To cut and remove packaging
2 Open Ended Wrenches
To make gas connections
Leather Gloves
To protect hands from rough edges found on the
coffee table.
One (1) AAA Battery (not included)
Required for piezoelectric igniter installation.
Electric screw gun
90220:C 5.24.2012
3 | P a g e
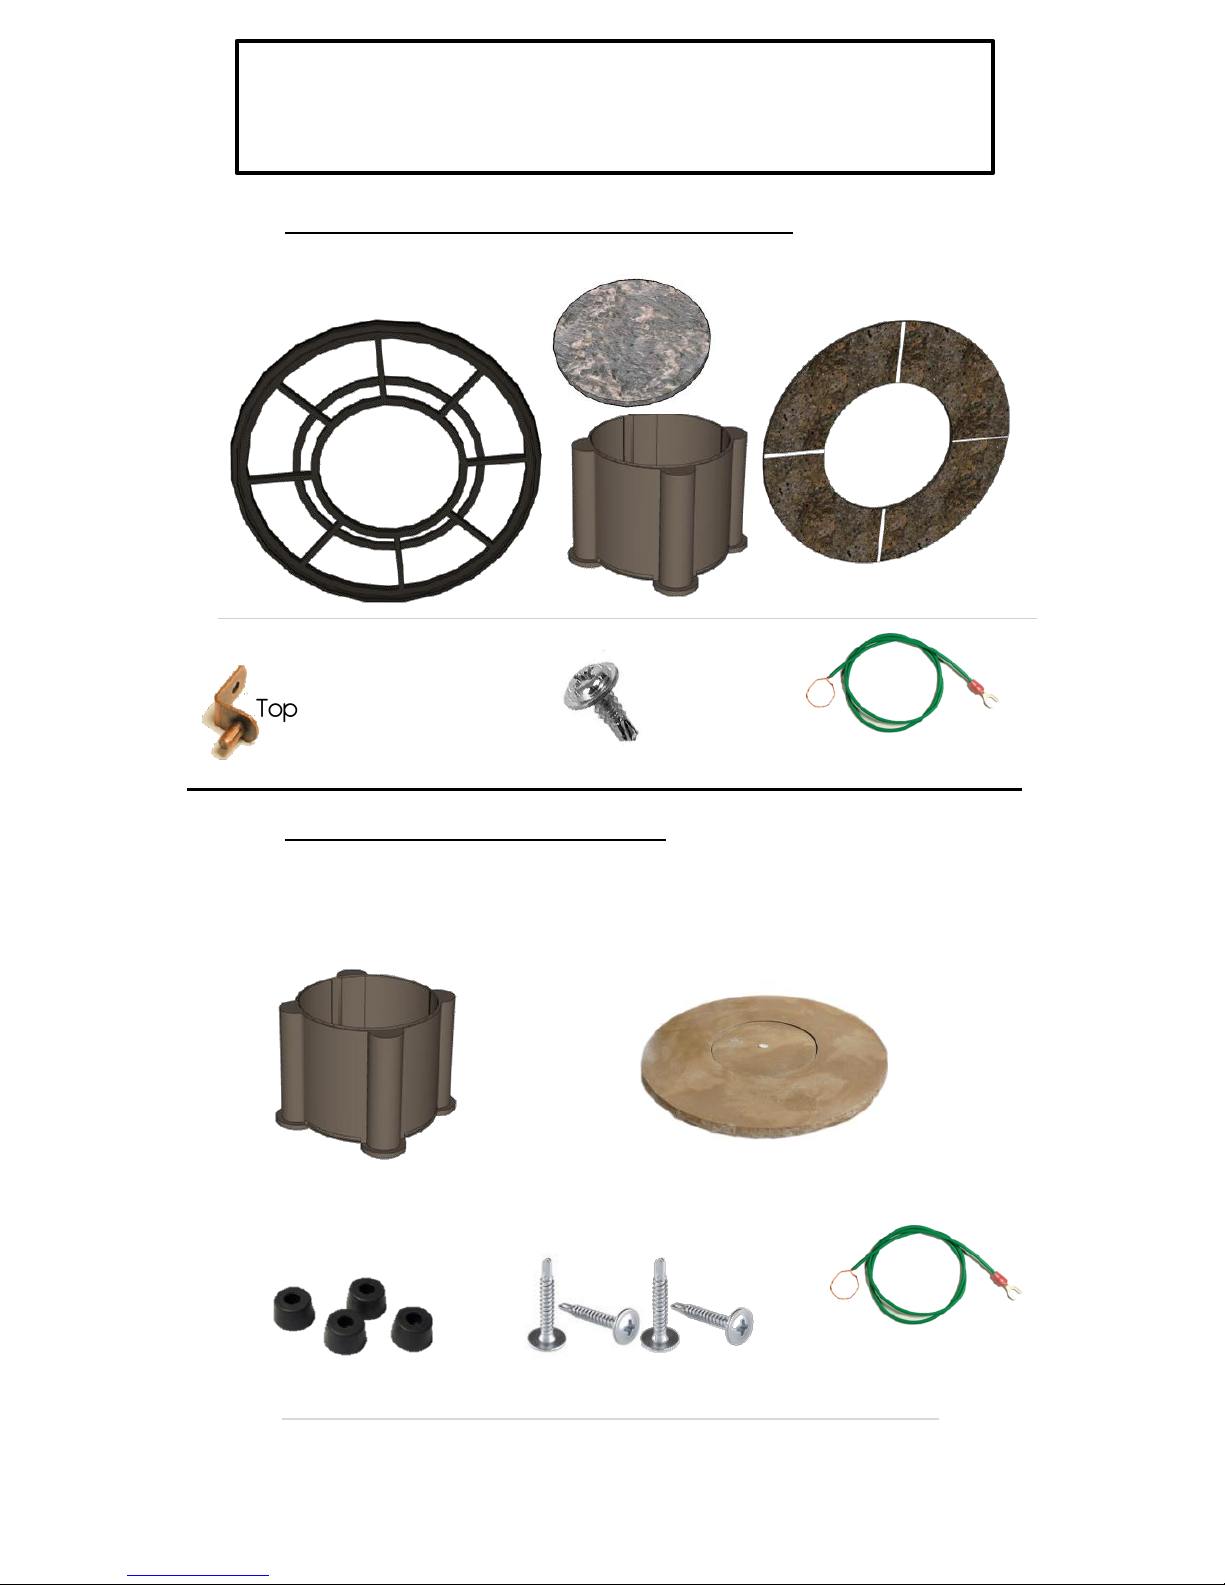
Included with Grand Colonial:
Included with Colonial:
Tabletop frame Base Granite Pieces (x4)
Top-Securing Bracket (x4)
Screws (x4)
Lazy Susan/Burner Cover
Depending on which model you purchased, turn to the
corresponding page in this manual for installation
instructions.
Base Supercast Tabletop with center burner
(Instructions begin
on next page)
(Flip to page 6 for
assembly instructions)
Risers (4) Screws (4)
Grounding wire(x1)*
Grounding wire(x1)*
* Grounding wire may not be used depending on igniter
included with your burner. See P.8 for more information
4 | P a g e
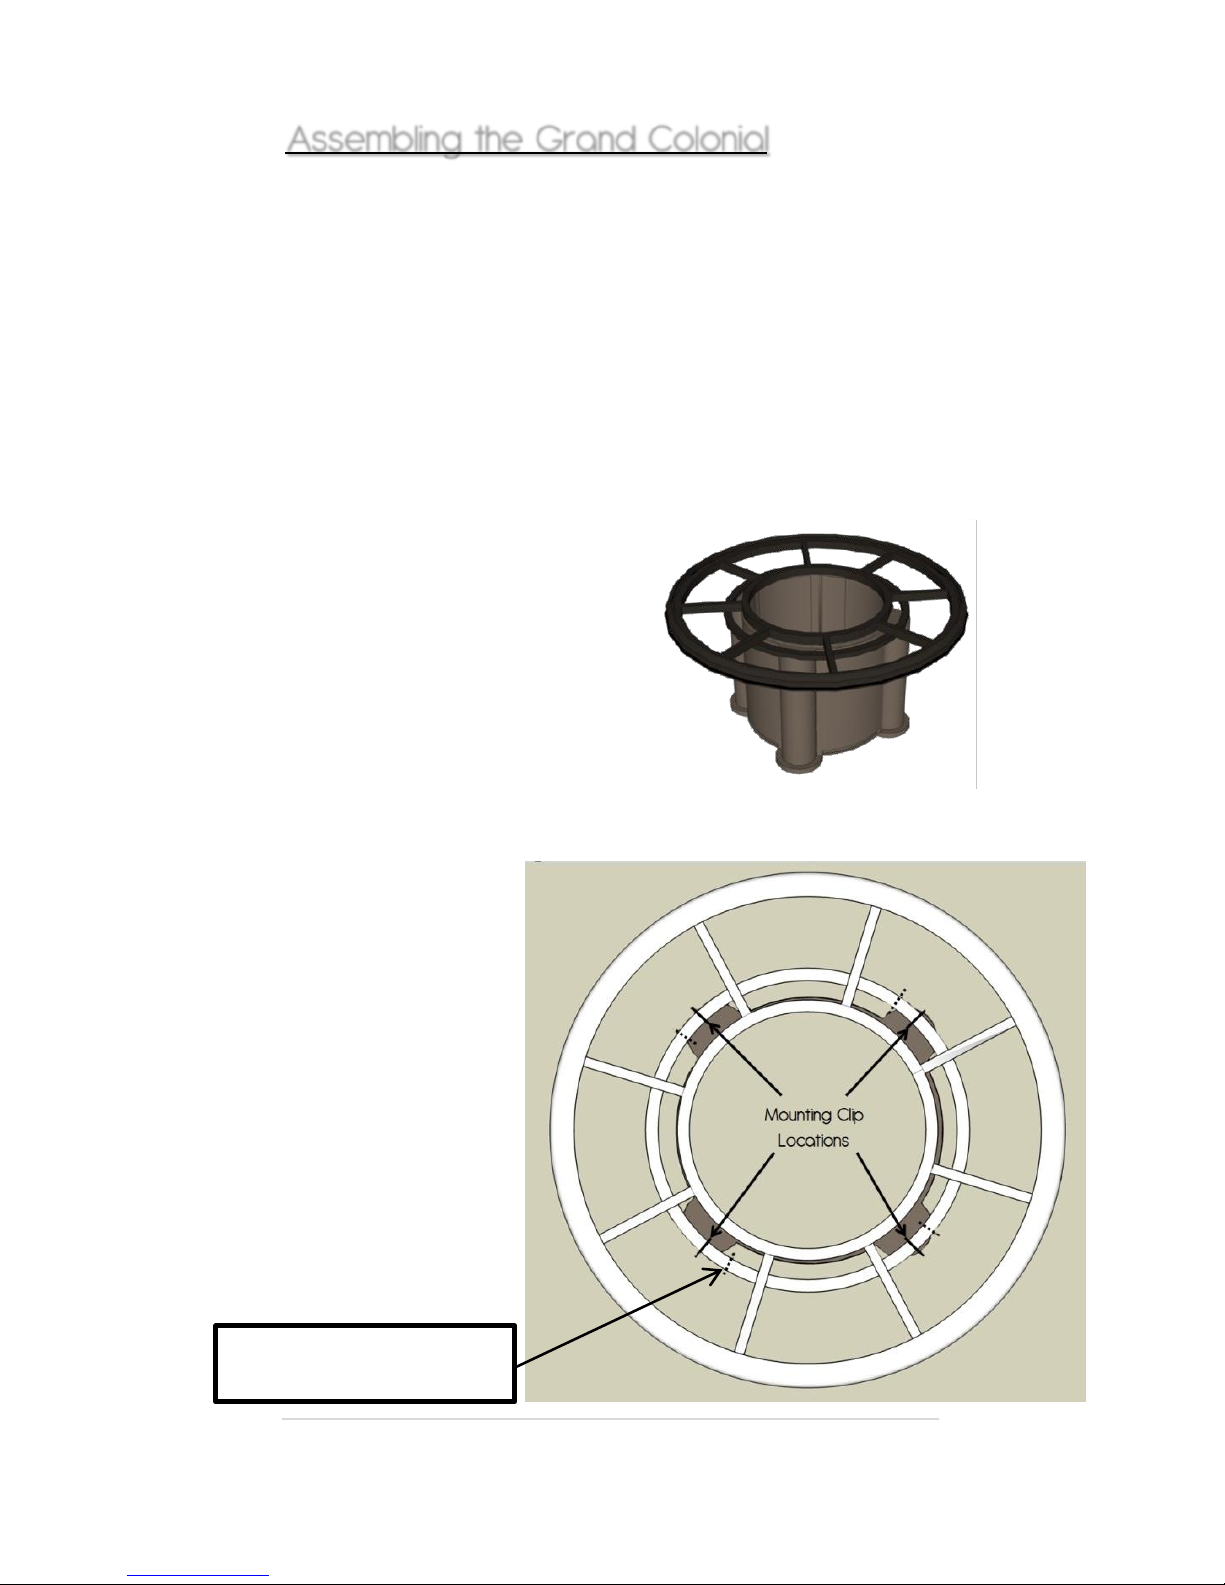
Assembling the Grand Colonial
1. Remove all components from packaging and
inspect for damage or missing parts.
2. Move the base to desired location and set into
place before installing granite.
- When locating your coffee table, refer to the
Crystal Fire manual and maintain clearance to
combustibles.
3. Place top on base
as shown.
4. Line top up with base as shown.
Holes in tabletop frame are also used
for an alternate installation so not
every hole will line up directly
centered in each corner
of the base. This is
normal, as only 4 of
these holes are used in
this installation. A solid
line in the diagram at
right indicates the
approximate location
of the holes used for
mounting. Dashed lines
are unused holes.
Dashed lines: Holes not used
for this installation
5 | P a g e
6. With top securely
fastened to base, set granite
sections into place, polished
side up.
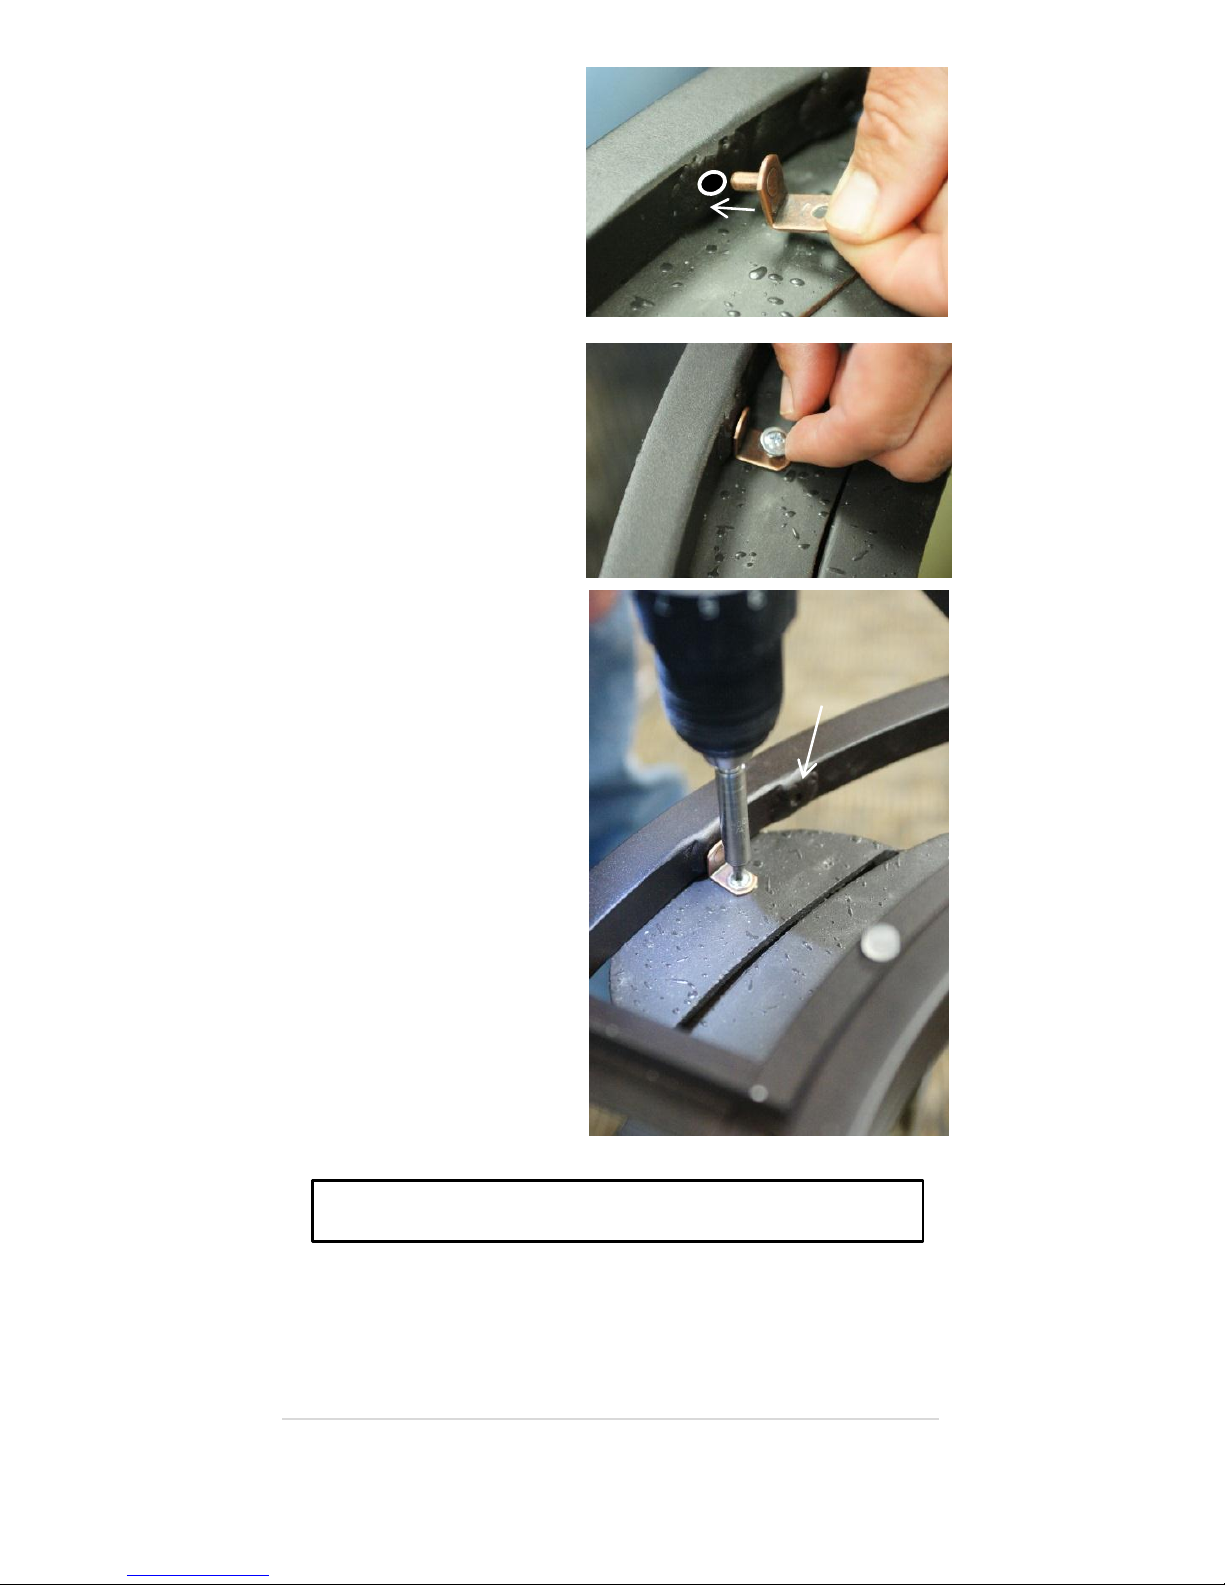
4. With top centered on
base and one hole
approximately centered on
each corner of the base,
insert a mounting clip into
mounting hole
(refer to image at right.)
5. Insert one of the
included screws through the
hole in the mounting clip
and screw into the table
base. Do not over-tighten as
this may cause stripping.
If stripping occurs, rotate
the top approximately 1”
and re-insert all screws.
Unused screw
hole
For gas hookup instructions, turn to page 7
 Loading...