


OUTDOORCHEF Montreux 570 G, COMPACTCHEF 480 G, Leon 570 G, Geneva 570 G, Cheslea 420 G operation manual
...GAS KETTLE
MANUAL
GENEVA 570 G I MONTREUX 570 G I ASCONA 570 G I LEON 570 G COMPACTCHEF 480 G I CHELSEA 480 G I CHELSEA 480 G LH I KENSINGTON 480 G
AMBRI 480 G I MINICHEF 420 G I CHELSEA 420 G | CITY 420 G

1A |
1B |
|
|
|
|
|
|
480 G |
|
570 G |
|
> 180° C |
|
+/- 100° C |
> 180° C |
360° F |
|
210° F |
360° F |
|
|
|
|
1C |
1D |
> 180° C |
|
+/- 100° |
C |
360° F |
|
210° |
F |
|
|
|
|
1E |
1F |
> 180° C 360° F
 AUTOMATIC
2
OUTDOORCHEF.COM

2A
max 500 mm
max Ø 310 mm
2B
3
1
2
3
OUTDOORCHEF.COM
de |
BEDIENUNGSANLEITUNG |
5 |
Lesen Sie diese Anleitung sorgfältig durch, bevor Sie Ihren OUTDOORCHEF Gas-Kugelgrill in Betrieb nehmen.
en |
USER GUIDE |
14 |
Please read these instructions carefully before using your OUTDOORCHEF Gas Kettle Barbecue.
fr |
MODE D’EMPLOI |
Avant la première mise en service de votre gril sphérique à gaz OUTDOORCHEF, lisez les informations suivantes attentivement.
it |
ISTRUZIONI PER L’USO |
Leggere attentamente le presenti istruzioni in tutte le loro parti prima di mettere in funzione il barbecue sferico a gas OUTDOORCHEF.
23
32
nl |
GEBRUIKSAANWIJZING |
41 |
Lees deze handleiding zorgvuldig door voordat u uw OUTDOORCHEF gaskogelbarbecue in gebruik neemt.
da BRUGSANVISNING |
50 |
Læs denne vejledning omhyggeligt igennem, før du tager din OUTDOORCHEF gaskuglegrill i brug.
sv BRUKSANVISNING 59
Läs de här enkla instruktionerna innan du börjar använda den OUTDOORCHEF här grillen –annars kanske du aldrig kommer underfund med hur duktig du är på att grilla.
no |
BRUKSANVISNING |
68 |
|
Les denne bruksanvisningen grundig før du tar i bruk gasskulegrillen OUTDOORCHEF.
fi |
KÄYTTÖOHJE |
77 |
Lue käyttöohje huolellisesti läpi, ennen kuin otat OUTDOORCHEF-kaasupallogrillin käyttöön.
is |
NOTKUNARLEIÐBEININGAR |
86 |
Lesið leiðbeiningarnar vandlega áður en OUTDOORCHEF kúlugasgrillið er tekið í notkun.
4
OUTDOORCHEF.COM
de BEDIENUNGSANLEITUNG
0063 2019 |
PIN 0063 BP 3505 |
Outdoorchef AG |
|||
Eggbühlstrasse 28, 8050 Zürich |
|||||
|
|||||
Typ: |
|
|
|
Serial No.: |
|
Article No.: |
|
|
|
||
Made in China |
|
|
|
||
Butane / Propane |
30/37 mbar |
DISTRIBUTION |
|||
G30 / G31 |
|
Outdoorchef Deutschland GmbH |
|||
Cat.I3+ Cat.I |
3 B/P |
|
Ochsenmattstr. 10 | 79618 Rheinfelden | Germany |
||
|
|
|
|||
Total rate ΣQn= |
|
|
|
||
WICHTIG:
Notieren Sie als Erstes die Seriennummer Ihres Gas-Kugelgrill auf der Rückseite dieser Bedienungsanleitung. Je nach Grillmodell finden Sie die Nummer auf dem Datensticker, welcher sich entweder am Grillgestell oder auf der Bodenplatte befindet.
Die Artikelnummer und Bezeichnung ihres Gas-Kugelgrill finden Sie auf der Welcome Card, welche der Dokumentenmappe beigelegt ist.
LOGIN CARD
Die Seriennummer und Artikelnummer sind wichtig für eine problemlose Abwicklung bei Rückfragen, bei Ersatzteilbestellungen und bei allfälligen Garantieansprüchen. Bewahren Sie die Bedienungsanleitung an einem sicheren Ort auf. Sie enthält wichtige Informationen bezüglich Sicherheit, Betrieb und Unterhalt.
WICHTIG FÜR IHRE SICHERHEIT
Jede Person, die den Grill bedient, muss den genauen Zündvorgang kennen und befolgen. Kinder dürfen den Grill nicht bedienen.
Die Montageanweisungen in der Aufbauanleitung sind genau zu befolgen. Eine unsachgemässe Montage kann gefährliche Folgen haben. Platzieren Sie keine entflammbaren Flüssigkeiten und Materialien oder Ersatzgasflaschen in der Nähe des Grills. Stellen Sie den Grill oder die Gasflasche(n) nie in geschlossene Räume ohne Belüftung.
Lesen Sie diese Anleitung sorgfältig durch, bevor Sie Ihren Gas-Kugelgrill in Betrieb nehmen. Der Grill darf nur im Freien benützt werden und es muss ein Sicherheitsabstand von mindestens 1.5 m zu brennbaren Gegenständen eingehalten werden.
GASFLASCHEN
•Es dürfen nur Gasflaschen mit maximal 8 kg Füllgewicht auf die Bodenplatte gestellt werden. Positionieren Sie die Flasche auf dem dafür vorgegebenen Platz, siehe AUFBAUANLEITUNG.
•Zur Befestigung dient der mitgelieferte Flaschengurt oder die vorgesehene Gasflaschenhalterung. Bitte achten Sie darauf, dass keine undichten Verschraubungen vorhanden sind. (Abb. 2A)
•Führen Sie vor Inbetriebnahme und nach jedem Gasflaschenwechsel die PRÜFUNG AUF DICHTHEIT durch.
•Gasflaschen dürfen nicht einer Temperatur von mehr als 50° C ausgesetzt und nie in einem geschlossenen Raum oder in einem Kellergeschoss gelagert werden.
•Beachten und befolgen Sie die Sicherheitsvorschriften, die auf den verwendeten Gasflaschen vermerkt sind.
•HINWEIS: Kontrollieren Sie ob Druckregler und Gasflasche in ihrem Land zum ordnungsgemässen Betrieb zugelassen sind. Nur Gasflaschen der entsprechenden Ländernorm verwenden. Aufgrund der unterschiedlichen Dichtungssysteme kann bei einer Abweichung der Druckreglerund Gasflaschensysteme keine dichte Verschraubung hergestellt werden. Diese Undichtheit kann dazu führen, dass das ausströmende Gas ohne weiteres mit einem offenen Feuer oder Funken entzündet werden kann. Wir empfehlen Ihnen aus Sicherheitsund Haftungsgründen, die in den Verkauf gelangenden Gasgrills in jedem Fall zu prüfen und, wenn erforderlich, Druckregler und Gasschlauch den Landesvorschriften anzupassen beziehungsweise anpassen zu lassen.
5
OUTDOORCHEF.COM

SICHERHEITSHINWEISE
Diese Bedienungsanleitung muss vom Besitzer aufbewahrt werden und jederzeit griffbereit sein.
Nehmen Sie den Grill gemäss Kapitel ANLEITUNG FÜR DAS ANZÜNDEN in Betrieb.
•„Nur im Freien verwenden“
•„Lesen Sie die Bedienungsanleitung vor Inbetriebnahme des Gerätes“
•„ACHTUNG: Zugängliche Teile können sehr heiss sein. Kinder fernhalten“
•„Das Gerät muss während des Betriebs von brennbaren Materialien ferngehalten werden“
•„Das Gerät während des Betriebs nicht bewegen“
•„Nach Gebrauch die Gaszufuhr an der Gasflasche schließen“
•Benützen Sie den Grill nie unter einem Vordach.
•Schieben Sie Geräte, die mit Lenkrollen ausgestattet sind, nicht über unebene Böden oder Absätze.
•Tragen Sie Schutzhandschuhe wenn Sie heisse Teile anfassen.
•Stellen Sie nach dem Grillen den Gasregulierknopf immer auf Position  und schliessen Sie die Gaszufuhr an der Gasflasche.
•Achten Sie beim Wechseln der Gasflasche darauf, dass der Gasregulierknopf auf Position  steht und die Gaszufuhr an der Gasflasche geschlossen ist. WICHTIG: Es dürfen sich keine Zündquellen in der Nähe befinden.
•Kontrollieren Sie nach dem Anschliessen einer neuen Gasflasche die Verbindungsteile gemäss Anleitung PRÜFUNG AUF DICHTHEIT.
•Besteht der Verdacht auf undichte Teile, dann stellen Sie den Gasregulierknopf auf Position  und schliessen Sie die Gaszufuhr an der Gasflasche. Lassen Sie die gasführenden Teile im Gasfachgeschäft überprüfen.
•Weist der Gasschlauch Beschädigungen oder Abnutzungserscheinungen auf, muss er sofort ersetzt werden. Der Schlauch muss frei von Knicken sein und darf keine Risse aufweisen. Vergessen Sie nicht, den Gasregulierknopf und die Gaszufuhr zuzudrehen, bevor Sie den Schlauch entfernen.
•Wechseln Sie den Schlauch und den Gasdruckregler nach einer Gebrauchsdauer von 3 Jahren ab Kaufdatum. Achten Sie darauf, dass der Gasdruckregler und der Schlauch den entsprechenden EN Standards entsprechen. Die empfohlene Länge des Gasschlauches beträgt 90 cm und darf 150 cm nicht überschreiten.
•Blockieren Sie nie das grosse runde Luftansaugloch am Boden des Beckens oder die Luftschlitze im Deckel. Die Belüftungsöffnungen des Gasflaschenraumes dürfen auf keinen Fall verschlossen oder abgedeckt werden.
•„Keine Veränderungen am Gerät vornehmen”
•Der Grill wird mit dem passenden Gasschlauch samt Gasdruckregler geliefert. Der Gasschlauch muss unbedingt von den heissen Aussenflächen des Grills fern gehalten werden. Der Schlauch darf nicht verdreht werden. Der Schlauch muss bei Grillmodellen, welche über eine Schlauchführung verfügen, zwingend in dieser Führung fixiert werden.
•Schlauch und Regler entsprechen den jeweiligen Landesvorschriften und den EN Standards.
•Falls die volle Leistung nicht erreicht wird und Verdacht auf eine Verstopfung der Gaszufuhr besteht, wenden Sie sich an ein Gasfachgeschäft.
•Benutzen Sie den Grill nur auf einem festen und sicheren Untergrund. Stellen Sie den Grill während des Betriebs nie auf Holzböden oder andere brennbare Flächen. Halten Sie den Grill von brennbaren Materialien fern.
•Vermeiden Sie bei Geräten mit Granitplatten einen Temperaturschock der Platte.
•Lagern Sie den Grill nicht in der Nähe von leicht entflammbaren Flüssigkeiten oder Materialien.
•Falls der Grill in einem Raum überwintert wird, muss die Gasflasche unbedingt entfernt werden. Sie sollte immer im Freien an einem gut belüfteten Ort gelagert werden, zu dem Kinder keinen Zugang haben.
•Platzieren Sie den Grill vor der Inbetriebnahme möglichst windgeschützt.
•Wenn der Grill nicht benutzt wird, sollte er, nachdem er ganz abgekühlt ist, mit einer Abdeckhaube vor Umwelteinflüssen geschützt werden. Abdeckhauben können Sie bei Ihrem Grillhändler beziehen.
•Um Staufeuchtigkeit zu vermeiden, entfernen Sie die Abdeckhaube nach starkem Regen.
6
OUTDOORCHEF.COM
PRÜFUNG AUF DICHTHEIT
WARNUNG: Während des Prüfens auf Dichtheit dürfen sich keine Zündquellen in der Nähe befinden. Dies gilt auch fürs Rauchen. Prüfen Sie die Dichtheit nie mit einem brennenden Streichholz oder einer offenen Flamme und immer im Freien.
1.Der Gasregulierknopf muss auf Position  stehen.
2.Öffnen Sie die Gaszufuhr an der Flasche und bepinseln Sie alle gasführenden Teile (die Verbindung an der Gasflasche / den Gasdruckregler / den Gasschlauch / den Gaseintritt / die Verbindung am Ventil) mit einer Seifenlösung aus 50 % flüssiger Seife und 50 % Wasser. Sie können auch ein Lecksuchspray verwenden. (Abb. 2B)
3.Eine Blasenbildung der Seifenlösung deutet auf Leckstellen hin. WICHTIG: Der Grill darf erst benutzt werden, wenn alle Leckstellen beseitigt sind. Schliessen Sie die Gaszufuhr an der Gasflasche.
4.Beseitigen Sie die Leckstellen durch Nachziehen der Verbindungen, wenn dies möglich ist, oder ersetzen Sie die defekten Teile.
5.Wiederholen Sie die Schritte 1 und 2.
6.Lassen sich die Leckstellen nicht beheben, wenden Sie sich an Ihren Gasfachhändler.
HINWEIS: Führen Sie die PRÜFUNG AUF DICHTHEIT nach jedem Anschluss oder Austausch der Gasflasche sowie am Anfang der Grillsaison durch.
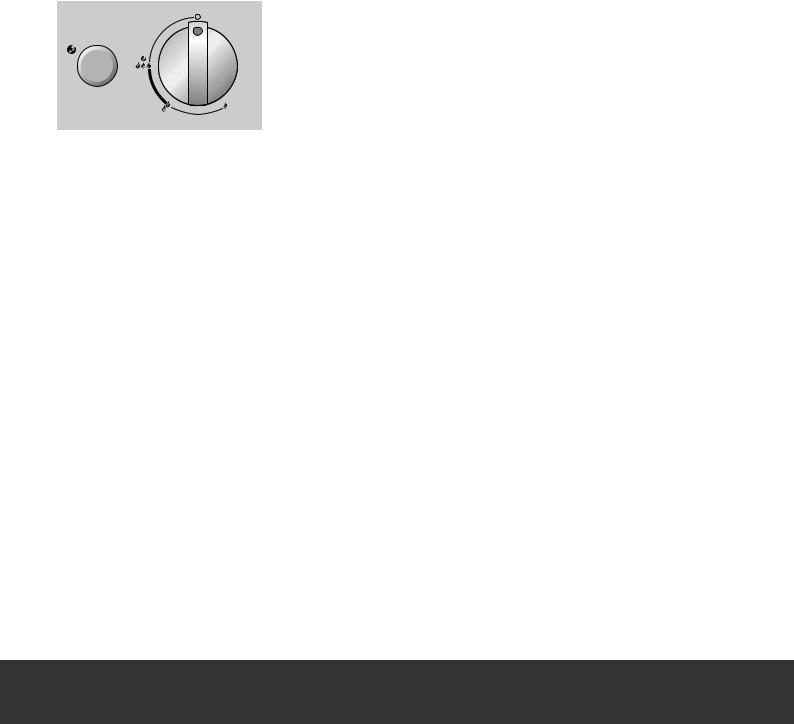
ERKLÄRUNG DER ZEICHEN AUF DER BEDIENKONSOLE
Wärmestufen und Zündung
 : Aus Position
 : niedrige Leistung
 : mittlere Leistung

 : hohe Leistung


 : Zündung
  : Zünder
Positionierung des EASY FLIP Trichters
Direkte Position des EASY FLIP Trichters
Indirekte Position des EASY FLIP Trichters
BRENNER-SYSTEM DER KUGEL
Modelle mit einem Ringbrenner (Abb. 1A)
Der Ringbrenner erreicht auf Stufe 
 die höchste Leistung und auf
  die niedrigste Leistung.
Modelle mit zwei Ringbrenner (Abb. 1B)
Der grosse Ringbrenner erreicht auf Stufe 
 die höchste Leistung und auf
  die niedrigste Leistung. Er ist auf Anwendungen im mittleren bis hohen Temperaturbereich ausgelegt.
Der kleine Ringbrenner ist für das Garen bei niedrigen Temperaturen konzipiert und lässt sich nur geringfügig regulieren. Der Unterschied zwischen 
 und
und  ist nicht sichtbar. Der kleine Ringbrenner erreicht eine Temperatur von ca. 100° bis 120° C.
7
OUTDOORCHEF.COM

VOR DEM ERSTGEBRAUCH
1.Reinigen Sie alle Teile, die mit Lebensmitteln in Berührung kommen.
2.Prüfen Sie alle gasführenden Teile, wie im Kapitel PRÜFUNG AUF DICHTHEIT beschrieben. Tun Sie dies auch dann, wenn Ihr Gas-Kugelgrill vom Händler montiert geliefert wurde.
3.Brennen Sie den Grill ca. 20–25 Minuten lang auf Stufe 
 aus.
aus.
ANLEITUNG FÜR DAS ANZÜNDEN
1.Stellen Sie sicher, dass alle Verbindungen zwischen dem Gasschlauch, dem Gasdruckregler und der Gasflasche gut festgeschraubt sind (Verfahren Sie gemäss den Anweisungen im Kapitel PRÜFUNG AUF DICHTHEIT).
2.Öffnen Sie den Grilldeckel. ACHTUNG: Zünden Sie den Grill nie mit geschlossenem Deckel.
3.Öffnen Sie die Gaszufuhr an der Gasflasche.
4a. Modelle mit einem Ringbrenner:
Drücken Sie den Gasregulierknopf und drehen Sie ihn entgegen dem Uhrzeigersinn auf Stufe 


Drücken Sie den schwarzen Zündknopf und halten Sie ihn gedrückt, bis der Funke überspringt und das Gas brennt. (Abb. 1C)
4b. Modelle mit zwei Ringbrennern und separatem Zündknopf:
Drücken Sie den Gasregulierknopf des grossen Ringbrenners und drehen Sie ihn entgegen dem Uhrzeigersinn auf Stufe 

 . Drücken Sie den schwarzen Zündknopf und halten Sie ihn gedrückt, bis der Funke überspringt und das Gas brennt.
Oder drücken Sie den Gasregulierknopf des kleinen Ringbrenners (linken Knopf) und drehen Sie ihn entgegen dem Uhrzeigersinn auf Stufe 

 . Drücken Sie den schwarzen Zündknopf und halten Sie ihn gedrückt, bis der Funke überspringt und das Gas brennt. (Abb. 1D)
4c. Modelle mit zwei Ringbrennern ohne separatem Zündknopf:
Drücken Sie den Gasregulierknopf des grossen Ringbrenners und drehen Sie ihn entgegen dem Uhrzeigersinn auf Stufe 

 . Halten Sie den Gasregulierknopf gedrückt, bis der Funke überspringt und das Gas brennt. (Abb. 1E)
Oder drücken Sie den Gasregulierknopf des kleinen Ringbrenners (linken Knopf) und drehen Sie ihn entgegen dem Uhrzeigersinn auf Stufe 

 . Halten Sie den Gasregulierknopf gedrückt, bis der Funke überspringt und das Gas brennt.
5.Wenn das Gas nicht innerhalb 3 Sekunden zündet, stellen Sie den Gasregulierknopf auf  . Warten Sie 2 Minuten, damit sich das nicht verbrannte Gas verflüchtigen kann. Danach wiederholen Sie Punkt 4.
6.Ist es nicht möglich, den Grill nach 3 Versuchen in Betrieb zu nehmen, suchen Sie die Ursachen (wie im Abschnitt FEHLERBEHEBUNG beschrieben).
ANLEITUNG FÜR DAS ANZÜNDEN DES CITY 420 G / CHELSEA 420 G / MINICHEF 420 G
1.Stellen Sie sicher, dass alle Verbindungen zwischen dem Gasschlauch, dem Gasdruckregler und der Gasflasche gut festgeschraubt sind. (Verfahren Sie gemäss den Anweisungen im Kapitel PRÜFUNG AUF DICHTHEIT). HINWEIS: Beim MINICHEF 420 G müssen die Seitentablare während des gesamten Grillvorgangs ausgeklappt sein.
2.Öffnen Sie den Grilldeckel. ACHTUNG: Zünden Sie den Grill nie mit geschlossenem Deckel.
3.Öffnen Sie die Gaszufuhr an der Gasflasche.
4.Drücken Sie den Gasregulierknopf und drehen Sie ihn entgegen dem Uhrzeigersinn auf Stufe 

 . Betätigen Sie den roten Zündknopf mehrmals, bis sich das Gas entzündet. (Abb. 1F)
5.Wenn das Gas nicht innerhalb 3 Sekunden zündet, stellen Sie den Gasregulierknopf auf  . Warten Sie 2 Minuten, damit sich das nicht verbrannte Gas verflüchtigen kann. Danach wiederholen Sie Punkt 4.
6.Ist es nicht möglich, den Grill nach 3 Versuchen in Betrieb zu nehmen, suchen Sie die Ursachen (wie im Abschnitt FEHLERBEHEBUNG beschrieben).
8
OUTDOORCHEF.COM

DAS EASY FLIP TRICHTER-SYSTEM MACHT AUS EINEM GRILL ZWEI
Das Herzstück des OUTDOORCHEF Gas-Kugelgrill heisst EASY FLIP Trichter und widerspiegelt die Innovationskunst der OUTDOORCHEF Ingenieure.
Der EASY FLIP Trichter ermöglicht es Ihnen, innert Sekunden die Hitzeverteilung von direkt auf indirekt zu ändern. Gleichzeitig verhindert er als intelligenter Schutzschild den schädlichen Fettflammenbrand und unerwünschte Rauchentwicklung.
Ein einziger Handgriff genügt, um vom direkten auf indirektes Grillen, Kochen und Backen zu wechseln: einfach den EASY FLIP Trichter umdrehen.
DIREKTE HITZE |
INDIREKTE HITZE |
Beim direkten Grillen und Kochen |
Beim indirekten Grillen, Kochen und Backen |
arbeiten Sie mit hoher Temperatur, die sich auf |
verteilt sich die Hitze gleichmässig in der |
den Rost konzentriert. Zum Beispiel für ein schönes |
geschlossenen Grillkugel. Ideal zum Beispiel zum |
Grillmuster auf dem Steak |
Dünsten von Gemüse oder Niedergaren |
|
eines Bratens. |
GEBRAUCHSANLEITUNG FÜR DEN GAS-KUGELGRILL
So einfach geht es:
1.Bringen Sie den EASY FLIP Trichter in die gewünschte Position. ACHTUNG: Verändern Sie während des Grillens die Trichterposition nur mit
hitzebeständigen Handschuhen. HINWEIS: Beim direkten Grillen und Kochen auf Stufe 
 den Deckel offen lassen. Nur auf Stufe
 –
–  kann auch beim direkten Grillen mit geschlossenem Deckel gearbeitet werden.
2.Wählen Sie, wenn nötig, das entsprechende Zubehör aus.
3.Heizen Sie den Grill bei geschlossenem Deckel ca. 10–15 Minuten lang auf Stufe 
 vor.
vor.
4.Stellen Sie nach dem Grillen immer den Gasregulierknopf auf Position  . Danach schliessen Sie die Gaszufuhr an der Gasflasche. Auch bei leeren Flaschen muss der Flaschenhahn geschlossen werden.
9
OUTDOORCHEF.COM

TIPPS UND TRICKS
Mit indirekter Hitze
Grössere Bratenstücke oder ganze Hähnchen: Dank des EASY FLIP Trichters müssen grössere Fleischstücke während des Grillens nicht mehr gewendet werden. Die Hitze des Gasbrenners steigt an den Innenseiten der Grillkugel empor und verteilt sich gleichmässig
in der ganzen Kugel. Legen Sie das Grillgut auf den vorgeheizten Grillrost und schliessen Sie den Deckel. Lassen Sie immer etwas Abstand zwischen den einzelnen Fleischstücken. Durch das Schliessen des Deckels wird das Grillgut von allen Seiten gleichmässig gebräunt und der Saft bleibt im Braten.
Um bei grösseren Stücken nichts dem Zufall zu überlassen, empfehlen wir den OUTDOORCHEF GOURMET CHECK– das Kerntemperatur-Messgerät für perfekte Ergebnisse.
Mit direkter Hitze
Kleinere Fleischstücke wie Steaks, Koteletts und Würste: Das Grillgut wird auf den vorgeheizten Grillrost in der Mitte positioniert und
bei geöffnetem Deckel kurz angebraten. Legen Sie danach das Grillgut nach aussen, reduzieren Sie die Hitze auf  und braten Sie mit
geschlossenem Deckel fertig.
Damit Sie ein optimales Ergebnis für Kurzgebratenes erzielen, empfehlen wir die Gusseisenplatte von OUTDOORCHEF.
Mit dem richtigen Zubehör macht Ihr OUTDOORCHEF noch mehr Spass. Ob Grillen, Kochen oder Backen: Lassen Sie Ihrer Kreativität und Experimentierfreude freien Lauf.
Alle Zubehörprodukte für Ihren Grill finden Sie unter OUTDOORCHEF.COM
Die OUTDOORCHEF-Grillzeittabelle für die einzelnen Grilladen finden Sie unter OUTDOORCHEF.COM
GRILLEN AUF DER ZUSATZFLÄCHE
Heizen Sie Ihren Grill bei voller Hitze 
 ca. 10 Minuten lang vor. Legen Sie das Grillgut auf den Grillrost und regulieren Sie die Temperatur nach Ihren Wünschen
  –
–
 .
.
NACH DEM GRILLEN
1.Stellen Sie den Gasregulierknopf jedes Brenners auf  .
.
2.Schliessen Sie die Gaszufuhr an der Gasflasche.
3.Lassen Sie den Grill ganz auskühlen und reinigen Sie ihn.
4.Decken Sie den Grill mit der passenden Abdeckhaube ab.
REINIGUNG
Es ist nur eine sehr geringe Reinigung zwischen den Grillgängen erforderlich, da das meiste Fett entweder verdunstet oder in die Auffangschale abgeleitet wird. Bei stärkerer Verschmutzung heizen Sie den Grill ca. 10 Minuten mit voller Leistung auf. Verwenden Sie für die Reinigung der Trichter und des Rostes eine Grillbürste mit Messingborsten (keine Stahlborsten).
Für eine gründlichere Reinigung, verwenden Sie den OUTDOORCHEF BARBECUE CLEANER. Wahlweise können Sie einen Topfschwamm aus Nylon und Seifenwasser verwenden, um alle losen Rückstände zu entfernen.
WICHTIG: Lassen Sie den Grill nach jeder gründlichen Reinigung auf Stufe 
 richtig austrocknen (ausbrennen).
ANWENDUNG DES OUTDOORCHEF BARBECUE CLEANER
WICHTIG: Der Grill darf während der Verwendung von OUTDOORCHEF BARBECUE CLEANER nicht in Betrieb sein.
Den Händen zuliebe Handschuhe und möglichst Brille tragen. Den Grill oder das Zubehör in noch leicht warmem Zustand gründlich einsprühen und 15–30 Min. einwirken lassen. Verschmutzte Flächen nochmals einsprühen, gründlich mit Wasser abspülen und trocknen lassen. ACHTUNG: Der OUTDOORCHEF BARBECUE CLEANER darf nicht auf pulverbeschichteten Flächen verwendet werden.
ANWENDUNG DES OUTDOORCHEF CHEF CLEANER
WICHTIG: Der Grill darf während der Verwendung des OUTDOORCHEF CHEF-CLEANER nicht in Betrieb sein.
Zum Schutz Handschuhe und Brille tragen. Den Grill oder das Zubehör in noch leicht warmem Zustand einsprühen und 10 Minuten einwirken lassen, bis sich der Schaum aufgelöst hat.
Bei Bedarf mit einer geeigneten Grillbürste oder einem Nylonschwamm nachreinigen. Danach gründlich mit Wasser abspülen und trocknen. ACHTUNG: Der OUTDOORCHEF CHEF CLEANER darf nicht auf pulverbeschichteten Flächen verwendet werden.
10
OUTDOORCHEF.COM
UNTERHALT
Ein regelmässiger Unterhalt Ihres Grills garantiert ein einwandfreies Funktionieren.
•Kontrollieren Sie alle gasführenden Teile mindestens zweimal pro Jahr und jedes Mal nach einer längeren Lagerung. Spinnen und andere Insekten können Verstopfungen verursachen, welche vor Gebrauch behoben werden müssen.
•Wird der Grill regelmässig auf unebenem Gelände verschoben, kontrollieren Sie von Zeit zu Zeit, ob noch alle Schrauben fest sind.
•Wenn Sie den Grill während einer längeren Periode nicht benützen, sollten Sie vor dem erneuten Gebrauch eine PRÜFUNG AUF DICHTHEIT durchführen. Wenn Sie irgendwelche Zweifel haben, wenden Sie sich bitte an Ihren Gaslieferanten oder an die Verkaufsstelle.
•Um Korrosionsschäden zu vermeiden, ölen Sie vor einer längeren Lagerung alle Metallteile ein.
•Nach einer längeren Lagerung und mindestens einmal während der Grillsaison sollten Sie den Gasschlauch auf Risse, Knicke und andere Beschädigungen überprüfen. Ein beschädigter Gasschlauch muss sofort ersetzt werden, wie es im Kapitel SICHERHEITSHINWEISE beschrieben ist.
•Behandeln Sie alle Holzbestandteile einmal jährlich mit einem Holzöl – dies wirkt Rissbildungen entgegen.
•Schützen Sie ihren Grill, nachdem er ganz abgekühlt ist, mit einer passenden OUTDOORCHEF Abdeckhaube vor Umwelteinflüssen.
•Um Staufeuchtigkeit zu verhindern, die Abdeckhaube nach Regen entfernen. Abdeckhauben können Sie bei Ihrem Grillhändler beziehen.
FEHLERBEHEBUNG
Der Brenner zündet nicht:
•Überprüfen Sie, ob die Gaszufuhr der Gasflasche geöffnet ist.
•Stellen Sie sicher, dass sich genug Gas in der Flasche befindet.
•Überprüfen Sie, ob Funken von der Elektrode auf den Brenner überspringen.
Kein Funke:
•Stellen Sie sicher, dass die Batterie richtig eingelegt ist (bei Grills mit Elektrozündung).
•Der Abstand zwischen Brenner und Elektrode darf nur 5–8 mm betragen.
•Überprüfen Sie, ob die Kabel bei der elektrischen Zündung und der Elektrode eingesteckt sind und fest sitzen.
•Setzen Sie eine neue Batterie (Typ AAA, LR03, 1.5 Volt) in die elektrische Zündung ein (bei Grills mit Elektrozündung).
Können Sie den Grill anhand der oben erwähnten Massnahmen nicht in Betrieb nehmen, kontaktieren Sie bitte Ihre Verkaufsstelle.
VERBRAUCHER-GARANTIE
1. Garantie und Verhältnis zu sonstigen Rechten des Käufers
Mit dem Kauf dieses OUTDOORCHEF Produktes bei einem autorisierten Händler erhalten Sie als privater Endkunde (Verbraucher) eine Herstellergarantie von Outdoorchef AG („OC“).
Die Herstellergarantie gewährt Ihnen Garantieansprüche gegen den Garantiegeber nach Maßgabe dieser Vereinbarung. Die Garantieansprüche bestehen dabei neben Ihren sonstigen vertraglichen oder gesetzlichen Rechten. Diese sonstigen Rechte werden durch diese Garantie nicht ausgeschlossen oder eingeschränkt. Sie können daher auch Ihre sonstigen vertraglichen oder gesetzlichen Ansprüche gegenüber dem jeweils Verpflichteten geltend machen. So werden bspw. Ansprüche nach dem Produkthaftungsgesetz durch diese Garantie nicht berührt.
Als Käufer bleibt es Ihnen insbesondere auch möglich, vertragliche Gewährleistungsansprüche gegen Ihren Verkäufer geltend zu machen. So kann beispielsweise eine mögliche Rückabwicklung des Kaufvertrages nur gegenüber dem Verkäufer, nicht aber im Rahmen dieser Garantie gegenüber OC verfolgt werden.
2. Beteiligte und Garantievoraussetzungen
Garantiegeber ist OC. Garantieberechtigt ist jeder Endkunde, der ein Neuprodukt im autorisierten Handel für private Zwecke erwirbt. Der Erwerb ist durch Vorlage des Kaufbelegs zu führen. Ein Erwerb für private Zwecke liegt vor, wenn das Produkt durch eine natürliche Person zu Zwecken erworben wird, die überwiegend weder ihrer gewerblichen noch ihrer selbständigen beruflichen Tätigkeit zugeordnet werden können.
Wird ein Garantiefall erkennbar müssen Sie die Garantieansprüche innerhalb von zwei Monaten beim Garantiegeber geltend machen. Ansonsten sind Sie mit Garantieansprüchen ausgeschlossen. Für offensichtliche Mängel beginnt diese Ausschlussfrist mit Erhalt des Produkts. OC empfiehlt daher, das Produkt nach Erhalt umgehend auf Mängel zu prüfen.
3. Umfang
Die Garantie gilt ab Kaufdatum und wird in folgenden Fällen gewährt, sofern kein Ausschlusstatbestand nach Ziffer 4 vorliegt:
•3 Jahre auf die emaillierte Kugel (Unterteil und Deckel) gegen Durchrosten.
•3 Jahre auf den emaillierten Grillrost gegen Durchrosten oder Durchbrennen.
•3 Jahre auf alle Edelstahlteile gegen Durchrosten oder Durchbrennen.
11
OUTDOORCHEF.COM

•Fehler der Emaillierung vor erstmaliger Benutzung
•2 Jahre auf alle restlichen Herstellungs- / Materialfehler
Nicht als Mangel gelten dabei für die Funktion unerhebliche und für Sie als Kunden zumutbare Unebenheiten, Farbunterschiede der Emaillierung oder kleinere Fehlstellen wie produktionsbedingte Auflagepunkte am unteren Deckelrand oder an den Aufhängungen.
Bei einem Garantiefall wird OC nach eigener Wahl die beschädigten oder mangelhaften Teile oder das Produkt insgesamt austauschen und ersetzen. Soweit für Sie als Kunden zumutbar kann ein Austausch auch gegen ein vergleichbares Modell neuerer Bauart ausgetauscht werden, bspw. gegen ein Nachfolgemodell. Soweit durch einen Mangel die Funktionalität des Produkts nicht beeinträchtigt wird und soweit für Sie als Kunden zumutbar, kann Ihnen statt der Reparatur auch ein angemessener finanzieller Ausgleich angeboten werden.
Für die Dauer der Garantieabwicklung (Prüfung und eventuell Austausch) besteht gegen OC kein Anspruch auf ein Ersatzprodukt oder eine sonstige Entschädigung. Die Ausführung von Garantieleistungen bewirkt weder eine Verlängerung noch einen Neubeginn der Garantiezeit. Ausgewechselte Teile gehen in das Eigentum von OC über. Nur beim Produktaustausch beginnt die Garantiezeit von neuem.
Weitergehende Ansprüche gegen den Garantiegeber werden durch diese Garantie nicht begründet. Ihre Ansprüche aus sonstigen Rechtsgründen werden hierdurch jedoch nicht ausgeschlossen oder beschränkt (siehe auch oben 1.).
4. Ausschluss
Die Garantie ist in folgenden Fällen ausgeschlossen:
•Gewöhnliche Abnutzung bei bestimmungsgemäßem Gebrauch, insbesondere an allgemeinen Verschleißteilen wie Trichter, Flammendächer, Brenner, Thermometer, Zündung und Batterie, Elektrode, Zündkabel, Gasschlauch, Gasdruck-Regler, Heizelement, Reflektor, Alu-Schutzfolie, Grilloder Kohlerost und -schale, Anzündrost sowie die Kohle- / Fettauffangschale.
•Schäden der Emaillierung bei benutzten Geräten, sofern der der Fehler nicht nachweislich bereits vor erstmaliger Benutzung vorlag.
•Defekte und/oder Schäden aufgrund einer unsachgemäßen oder nicht bestimmungsgemäßen Benutzung, insbesondere aufgrund Nichtbeachtung der Bedienungsanleitung, der Sicherheitshinweise oder von Betriebs-/Wartungsanweisungen (beispielsweise Benutzung von Outdoor-Geräten in Innenräumen, Beschädigungen durch fehlerhafte Montage, durch unsachgemäße Reinigung der emaillierten Oberfläche des Trichters oder des Grillrosts, durch Nichtdurchführens eines Dichtheitstestes soweit in der Bedienungsanleitung empfohlen, durch Verwendung schädlicher Chemikalien, durch Zweckentfremdung usw.).
•Defekte und/oder Schäden, soweit diese durch Eingriffe oder Reparaturen von nicht durch OC autorisierte Personen erfolgt sind.
•Defekte und/oder Schäden durch zerstörende Witterungseinflüsse (beispielsweise Hagel oder Blitzschlag).
•Defekte und/oder Schäden aufgrund von mutwilliger Beschädigung oder aufgrund vorsätzlicher oder fahrlässiger Beschädigung, soweit nicht von OC zu vertreten.
•Defekte und/oder Schäden, welche beim Transport zum Käufer entstanden sind, soweit nicht der Transport vom Garantiegeber veranlasst wurde.
•Defekte und/oder Schäden aufgrund von höherer Gewalt.
•Defekte und/oder Schäden aufgrund von Abnutzung bei professionellem Gebrauch zu gewerblichen Zwecken (bspw. Einsatz in Hotellerie oder Gastronomie).
5. Garantieabwicklung
Im Garantiefall wenden Sie sich bitte möglichst umgehend an uns oder einen unserer autorisierten Händler (Händlernachweis unter www. outdoorchef.com) und nennen uns neben Ihrer Anschrift nach Möglichkeit Produkt/Produktteil, Kaufquittung, Seriennummer und Artikelnummer (beides finden Sie auf dem Datensticker auf Ihrem Grill; siehe dazu den ersten Abschnitt der Bedienungsanleitung). Beschreiben Sie uns den Mangel gerne auch mit Foto. Zur Prüfung des Garantiefalls übergeben Sie das Produkt dem Händler oder uns (Bring-In-Garantie). Bei berechtigten Garantiefällen erstatten wir die notwendigen und erforderlichen Transportund Versandkosten, ansonsten senden wir das Produkt auf Ihre Kosten zurück.
Die registrierte Marke OUTDOORCHEF wird durch folgende Unternehmung repräsentiert
Outdoorchef AG | Eggbühlstrasse 28 | Postfach | 8050 Zürich-Schweiz | www.outdoorchef.com
*Einen Händlernachweis finden Sie auf unserer Website unter OUTDOORCHEF.COM
**Die Seriennummer sowie die Artikelnummer können Sie dem Datensticker auf ihrem Grill entnehmen (siehe dazu den ersten Abschnitt dieser BEDIENUNGSANLEITUNG).
12
OUTDOORCHEF.COM

TECHNISCHE INFORMATIONEN
ASCONA 570 G / MONTREUX 570 G / GENEVA 570 G
CE |
0063 |
Gas |
Propan/Butan 30/31 |
Leistung |
|
- kleiner Brenner |
1.20 kW |
- grosser Brenner |
8.50 kW |
Gasverbrauch |
702 g/h |
Düsen (28–30/37 mbar) |
|
- Düse kleiner Brenner |
0.55 mm/Markierung: BF |
- Düse grosser Brenner |
1.47 mm/Markierung: BT |
Düsen (50 mbar) |
|
- Düse kleiner Brenner |
0.48 mm/Markierung: AF |
- Düse grosser Brenner |
1.27 mm/Markierung: AT |
Gasdruck |
Butan 28 mbar. |
|
Propan 37 mbar |
LEON 570 G |
|
CE |
0063 |
Gas |
Propan/Butan 30/31 |
Leistung |
8.50 kW |
Gasverbrauch |
612 g/h |
Düse (28–30/37 mbar) |
1.47 mm/Markierung: BT |
Düse (50 mbar) |
1.27 mm/Markierung: AT |
Gasdruck |
Butan 28 mbar |
|
Propan 37 mbar |
AMBRI 480 G |
|
CE |
0063 |
Gas |
Propan/Butan 30/31 |
Leistung |
5.40 kW |
Gasverbrauch |
389 g/h |
Düse (28–30/37 mbar) |
1.15 mm / Markierung: BN |
Düse (50 mbar) |
1.02 mm / Markierung: AN |
Gasdruck |
Butan 28 mbar |
|
Propan 37 mbar |
CHELSEA 480 G / CHELSEA 480 G LH / KENSINGTON 480 G / P-480 G COMPACTCHEF
CE
Gas Leistung Gasverbrauch
Düse (28–30/37 mbar) Düse (50 mbar) Gasdruck
CITY 420 G / CHELSEA 420 G / MINICHEF 420 G
CE |
0063 |
Gas |
Propan/Butan 30/31 |
Leistung |
4.30 kW |
Gasverbrauch |
315 g/h |
Düse (28–30/37 mbar) |
1.02 mm / Markierung: BL |
Düse (50 mbar) |
0.88 mm / Markierung: AH |
Gasdruck |
Butan 28 mbar |
|
Propan 37 mbar |
Kategorien
I3B/P (30 mbar)
I3B/P (50 mbar)
I3+ (28/30/37 mbar)
Elektrische Zündung
Für den Betrieb der elektrischen Zündung benötigen Sie eine Batterie (Typ AAA, LR03, 1.5 Volt).
Hinweis zur Temperaturanzeige
Die Anzeigenabweichung vom Thermometer kann +/– 10% betragen.
Webpage
Weitere Informationen, Tipps Tricks, Rezepte und alles Wissenswerte zu OUTDOORCHEF Produkte finden Sie unter OUTDOORCHEF.COM
13
OUTDOORCHEF.COM

en USER GUIDE
0063 2019 |
PIN 0063 BP 3505 |
Outdoorchef AG |
|||
Eggbühlstrasse 28, 8050 Zürich |
|||||
|
|||||
Typ: |
|
|
|
Serial No.: |
|
Article No.: |
|
|
|
||
Made in China |
|
|
|
||
Butane / Propane |
30/37 mbar |
DISTRIBUTION |
|||
G30 / G31 |
|
Outdoorchef Deutschland GmbH |
|||
Cat.I3+ Cat.I |
3 B/P |
|
Ochsenmattstr. 10 | 79618 Rheinfelden | Germany |
||
|
|
|
|||
Total rate ΣQn= |
|
|
|
||
IMPORTANT:
First of all, make a note of the serial number of your gas kettle barbecue on the back of this user guide. Depending on the barbecue model, you will find the number on the data sticker that is either on the barbecue frame or the base plate.
The article number and name of your gas kettle barbecue are printed on the welcome card included in the document folder.
LOGIN CARD
The serial number and article number are important to allow straightforward handling of inquiries, spare part orders and any warranty claims. Keep the user guide in a safe place. It contains important information about safety, operation and maintenance.
IMPORTANT FOR YOUR SAFETY
Anyone who operates the barbecue must know and follow the ignition process precisely.
Children are not allowed to use the barbecue. Follow the assembly instructions in the set-up instructions precisely. Incorrect assembly can have dangerous consequences.
Do not position any flammable liquids, materials or spare gas bottles in the vicinity of the barbecue. Never set up the barbecue or the gas bottle(s) in enclosed rooms without ventilation.
Please read these instructions carefully before using your gas kettle barbecue. The barbecue is only allowed to be used outdoors, and it is necessary to maintain a safety clearance of at least 1.5 m from flammable objects.
GAS BOTTLES
•Only gas bottles with a maximum net weight of 8 kg are allowed to be placed on the base plate. Position the bottle in the place provided, see SET-UP INSTRUCTIONS.
•Use the supplied bottle strap or the gas bottle holder provided in order to secure the gas bottle. Please make sure there are no leaking screw connections. (Fig. 2A)
•CHECK FOR LEAKS before use and after each gas bottle change.
•Gas bottles are not allowed to be exposed to a temperature of more than 50° C, and must never be stored in an enclosed room or basement.
•Comply with and follow the safety regulations that are indicated on the gas bottles used.
•NOTE: Check whether the pressure regulator and gas bottle are approved for use in your country. Use only gas bottles that comply with the applicable national standard. The different sealing systems mean that any discrepancy in the pressure regulator and gas bottle systems will prevent the secure closure of the seal. This could result in leakages of gas which could then be ignited by an open fire or a spark. For safety and liability reasons, in all cases, we recommend checking gas barbecues intended for sale and, if required, adapting the pressure regulator and gas hose according to national regulations or arranging for this work to be performed.
SAFETY NOTES
This user guide must be kept by the owner and be close at hand at all times.
Take the barbecue into operation in accordance with the INSTRUCTIONS FOR LIGHTING chapter.
•“Use outdoors only”
•“Read the instructions before using the appliance”
•“WARNING: accessible parts may be very hot. Keep young children away.”
•“This appliance must be kept away from flammable materiels during use”
•“Do not move the appliance during use”
14
OUTDOORCHEF.COM

•“Turn off the gas supply at the gas cylinder after use”
•Never use the barbecue under a canopy.
•Do not push appliances with castor wheels over uneven surfaces or steps.
•Wear protective gloves when you touch hot parts.
•After grilling, always turn the gas regulating knob to the  position and close the gas supply at the gas bottle.
•When changing the gas bottle, make sure that the gas regulating knob is in the  position and the gas supply is closed at the gas bottle. IMPORTANT: No sources of ignition are permitted to be in the vicinity.
•After connecting a new gas bottle, check the connection parts in accordance with the instructions in CHECKING FOR LEAKS.
•If you suspect that parts are leaking, turn the gas regulating knob to the  position and close the gas supply at the gas bottle. Have the parts that carry gas checked at a specialist gas equipment retailer.
•Renew the gas hose immediately if it is damaged or displays signs of wear. The hose must be free from kinks and must not have any cracks. Do not forget to switch off the gas regulating knob and the gas supply before you remove the hose.
•Renew the hose and the gas pressure regulator after it has been in use for 3 years from the date of purchase. Make sure that the gas pressure regulator and the hose are in accordance with the corresponding EN standards.
•The recommended length of the gas hose is 90 cm, and it must not be longer than 150 cm.
•Never block the large round air intake hole on the base of the bowl or the air slots in the lid. The ventilation openings in the gas bottle compartment must never be closed or covered.
•“Do not modify the appliance.”
•Never modify the gas tap, the safety pilot, the burner or other parts of the barbecue. Contact a specialist if you suspect there is a malfunction.
•The barbecue is supplied with the appropriate gas hose and gas pressure regulator. It is essential to keep the gas hose away from the hot outside surfaces of the barbecue. The hose is not allowed to be twisted. On barbecue models that have a hose guide, it is essential for the hose to be secured in this guide.
•The hose and regulator are in accordance with the particular national regulations and EN standards.
•Contact a specialist gas equipment retailer if full power is not achieved and you suspect there may be a blockage in the gas supply.
•Only use the barbecue on firm, secure ground. Never place the barbecue on wooden floors or other flammable surfaces while it is in use. Keep the barbecue away from flammable materials.
•In devices with granite work surfaces, avoid exposing the surface to a temperature shock.
•Do not store the barbecue in the vicinity of highly inflammable liquids or materials.
•If you store the barbecue indoors over winter, it is essential for the gas bottle to be removed. It should always be stored in a well ventilated location which is inaccessible to children.
•Before using the barbecue, make sure you select a location that affords the greatest possible protection against the wind.
•When the barbecue is not in use, make sure it has cooled down fully and then protect it from the weather with a cover. Covers can be purchased from your barbecue retailer.
•Remove the cover after heavy rain in order to avoid condensation build-up.
CHECKING FOR LEAKS
WARNING: No sources of ignition are permitted to be in the vicinity during the leak test. This also includes smoking. Never check for leaks with a burning match or a naked flame, and always do this task outdoors.
1.The gas regulating knob must be in the  position.
2.Open the gas supply at the bottle and brush a soap solution comprising 50 % liquid soap and 50 % water onto all parts that carry gas (connection at the gas bottle / gas pressure regulator / gas hose / gas inlet / connection on the valve). You can also use a leak spray. (Fig. 2B)
3.Bubbles forming in the soap solution indicate there are leaks. IMPORTANT: Do not use the barbecue before all leaks have been eliminated. Close the gas supply at the gas bottle.
4.Eliminate the leaks by retightening the connections if possible, or else renew the defective parts.
5.Repeat steps 1 and 2.
6.Contact your specialist gas equipment retailer if the leaks cannot be eliminated.
NOTE: Carry out the CHECK FOR LEAKS each time after the the gas bottle is connected or changed, and also at the start of the barbecue season.
15
OUTDOORCHEF.COM

EXPLANATION OF THE SYMBOLS ON THE OPERATING CONSOLE
Heat settings and lighting
 : Off position
 : Low power
 : Medium power

 : Full power


 : Lighting
  : Igniter
Positioning of the EASY FLIP funnel
Direct position of the EASY FLIP funnel
Indirect position of the EASY FLIP funnel
BURNER SYSTEM OF THE KETTLE
Models with one ring burner (Fig. 1A)
The ring burner achieves its highest power at the 
 setting and its lowest power at the
  setting.
Models with two ring burners (Fig. 1B)
The large ring burner achieves its highest power at the 
 setting and its lowest power at the
  setting. It is designed for applications in the medium to high temperature range.
The small ring burner is designed for cooking at low temperatures, and can only be adjusted in a narrow range. The difference between 
 and
and  cannot be seen. The small ring burner achieves a temperature of about 100 to 120° C.
16
OUTDOORCHEF.COM

BEFORE FIRST USE
1.Clean all parts that come into contact with foodstuffs.
2.Check all parts that carry gas, as described in the CHECKING FOR LEAKS chapter. Also do this if your gas kettle barbecue was delivered already assembled by the retailer.
3.Let the barbecue burn for about 20–25 minutes at the 
 setting.
INSTRUCTIONS FOR LIGHTING
1.Make sure that all connections between the gas hose, the gas pressure regulator and the gas bottle are firmly tightened. (Follow the instruction in the CHECKING FOR LEAKS chapter.)
2.Open the barbecue lid. CAUTION: Never light the barbecue when the lid is closed.
3.Open the gas supply at the gas bottle.
4 a. Models with one ring burner:
Press the gas regulating knob and turn it anticlockwise to the 

 setting. Press the black ignition button and hold it until the spark catches and the gas is burning. (Fig. 1C)
4 b. Models with two ring burners and a separate ignition button:
Press the gas regulating knob for the large ring burner and turn it anticlockwise to setting 

 . Press the black ignition button and hold it until the spark catches and the gas is burning.
Alternatively press the gas regulating knob for the small ring burner (left knob) and turn it anticlockwise to setting 

 . Press the black ignition button and hold it until the spark catches and the gas is burning. (Fig. 1D)
4 c. Models with two ring burners without a separate ignition button:
Press the gas regulating knob for the large ring burner and turn it anticlockwise to setting 

 . Press the gas regulating knob and hold it until the spark catches and the gas is burning. (Fig. 1E)
Alternatively press the gas regulating knob for the small ring burner (left knob) and turn it anticlockwise to setting 

 . Press the gas regulating knob and hold it until the spark catches and the gas is burning.
5.If the gas does not light within 3 seconds, set the gas regulating knob to  . Wait 2 minutes to allow the uncombusted gas to dissipate. Then repeat point 4.
6.If it is not possible to light the barbecue after 3 attempts, check the causes (as described in the TROUBLESHOOTING section).
INSTRUCTIONS FOR LIGHTING THE CITY 420 G / CHELSEA 420 G / MINICHEF 420 G
1.Make sure that all connections between the gas hose, the gas pressure regulator and the gas bottle are firmly tightened
(Follow the instruction in the CHECKING FOR LEAKS chapter). NOTE: For the MINICHEF 420 G, the side shelves must be folded out the entire time the barbecue is in use.
2.Open the barbecue lid. CAUTION: Never light the barbecue when the lid is closed.
3.Open the gas supply at the gas bottle.
4.Press the gas regulating knob and turn it anticlockwise to the 

 setting. Press the red ignition button several times until the gas lights. (Fig. 1F)
5.If the gas does not light within 3 seconds, set the gas regulating knob to  . Wait 2 minutes to allow the uncombusted gas to dissipate. Then repeat point 4.
6.If it is not possible to light the barbecue after 3 attempts, look for the causes (as described in the TROUBLESHOOTING section).
17
OUTDOORCHEF.COM

THE EASY FLIP FUNNEL SYSTEM TURNS ONE BARBECUE INTO TWO
The heart of the OUTDOORCHEF gas kettle barbecue is the EASY FLIP funnel, which embodies the innovative genius of OUTDOORCHEF's engineers.
The EASY FLIP funnel enables you to change the heat distribution from direct to indirect within a matter of seconds. At the same time, it functions as an intelligent protective shield to prevent detrimental flare-ups and unwanted smoking.
Just one hand movement is all it takes to switch from direct to indirect grilling, cooking and baking: simply turn over the EASY FLIP funnel.
DIRECT HEAT |
INDIRECT HEAT |
For direct grilling and cooking
work with high temperature that is concentrated on the rack. For example for a lovely
grilled finish on the steak
For indirect grilling, cooking and baking
the heat is distributed evenly in the
closed barbecue kettle. Ideal, for example, for steaming vegetables or slow roasting a joint.
INSTRUCTIONS FOR USING THE GAS KETTLE BARBECUE
It couldn't be simpler:
1.Move the EASY FLIP funnel to the desired position. CAUTION: Wear heat-resistant gloves if you want to change the funnel position while grilling. NOTE: For direct grilling and cooking at the 
 setting, leave the lid open. It is only at the
  –
–  setting that the lid can be kept closed for direct grilling as well.
2.Select the appropriate accessories, if required.
3.Preheat the barbecue with its lid closed for about 10–15 minutes at the 
 setting.
4.After grilling, always set the gas regulating knob to the  position. Then close the gas supply at the gas bottle. The bottle tap must be closed even on empty bottles.
18
OUTDOORCHEF.COM

TIPS AND TRICKS
With indirect heat
Relatively large roasting joints or whole chickens: The EASY FLIP funnel means there is no longer any need to turn over large pieces of meat while grilling. The heat from the gas burner rises along the insides of the barbecue kettle and is distributed evenly throughout the
kettle. Place the food to be grilled on the preheated grilling rack and close the lid. Always leave a space between the individual pieces of meat. Closing the lid means the food to be grilled is evenly browned on all sides, while the juices remain in the joint.
To leave nothing to chance when cooking relatively large joints, we recommend using the OUTDOORCHEF GOURMET CHECK – the digital meat thermometer for perfect results.
With direct heat
Smaller cuts of meat such as steaks, chops and sausages: Position the food to be grilled on the preheated grilling rack in the middle,
and grill briefly to seal with the lid open. Then move the food to be grilled towards the outside, reduce the heat  and roast with the lid
closed until done.
To achieve optimum results with flash-grilled meat, we recommend using the cast-iron griddle from OUTDOORCHEF
The right accessories make your OUTDOORCHEF even more enjoyable. Whether grilling, cooking or baking: give free rein to your creativity and flair for experimentation.
You can find all the accessories for your barbecue at OUTDOORCHEF.COM
The OUTDOORCHEF grilling time chart for the individual grilled foods is available at OUTDOORCHEF.COM
GRILLING ON THE ADDITIONAL AREA
Preheat your barbecue at maximum heat 
 for about 10 minutes. Place the food to be grilled on the grilling rack and regulate the temperature according to your requirements
  –
–
 .
.
AFTER GRILLING
1.Set the gas regulating knob of each burner to  .
.
2.Close the gas supply at the gas bottle.
3.Allow the barbecue to cool down fully and clean it.
4.Protect the barbecue with the corresponding cover.
CLEANING
Only very minor cleaning is required between uses of the barbecue, because most of the grease either evaporates or is gathered in the collecting tray.
In case of heavy contamination, heat up the barbecue for about 10 minutes at full power. For cleaning the funnel and the rack, use a barbecue brush with brass bristles (not steel bristles).
For more thorough cleaning, use the OUTDOORCHEF BARBECUE CLEANER. Alternatively, you can use a nylon kitchen sponge and soapy water in order to remove all loose residues.
IMPORTANT: After each thorough cleaning, leave the barbecue burning at the 
 setting to allow it to dry out completely (burn out).
USING THE OUTDOORCHEF BARBECUE CLEANER
IMPORTANT: the barbecue must not be operated while using the OUTDOORCHEF BARBECUE CLEANER.
Wear gloves to protect your hands and, if possible, glasses to shield your eyes. Spray the barbecue or accessories thoroughly while they are still slightly warm and leave the product to work for 15-30 minutes. Spray stained surfaces again, rinse thoroughly with water and leave to dry. WARNING: Do not use the OUTDOORCHEF BARBECUE CLEANER on powder-coated surfaces.
USING THE OUTDOORCHEF CHEF CLEANER
IMPORTANT: the barbecue must not be operated while using the OUTDOORCHEF CHEF CLEANER.
Wear gloves and glasses for protection. Spray the barbecue or accessory while still slightly warm and leave the product to work for 10 minutes until the foam has dissolved.
If required, clean off any remaining residue using a suitable barbecue brush or a nylon sponge. Then rinse thoroughly with water and dry. WARNING: Not suitable for wood, plastic, powder coated or varnished surfaces.
19
OUTDOORCHEF.COM

MAINTENANCE
Regular maintenance of your barbecue will ensure it functions correctly.
•At least twice a year, check all parts that carry gas; also check them after long periods of storage. Spiders and other insects can cause blockages that must be cleared before use.
•If the barbecue is regularly pushed across uneven ground, check from time to time whether all screws are still tight.
•If you have not used the barbecue for a long period, you should carry out a CHECK FOR LEAKS before using it again. If you have any doubts, please contact your gas supplier or the retailer.
•To prevent damage due to corrosion, oil all metal parts before lengthy storage.
•Following lengthy storage, and at least once a year during the barbecue season, you should check the gas hose for cracks, kinks and other damage. A damaged gas hose must be renewed immediately, as described in the SAFETY NOTES chapter.
•We recommend the following so you will be able to enjoy your barbecue for as long as possible:
•Once a year, apply wood oil to all wooden parts – this helps to prevent cracking.
•Once your barbecue has cooled down fully, protect it against the effects of the weather using a suitable OUTDOORCHEF cover.
•Remove the cover after rain in order to prevent condensation build-up. Covers can be purchased from your barbecue retailer.
TROUBLESHOOTING
The burner does not light:
•Check if the gas supply is open at the gas bottle.
•Make sure there is enough gas in the bottle.
•Check if sparks are passing between the electrode and the burner.
No spark:
•Make sure that the battery has been inserted correctly (in barbecues with electric ignition).
•The distance between the burner and electrode is only allowed to be 5–8 mm.
•Check whether the cables of the electric ignition and the electrode are plugged in and firmly connected.
•Insert a new battery (type AAA, LR03, 1.5 volts) in the electric ignition (in barbecues with electric ignition).
Please contact the retailer if you cannot get the barbecue to operate with reference to the measures above.
CONSUMER WARRANTY
1. Warranty and relation to other rights of the purchaser
As a private end user (consumer) purchasing this OUTDOORCHEF product from an authorized dealer, you are eligible to receive a manufacturer’s warranty from Outdoorchef AG (“OC”).
The manufacturer’s warranty entitles you to assert warranty claims against the warranty provider in accordance with this agreement. The warranty claims exist in addition to your other contractual or statutory rights. These other rights are not excluded or restricted by this warranty. Therefore, you can also assert other contractual or statutory claims against the respective obligated parties. Thus for example, claims asserted under the Product Liability Act are not affected by this guarantee. As the purchaser, you may in particular also assert contractual warranty claims against the seller. The reversal of the purchase contract, for example, can only be be pursued against the seller, but not against OC under this warranty.
2. Participants and warranty conditions
The warranty provider is OC. All end customers who purchase a new product from an authorized dealer for private purposes are eligible for the warranty. Proof of purchase shall be the purchase receipt. A purchase for private use means the product is purchased by a person for purposes which are, for the most part, not associated with either their commercial or their independent vocational activities. If it becomes recognised that a warranty claim must be made, said warranty claim must be asserted against the warranty provider within two months. Otherwise, the warranty claim will be excluded. For obvious defects, this limitation period begins upon receipt of the product. OC therefore recommends that you check the product for defects immediately upon receipt.
3. Scope
The warranty is valid from the date of purchase and is granted in the following cases, provided that no exclusion of facts exists pursuant to Paragraph 4:
•3 years on the enamelled kettle (bottom part and lid) against corrosion perforation
•3 years on the enamelled barbecue grid against corrosion perforation or burn-through
•3 years on all stainless steel parts against corrosion perforation or burn-through
•Faults in the enamel coating prior to first use
•2 years on all remaining manufacturing/material defects
20
OUTDOORCHEF.COM
Imperfections which are not considered to be defects include functionally insignificant and reasonable irregularities, differences in the colour of enamelling and minor defects such as production-related support points at the lower edge of the lid or on the suspensions.
In a warranty case, OC will exchange and replace, at the purchaser’s request, either the damaged/defective parts or the entire product. As far as is reasonable, an exchange can be made for a similar model of a newer design, e.g. for a successor model. Insofar as the functionality of the product is not affected by a defect and to an extent reasonable for you as the customer, appropriate financial compensation can be offered to you in lieu of repair.
During the processing of a warranty claim (verification and possibly replacement) the purchaser shall not be entitled to assert a claim for a replacement or other compensation against OC. Undertaking warranty services does not mean that the warranty period is extended or restarted. Exchanged parts become the property of OC. The warranty period will only start again if the product is replaced.
Any further claims against the warranty provider are not covered by this warranty. However, this does not restrict or exclude your claims on other legal grounds (see also Section 1 above).
4. Exclusion
The warranty shall not apply in the following cases:
•Normal wear and tear resulting from normal (intended) use, especially to general wear parts such as funnel, flame cover, burner, thermometer, ignition and battery, electrode, ignition cable, gas hose, gas pressure regulator, heating element, reflector, aluminium protection foil, barbecue grid or charcoal grate and basket, lighting grate and charcoal/drip pan.
•Damage to the enamel from the use of utensils and other devices, provided that the error did not already demonstrably exist before first use.
•Defects and/or damage due to misuse, improper use, in particular due to not following the instruction manual, safety instructions or operating/maintenance instructions (for example, use of outdoor equipment indoors, damage resulting from incorrect installation, improper cleaning of the enamelled surface of the funnel or grill bars, failure to perform a leakage test to the extent recommended in the operating instructions, use of harmful chemicals, unintended use, etc.).
•Defects and/or damages that are remedied through intervention or repair by persons other than those authorized by OC.
•Defects and/or damage caused by destructive weather influences (e.g. hail or lightning).
•Defects and/or damage due to vandalism or due to intentional or negligent damage to the extent that this was not caused by OC.
•Defects and/or damages incurred during transport to the buyer, unless the transport was arranged by the warranty provider.
•Defects and/or damage due to force majeure.
•Defects and/or damage due to wear caused by professional use for commercial purposes (e.g. use in a hotel or restaurant).
5. Processing of warranty claims
In the event of a warranty claim please contact us or one of our authorized dealers (a dealer directory is available at www.outdoorchef.com) as soon as possible and tell us your address and, if possible, the product/product part, sales receipt information, serial number and item number (both can be found on the data sticker on your barbecue; see the first section of the instruction manual). Please describe the defect and, if possible, also send us a photo of it. In order to verify your warranty claim, you will need to return the product to us or your local dealer (bring-in warranty). Once your warranty claim has been verified, we will reimburse the necessary and required transport and shipping costs, otherwise we will send the product back to you at your expense.
The registered brand OUTDOORCHEF is represented by the following enterprise:
Outdoorchef AG | Eggbühlstrasse 28 | Postfach | 8050 Zürich-Schweiz | www.outdoorchef.com
*A dealer directory can be found on our website at OUTDOORCHEF.COM
**The serial number and article number can be found on the data sticker on your barbecue (see the first section in this USER GUIDE) for information.
21
OUTDOORCHEF.COM

TECHNICAL INFORMATION
ASCONA 570 G / MONTREUX 570 G / GENEVA 570 G
CE |
0063 |
Gas |
Propane/butane 30/31 |
Power |
|
- Small burner |
1.20 kW |
- Large burner |
8.50 kW |
Gas consumption |
702 g/h |
28–30/37 mbar |
|
- Small burner nozzle |
0.55 mm/mark: BF |
- Large burner nozzle |
1.47 mm/mark: BT |
50 mbar |
|
- Small burner nozzle |
0.48 mm/mark: AF |
- Large burner nozzle |
1.27 mm/mark: AT |
Gas pressure |
Butane 28 mbar |
|
Propane 37 mbar |
LEON 570 G |
|
CE |
0063 |
Gas |
Propane/butane 30/31 |
Power |
8.50 kW |
Gas consumption |
612 g/h |
Nozzle (28–30/37 mbar) |
1.47 mm/mark: BT |
Nozzle (50 mbar) |
1.27 mm/mark: AT |
Gas pressure |
Butane 28 mbar |
|
Propane 37 mbar |
AMBRI 480 G |
|
CE |
0063 |
Gas |
Propane/butane 30/31 |
Power |
5.40 kW |
Gas consumption |
389 g/h |
Nozzle (28–30/37 mbar) |
1.15 mm/mark: BN |
Nozzle (50 mbar) |
1.02 mm/mark: AN |
Gas pressure |
Butane 28 mbar |
|
Propane 37 mbar |
CHELSEA 480 G / CHELSEA 480 G LH / KENSINGTON 480 G / COMPACTCHEF 480 G
CE
Gas
Power
Gas consumption
Nozzle (28–30/37 mbar) Nozzle (50 mbar)
Gas pressure
CITY 420 G / CHELSEA 420 G / MINICHEF 420 G
CE |
0063 |
Gas |
Propane/butane 30/31 |
Power |
4.30 kW |
Gas consumption |
315 g/h |
Nozzle (28–30/37 mbar) |
1.02 mm/mark: BL |
Nozzle (50 mbar) |
0.88 mm/mark: AH |
Gas pressure |
Butane 28 mbar |
|
Propane 37 mbar |
Categories
I3B/P (30 mbar)
I3B/P (50 mbar)
I3+ (28/30/37 mbar)
Electric ignition
A battery (type AAA, LR03, 1.5 volts) is required for operating the electric ignition.
Note on the temperature display
The thermometer display is subject to a +/-10 % fluctuation.
Web page
More information, tips and tricks, recipes and all kinds of useful nformation about OUTDOORCHEF products can be found at OUTDOORCHEF.COM
22
OUTDOORCHEF.COM
fr MODE D’EMPLOI
0063 2019 |
PIN 0063 BP 3505 |
Outdoorchef AG |
|||
Eggbühlstrasse 28, 8050 Zürich |
|||||
|
|||||
Typ: |
|
|
|
Serial No.: |
|
Article No.: |
|
|
|
||
Made in China |
|
|
|
||
Butane / Propane |
30/37 mbar |
DISTRIBUTION |
|||
G30 / G31 |
|
Outdoorchef Deutschland GmbH |
|||
Cat.I3+ Cat.I |
3 B/P |
|
Ochsenmattstr. 10 | 79618 Rheinfelden | Germany |
||
|
|
|
|||
Total rate ΣQn= |
|
|
|
||
IMPORTANT:
Veuillez avant tout noter le numéro de série de votre barbecue boule à gaz sur le verso de cette notice d‘utilisation. Selon le modèle, vous trouverez le numéro sur l’autocollant situé sur la structure ou sur la plaque de base du barbecue.
La référence et la désignation de votre barbecue boule à gaz sont disponibles sur la Welcome Card, jointe à l’ensemble des documents.
LOGIN CARD
Le numéro de série et la référence sont importants pour assurer le bon déroulement de toutes vos demandes, commandes de pièces de rechange ou éventuels cas de garantie. Veuillez conserver cette notice d’utilisation dans un endroit sûr. Elle contient des informations importantes relatives à la sécurité, le fonctionnement et l’entretien.
IMPORTANT POUR VOTRE SÉCURITÉ
Toute personne utilisant le barbecue doit connaître le procédé exact de l’allumage et le suivre.
Ne laissez pas les enfants utiliser le barbecue. Les instructions de montage doivent être rigoureusement respectées. Leur non-observation peut avoir de graves conséquences. Ne placez ni liquide ou matériau inflammable, ni bouteille de gaz de rechange à proximité du barbecue. Ne stockez jamais le barbecue ou les bouteilles de gaz dans un local fermé sans aération.
Avant la première mise en service de votre barbecue sphérique à gaz OUTDOORCHEF, lisez ce mode d’emploi attentivement. Le barbecue ne doit être utilisé qu’en plein air et être placé à une distance d’au moins 1,50 m d’objets inflammables.
BOUTEILLES DE GAZ
•Posez uniquement des bouteilles de gaz d’un poids de remplissage 8 kg maximum sur la plaque de fond. Placez la bouteille à l’endroit prévu à cet effet, voir les INSTRUCTIONS DE MONTAGE.
•La sangle fournie ou le support pour bouteilles de gaz prévu sert à fixer les bouteilles de gaz. Veillez à ce que tous les raccords vissés soient bien étanches. (Ill. 2A)
•Avant la mise en service et après chaque changement de bouteille de gaz, procédez à une VÉRIFICATION DE L’ÉTANCHÉITÉ
•Ne jamais exposer les bouteilles de gaz à une température supérieure à 50° C et ne jamais les stocker dans un local fermé ou au sous-sol.
•Observez à la lettre les instructions de sécurité apposées sur les bouteilles de gaz que vous utilisez.
•INDICATION : Veuillez vérifier que le régulateur de pression et la bouteille de gaz conviennent à un usage conforme dans votre pays. Utiliser exclusivement des bouteilles de gaz conformes aux normes locales. Étant donné les différents systèmes d‘étanchéité, un assemblage étanche ne sera pas garanti en cas d‘utilisation d‘un mauvais régulateur de pression ou d‘une mauvaise bouteille de gaz. Le gaz s‘échappant à cause de ce défaut d‘étanchéité peut s‘enflammer en présence de flammes ou d‘étincelles. Pour des raisons de sécurité et de responsabilité, nous vous recommandons de systématiquement vérifier les barbecues mis en vente et, si nécessaire, d‘adapter ou de faire adapter le régulateur de pression et la bouteille de gaz aux réglementations locales.
CONSIGNES DE SÉCURITÉ
Le propriétaire du barbecue doit conserver ce mode d’emploi et toujours l’avoir à disposition.
Mettez l’appareil en marche conformément au chapitre GUIDE POUR L‘ALLUMAGE.
•« A n’utiliser qu’à l’extérieur des locaux »
•« Consulter la notice avant l’utilisation »
•« ATTENTION : des parties accessibles peuvent être très chaudes. Eloigner les jeunes enfants à l’écart »
•« Cet appareil doit être éloigné des matériaux inflammables durant l’utilisation »
23
OUTDOORCHEF.COM

•« Ne pas déplacer l’appareil pendant l’utilisation »
•« Fermer le robinet du récipient de gaz après usage »
•N’utilisez jamais le barbecue sous un auvent.
•Ne poussez jamais les appareils équipés de roulettes sur un sol irrégulier ou des marches.
•Portez des gants de protection quand vous touchez les parties chaudes.
• Après la grillade, positionnez toujours le bouton de réglage de gaz sur |
et fermez l’alimentation en gaz sur la bouteille. |
•Lors du changement de la bouteille de gaz, le bouton de réglage de gaz doit toujours être sur la position  et l’alimentation en gaz doit être fermée sur la bouteille. IMPORTANT ! Aucune source inflammable ne doit se trouver à proximité.
•Après le raccordement d’une nouvelle bouteille de gaz, contrôlez les raccordements selon les instructions concernant la
VÉRIFICATION DE L’ÉTANCHÉITÉ.
• Si vous doutez de l’étanchéité, positionnez le bouton de réglage de gaz sur |
et fermez l’alimentation en gaz sur la bouteille. Faites vérifier |
les parties conductrices de gaz par un magasin spécialisé. |
|
•Si le tuyau de gaz est endommagé ou présentent des marques d’usure, il faut immédiatement le remplacer. Le tuyau ne doit pas être plié et ne doit présenter aucune fissure. N’oubliez pas de fermer le bouton de réglage de gaz et l’alimentation en gaz avant d’enlever le tuyau.
•Changez le tuyau et le bouton de réglage de gaz après 2 à 3 ans d’utilisation à compter de la date d’achat. Veillez à ce que le bouton de réglage de gaz et le tuyau soient conformes aux normes EN applicables.
•La longueur conseillée pour le tuyau de gaz est de 90 cm et ne doit pas excéder 150 cm.
•N’obstruez jamais la grande ouverture ronde d’aspiration d’air au fond du bac ni les fentes d’aération du couvercle. Ne jamais boucher ni recouvrir les aérations de l’espace dans lequel la bouteille est placée.
•« Ne pas modifier l’appareil »
•Ne procédez à aucune modification au robinet de gaz, à la veilleuse de sécurité, au brûleur ou à d’autres parties du barbecue. S’il réside un doute de dysfonctionnement, faites appel à un spécialiste.
•Le barbecue est livré avec le tuyau et le bouton de réglage de gaz adaptés. Le tuyau de gaz doit impérativement être gardé éloigné des surfaces extérieures chaudes du barbecue. Le tuyau mural ne doit pas être tordu. Le tuyau des modèles possédant un guide-tuyau doit obligatoirement être fixé dans ce guide.
•Le tuyau et le bouton de réglage de gaz sont conformes aux normes EN et aux règlementations de chaque pays respectif.
•Dans le cas où la pleine puissance ne peut être atteinte et que vous soupçonnez une obstruction dans l’alimentation en gaz, adressez-vous à un magasin spécialisé en gaz.
•N’utilisez le barbecue que sur une surface solide et sûre. Ne mettez jamais le barbecue en fonction sur un sol en bois ou d’autres surfaces inflammables. Tenez-le éloigné des matériaux inflammables.
•Évitez tout choc thermique à la plaque sur les appareils avec plaque de granit.
•Ne stockez jamais le barbecue à proximité de liquides ou de matériaux facilement inflammables.
•Dans le cas où le barbecue est placé dans un local pour l’hiver, il faut absolument enlever la bouteille de gaz. Elle doit toujours être stockée à l’extérieur dans un endroit bien aéré où les enfants n’ont pas accès.
•Avant la mise en service, placez le barbecue à l’abri du vent si possible.
•Lorsque le barbecue n’est pas utilisé, il doit être, après son complet refroidissement, protégé contre les agressions extérieures par une housse de protection. Vous trouverez ces housses de protection chez votre revendeur.
•Retirez la housse de protection après une forte pluie pour prévenir toute stagnation d’humidité.
VÉRIFICATION DE L’ÉTANCHÉITÉ
AVERTISSEMENT ! Pendant la vérification de l’étanchéité, aucune source inflammable ne doit se trouver à proximité. Ceci est aussi valable pour les fumeurs. Ne testez jamais l’étanchéité au moyen d’une allumette enflammée ou d’une flamme. Vérifiez toujours l’étanchéité en plein air.
1.Le bouton de réglage de gaz doit se trouver sur la position  .
.
2.Ouvrez l’alimentation en gaz et badigeonnez avec un pinceau toutes les parties conductrices de gaz (le raccordement à la bouteille de gaz / le régulateur de pression de gaz / le tuyau de gaz / l’arrivée de gaz / le raccordement à la soupape) avec une solution savonneuse faite à moitié de savon liquide et à moitié d’eau. Vous pouvez également utiliser un spray détecteur de fuites. (Ill. 2B)
3.La formation de bulles indique les fuites. IMPORTANT ! Le barbecue ne doit être utilisé que lorsque toutes les fuite auront été supprimées. Fermez l’alimentation en gaz sur la bouteille de gaz.
4.Supprimez les fuites en resserrant les vis des raccordements, si cela est possible, sinon remplacez les pièces défectueuses.
5.Répétez les points 1 et 2.
6.Si les fuites ne peuvent être éliminées, contactez votre fournisseur de gaz.. INDICATION: Procédez à la VÉRIFICATION DE L’ÉTANCHÉITÉ après chaque raccordement ou changement de la bouteille de gaz ainsi qu’au début de la saison des grillades.
24
OUTDOORCHEF.COM

EXPLICATIONS DES SYMBOLES SUR LA CONSOLE DE COMMANDE
Allures de chauffe et allumage
 : Position arrêt
 : puissance basse
 : puissance moyenne

 : puissance maximale


 : Allumage
  : Allumeur
Positions de l’entonnoir EASY FLIP
Position directe l’entonnoir EASY FLIP
Position indirecte l’entonnoir EASY FLIP
SYSTÈME DE BRÛLEURS DE LA SPHÈRE
Modèles avec un brûleur circulaire (Ill. 1A)
Le brûleur circulaire atteint en position 
 la plus grande puissance et en position
  la plus petite puissance.
Modèles avec deux brûleurs circulaires (Ill. 1B)
Le grand brûleur circulaire atteint en position 
 la plus grande puissance et en position
  la plus petite puissance. Il est configuré pour une utilisation à température moyenne à élevée.
Le petit brûleur circulaire est conçu pour cuire à basse température et ne se laisse que très peu réguler. La différence entre les positions 
 et
et  n’est pas visible. Le petit brûleur circulaire atteint une température d’env. 100 à 120° C.
25
OUTDOORCHEF.COM

AVANT LA PREMIÈRE GRILLADE
1.Nettoyez toutes les pièces qui entrent en contact avec les aliments.
2.Vérifiez l’étanchéité de toutes les pièces conduisant le gaz comme décrit dans le chapitreVÉRIFICATION DE L’ÉTANCHÉITÉ. Effectuez la vérification même si votre revendeur vous a livré votre barbecue sphérique à gaz complètement monté.
3.Faites chauffer votre barbecue durant 20 à 25 minutes sur la position 
 .
.
INSTRUCTIONS D’ALLUMAGE
1.Assurez-vous que tous les raccordements entre le tuyau, le régulateur de pression de gaz et la bouteille de gaz sont bien serrés. (Procédez comme indiqué au chapitre VÉRIFICATION DE L’ÉTANCHÉITÉ)
2.Ouvrez le couvercle du barbecue. ATTENTION ! N’allumez jamais le barbecue avec le couvercle fermé.
3.Ouvrez l’arrivée de gaz sur la bouteille.
4 a. Modèles avec un brûleur circulaire: |
|
appuyez sur le bouton de réglage de gaz et tournez-le dans le sens contraire des aiguilles d’une montre jusqu’à la |
. Pressez sur le |
bouton d’allumage noir et tenez-le pressé jusqu’à ce que l’étincelle se produise et que le gaz brûle. (Ill. 1C) |
|
4 b. Modèles avec deux brûleurs circulaires et bouton d’allumage séparé :
appuyez sur le bouton de réglage de gaz du grand brûleur et tournez-le dans le sens contraire des aiguilles d’une montre jusqu’au niveau 

 . Pressez le bouton d’allumage noir et maintenez-le enfoncé jusqu’à ce que l’étincelle se produise et que le gaz brûle.
Ou appuyez sur le bouton de réglage de gaz du petit brûleur (bouton gauche) et tournez-le dans le sens contraire des aiguilles d’une montre jusqu’au niveau 

 . Pressez le bouton d’allumage noir et maintenez-le enfoncé jusqu’à ce que l’étincelle se produise et que le gaz brûle. (Ill. 1D)
4 c. Modèles deux brûleurs circulaires sans bouton d’allumage séparé:
appuyez sur le bouton de réglage de gaz du grand brûleur et tournez-le dans le sens contraire des aiguilles d’une montre jusqu’au niveau 

 . Maintenez-le enfoncé jusqu’à ce que l’étincelle se produise et que le gaz brûle. (Ill. 1E)
Ou appuyez sur le bouton de réglage de gaz du petit brûleur (bouton gauche) et tournez-le dans le sens contraire des aiguilles d’une montre jusqu’au niveau 

 . Maintenez-le enfoncé jusqu’à ce que l’étincelle se produise et que le gaz brûle.
5.Si le brûleur ne s’allume pas en l’espace de 3 secondes, positionnez le bouton de réglage de gaz sur  . Patientez 2 minutes que le gaz non brûlé puisse se volatiliser. Puis reprenez au point 4.
6.Si vous ne réussissez pas à allumer le barbecue après 3 essais, veuillez rechercher la cause au chapitre COMMENT REMÉDIER AUX PROBLÈMES.
INSTRUCTIONS D’ALLUMAGE DU CITY 420 G / CHELSEA 420 G / MINICHEF 420 G
1.Assurez-vous que tous les raccordements entre le tuyau, le régulateur de pression de gaz et la bouteille de gaz sont bien serrés. (Procédez comme indiqué au chapitre VÉRIFICATION DE L’ÉTANCHÉITÉ). INDICATION : Pour le MINICHEF 420 G, les tablettes latérales doivent être rabattues pendant toute l’utilisation du barbecue.
2.Ouvrez le couvercle du barbecue. ATTENTION ! N’allumez jamais le barbecue avec le couvercle fermé.
3.Ouvrez l’arrivée de gaz sur la bouteille.
4.Appuyez sur le bouton de réglage de gaz et tournez-le dans le sens contraire des aiguilles d’une montre jusqu’à la 

 . Actionnez plusieurs fois le bouton d’allumage rouge jusqu’à ce que le gaz s’enflamme. (Ill. 1F)
5.Si le brûleur ne s’allume pas en l’espace de 3 secondes, positionnez le bouton de réglage de gaz sur  . Patientez 2 minutes que le gaz non brûlé puisse se volatiliser. Puis reprenez au point 4.
6.Si vous ne réussissez pas à allumer le barbecue après 3 essais, veuillez rechercher la cause au chapitre COMMENT REMÉDIER AUX PROBLÈMES).
26
OUTDOORCHEF.COM
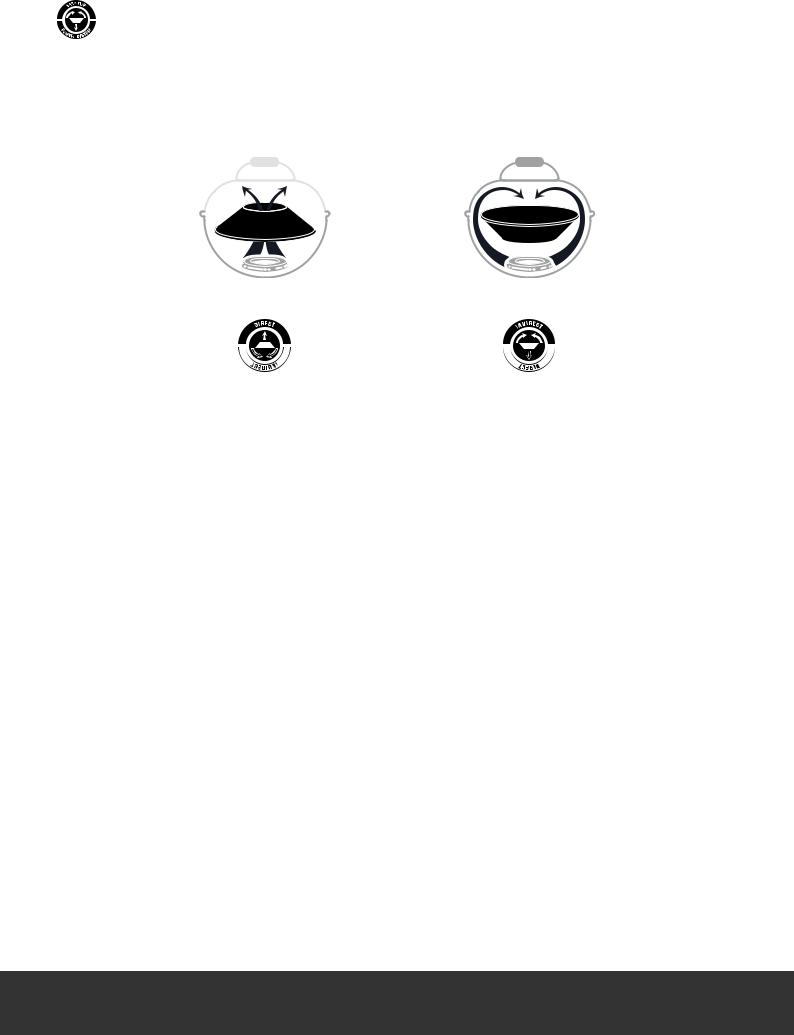
AVEC LE SYSTÈME ENTONNOIR EASY FLIP, VOUS AVEZ DEUX BARBECUES
L’entonnoir EASY FLIP forme le cœur du barbecue sphérique à gaz OUTDOORCHEF et reflète l’art innovateur des ingénieurs OUTDOORCHEF.
L’entonnoir EASY FLIP vous permet de passer d’une répartition directe de la chaleur à une répartition indirecte en quelques secondes. En tant que bouclier intelligent, il empêche en même temps la combustion nocive de la graisse par embrasement et le développement de fumées désagréables. Un seul geste suffit pour passer du barbecue direct à la grillade ou à la cuisson de façon indirecte : retourner tout simplement l’entonnoir EASY FLIP.
CHALEUR DIRECTE |
CHALEUR INDIRECTE |
Pour gril et cuisson de manière directe,
vous travailler à haute température qui se concentre sur la grille. Par exemple, pour obtenir un joli motif sur le steak à griller,
Pour gril, cuisson et cuisson «façon four» de manière indirecte,
la chaleur se répartit de manière uniforme dans la sphère fermée. Idéal pour faire cuire les légumes à l’étuvée ou faire mijoter un rôti.
MODE D’EMPLOI DU BARBECUE SPHÉRIQUE À GAZ
C’est très simple.
1.Mettez l’entonnoir EASY FLIP dans la position souhaitée. ATTENTION ! Portez toujours des gants de protection contre les hautes
températures pour modifier la position de l’entonnoir pendant la grillade. INDICATION : Pendant les grillades ou la cuisson au niveau 
 , il faut laisser le couvercle ouvert. Le couvercle peut être fermé seulement au niveau
  –
– 
 , même en cuisson directe.
2.Choisissez l’accessoire adéquat si besoin est.
3.Faites chauffer votre barbecue durant 10 à 15 minutes sur la position 
 , le couvercle étant fermé.
4. Tournez le bouton de réglage de gaz sur la position  après la grillade. Fermez ensuite l’alimentation en gaz sur la bouteille de gaz. Même si la bouteille est vide, il est nécessaire de bien fermer le robinet de la bouteille de gaz.
27
OUTDOORCHEF.COM

CONSEILS ET ASTUCES
Chaleur indirecte
Gros rôtis ou poulets entiers Il n’est plus nécessaire de tourner les gros morceaux à rôtir pendant le barbecue grâce à l’entonnoir EASY FLIP. La chaleur du brûleur à gaz s’élève sur le long des parois intérieures de la sphère et se répartit de manière uniforme à
l’intérieur. Posez les aliments à griller sur la grille préchauffée et refermez le couvercle. Écartez toujours un peu les morceaux de viande. Par la fermeture du couvercle, les aliments à griller brunissent de manière régulière sur toutes les faces et les rôtis restent juteux.
Pour ne rien laisser au hasard dans le cas de gros aliments à griller, nous vous conseillons d’utiliser le GOURMET CHECK de OUTDOORCHEF, un thermomètre mesurant la température interne pour garantir un résultat parfait.
Chaleur directe
Des morceaux de viande de plus petite taille comme les steaks, les côtelettes et les saucisses. Les aliments à griller sont posés au
milieu de la grille préchauffée et saisis rapidement en laissant le couvercle ouvert. Placez ensuite les aliments sur l’extérieur, réduisez la
chaleur  et terminez la cuisson avec le couvercle fermé.
Pour obtenir un résultat parfait avec des aliments à griller rapidement, nous vous conseillons d’utiliser la plaque de fonte de OUTDOORCHEF.
Vous aurez encore plus de plaisir avec votre OUTDOORCHEF avec les bons accessoires. Pour griller, mijoter ou cuire au four: Laissez libre cours à votre imagination et au plaisir de l’expérience.
Vous trouverez sous outdoorchef.cm tous les accessoires pour votre barbecue. Le tableau OUTDOORCHEF des durées de cuisson des différentes grillades se trouve sous OUTDOORCHEF.COM
GRILLER SUR LA SURFACE DE GRILL SUPPLÉMENTAIRE
Préchauffez votre barbecue à pleine puissance 
 pendant environ 10 minutes. Posez les aliments à griller sur la grille et réglez la température selon vos souhaits
  –
–
 .
.
APRÈS LA GRILLADE
1.Positionnez le bouton de réglage de gaz de chaque brûleur sur  .
.
2.Fermez l’alimentation en gaz sur la bouteille de gaz.
3.Laissez refroidir le barbecue complètement et nettoyez-le.
4.Recouvrez le barbecue avec une housse adaptée.
NETTOYAGE
Ce barbecue ne demande que peu de nettoyage entre les grillades, car soit la matière grasse s’est évaporée, soit elle a été dérivée dans le bac récupérateur de graisse.
Si votre barbecue est plus encrassé, chauffez-le à pleine puissance durant environ 10 minutes. Utilisez pour le nettoyage de l’entonnoir et de la grille une brosse pour barbecue avec des fils en laiton (pas de fils en acier).
Pour un nettoyage en profondeur, utilisez le DETERGENT POUR BARBECUE D’OUTDOORCHEF. Vous pouvez aussi utiliser une éponge pour casserole en nylon et de l’eau savonneuse afin d’ôter tous les résidus.
IMPORTANT ! Après le nettoyage, laissez bien sécher le barbecue en le faisant fonctionner sur la position 
 ..
..
UTILISATION DU BARBECUE CLEANER OUTDOORCHEF
IMPORTANT : le barbecue ne doit pas être allumé lorsque vous utilisez le BARBECUE CLEANER OUTDOORCHEF.
Porter des gants pour protéger vos mains et, si possible, des lunettes. Appliquer soigneusement le produit sur la grille ou les accessoires encore légèrement chauds et laisser agir 15 à 30 minutes. Vaporiser à nouveau les surfaces encrassées, rincer abondamment à l’eau et les laisser sécher. ATTENTION : ne pas utiliser le détergent pour barbecue d’OUTDOOR CHEF sur des surfaces dotées d’un revêtement par poudre.
UTILISATION DU CHEF CLEANER OUTDOORCHEF
IMPORTANT : le barbecue ne doit pas être mis en marche pendant le nettoyage avec le CHEF CLEANER D’OUTDOORCHEF.
Porter des gants et des lunettes de protection. Pulvériser le barbecue ou l’accessoire encore légèrement chaud et laisser agir pendant 10 minutes, jusqu’à ce que la mousse ait disparu.
Si nécessaire, frotter avec une brosse pour barbecue adaptée ou une éponge en nylon. Ensuite, rincer abondamment avec de l’eau et sécher. ATTENTION : ne convient pas pour les surfaces en bois, plastique, protégées avec une revêtement par poudre ou laquées.
28
OUTDOORCHEF.COM

ENTRETIEN
Un entretien régulier de votre barbecue garantit un fonctionnement irréprochable.
•Contrôlez toutes les parties conductrices de gaz au moins deux fois par an et après chaque long stockage. Des araignées et autres insectes peuvent causer des obstructions à éliminer avant l’utilisation.
•Lorsque le barbecue est souvent déplacé sur un sol inégal, il faut contrôler de temps en temps les vis pour s’assurer de leur bonne fixation.
•Si le barbecue n’est pas utilisé pendant une longue période, il faut toujours procéder à une VÉRIFICATION DE L’ÉTANCHÉITÉ avant de le réutiliser. Si vous avez un doute, faites appel à votre fournisseur de gaz ou à votre revendeur.
•Pour éviter la corrosion, huilez toutes les parties métalliques avant un long stockage.
•Après une longue période de stockage et au moins une fois pendant la saison des grillades, vérifiez le tuyau de gaz quant à d’éventuelles fissures, pliures ou autres dommages éventuels. Un tuyau défectueux doit immédiatement être remplacé comme décrit au chapitre
CONSIGNES DE SÉCURITÉ.
•Pour que vous puissiez profiter aussi longtemps que possible de votre barbecue, nous vous recommandons ce qui suit:
•Traitez une fois par an toutes les parties en bois avec de l’huile pour bois. Cela agit contre les fissures.
•Protégez votre barbecue des agressions extérieures avec une housse de protection d’OUTDOORCHEF adaptée.
•Pour éviter l’accumulation d’humidité, enlevez la housse après une pluie. Vous trouverez ces housses de protection chez votre revendeur.
COMMENT REMÉDIER AUX PROBLÈMES
Le brûleur ne s’allume pas:
•Vérifiez que le robinet de la bouteille de gaz est ouvert.
•Assurez-vous qu’il y ait assez de gaz dans la bouteille.
•Assurez-vous que l’étincelle saute bien de l’électrode au brûleur.
Aucune étincelle:
•Assurez-vous que la pile soit correctement placée (valable pour les barbecues avec un allumage électrique).
•La distance entre le brûleur et l’électrode devrait être au maximum de 5 à 8 mm.
•Assurez-vous que les câbles soient bien branchés et solidement fixés sur l’allumage électrique et sur l’électrode.
•Insérez une nouvelle pile (type AAA, LR03 1.5 Volt) dans l’allumage électrique (valable pour les barbecues avec un allumage électrique).
Si vous ne pouvez pas allumer le barbecue après avoir essayé d’éliminer les problèmes à l’aide des remèdes mentionnés ci-dessus, contactez votre point de vente.
GARANTIE CONSOMMATEUR
1. Garantie et autres droits de l’acheteur
En achetant ce produit OUTDOORCHEF chez un revendeur agréé, vous bénéficiez en tant que client final privé (consommateur) de la garantie fabricant Outdoorchef AG (“OC”). La garantie fabricant assure des droits à la garantie vis-à-vis du garant et conformément aux conditions de cet accord. Les droits à la garantie s’appliquent parallèlement à vos autres droits contractuels et légaux. Ces autres droits ne sont pas exclus ni limités par cette garantie. Vous pouvez donc également faire valoir vos autres droits contractuels ou légaux face aux parties engagées. En conséquence, les droits définis par la loi sur la responsabilité des produits restent valables. En tant qu’acheteur, vous pouvez également faire valoir vos droits de garantie vis-à-vis du vendeur. Vous pouvez notamment demander la résiliation du contrat d’achat exclusivement auprès du vendeur et non auprès de OC dans le cadre de cette garantie.
2. Parties et conditions d’application de la garantie
Le garant est OC. Tout client final ayant acheté un produit neuf chez un revendeur agréé à des fins personnelles peut bénéficier de la garantie. Pour justifier de l’achat, il faut présenter une preuve d’achat. On parle d’achat à des fins personnelles quand un produit est acheté par une personne physique et quand l’usage du produit reste majoritairement privé et donc ne pouvant être attribué ni à une activité commerciale ni à une activité professionnelle indépendante. Si un cas de garantie se présente, toute réclamation doit être présentée au garant dans la limite de deux mois. Sinon, toute réclamation sera refusée. En cas de défaut apparent, le délai de forclusion commence à compter de la date d’achat du produit. OC vous conseille donc de bien vérifier le produit au moment de l’achat.
3. Étendue
La garantie est valable dès la date d’achat et s’applique dans les cas suivants, à condition qu’il n’existe aucun cas d’exclusion comme défini au point 4 :
•3 ans pour la sphère émaillée (partie inférieure et couvercle) contre la corrosion.
•3 ans pour la grille émaillée contre la corrosion et les brûlures.
29
OUTDOORCHEF.COM
 Loading...