

Otter Outdoors Pro Ice Cottage User Manual
Otter Pro Ice Cottage
Installation and Set-Up Instructions
Otter Pro Ice Cottage
Fits Small Ultra-Wide Otter Pro and Otter II Sled Only
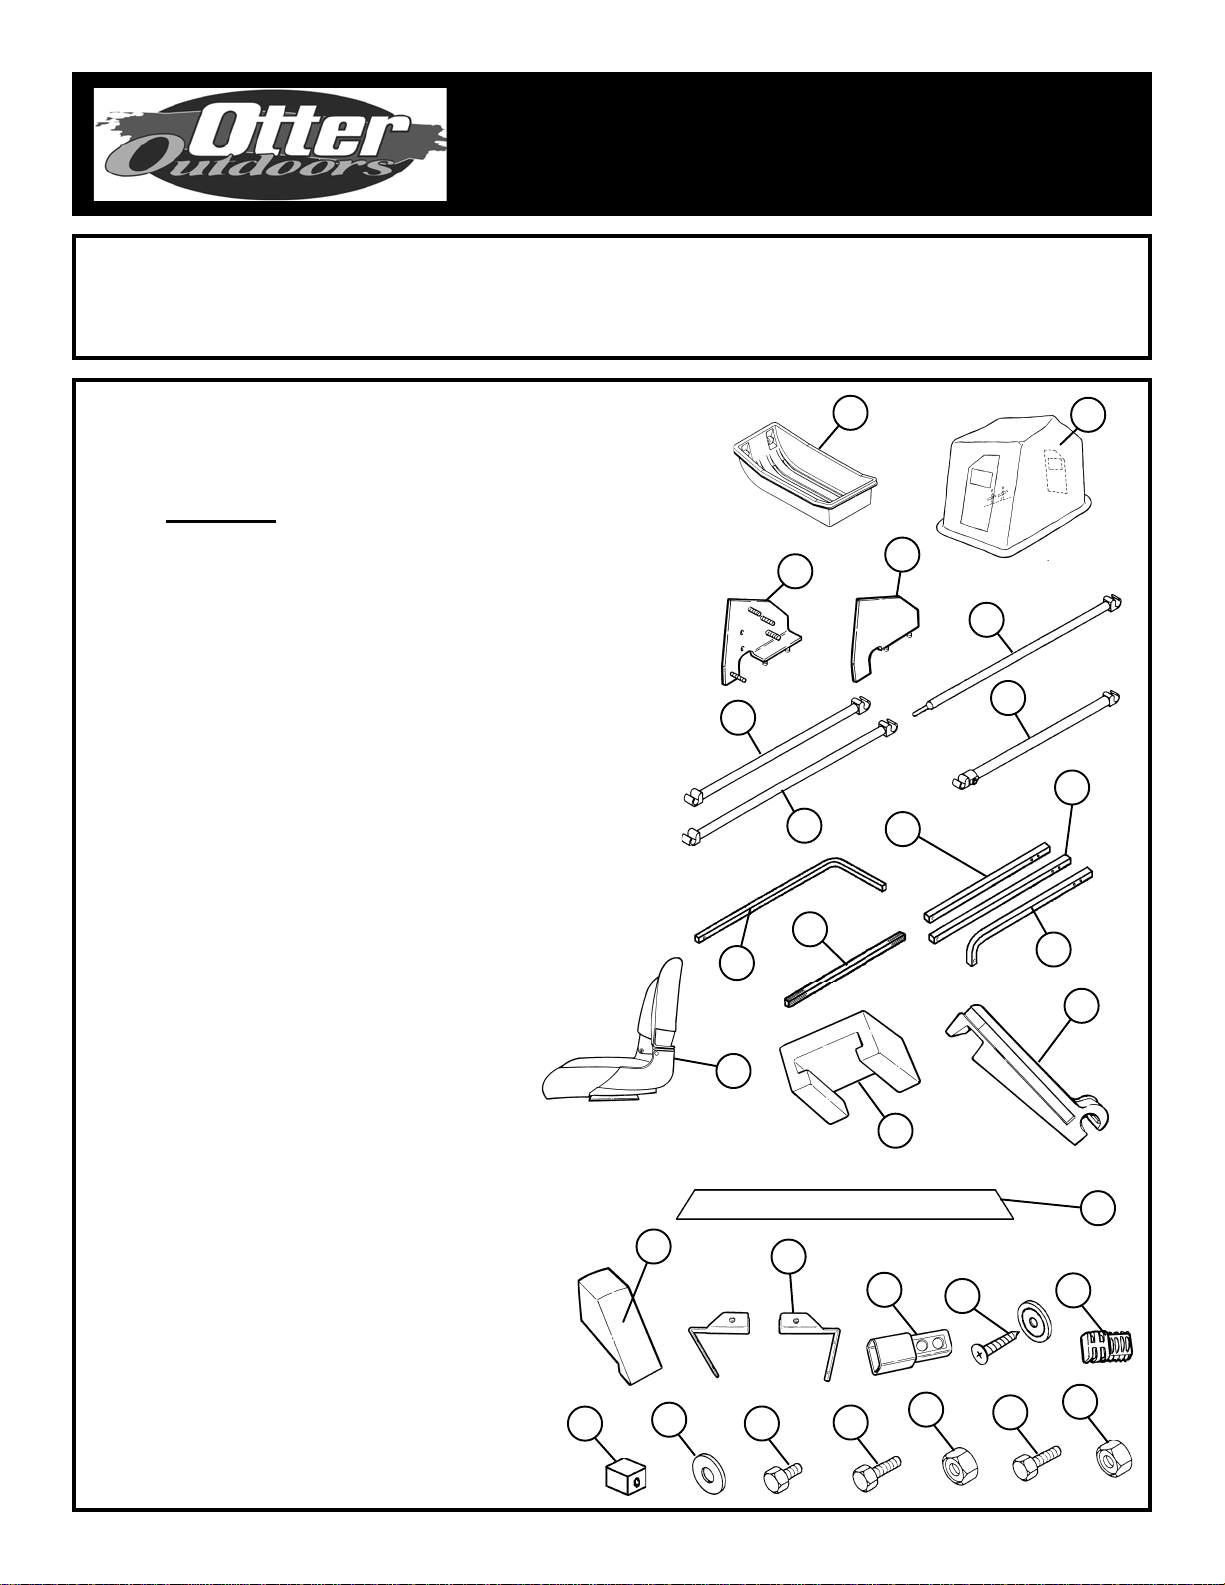
Parts Identification and Check List
M InstructionsODEL NUMBERS:
House Only Thermo Ice Camo 2406
Complete Pkg Thermo Ice Camo 2806
*Note:
PARTS LIST
Item # Qty Part # Description
House Only does not include parts indicated below. Also,
disregard pages 2, 3, and 4 of this instruction.
1 1 1 1 0 0 Sled - Black (Sold Separately) - 2406 only
2 1 90367 Cottage T ent-Thermal Ice Camo
3 1 80172 Frame Bracket “A”
4 1 80171 Frame Bracket “B”
5 1 80537 Back Wind Support Bar - 40 1/2”
6 1 80535 Center Wind Support Bar - 26 5/8”
7 1 80536 Center Wind Support Bar - 33”
8 1 80512 Adjustable Front Wind Support Bar
9 2 80530 Main Frame Extension Bar - 22 7/8”
10 2 80531 Main Frame Extension Bar - 24 1/2”
1 1 4 80532 Main Frame Extension Bar - 22 1/2”
13 8 80533 Outer Main Frame Bar - 25 1/2”
14 4 80534 Middle Main Frame Bar - 33”
*15 2 90021 Seat
*16 2 95349 Seat Slide
*17 2 95348 Seat Base
*18 1 90375 Seat Rail - 48”
*19 2 80492 Seat Rail Cap
*20 2 95369 Seat Rail Bracket
21 8 80489 Sleeve
22 16 40714 Self T apping Screw and Plastic Protectors
*12 40714 Self T apping Screw
23 8 80487 Black Plug
24 8 80488 Black End Cap
25 4 40103 5/16 Washer
*10 40103 5/16 Washer
*26 4 40024 1/4 x 1/2 Hex Bolt
*27 4 40598 1/4 x 3/4 Hex Bolt
28 12 80013 1/4 Nylon Hex Lock Nut
*8 80013 1/4 Nylon Hex Lock Nut
2 9 2 5/16 x 2 Hex Bolt
3 0 2 5/16 Nylon Hex Lock Nut
24
19
25
13
15
1
27
4
11
Back & Center
16
21
28
5
8
22
29
3
6
7
14
All
20
26
10
9
23
2
Front
Bottom
17
18
30
Page 1 Instructions - 70764
Tools Required:
7/16” Box End Wrench 3/8 Bit
7/16” Socket and Ratchet 5/16 Bit
Drill/Driver
Phillips Bit
3/32 Drill Bit (optional)
Complete Pkg Only
1/2” Wrench
1/2” Socket
1. Layout all parts. Position sled as shown. Skip pages 2-4 if not assembling the complete package.
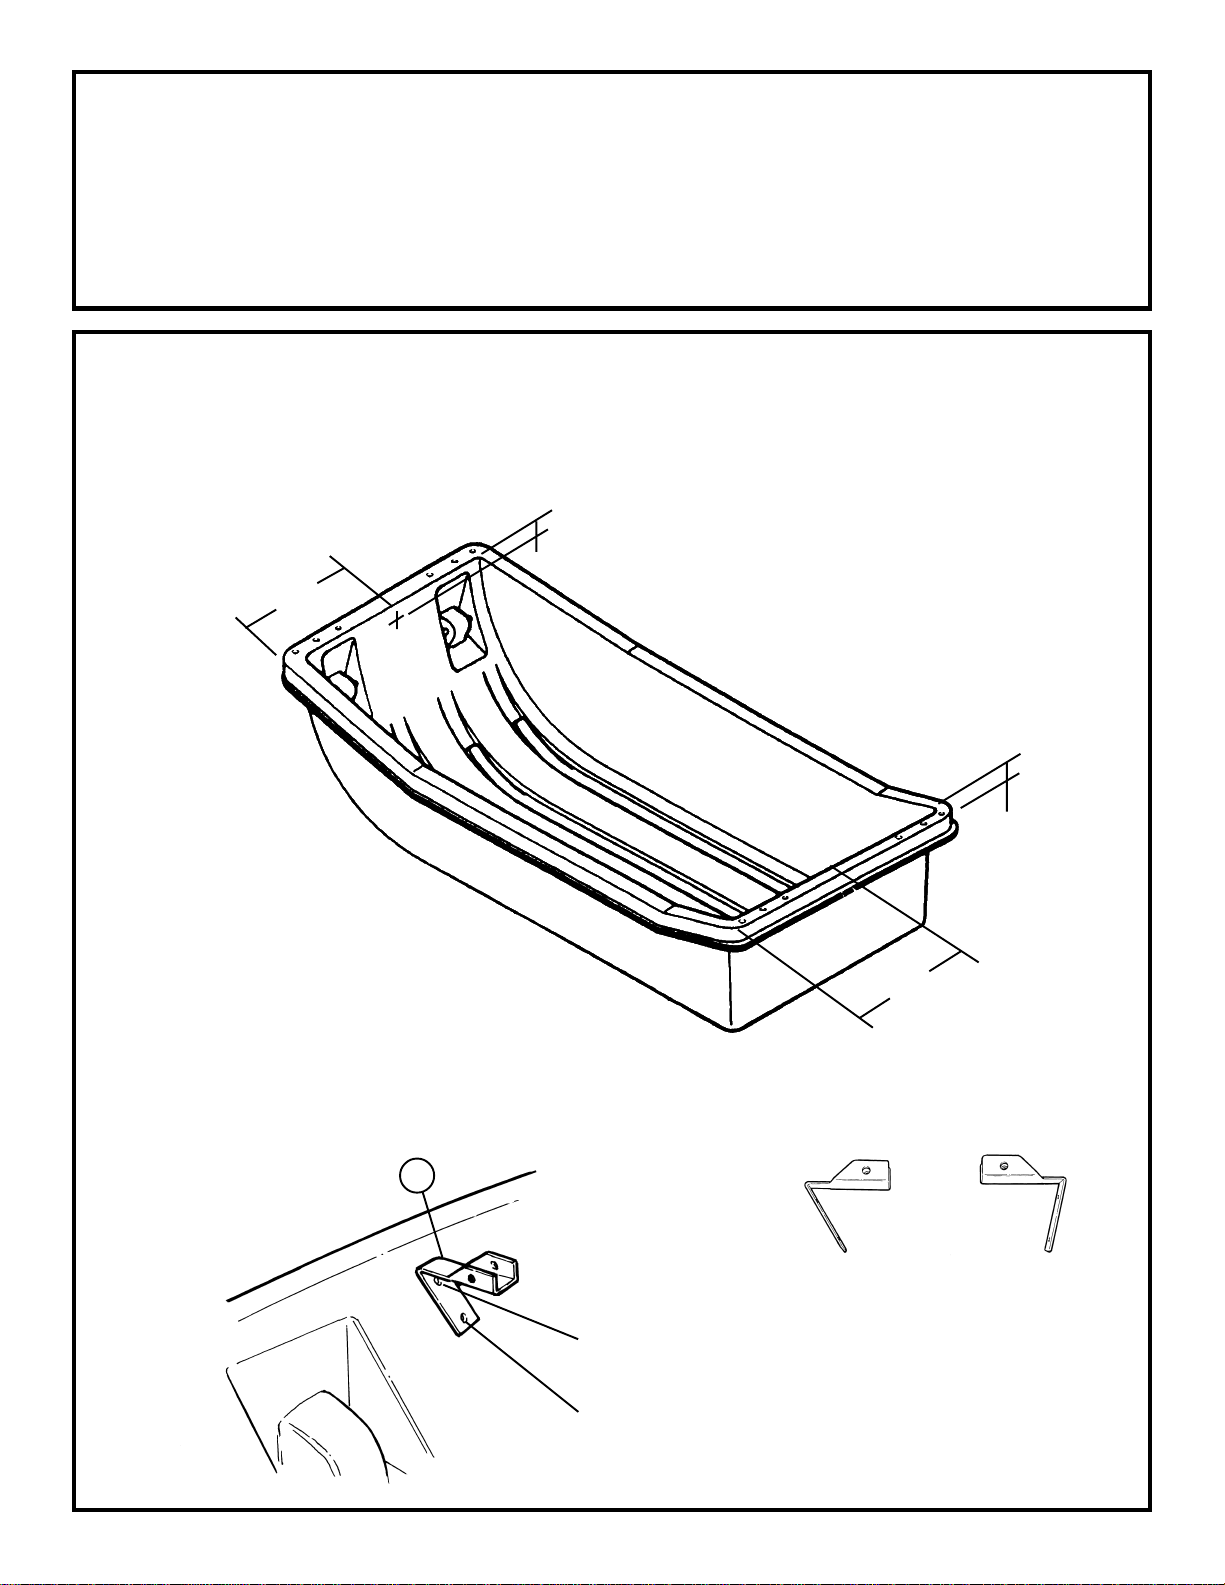
2. Measure 17” from the front/left corner of the sled and 1-1/2” down and mark the location for the top hole needed
for the seat rail bracket (Item 20). Measure 17-1/2” from the rear/left corner of the sled and 1-1/2” down and
mark the location for the top hole needed on the other side. Check bracket placement to be sure brackets are
either flush with top edge of sled or below the edge. Drill the two 5/16” holes through the sled. Ref. Diagram 1.
Diagram 1
Front
17 in.
1-1/2 in.
Right
1-1/2 in.
Left
17-1/2 in.
Rear
3. Place the seat rail bracket (Item 20) on the first hole and mark second hole location. Note: Bracket for front of
sled has a different bend then the rear of sled. Drill the remaining two 5/16” holes through the sled. Do not attach
the brackets to the sled at this point. Ref. Diagram 2.
Diagram 2
20
First hole
Front of sled
bracket
Rear of sled
bracket
Mark second hole and drill 5/16”
Page 2
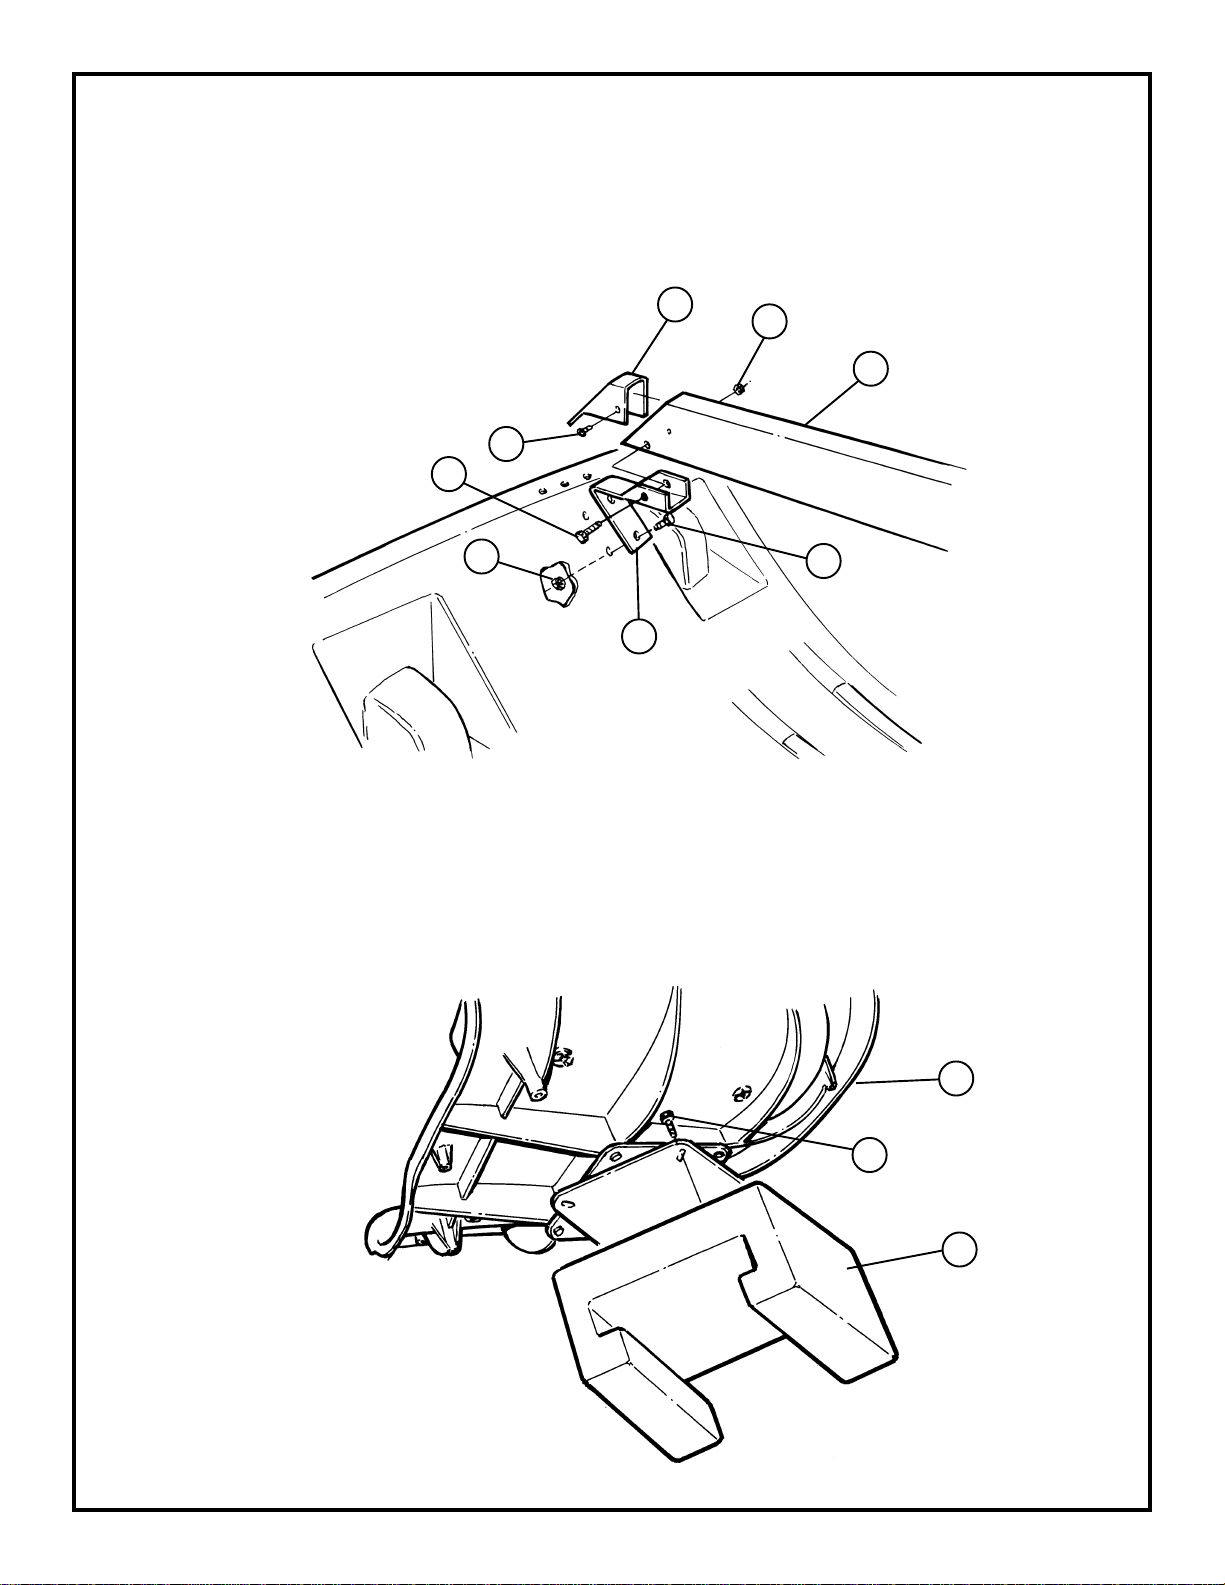
4. Attach seat rail (Item 18) to seat rail bracket (Item 20) and secure with bolt (Item 29) and nut (Item 30), both
ends. Attach seat rail cap (Item 19) to seat rail (Item 18) and secure with self tapping screws (Item 22). Attach
seat rail brackets (Item 20) to the sled, both ends, and secure with bolt (Item 27) and nut (Item 28).
Ref. Diagram 3.
Diagram 3
19
22
29
28
20
30
18
27
5. Fasten the seat slide (Item 16) to the seat (Item 15) with four bolts (Item 26). Ref. Diagram 4.
Diagram 4
15
26
16
Page 3
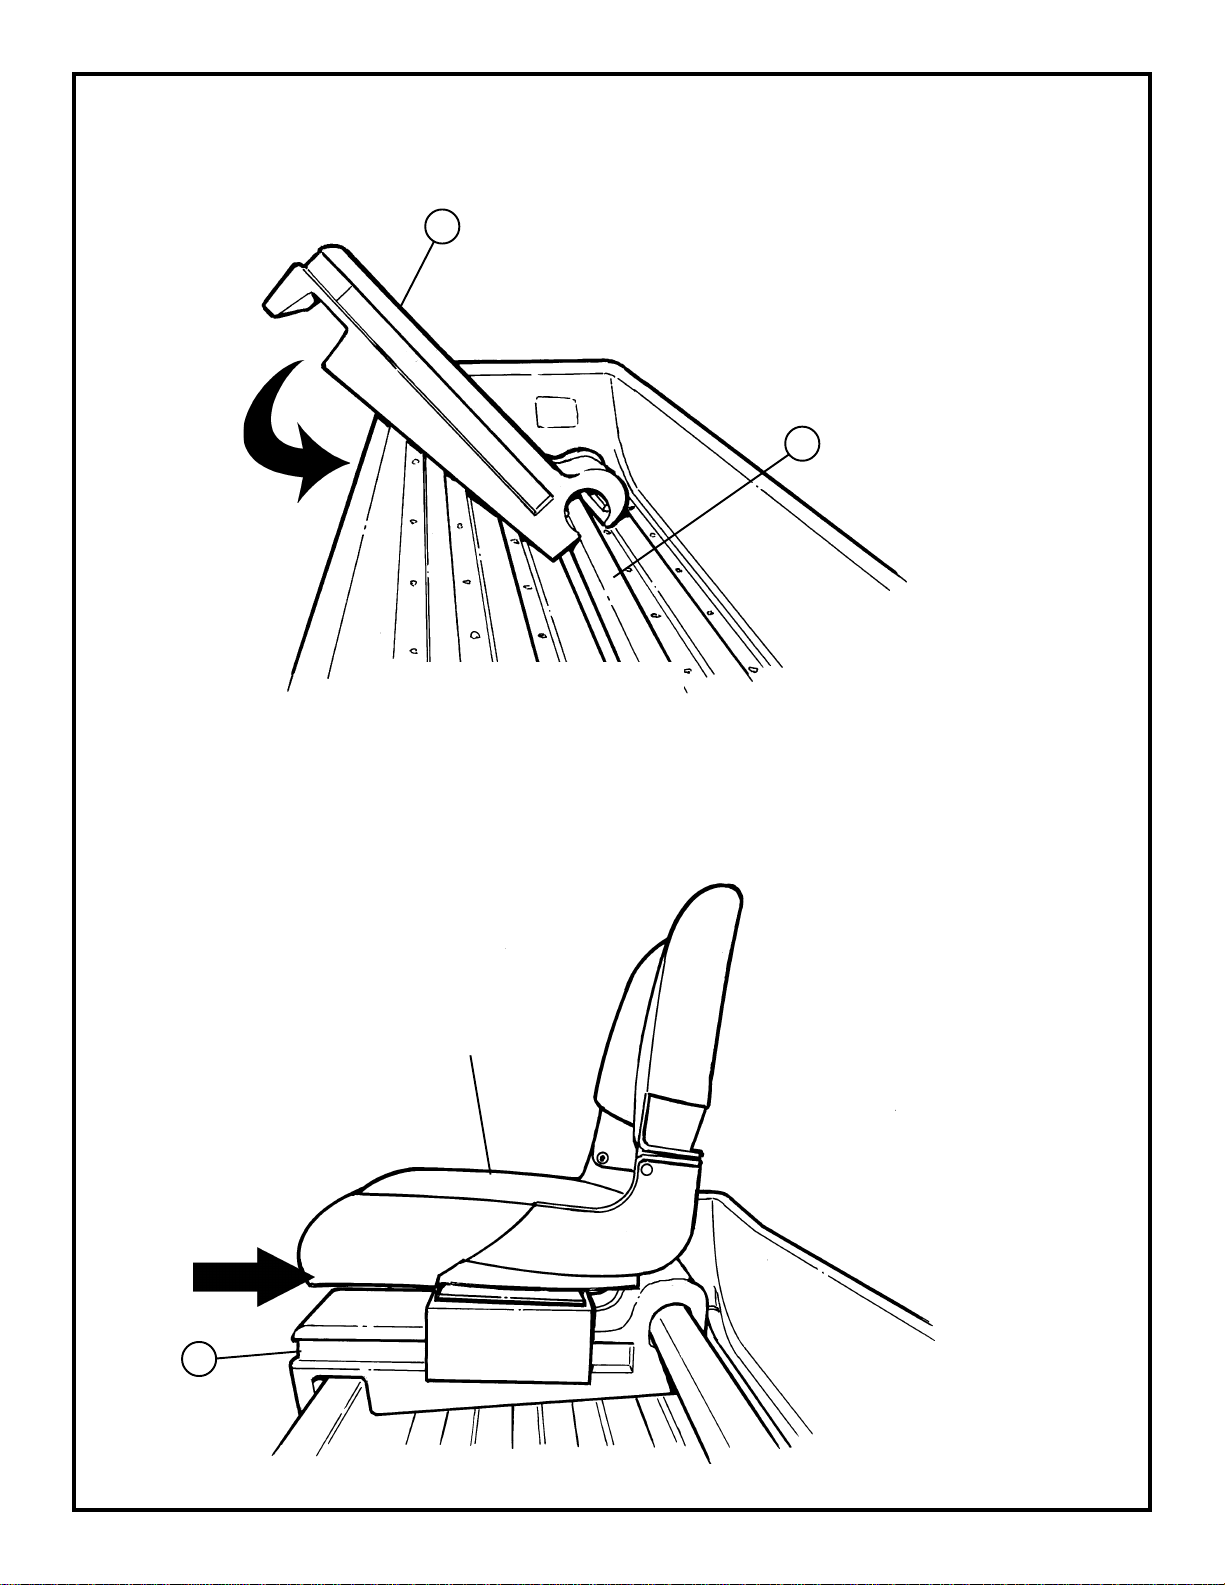
6. Position seat base (Item 17) as shown and lock onto the seat rail (Item 18). Lower the seat base onto the sled.
Ref. Diagram 5.
Diagram 5
17
18
7. Slide the seat assembly (assembled in step 5) onto the seat base (Item 17). Check the fit on the plastic seat base
(Item 17) and adjust as necessary. Ref. Diagram 6.
Diagram 6
Seat assembly
17
Page 4
 Loading...