

ET4222PpH-S-DR
Self-Configured Hardened 4-port 10/100/1000Base-T + 2-port 1000Base-X SFP Ethernet Switch with
PoE+/PSE
1 V1.0
This quick start guide describes how to install and use the Self-Configured Hardened Ethernet Switch with PoE+. This is the
Switch of choice for harsh environments.
Overview
The ET4222PpH-S-DR product is a Self-Configured Hardened Ethernet switch which provides 4 port
10/100/1000Base-TX + 2x1000Base-FX SFP port. The 10/100/1000Base-TX ports supports PoE+ (Power Sourcing
Equipment) and compliant with IEEE 802.3at.
Comply with IEEE 802.3 10Base-T, IEEE802.3u 100Base-TX/FX, IEEE 802.3x, and IEEE802.3at. The product will
provide PoE power to any IEEE802.3at/af compliant network device. It supports IGMP snooping which
significantly saves the network bandwidth and reduces network load. With its reliable design and ease of use, the
product is a great choice for integrating networks consisting of network devices such as IP cameras and wireless
access points between remote locations.
General
To ensure trouble free transportation and storage, all OT Systems products must be thoroughly inspected, tested
and well packed before delivery. Check the product upon receipt for any visible damage which may have been
caused during shipping.
Package Content
Self-Configured Hardened 4-port 10/100/1000Base-T + 2-port 1000Base-X SFP Ethernet Switch with PoE+/PSE x 1
Quick Start Guide x 1
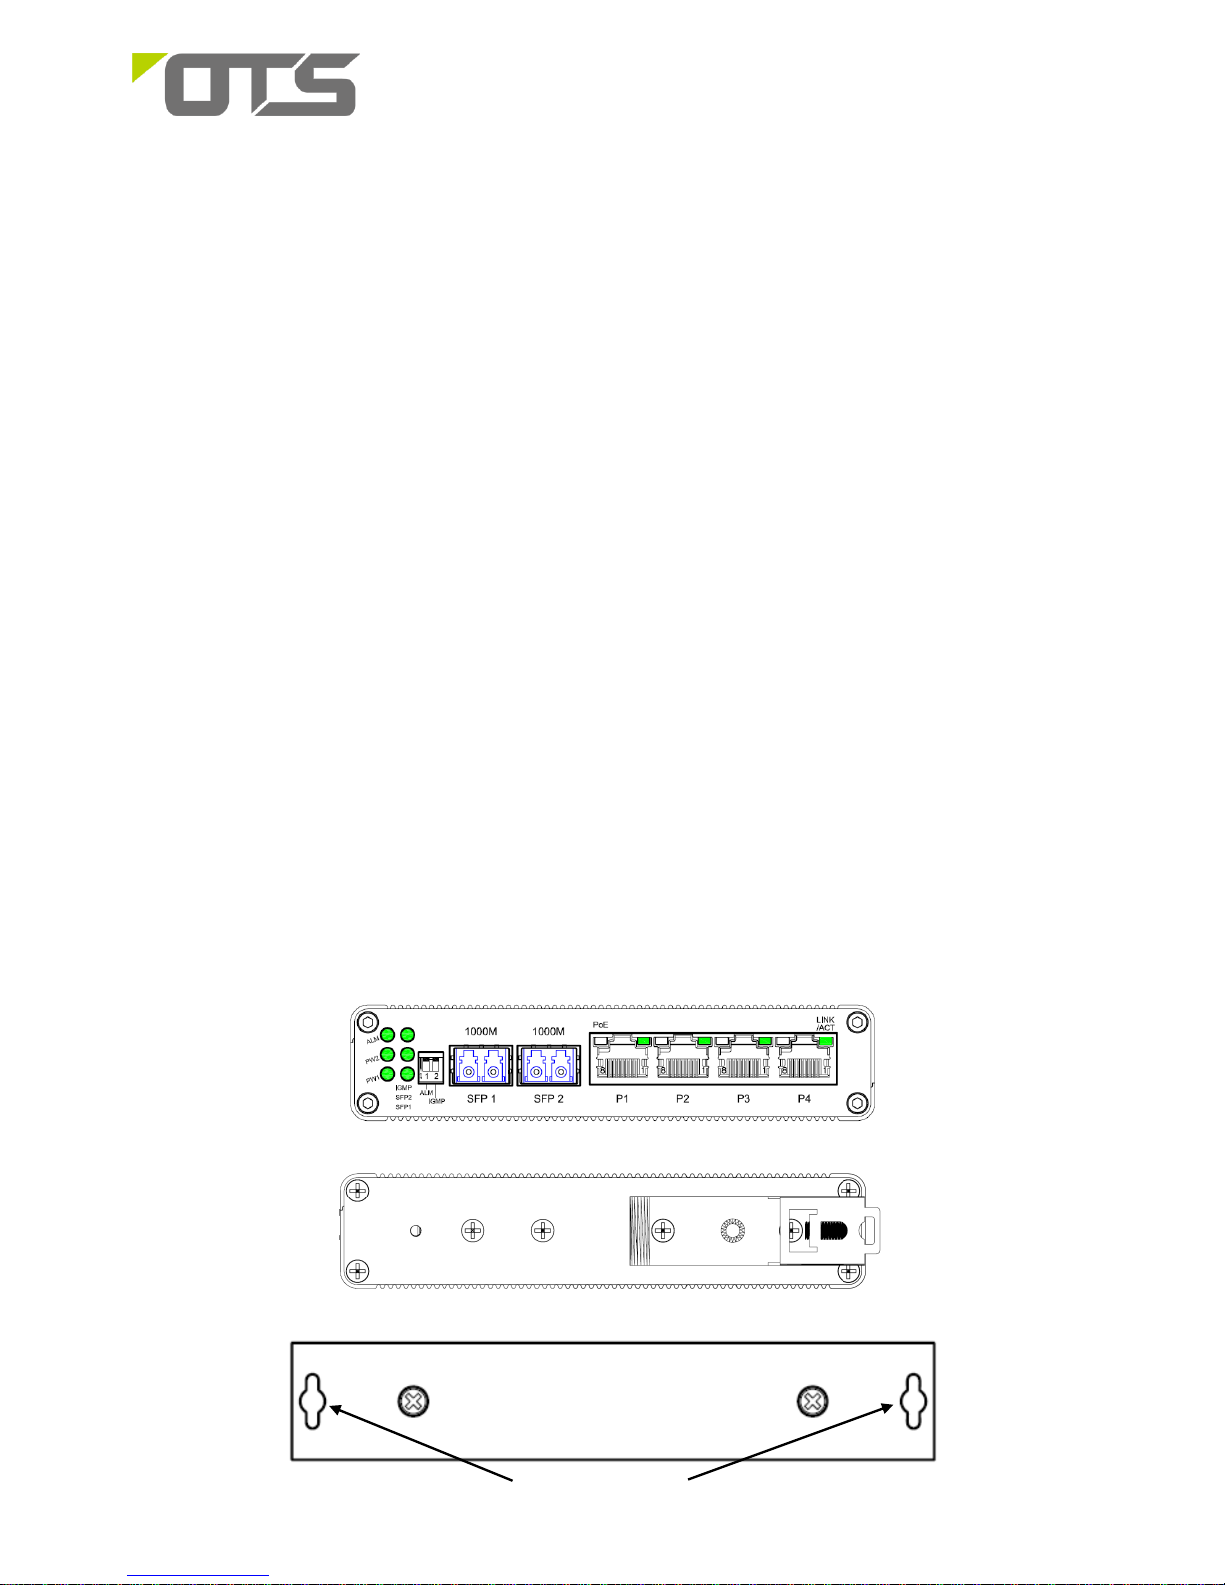
Physical Description
Front Panel
Rear Panel (Din-Rail)
Rear Panel (Wall mount)
Mounting holes
ET4222PpH-S-DR
Self-Configured Hardened 4-port 10/100/1000Base-T + 2-port 1000Base-X SFP Ethernet Switch with
PoE+/PSE
2 V1.0
Left Side view
Installation
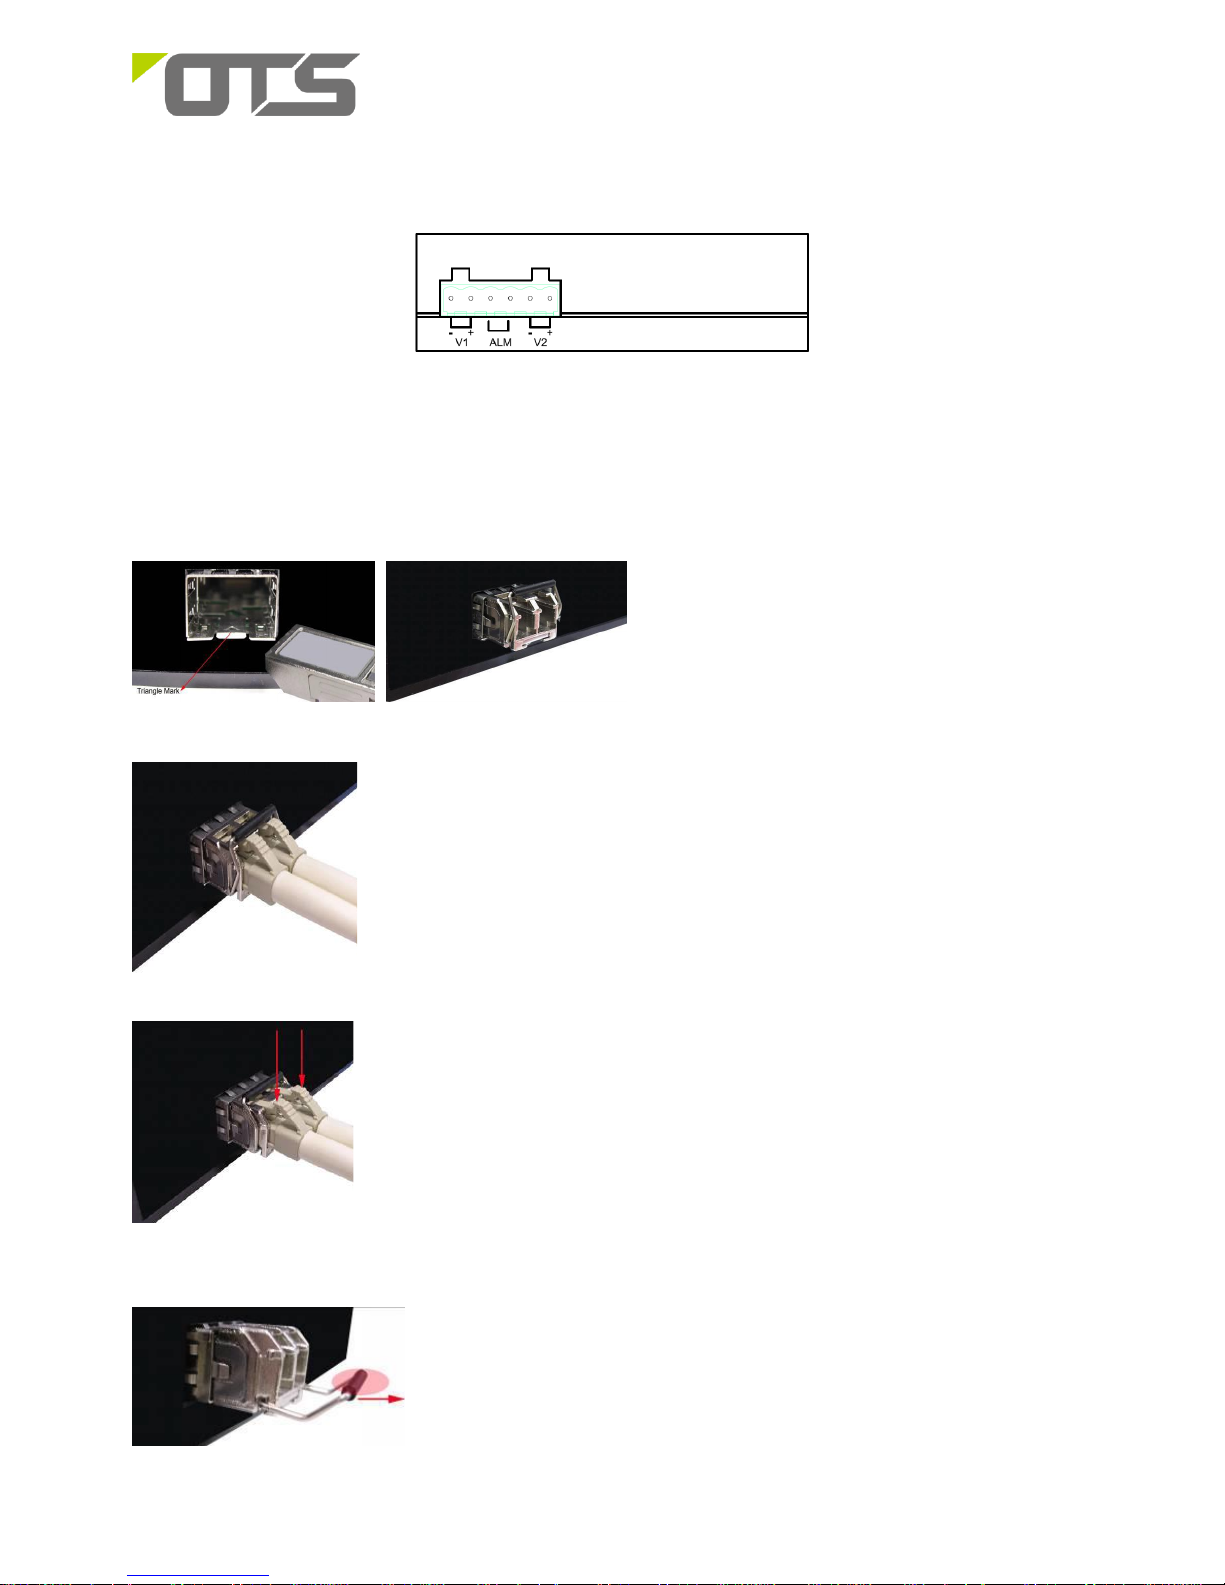
SFP Optical Module
You can select different SFP modules as required (Please refer to our SFP Ordering Options for the appropriate
module).
To insert/remove the SFP, the procedures are as follows:
1. On the front panel, insert the SFP module into the SFP port until it is securely locked.
2. Connect the optical fiber (1/2 core) to the LC connector(s) of the SFP.
3. To remove the SFP module, press down the lock of the LC connector of the optical fiber to pull out the fiber
cable.
4. Pull down the SFP lever and hold its position. Pull out the SFP module from the SFP port.
 Loading...