

Page 1
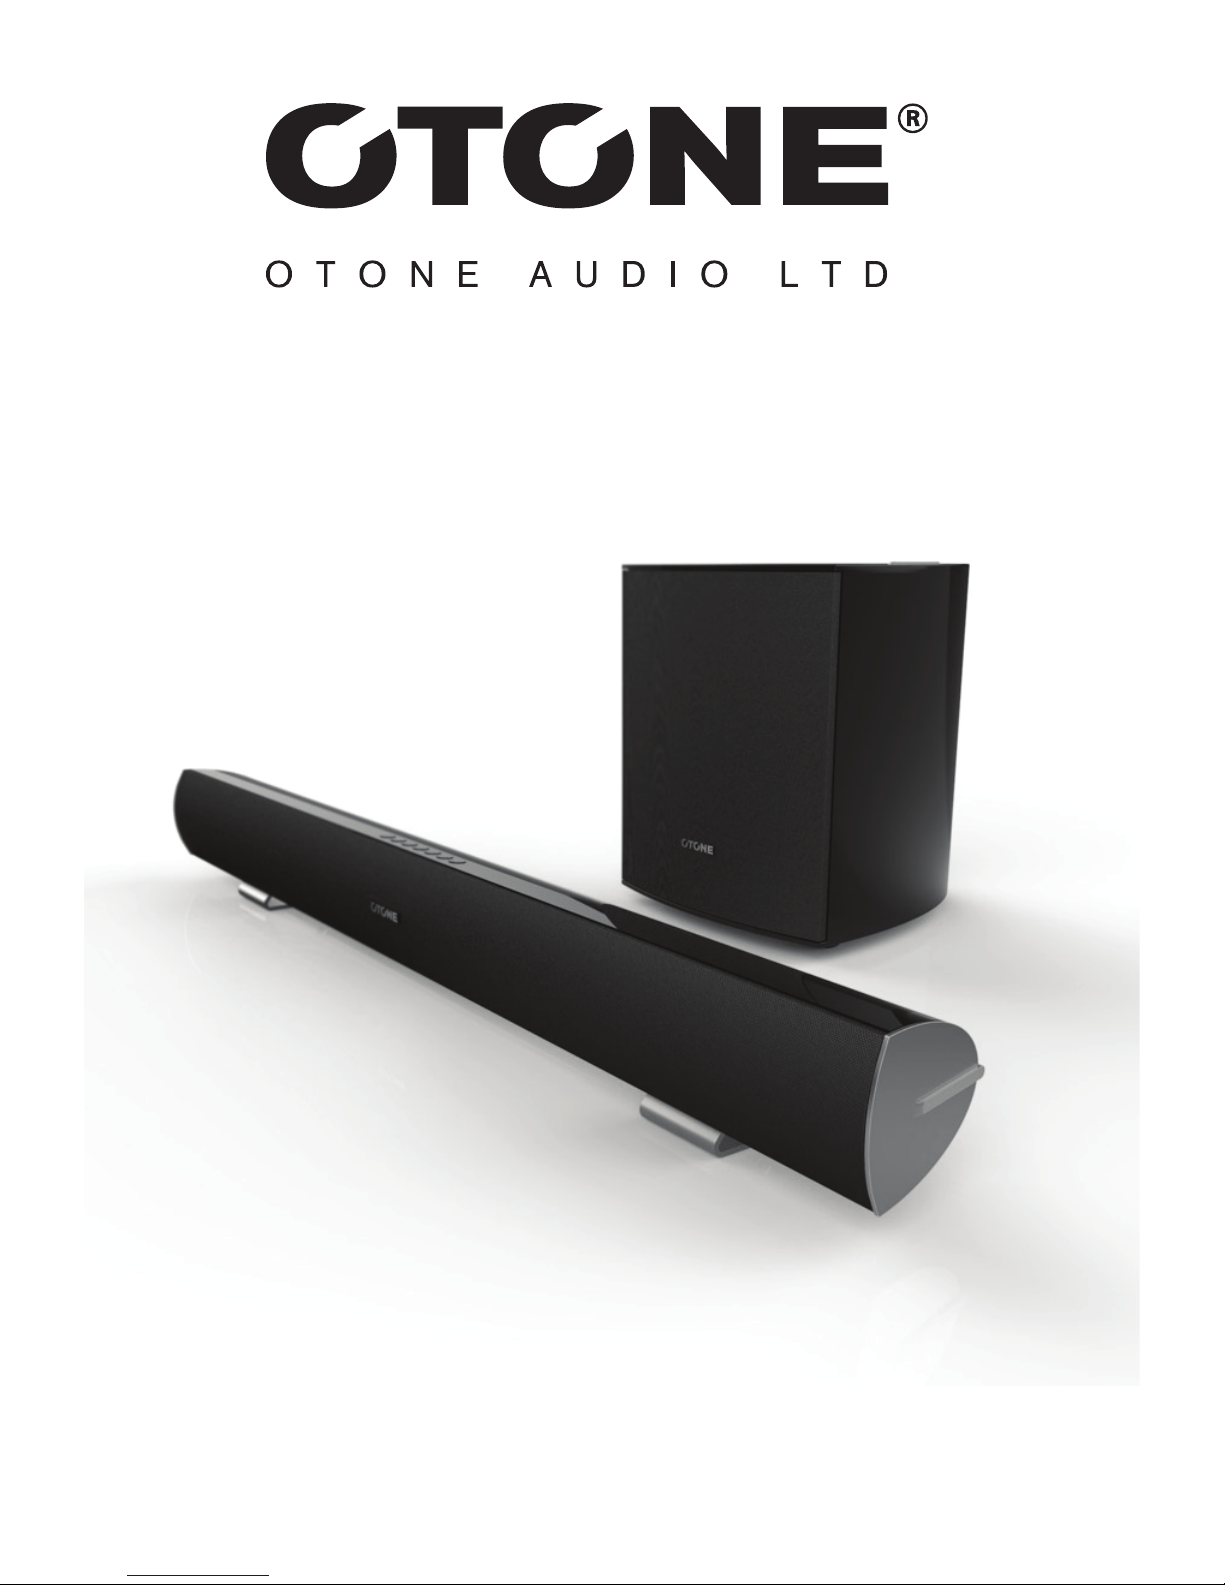
Sonora AV-Lance
Soundbar
User Manual
Page 2
User Manual
PLEASE
READ
FIRST
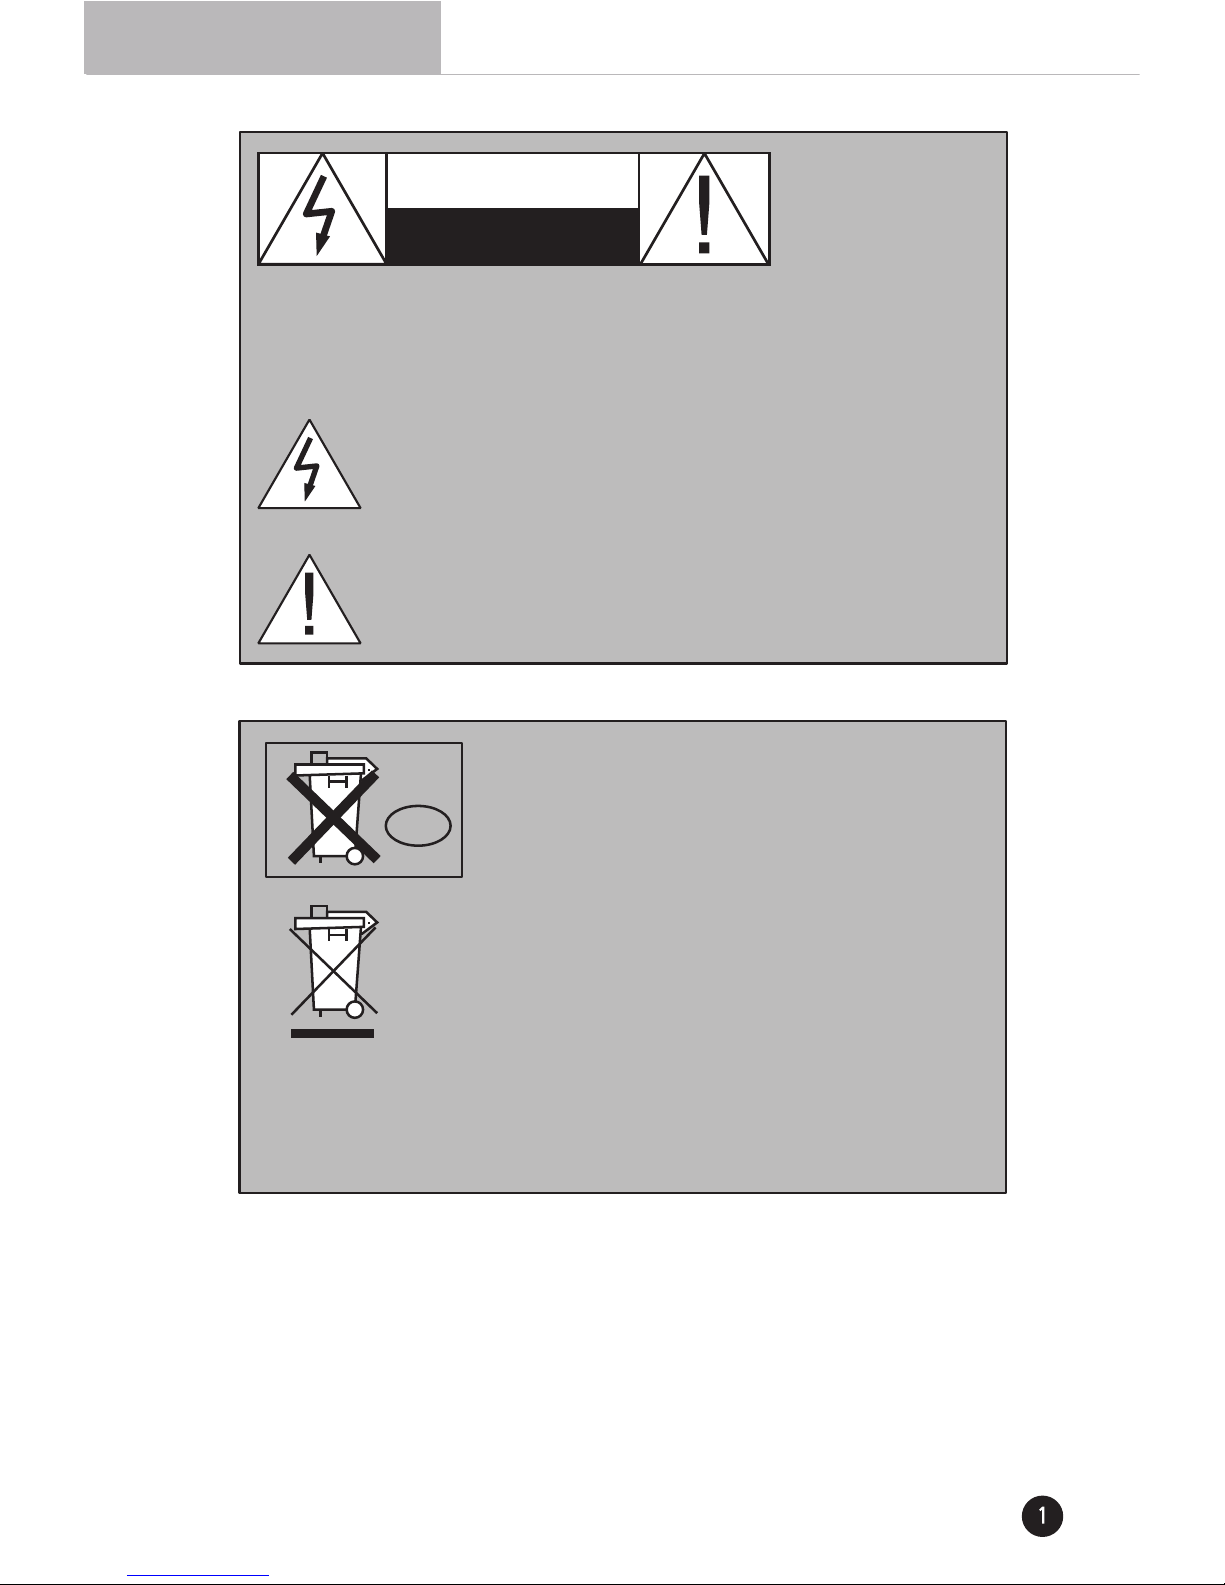
CAUTION
RISK OF ELECTRIC SHOCK
DO NOT OPEN
CAUTION: To reduce the risk of electric shock, do not remove the cover. No user
serviceable parts inside. Refer to qualified personnel.
WARNING: To reduce the risk of fire or electric shock, do not expose this appliance
to rain or moisture.
The lightning flash with arrowhead, with in an equilateral triangle, is
intended to alert the user to the presence of uninsu lated “dangerous
voltage” within the product’s enclosure that maybe of suficient magnitude
to constitute a risk of electrical shock to persons.
The exclamation point within an equilateral triangle is intended to alert
the user to the presence of important operating maintenance (servicing)
instructions in the guide accompanying this device.
This symbol on the product or on its packaging indicates that
this product shall not be treated as household waste. Instead it
shall be handed over to the applicable collection point for the
recycling of electrical and electronic equipment. By ensuring this
product is disposed of correctly, you will help prevent potential
negative consequences for the environment and human health, which could otherwise be
caused by inappropriate waste handling of this product. The recycling of materials will help
to conserve natural resources. For more detailed information about recycling of this
prodcut, please contact your local city office, your household waste disposal service or the
shop where you purchased the product.
Don’t throw away the battery with general house
waste, dispose of it correctly as chemical waste.
Disposal of Old Electrical & Electronic Equipment
(Applicable in the European Union and other
European counties with separate collection
systems)
NL
CAUTION: Please read these important safety instructions carefully
■ Read Instructions–All the safety and operating instructions should be read before
the unit is operated.
■ Retain Instructions–The safety and operating instructions should be retained for future
reference.
■ Heed Warnings–All warnings on the unit and in the operating instructions should be
adhered to.
■ Follow Instructions–All operating and use instructions should be followed.
Page 3

User Manual
■ Cleaning–Unplug the unit from the wall outlet before cleaning. The unit should be cleaned
only as recommended by the manufacturer.
■ Attachments–Only use attachments recommended by the manufacturer as
non-recommended attachments may cause hazards.
■ Water and Moisture–Do not use the unit near water–for example, near a bath tub, wash
bowl, kitchen sink, or laundry tub; in a wet basement; or near a swimming pool.
■ Accessories–Do not place the unit on an unstable surface, stand, tripod, bracket, or table.
The unit may fall, causing serious injury to yourself or others, and serious damage to the unit.
■ Ventilation–Do not place in a location or position that will interfere with the unit’s ventilation.
Do not operate on a bed, sofa, rug, or other similar surface.
■ Power Sources–The unit should be operated only from the type of power source indicated
on the marking label. If you are not sure of the type of power supplied to your home, consult
your unit dealer or local power company.
■ Power-Cord Protection–Power-supply cords should be routed so that they are not likely to
be walked on or pinched by items placed upon or against them, paying particular attention to
cords where they enter a plug, or exit from the unit.
■ Lightning–For added protection for the unit during a lightning storm, or when it is left
unattended and unused for long periods of time, unplug it from the wall outlet and disconnect
from other devices. This will prevent damage to the unit due to lightning and power-line surges.
■ Overloading–Do not overload wall outlets, extension cords, or integral convenience
receptacles as this can result in a risk of fire or electric shock.
■ Object and Liquid Entry–Never push objects of any kind into the unit through openings as
they may touch dangerous voltage points or short-out parts that could result in a fire or electric
shock. Never spill liquid of any kind on the unit.
■ Servicing–Do not attempt to service the unit yourself as opening or removing covers may
expose you to dangerous voltage or other hazards. Refer all servicing to qualified service
personnel.
■ Damage Requiring Service–Unplug the unit from the wall outlet and refer servicing to
service qualified personnel under the following conditions:
When the power-supply cord or plug is damaged,
If liquid has been spilled, or objects have fallen into the unit,
If the unit has been exposed to rain or water,
If the unit does not operate normally by following the operating instructions,
If the unit has been dropped or damaged in any way, and great care should be
Page 4
User Manual
exercised in handling, and the unit should be examined by qualified service personnel.
When the unit exhitbits a distinct change in performance- this indicates a need for service.
■ Replacement Parts- When replacement parts are required, be sure the service technician
has used replacement parts specified by the manufacturer or have the same characteristices
as the original part. Unauthorized substitutions may result in fire, electric shock, or other
hazards.
■ Heat- The unit should be situated away from heat sources such as radiators, heat registers,
stoves, or other units (including amplifiers) that produce heat.
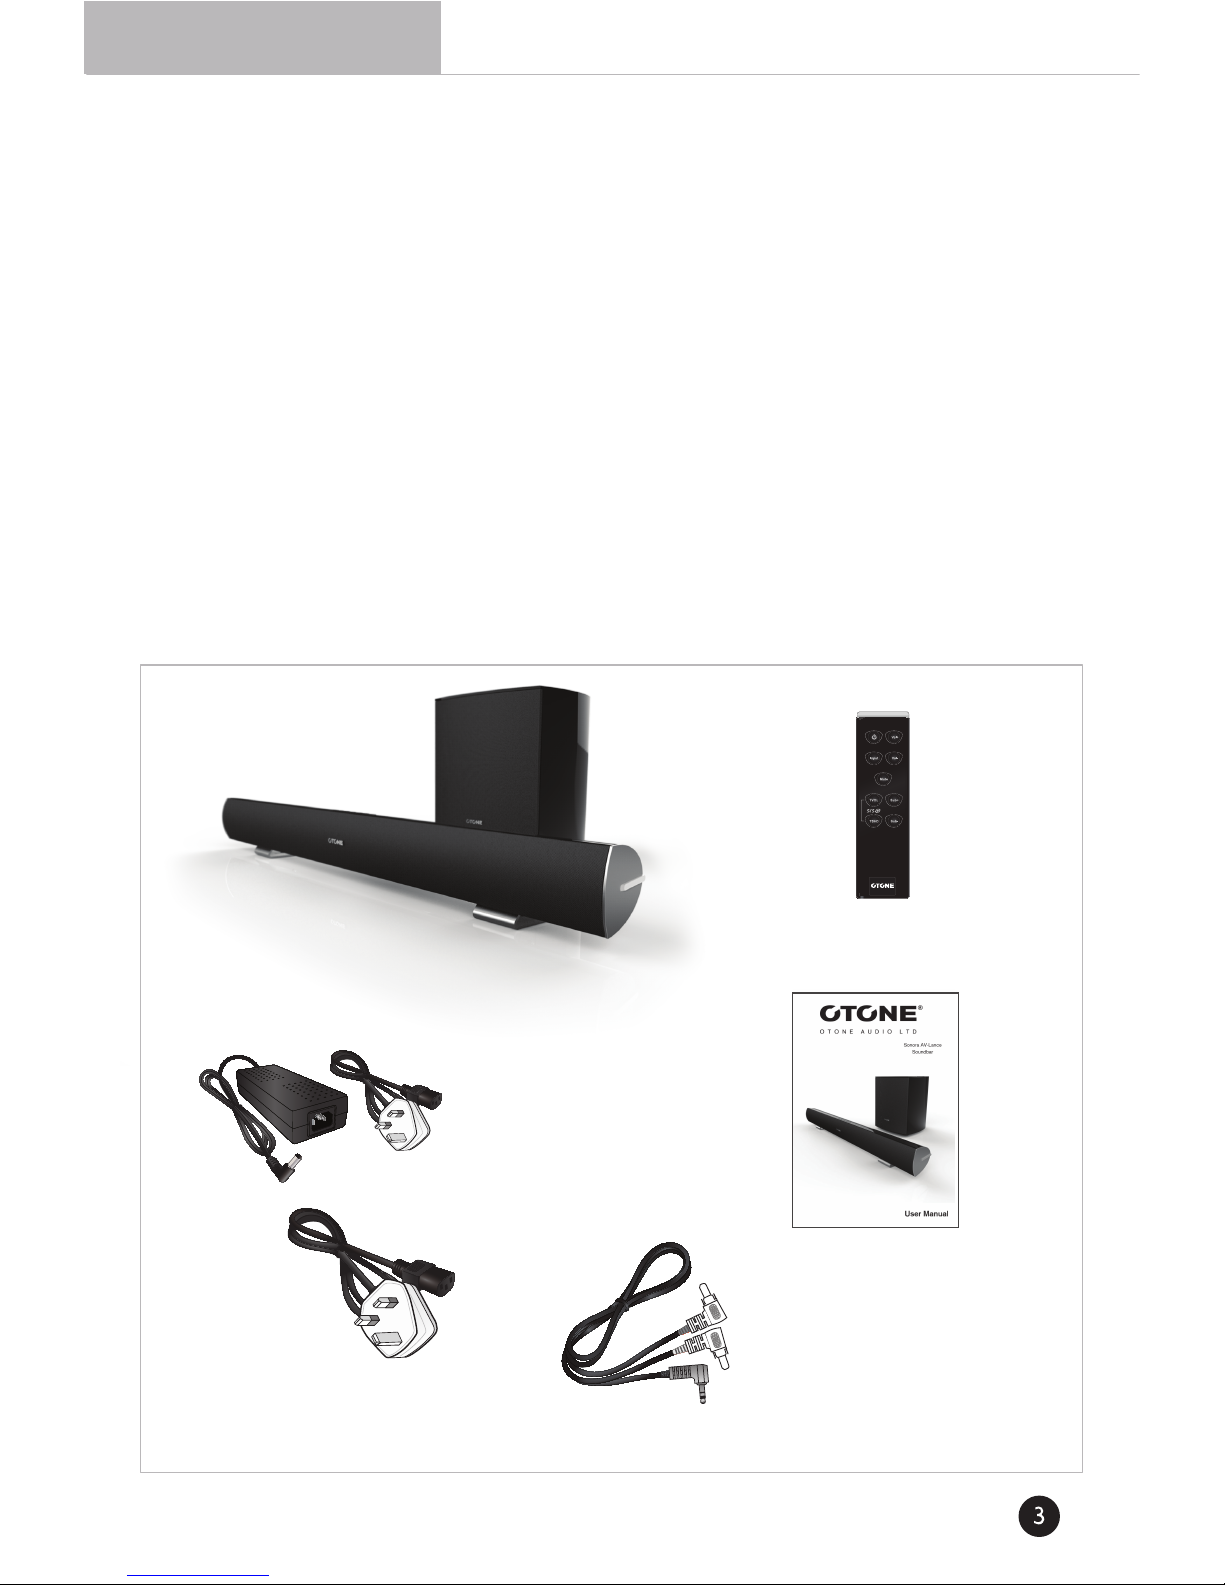
● PACKAGE CONTENTS
Soundbar with Wireless Subwoofer
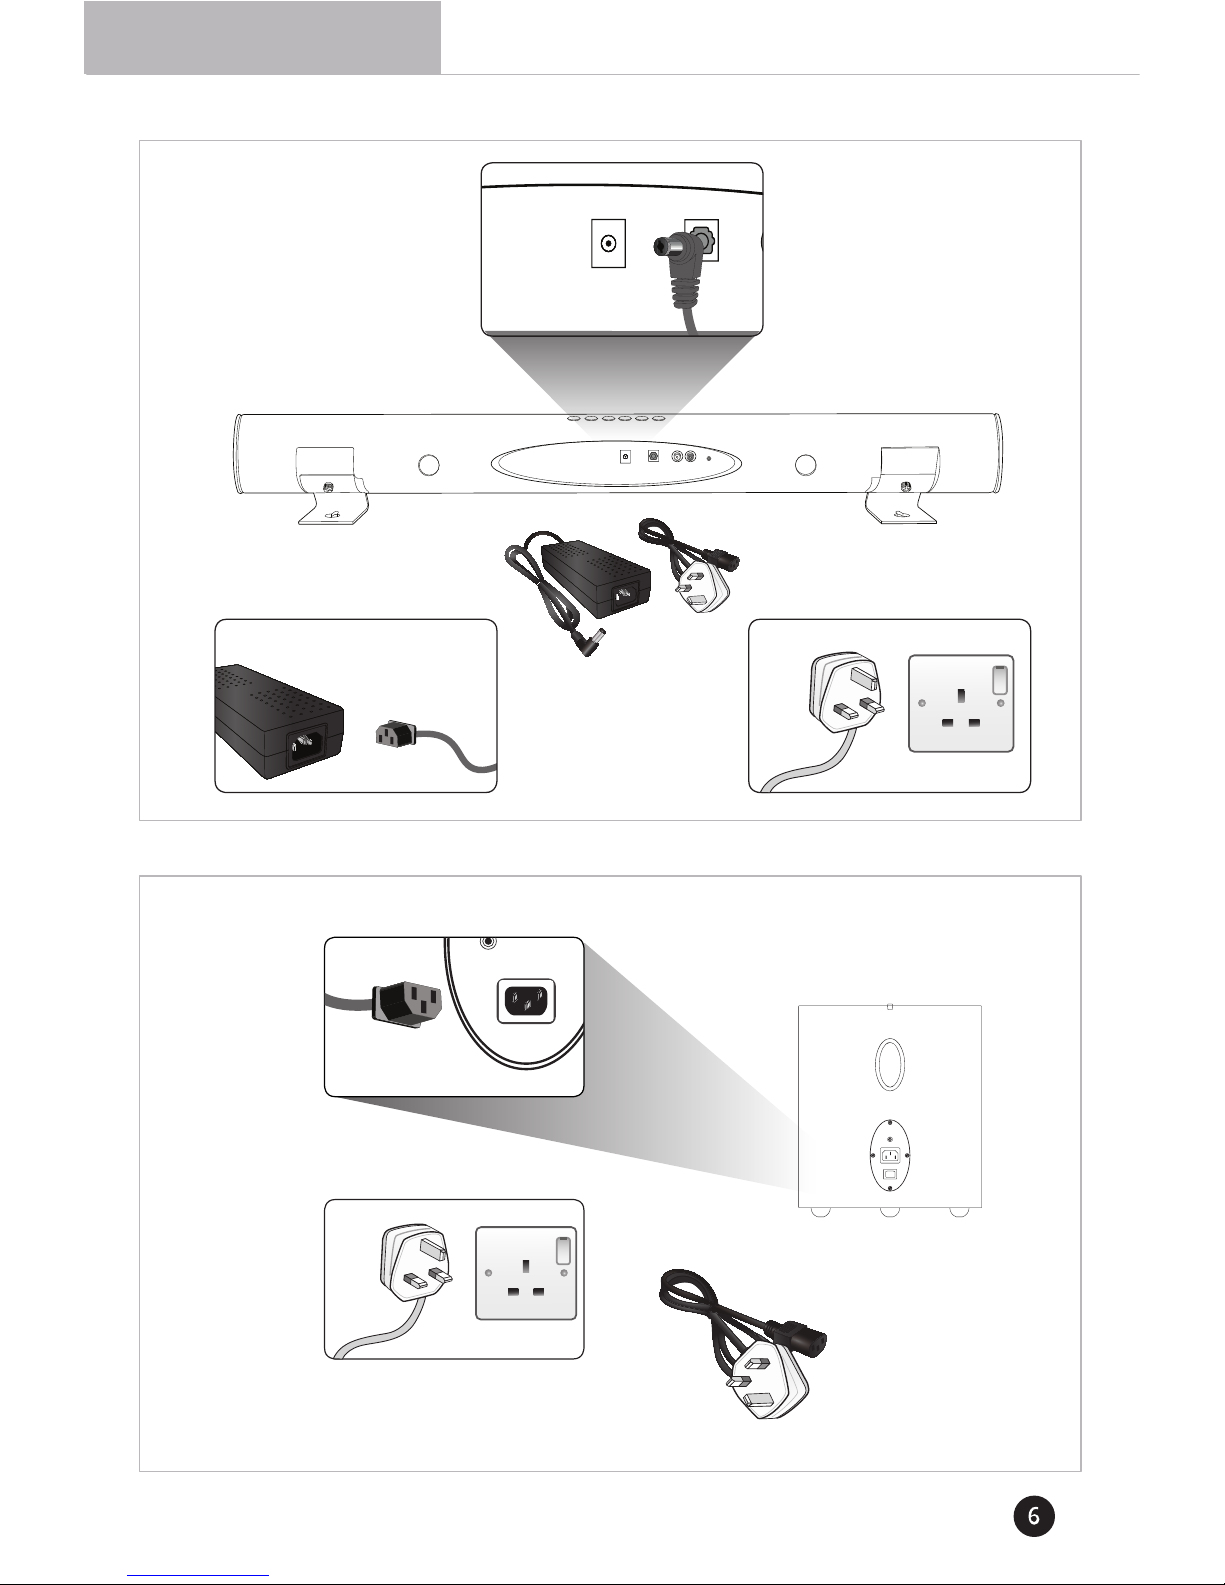
Power Adapter W/Cable
or Soundbar
Power Cable for Subwoofer
This Quick Start Guide
Stereo RCA to 3.5mm
Audio Cable
Remote Control with Battery
Page 5

User Manual
● INTRODUCTION
Thank you for purchasing Otone Audio’s Sonora AV-Lance Soundbar speaker with wireless
subwoofer. Your new audio system combines great audio performance and user-friendly
operation with cutting edge style.
This system offers a full home entertainment system - the soundbar itself delivers crisp
midrange with panoramic SRS surround sound, add in the dynamic bass from the 60 Watts
Vortex Drive™ subwoofer and whether you’re looking for a true home cinema effect or intense
gaming, the Sonora AV-Lance Soundbar brings the experience to life.
We are committed to creating innovative audio products to meet your home AV needs. To get
the most from your new system, please be sure to read this User Manual completely. It
contains all of the necessary information to connect and operate your system for maximum
performance.
● SPECIFICATIONS
Total RMS Power: 120W (2 x 30 + 60W)
Frequency Response (soundbar): 90 Hz ~ 20KHz
Frequency Response (subwoofer): 40 Hz ~ 90 Hz
Signal to Noise Ratio: >100dB
Soundbar Drivers: 4 x 3” high-efficiency full-range drivers; 2 x ¾" tweeters
Subwoofer Driver: 6½” long-excursion driver
Audio Input: 2 x RCA stereo, 3.5mm stereo, SPDIF (optical)
Power Input: 100-240v AC, 50~60 Hz
Dimensions (soundbar): 1011.8mm x 113.3mm x 107.7mm (W,H,D)
Dimensions (subwoofer): 205mm x 319.5mm x 311.2mm (W,H,D)
Weight (soundbar): 4.36kg
Weight (subwoofer): 6 kg
Page 6
User Manual
● FIRST-TIME SETUP
1
24V DC
OPTICAL
24V DC
OPTICAL INPUT 1 INPUT 2
Rear view
of Soundbar
CHOOSE ONE
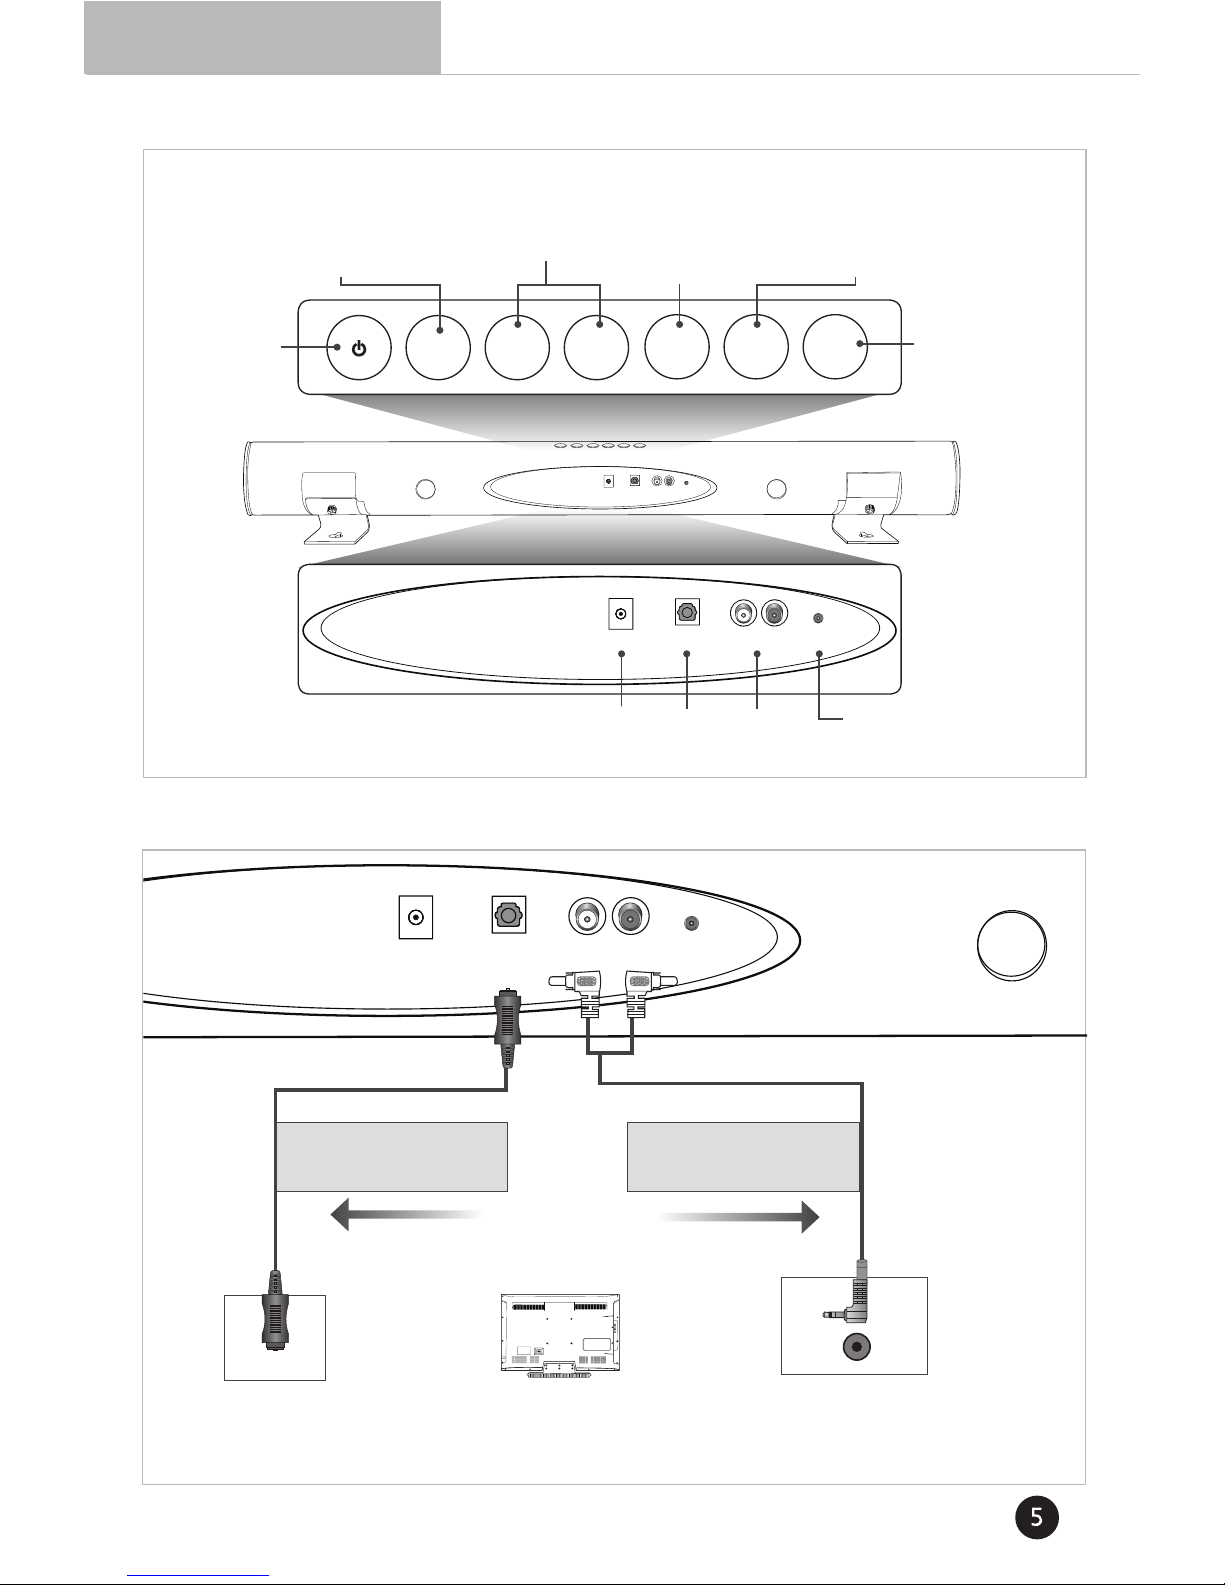
Connect an optical cable (not included)
or the included RCA stereo cable to
one TV audio output as shown.
Stereo RCA
Stereo 3.5mm
AUDIO OUT
When using SPDIF, be sure to set your
TV to PCM output. See your TV user
manual for details.
BACK OF YOUR TV*
*Not all TVs have the audio outputs shown above. to connect the Sound Bar directly to your other devices (Blu-ray player, game system, etc) see your device’s user manual.
BETTER - Digital GOOD - Analogue
Input Vol - Vol +
Mute TVOL SRS
24V DC
OPTICAL
Stereo RCA Stereo 3.5mm
24V DC
OPTICAL Stereo RCA Stereo 3.5mm
● CONTROLS & CONNECTIONS
Input
Press to change
input source (RCA Stereo,
3.5mm Stereo, Optical).
Volume+/Press to increase/
decrease system
volume.
Mute
Press to turn sound
off. Press again to
turn sound on.
TVOL
Press to turn SRS
TruVolume on or
off.
SRS
Press to turn SRS
TruSurround or
SRS WOW HD
on or off.
Power
Press to turn
Soundbar
on or off.
Input 1
(Stereo RCA)
Power
Input 2
(Stereo 3.5mm)
SPDIF
(Optical)
Page 7
User Manual
2
3 4
24V DC
OPTICAL
24V DC
OPTICAL
Stereo RCA
Stereo 3.5mm
5
6
Page 8
User Manual
7
7
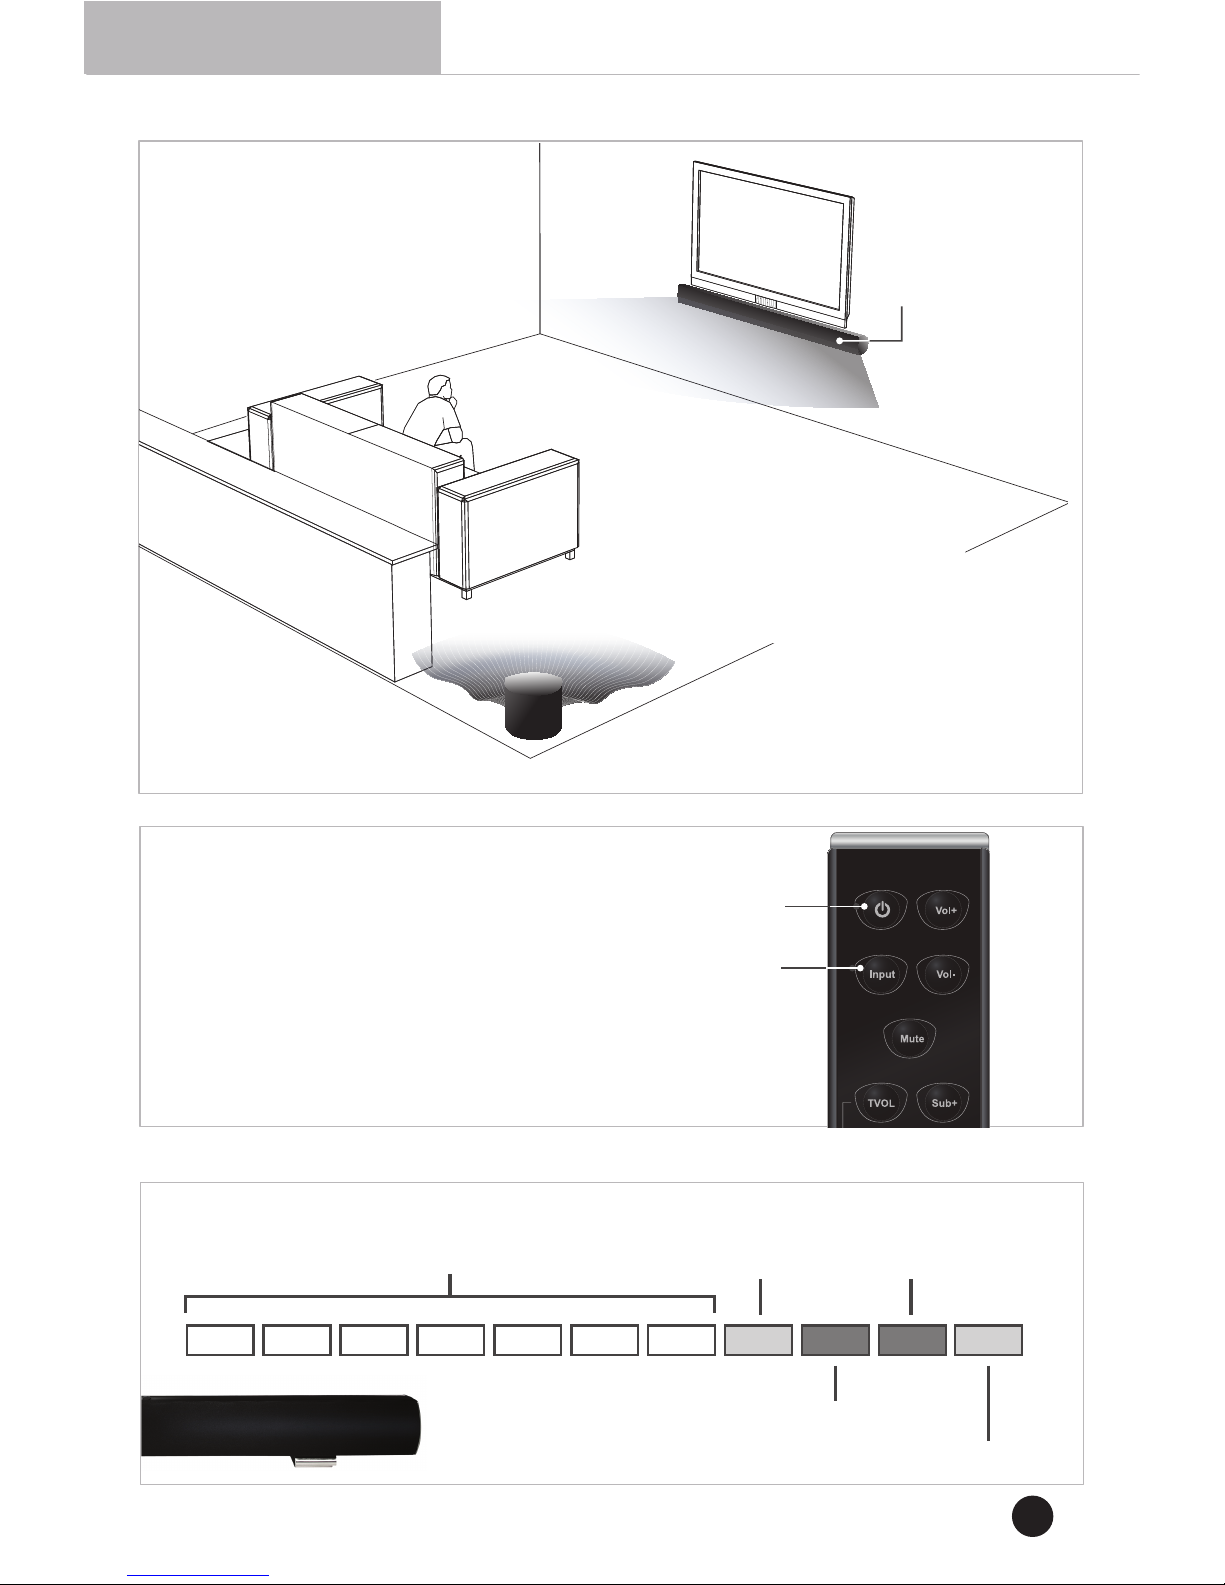
Soundbar is centered
below the TV.
For the best surround sound experience, position the
speakers as shown.* the Soundbar should be close
to ear level.
● READING THE INDICATOR LIGHTS
Volume (White)
as volume increases,
more lights are displayed.
Link (White)
When Subwoofer is linked, light is
solid. Light blinks when pairing.
SRS TruSurround HD (Blue)
When truSurroundHD
is on, light is solid.
SRS TruVolume (Blue)
When TruVolume is on, light is solid.
SRS WOW HD (Orange)
When WOW HD is on, light is solid.
Lights are located here.
.
.
8
Turn your TV on, then press the Power button
on the remote to turn the Soundbar on.
Press the Input button to switch between the
Stereo RCA, Stereo 3.5mm and Optical audio source.
For example, if you connect your TV using Stereo RCA cables,
set the Soundbar input to Stereo RCA.
Setup is complete.
Power
Input
Subwoofer is near the corner of
the room, up to 60 feet away from
the Soundbar. Bass is projected
outward.
When using the remote,
point it at the right side
of the Soundbar. the
sensor is located there.
Page 9
User Manual
● USING THE REMOTE
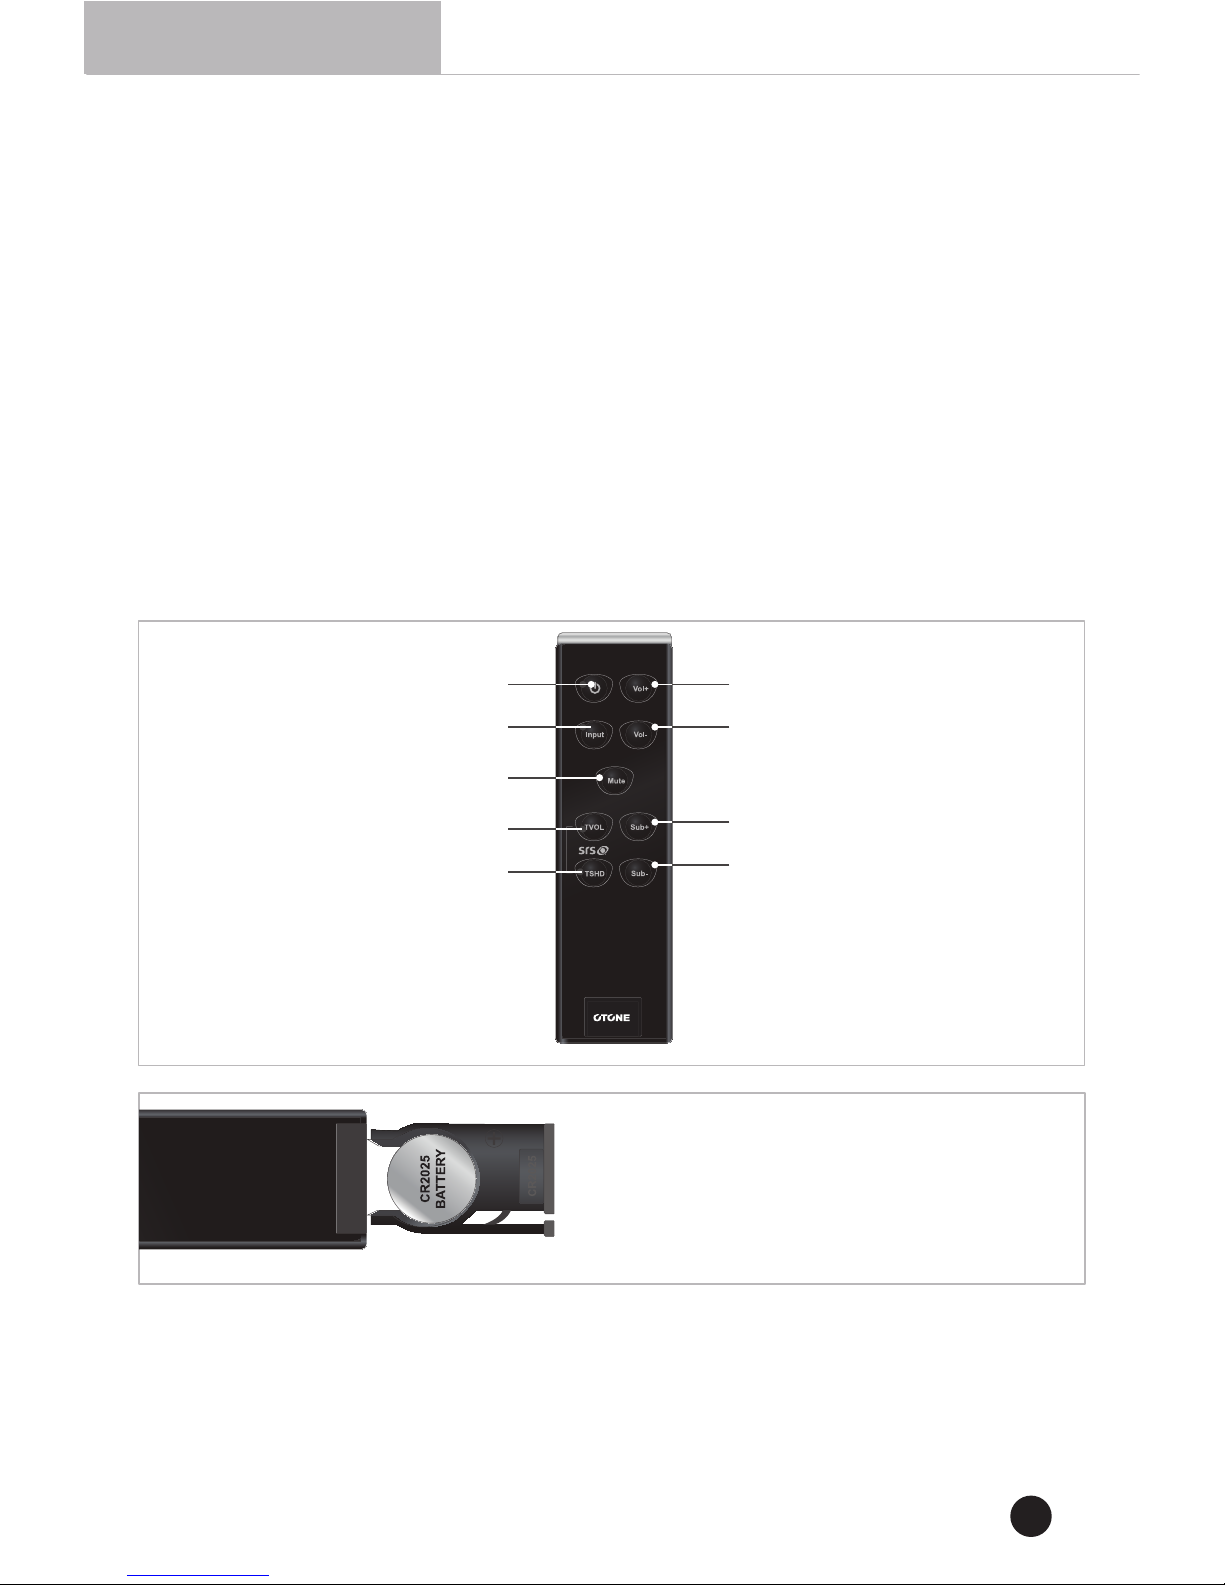
Power
Press to turn on or off.
Input
Press to change input source.
Mute
Press to mute/unmute.
TVOL
Press to activate SRS truVolume.
TSHD
Press to activate SRS TruSurround HD
or SRS WOW HD
Volume Up
Press to increase volume.
Volume Down
Press to decrease volume.
SUB +
Press to increase subwoofer volume.
SUB -
Press to decrease subwoofer volume.
When using the remote, point it at the
right side of the Soundbar. the sensor is
located there.
If your remote stops responding, you may need
to replace the battery.
To replace the battery, open the battery
compartment as shown, then replace the old
battery with a new CR2025. Be sure that the +
sign on the battery is facing up.
8
Link LED
The white light indicates the pairing (or linking) process between the Soundbar and the Subwoofer. The LED
blinks fast to indicate pairing is taking place. When paired, the LED will light solid white. If not paired, the LED
will blink slowly. The Soundbar and the Subwoofer are paired as default from the factory.
SRS TruVolume LED
This lights blue when SRS TruVolume is on. This feature allows you to control the level of audio output to prevent
commercials from being louder than the volume of the program being viewed. Press SRS TVOL on the remote
control to turn SRS TruVolume on or off.
SRS TruSurround HD
This LED lights blue when SRS TruSurround HD is on. This feature gives you a more expansive sound and is best
for movie/TV content.
SRS WOW HD LED
This LED lights orange when SRS WOW HD (best for music content) is on. Press the SRS TSHD button on the
remote control to switch between these modes.
Page 10
User Manual
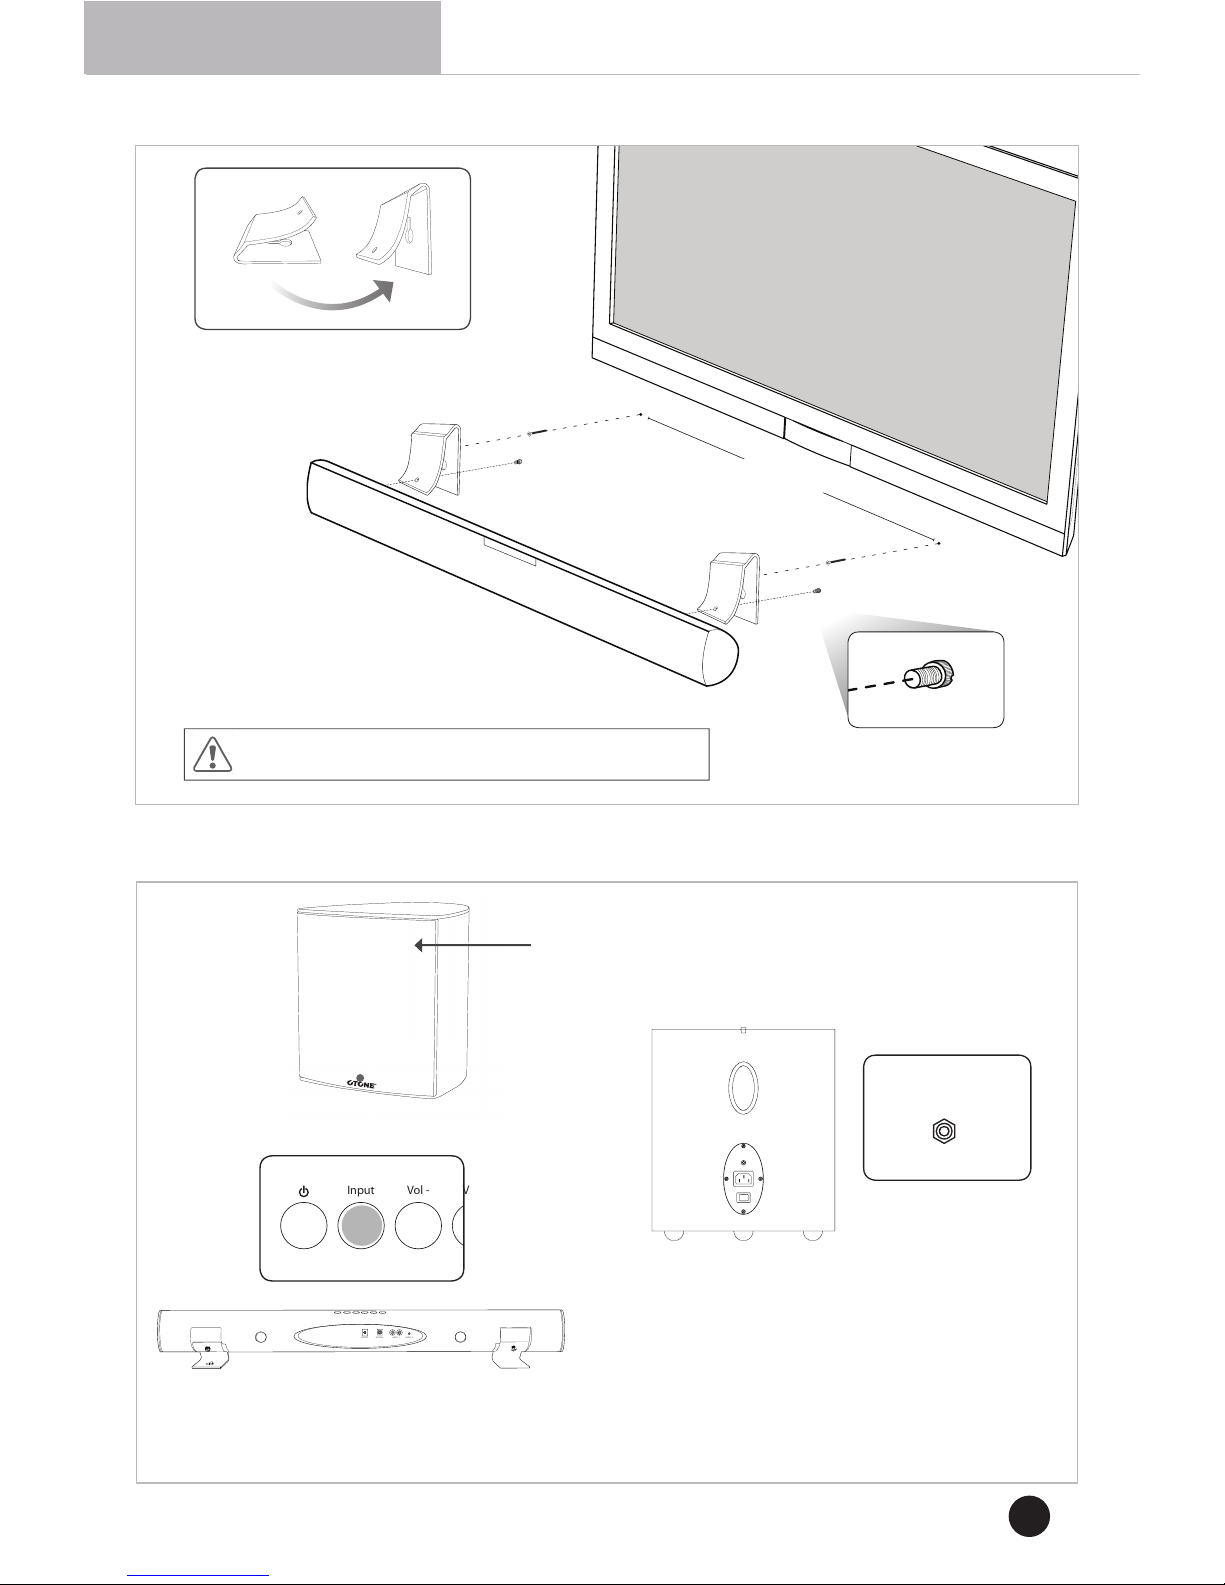
● WALL MOUNTING THE SOUNDBAR
Remove the screw from the Soundbar
stands and rotate as shown.
26 3/4”
(67.95 cm)
Be sure your screws are attached to wood
studs or drywall anchors (for drywall) or
concrete anchors (for brick/concrete walls).
Reattach stands using the
included screw.
If you are unfamiliar with power tools or the layout of electrical wiring in
the walls of your home, consult a professional installer.
1
2
LINK
Input Vol - V
24V DC
OPTICAL INPUT 1 INPUT 2
● RELINKING THE SUBWOOFER
You may need to re-link the Subwoofer to the Soundbar
if there is no sound coming from the Subwoofer and the
white light on the front of the Subwoofer is flashing in
this pattern: LONG ON, SHORT OFF.
2.
Press and hold the LINK button on the back
of the Subwoofer for 3 seconds.
The white light on the Subwoofer will begin to
blink rapidly a
t first, then slowly.
1.
Press and hold the INPUT button on the top of
the Soundbar for 3 seconds. The white light on the
front of the Soundbar will begin to blink rapidly.
Mounting hardware not included.
9
3. Press and hold the LINK button again until the white
light blinks rapidly. On releasing the button the light will
change to a solid state, this indicates that the soundbar
and subwoofer are now paired.
LINK
Page 11

User Manual
There is no power.
There is no sound.
There is no bass.
I hear buzzing
or humming.
• Press the POWER button on the remote control or on the top of your
Soundbar.
• Eusure the power cord is securely connected.
• Ensure the light on the power adapter is glowing green.
•
Plug a different device into the electrical outlet to verify that the outlet is
working correctly.
• Increase the volume. Press Volume Up on the remote control or on the
top of your Soundbar.
• Press MUTE on the remote to ensure the Soundbar is not muted.
• Press INPUT on the remote or on the top of your Soundbar to s
elect a
different input source.
• If you are trying to use the 3.5mm output from your TV, ensure it is the
OUTPUT connector you are using. Some TVs use 3.5 mm audio
INPUT for devices such as computers.
• Your TV may be set to variable audio output. Confirm that the audio
output setting is set to FIXED or STANDARD, not VARIABLE. Consult
your TV’s user manuel for more detailed information.
• Ensure all cables and wires are securely connected.
• Connect a different source device (TV, Blu-ray player, etc) t
o see if the
buzzing persists. If it does not, the problem may be with the original device.
• Connect your device to a different input on the Soundbar.
• Press the SUB + button on the remote control to increase the
bass level.
Ensure the Subwoofer is linked to the Sound Bar. See Re-Linking the
Subwoofer on the previous page.
There is too
much bass.
• Press the SUB - button on the remote control to decrease the bass level.
● HELP & TROUBLESHOOTING
1. The system should not be placed in hot, humid environment should not
be exposed to rain or subjected to strong impact.
2. There are no customer-serviceable parts in this product, to prevent
electric shock and other accidents do not try to service this product
yourself. Refer all servicing to qualified service personnel.
3. If you accidentally spill liquid on or in any part of the speaker, you should
immediately switch off the power, and then arrange for it to be checked by
qualified service personnel before you use it again.
4. When connecting the system to a source with a large signal volume, do
not set the input on the source to maximum, it should be set to the level
where no distortion can be detected.
5. If you are not going to use your speaker for an extended period
of time always switch off the power at the mains power socket.
Note
10
Page 12

User Manual
11
This product conforms to all the applicable requirements of the standards EN 60065 (safety),
EN 55013 and EN 55020 and as defined by EU Directive 1999/5/EC and is CE-marked accordingly.
All features and specifications are subject to change without notice or liability this may be done to
upgrade or improve existing designs or features.
● COMPLIANCE STATEMENT
SRS TruSurround HD, SRS TruVolume, and SRS WOW HD ae
trademarks of SRS Labs, Inc. TruSurround HD, TruVolume, and WOW
HD technologies are incorporated under license from SRS Labs, Inc.
 Loading...