

Oticon Medical Ponto SoundConnector, Ponto Softband Instruction Manual
Explanation of symbols
CE mark
Ponto Softband
Ponto SoundConnector
™
Rx ONLY
Manufacturer
Reference number
Batch code
Caution: Federal law (USA) restricts this
device to sale by or on the order of a
licensed medical practitioner
Consult Instructions for use
Caution
Hand wash
Instructions for Use
The Ponto Softband and the Ponto SoundConnector are intended for users who
have not had implant surgery, but could benefit from a bone conduction solution.
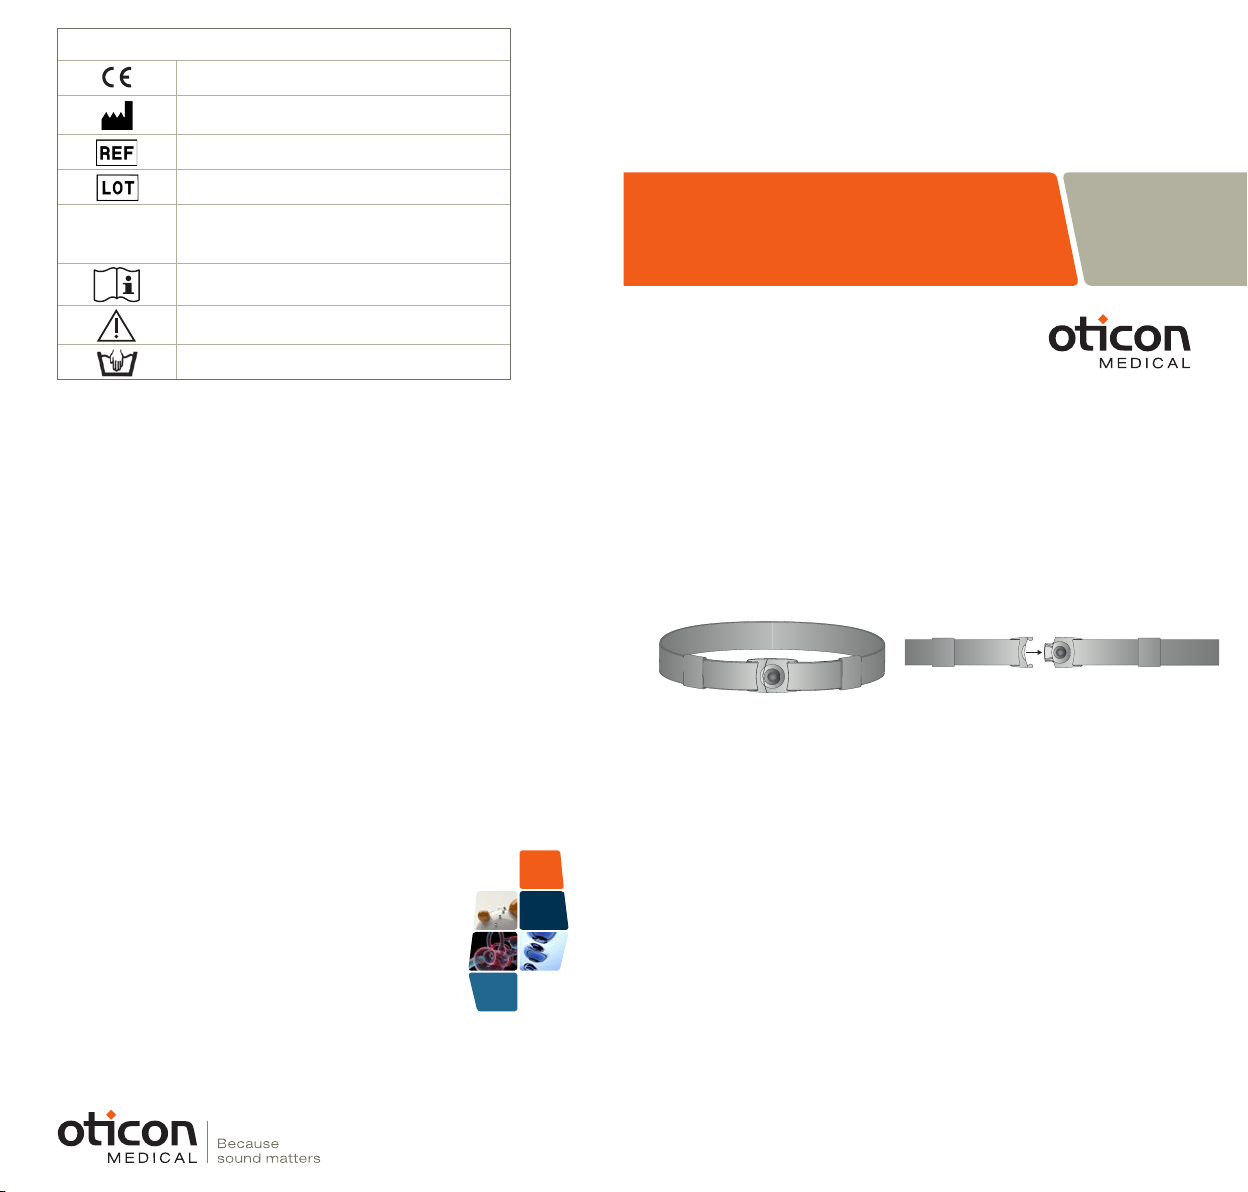
The Softband consists of an adjustable elastic band (A) with a connector (B) for
the Ponto sound processor. The band has a built-in safety feature (C), which is
designed to open the band if it gets caught. The Ponto Softband is available for
unilateral or bilateral use.
A
Pictures show Softband for unilateral use.
B
A
C D
Manufacturer:
Oticon Medical AB
Datavägen 37B
SE-436 32 Askim
Sweden
Phone: +46 31 748 61 00
info@oticonmedical.com
The SoundConnector allows users to use their Ponto sound processor with
alternative headwear. In order to secure the best possible sound transmission,
use headwear with a tight fit.
To allow for correct assembly of the SoundConnector, the material must be
no thicker than 1 mm when compressed. Once attached to the headwear, the
SoundConnector cannot be removed.
173493UK / 2017.09
For local office please visit:
www.oticonmedical.com
Pictures show Softband for unilateral use.
Getting started with the Softband
Place the Softband around the user's head. Adjust the length to fit the head
by sliding the adjustment mechanism. Ideally there should be enough space to fit
a finger between the head and the Softband. Make sure the band is not folded.
Connect the sound processor(s) to the connector(s) on the Softband. The
connector(s) should be placed against the skull behind the ear or any other flat
location of the skull, such as the forehead.
Talk to the user to confirm that the sound processor is working and that they can
hear. If you are uncertain, listen to it through the test rod or by wearing the Softband
yourself.
F
E
Using the Softband and the SoundConnector
It is important to make the use of the Softband/SoundConnector a positive
experience. We recommend wearing it for about 10-15 minutes in the beginning
and then gradually increase the wearing time.
During long-term use, vary the position of the Softband/SoundConnector on
a regular basis to avoid discomfort. Take a break for a few days, if the problem
persists. The Softband/SoundConnector can be placed in different positions
for different situations.
Parents or caregivers should always check that the Softband/SoundConnector
is correctly attached and positioned and that the sound processor is functioning
properly before use.
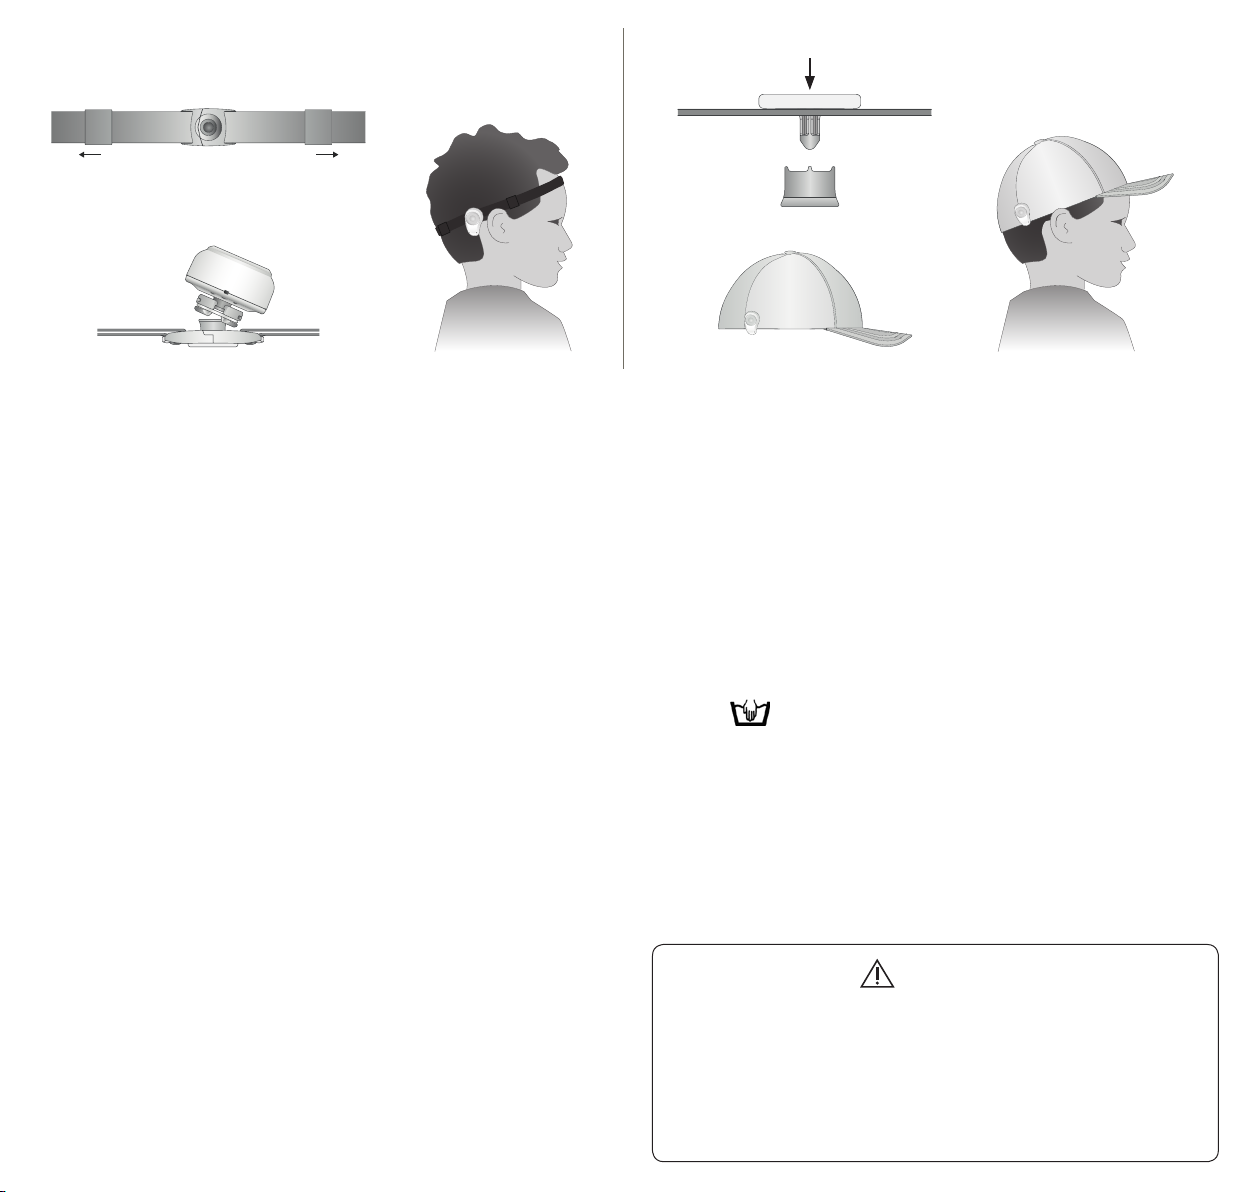
Getting started with the SoundConnector on headwear
Identify the position of the sound processor on the headwear. In order to secure
the best possible sound transmission, use headwear with a tight fit. Make sure to
select a position that allows the SoundConnector to be in direct contact with the
skull behind the ear or on any other flat location of the skull, such as the forehead.
Push the inner part (E) of the SoundConnector through the headwear. Place
the outer part (F) on a flat surface, with the pins facing up. Press the inner part (E),
with the headwear penetrated, against the outer part (F) until the parts attach.
You will hear a click, which will indicate that the SoundConnector is in place.
Connect the sound processor to the SoundConnector.
Place the headwear on the users head. Talk to the user to confirm that the
sound processor is working and that they can hear.
Replace the Softband with a new one if it has lost its elasticity.
Cleaning
The Softband can be washed by hand at 40°C or lower. Note that the sound
processor must NEVER be washed, as it is not waterproof!
WARNING
The Softband, SoundConnector and sound processor should not be used by
children or persons with diminished mental capacity without adult supervision.
The Softband and SoundConnector contain small parts that may be
a choking hazard.
The Softband or SoundConnector must never be worn on top of a bone
anchored implant during the healing period, as this can inhibit the
osseointegration.
 Loading...