

Oticon Medical Ponto Pro Power User Manual

Ponto Pro Power
Ponto - The bone anchored hearing system from Oticon Medical
User Manual

Congratulations
We would like to take this opportunity to congratulate you on selecting a Ponto sound
processor. Ponto Pro Power is designed so that it can be optimized for each individual
person. This will help you to get the best possible benefit from your sound processor.
This user manual describes how to use your Ponto Pro Power sound processor.
Please read through this manual carefully, with extra attention to the yellow pages, to
learn how to get the most out of your Ponto! Discuss any questions or concerns with
your hearing center. Please note the instructions for skin hygiene and maintenance in
this manual.

Contents
Direct bone conduction 4
Instrument view 6
Managing the battery 8
Turning it ON and OFF or stand-by 10
Connection 12
Disconnection 13
Correct position 14
Volume control 16
Programs 18
Sound processor maintenance 19
Skin hygiene 20
DAI (Direct Audio Input) 22
DAI accessories 24
Other accessories 28
Common problems and
their possible solutions 32
Service and repair 34
Manufacturer’s warranty 35
Important information 36
Warnings Yellow pages

4
Direct bone conduction
Your Ponto is designed to help you gain improved hearing through direct bone conduction. The sound processor converts sound into vibrations that are transmitted via the
abutment and implant through the skull bone to the inner ear. In this way Ponto works
independently of the function of the ear canal, ear drum and middle ear. Ponto is
therefore a possible solution to hearing losses where there is a problem in the outer
or middle ear preventing sound from reaching the inner ear.
Ponto can also pick up sound from one side and transfer it to the inner ear on the
opposite side. This makes it suitable for those who are deaf on one side, but have a
functioning inner ear on the other side (called unilateral hearing loss or single sided
deafness).

5
Sound
processor
Abutment
Implant

6
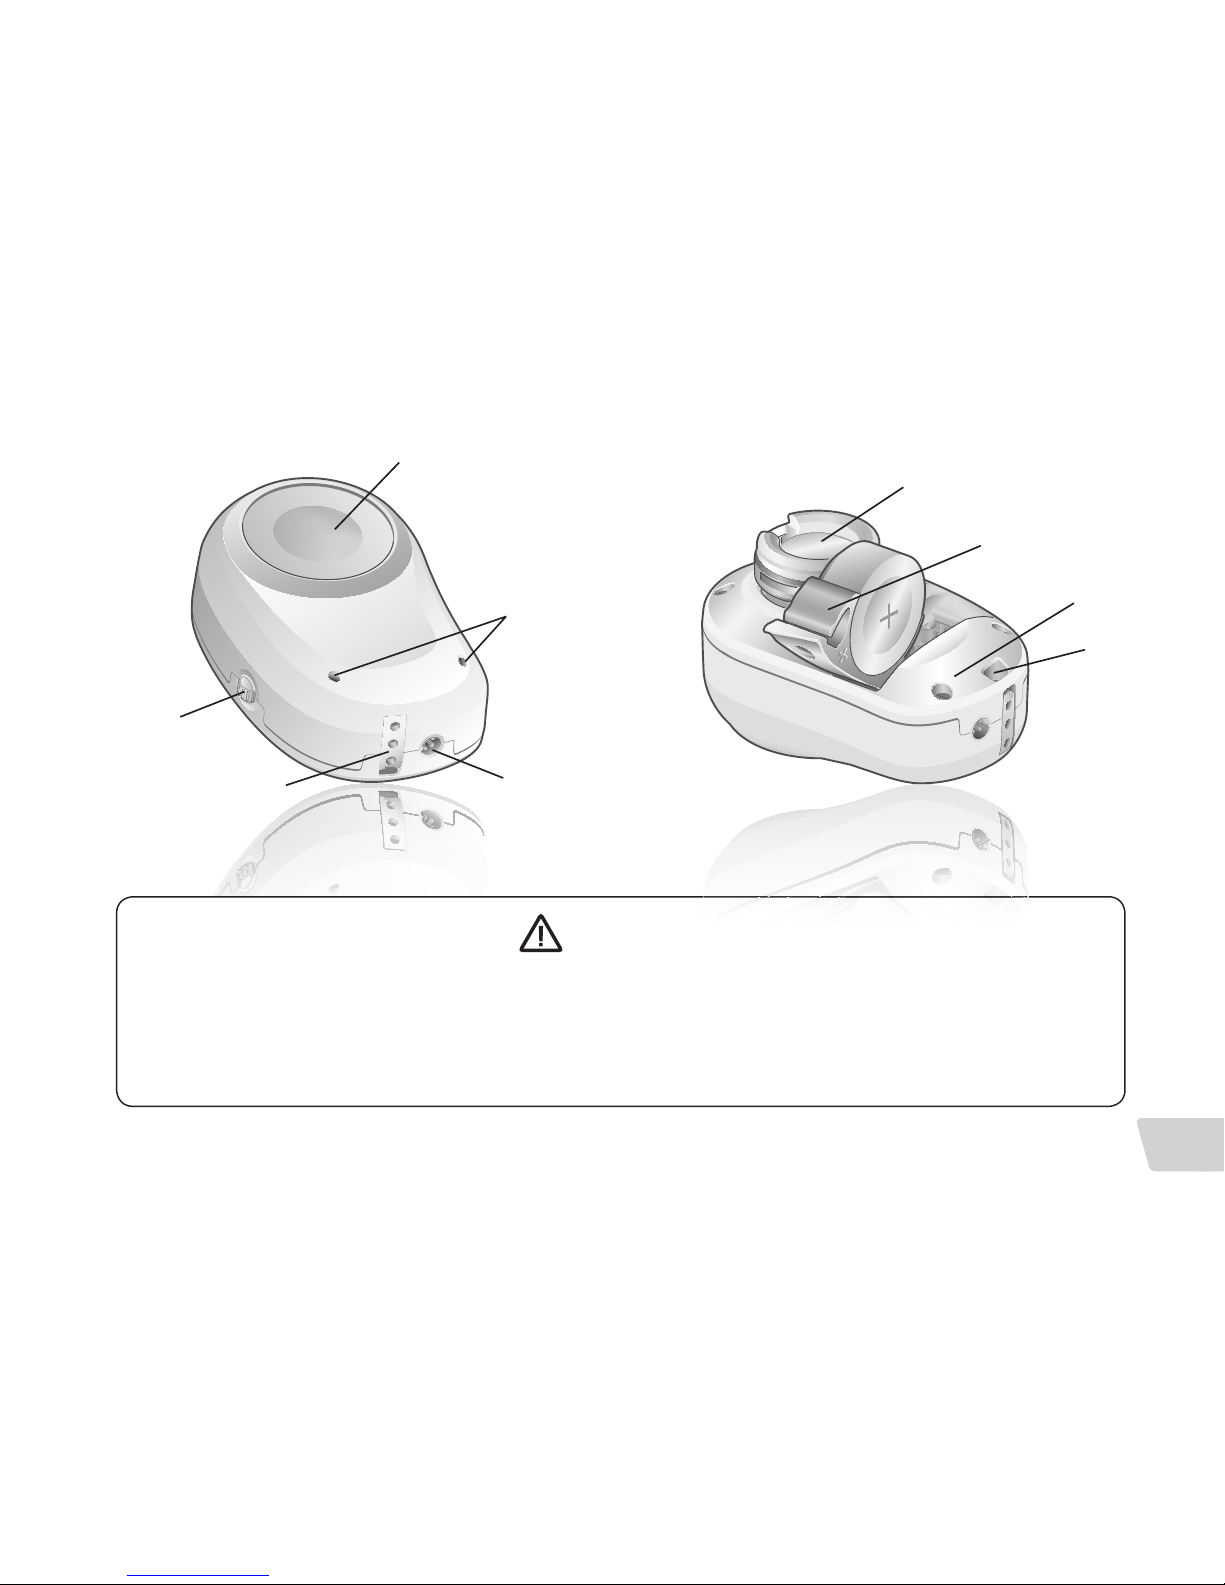
Instrument view
1. Push button for programs and stand-by/mute
2. Volume control
3. DAI (Direct Audio Input) connector
4. Microphones
5. Inlet for programming
6. Battery door (on/off, tamper-resistant)
7. Coupling
8. Hole for safety line
9. Labeling
Right or left version: Ponto Pro Power is available in a left and a right hand version. Each
sound processor is marked with an L (left) or R (right) on the battery door for easy
identification.
7
WARNING
The sound processor contains small parts that may be a choking hazard for small
children. Batteries can also be harmful if swallowed. Always keep batteries out of
reach of small children or people of diminished mental capacity. If a battery is
accidentally swallowed, seek medical attention at the nearest emergency department!
8
Managing the battery
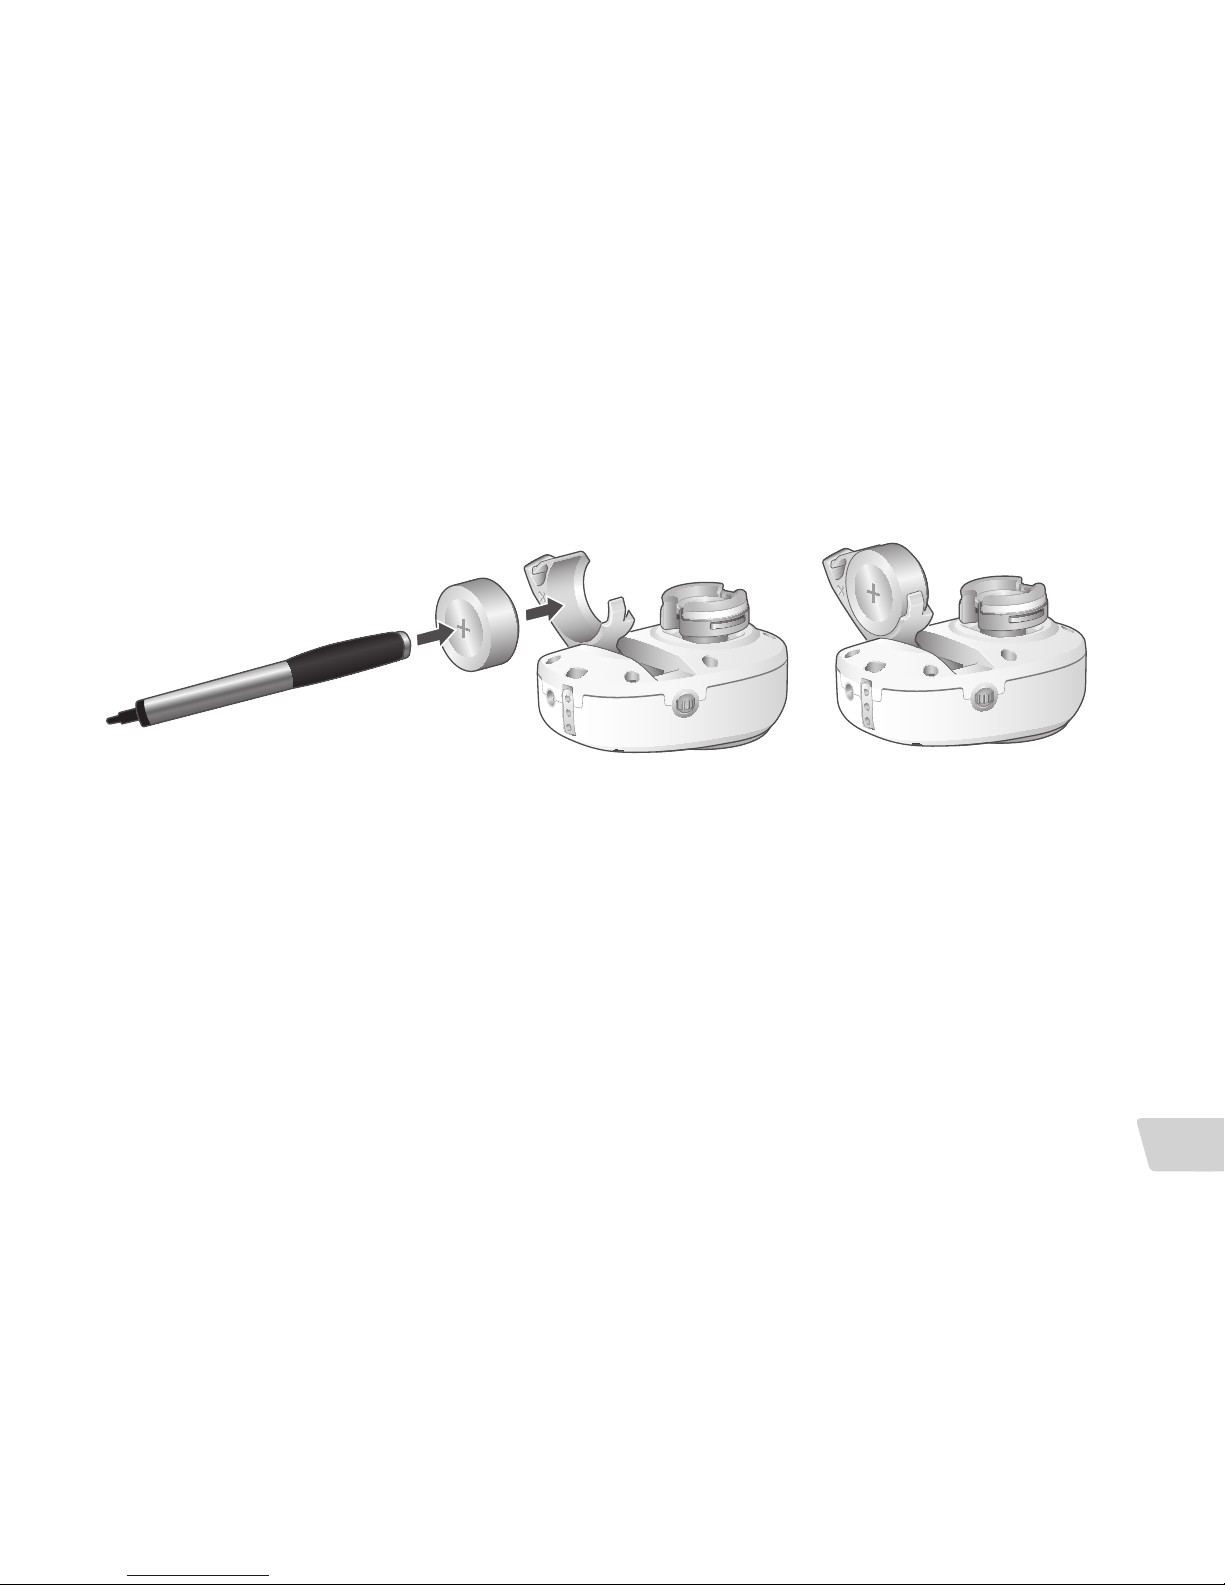
Battery insertion
Open the battery door and insert the battery with the plus-sign facing downwards on
the sound processor. Only high quality zinc-air batteries, type 675, are recommended.
The battery lifetime is usually between 80-160 hours.
Note: It is very important to insert the battery correctly to avoid damaging the battery
compartment. The batteries are not rechargeable.
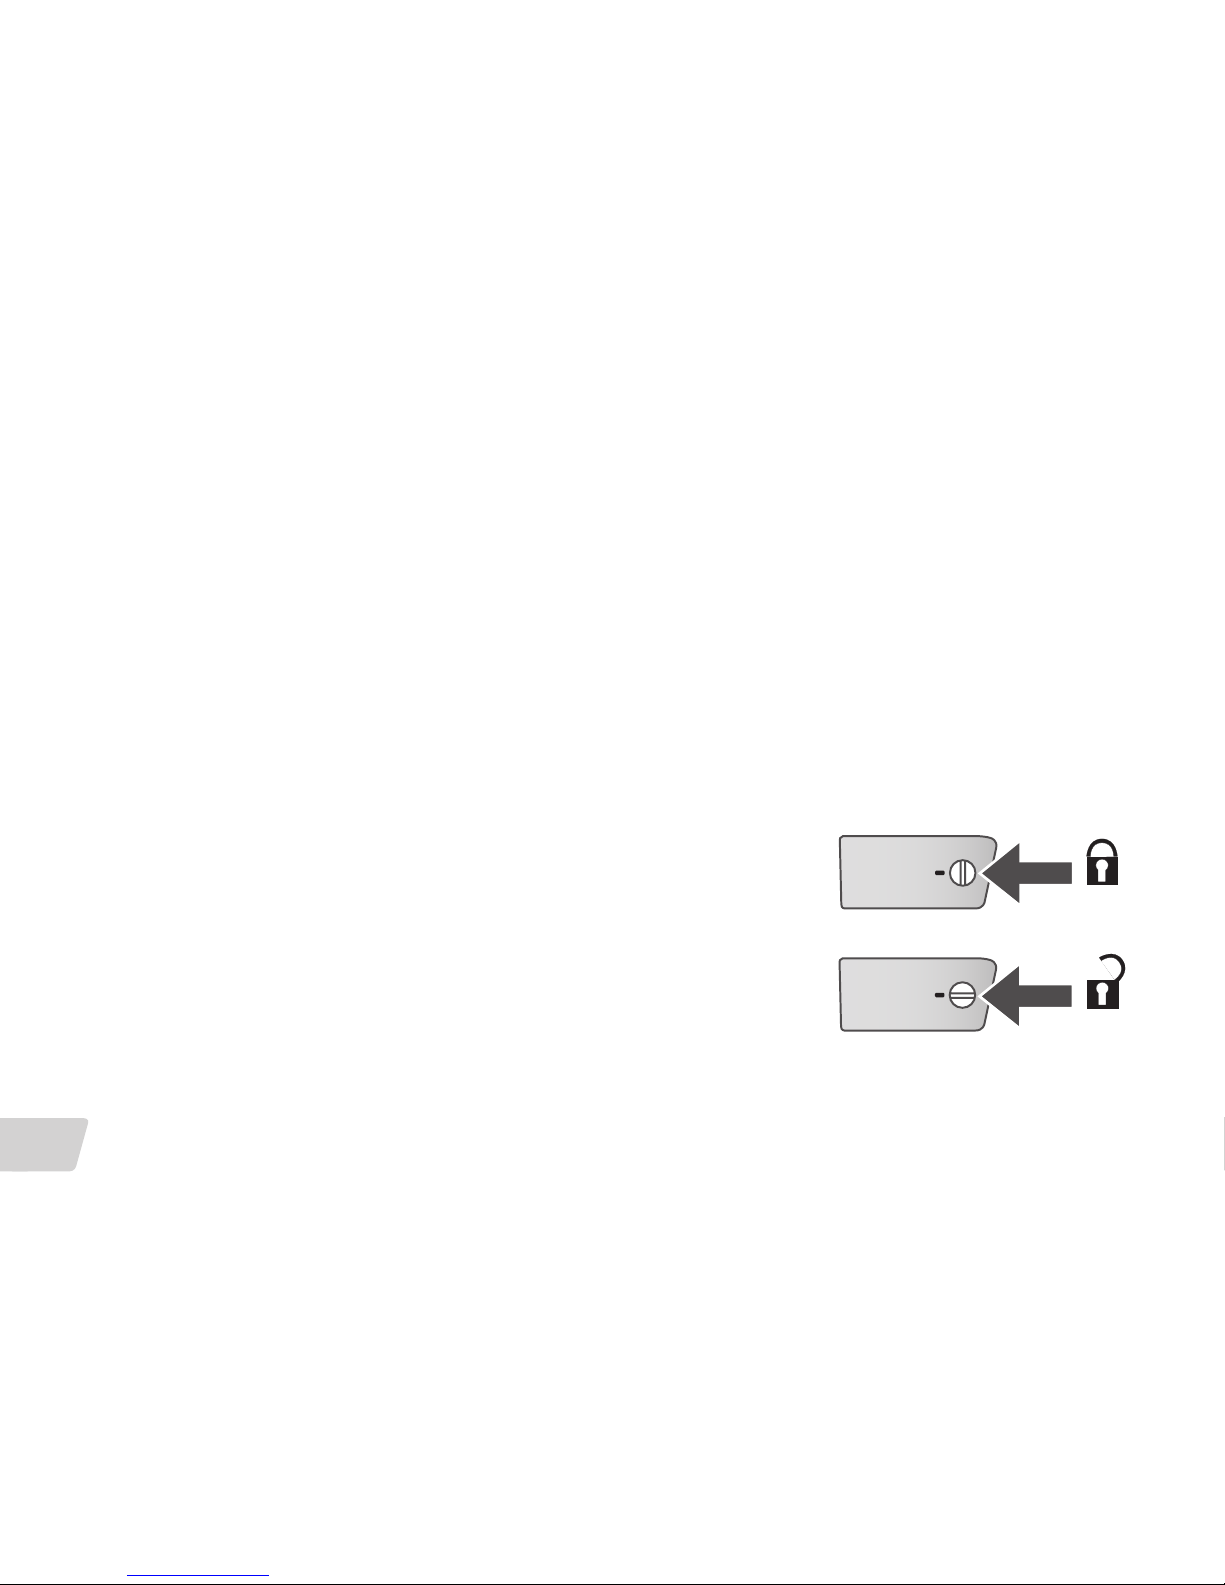
Tamper-resistant battery door
To lock the battery door: Make sure the door is completely
closed. Use the screwdriver in the battery removal tool to
turn the tamper-resistant screw to locked position.
To unlock the battery door: User the screwdriver in the
battery removal tool to turn the tamper-resistant screw
to unlocked position. The battery door can now be
opened and closed as usual.
9
Low battery indicator
Ponto has a low battery warning system. When it is time to change the battery you will
hear two consecutive beeps. When the battery is completely worn out this will be
indicated by four consecutive beeps.
Battery removal
After opening the battery door the battery can be removed. The small magnetic battery
removal tool delivered with your Ponto may facilitate battery removal and insertion.

10
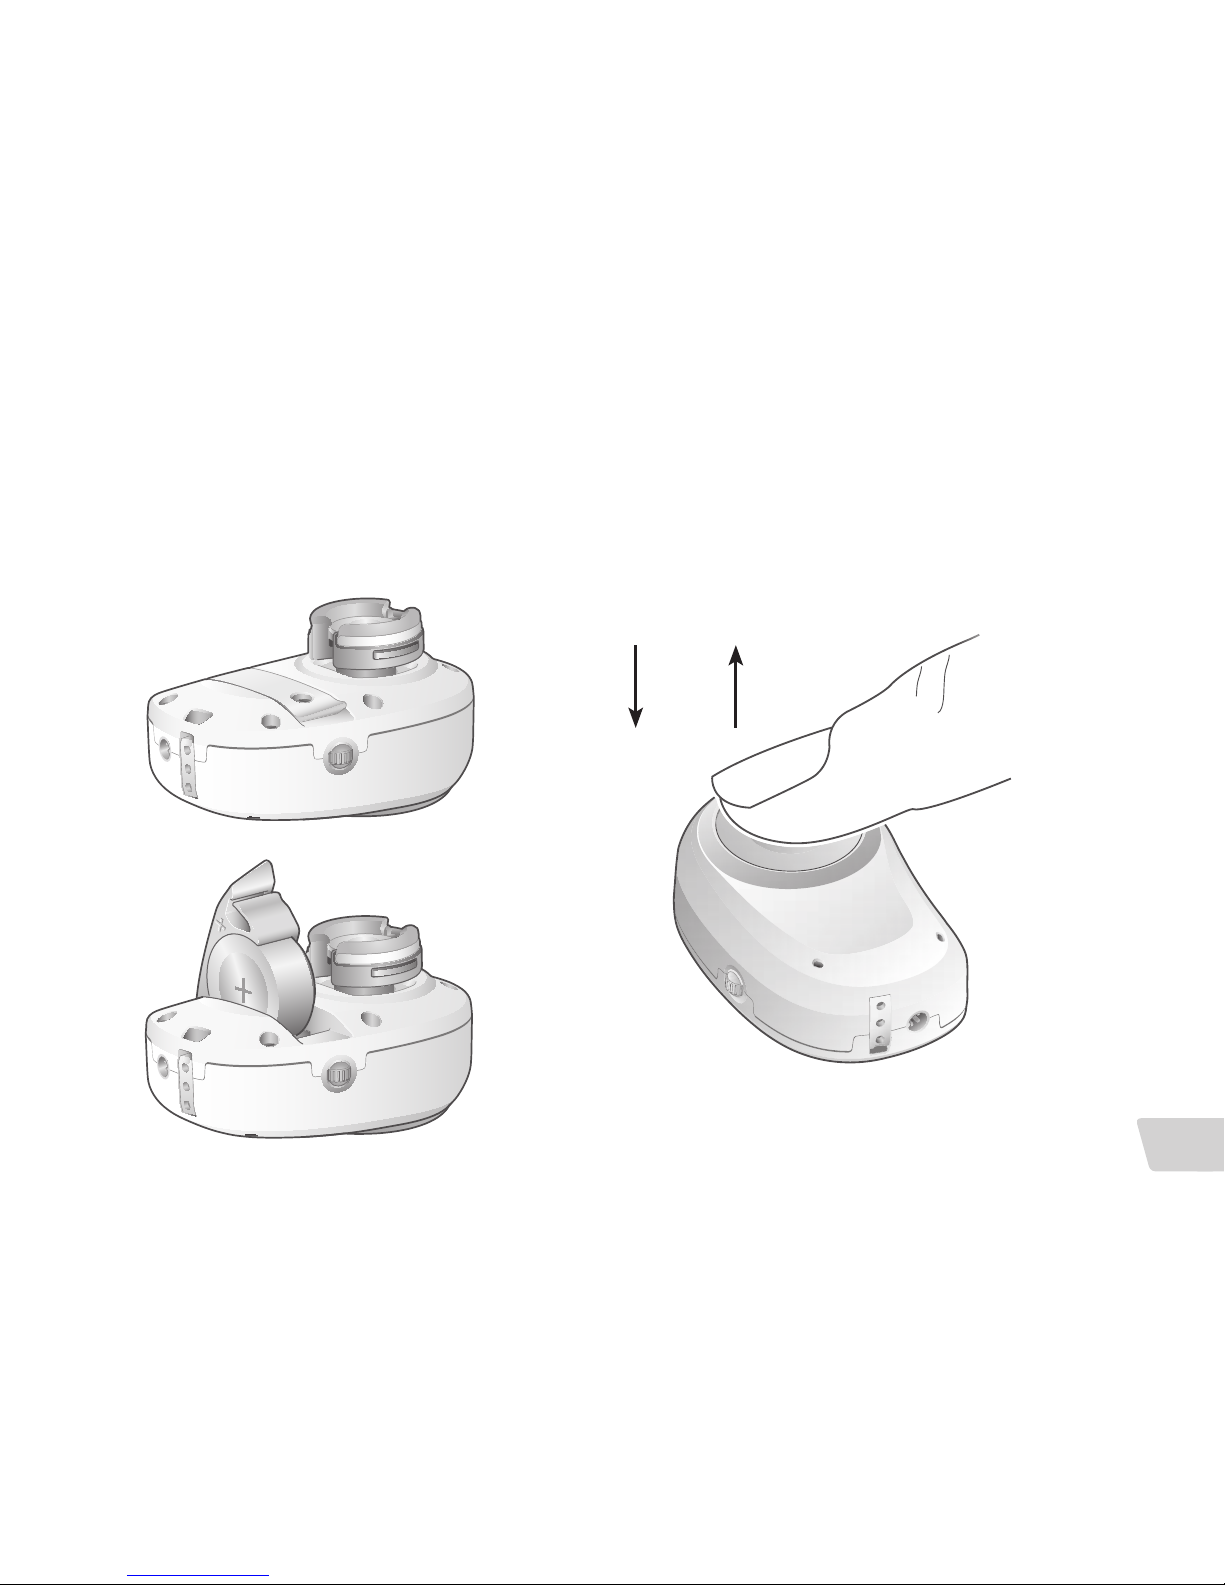
Turning it ON and OFF or stand-by
ON
Ponto is turned ON by closing the battery door. After a start up jingle there is a few
seconds’ delay before the sound processor is turned on. This will protect you from
uncomfortable noise while connecting the sound processor.
OFF
Ponto is turned OFF by opening the battery door. It is enough to open the battery door
halfway, this prevents the battery from falling out. During longer storage it is recommended to remove the battery from the sound processor.
STANDBY/MUTE
If you want to turn off the sound processor for shorter periods, press the push button
and hold until 2 beeps are presented and then release the button. The sound processor
will now be in stand-by/mute mode and the volume will be set to zero. To hear sound
again, shortly press and release the push button and Ponto will resume in its previous
setting. It is not recommended to use the stand-by mode during longer periods, more
than 5 hours, since this will reduce the battery lifetime.
11
ON STANDBY
OFF
Note: The stand-by feature is optional and may sometimes be disabled during the fitting
procedure. Talk to your hearing center if you have questions.
12
Connection
To safely and comfortably connect the sound processor, tilt it slightly and carefully push
it onto the abutment.
Note: It is important to keep your hair out of the way when the sound processor is
connected to the abutment.

13
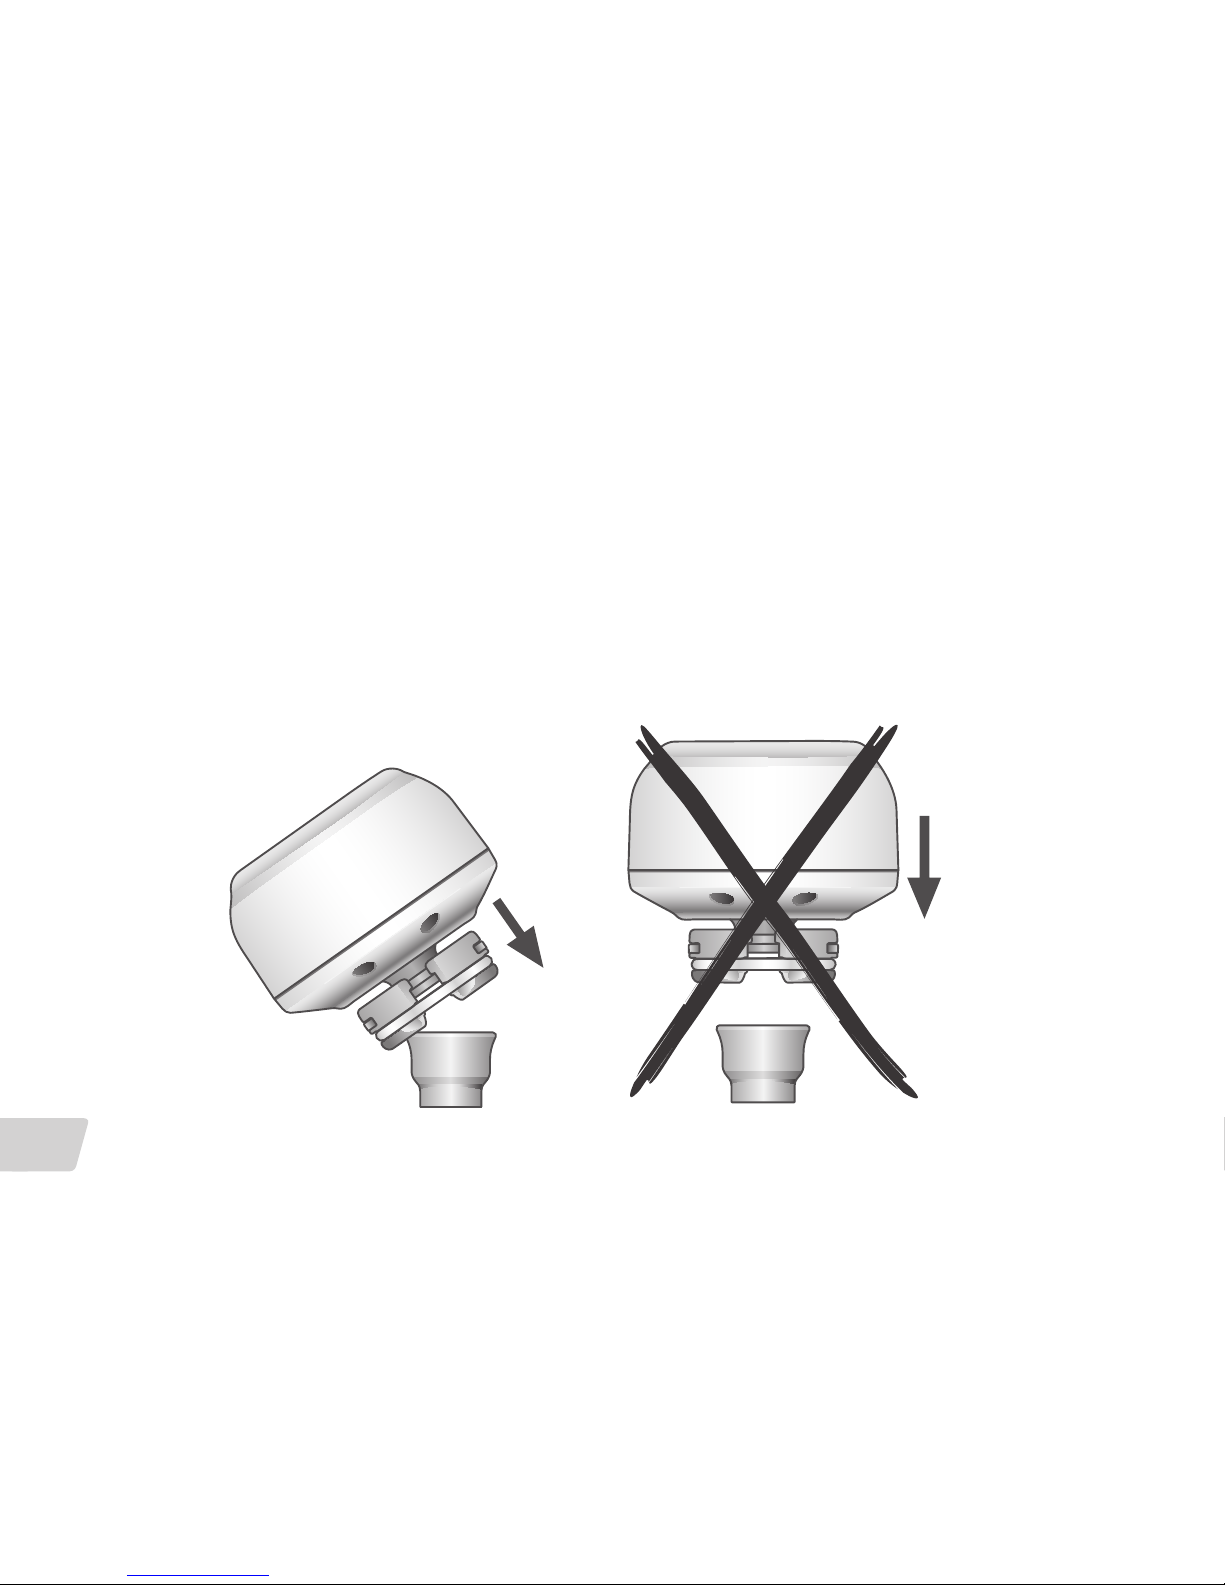
Disconnection
The sound processor is safely and comfortably disconnected by carefully tilting it away
from the abutment.

14
Correct position
To get optimum performance from the directional microphone system, the sound
processor should be positioned vertically with the microphones at the bottom and the
volume control facing backwards.
Note: It is very important that the sound processor does not touch anything, e.g. the ear,
skin or a hat. This can cause feedback (a whistling sound).
 Loading...