


906 73 810 00 / 10.09 Printed in Denmark
I N S T R U C T I O N S F O R U SE
A M I G O A R C

Important notice
Please familiarise yourself with the entire contents of this booklet before using
your Amigo Arc. The booklet contains various statements, safety instructions and
important information about the use and handling of the Amigo Arc.
Contents
Introduction 4
Typical package content 5
Getting started 6
What does Amigo Arc connect to 6
Overview 7
Charging the battery 8
Wearing Amigo Arc 9
LED legend 10
Button functionality 12
On/O/Scan button 12
Volume up and down 13
Audible indicators 14
Intelligent memory for your convenience 15
Exchangeable shells 16
Synchronising Amigo Arc 17
Cleaning of Amigo Arc 18
Appendix A: Troubleshooting 20
Amigo Arc features 22
Warnings and precautions 23
Introduction
Thank you for choosing Amigo Arc as your choice of neckloop receiver.
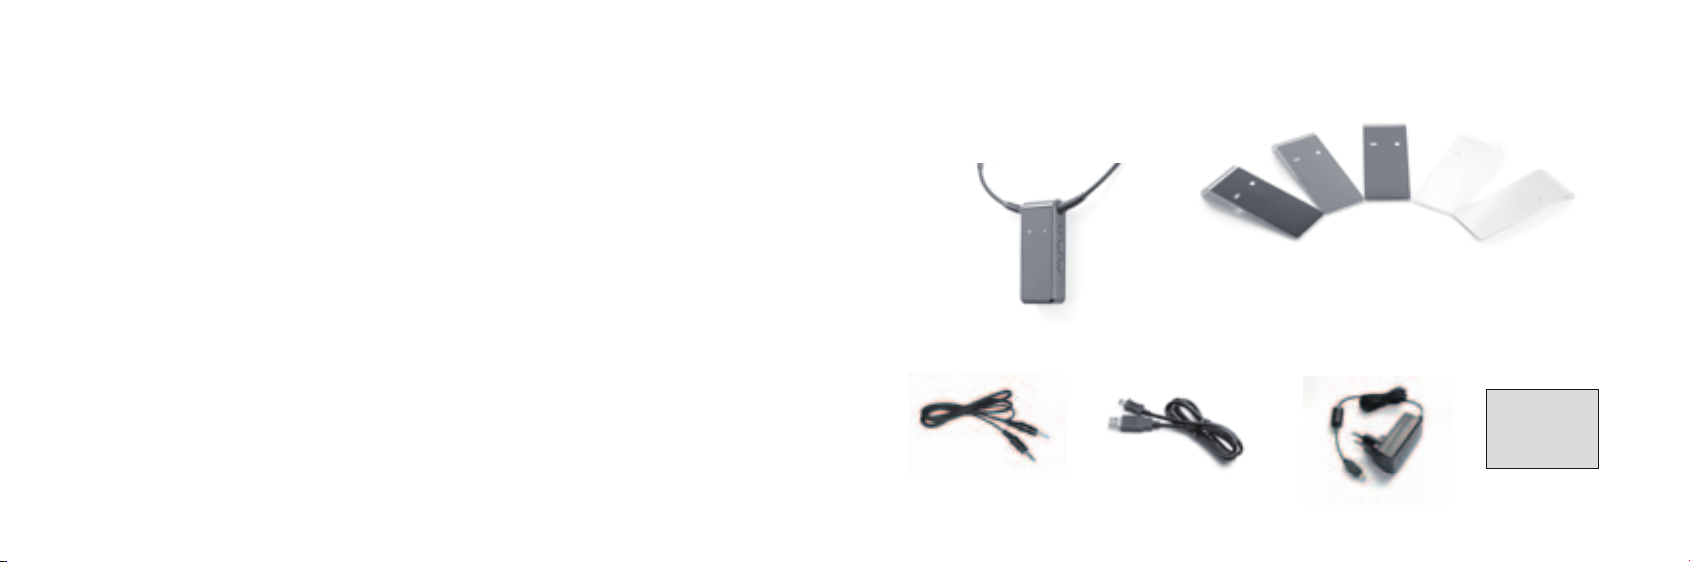
Typical package content
Amigo Arc belongs to the Amigo FM product family from Oticon – a company that strives to
provide superior solutions for school and home use.
The Amigo family is extremely versatile, making life much easier for users in academic,
professional and social listening situations.
The transmitters and receivers in the Amigo family are compatible with most types of
Behind-the-Ear hearing instruments, as well as cochlear implants, and Amigo Arc can also
be used for the ITE hearing instruments that have a telecoil.
4 5
Amigo Arc
Exchangeable shells
usB cord ChargerusB cable IFU
Getting started
Overview
LED indicator
What does Amigo Arc connect to
Amigo Arc can connect to all instruments with a telecoil, e.g. BTE, ITE, Cochlear Implants and
Bone Anchored hearing solutions.
Using an AUX cable, e.g. MP3 players can be connected to Amigo Arc through the AUX plug.
By changing the AUX plug to output, headphones can be attached, thus enabling Amigo Arc
to be used for CAPD.
Further, Amigo Arc works with all Amigo transmitters as well as other manufacturers’ transmitters.
6 7
Change plug
Exchangeable shell
ON/OFF + scan
Volume up/down - HI program change
Aux plug
For audio equipment
or headphones
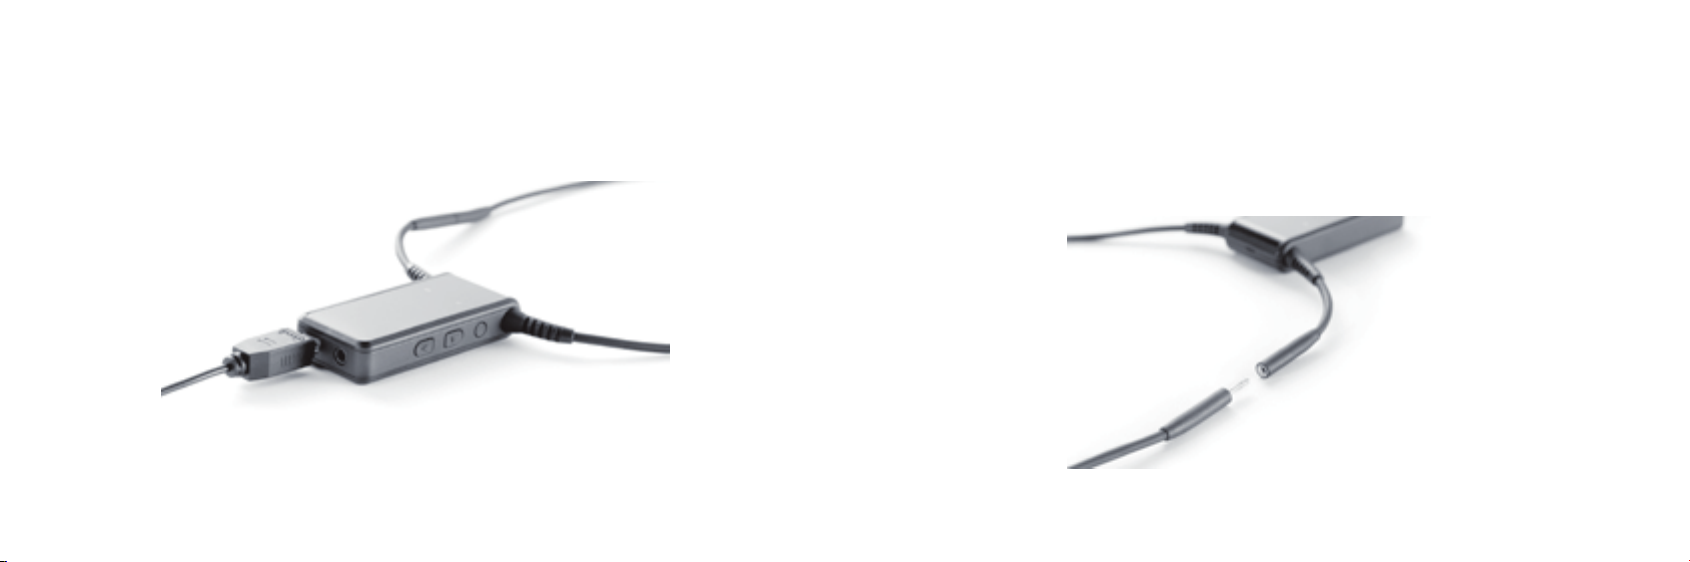
Charging the battery
Wearing Amigo Arc
The Amigo Arc uses a built-in rechargeable battery, which must be charged for 4 hours before being used for the first time. To charge the battery, remove the AUX plug and plug in the
charger as shown in the picture.
Note: It is also possible to charge Amigo Arc from a PC using the USB cable that is part of the
package. While charging, Amigo Arc will automatically shut o.
8 9
Amigo Arc is designed to be worn around the neck and it is possible to open the loop at the
jack, which is located at one side of the loop.
Simply open the jack, and pull the wire around the neck, and then close the jack again.
 Loading...