

Page 1
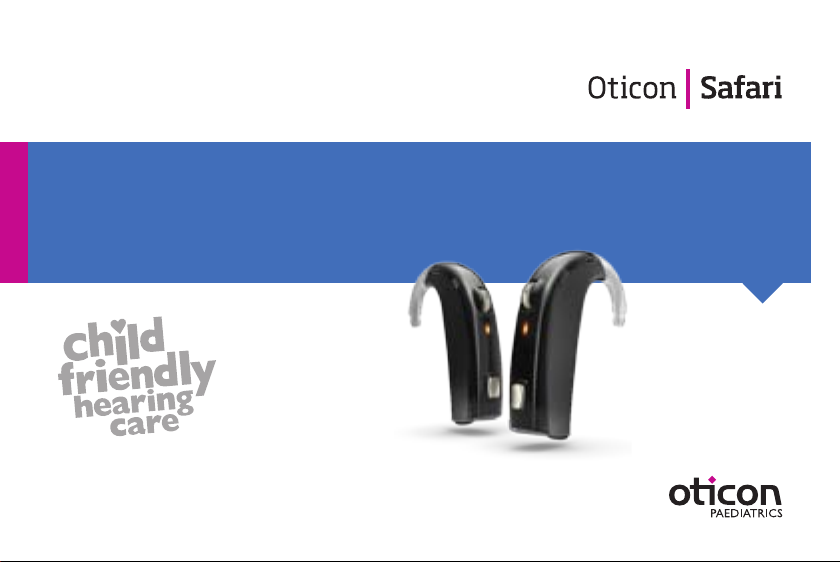
INSTRUCTIONS FOR US E BTE 13 SP
Page 2

Thank you
Contents
Thank you for choosing a Safari hearing instrument for yourself or your child.
To support your efforts, we have put great care and attention into making sure that
all new hearing instruments are of the highest quality and that they are easy to
use and maintain.
We recommend that you read this manual carefully to exploit the maximum benefit
of the hearing instrument.
We would like to congratulate you on your decision to actively improve your or your
childs hearing with today’s most advanced hearing technology in the market.
Instrument View – BTE 13 SP 5
Changing batteries 7
Tamper-resistant battery door (Optional) 9
Turning your instrument ON and OFF 10
Left/Right ear marking 11
Putting on the hearing instrument 12
Push-button 13
Programs (Optional) 14
Volume Control (Optional) 16
Volume Control and ConnectLine (Optional) 18
Stand-by (Optional) 19
Telecoil (Optional) 20
Auto Phone (Optional) 21
FM 23
DAI (Direct Audio Input) 25
Audible and visual indicators 27
Page 3

Caring for the hearing instrument 30
Avoiding heat, humidity and chemicals 36
Good communication habits if your child has a hearing loss 37
Seven easy steps to better hearing if you have a hearing loss 38
Common problems and their solutions 44
Warnings Yellow Pages
Instrument View – BTE 13 SP
Sound hook
Microphone
openings
Plastic tube
IMPORTANT NOTICE
Please familiarise yourself with the entire contents of this booklet before using the
hearing instru ments. It contains instructions and important informa tion about the use
and handling of the hearing instru ments and batteries.
The BTE 13 SP is a powerful hearing instrument. In case you are fitted with BTE 13 SP,
never allow others to wear your hearing instruments as incorrect or wrongful usage
could cause permanent damage to their hearing.
Volume
wheel
Visual indicator
(LED)
Push-button
Battery size: 13
Sound outlet
Ventilation
opening
Earmould
Battery door
5
Page 4

Changing batteries
A worn out battery should be removed immediately and
disposed of according to local regulations.
When the battery power is low, the visual indicator (LED)
blinks rapidly and continuously (if enabled), and the user
will hear 2 beeps (if enabled).
This pre-warning starts when the battery has only a few
hours of operation left. The 2 beeps will be repeated in
moderate intervals to indicate it is time to change the
battery.
If the battery runs out the instrument turns off. When that
happens, 4 beeps are played and the visual indicator (LED)
will turn off (if enabled) to indicate that the instrument is
no longer operating.
7
Page 5
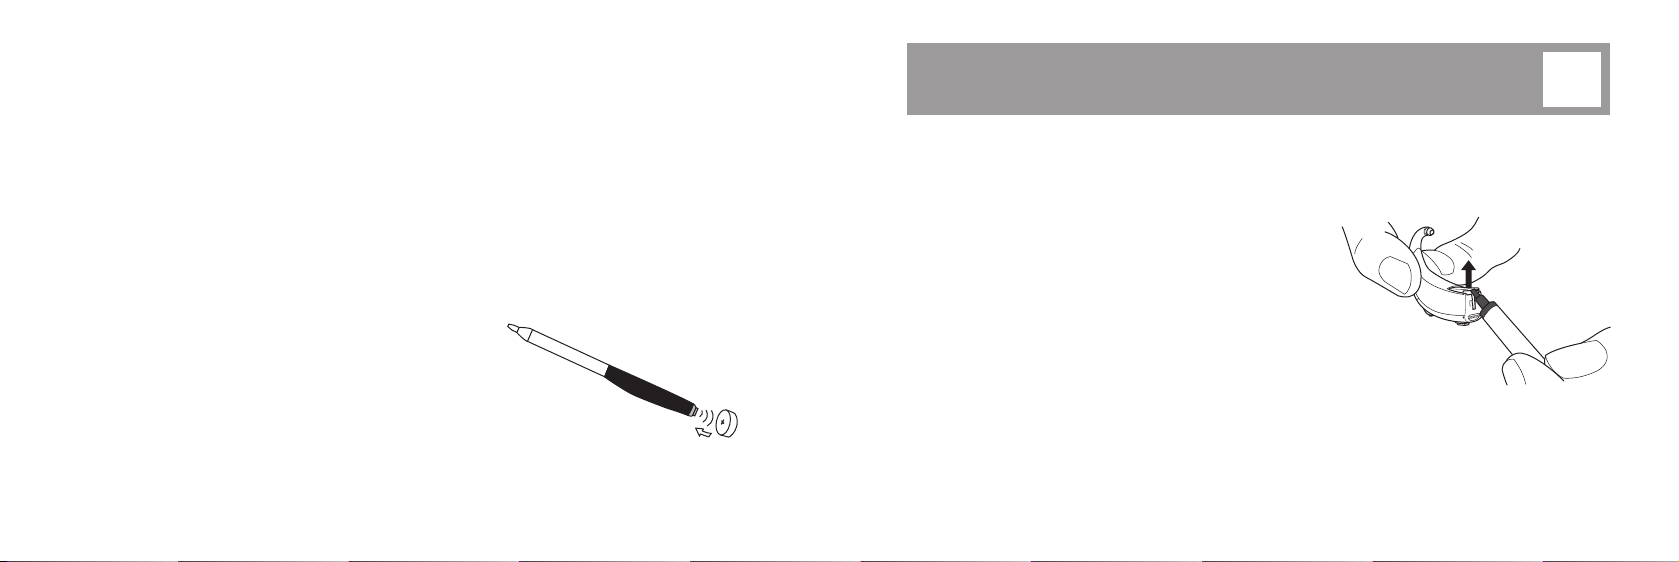
To replace the battery, follow these instructions:
• Open the battery door fully by pushing the raised edge on the bottom of the
instrument. Remove the old battery. To assist with the handling of the batteries,
the magnet placed at the end of the MultiTool can be used.
• Remove the sticky label from the + side of the new battery.
• The new battery may be inserted by using the magnetic end of the MultiTool.
Ensure that the positive (+) marking faces the positive (+) sign printed on the
battery door. Close the battery door.
BTE 13 SP – Tamper-resistant battery door
(Optional)
To keep the battery out of reach of small children and people with learning difficulties,
it is strongly recommended to use a tamper-resistant battery door on the hearing
instrument.
The battery door is designed only to be opened
using a tool. Use the MultiTool to unlock the door by
inserting it into the channel in the bottom of the
hearing instrument and push on the door to open.
Any moisture on the battery surface should be
wiped off before use.
After replacing the battery, it will take a few seconds
before the battery works to full capacity.
8 9
MultiTool
Important: Do not force the battery door beyond its
fully opened position. Make sure to insert the
battery correctly. Excessive force can deform the
battery door, which will reduce its tamper resistant
effectiveness.
Page 6

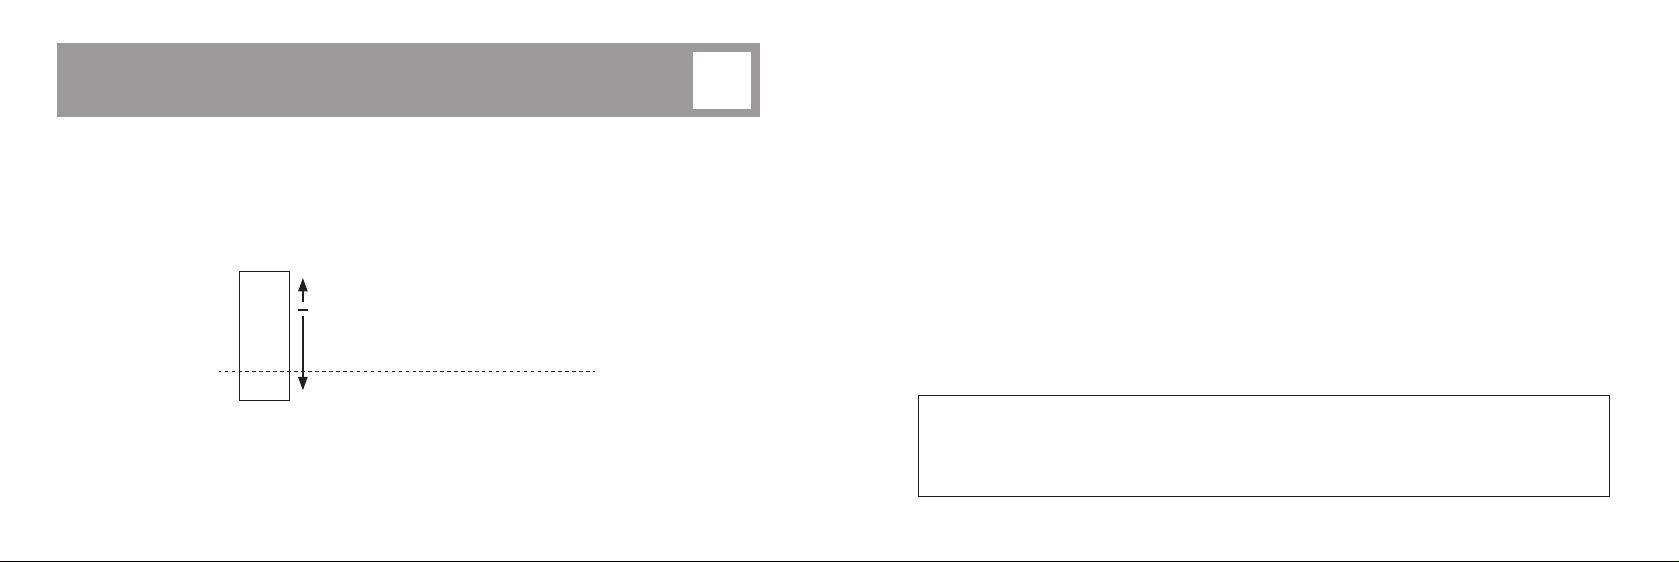
Turning your instrument ON and OFF
Left/Right ear marking
Turn ON the hearing instrument by closing the battery door completely with the battery
in place. If enabled the instrument will start up by playing a jingle and the LED will blink
according to program setting (see chapter about programs). This indicates that the
battery is working and the instrument is operating.
Turn OFF the hearing instrument by opening the battery door slightly until a “click” is felt.
To preserve the battery, make sure the hearing instrument is switched off when
not worn.
IMPORTANT NOTICE
Open the battery compartment
fully to allow air to circu late
whenever you are not using
your hearing instrument, e.g.
at night!
ON
Click
10 11
OFF
Click
Hearing instruments are fitted to the uniqueness of each ear, which means that if you
or your child has two instruments the left hearing instrument may be programmed differently from the right. Therefore, it is important to distinguish between the left and the
right hearing instrument.
In order to easily identify the left or right hearing instrument, colour markings may be
applied inside the battery door.
Blue marks the LEFT instrument.
Red marks the RIGHT instrument.
Page 7
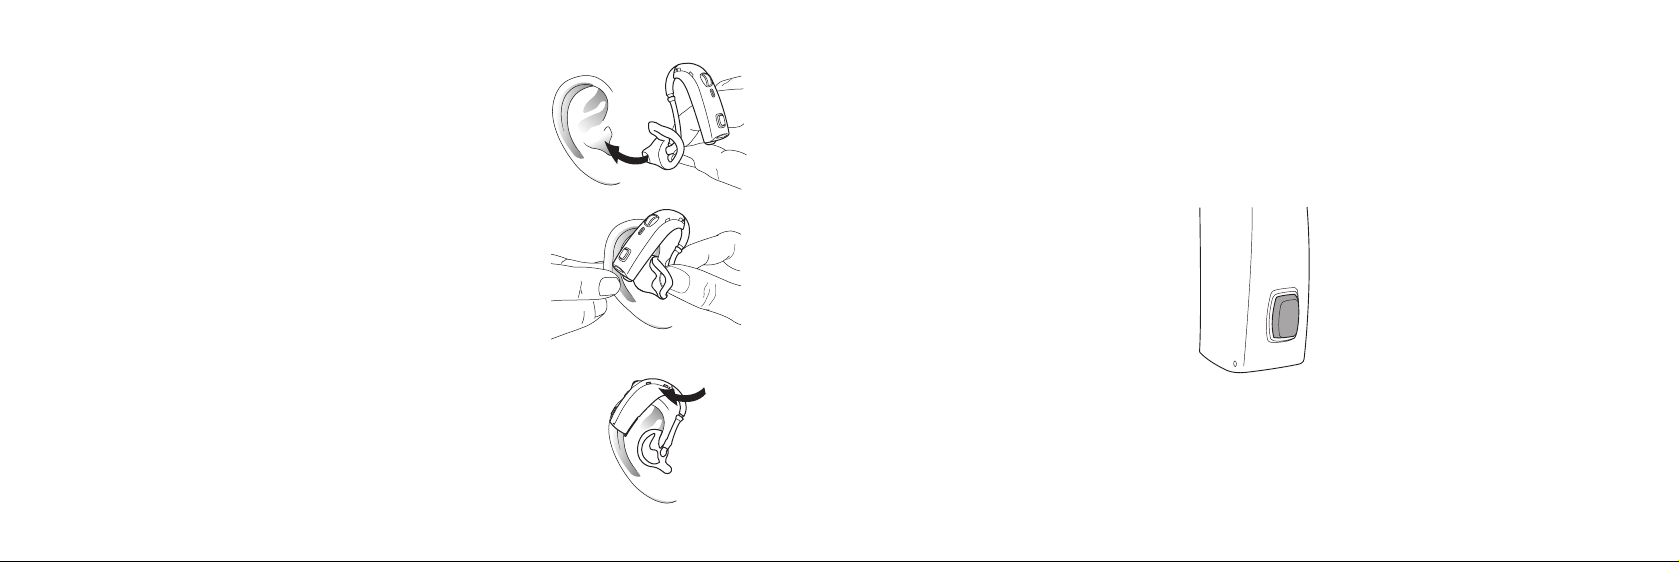
Putting on the hearing instrument
Push-button
Place the tip of the earmould in the ear canal, twisting
slightly, making sure that the top part of the earmould (A)
is pushed behind and under the fold (B) of the ear.
Gently pull up the ear and press the earmould in the
direction of the ear canal.
With the earmould positioned correctly in the ear, place
the hearing instrument behind the ear by lifting the base
of the hearing instrument over the top of the ear.
12 13
B
A
The hearing instrument has a push-button for switching between different programs.
Page 8
Programs (Optional)
The hearing instrument can have up to 4 different programs. When using FM or DAI
2 additional programs are automatically added (see chapters about FM and DAI for more
details).
When shifting between programs, the hearing instrument will beep to indicate to the user
which program is set. The visual indicator will show a corresponding blinking pattern.
Below you can see a description of the programs available in the hearing instrument.
To be filled out by the Hearing Care Professional!
Prg. 1:
Prg. 2:
Prg. 3:
Tone Visual indicator
One beep, when you switch to program 1 One blink
Two beeps, when you switch to program 2 Two blinks
Three beeps, when you switch to program 3 Three blinks
Four beeps, when you switch to program 4 Four blinks
Press the button to go to the next program e.g. from P1-P2.
14 15
Prg. 4:
Using 2 instruments
For ease of use, the push-button on one instrument can be programmed to change
the program on both hearing instruments (Binaural Coordination). This means, when
adjusting the program for one instrument, it automatically adjusts the other.
Page 9
Volume Control (Optional)
The volume wheel may be activated. The volume wheel allows the user to adjust the
volume in specific listening situations to the level he or she feels comfortable with.
The volume wheel has markings 1, 2, 3 and 4 and a ‘click’ position:
Setti ng
4 Loude r
3 No rma l s ound level – pref erred
2
So fter
1
‘c lic k’ In act ive (si lent )
The normal volume wheel setting is 3. When adjusting the volume to the normal level,
the user will hear a double beep (if enabled). If the Visual Indicator (LED) is enabled,
it will show a sequence 5 of rapid blinks.
16 17
When the wheel is turned below 1, you can feel a ‘click’ and the instrument will become
inactive and silent. Use the inactive setting if the user need to silence the instrument
while he or she has the instrument on.
Remember to adjust the volume to the normal setting 3 either before or after putting
the instrument on to assure good audibility.
IMPORTANT NOTICE
Do not use the inactive ‘click’ position as a switch off as the hearing aid still draws
power from the battery in this mode.
Page 10

Volume Control and ConnectLine (Optional)
Stand-by (Optional)
Make sure to set the volume control on the instrument in the 1 to 4 range to enable use
of the Streamer for remote control, phone calls and TV/music streaming. Streaming
cannot be initiated while the instrument volume control is set to the inactive
‘click’ position.
If the Streamer is used to adjust the regular hearing instrument listening volume, the
resulting volume will no longer match the indications on the volume wheel. Turning the
volume control to the inactive ‘click’ position and back into the 1-4 range or turning the
instrument off and back on will reset the volume to the setting indicated on the volume
wheel.
When adjusting the volume to the preferred level the user will hear a double beep
(if enabled). If the Visual Indicator (LED) is enabled it will show a sequence of 5 rapid blinks.
During audio streaming, adjust the volume on the Streamer. The Streamer will control
the volume independently of the setting of the volume wheel.
18 19
Push the button for a minimum of 3 seconds to set the instrument to stand-by mode.
Use this stand-by function to silence the instrument
while in operation.
To reactivate the instrument, push the button briefly again.
Note: Pushing either side of the button for 3 seconds
will set both instruments on stand-by.
Push 3 sec
IMPORTANT NOTICE
Do not use the stand-by function as a “switch off” as the hearing instrument still
draws power from the battery in this mode.
Page 11

Telecoil (Optional)
Auto Phone (Optional)
The telecoil is a receiver for audio signals transmitted from an inductive loop installation.
The telecoil is meant for telephone conversations and for loop systems in e.g. theatres,
churches or lecture rooms, marked with the following symbol.
The telecoil is activated by selecting the telecoil program using the push-button.
When activated, a certain number of beeps/blinks corresponding to the telecoil program
will be played.
See “Programs” to see where the telecoil program is placed.
20 21
The hearing instrument may have a built-in Auto Phone functionality. When the hearing
instrument is close to a telephone receiver, the Auto Phone will activate a Phone
Program. When the Phone Program is activated you will hear two short beeps.
When ending a telephone conversation, the hearing instrument will automatically return
to the previous program.
Not all telephones can activate the Auto Phone.
The telephone receiver must have a special magnet
fitted. Please follow the separate instructions for
mounting the magnet, available from your Hearing
Care Professional.
Page 12

FM
An FM receiver enables the hearing instrument to receive signals directly from an
external wireless FM transmitter.
WARNING
If you use an Auto Phone magnet:
• Keep magnets out of reach of children and pets. If a magnet is swallowed,
see a doctor immediately.
• Do not wear the magnet in a breast pocket and always keep it 30 cm away
from active implantable devices. Preferably, use the telephone with magnet on
the opposite side of a pacemaker or other active implantable devices.
• Keep the magnet 30 cm away from credit cards and other magnetically
sensitive devices.
22 23
Mounting of a dedicated FM receiver
Start by opening the battery door. Slide the FM receiver
onto the instrument. Alternatively, an FM adaptor (FM9)
can be used to connect to FM receivers with a 3-pin Euro
connection.
If the hearing instrument has only one program and the
FM receiver is connected and turned on, it will automatically
switch to a program that receives signals from the microphone in combination with an external wireless FM transmitter or from an external wireless FM transmitter only,
depending on configuration.
Instrument
FM receiver
Page 13

If the program push-button is enabled and you or your child wants to toggle between
standard programs and FM programs, simply use the push-button.
DAI (Direct Audio Input)
As long as the FM receiver is connected to the instrument two FM programs
(FM + microphone and FM only) will automatically be added after the standard programs,
which have been programmed into the instrument by the Hearing Care Professional.
For detailed instructions on handling and use of the FM receiver, please refer to the
relevant instructions for use of the FM product.
24 25
If the hearing instrument is connected by means of a DAI adaptor with an external sound
source, like a media player/MP3, body-worn FM receiver or hand mic, the signals of these
devices will be directly transferred to the hearing instrument.
Mounting of the DAI adaptor
Start by opening the battery door, slide the DAI adaptor
onto the instrument.
Insert the DAI cord into the adaptor.
If the hearing instrument has only one program and the
DAI adaptor is connected, it will automatically switch to a
combination of a DAI program and the microphone input of
the instrument, or DAI only, depending on configuration.
Instrument
DAI adaptor
Connector
Page 14

If the program push-button is enabled and you or your child wants to toggle between
DAI programs, simply use the push-button.
As long as the DAI adaptor is connected to the instrument two programs (DAI + microphone and DAI only) will automatically be added after the standard programs, which have
been programmed into the hearing instrument by the Hearing Care Professional.
IMPORTANT NOTICE
When the DAI is connected to mains-operated equipment, this equipment must
comply with IEC-60065, IEC-60601 or equivalent safety standards.
26 27
Audible and visual indicators
The instrument has two means of status indication, the audible beeps and a visual
indicator (LED). These indicators are configured by your Hearing Care Professional.
In the table below you find an overview of the behavior and the possible configurations
of the indicators.
Instrument
is turned ON
Instrument
is operating
and program
setting
Visual indicator
(LED: Light Emitting Diode)
During startup the LED is always lit.
After startup the LED will blink according
to the active program number when the
instrument is turned ON.
The blinking pattern indicates the
program setting:
P1: One blink followed by a pause and
then one blink and a pause, etc.
P2: Two blinks followed by a pause and
then two blinks and a pause, etc.
This feature can be disabled.
Audible beeps
The instrument will start up by
playing a jingle indicating that
the battery is working and the
instrument is operating.
No audible beeps.
Page 15

Program
switch
VC preferred
level setting
Visual indicator
(LED: Light Emitting Diode)
When changing program the LED will
change blinking pattern according to the
selected program number.
The volume control is programmed to
work at a certain level under normal
conditions. When this level is reached by
adjusting the volume control the LED
initiates a rapid blinking sequence, of
5 blinks.
This feature can be disabled.
28 29
Audible beeps
When you change program the
instrument will beep according
to the program selected.
Your volume control is programmed to work at a certain
level under normal conditions.
When this level is reached by
adjusting the volume control,
this is indicated by two short
beeps.
Using
accessories
with the
hearing
instrument
(FM, DAI,
Streamer,
Auto phone)
Battery low
warning
Visual indicator
(LED: Light Emitting Diode)
Accessory + microphone:
One long blink followed by one short
blink.
Accessory only:
One short blink followed by one long
blink.
Continuous rapid blinking. Two beeps every 15 minutes.
Audible beeps
Accessory + microphone:
One low tone beep followed by
one high tone beep.
Accessory only:
One high tone beep followed
by one low tone beep.
Page 16

Caring for the hearing instrument
Cleaning the instrument
Every ear canal produces ear wax (cerumen) which may clog up the sound outlet or the
ventilation opening of the ear mould. To prevent wax accumulation causing a change
in performance, the guidelines in this section should be followed.
When handling a hearing instrument, keep it over a soft surface to avoid damage
if dropped.
Before retiring at night:
• Make sure that there is no ear wax in any of the earmould openings since it may reduce
the hearing instrument’s efficiency.
• Open the battery door to allow air to circulate.
30 31
The multi-purpose tool contains a brush for the special purpose of cleaning the instruments. This should be used to ensure the best care and performance of the hearing
instruments.
MultiTool
Screwdriver
BrushCover Handle
Magnet
Page 17

Cleaning the earmould
Washing the earmoulds
• Clean away any traces of wax from around the sound
outlet with the brush.
• Clean the ventilation opening by pressing the brush
through the hole while twisting it slightly.
Use the cloth to clean the surface of the instrument.
Replace the brush when necessary. Just pull it out of the
handle and insert a new fresh brush. Press the new one
firmly into the handle.
Brushes can be purchased from the Hearing Care
Professional.
32 33
The earmoulds should be washed regularly:
• Firmly holding the sound hook of the hearing instrument
between two fingers, pull down the tubing gently to disconnect
the earmould.
• Wash the earmould in lukewarm water using a mild soap.
Do not use strong detergents.
• Rinse with water.
• Dry the earmould.
• Any water drops inside the earmould or tubing should be
blown out. A special device for this purpose (an earmould
blower) is available from the Hearing Care Professional.
Page 18

• Make sure the earmould and tubing are completely dry before they are reconnected to
the hearing instrument. Be careful that left ear earmould and tubing are connected to
the hearing instrument with left ear marking (blue) and vice versa for the right ear
instrument (red).
Replacing the tubing
The tubing in the earmould should be replaced when it becomes yellow or stiff.
Consult the Hearing Care Professional in relation to this.
IMPORTANT NOTICE
The hearing instrument itself must never be washed or immersed in water or other
liquids!
34 35
IMPORTANT NOTICE
• Only use parts designed for the hearing instruments.
• The cleaning tools should only be used for cleaning the tubing when it is detached
from the hearing instrument and not on the ear.
• The tube should never be used without the earmould attached.
• Proper preventive care and maintenance will go a long way toward ensuring
reliability and safe performance. Clean the sound tube on a regulary basis.
• Do not share the hearing instruments or any of the parts with other people.
• Ensure your hands are clean when handling the hearing instrument and its parts.
Page 19

Avoiding heat, humidity and chemicals
The hearing instrument must never be exposed to extreme heat e.g. left inside a parked
car in the sun. They must never be exposed to a lot of moisture e.g. steam baths, showers
or heavy rain. Nor must they be dried in microwave ovens or other ovens.
Good communication habits if your
child has a hearing loss
When you communicate with your child try to remember some basic rules which will help
your child understand and develop speech better.
Wipe the batteries carefully if moisture is present as it may affect their performance.
Using an anti-humidity kit can help to avoid these problems and may even extend the life
of the hearing instrument. Consult your Hearing Care Professional for further advice.
The chemicals in cosmetics, hairspray, perfume, aftershave lotion, suntan lotion and
insect repellant can damage the hearing instrument. Always remove the hearing
instrument before applying such products and allow time for the product to dry before
refitting the hearing instrument. If lotion is used, be sure to wipe hands dry before putting
on the hearing instrument.
36 37
1. Always face your child when speaking, preferably within 1-5 meters. Keep your face in
view. If you stand where your face is well lit, it makes it easier to see your facial
expressions and read your lips.
2. Try not to talk while chewing food. This makes it difficult to understand what you are
saying, and almost impossible for others to read your lips.
3. Don’t lean with your face on your hand, or sit behind newspaper when talking,
because this also makes lip-reading difficult.
4. Speak clearly, at a normal pace, and remember that you don’t need to shout. If your
child has trouble understanding you, try re-phrasing the word or sentence rather than
just repeating yourself.
5. Try to avoid background noise when talking to your child. Turn off the television and
close any open windows to muffle any noise from traffic. Either move closer to make
your voice louder than the background noise, or try to find somewhere quieter to talk.
Page 20

Seven easy steps to better hearing
if you have a hearing loss
It takes time to adjust to a new hearing instrument. How long this adjustment takes
differs from person to person. It will depend on a number of factors, such as whether
you have had a hearing instrument before and the degree of your hearing loss.
1. In the quiet of your home
Try to accustom yourself to all the new sounds. Listen to the many background sounds
and try to identify each sound. Bear in mind that some sounds will seem different from
what you are used to. You may have to learn to identify them again. Note that in time
you will get accustomed to the sounds in your environment – if not please contact your
Hearing Care Professional.
If using the hearing instruments makes you tired, take them off for a little while and
have a rest. Gradually, you will begin to be able to listen for longer periods of time.
Soon, you will be able to wear your hearing instruments comfortably all day long.
38 39
2. Conversation with another person
Sit with someone else in a quiet room. Face each other so you can read facial expressions
easily. You may experience new speech sounds, which can seem a little disturbing in the
beginning. However, after the brain has adapted to the new speech sounds, you should
hear speech clearer.
3. Listen to radio or TV
When listening to the TV or the radio, start out by listening to news commentators since
they usually speak clearly, then try other programs.
If you find it difficult to listen to TV or radio, ask your Hearing Care Professional for more
information regarding the Oticon ConnectLine system and other available accessories.
4. In group conversations
Group situations are usually accompanied by a greater degree of background noise, and
are, therefore, naturally more difficult to cope with. In such situations, therefore, focus your
attention on the person you want to hear. If you miss a word, ask the speaker to repeat.
Page 21

5. Telecoil use in church, theatre or cinema
Churches, theatres and public buildings often have loop systems installed. These systems
send out wireless sound to be received by the telecoil in your hearing instrument.
Typically, a sign will let you know whether the place has a telecoil. Ask your Hearing Care
Professional for details.
6. Using the telephone
When using the telephone, tilt the receiver edge lightly on
your cheek-bone and position the phone slightly over the
ear close to the hearing instruments microphone. The
sound then flows directly into the hearing instruments
microphone opening. This way, the hearing instruments
will not whistle and you ensure the best conditions to
understand the conversation. When you have the receiver
in this position, remember to speak directly into the
mouthpiece on the telephone in order to ensure good
understanding on the other “end of the line”.
Telecoil symbol
40 41
If you find it difficult to use the telephone, ask your Hearing Care Professional for more
information regarding the Oticon ConnectLine system and other available accessories.
All BTE hearing instruments have a telecoil built in. If your telephone has a built in
tele-loop, you can then switch into telecoil program in order to improve the sound
reception further.
Remember that the telecoil in your hearing instruments may pick up disturbing signals from
electronic devices, such as fax machines, computers, televisions or similar. Make sure
that the hearing instrument has a distance of 2-3 meters to such devices when using the
telecoil program.
7. Wireless and mobile phones
Your hearing instrument is designed to comply with the most stringent Standards of
International Electromagnetic Compatibility. However not all mobile phones are hearing
instrument compatible. The varying degree of disturbance can be due to the nature of
your particular mobile phone.
Page 22

If you find it difficult to obtain a good result while using your mobile telephone, ask your
Hearing Care Professional for more information regarding the Oticon ConnectLine system
and other available accessories.
The most important benefits of wearing two hearing instruments are:
• Your ability to localize sounds will improve.
Use your hearing instruments all day long
The best way to ensure better hearing is to practice listening until you can wear your
hearing instruments comfortably all day. In most cases, you will not get the full benefit
of the hearing instuments if you use them infrequently.
Your hearing instruments will not restore normal hearing. Nor will they prevent or improve
a hearing impairment resulting from a physiological condition. What they will give you,
however, is help towards making better use of the hearing ability that you have. If you have
two hearing instruments always wear both.
42 43
• It will be easier to understand speech in noisy surroundings.
• You will experience a fuller, more comfortable sound picture.
Page 23

Common problems and their solutions
Symptom Possible causes Solutions
No sound
Intermittent or
reduced sound
Squealing noise
No sound- and LED constant
lit or constant OFF
If none of the above solutions solves the problem, ask your Hearing Care Professional
for assistance.
Worn-out battery Change battery pg. 7
Clogged sound outlet Clean earmould pg. 32 to 34
Clogged sound outlet Clean earmould pg. 32 to 34
Moisture Wipe battery and instrument with dry cloth pg. 36
Worn-out battery Change battery pg. 7
Clogged damping filter in hook Contact your Hearing Care Professional for assistance
Hearing instrument inserted improperly Reinsert hearing instrument pg. 12
Ear wax accumulated in ear canal Have ear canal examined by your doctor
Worn-out battery Change battery pg. 7
44 45
Page 24

International Warranty
Your hearing instruments are covered by a limited warranty issued by the manufacturer
for a period of 12 months from the date of delivery. This limited warranty covers manufacturing and material defects in the hearing instrument itself, but not accessories such
as batteries, tubing, earwax filters etc.
Problems arising from improper handling or care, excessive use, accidents, repairs made
by an unauthorized party, exposure to corrosive conditions, physical changes in your ear,
damage due to foreign objects entering the device, or incorrect adjustments are NOT
covered by the limited warranty and may void it.
The above warranty does not affect any legal rights that you might have under applicable
national legis lation governing sale of consumer goods. Your Hearing Care Professional
may have issued a warranty that goes beyond the clauses of this limited warranty.
Please consult him/her for further information.
46 47
If you need service
Take your hearing instrument to your Hearing Care Profes sional, who may well be able
to sort out minor problems and adjustments on the spot.
Page 25

Warranty Certificate
Product approval, precautions and markings
Name of Owner:
Dispenser:
Dispenser Address:
Dispenser Phone:
Purchase Date:
Warranty Period: Month:
Model Left: Serial no.:
Model Right: Serial no.:
Battery Size: 13
The hearing instrument contains a radio transmitter using short range magnetic induction
technology working at 3.84 MHz. The magnetic field strength of the transmitter is
< -42 dBμA/m @ 10m.
The emission power from the radio system is well below international emission limits for
human exposure. For comparison, the radiation of the hearing instrument is lower than
unintended electromagnetic radiation from for example halogen lamps, computer monitors,
dishwashers etc. The hearing instrument complies with international standards concerning
Electromagnetic Compatibility.
Due to the limited space available on the instruments all relevant approval markings are
found in this document.
48 49
Page 26

Mobile Phone
“Some hearing instrument users have reported a buzzing sound in their hearing instruments
when they are using Mobile Phones, indicating that the Mobile Phone and hearing
instrument may not be compatible. According to the ANSI C63.19 standard (ANSI
C63.19-2006 American National Standard Methods of Measurement of Compatibility
Between Wireless Communications Devices and Hearing instruments), the compatibility
of a particular hearing instrument and Mobile Phone can be predicted by adding the
rating for the hearing instrument immunity to the rating for the Mobile Phone emissions.
For example, the sum of a hearing instrument rating of 2 (M2/T2) and a telephone rating
of 3 (M3/T3) would result in a combined rating of 5. Any combined rating that equals at
least 5 would provide “normal use”; a combined rating of 6 or greater would indicate
“excellent performance.”
The immunity of this hearing instrument is M4/T4.
50 51
IMPORTANT NOTICE
The performance of individual hearing instruments may vary with individual Mobile
Phones. Therefore, please try this hearing instrument with your Mobile Phone or,
if you are purchasing a new phone, be sure to try it with your hearing instrument prior
to purchase. For additional guidance, please ask your Mobile Phone provider for the
booklet entitled “Hearing instrument Compatibility with Digital Wireless Mobile
Phones.”
Page 27

The hearing instrument contains a module with:
Warnings
FCC ID: U28FUSPR01
IC: 1350B-FUSPR01
The device complies with Part 15 of the FCC rules and RSS-210 of Industry Canada.
Operation is subject to the following two conditions:
1. this device may not cause harmful interference.
2. this device must accept any interference received, including
interference that may cause undesired operation.
Changes or modifications not expressly approved by the party responsible for
compliance could void the user’s authority to operate the equipment.
52
104543UK / 08.10
You should familiarise yourself fully with the following general warnings and the entire
contents of this booklet before using your hearing instrument.
Hearing instruments and batteries can be dangerous if swallowed or used improperly.
Such actions can result in severe injury, permanent hearing loss, or can even be fatal.
• Hearing instruments, their parts, and batteries are not toys and should be kept out
of reach of anyone who might swallow these items or otherwise cause injury to
themselves.
• Never change the battery of the hearing instruments in front of infants, small children
or people with learning difficulties.
• Discard batteries carefully in a place where infants, small children or people with
learning difficulties cannot reach them.
• Batteries have occasionally been mistaken for pills. Therefore check your medicine
carefully before swallowing any pills.
• Never put your hearing instrument or batteries in your mouth for any reason,
as they are slippery and could be swallowed by accident.
Page 28

• Most hearing instruments can be supplied with a tamper-resistant battery compartment
upon request. This is strongly recommended for infants, small children, and people
with learning difficulties.
If a battery or hearing instrument is swallowed, see a doctor immediately.
Usage of hearing instruments
• Hearing instruments should be used only as directed and adjusted by your Hearing
Care Professional. Misuse can result in sudden and permanent hearing loss.
• Never allow others to wear your hearing instrument as incorrect/wrongful usage
could cause permanent damage to their hearing.
Battery use
• Always use batteries recommended by your Hearing Care Professional. Batteries of
low quality may leak and cause bodily harm.
• Never attempt to recharge your batteries. They may explode and cause serious injury.
• Never dispose of batteries by burning them. There is a risk that they will explode and
cause serious injury.
Dysfunction in hearing instruments
• Hearing instruments may stop functioning, for instance if the batteries have expired
or if the tubing is blocked by moisture or earwax. You should be aware of this possibility, in particular when you are in traffic or otherwise dependent on warning sounds.
Interference
• Your hearing instrument has been thoroughly tested for interference, according to the
most stringent international standards. But new technical developments constantly
bring new products into society, and some may emit electromagnetic radiation, leading
to unforeseen interference in hearing instruments. Examples include induction
cooking appliances, shop alarm systems, mobile telephones, fax machines, personal
computer devices, X-rays, Computer tomography etc.
• Your hearing instruments are designed to comply with the most stringent Standards
of International Electromagnetic Compatibility. However, your hearing instrument may
cause interference with other medical devices. Such interference can also be caused
by radio signals, power line disturbances, airport metal detectors, electromagnetic fields
from other medical devices and eletrostatic discharges.
Page 29

Possible side effects
• Hearing instruments may cause an accelerated accumulation of cerumen (ear wax).
• The otherwise non-allergenic materials used in hearing instruments may in rare
cases cause a skin irritation.
Consult a doctor if you experience any of these side effects.
Safety requirements regarding Direct Audio Input (DAI)
• The safety of hearing instruments with DAI (Direct Audio Input) is determined
by the external signal source. When the DAI is connected to mains-operated equipment, this equipment must comply with IEC-60065, IEC-60601 or equivalent safety
standards.
Warning to hearing instrument dispenser and user
• Special care should be excercised in selecting,fitting and using a hearing instrument
where maximum sound pressure capability exceeds 132 dB SPL (IEC 711) as there may
be risk of impairing the remaining hearing of the hearing instrument user.
• The included case for instrument storage has a built-in magnet. If you have an implantable device, such as pacemakers or defibrillators, the instrument case should not be
carried in a chest pocket or near to the chest.
104543UK / 08.10
Hereby, Oticon A/S declare that this hearing instrument is in compliance with
the essential requirements and other relevant provisions of Directive 1999/5/EC.
Declaration of comformity is available at:
Oticon A/S
Kongebakken 9
DK-2765 Smørum
Denmark
www.oticon.com
0543 0682
Waste from electronic
equipment must be
handled according to
local regulations.
N1175
104543UK / 08.10
Page 30

It ta kes a tru ly ded icate d a ppro ach to hel p c hil dre n w ith
hea ri ng prob lems ac hie ve t hei r f ul l p otent ial . T hat ’s why
we del iver t he s olut ion s a nd ser vice s that pro fes sion als an d
ca reg iver s ne ed to prov ide ch ild ren th e op por tun iti es they
de ser ve. Th is is what ch ild -fr iend ly hea rin g c are is al l abou t.
 Loading...