

Page 1
WiJET.G
802.11g Wireless Projector and Monitor Adapter
Technical Manual
www.otcwireless.com
Page 2

OTC Wireless, Inc
WiJET.G
802.11g Wireless Projector and Monitor Adapter
Technical Manual
Copyright
Information in this document is subject to change without notice. Complying with all
applicable copyright laws is the responsibility of the user. No part of this document may
be reproduced or transmitted in any form or by any means, electronically or
mechanically, for any purpose, without the express written permission of the seller. If,
however, your only means of access is electronic, permission to print one copy is
hereby granted.
The seller provides this documentation without warranty, term, or condition of any kind.
The seller may make improvements or changes in the product(s) and/or the program(s)
described in this documentation at any time.
Other product and company names herein may be trademarks of their respective
owners.
Copyright 2002-2004 OTC Wireless, Inc. All rights reserved.
Rev 1.0.4
WiJET.G Technical Manual
ii
Page 3

Table of Contents
Chapter 1: INTRODUCTION ....................................................................................... 1
Key Features........................................................................................................................... 2
Specifications.......................................................................................................................... 2
Chapter 2: WiJET.G SYSTEM INSTALLATION......................................................... 3
2.1 Safety Statements .......................................................................................................... 3
2.2 Hardware Installation ..................................................................................................... 3
2.2.1 Power......................................................................................................................... 3
2.2.2 VGA Connection ........................................................................................................ 3
2.2.3 Status LED’s .............................................................................................................. 3
2.2.4 Hardware Reset Button.............................................................................................. 3
2.3 Software Installation....................................................................................................... 4
2.3.1 System Requirements for User Software .................................................................. 4
2.3.2 Installation for the WiJET.G Software........................................................................ 4
2.4 System Requirements for Web-based Administration Utility ......................................... 4
Chapter 3: USING WiJET.G .......................................................................................6
3.1 Using the WiJET.G in a Meeting .................................................................................... 6
3.2 Starting the WiJET.G ..................................................................................................... 6
3.3 Configuring Computer to Control WiJET.G.................................................................... 8
3.4 Starting WiJET.G Presentation Session Manager......................................................... 8
3.5 Configuring the Wireless Adapter to Connect WiJET.G .............................................. 10
3.5.1 Configure the Wireless Network Adapter................................................................. 10
3.5.2 Configure the Wireless Adapter for Windows XP .................................................... 10
3.6 WiJET.G Running as Infrastructure Station ................................................................. 13
3.7 Start or Resume Your WiJET.G Presentation Session................................................ 13
3.7.1 “Select Units to Connect”......................................................................................... 14
3.7.2 “WiJET.G is currently in session” Message ............................................................. 14
3.8 Release Your WiJET.G Presentation Session............................................................. 14
3.9 Exit the WiJET.G Presentation Session Manager ....................................................... 15
Chapter 4: WEB-BASED ADMINISTRATION UTILITY............................................ 16
4.1 Introduction to the Web-Based Administration Utility................................................... 16
4.2 Access the Web-Based Administration Utility .............................................................. 16
4.3 Configure the WiJET.G Using Administration Manager............................................... 17
4.3.1 WiJET.G Firmware Version ..................................................................................... 18
4.3.2 Configuration............................................................................................................ 18
4.3.3 Administration .......................................................................................................... 20
4.3.4 Firmware and Banner Page Upload ........................................................................ 22
Chapter 5: TROUBLESHOOTING ............................................................................ 24
5.1 Unable to Connect or Establish a Session with WiJET.G............................................ 24
5.2 The Presentation screen appears frozen during a presentation.................................. 24
5.3 The WiJET.G Session is Interrupted During a Presentation........................................ 25
5.4 Radio Interference........................................................................................................ 25
Appendix A: LIMITED WARRANTY.............................................................................. 26
Wireless LAN Hardware........................................................................................................ 26
Appendix B: REGULATORY COMPLIANCE................................................................ 27
FCC Part 15 Declaration of Conformity (DoC)...................................................................... 27
FCC ID: MKZWIJET11G....................................................................................................... 27
FCC Rules and Regulations - Part 15 .................................................................................. 27
European Community (EC) Directives Conformity and Restrictions .................................... 28
WiJET.G Technical Manual
iii
Page 4

Chapter 1: INTRODUCTION
The WiJET.G is an IEEE 802.11g compliant product designed specifically for wirelessly
connecting projectors and monitors to computers. It connects to the existing VGA
connector of the projector/monitor and offers 802.11g connectivity up to 54 Mbps.
The advantages of the WiJET.G become obvious in any conference room where the
ideal location of the projector or display screen makes it difficult for a laptop or desktop
to connect to it while allowing the speaker to maintain audience interest. All too
frequently, projectors placed in the middle of the room force the speaker to present
from the middle of the room, because of the VGA cable that exists between the
projector and the presenter’s laptop.
The WiJET.G solves this problem by allowing any laptop or desktop with an 802.11g
Wi-Fi adapter to give the presentation from anywhere in the conference room that the
presenter desires. Wherever the presenter feels would garner the most amount of
interest from the audience. Truly freedom from wires allows for more flexibility in
meetings.
Another application of the WiJET.G is in a situation where multiple presenters must
give presentations in rapid succession. The WiJET.G allows for fast handover of the
projector or monitor without the hassle of removing and reattaching the VGA cable.
Using the easy-to-use Presentation Session Manager, the presenters can effortlessly
connect to the WiJET.G, give a presentation, and disconnect from the WiJET.G to allow
another user to connect to it without touching a single cable.
A third application that showcases the advantages of the WiJET.G is where there are
multiple conference rooms with multiple projectors. A WiJET.G in every conference
room will substantially save setup time when the presenter comes into the room. The
presenter only simply selects the WiJET.G number displayed on the projector/monitor
screen and he is instantly connected to the projector and able to start his presentation.
This removes a lot of setup time associated with presenters moving from room to room
to give their presentations, ultimately saving IT costs.
In summary, the WiJET.G is a tool that will change how people come to view
conferences and meeting rooms. Instead of a static meeting place, the conference
rooms can now become a dynamic meeting place where new thoughts and ideas are
exchanged and created.
WiJET.G Technical Manual
1
Page 5

WiJET.G Wireless Projector/Monitor Adapter
Key Features
Interoperable with any PCs/Laptops equipped with Windows OS and an industry standard IEEE
802.11g-compliant wireless interface cards
Simple user interface with the supplied client software
Plug & Play—
o Operating as AP for easy wireless connection from any PC
o Operating as an Station for joining any existing wireless network
o Automatically scanning for the clearest channel and avoiding duplicate SSID as AP
o No need to change IP address settings of the wireless card in a user’s PC
Maximum 54 Mbps data rate with automatic fall back to maintain best link connection
Direct access to video buffer to allow fast real-time updates of the projected images - no long and
embarrassing pauses or broken images
Up to1024x768 resolution for optimized speed/resolution tradeoff
Automatic re-connect of sessions/ wireless link
User customizable WiJET.G-ready banner image to allow the display of information such as
meeting agenda, conference logo, etc. before and between presentations
Web browser based administration utility for upgrading firmware and setting encryption keys
Standard VGA connector to allow the use with any presentation projector
Up to 6 simultaneous wireless display support available with additional units
Specifications
Model
Standard
Projector/Monitor Interface
Display resolution & color
Software supplied
Frequency
RF Channels
Transmission power
Receiver sensitivity
Antenna
Data Rate
Modulation
Link Distance
Network Types
Network Security
DC Voltage
Current consumption
LED Indicators
Dimensions
Operating Temperature
Operating Humidity
Regulation Compliance
WiJET.G
802.11g
Standard 15-pin VGA connector
Automatically set to user’s display resolution up to XGA (1024x768)
Automatically set to user’s color depth up to 16-bit True-Color
User software run on Windows 98/ NT4/ ME/2000/ XP
Web-browser-based Administration Utility to allow user to upload
customized banner page, set WEP, set channel and upload firmware
upgrades
2.4GHz – 2.483GHz
11 channels (US, Canada), 13 channels (Europe), 13 channels (Japan)
14dBm at antenna input typical
-80dBm @1e-5 BER typical
Support antenna diversity with one externally connected (RSMA
connector) Dipole antennae with ~5dBi gain and an internal dipole
antennae with ~0 dBi gain
54 Mbps maximum with multiple user selectable fall back data rates.
OFDM, Direct Sequence Spread Spectrum
~1200 ft in open space; 300 ft typical indoor environment
AP mode for dedicated presentation link and other traffic as desired.
64bit or 128-bit WEP
5V
1.7A (max. reached in transmit-mode)
Power, Wireless Link
4.4”x6.25”x1.5”
-10°C – +50°C
10% to 85% non-condensing
FCC, CE
WiJET.G Technical Manual
2
Page 6

Chapter 2: WiJET.G SYSTEM INSTALLATION
2.1 Safety Statements
Use only the power adapter provided with this product or the manufacturer's authorized
replacement power supply.
Connect the power adapter to a properly grounded electrical outlet that is near the
product and easily accessible.
Refer service or repairs, other than those described in the user documentation, to a
professional service person.
2.2 Hardware Installation
2.2.1 Power
Power is supplied to the WiJET.G via a 1.7 amps 5 volt DC power adapter.
Warning: use only the power supply adapter provided with this product or the
manufacturer’s authorized replacement power supply.
2.2.2 VGA Connection
This is a standard 15 pin female VGA connector where you will connect the WiJET.G
to either a monitor or a projector via a straight-thru monitor cable (either purchased
separately or with the one that comes with the projector or mon
itor).
2.2.3 Status LED’s
There are two status LED’s on the WiJET.G. From the front of the unit, the LED on the
left is the power indicator while the LED on the right is the link status and video out
indicator. During boot-up, the link status LED will initially remain unlit. When the link
LED blinks red, it means the WiJET.G is ready for connection to a PC. Upon
connection from a computer, the LED will turn solid green. Upon disconnection, the
LED will revert to blinking red again.
2.2.4 Hardware Reset Button
The hardware-reset button is located at the back of the WiJET.G. It requires a bent
paper clip to access the hardware-reset button. The main function of the hardwarereset button is to reset the WiJET.G unit back to the factory default settings. However,
to perform the reset to factory default, the procedure below has to be followed.
1. Turn on or reboot the WiJET.G
2. During the boot-up screen, a message “Reset to factory default” timer starts
appears and the user will have approximately 10 seconds to do the following
step.
3. Push the hardware reset button on WiJET.G unit before the timer ends. The
WiJET.G shall automatically reboot itself.
WiJET.G Technical Manual
3
Page 7

4. Observe that, during the next boot-up screen after above steps, a message of
Reset to Factory Default should appear next to the Timer message. It indicates
the operation is successful.
Note: The subsequent boot-up screen should not display the Reset to Factory
Default message unless being triggered using above procedure or having
corrupted data in the WiJET.G.
Caution: Please note that resetting the WiJET.G to its factory default means losing
all configurations and encryption information you may have set through the
web interface!
2.3 Software Installation
The following details the steps involved in installing the software needed to control the
WiJET.G.
2.3.1 System Requirements for User Software
To use the WiJET.G software, your computer must meet the following requirements.
• Wi-Fi or IEEE 802.11g enabled computer (either built-in or add-on NIC);
• (Optional) Wi-Fi or IEEE 802.11g Access Point
• Windows 98/NT4/ME/2000/XP; and
• Minimum equivalent processing power of Pentium 3 at 750 MHz and 64MB of
RAM.
2.3.2 Installation for the WiJET.G Software
This step is optional for those who simply want to run WiJET.G Presentation Session
Manager (PSM) without the administration capability. WiJET.G PSM can be executed
on CD-ROM without being installed to the local hard drive. To install the WiJET.G
utility software on your local hard drive, insert the Installation CD in your computer’s
CD-ROM drive. A selection window would automatically start and the user can choose
to run the PSM from CD-ROM or to install the PSM onto the local hard drive. If the
selection window does not automatically start, go to “My Computer”, double click on
the CD-ROM Drive where the Installation CD is located, and run “setup.exe”.
2.4 System Requirements for Web-based Administration Utility
WiJET.G has a Web-based Administration Utility for configuring the settings of the
WiJET.G. The web-based Administration utility can be accessed through the icon
located on the system tray once a session has been established. To use the WiJET.G
Web-based administration utility, the computer must meet the following requirements:
(1) A Web browser must be installed on the computer. The supported Web browsers
include Internet Explorer 5.0 and above. JavaScript for the browser must be enabled.
(2) IEEE 802.11b/g or Wi-Fi enabled computer (either built-in or add-on NIC).
WiJET.G Technical Manual
4
Page 8

See Chapter 4: for detailed information on how to configure the WiJET.G using Webbased Utility.
WiJET.G Technical Manual
5
Page 9

Chapter 3: USING WiJET.G
3.1 Using the WiJET.G in a Meeting
In addition to the obvious convenience with wireless connection, the most important
benefit of eliminating the VGA cable in using presentation projectors or monitors is to
enable fast handover of the projector or monitor control among multiple meeting
participants. The WiJET.G Presentation Session Manager (PSM) provides a simple
user interface allowing quick rotation of presentation among multiple presenters. The
following simple steps sketch out how a successful WiJET.G Wireless Presentation
Meeting unfolds:
1. Copies of the WiJET.G installation CD are kept with the WiJET.G in the meeting
room. The meeting host, before the presentations start, identifies the meeting
participants who do not yet have the WiJET.G Presentation Session Manger
installed on their computers and hands them the installation CDs. The
participants can either run PSM from the CDs or install the PSM onto their
system. The installation is automatic and does not require rebooting the
computer.
2. The meeting host asks all meeting participants to establish a wireless
connection to the WiJET.G before the meeting starts. Most participants can
accomplish this by clicking just one button. This wireless connection is kept
alive throughout the meeting even if only one presenter can use the projector or
monitor at a given time. Confirming wireless connections before the meeting
starts assures a smooth presentation session.
3. At any given time, by clicking just one button in the PSM, one designated
presenter can start the presentation and exclude other presenters from using
the projector/monitor.
4. At the click of one button in the PSM, the incumbent presenter yields the floor
(the projector/monitor) to another presenter while still maintaining a live wireless
link to the WiJET.G.
5. At the click of one button in the PSM, a waiting presenter, owing to the already
established wireless link, can instantaneously take over the projector/monitor.
The normal meeting etiquettes have to be followed to determine how the control of the
projector/monitor should be rotated among presenters. The WiJET.G and its PSM
make the rotation easy and quick and thereby make the meeting dynamic.
3.2 Starting the WiJET.G
When the WiJET.G is first turned on, a boot up sequence will follow. After about
30 seconds, the WiJET.G will display the following graphic (Figure 3.1) with a few
informative messages.
WiJET.G Technical Manual
6
Page 10
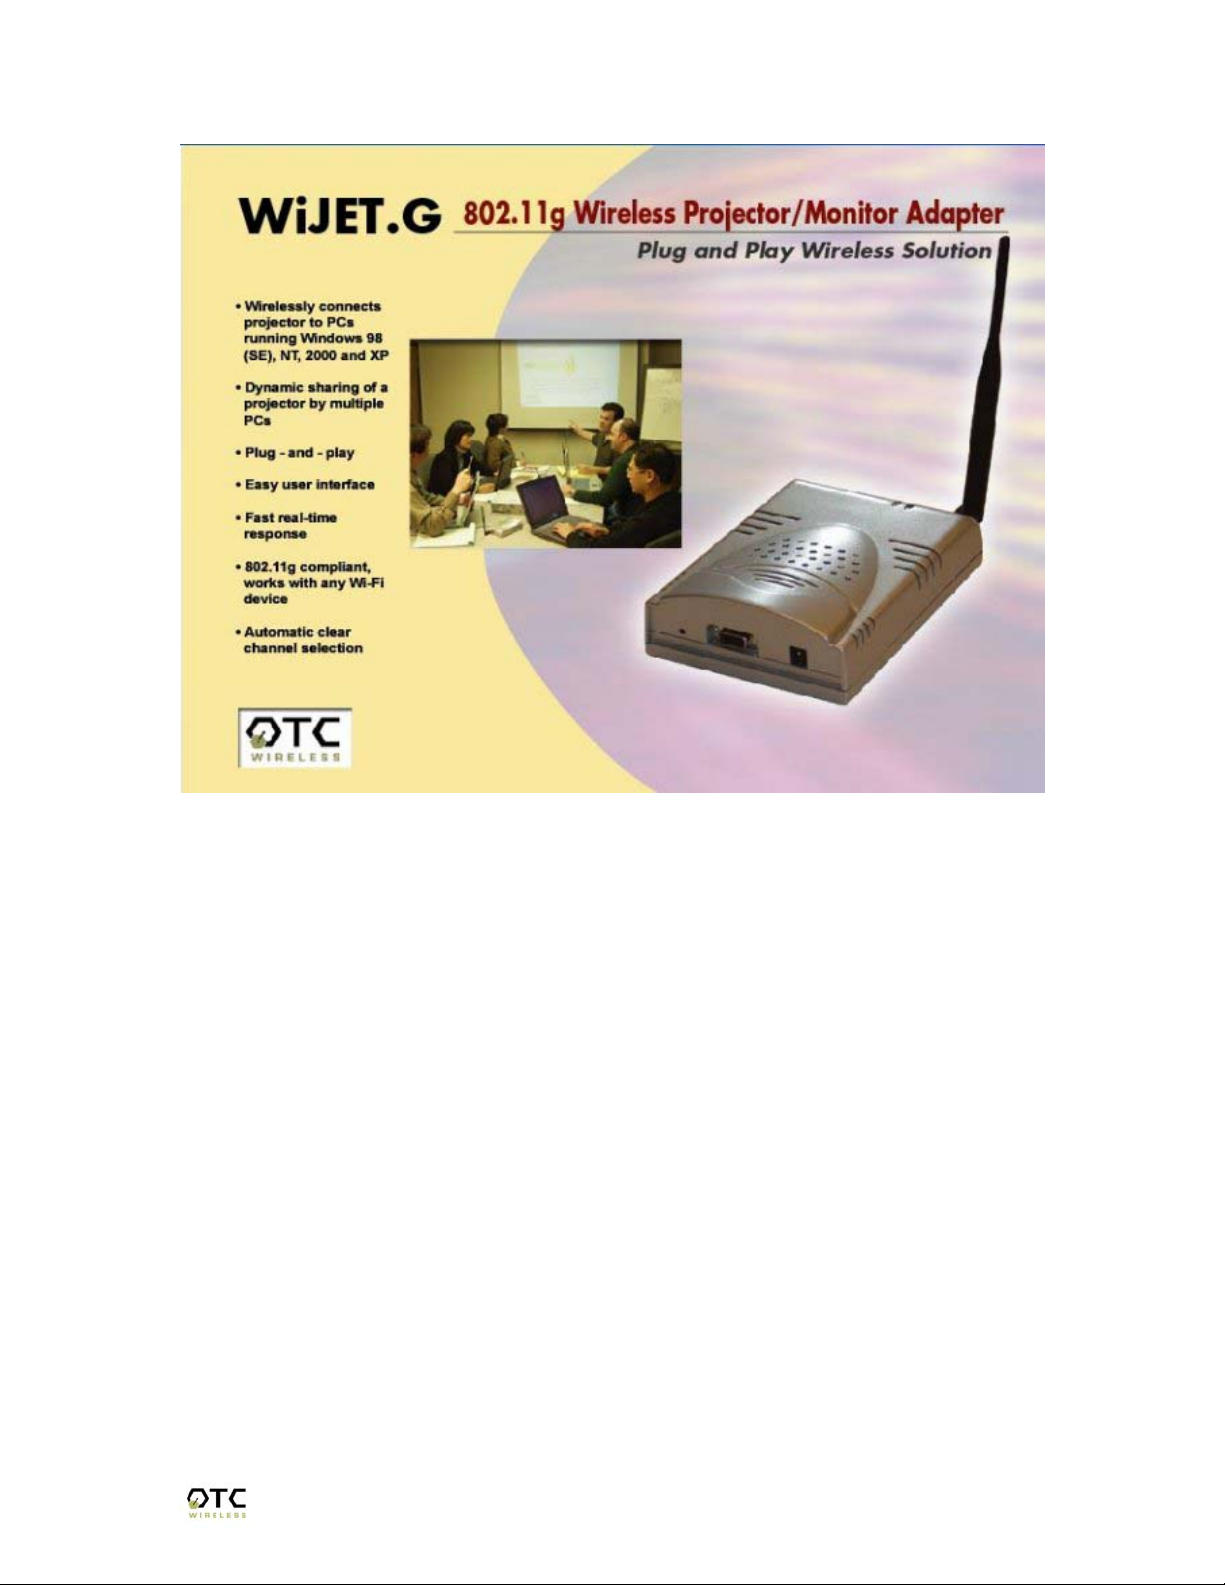
Figure 3.1 WiJET.G Banner Page
The messages will be displayed on the top of this image and consist of three lines. The
top line displays the SSID and the firmware version of the WiJET.G while the second
line reports the channel, radio mode, IP address, and MAC address. The last line
displays a list of detected channels that may cause interference.
An example of the messages is given below:
SSID=WiJET.G Version:1.1.b
Channel=11 Mode=Local Access Point IP=169.254.98.170 MAC=00:60:B3:25:4B:41
RF activities detected on other channels (none).
There are several variations to the message on the second line. The variations and
what they mean are as follows:
RF activities detected on other channels (none).
No other 802.11g channels detected in use other than the WiJET.G at all. Your
connection to the WiJET.G should be smooth and error free.
RF activities detected on other channels (8, 9).
WiJET.G Technical Manual
7
Page 11

Existing 802.11b/g channels detected in use, but there is no interference. Your
connection to the WiJET.G should be smooth and error free.
RF activities detected on other channels (1, 5, 8, 11). WARNING:
Interference.
Existing channels detected and interference found. The WiJET.G is in a RF noisy
environment, you may have trouble connecting and maintaining connections to
the WiJET.G even if a connection can be made.
Note: WiJET.G updates this information whenever the banner page
appears. In a noisy environment, channel information might get
outdated quickly since the WiJET.G does not monitor channels
continuously.
Once you have turned the WiJET.G on and noted the above information, you can now
configure your computer to connect to the WiJET.G.
3.3 Configuring Computer to Control WiJET.G
Before starting the Presentation Session Manager, the network interface of the
computer must have a valid IP address. For computers running DHCP client mode
while DHCP server is unavailable, it may take a few moments for the computers to
obtain a system IP address. If users cannot obtain a valid IP address for the network
interface, please refer to any network administration references for how to assign IP
address to a network interface/connection.
NOTE: The computer’s network interface must have a valid IP address before PSM
starts.
3.4 Starting WiJET.G Presentation Session Manager
Start the WiJET.G Presentation Session Manager (PSM) to control the WiJET.G. There
are two ways to run the WiJET.G PSM. One is to run the WiJET.G PSM directly from
the utility CD while the other is to run a locally installed WiJET.G PSM from a harddrive.
To run the PSM directly from the utility CD, insert the installation CD into CD-Drive and
click the “Run from CD” button in an auto-start window. If the auto-run window does not
show up automatically, open My Computer and explore on the CD-Drive where the
installation CD is inserted and execute “psm.exe”.
To run the locally installed PSM from a hard-drive, start WiJET.G PSM program located
under the Programs Folder in the Windows Start menu, WiJET.G Utility as shown in
Figure 3.2. You can also double-click on the WiJET.G shortcut on Windows desktop to
start PSM.
WiJET.G Technical Manual
8
Page 12

Figure 3.2 Location of WiJET.G
When the WiJET.G PSM starts, it displays the note below about configuring your
wireless NIC and graphics card to link with the WiJET.G:
Figure 3.3 Radio Linking Message
Upon acknowledging the above message, the PSM will become accessible.
Figure 3.4 WiJET.G PSM
There are three action buttons in the PSM: “Establish a Session”, “Release the
Session”, and “Exit”. Clicking “Exit” will quit the WiJET.G PSM program. The functions
of three other action buttons are described in the following sections.
WiJET.G Technical Manual
9
Page 13

3.5 Configuring the Wireless Adapter to Connect WiJET.G
3.5.1 Configure the Wireless Network Adapter
Look at the banner page on the projector/monitor screen in your meeting room to
determine the SSID and the channel that the WiJET.G is currently set on. The channel
number ranges from 1 – 11 for the US or 1 – 13 for Europe.
By default, WiJET.G operates as an AP (Access Point). When the WiJET.G starts up,
the SSID of the WiJET.G will be displayed on the upper left corner of the
monitor/projector. You should configure your Wi-Fi wireless network adapter so that it
connects to the SSID of WiJET.G. There are many ways to configure the wireless
adapter cards. The following is an example sequence.
Open the Wireless Configuration Utility program (which may be called a different name)
provided by the manufacturer of the Wi-Fi wireless network adapter and modify the
settings as the following:
1. Change the network type to “the “Infrastructure” mode.
2. Change the “SSID” of the wireless network adapter so that it matches the SSID of
WiJET.G
3. Observe the wireless signal indications on the wireless configuration program to
make sure there is an active wireless link between the wireless network adapter
and the WiJET.G.
3.5.2 Configure the Wireless Adapter for Windows XP
To configure your Wireless Network Adapter for Windows XP, you must first know if
your Wireless Adapter is natively supported under Windows XP. The easiest way to
know this is to see if an icon is in your system tray as in Figure 3.9.
Figure 3.9 Network Adapter with native support under Windows XP
If your system tray looks like the figure shown in Figure 3.9, your wireless card is
natively supported under Windows XP and you should read the rest of this section. It
will instruct you on how to connect your wireless adapter to the WiJET.G under
Windows XP. If you do not have the addition Wireless Network Connection icon in your
system tray as shown in Figure 3.9, you should check if you have any Wireless
configuration utility in your system tray instead, as in Figure 3.10.
WiJET.G Technical Manual
10
Page 14

Figure 3.10 Network Adapter utility provided by 3rd party
If your system tray looks like the figure shown in Figure 3.10, your wireless card is not
natively supported by Windows XP and you should go to the section above labeled
“Manually Configuring the Wireless Adapter”.
To configure the natively supported network adapter, double-click the wireless network
connection icon in the system tray. You should get a figure much like Figure 3.11.
Click the Properties button. A new window much like Figure 3.12 should appear.
Figure 3.11 Wireless Network Connection Figure 3.12 Network Properties
Click on the “Wireless Networks” tab and you should see a figure like Figure 3.13.
Figure 3.13 Wireless Networks tab.
WiJET.G Technical Manual
11
Page 15

Here you will find the various networks that your wireless card has been able to detect.
To allow for a connection to the WiJET.G, you must click the “Advanced” button. A
figure like Figure 3.14 should appear.
Figure 3.14 Advanced Network Settings Window
Set the configuration to be “Access point (infrastructure) networks only” and click the
“Close” button. Take note of the Preferred Networks area. You should see only ad hoc
networks now as in Figure 3.15.
Figure 3.15 Preferred networks changed to access point networks only
If there is more than one ad hoc network, you must use the “Move up” and “Move
down” buttons to move the WiJET.G you wish to have connected to the top. When you
are done, press the “OK” button. At that time, you should be able to connect to the
WiJET.G and your system tray should display an image much like Figure 3.16.
Figure 3.16 Connected to WiJET.G
WiJET.G Technical Manual
12
Page 16

3.6 WiJET.G Running as Infrastructure Station
The WiJET.G can run as a Wi-Fi Infrastructure station and join an existing Wi-Fi
Wireless Network. The benefits include that several WiJET.G units can join the same
wireless network and thus the users can use the one-to-multiple display feature (one PC
sending screen image displays to multiple WiJET.G units) For how to configure the
WiJET.G running under Infrastructure station mode, please refer to the Web-based
Administration Utility Configuration section in Chapter 4.
3.7 Start or Resume Your WiJET.G Presentation Session
Once you have successfully configured the wireless card to connect to the WiJET.G and
when it is your turn to make a presentation, click “Establish a Session” and you should
find yourself connected to the WiJET.G. There will be a confirmation window alerting you
that your session is on, and your projector or monitor should now display your Desktop.
Figure 3.17 WiJET.G Presentation Session Manager
Various abnormal conditions, such as RF interference or network time-out, however
rare in occurrence, can cause the communication between the WiJET.G and the PSM
to be interrupted. If an interruption of session is detected, WiJET.G will automatically try
to reconnect and keep the user in session. In case of failing to keep the use in session,
WiJET.G will return to the banner page and be available for a new session. Certain
abnormal conditions that cause interruption of the link may be localized on the current
presenter’s computer and/or its wireless card. If the anomaly persists but can be
localized on the current presenter’s computer system, another presenter can still make
use of the projector/monitor by clicking the “Establish a Session” button on his/her
PSM.
Note: If the PC resolution is above 1024x768, the following message will be
displayed.
WiJET.G Technical Manual
13
Page 17

Figure 3.18 Screen Resolution Warning
3.7.1 “Select Units to Connect”
If multiple WiJETs are connected to the same network in infrastructure mode, the
following selection box will appear when establishing a session. Select the desired unit
and establish a session accordingly. If multiple WiJET.Gs are available, multiple users
may connect to any combination of available units.
Figure 3.19 Select Unit to Connect
3.7.2 “WiJET.G is currently in session” Message
Another presenter may have an active session with the WiJET.G you are trying to
connect. In this case, a message box indicating that WiJET.G is currently in session
will be displayed for your information.
3.8 Release Your WiJET.G Presentation Session
If at any time you wish to release your computer from the WiJET.G, simply bring up the
WiJET.G PSM and click on the “Release a Session” button. The wireless connection
to the WiJET.G stays alive after clicking the “Release a Session” button so a presenter
can quickly get back to another turn of presentation.
WiJET.G Technical Manual
14
Page 18

3.9 Exit the WiJET.G Presentation Session Manager
Either clicking the “Exit” button in the PSM, or right-clicking the WiJET.G Tray Icon and
then clicking “Exit” will terminate the WiJET.G PSM program. The System Tray Icon will
disappear from your Windows start menu.
Upon termination, the WiJET.G software restores your wireless network adapter to its
original settings if the adapter has been automatically configured. If not automatically
configured, users have to manually configure the adapter to its original settings.
WiJET.G Technical Manual
15
Page 19

Chapter 4: WEB-BASED ADMINISTRATION UTILITY
4.1 Introduction to the Web-Based Administration Utility
Along with the software-based PSM available on the install CD, a web-based
administration utility is built into the WiJET.G. This includes change of banner page,
encryption settings, and firmware version.
Warning: Do not power off or disconnect WiJET.G unit while modifying
WiJET.G settings. Doing so may damage the equipment. The webbased utility will automatically reboot the WiJET.G if necessary.
4.2 Access the Web-Based Administration Utility
To access the web-based administration utility, the user needs to install PSM as
described in Chapter 2.
To use WiJET.G Administration Manager, the users must have an IEEE 802.11b/g
wireless network adapter and WiJET.G utilities installed on their PCs. Once a session
has been established, the user will be able to right click on the OTC Wireless logo
located in the taskbar and select the option shown in Figure 4.1a.
Figure 4.1a System Tray Menu
Figure 4.1b Administration Unit Select
WiJET.G Technical Manual
16
Page 20

As shown in Figure 4.1b, select the WiJET.G to be configured and click the “Admin”
button.
Once the wireless adapter is properly configured, the user should click on “Launch
Admin Web Interface” button to open the web-browser to access the web-based utility
program.
4.3 Configure the WiJET.G Using Administration Manager
When you successfully reach the web site, a logon window will be prompted as shown in
Figure 4.2.
Figure 4.2: Login Screen
The Default User Name is admin and the password is public. Once clicked the OK
button, you should see the following web page as shown in Figure 4.3 and details of the
web page are explained below.
WiJET.G Technical Manual
17
Page 21

Figure 4.3: Web Utility Screen
4.3.1 WiJET.G Firmware Version
This is the current WiJET.G firmware version. It is important to know which WiJET.G
firmware version you have before calling or emailing technical support.
4.3.2 Configuration
When you click on the Configuration hyperlink, you should see the following screen as
in Figure 4.4. This is where you set the security for the WiJET.G. The description of
each feature is as detailed below.
WiJET.G Technical Manual
18
Page 22

Figure 4.4 Configuration screen
Radio mode:
Point and Infrastructure station modes. While running the Infrastructure station, make
sure the operation mode is set to “Manual” and the SSID/network name matches that of
the existing wireless network.
WEP enabled:
WiJET.G currently supports only the default (shared) WEP key scheme defined in the
802.11 standard, not the mapped key scheme. A set of four keys needs to be created
in the default-key scheme.
Authentication Type:
applied to the exchanged packets between this Station radio and another radio.
Communication with another radio (a station or an AP), however, can be successful
This pull-down menu allows the WiJET.G to switch between the Access
This check box allows users to enable or disable WEP feature. The
When the “Open system” option is chosen, no encryption is
WiJET.G Technical Manual
19
Page 23

only if the other radio also is set up to communicate in the “Open system” mode. When
the “Shared key” option is chosen, the “Encryption” page of the Utility program must be
properly filled out. See “Encryption” page for details.
WEP key length:
encryption is supported by equipment from a limited number of vendors. Note that the
“user-controlled” portion of the 64-bit encryption is just 40 bits (10 Hex digits) and that
for the 128-bit encryption is just 104 bits (26 Hex digits)—3-bytes of the encryption key
are internal to the encryption algorithm.
Warning: After the change of the settings on this page, you may have to manually
Transmission key selection:
transmitting data frames. The radio can de-encrypt received data encrypted in any one
of the four default keys, but it uses only one of the default keys for transmitting its data.
Operation Mode:
(default) or manual operation mode. Automatic mode will make the WiJET.G
automatically select an unused SSID AND a clearest channel when boots up. Under
the Manual mode, the user can select SSID and channel for WiJET.G to operate.
SSID/ Network Name:
running under the infrastructure station mode, this field must match the SSID of the
Access Point which the WiJET.G is trying to connect to.
Default Channel:
interference.
Output Power: The transmission power of the WiJET.G’s radio signal. Useful when
many WiJET.Gs are located in close proximity to minimize interference.
Reset:
This button will reset the WiJET.G to its factory default settings.
The 64-bit encryption is currently the 802.11 standard. The 128-bit
change the PCMCIA adapter security settings accordingly so that PSM can
connect wirelessly to the WiJET.G.
One of the four default keys needs to be selected for
Automatic or Manual. This is to set the WiJET.G to be in automatic
The name of the Wi-Fi wireless network. If the WiJET.G is
The default channel the WiJET.G is set to given no detected
4.3.3 Administration
When you click on the Administration hyperlink, you will see the following page as on
Figure 4.5. Detail of each field is described below.
WiJET.G Technical Manual
20
Page 24

Figure 4.2: Administration Screen Page
Network Settings
Device Name: The name assigned to the WiJET.G may be modified.
Radio MAC address:
IP addressing mode:
available, an IP will be assigned to the unit automatically based on the connected PC’s
subnet. Manual-Static mode allows the user to set a fixed IP address.
IP address:
server is found. In Manual-Static mode, this value will be the unit’s fixed IP address.
In Automatic-DHCP mode, this value will be the default IP if no DHCP
The WiJET.G’s MAC address.
Automatic-DHCP mode checks for DHCP server. If there is none
WiJET.G Technical Manual
21
Page 25

Subnet mask: In Automatic-DHCP mode, this value will be the default subnet mask if
no DHCP server is found. In Manual-Static mode, this value will be the unit’s fixed
subnet mask.
Default Gateway:
DHCP server is found. In Manual-Static mode, this value will be the unit’s fixed default
gateway.
In Automatic-DHCP mode, this value will be the default gateway if no
Account Settings
User Name: User is able to change the login name for the device. The limit is 16
characters for this field.
Enter New Password:
default is “public”. The limit is 16 characters for this field.
Confirm New Password:
Reboot WiJET.G:
name or password if you did not click Apply beforehand.
User is able to change the password of the WiJET.G. The
Retype desired password for confirmation.
This will reboot the WiJET.G. Note that it will not change the User
4.3.4 Firmware and Banner Page Upload
When you click on the Firmware and Banner Page hyperlink, you should see the web
page as shown in figure 4.6.
Figure 4.6: Firmware and Banner Page Upload
WiJET.G Technical Manual
22
Page 26

Upload Options: Select between the Full Firmware upload or the Banner Page upload.
The user can upload any jpeg image with resolution up to 1024x768 as the Banner
page.
File path/name:
selection box. For a Firmware file, select the file with the extension of .tar.gz. For
Banner page file, select a file with the extension of .jpg. For the best picture on the
WiJET.G banner screen, the picture file should be of 800 x 600 resolution. The
maximum .jpg size is 2 megabytes.
Warning: When uploading the firmware or banner page, do NOT power off or
disconnect the WiJET.G unit. Doing so may damage the equipment.
Click the browse button to the right of the field to display a file
WiJET.G Technical Manual
23
Page 27

Chapter 5: TROUBLESHOOTING
5.1 Unable to Connect or Establish a Session with WiJET.G
If you could not establish a session with WiJET.G(s) and get a message box indicating
no WiJET.G is available for connection or no WiJET.G is found, the possible causes
are listed below.
1) The SSID of the wireless adapter is not set up to be the same as the
WiJET.G’s.
2) The computer’s Wi-Fi Adapter is not set to Infrastructure Station mode.
3) The computer’s Wi-Fi Adapter is not set to use the same encryption
settings as WiJET.G, if WiJET.G’s default encryption settings were
changed.
4) The WiJET.G is somehow not receiving the wireless signal, power-cycle
the WiJET.G.
5) Some DHCP-enabled wireless network connection client may take a
while to obtain a valid OS-assigned IP address. You can use “ipconfig”
command to see whether a valid IP address has been assigned or not to
the corresponding network connection.
6) With certain brands of PCMCIA 802.11g Wi-Fi cards, it might take a bit
longer to link up with the WiJET.G than with other brands of PCMCIA
cards. The reason for this is that the drivers and features set of each
brand might cause the link up time between the WiJET.G and the
computer to take longer. Simply try to establish a session again. If the
same issue persists, there probably is no link established between the
WiJET.G and the computer.
5.2 The Presentation screen appears frozen during a presentation
This indicates that WiJET.G has detected a link-loss. WiJET.G and WiJET.G PSM have
an intelligent built-in mechanism to detect the link-loss and can automatically restore
the connection by coordination. When a link-loss has been detected, WiJET.G PSM
displays a message box and trying to automatically restore the connection. If the autoreconnection attempt is successful, user does not need to do anything. In this case, the
auto-reconnection is user transparent. However, if the cause to the link-loss is due to
physical disconnection, for instance, the PCMCIA card was pulled out, user needs to
restore the physical connection so that the auto-reconnection attempt can succeed.
The presentation screen won’t be updated once the link is lost, unless a reconnection
is re-established. However, if link-loss stays for an extended period, the WiJET.G will
terminate the reconnection waiting state and display the banner page indicating that a
fresh presentation session is ready for being established.
The default duration for a link-loss is 8 seconds. WiJET.G will retry 3 periods of this
duration. If no re-connection is established before the reconnection time running out,
WiJET.G returns itself to the banner page.
WiJET.G Technical Manual
24
Page 28

5.3 The WiJET.G Session is Interrupted During a Presentation
This signals that the WiJET.G has detected a link-loss for an extended period of time or
severe communication error. Since the WiJET.G is designed to support one
presentation at a time, the WiJET.G cleans up the communication error and returns
itself to the initial state (where displaying the banner page is a part) of being “available
for connection” in order to prevent the WiJET.G from being locked up with one possibly
malfunctioning user computer. With the auto-reconnection feature, this rarely occurs.
When this condition occurs, follow the steps below:
1) The current presenter should click “Establish a Session” to try to resume the
presentation. If the presentation is successfully resumed, the abnormal
condition is just temporary and no further action is required.
2) If the current presenter failed to resume presentation by clicking “Establish a
Session”, another presenter should try to “Establish a Session”. If this new
presenter can successfully start a presentation, the problem was localized on
the previous presenter’s computer and/or its wireless card. Address that
problem after the meeting.
3) If a second presenter also fails to “Establish a Session” to the WiJET.G, a
persistent abnormal condition has to be identified. Follow other trouble-shooting
tips in this chapter to identify the persistent abnormal condition.
5.4 Radio Interference
You may be able to eliminate RF interference by trying the following:
• Find the “channel” used by the source of the interference and coordinate your
network and the interference source to be on channels that are at least 20MHz,
but preferably 30MHz, apart.
• Reseat the WiJET.G to a location where the interference is minimized; in
general, increase the distance between the wireless computers and the device
causing radio interference.
• Avoid using 2.4GHz cordless phone in the vicinity of the radio
• Keep the computer with the WiJET.G away from the microwave oven and large
metal objects.
• Consult the dealer or an experienced radio technician for help.
Technical Support
Please contact OTC Wireless Technical Support to obtain further assistance.
1-800-770-6698 (USA)
011-510-490-8288 (International)
E-mail: support@otcwireless.com
WiJET.G Technical Manual
25
Page 29

Appendix A: LIMITED WARRANTY
Wireless LAN Hardware
The seller warrants to the end user (“Customer”) that this product will be free from
defects in workmanship and materials, under normal use and service, for one (1) year
from the date of purchase. The seller’s sole obligation under this express warranty shall
be, at the seller’s option and expense, to repair the defective product or part, deliver to
Customer an equivalent product or part to replace the defective item.
All products that are replaced will become the property of the seller. Replacement
products may be new or reconditioned.
WiJET.G Technical Manual
26
Page 30

Appendix B: REGULATORY COMPLIANCE
FCC Part 15 Declaration of Conformity (DoC)
The following equipment:
Product Name: WiJET.G Wireless Projector/Monitor Adapter
Model Number: WiJET.G is herewith confirmed to comply with the requirements of FCC
Part 15 rules. The operation is subject to the following two conditions:
1. This device may not cause harmful interference, and
2. This device must accept any interference received, including interference that
may cause undesired operation.
FCC ID: MKZWIJET11G
FCC Rules and Regulations - Part 15
Warning: This device has been tested and found to comply with the limits for a Class B
digital device pursuant to Part 15 of the Federal Communications
Commissions Rules and Regulations. These limits are designed to provide
reasonable protection against harmful interference when the equipment is
operated in a commercial environment. This equipment generates, uses,
and can radiate radio frequency energy and, if not installed and used in
accordance with the instruction manual, may cause harmful interference to
radio communications.
However, there is no guarantee that interference will not occur in a
particular installation. If this equipment does cause harmful interference to
radio or television reception, which can be determined by turning the
equipment off and on, the user is encouraged to try and correct the
interference by one or more of the following measures:
. Relocate your WLAN equipped laptop computer.
. Increase the separation between the WLAN equipped laptop computer and
other electronics.
. Connect the WLAN equipped laptop computer into an outlet on a circuit
different from that of other electronics.
. Consult the dealer or an experienced radio/TV technician for help.
FCC Radiation Exposure Statement
This equipment complies with FCC radiation exposure limits set forth for an
uncontrolled environment. This equipment should be installed and operated with
minimum distance of 20cm between the radiator & your body.
Caution: Changes or modifications not expressly approved by OTC Wireless could
void the user’s authority to operate the equipment.
Warning:
This transmitter must not be co-located or operating in conjunction with any
other antenna or transmitter.
WiJET.G Technical Manual
27
Page 31

European Community (EC) Directives Conformity and Restrictions
This product is in conformity with the protection requirements of EC Council directives
89/336/EEC, 73/23/EEC, and 1999/5/EC on the approximation and harmonization of
the laws of the Member States relating to electromagnetic compatibility, safety of
electrical equipment designed for use within certain voltage limits and on radio
equipment and telecommunications terminal equipment. Compliance is indicated by
the CE marking
300 328-1, the EMC requirements of EN 301 489-17, the safety requirements of EN
60950, and the RF safety requirement of EN 50371.
. This product satisfies the radio spectrum requirements of EN
WiJET.G Technical Manual
28
 Loading...