


MIXpro
QUICK START GUIDE
ACCESSORIES

GENERAL
Congratulations for buying this advanced multifunctional outdoorwatch. Take a moment
to read this guide carefully.
These resources provide important setup information and are designed to help you get
the most from your device.
If you regularly carry out a sporting activity or wish to step up your training, the MIXpro
heart rate monitor is the perfect choice for you. An option would be to use several accessories like the MAXrun, an accelerometer sensor that will be attached under your shoe layers,
or the MACRO X bike sensors that can be mounted on the fork or frame of any bike.
These products optimize your physiological performance in terms of data for speed and
distance travelled when running or cycling.
The design and comfort of these product have also been specifically developed to suit all
body types and for easy use during your sport.
This is a quick start guide which can help you to use your MIXpro watch basic
functions. For the latest product information and more details of the optional
accessories and the free SAS sport analyse system, visit the o-synce Web site at
www.o-synce.com
CAUTION! Always consult your physician before beginning or modifying any exercise
program. If you have a pacemaker or other implanted electronic devices, consult your
physician before using a heart rate monitor.
_2

CONTENTS
General _2
Contents _3
1 IN THE BOX _4
2 GETTING STARTED _5
Buttons _5
Icons _5
Turn on the MIXpro _6
Backlight _6
Navigations _6
Time _6
Date _6
Chimes/beeper _7
Alarm _7
Second Time zone _7
3 SETTING AND PAIRING (optional) _7
What is Pairing? _7
Switch on the sensors _8
Personal and basic settings _8
4 USING ACCESSORIES _12
Switch off the sensors _13
5 SPORT-MODE _14
Stop watch w/o sensors _14
Stop watch with sensors _14
6 TIMER-MODE (Countdown) _16
Setting the Countdowns _17
Setting the Timer _18
Countdowns 1 & 2 and repeat function _18
7 HISTORY MODE _19
Viewing Workout History _19
Deleting Workout History _19
Managing Memory _19
8 PC SAS SOFTWARE _19
Software Downloading _19
9 APPENDIX _20
Technical Features _20
Battery _20
Maintenance and Care _21
Warranty _21
Recycling _22
Contact _22
_3
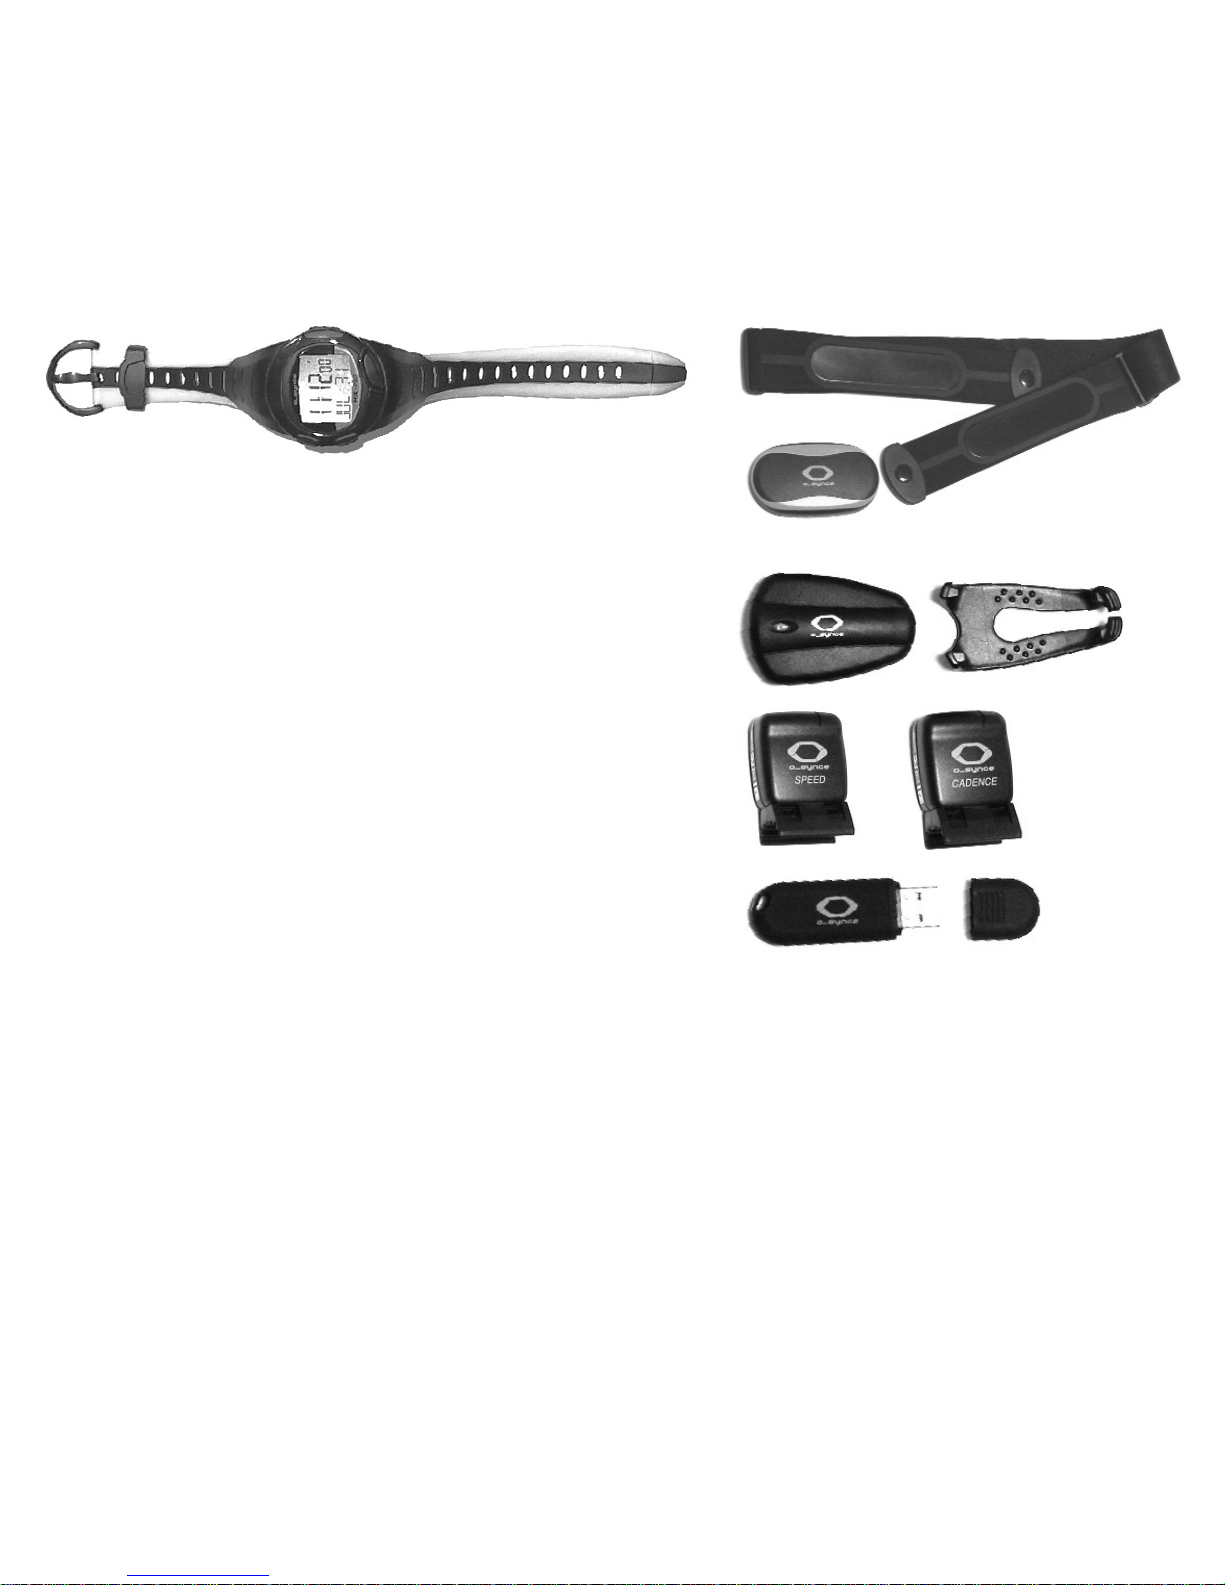
1 IN THE BOX
1x MIXpro Multi watch 1x HEART2feel X Heart rate monitor belt
For more information about Optional Compatible
Accessories go to www.o-synce.com
MAXrun Foot pod sensor for running and walking
MACRO2SXspe Speed sensor for biking
MACRO2SXcad Cadence sensor for biking
MAXpc USB transceiver for PC-Download of the
training data (store & analyse with SAS)
Strong electromagnetic fields and some 2.4 GHz wireless sensors can interfere with
your heart rate monitor and other accesories. Sources of interference may include very
high voltage power lines, electric motors, microwave ovens, 2.4 GHz cordless phones,
and wireless LAN access points. After you moveaway from the source of interference,
your heart rate data should return to normal.
_4
T2
D
C
B
A
Above high zone setting Data uploading
Below low zone setting Timer mode
Bike sensor active Alarm on
Foot pod sensor active Chime on
Heart rate sensor active Second time zone
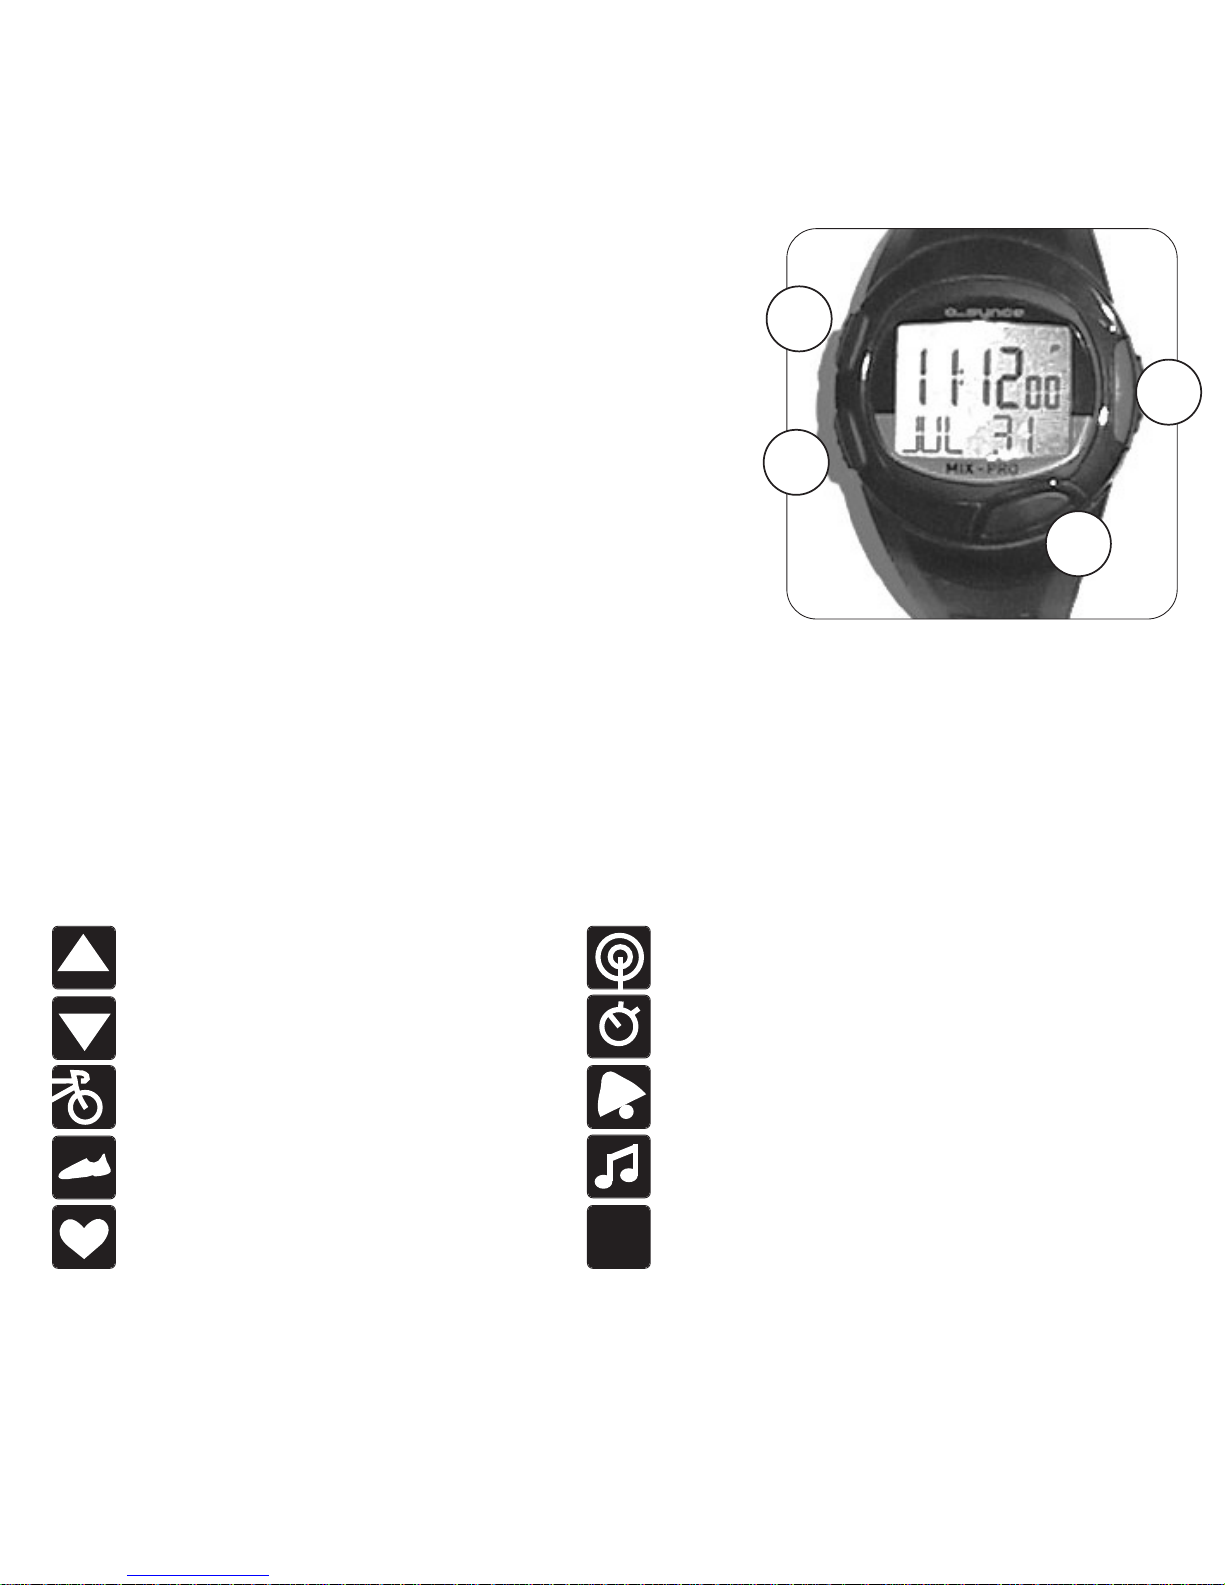
2 GETTING STARTED
BUTTONS (meaning is written on the backplate
of the watch)
Button A (right): START/STOP/+
Stop watch > Start and Stopp press
to increase value for settings press
to customize settings press & hold
Button B (front): VIEW/LIGHT
to scroll through data pages in Sport or
History mode press
to advance to the next setting press
for switching on the backlight press & hold
Button C (left down): MODE
To change modes press
To exit a menu or page press
To jump back to the time mode press & hold
Button D (left up): LAP/MEM/-
To create a new lap press
to decrease value for settings press
to save workouts & reset the timer press & hold
ICONS
_5

TURN ON YOUR MIXpro
Press and hold C to turn on your MIXpro because the watch from factory is on stand by
mode to conserve the battery. For more information see BATTERY.
BACKLIGHT
Press and hold B to turn on the backlight for 5 seconds. Extend the backlight for 5 more
seconds by pressing any button.
NAVIGATION
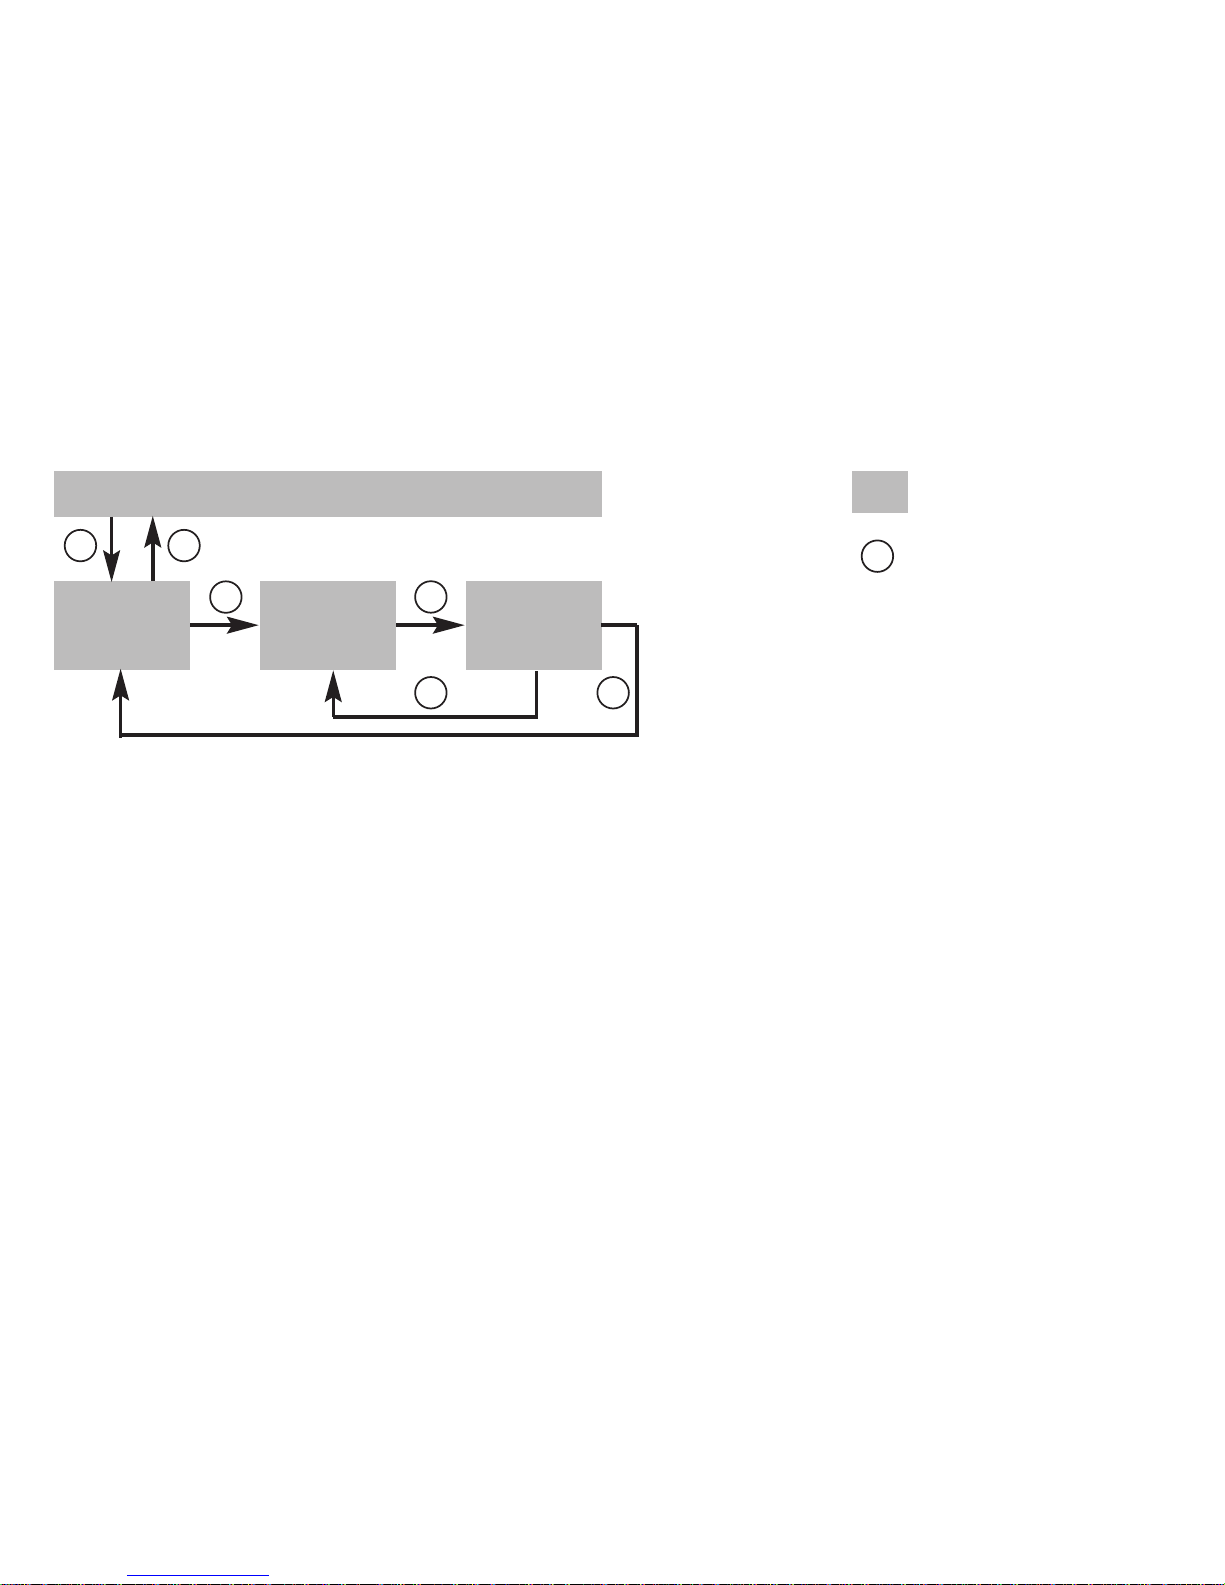
The MIXpro watch includes four modes:
TIME SPORT
INTERVAL TIMERTRAIN HISTORY
With the key C you can switch from one mode to the next.
SET THE TIME AND DATE
On the Time page, press and hold A until the hour setting blinks. Use A - and/or C+to
adjust the hour.
TIP: Press and hold + or - to scroll quickly through the hours, minutes, and other Time mode
settings. Continue this process to set seconds, month, day, year, and 12/24 hour mode.
Press C any time to resume to the Time mode.
HH
Flashing values
can be changed
with A(+) or D(-)
Press and hold
for 3 sec.
HH:MM sec
HOUR
TIME
B BBB
HH:MM sec
MIN
HH:MM sec
SEC
MO:DD
MONTH
BB
12-H
MODE
YYYY
YEAR
MO:DD
DAY
A3
A3
TIME
C CCC
TIMER SPORT DATA
_6
BEEPER
The key tone /beeper will be active then the beep icon is shown in the TIME mode. To activate the beeper you have to hold B for 5 seconds. The icon will be shown on the screen!
ALARM
The alarm icon will be shown on the Time mode, press A or D to switch the alarm on or off.
Press C to go back to the alarm mode.
SETTING THE 2ND TIME ZONE
The T2 offset enable a second time zone. To change the current time to T2 press & hold D
for 5 sec in the TIME mode. When the T2 icon is shown in the right upper corner of the display – the second time can be set in the same way like the TIME setting.
3 SETTING AND PAIRING OF ACCESSORIES (OPTIONAL)
WHAT IS PAIRING?
Pairing is the connecting of sensors, like your heart rate monitor with the MIXpro. After you
pair the first time, your MIXpro automatically recognizes the paired sensor each time it is
activated. This process occurs automatically when you turn on the SPORT mode and only
takes a few seconds when the sensors are activated and begin functioning correctly. Once
paired, your MIXpro only receives data from your sensor, and you can go close to other
sensors without interference.
TO PAIR SENSORS WITH THE WATCH:
Move away (10 m) from other sensors while the MIXpro is trying to pair with your sensor for
the first time. Bring your sensor within range (3 m) of the MIXpro. Press C until the SPORT
mode appears. Follow the instruction in the basic setting to ‘PAIR ’ the sensors.
12:00 - -
ALARM
TIME
B
B C
A3
12:00 - -
HOUR
12:00 - -
MIN
A A
12
Flashing values can be
changed with A(+) or D(-)
Press and hold for 3 sec.
A3
_7
 Loading...