

Page 1
DALI EASY RMC
Remote control
Operating instructions
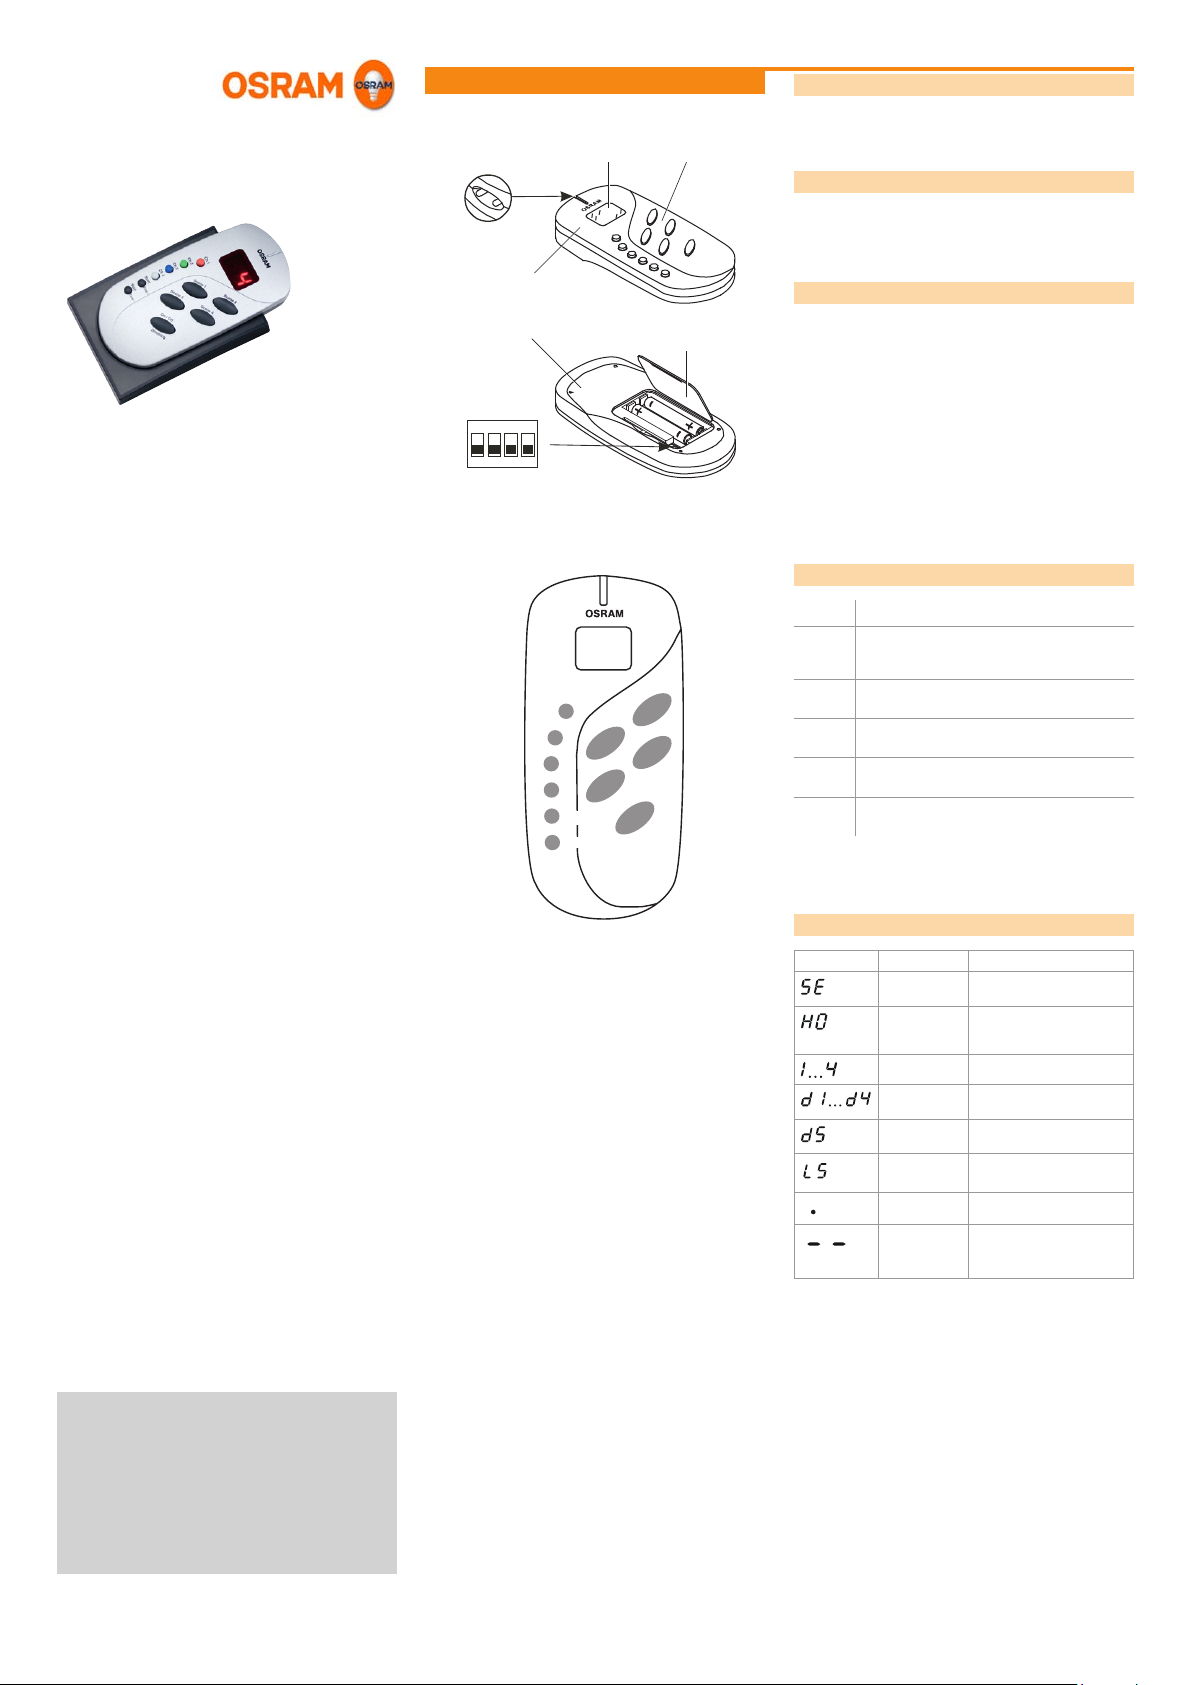
Description
E
ON
1 2 3 4
DIP
Function and application
The DALI EASY RMC remote control in conjunction with an infrared receiver is used for the adjustment and functional control
B
CA
of the DALI EASY III and OT EASY 60 II control units.
Function
The remote control sends digital coded infrared signals to the
DALI EASY IR infrared receiver. The receiver converts the
digital coded infrared signals into the corresponding telegrams
and transmits them to the connected control units.
F
F
D
Design
The DALI EASY RMC remote control is made up of the following components:
• Infrared transmitter (A)
• Display (B)
• Function buttons (C)
• Battery compartment (D)
• DIP switch (E)
• Housing (F)
Button functions
Button Function
Ch 3
Ch 4
Start
Stop
Ch 2
Ch 1
Time +
Time -
Scene 1
Scene 3
On/Off
Scene 2
Scene 4
Dimming
CH 1...
CH 4
Start/
time +
Stop/time - The current sequence is stopped (short press) or
Scene 1 to
Scene 4
On/Off
Dimming
The luminaires of a group (channels 1...4) are
switched on and off (short press) and their brightness is changed (long press).
The sequence is started (short press) or the fade
time is extended (long press).
the fade time is shortened (long press).
The corresponding scene is called up (short press)
or stored (long press).
All luminaires are switched on and off (short press)
and their brightness is changed (long press).
III 2009
DALI_EASY_RMC_ba0903en_we1.01.indd
OSRAM GmbH
Kunden Service Center
Customer-Service-Center (CSC)
Steinerne Furt 62
86167 Augsburg
Germany
Tel : +49 (0) 1803 677 - 200
(kostenpichtig / charges apply)
Fax.: +49 (0) 1803 677 - 202
www.osram.com
www.osram.de
Displays
Display Meaning Description
Sequence The sequence mode was
Hold The sequence mode or
Scene 1…4 The scene was called up.
Daylight scene
1...4
Daylight
sequence
Learn
IR sequence
started.
daylight simulation was
stopped.
The daylight simulation
scene was called up.
Daylight simulation was
started.
IR coding is transmitted.
Command is transmitted.
Function is disabled or not
available in the activated
operating mode.
40083210531524
4008321053152
Page 1 of 2
Page 2
Operation
Note
For the function of the DALI EASY III and OT EASY 60 II control
units, see the separate instructions.
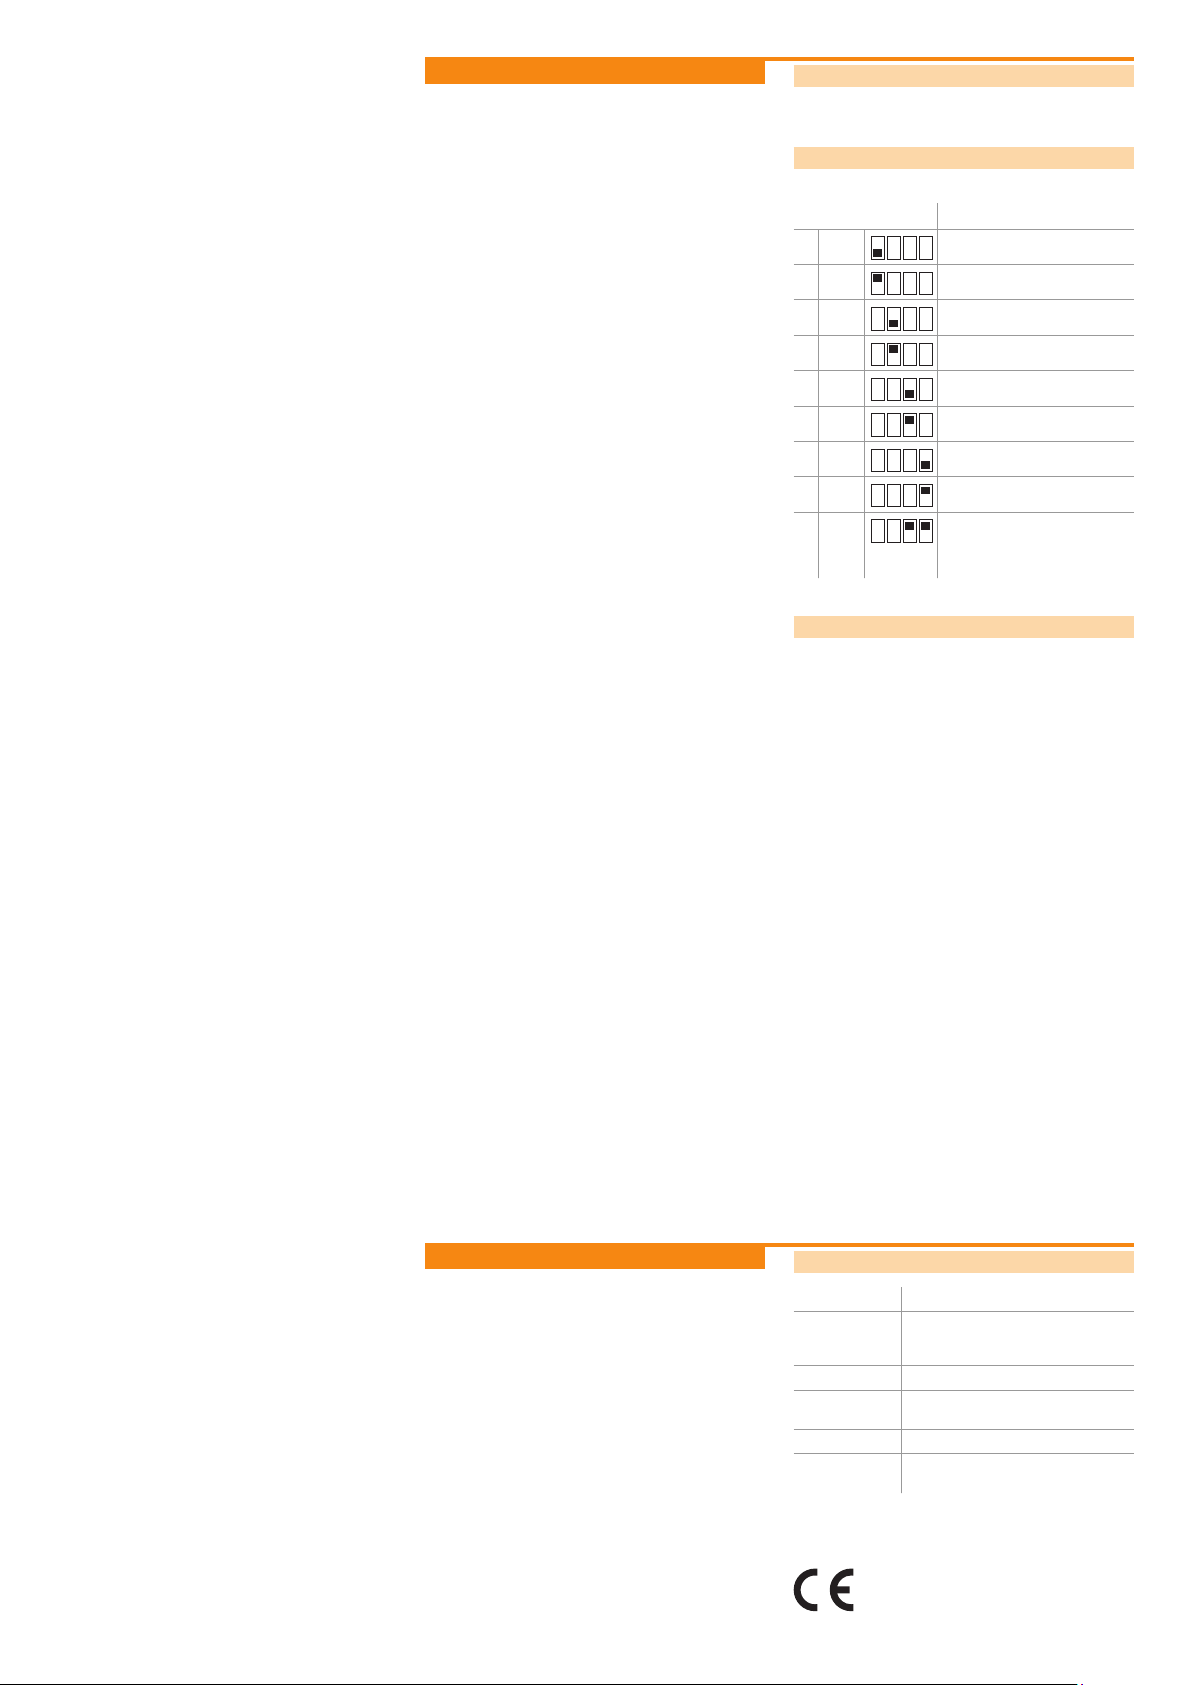
DIP switch positions
The following settings can be made using the DIP switches (E):
DIP switch Function
1 OFF
1 ON IR coding 2 is active
2 OFF
2 ON
3 OFF
3 ON
4 OFF
4 ON
3/4 ON/ON
IR coding 1 is active
Scene storage is disabled
Scene storage is enabled
Sequence mode is disabled
Sequence mode is enabled
Daylight simulation is disabled
Daylight simulation is enabled
Learn mode for transmitting the
IR coding and resetting the control units to the factory settings
(RESET)
Setting the infrared coding / RESET
The two infrared codings make it possible to operate two
separate lighting control units in one room using a single remote
control without mutual interference. The control unit is returned
to the factory setting by means of a RESET or by changing the
infrared coding.
Disconnect control units whose infrared coding should not
be reset or adjusted from the mains supply or interrupt the
connection to the IR receiver.
Set the desired infrared coding via the DIP switch of the
remote control:
– DIP switch 1 = OFF:
infrared coding 1 is active
– DIP switch 1 = ON:
infrared coding 2 is active
Note the positions of DIP switches 3 and 4.
Set DIP switches 3 and 4 to ON.
Point the remote control to the infrared receiver and press
any button.
Conrmation:
„LS“ appears in the display and the luminaires ash.
– 1x for infrared coding 1
– 2x for infrared coding 2
Set DIP switches 3 and 4 to the original positions, reconnect
all control units to the mains supply and reconnect the IR
receiver.
Appendix
Technical data
Power supply 2 Micro AAA / LR03 batteries (alkaline)
Infrared signal Interference-immune 38 kHz Rmap pro-
Range Approx. 10 – 15 m
Operating
temperature
Protection type IP 20
Dimensions
(L x W x H)
tocol, digital coded. 2 OSRAM-specic
codings are selectable.
0 °C ... +40 °C
120 x 57 x 26 mm
Conformity with the relevant EU directives is
conrmed by the CE symbol.
Page 2 of 2
 Loading...