

Page 1
EASY Color Drive
Wall operating unit
Conguration
VIII 2009
EASY_Color_Drive_ko0908en_we1.01.indd
OSRAM GmbH
Kunden Service Center
Customer-Service-Center (CSC)
Steinerne Furt 62
86167 Augsburg
Germany
Tel : +49 (0) 1803 677 - 200
(kostenpichtig / charges apply)
Fax.: +49 (0) 1803 677 - 202
www.osram.com
www.osram.de
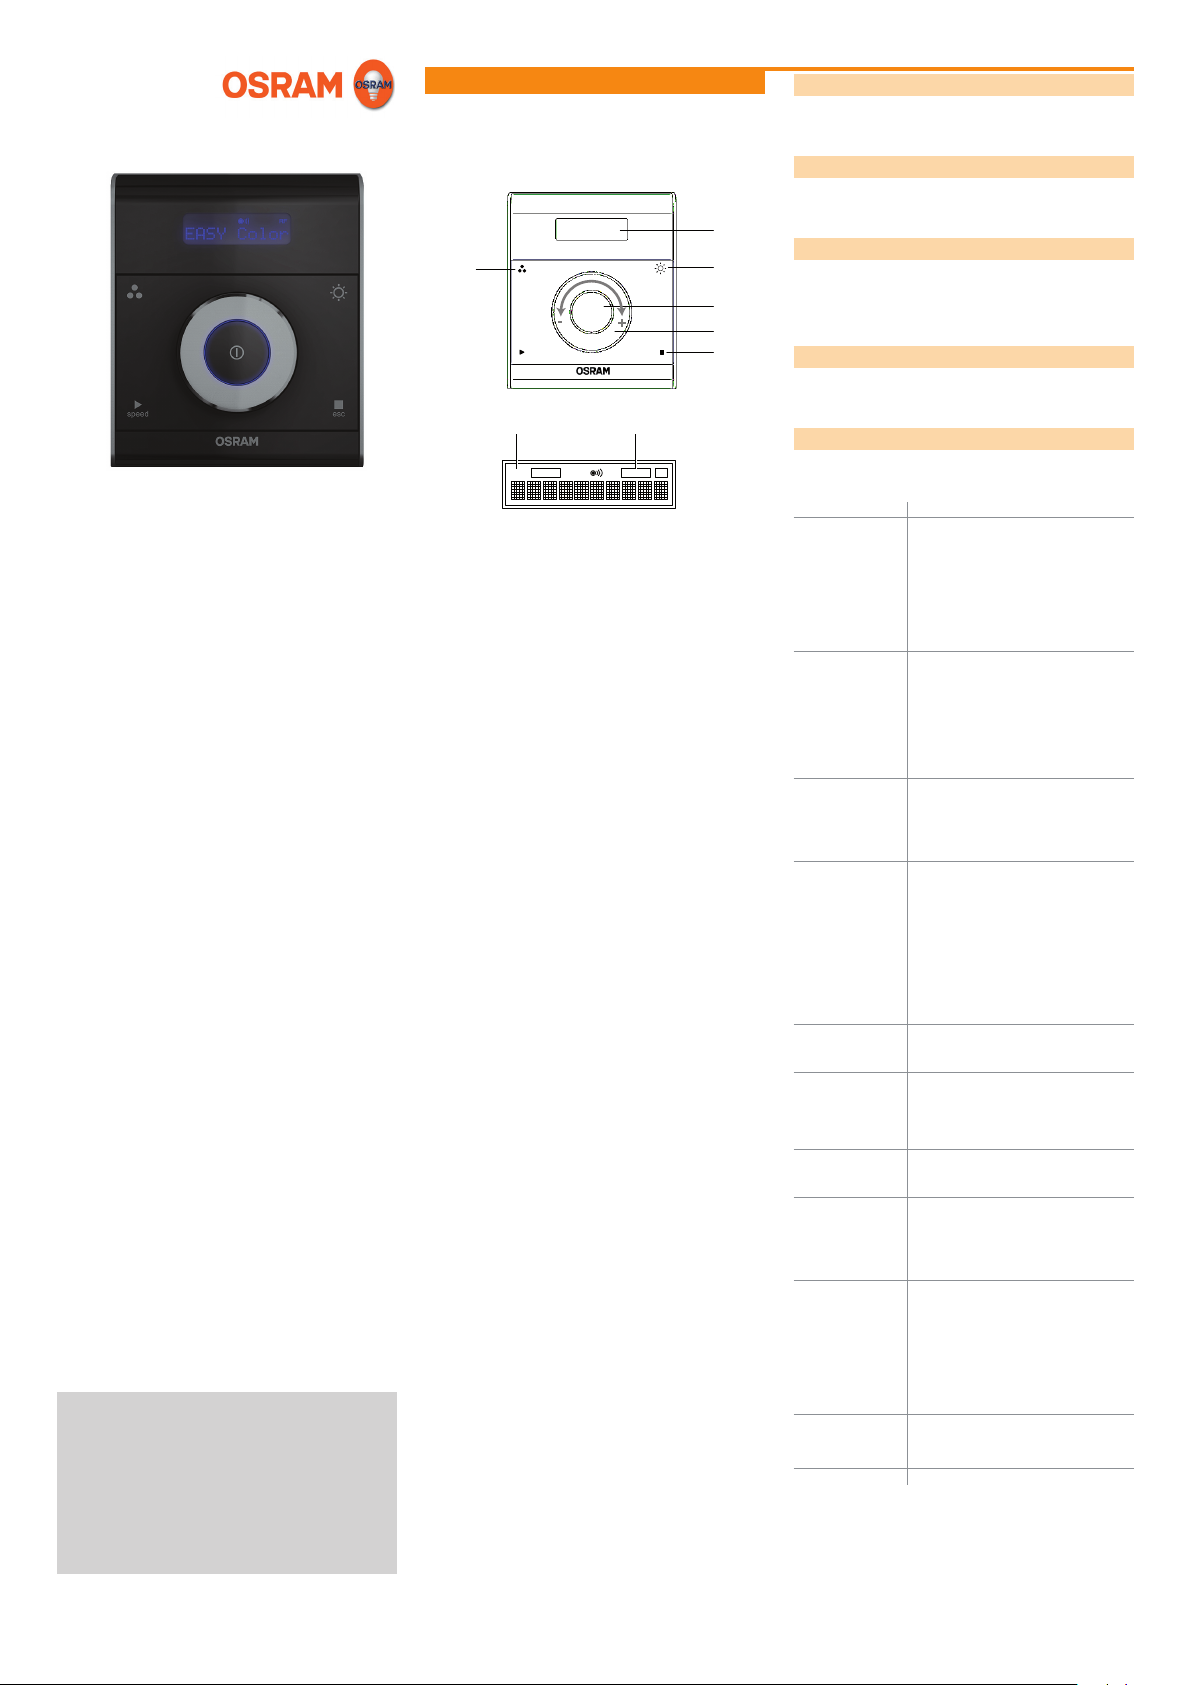
Setup menu
F1
A
-
+
speed esc
3
LEARN SETUP RF
F2
F4
General information
The optional user settings of the wall operating unit are congured in the Setup menu.
Calling up the Setup menu
Press buttons F1+F2 simultaneously and hold for at least 5 s
until the Setup symbol (3) appears on the display (A).
A
Navigating and conguring
Select menu item/setting: Use the jog wheel (D)
C
D
Conrm selection: Press the central button (C)
Cancel and return: Press button F4 briey
Leaving the Setup menu
Press button F4 and hold for at least 3 s or select the „Exit“
menu item.
Parameter settings
The menu items for conguration are described below.
Default or reset settings are highlighted in bold.
Menu item Function
Backlight
B. color
B. brightn.
B. timeout
Nightlight
Default
Brightness
Color
Scenes
Last func.
None
Switch On
Last state
Scene 1…16
100%
Channel set
RGB
RGB+ white
Warm/Cold
8-Ch. … 1-Ch.
Scene set
Scenes 1-8
Scenes 9-16
Scenes
Scene 1…8
Scene 9…16
Sequence
Sequence A…D Sequence A...D can be called up/cannot
Speed set
Fade Time
Multiplier
Disabled
Buttons
F1-Color
F2-Brightness
F3-Play
F4-Stop
Jogwheel
C1-On/Off
Service
Demo Mode
Reset
Exit Leave the Setup menu
Background lighting
Colour (1…12)
Brightness (off, low, mid, high)
Switch-off delay time or time to return to
standby (3 s, 5 s, 10 s)
Orientation lighting for the central button
(external power supply required)
Jog wheel basic function
Changing the brightness
Change the colour/colour temperature
Call up scenes
Function selected last
None
Switch on
To last state
To scene A1…A16
All channels to 100%
Channel control
3-channel colour control
3-channel colour control with white
channel
2-channel colour temperature control
Ch-1 = warm-white channel
Ch-3 = cold-white channel
8-channel/8-groups- …
1-channel/1-group control
Scene range
A1-A8
A9-A16
Scenes that can be called up from the
scene range (see "Scene set")
A1…A8 (enabled=available / disabled =
not available)
A9…A16
be called up via F3 button
Speed setting
Via fade time
Via speed factor
Disabled
Enable/disable buttons
F1
F2
F3
F4
Jog wheel
On/off button
Start demo mode
Reset wall transmitter to default settings
40083214217776
4008321421777
Page 1 of 2
Page 2
A
F2
C
D
F1
F4F3
speed esc
A
-
+
B E
LEARN SETUP RF
4
1
2 3
5
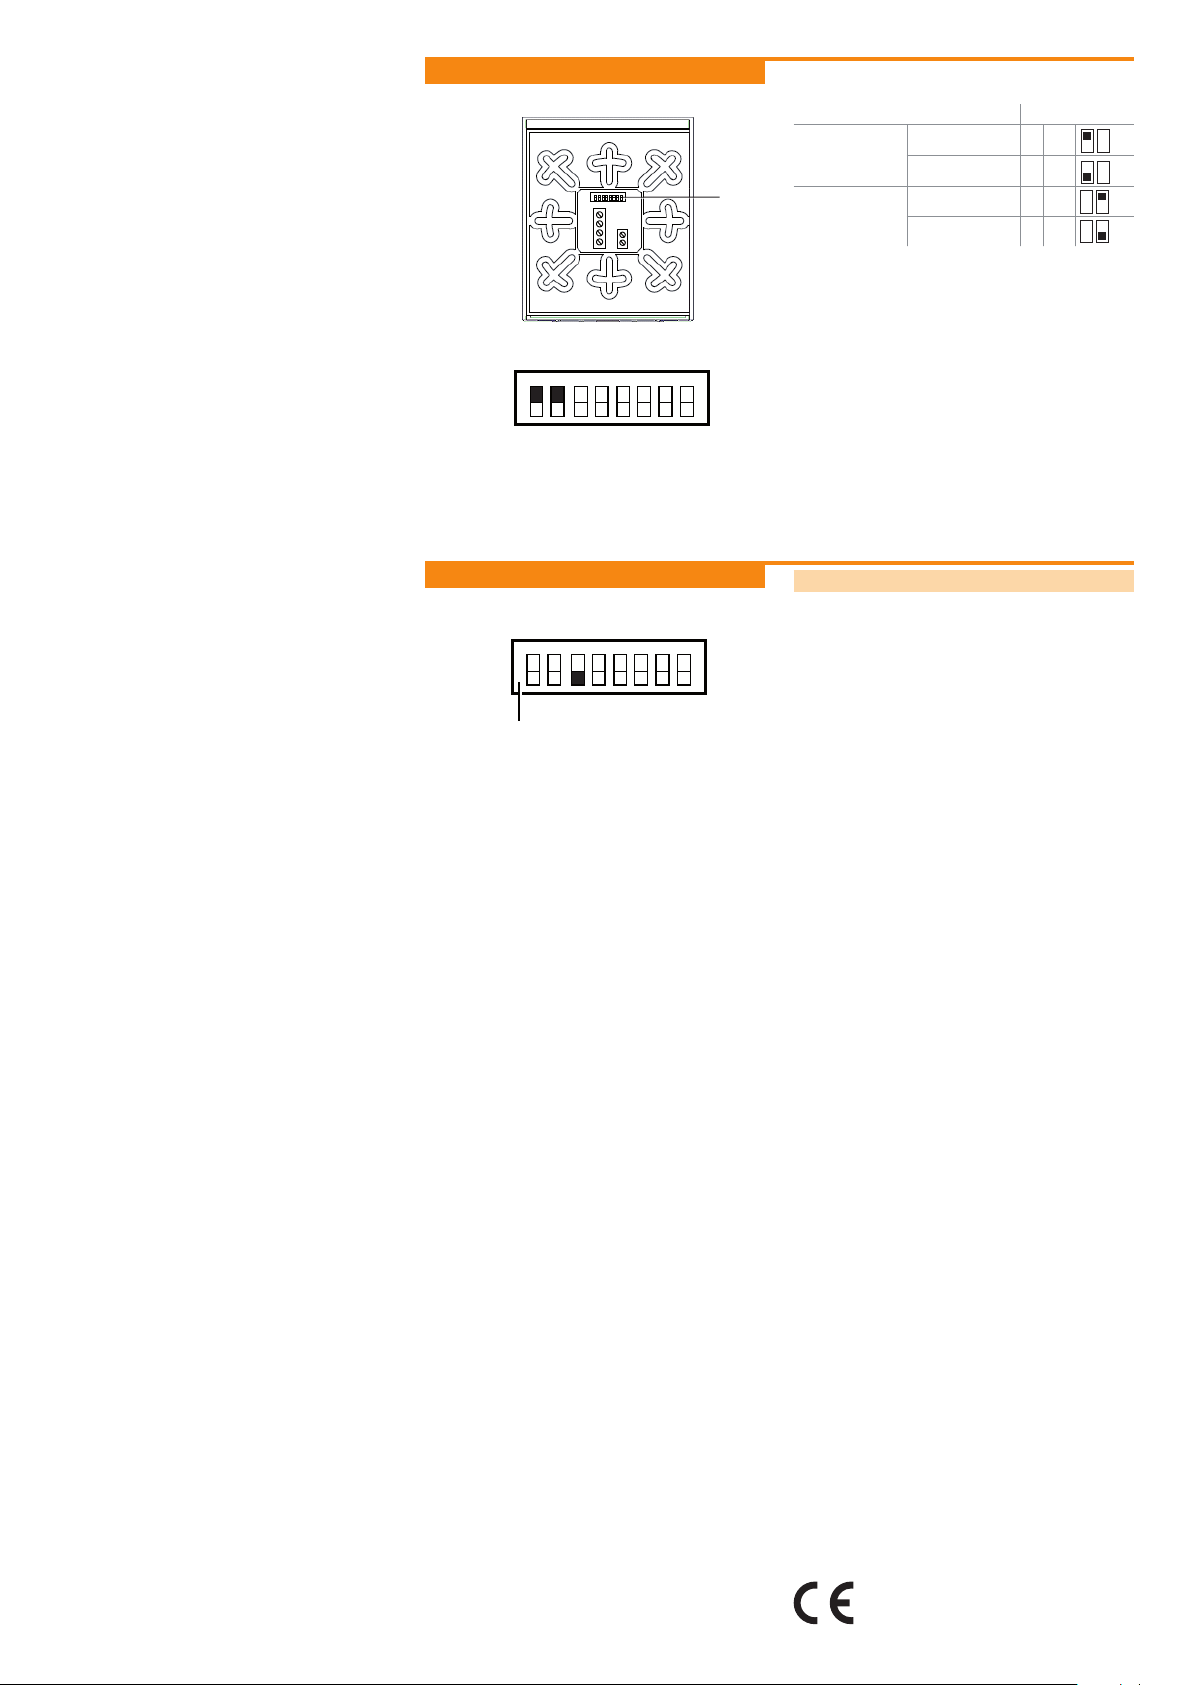
Basic settings
. . .
. . .
. . .
. . .
ON
OFF
1 2 3 4 5 6 7 8
Use DIP switches 1 and 2 on the back (G).
Do not change DIP switches 4-8.
Function DIP switch
Signal transmission
type
G
Access to
user settings
Radio 1 ON
Wired 1 OFF
Enable 2 ON
Disable 2 OFF
Default setting
1 2 3 4 5 6 7 8
ON
OFF
RESET of control units
Reset the connected control units to the default setting.
Set DIP switch 3 on the back of the wall operating unit (G) to
OFF.
Press central button (C).
Set DIP switch 3 to ON again.
G
Conformity with the relevant EU directives is
conrmed by the CE symbol.
Page 2 of 2
 Loading...