

Page 1
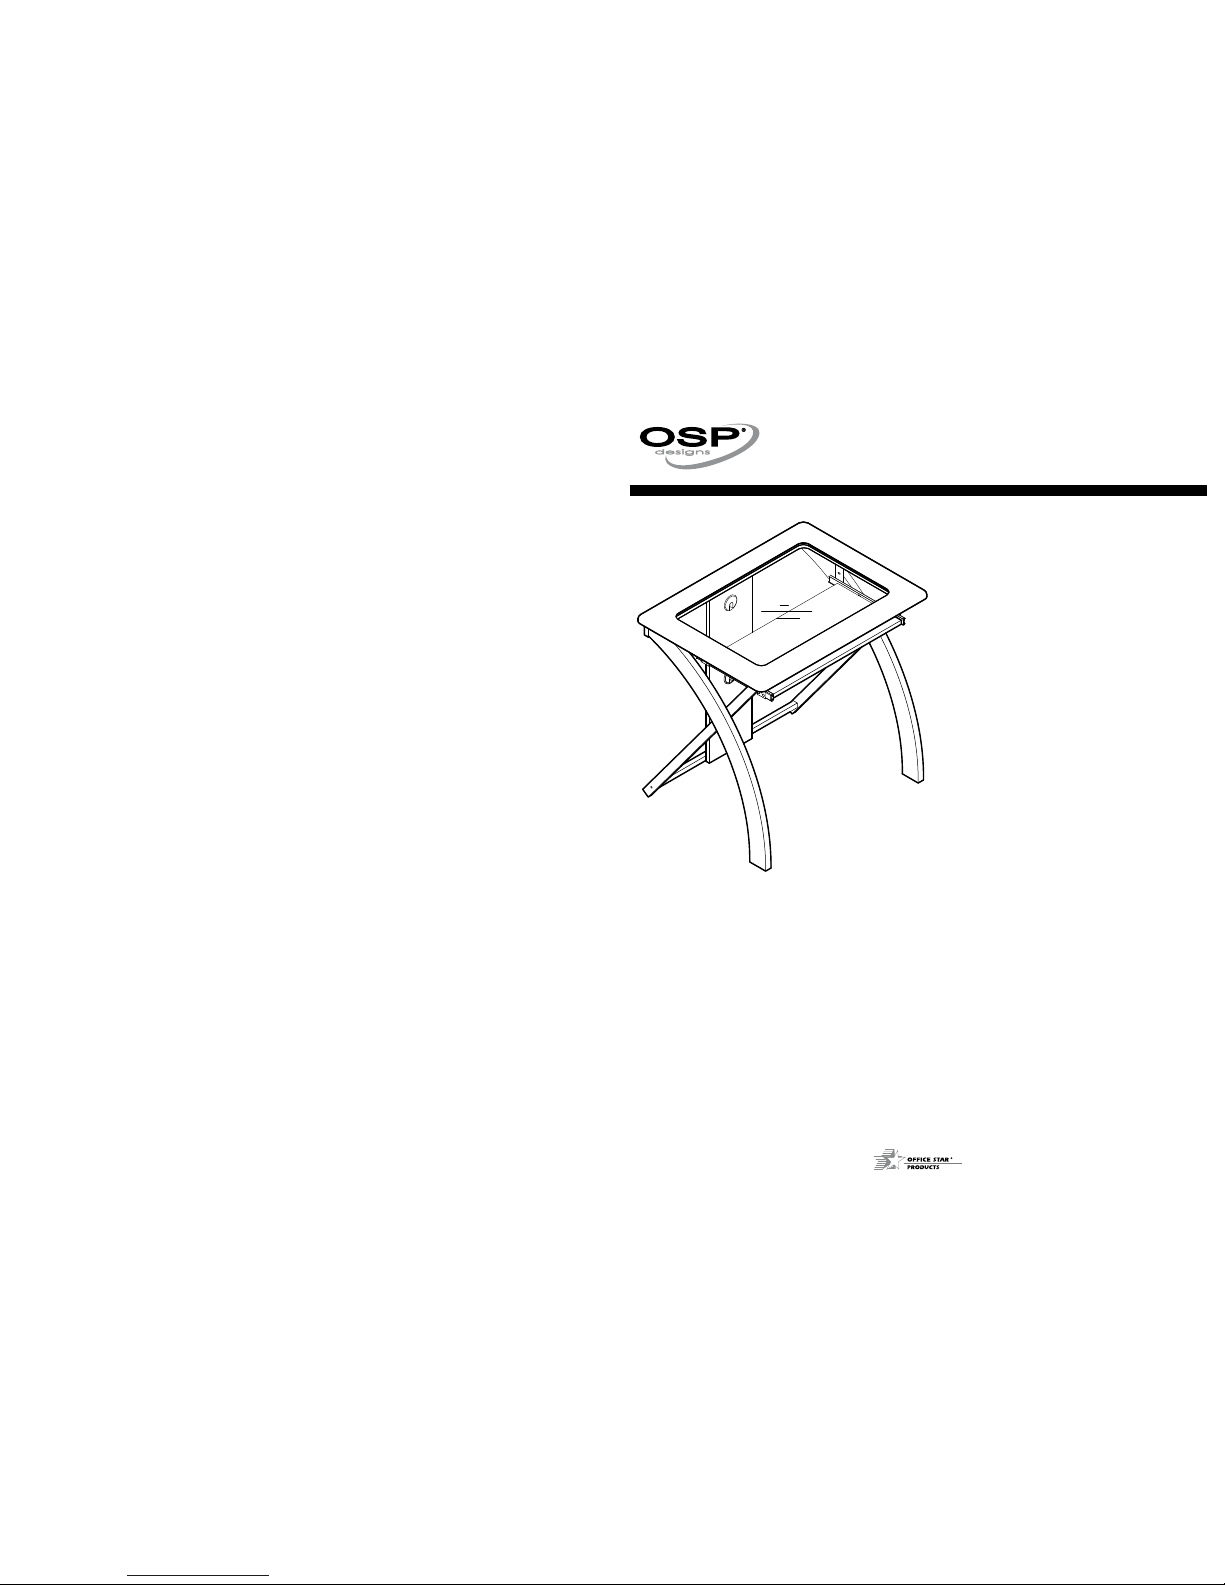
XT59ES
COMPUTER DESK
OPERATING INSTRUCTIONS
WARNING
1. Do not use this product unless all screws and bolts are
securely tightened.
2. Check that all screws and bolts are tight every three months or
as needed.
3. Dispose of packing material properly. Do not use plastic cover
as head covering. It may cause suffocation.
4. Do not use this product as a stepladder.
5. Use this product for its intended purpose only.
LIMITED WARRANTy
OSP Designs Warrants, to the original purchaser its products to be free from defects in material and workmanship for a period of 90 days. Defects
and damage from misuse, abuse, negligence, alteration, accident, vandalism, rusting, acts of nature or any other event beyond the control of OSP
Designs is not covered. The warranty does not cover cosmetic damage that may result from normal use. Liability for incidental or consequential
damages is excluded. The user assumes all risk of injury resulting from use of this product. This warranty gives you specific legal rights, and you
may also have other rights which vary from state to state.
To make a warranty claim, contact Customer Service, provide model number, sales receipt and description of the problem. It is the customer’s
responsibility to prepay freight on any components returned to the factory. OSP Designs will pay return freight on components covered under
terms of warranty.
Our quality standards are among the highest in the industry. Sometimes, no matter how hard we try, there are times when hardware is missing.
Our Parts Department will do everything possible to promptly remedy the problem. Contact us via email parts@officestar.net, by Fax
1-909-930-5629, or toll free parts number 1-800-950-7262, Monday through Friday 8:00 a.m. - 5:00 p.m. Pacific Time. OSP Designs P.O. Box
3520 Ontario, California 91761 USA
Page 2
IMPORTANT NOTE:
1. Use hand tools only for assembly as power tools may cause damage
2. Carefully remove any staples used for packaging.
3. Phillips Screwdriver also needed for assembly (not provided)
Remove all parts from carton, separate by part numbers indicated on parts list, and verify part quantities.
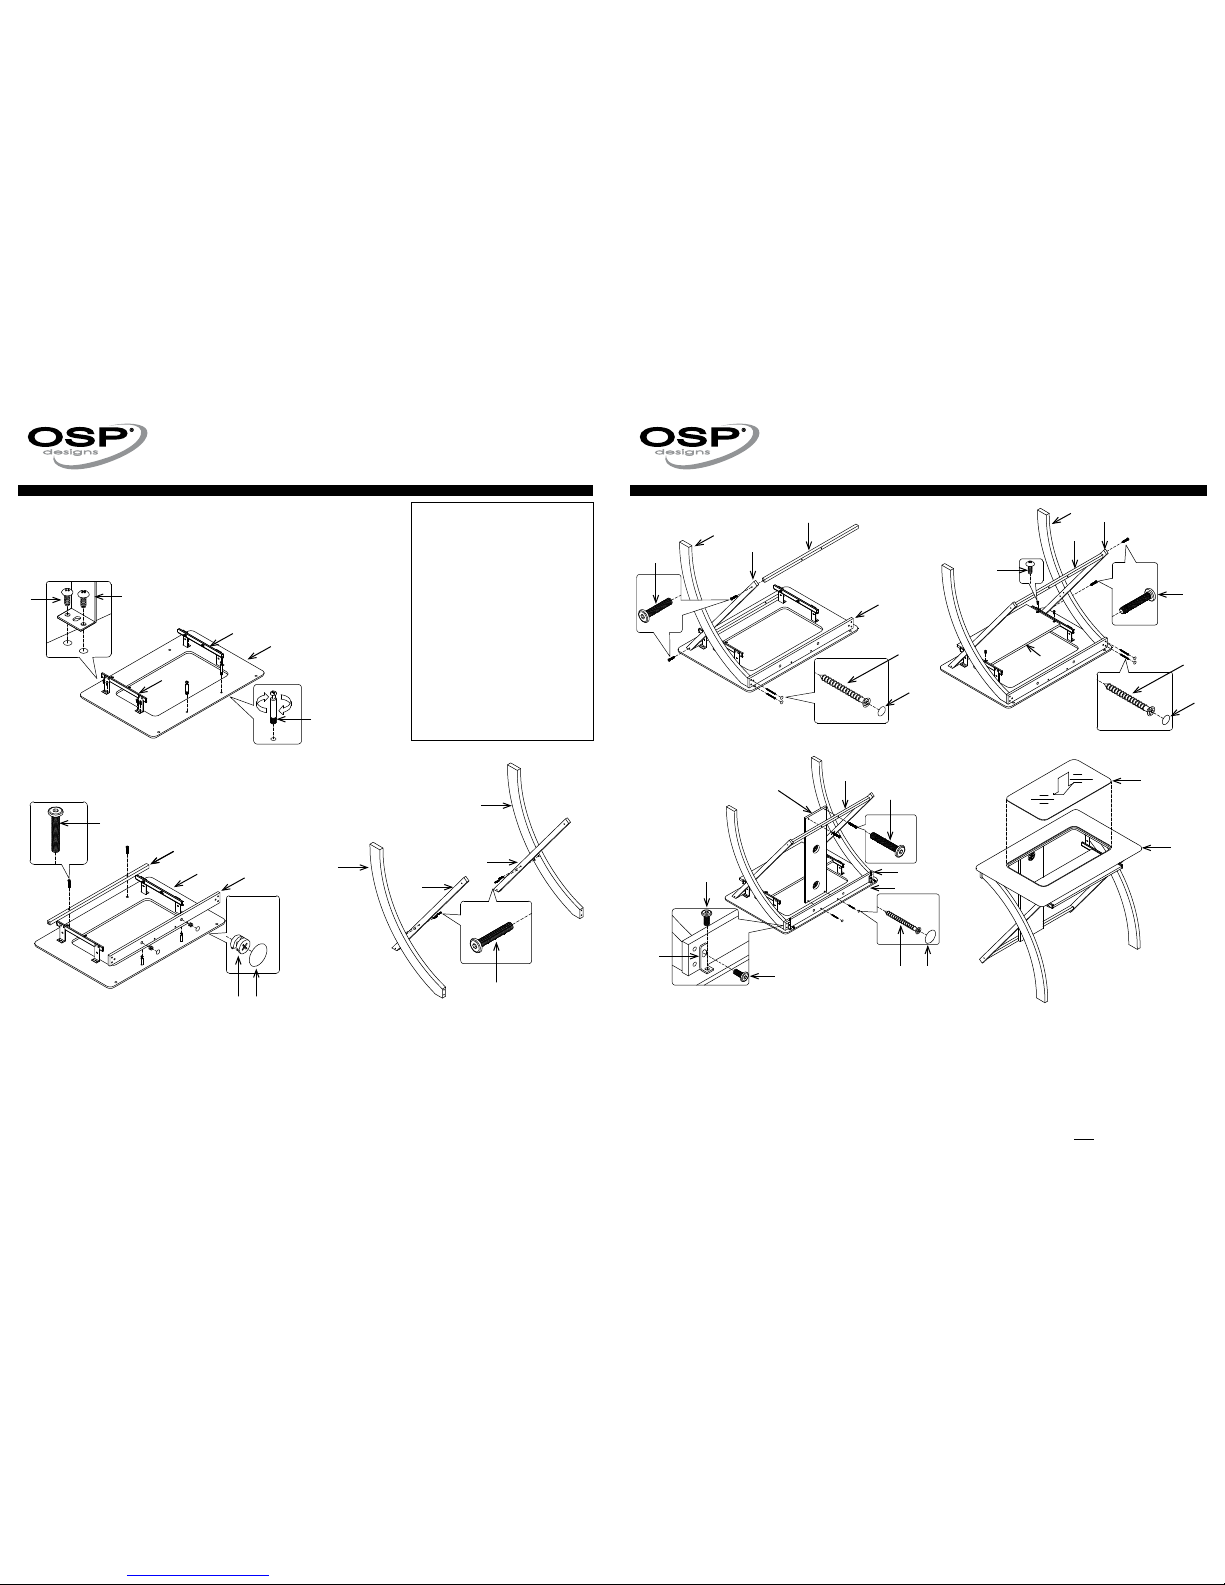
STEP 1 Attach Keyboard Glides (10L & 10R) to Desk Top (1) using four Small Phillips Screws (16) for each Keyboard Glide (10).
FULLY TIGHTEN ALL SMALL PHILLIPS SCREWS (16) USING PHILLIPS SCREWDRIVER (not provided).
Insert two Cam Lock Studs (12) into Desk Top (1).
STEP 2 Attach Top Metal Rail (8) to Desk Top (1) using two Long Allen Screws (15). FULLY TIGHTEN LONG ALLEN SCREWS (15) USING
ALLEN WRENCH (21). Attach Back Wooden Rail (4) to Desk Top (1) and secure using two Cam Locks (11). FULLY TIGHTEN CAM LOCKS (11)
USING PHILLIPS SCREWDRIVER (not provided). Cover cam lock holes using two Cam Caps (13).
STEP 3 Attach Wooden Legs (5L & 5R) to Metal Legs (6) using two Long Allen Screws (15) for each Wooden Leg (5).
FULLY TIGHTEN ALL LONG ALLEN SCREWS (15) USING ALLEN WRENCH (21).
PART QTY
1. Desk Top ....................1
2. Key Board ...................1
3. Back Panel ..................1
4. Back Wooden Rail .............1
5. Wooden Leg (5L & 5R) .........2
6. Metal Leg ....................2
7. Bottom Metal Rail .............1
8. Top Metal Rail ................1
9. Glass Top ...................1
10. Keyboard Glides (10L & 10R) ...2
11. Cam Lock ..................2
12. Cam Lock Stud ..............2
13. Cam Cap ...................2
14. Short Allen Screw ............4
15. Long Allen Screw ............12
16. Small Phillips Screw .........12
17. Medium Phillips Screw ........2
18. Large Phillips Screw ..........4
19. Sticker .....................6
20. Metal L-Bracket ..............2
21. Allen Wrench (not shown) ......1
XT59ES
COMPUTER DESK
ASSEMBLY INSTRUCTIONS
XT59ES
COMPUTER DESK
ASSEMBLY INSTRUCTIONS
STEP 4 Secure Wooden Leg (5L) to Back Wooden Rail (4) using two Large Phillips Screws (18), secure Metal Leg (6) to desk top assembly using one
Long Allen Screw (15), secure Bottom Metal Rail (7) to Metal Leg (6) using one Long Allen Screw (15). FULLY TIGHTEN ALL SCREWS. Cover holes
in Back Wooden Rail (4) using two Stickers (19).
STEP 5 Secure Wooden Leg (5R) to Back Wooden Rail (4) using two Large Phillips Screws (18), secure Metal Leg (6) to desk top assembly using one
Long Allen Screw (15), secure Bottom Metal Rail (7) to Metal Leg (6) using one Long Allen Screw (15). FULLY TIGHTEN ALL SCREWS. Cover holes
in Back Wooden Rail (4) using two Stickers (19).
STEP 6 Attach Back Panel (3) to Bottom Metal Rail (7) using two Long Allen Screws (15), secure Back Panel (3) to Back Wooden Rail (4) using two Large
Phillips Screws (19). FULLY TIGHTEN ALL SCREWS. Cover holes in Back Wooden Rail (4) using two Stickers (19). Secure two Metal L-Brackets (20)
to each end of Back Wooden Rail (4) and Desk Top (1) using two Short Allen Screws (14). FULLY TIGHTEN ALL SHORT ALLEN SCREWS (14).
STEP 7 Carefully turn desk to upright position. Careully place Glass Top (9) onto Desk Top (1).
ATTENTION: MAKE SURE ALL SCREWS AND CAM LOCKS (11), CAM LOCK STUDS (12) AND ALL SCREWS ARE FULLY
TIGHTENED BEFORE USING DESK.
© Office Star Products Decebmer 2010
4
5L
6
8
STEP 1
STEP 2
STEP 3
STEP 5
STEP 7
STEP 6
10L
10R
10L, 10R
11
12
15
16
13
2
5R
6
15
3
9
14
18
19
20
14
15
15
18
19
16
7
1
2
5R
5L
STEP 4
15
7
18
19
4
6
6
7
4
1
1
 Loading...