

Page 1

T5 4K ULTRAHD
ON CAMERA Monitor
Quick Guide
Page 2
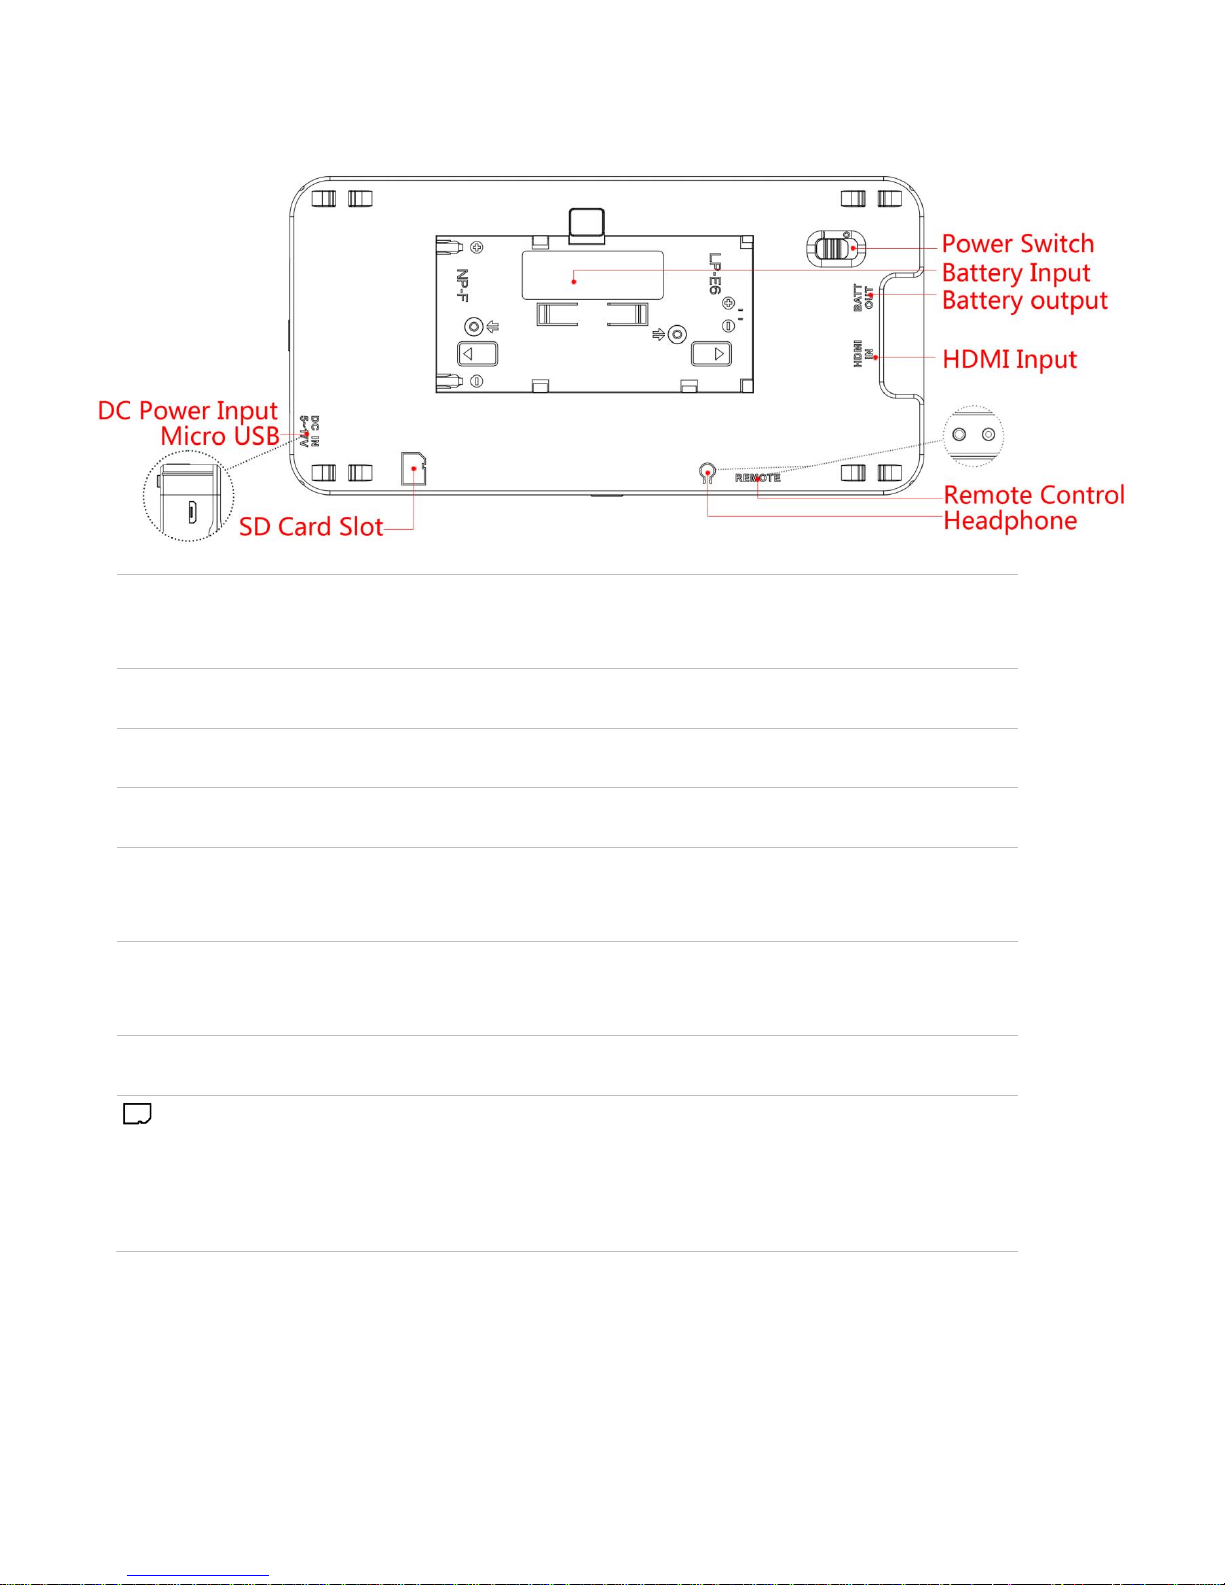
INTERFACES AND BUTTONS
Power Switch
Switch to“|”position to power on; and switch to “”
position to power off
DC IN
DC power input, 5~17VDC,Micro USB
Battery Input
External battery NP-F/LP-E6, 6V~8.4V
BATT OUT
Battery output
HDMI IN
HDMI input interface, supports HDCP, compatible
DVI1.0, HDMI Type-A
Remote
Remote control, headphone output, 2.5mm Stereo
Jack
Ω
Headphone output jack, 3.5mm stereo Jack
SD card slot, the SD card is used to load the
customized LUT tables, and update the device
configuration data of V59 and FPGA.
* Support SONY NP-F and Canon LP-E6 battery currently.
Page 3
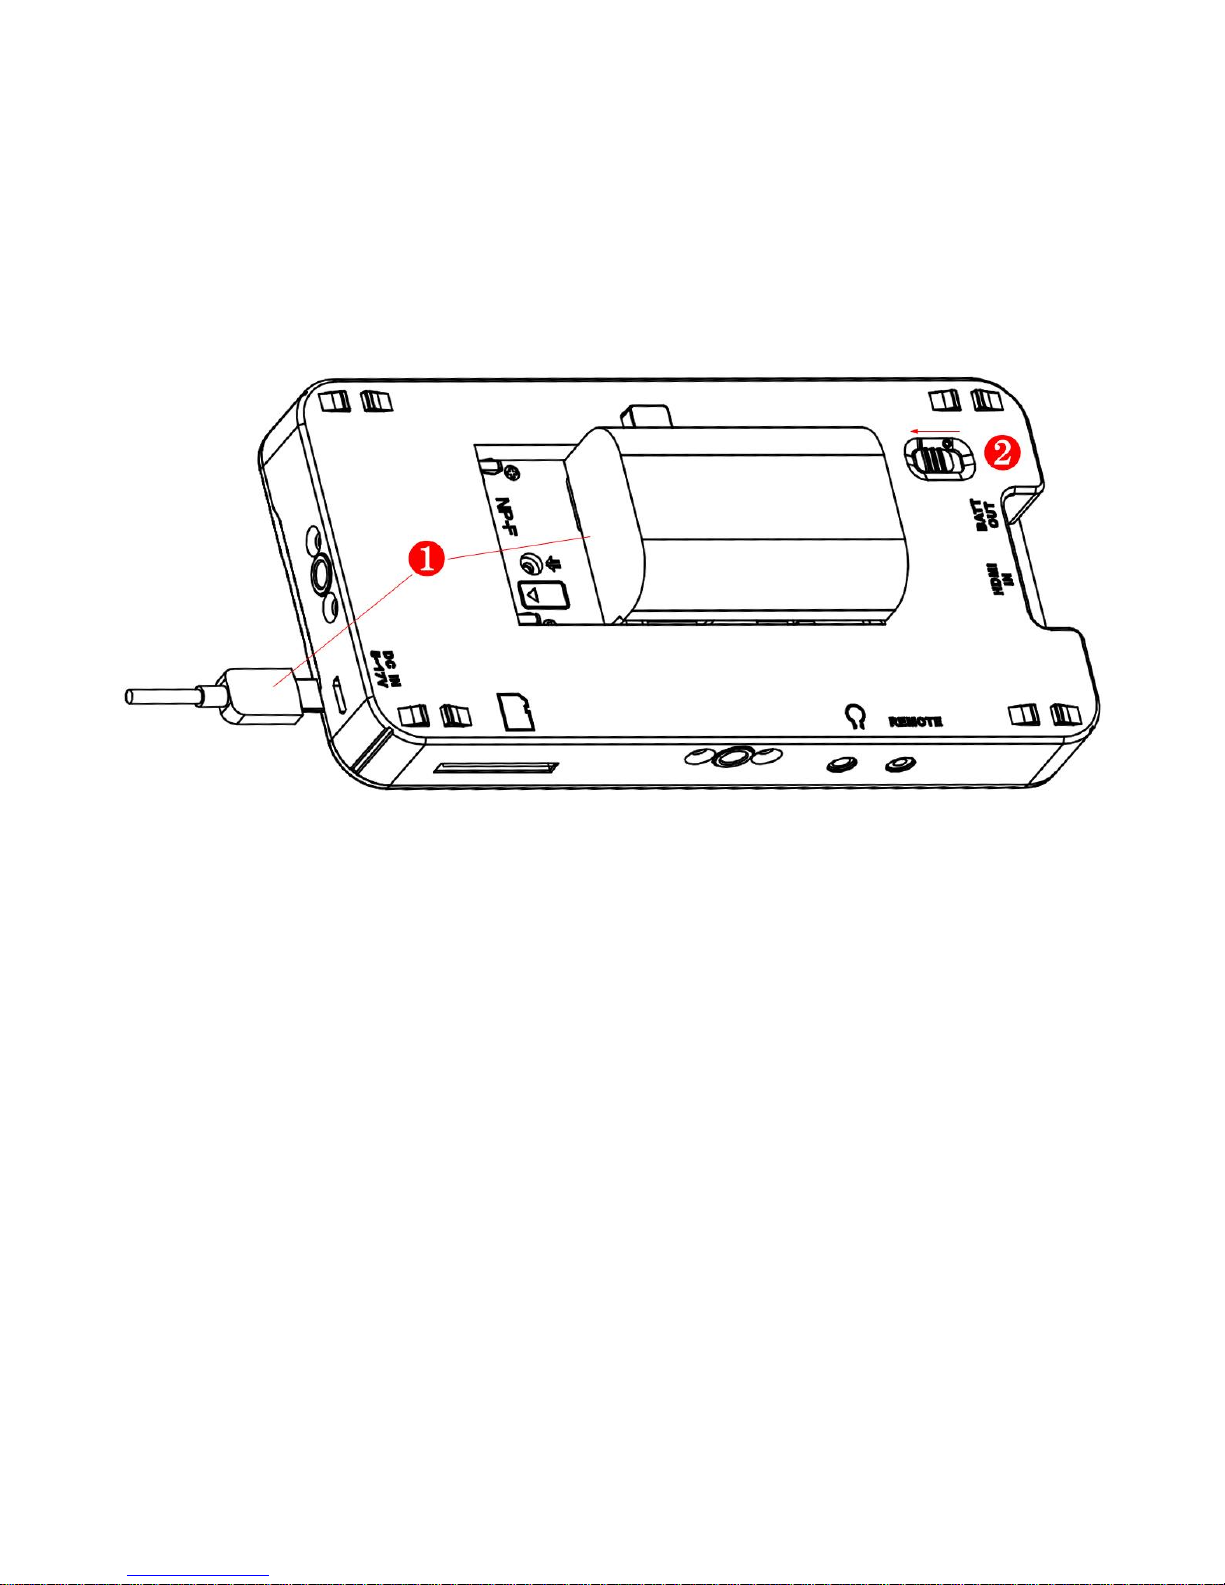
POWER ON
❶ Install the battery or connect the power cord.
❷ Switch the power switch to “一”position, the device is powered on,
and the control buttons on the front panel are lit up in highlight white.
* It will display the boot screen after power on for 3~4 seconds.
* The BATT OUT interface could offer a power output when amounting battery in
the device.
* Only use the adapter and the power cord specified by the manufacture for your
safety!
Page 4
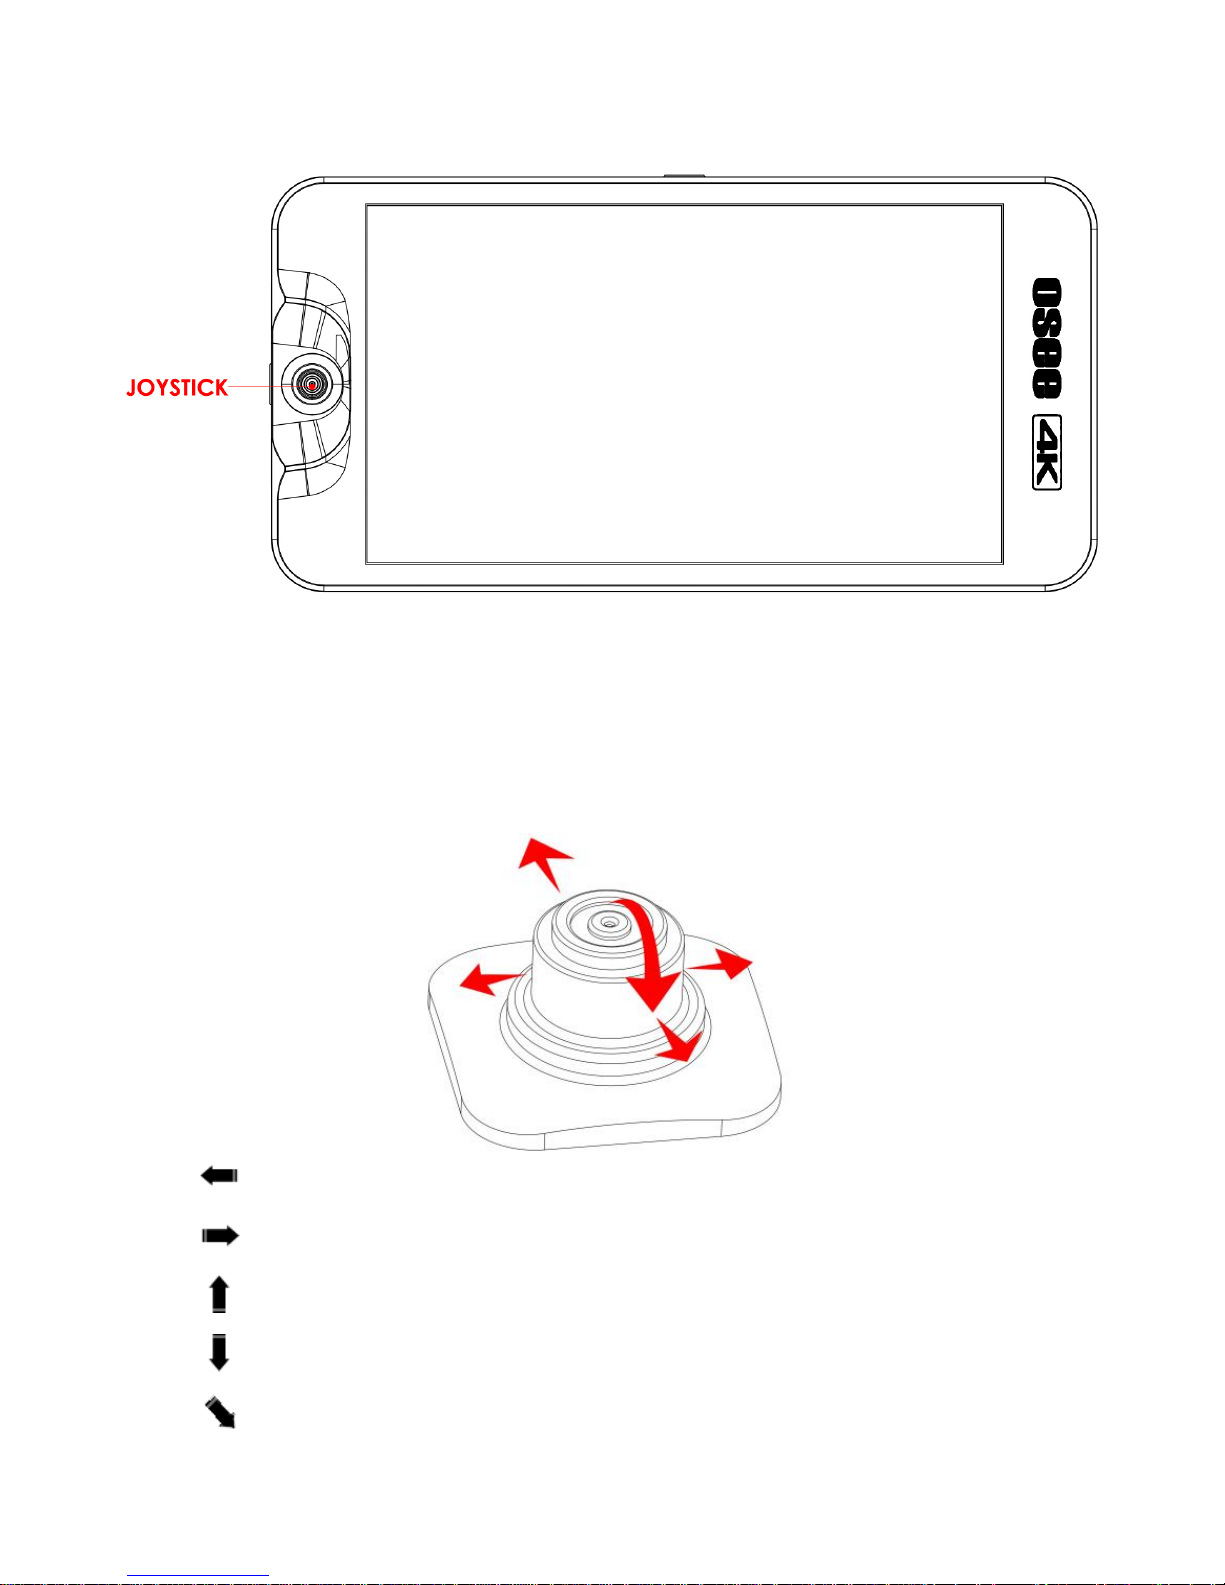
BUTTONS OPERATION
Joystick
Joystick provides five operation directions, Up Down, Left, Right, and
Straight Down. Use the joystick as a navigation tool to scroll between scenes
pages and set features.
: scroll it leftmost to enter into the monitor settings menu
: scroll it right to enter into a scene or create a scene mode
: scroll it up to enter into ZOOM mode
: cancel the settings, return to the previous menu or quit menu settings.
: scroll it down to confirm the current operation or selection
Page 5
SCENE MODE
Enter a Scene
It will display a scene as default after powered on. Scroll the joystick right or
left to switch among scenes.
Scroll the joystick down to return a scene when in ZOOM mode.
Scroll the joystick right to return a scenewhen in monitor settings menu.
Add a Scene
Hold the joystick right for 3 seconds, it will prompt “Add New MySet ”
command in the bottom center of the screen, press the joystick straight down
to confirm the operation. It supports up to 8 customized scenes.
The scene will be numbered in sequence, and the name will be displayed at
the left bottom of the screen, e.g., .
Delete a Scene
Scroll the joystick down in a scene, it will display the DELETE command at
the bottom of the screen, press the joystick straight down to confirm deletion.
The DELETE command is not available when there is only one scene.
SCENE TOOL
Add a Tool in a Scene
In a scene, scroll the joystick down, it will pop up the “ADD NEW TOOL”
command. Press the joystick straight down to confirm, it will display Tools
Menu on the left side of the screen, scroll the joystick up or down to select
your desired scene tool, and press the joystick straight down to confirm.
Page 6
Enable/Disable a Tool
In a scene, press straight down the joystick to display the scene tool, and
then scroll the joystick left to close the scene tool in current scene.
IMAGE ZOOM
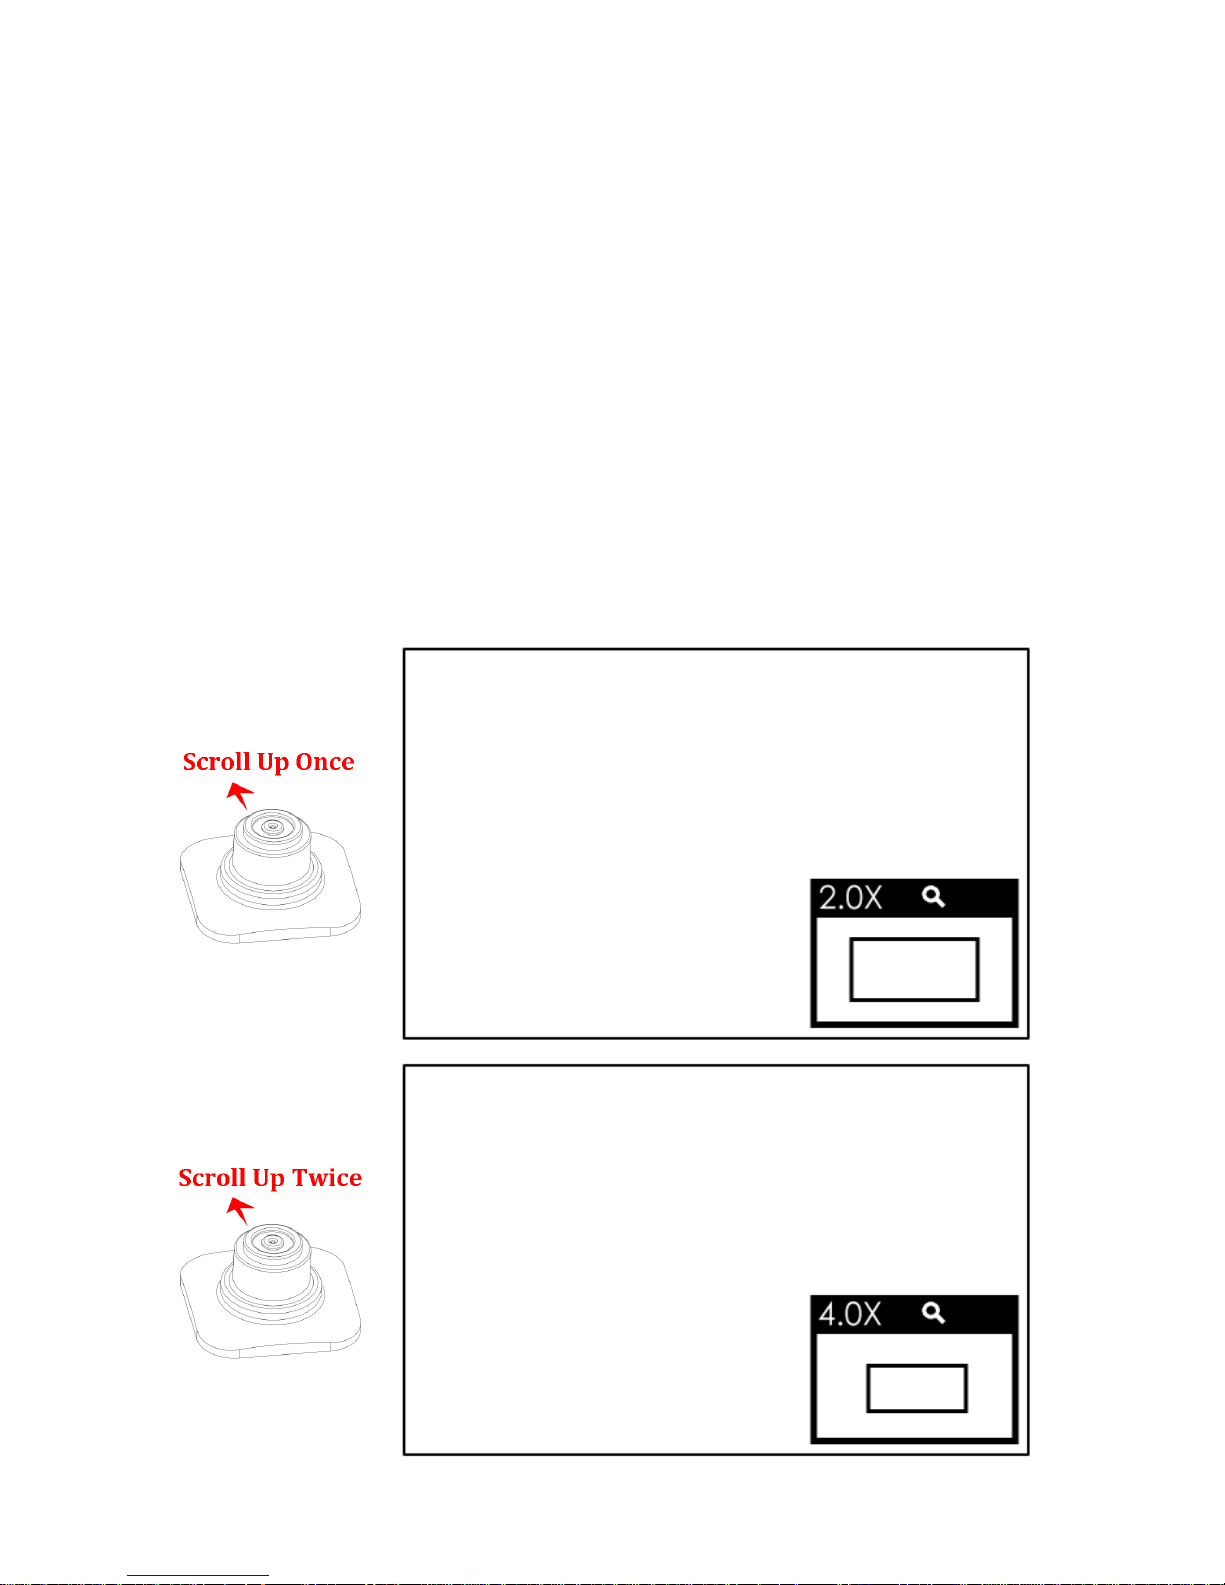
Scroll up the joystick to enter into image zoom mode, double(2X) or quadruple(4X)
the image, and move the starting position of the enlarged image.
❶ Enter ZOOM Mode
In a scene, scroll up the joystick to enter into image zoom 2X mode, and there
will be a 2X zoom icon at the right bottom corner of the screen, continue to scroll
up the joystick to to enter into image zoom 4X mode.
Page 7
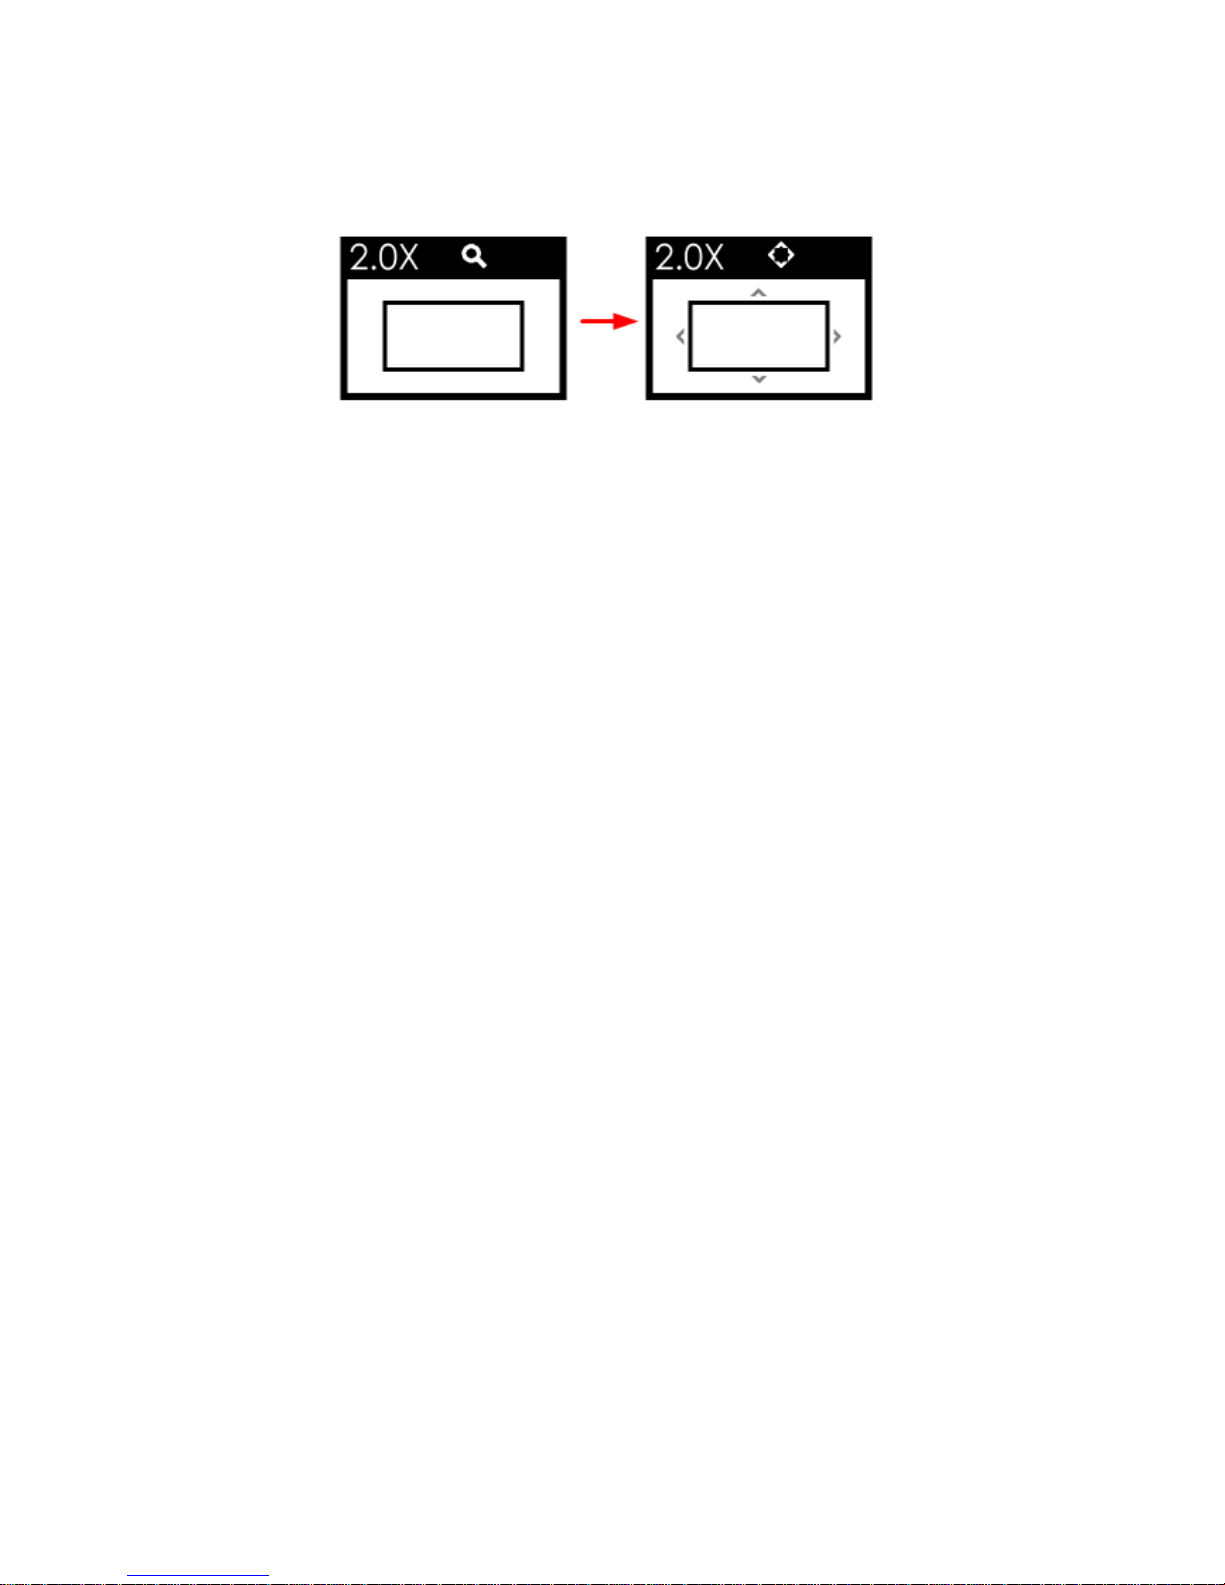
❷ Adjusting Mode
Press straight down the joystick to move the starting position of the enlarged
image.
Then, the icon is changed, there will be four arrows at each direction surrounding
the center rectangle.
Press straight down the joystick to confirm the adjustment.
* In 2X or 4X zoom mode, press straight down the joystick, it will recover and
display the original image.
Rotate Screen
Hold the joystick left for 3 seconds to enter the monitor settings menu;
Scroll down to select controlsDISPLAY ROTATE item, and press straight down
the joystick to display the DISPLAY ROTATE submenu. Scroll right or left to set the
SCREEN ROTATE item to be 180, then the input image will reverse vertically. Set
the IMAGE ROTATE as the same way.
Restore the Factory Settings
Select monitor settings menu, and select systemFACTORY RESET item, then
scroll right to select EXECUTE FACTORY RESET command, and press the
joystick straight down to confirm the selection to initialize the settings to default
values.
Page 8

 Loading...