

Oru Kayak COAST XT Assembly Manual
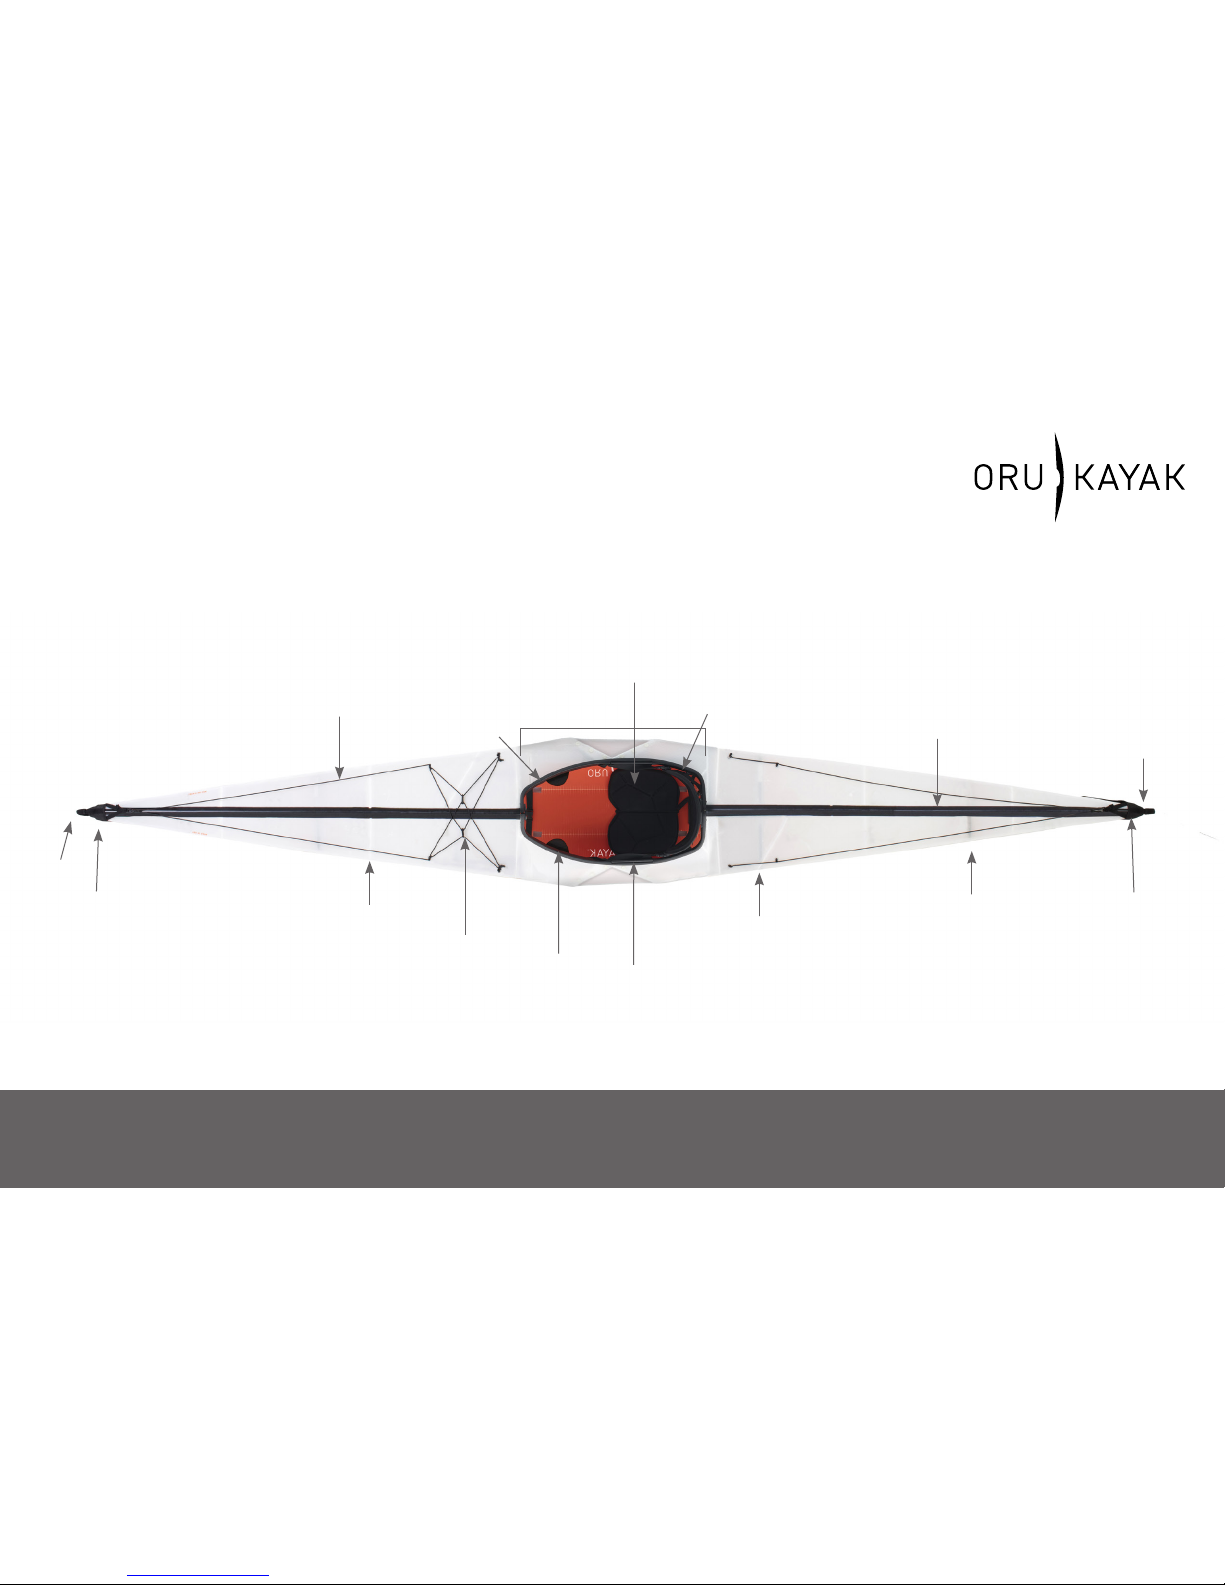
STERN
(back)
Stern
fairing
Bow
fairing
BOW
(front)
Handle
Cockpit
handles
Cockpit
Coaming
(cockpit rim)
Deck
line
Bow Bulkhead
(inside)
Cockpit
Bulkhead
(inside)
Deck
web
Seat
pad
Seat
back
Zipper
channel
US PATENT NO. 8,316,788
THE COAST XT
Handle
Assembly Guide
HOW TO GET
STARTED
Read this entire Assembly Guide
before assembling your Oru Kayak.
Watch the instruction video:
www.orukayak.com/pages/assembly
Be patient! With practice your
assembly time will get to 15 minutes.
WE’RE HERE TO HELP!
If you have questions, email us at service@orukayak.com
Stern
Bulkhead
(inside)
Thigh
braces
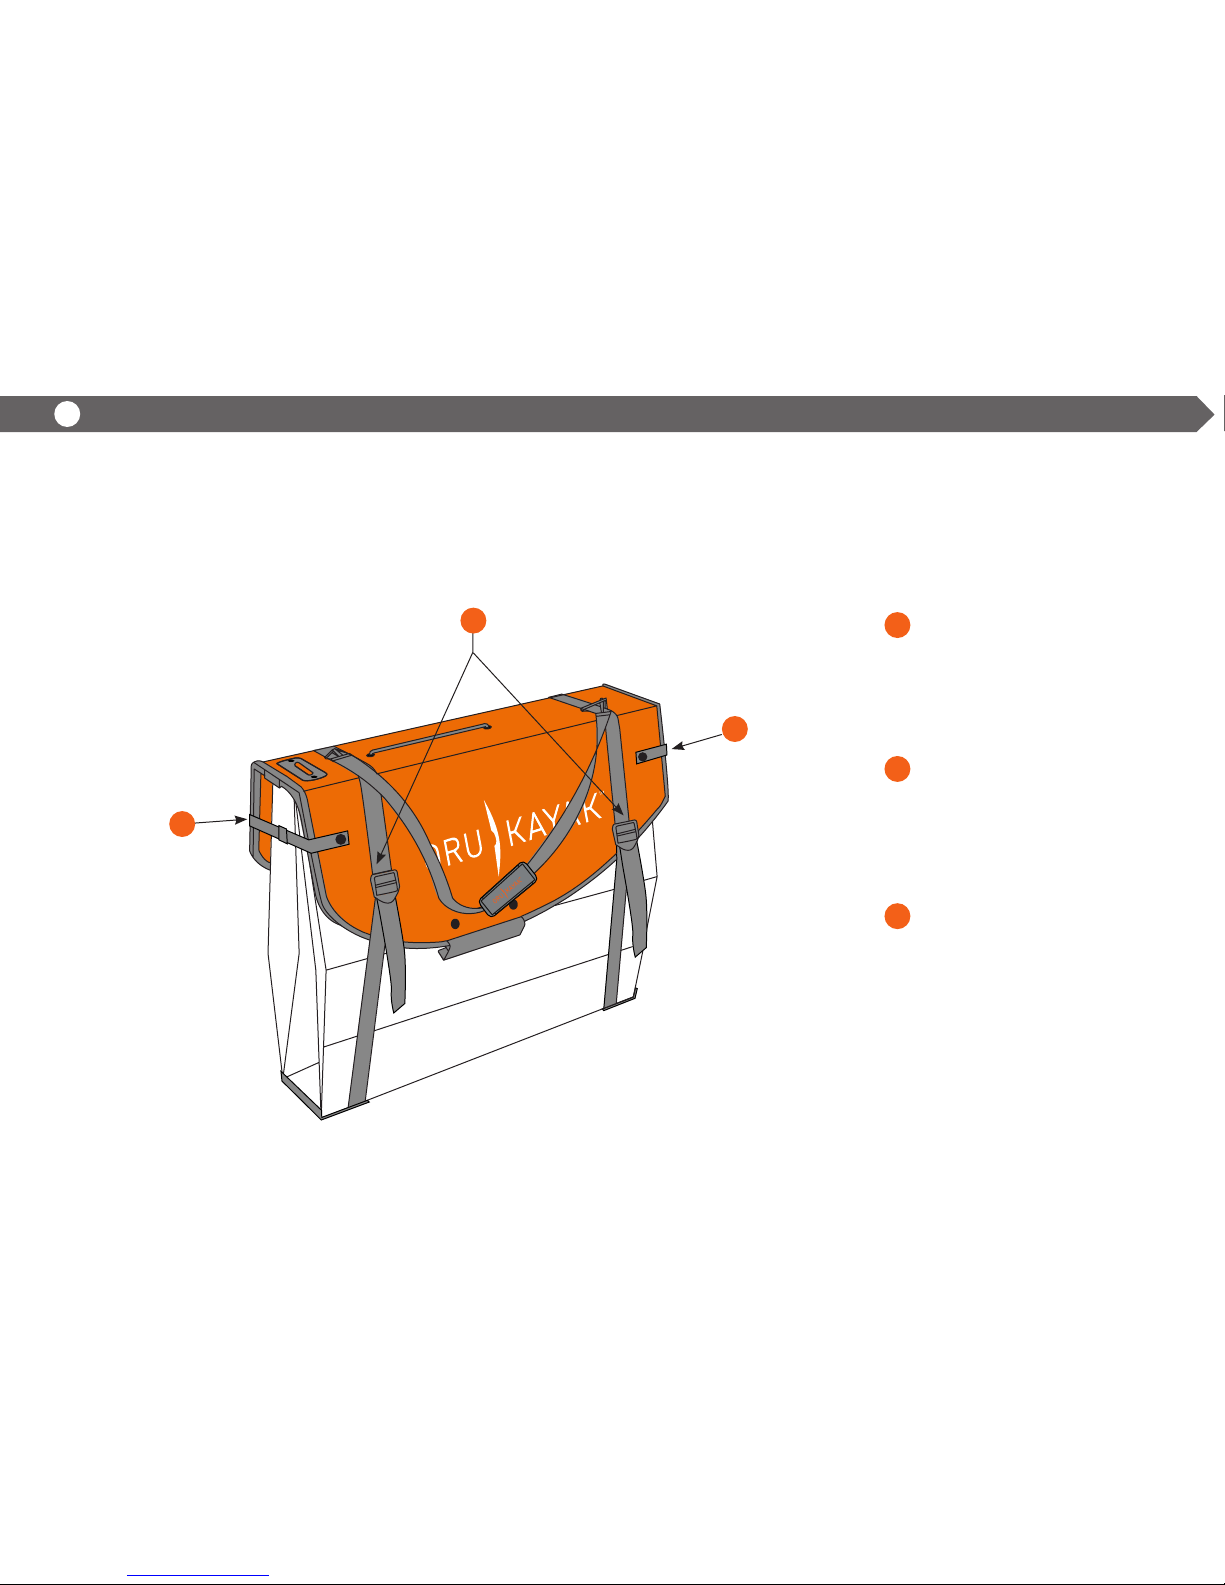
A
B
C
Loosen and slide the shoulder
strap off the sides of the box.
You will not use it while kayaking,
but you will need it when you fold
the Oru Kayak back into box form.
Unclip the two sets of box
buckles on both sides of the
orange lid. Lift the lid off –
this will become the kayak’s
floorboard.
Remove the loose kayak
components packed into
the box. See page 2 for a list
of the loose components.
Additional components are
permanently attached to
the hull/deck.
Step 1: Open the Oru Kayak box
The box contains all the components needed for assembly and includes
space to store gear—such as float bags and our 4-piece paddle.
B
A
2 3 4 5 6 7 8 9 101
B
1 ORU KAYAK | ASSEMBLY GUIDE
WWW.ORUKAYAK.COM 2
1
2
3
4
5
7
6
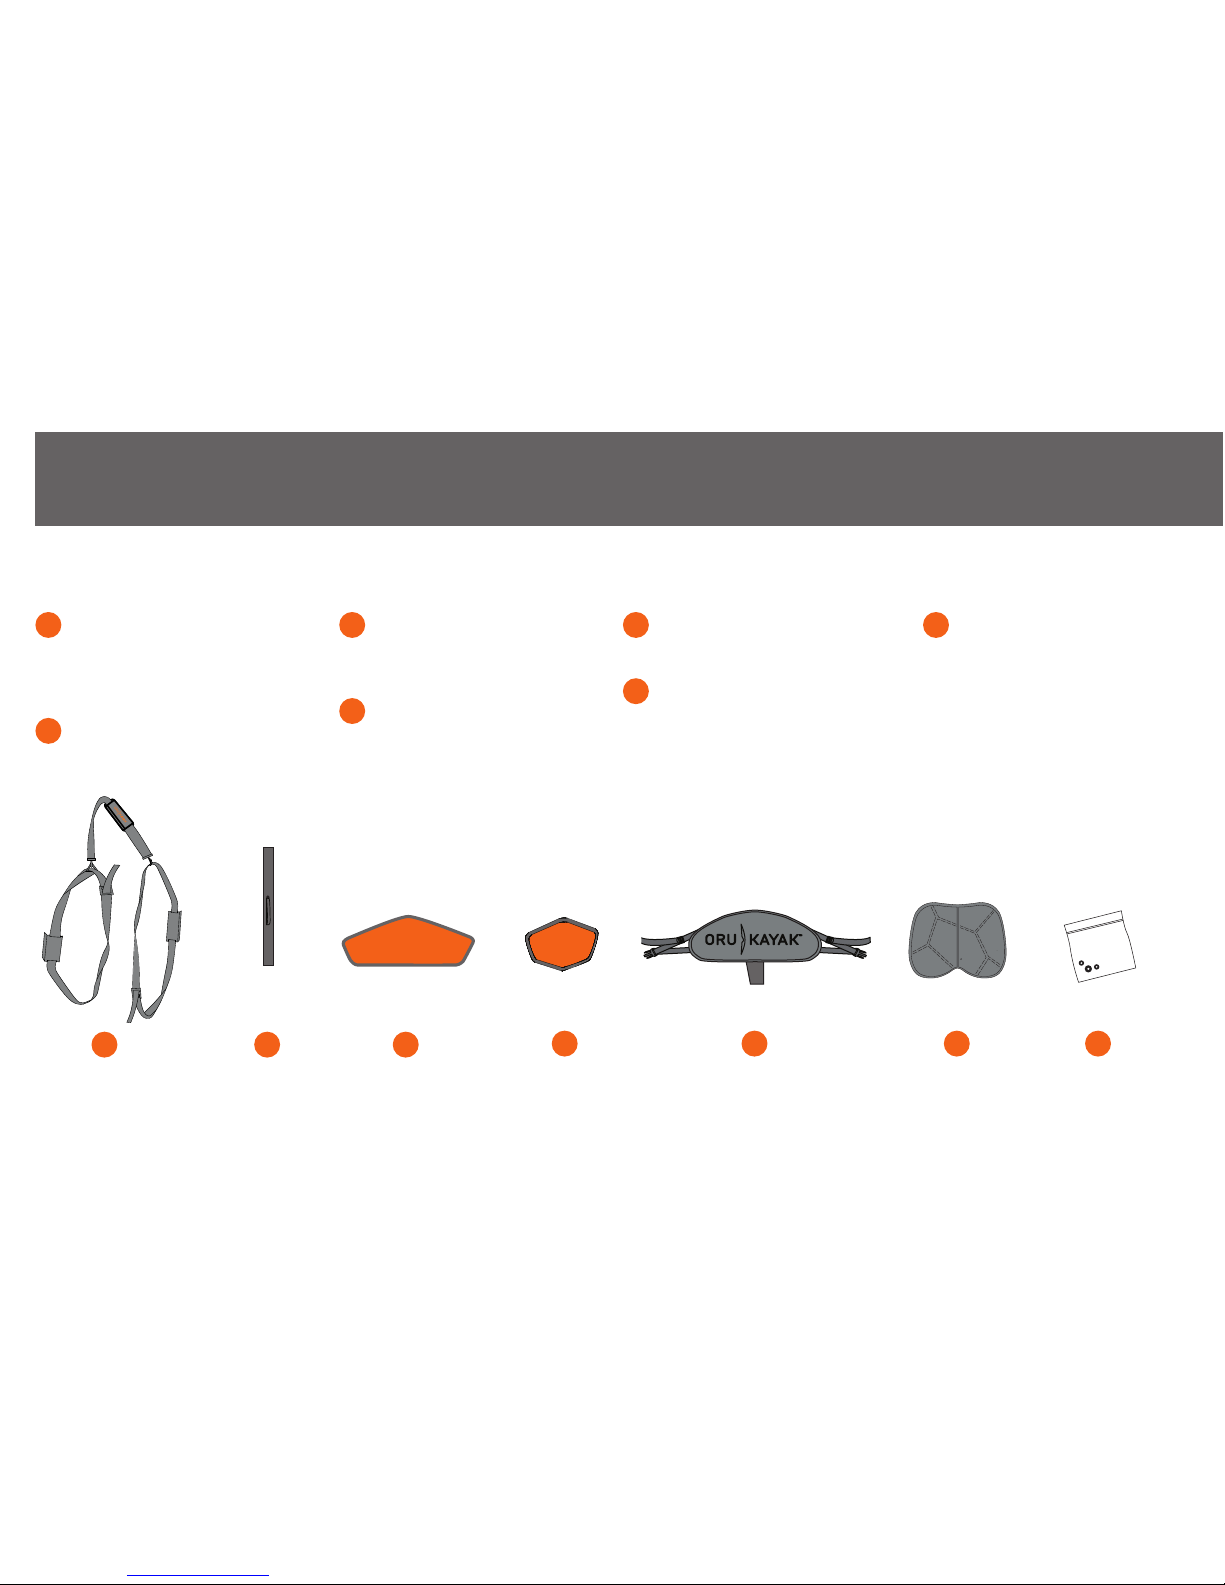
Parts: Loose components
1
SHOULDER
STRAP
STERN (back)
BULKHEAD
SPARE PARTS
KIT
64
BACKREST
5
SEAT PAD
2
ZIPPER
CHANNELS
x6
TOP
Shoulder strap: Used to carry
the kayak when in box form.
Stow behind the backrest while
kayaking.
Zipper channels: These seal
the deck seam.
Cockpit (large) bulkhead:
Provides structural rigidity
behind the cockpit.
Stern (back) bulkhead:
Provides structural rigidity
in the kayak’s stern.
Backrest: Combines back
support and structural rigidity.
Seat pad: Tucks under the
bungee in the oorboard.
Spare parts kit: Extra
hardware and lubricant for
repairs and upkeep.
7
7
3
COCKPIT (large)
BULKHEAD
TOP

Step 2: Unfold the box
Unclip side straps that are
keeping the kayak closed on
both sides.
Hold the two folds at the
orange stickers. Pull as
indicated in the illustration
(left) to open. The skin will
be stiff.
Push the ends apart to
extend the box into a long
sheet.
Pop the hull flat with your
hands as you extend it,
pushing down the inverted
folds, creating a bowl shape.
A
B
C
C
NOTE
Orange stickers will
help guide you through
your first assembly.
3 4 5 6 7 8 9 101 2
A
A
B
B
C
3 ORU KAYAK | ASSEMBLY GUIDE
PULL UP
PULL UP
D
PUSH DOWN
SIDES POP UP TO
CREATE BOWL SHAPE
D
D
PROFILE VIEW

BOW
(front)
WWW.ORUKAYAK.COM 4
Fairings: These finish the boat at
the bow and stern and include
handles for carrying the kayak.
Tension strap: Provides additional
rigidity to the hull of the kayak.
Bow and stern bulkheads: These
provide structural rigidity.
Adjustable footrest: Keeps your
legs in a comfortable position
and gives you greater
control of the
kayak.
1
5
6
2
3
Parts: Hull/deck
The box becomes the hull and deck of the kayak. Several key parts are permanently
attached to the hull/deck. The bow (front) and stern (back) of the Oru Kayak are
different, so pay attention to orientation throughout the assembly process.
STERN
(back)
3
Coaming: The rim around
the cockpit can hold the Oru
Kayak spray skirt as well as
any standard spray skirt
(size: medium), if desired.
Deck lines: These lines
provide a secure grabbing
point during a rescue.
(The lines are orange in
the manual for instructional
purposes only.)
Foam plugs: Keeps out any
water that gets through the
fairings.
Bulkhead channels: For
placing the bulkheads
3
7
7
4
8
8
BOW
(front)
3
5
6
5
2
4
1
6
 Loading...