

Oru Kayak Beach LT Assembly Manual
WWW.ORUKAYAK.COM 1
Read this Assembly Guide before assembling the Oru Beach LT, and watch the video at www.oru-
kayak.com/assembly. Questions? Email service@orukayak.com or call 1-844-FOLD-ORU.
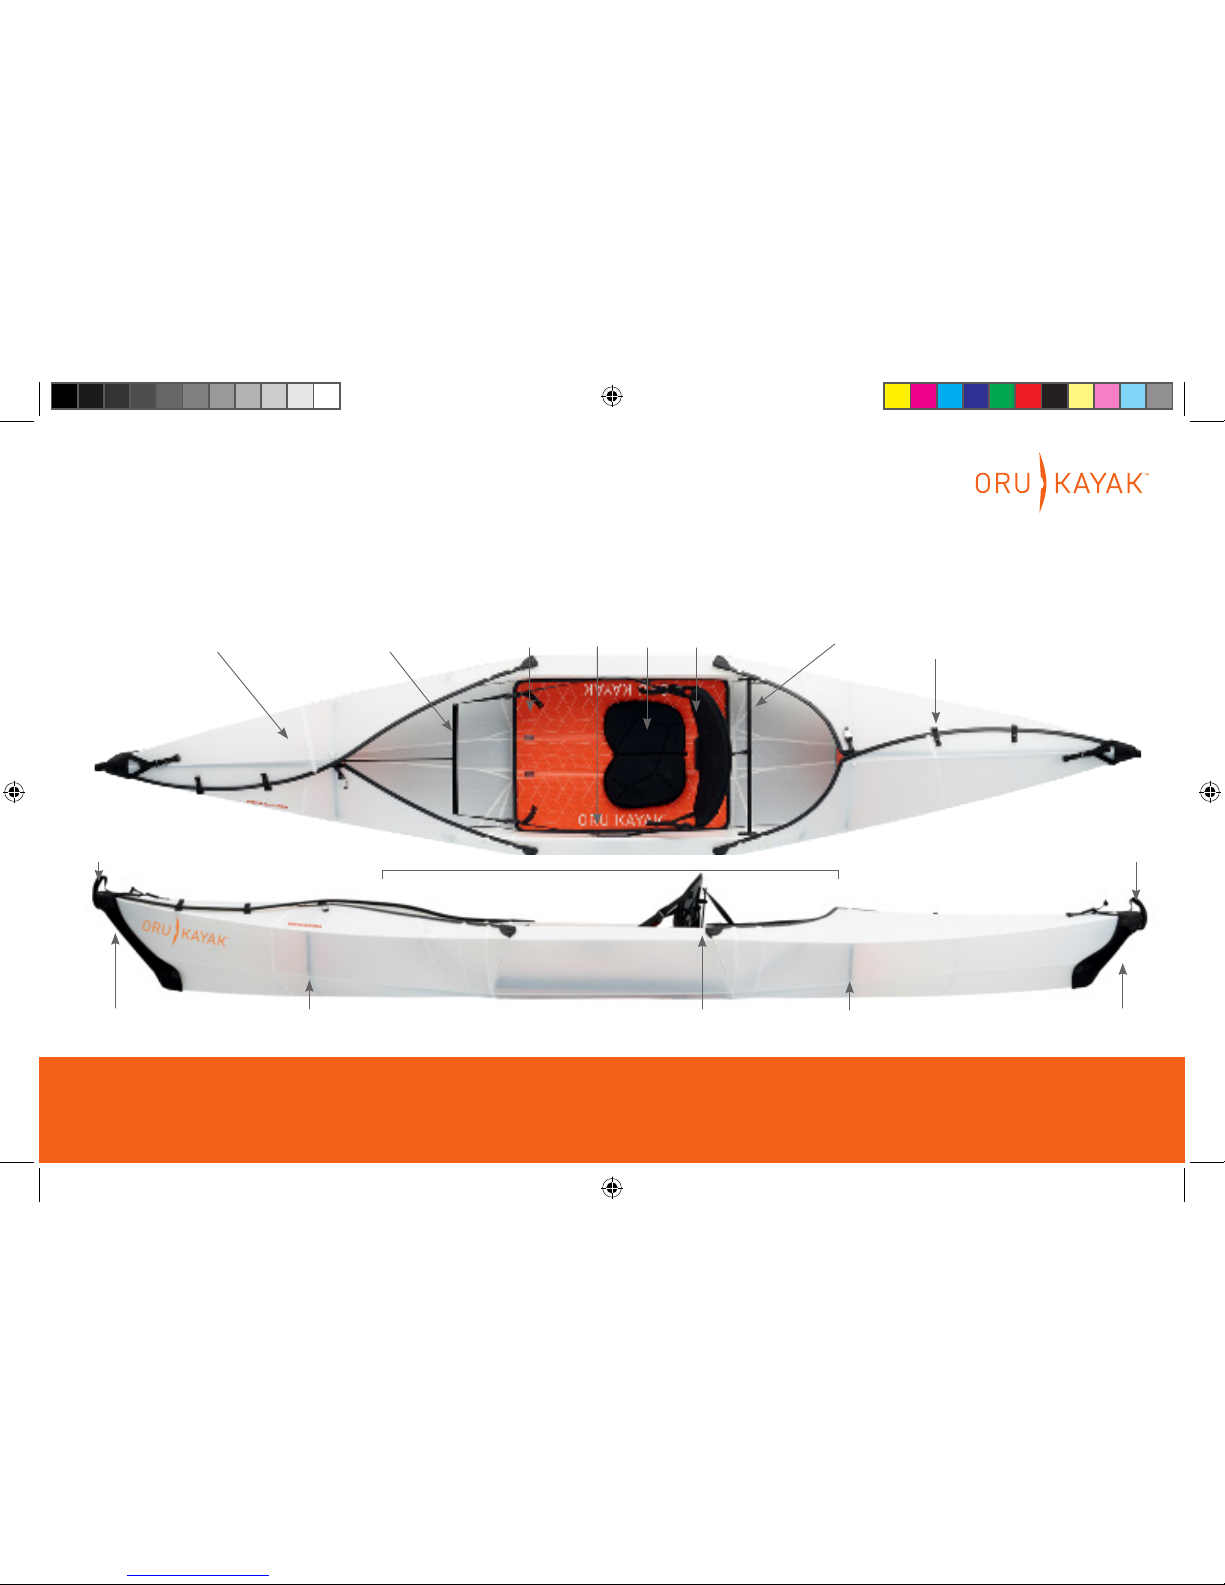
BOW
(front)
Stern
fairing
Bow
fairing
STERN
(back)
Handle Handle
Carrying
handles
Cockpit
Floorboard
Deck
snaps
Footrest
Stern
bulkhead
Seat
column
Bow
bulkhead
Seat
pad Backrest
Reinforcing
rod
BEACH LT
ASSEMBLY GUIDE
US PATENT NO. 8,316,788
OTHER PATENTS PENDING
Deck
THE
orukayak_Beachassemblyguide_090316.indd 1 11/1/16 11:56 AM

2 ORU KAYAK | BEACH LT KAYAK ASS EMBLY GUID E
Ready to fold? The box you’re looking at will unfold into a twelve-foot long kayak that’s up for
all kinds of fun. It’s inspired by the Japanese art of origami— and while it’s not quite as easy as
unfolding a piece of paper, your Oru Beach LT is designed for simple assembly.
With practice, the Beach LT can be put together in 3-5 minutes—but the first time will take longer,
as you learn the process and the folds break in. Be patient; we recommend trying it at home the first
time, and watching our assembly video online, in addition to reading this Assembly Guide. If you
still have questions, email us at service@orukayak.com or give us a call at 1-844-FOLD-ORU.
Then go out and hit the water! We can’t wait to hear about your Oru Beach LT experiences. Send
your photos and videos to service@orukayak.com or add #orukayak to share them with the
community on Instagram, Facebook or Twitter.
Enjoy your adventures!
The Oru Kayak team
GETTING STARTED
orukayak_Beachassemblyguide_090316.indd 2 11/1/16 11:56 AM

WWW.ORUKAYAK.COM 3
Pro Tips
Assembly
Back on Dry Land: Folding your
kayak into its box
Caring for your Oru Beach
• Read this entire Assembly Guide.
• Watch the assembly video at www.orukayak.
com/assembly.
• Your first assembly may take 15-20 minutes,
but with practice you’ll get to 3-5. Be patient!
• If possible, do your first assembly at home, and
leave it assembled overnight to help break in
the folds.
• Read the included Owner’s Manual for important information about safety, usage, care,
storage, and transportation of your Oru Beach
LT kayak.
• If you have any questions, email us at service@
orukayak.com or call us at 1-844-FOLD-ORU.
We love to help!
3
4-13
17
WWW.ORUKAYAK.COM 3
PRO TIPS
CONTENTS
14-16
orukayak_Beachassemblyguide_090316.indd 3 11/1/16 11:56 AM

4 ORU KAYAK | BEACH LT KAYAK ASS EMBLY GUID E
A
The lid
becomes
the kayak’s
floorboard.
The box becomes
the kayak’s hull
and deck.
Loosen and slide off the two
loops that go around box.
Set shoulder strap aside.
(You won’t need it while
kayaking.)
Lift the lid off. This will
become the kayak’s
floorboard.
Remove the loose parts
packed into the box.
See next page for a full
description of each part.
A
B
C
ASSEMBLY / STEP 1: OPEN THE BOX
orukayak_Beachassemblyguide_090316.indd 4 11/1/16 11:56 AM
WWW.ORUKAYAK.COM 5
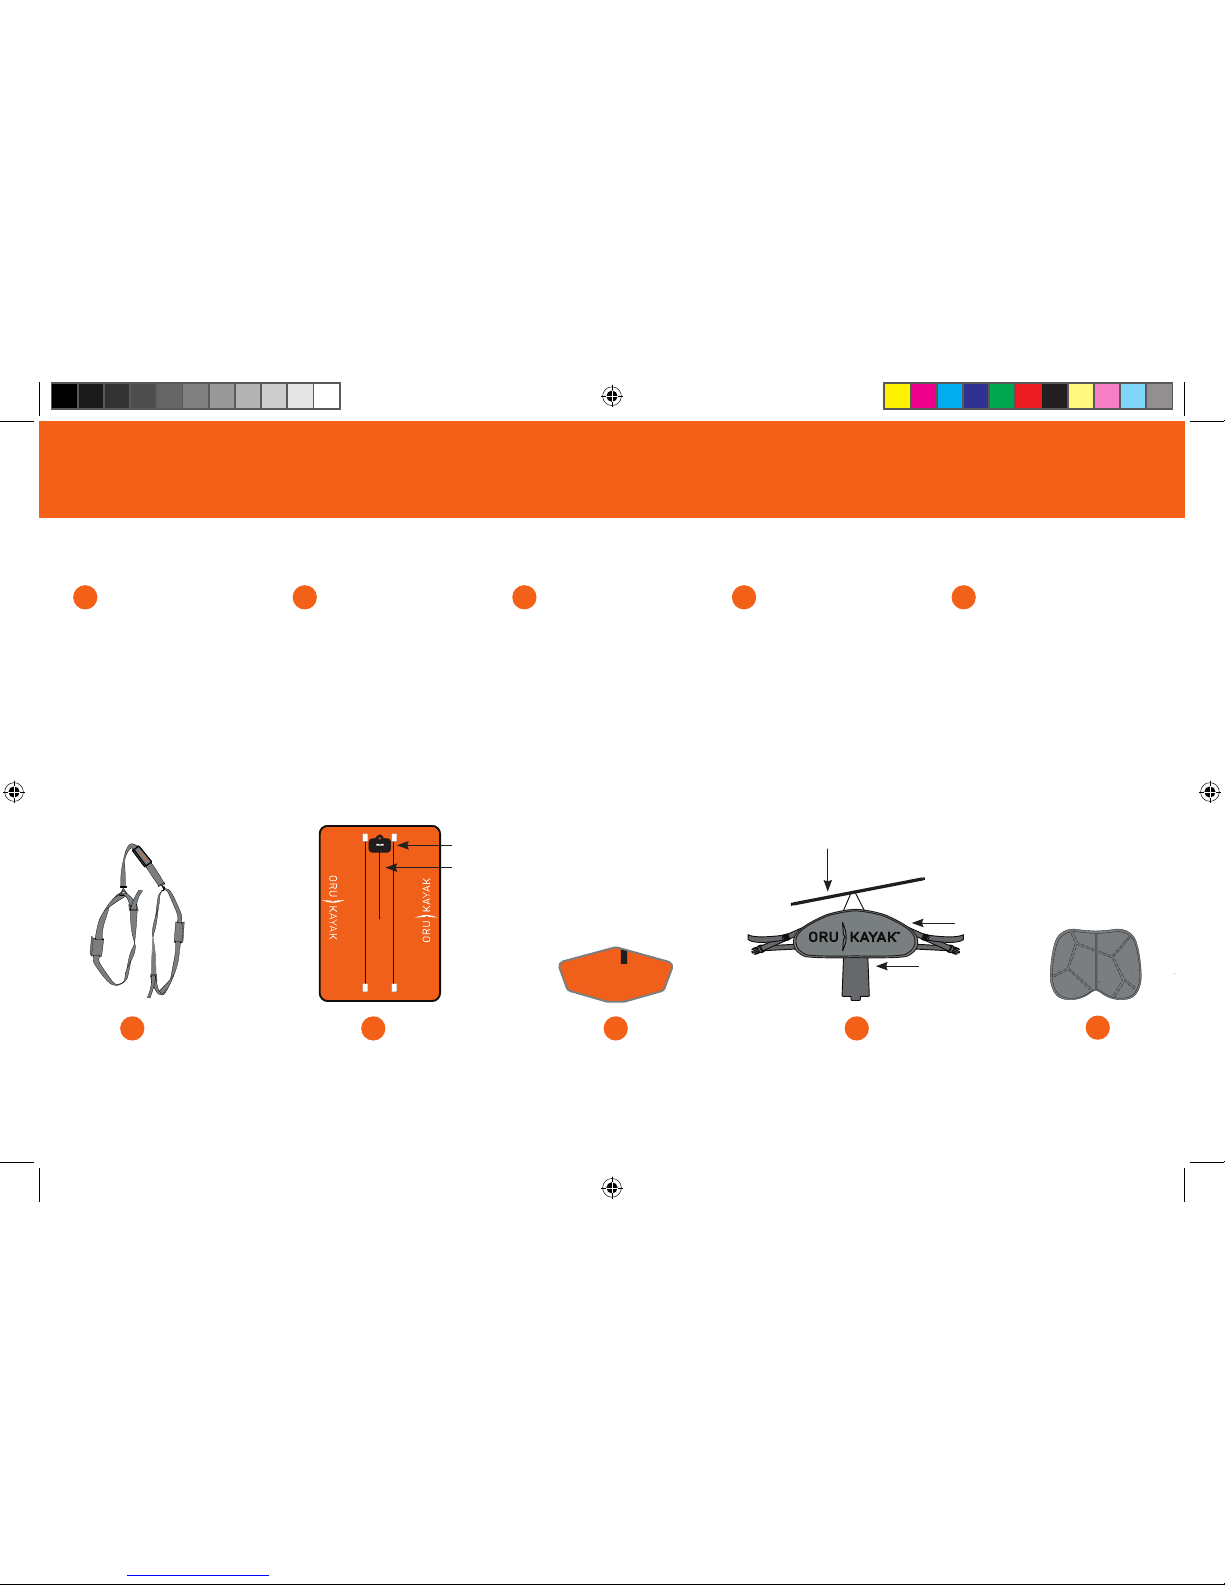
Shoulder strap:
Used to carry the
kayak when in box
form. Stow under
back deck while
kayaking.
Seat back: Includes
the seat column and
adjustable backrest.
An attached rod
reinforces the
cockpit.
Seat pad: Tucks
under the shock cord
in the floorboard and
provides additional
comfort.
Floorboard:
Reinforces kayak
bottom and holds
seat.
Stern bulkhead:
Provides structural
rigidity behind the
cockpit.
1 2 3 4 5
2
FLOORBOARD
1
SHOULDER
STRAP
TOP
TOP
TOP
3
STERN
BULKHEAD
4
SEAT BACK
5
SEAT PAD
Seatback plate
Seat pad shock cord
Seat column
Backrest
Reinforcing rod
GUIDE TO LOOSE PARTS
orukayak_Beachassemblyguide_090316.indd 5 11/1/16 11:56 AM

6 ORU KAYAK | BEACH LT KAYAK ASS EMBLY GUID E
NOTE: The double-walled
corrugated polypropylene that
Oru Kayaks are made from
will naturally show marks and
scratches from use. As long
as the hull is not punctured
there is nothing to worry
about. Think of them like
marks and scratches on thick
leather boots.
If you do get a hole or
puncture, repair kits are
available at www.orukayak.
com.
Unclip buckles located on
both handles on either side
of box.
Hold the two folds at the
removable orange stickers.
Pull as indicated in the illustration to open.
Push the ends apart to
extend the box into a long
sheet.
A
B
C
A
A
B
B
ASSEMBLY / STEP 2: UNFOLD THE BOX
orukayak_Beachassemblyguide_090316.indd 6 11/1/16 11:56 AM
 Loading...