

Page 1
Page 2
OR Technologies | Photo-eBox Plus Manual
Table of Contents
• Parts Included . . . . . . . . . . . . . . . . . . . . . . . . . . . . . . . . . . . . . . . . . . . . . . . . . . . . . . . 4
• Accessory Kit Contents . . . . . . . . . . . . . . . . . . . . . . . . . . . . . . . . . . . . . . . . . . . . . . . 4
• Benefits and Features . . . . . . . . . . . . . . . . . . . . . . . . . . . . . . . . . . . . . . . . . . . . . . . . 5
• Lighting System Setup . . . . . . . . . . . . . . . . . . . . . . . . . . . . . . . . . . . . . . . . . . . . . . . 5
• Camera Bracket Assembly . . . . . . . . . . . . . . . . . . . . . . . . . . . . . . . . . . . . . . . . . . . . 6
• Cleaning . . . . . . . . . . . . . . . . . . . . . . . . . . . . . . . . . . . . . . . . . . . . . . . . . . . . . . . . . . . . 7
• Lamp Replacement . . . . . . . . . . . . . . . . . . . . . . . . . . . . . . . . . . . . . . . . . . . . . . . . . . 7
• Important Notice . . . . . . . . . . . . . . . . . . . . . . . . . . . . . . . . . . . . . . . . . . . . . . . . . . . . 7
• Warranty . . . . . . . . . . . . . . . . . . . . . . . . . . . . . . . . . . . . . . . . . . . . . . . . . . . . . . . . . . . . 7
• Specifications . . . . . . . . . . . . . . . . . . . . . . . . . . . . . . . . . . . . . . . . . . . . . . . . . . . . . . . 8
DISCLAIMER
• While every effort has been made to ensure that the information contained in
this guide is accurate and complete, no liability can be accepted for any errors or
omissions.
• OR Technologies reserves the right to change the specifications of the hardware and
software described herein at any time without prior notice.
• No part of this guide may be reproduced, transmitted, transcribed, stored in a
retrieval system or translated into any language in any form, by any means, without
the prior written permission of OR Technologies.
• OR Technologies makes no warranties for damages resulting from corrupted or lost
data due to a mistaken operation or malfunction of the camera, the software, the OR
Tech lighting systems, personal computers or peripheral devices.
2
Page 3
3
OR Technologies | Photo-eBox Plus Manual
Lighting System Manual
Please make sure the system arrives in perfect condition and all parts are included.
Contact us immediately if there is any damage or if you are missing any parts.
WARNING
IF YOU ARE USING THE SYSTEM IN A COUNTRY THAT USES 220V POWER (MANY
COUNTRIES OUTSIDE OF THE USA), YOU MUST POWER THE SYSTEM USING A
220V/110V STEP DOWN TRANSFORMER. DO NOT PLUG DIRECTLY INTO YOUR WALL
OUTLET. THIS WILL DAMAGE THE INTERNAL ELECTRONIC COMPONENTS AND VOID
YOUR WARRANTY.
SI SE UTILIZA EL SISTEMA EN UN PAÍS QUE UTILIZA CORRIENTE DE 220V (MUCHOS
PAÍSES FUERA DE LOS EE.UU), SE DEBE CONECTAR EL SISTEMA USANDO UN
TRANSFORMADOR REDUCTOR DE VOLTAJE DE 220V A 110V. NUNCA CONECTE
DIRECTAMENTE A LA TOMA CORRIENTE DE PARED. ESTO PUEDE DAÑAR LOS
COMPONENTES ELECTRÓNICOS INTERNOS E INVALIDAR LA GARANTÍA DEL
EQUIPO.
SI VOUS UTILISEZ LE SYSTÈME DANS UN PAYS QUI UTILISE LA PUISSANCE
220V (BEAUCOUP DE PAYS EN DEHORS DES USA), VOUS DEVEZ ALIMENTER LE
SYSTÈME EN UTILISANT UN 220V/110V DÉMISSIONNER DE TRANSFORMATEUR. NE
PAS BRANCHER DIRECTEMENT SUR VOTRE PRISE MURALE. CELA ENDOMMAGERA
LES COMPOSANTS ÉLECTRONIQUES INTERNES ET ANNULER VOTRE GARANTIE..
VERWENDEN SIE DAS SYSTEM IN EINEM LAND, DAS 220V STROMVERSORGUNG
(VIELE LÄNDER AUßERHALB DER USA) VERWENDET, MÜSSEN SIE MACHT, DAS
SYSTEM MIT EINER 220V/110V STEP-DOWN TRANSFORMATOR. NICHT DIREKT AN
DIE STECKDOSE ANSCHLIEßEN. DAS ELEKTRONISCHE BAUTEILE BESCHÄDIGEN
UND ZUM ERLÖSCHEN DER GARANTIE.
3
Page 4
4
OR Technologies | Photo-eBox Plus Manual
Introduction
Thank you for choosing the OR Tech Photo@Box Plus professional lighting
system. This technically advanced electronic lighting system contains three
different light sources to correctly illuminate any type of product you are
interested in photographing. The three types of lights are fluorescent, warm LED
light and white high power LED.
The fluorescent light (6500º Kelvin) may be used to photograph nearly any
product that you wish to photograph, by providing you with flicker-free daylight
illumination. The warm LED lights are intended to be used when you photograph
jewelry that contains precious and colored stones such as amethysts, rubies
and any other stones that are red, orange, or purple in color. The white high
power LED lights, may be used in conjunction with fluorescent light and will
give “sparkle” to your jewelry.
Parts Included
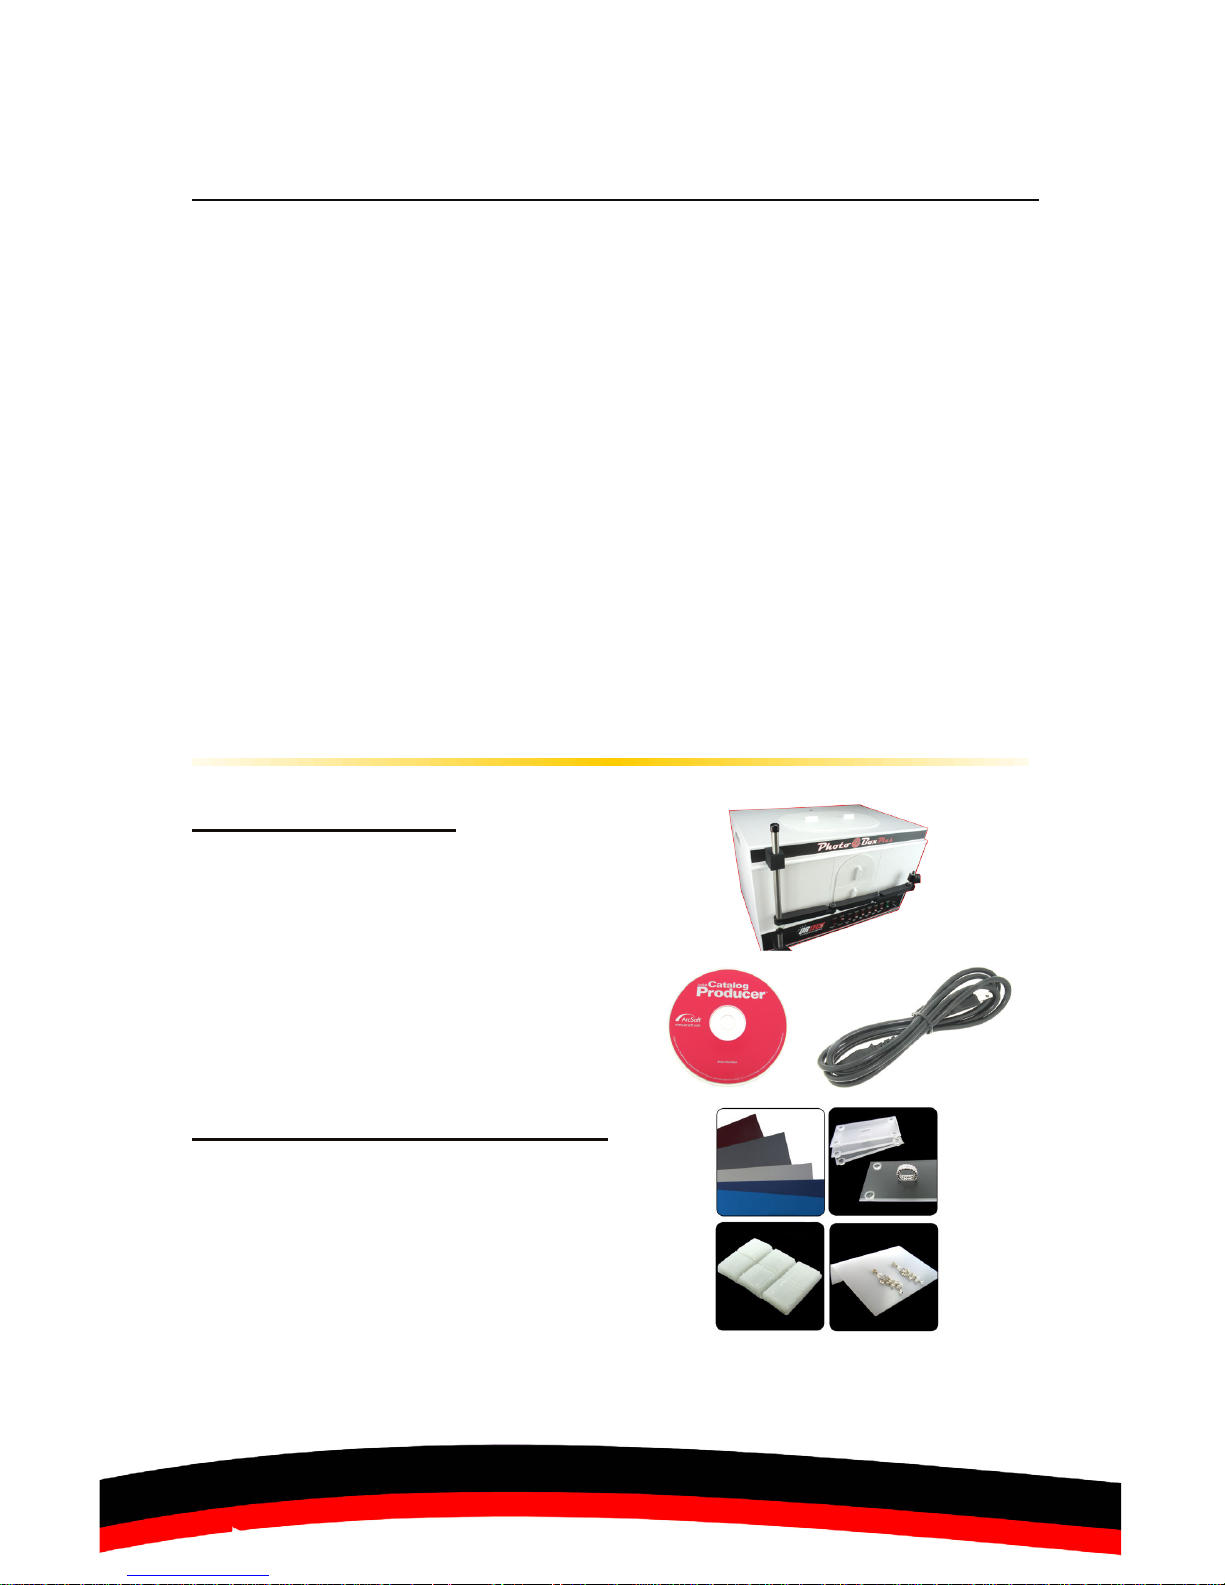
• 1 OR Tech Photo@Box Plus lighting system
• 1 Professional linkage bracket
• 1 Power Cord
• 1 Imaging Software CD
Accessory Kit Contents
• Box of holding wax
• Set of four ring stands
• Earring / Pendant stand
• Five color background
• Note: Accessories and parts included may differ from those listed in this manual, please
check our website (www.mkdigitaldirect.com) for the most up-to-date information.
4
Page 5

5
OR Technologies | Photo-eBox Plus Manual
Benefits and Features
• Natural lighting for proper product display
• Easy to setup and continuously capture product images
• Clean white background (or add your own background)
• Shadow-free wrap-around lighting eliminates the need for digital cleanup
• Show the true color, clarity and cut of your diamonds by showing the
brilliance, scintillation and refraction of your diamonds using white high
power LED light.
• Warm LED lighting for clear and natural gem stone colors
• Increase sales with sharp quality product images
• Tremendous savings and fast turn-around time by producing images
in-house rather than outsourcing to a graphic design company or
professional photographer
Product Applications
The Photo@Box Plus simplifies many product imaging applications, by
allowing you to create high-quality professional photographs in minutes.
Here are just a few examples of how you can use your photos:
• Product Sales (Print) – Advertising, brochures, catalogs, flyers, postcards
• Product Sales (Internet) – Auctions, banner advertising, e-commerce,
email attachments, online product catalogs, online Stores, etc.
• Website Design – Company Image, Product Line
• Inventory Management – Appraisals, insurance protection, inventory
tracking, etc.
Lighting System Setup
1. Connect the Photo@Box Plus - Connect the power cable to the Photo@
Box Plus and then to a 110V electricity outlet. Note: Read the warning message on
page 3 for details
2. Turn on the Photo@Box Plus - Flip the power switch at the front of box
3. Turn on the various lights and Features
• Fluorescent lighting: Select the light you want (Left, Right, Back or Platform).
• Warm LED lights: Warm Light switch at the front .
• White high power LED lighting: Accesory 1 and then use the dimmer at the
front (clockwise for more light or counterclockwise to reduce it).
• Goosenecks at the Top (Optional): Accesory 2 switch and then use the
dimmers at the top next to each gooseneck to increase or decrease light.
• Cooling Fan (On/Off): Cooling Fan switch at the front next to Accesory 1.
5
Page 6
6
OR Technologies | Photo-eBox Plus Manual
Camera Bracket Assembly
Our Linkage Bracket is designed for attaching most digital cameras to the
lighting system. This gives your camera a straight top-to-bottom view of the
items being photographed, and the reliability to change camera lenses and to
position the camera in endless ways.
Note: Carefully read the following information, as failure to do so may cause improper use
of the bracket and cause damage to your camera and equipment.
Positioning the camera bracket
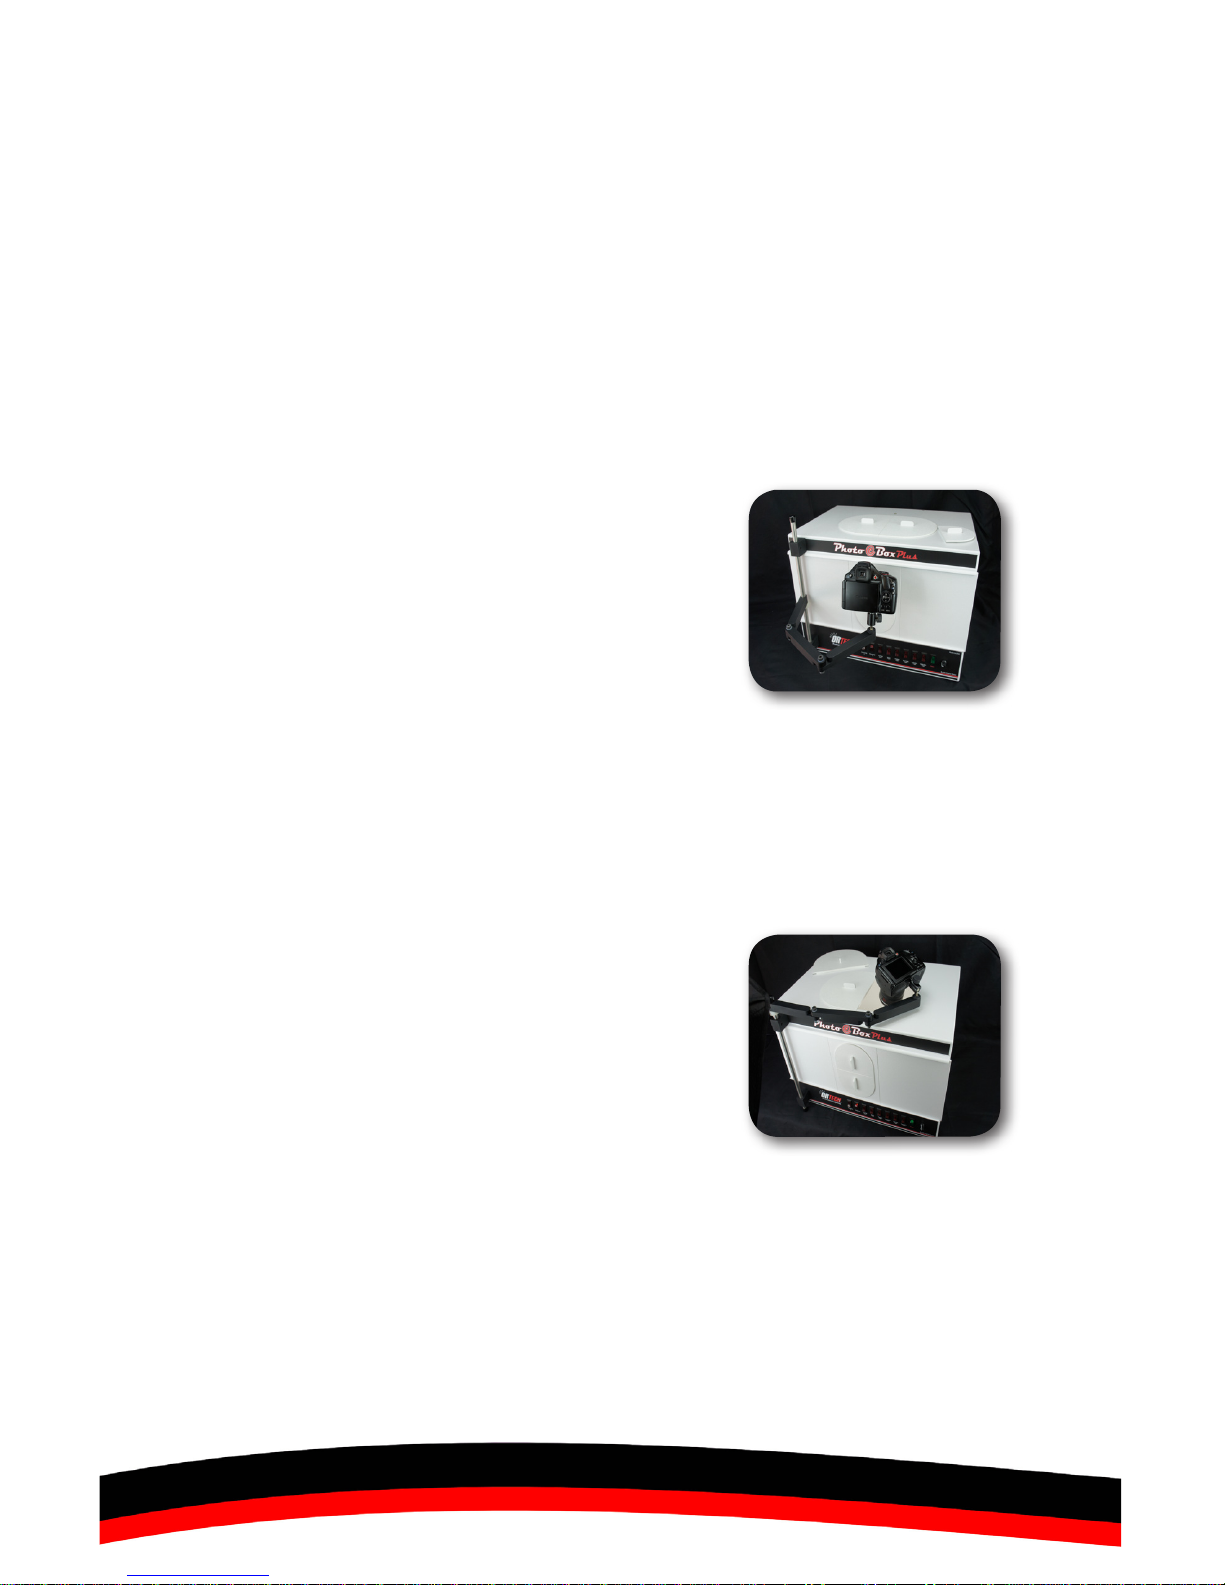
1. The bracket comes pre-assembled and attached
to the lighting system. In order to get started, you
must attach your camera to the ball head at the
end of the bracket (photo A).
2. To attach the camera, you must find the tripod
socket opening located at the bottom of the
camera. Then, you must align the knob of the ball head to the tripod opening and
put the screw of the knob inside your camera. Tighten the screw in a clockwise
manner in order to stabilize your camera.
Note: Make sure that your camera is correctly and tightly screwed to the ball head so
it does not fall off while you move the bracket.
3. Once your camera is secured, you can begin to
move your camera to look for the preferred angle
and position for your photographs.
4. The Linkage bracket can be moved at the top if
you wish to take pictures from the top opening
(photo B).
For an SLR camera with a macro lens, it is recommended that the lens is positioned at
about an inch away from the opening of the box.
For point-and-shoot cameras with a close-up lens, it is recommended that the lens is
positioned at about three inches from the opening of the box
For more tips on positioning the camera and how to use the new Linkage bracket,
please visit the support page on our website at www.mkdigitaldirect.com
Photo B
Photo A
6
Page 7

7
OR Technologies | Photo-eBox Plus Manual
Cleaning
The outside and inside of our lighting systems are made of thermoplastic.
Simply use a damp cloth to clean it, or use a plastic cleaner if needed. For
difficult marks, use odorless mineral spirits.
Lamp Replacement
All electronics and lamps used in your lighting system are made of the best
quality. But eventually you may need to replace a burnt-out lamp. Use the
following steps to replace a lamp:
a) Disconnect the power supply cable from the wall or remove it from the back
of the unit
b) Remove the back panel and slide out the lamp house
c) Remove the burnt-out lamp, using caution, by snapping it out from the
retainers and replace the burnt-out lamp (Model # DZU28)
d) Make sure all the lamps are the same model and same Kelvin color
temperature
Note: Gently pull out the wire connector. Make sure when you remove the wire to remember
the original position. Replace the lamp and reconnect the wires in their original position.
Be very careful when connecting the power: We suggest you test the unit before
reinstalling the panels to ensure that your lights are working properly. Connect the power
supply cable to the A/C outlet. Test the lamps. Remove the power cable from the unit, close
the panel and reinstall all the screws (make sure you do not over tighten the screws).
Important Note: Although all the light bulbs used in our system are 100% safe, some people
may experience some eye fatigue or eye stress due to a very long exposure period of time
working with our systems without any rest. We recommend to rest your eyes every couple
of hours and do not over expose your eyes to bright lights. This, as with any other highbrightness light source, needs to be used with basic precaution.
ONE YEAR WARRANTY
Defective components will be replaced during the 12 month warranty
period. No charge will be made for labor costs during this period.
Fluorescent lamps are NOT covered by this warranty. Proof of purchase
must be provided to verify the warranty status. Shipping is not included
7
Page 8
8
Specifications
Lighting Fluorescent: 6500º Kelvin (flicker-free continuos lighting)
Warm LED Light: 3200º
White High Power LED Lighting: 5800º Kelvin (Dimmable)
Lighting Panels Fluorescent: Left, Right, and Bottom (4 Lights)
Warm LED Light: Left and right (2 lights)
White High Power LED Light: One foot of LED (12 LEDs)
Power Controls
(Right to Left)
9 Switches: (1) On/Off, (2) Two warm LED lights, (3-6)
Individual switches for each of the 4 fluorescent light panels,
(7) Fan (On/Off), (8) High Power LED Iight strip, (9) Optional
Goosenecks (not included). Total of nine switches and one
dimmer on the front, Two dimmers for gooseneck on the
top (Optional)
Size (exterior) 19 L x 13 Wx 13 H (in); 48 L x 33 W x 33 H (cm)
Size (interior) 13½ L x 10 W x 8¼ H (in); 34 L x 25 W x 21 H (cm)
Weight 28 Lbs.
Camera Openings Top and Front
Tripod accessible Yes
CE Certification Yes
Built to ISO Standards Yes
Power Input 110 Volts 50/60 Hz.
Product Photography
Lighting Systems
www.mkdigitaldirect.com | [email protected]
Tel: (619) 661-0628| Toll Free: (800) 258-6230
861 Harold Place Suite 209,
Chula Vista, California 91914
8
 Loading...