

Page 1

HOME THEATER SEATING
USER GUIDE
Page 2
GET READY
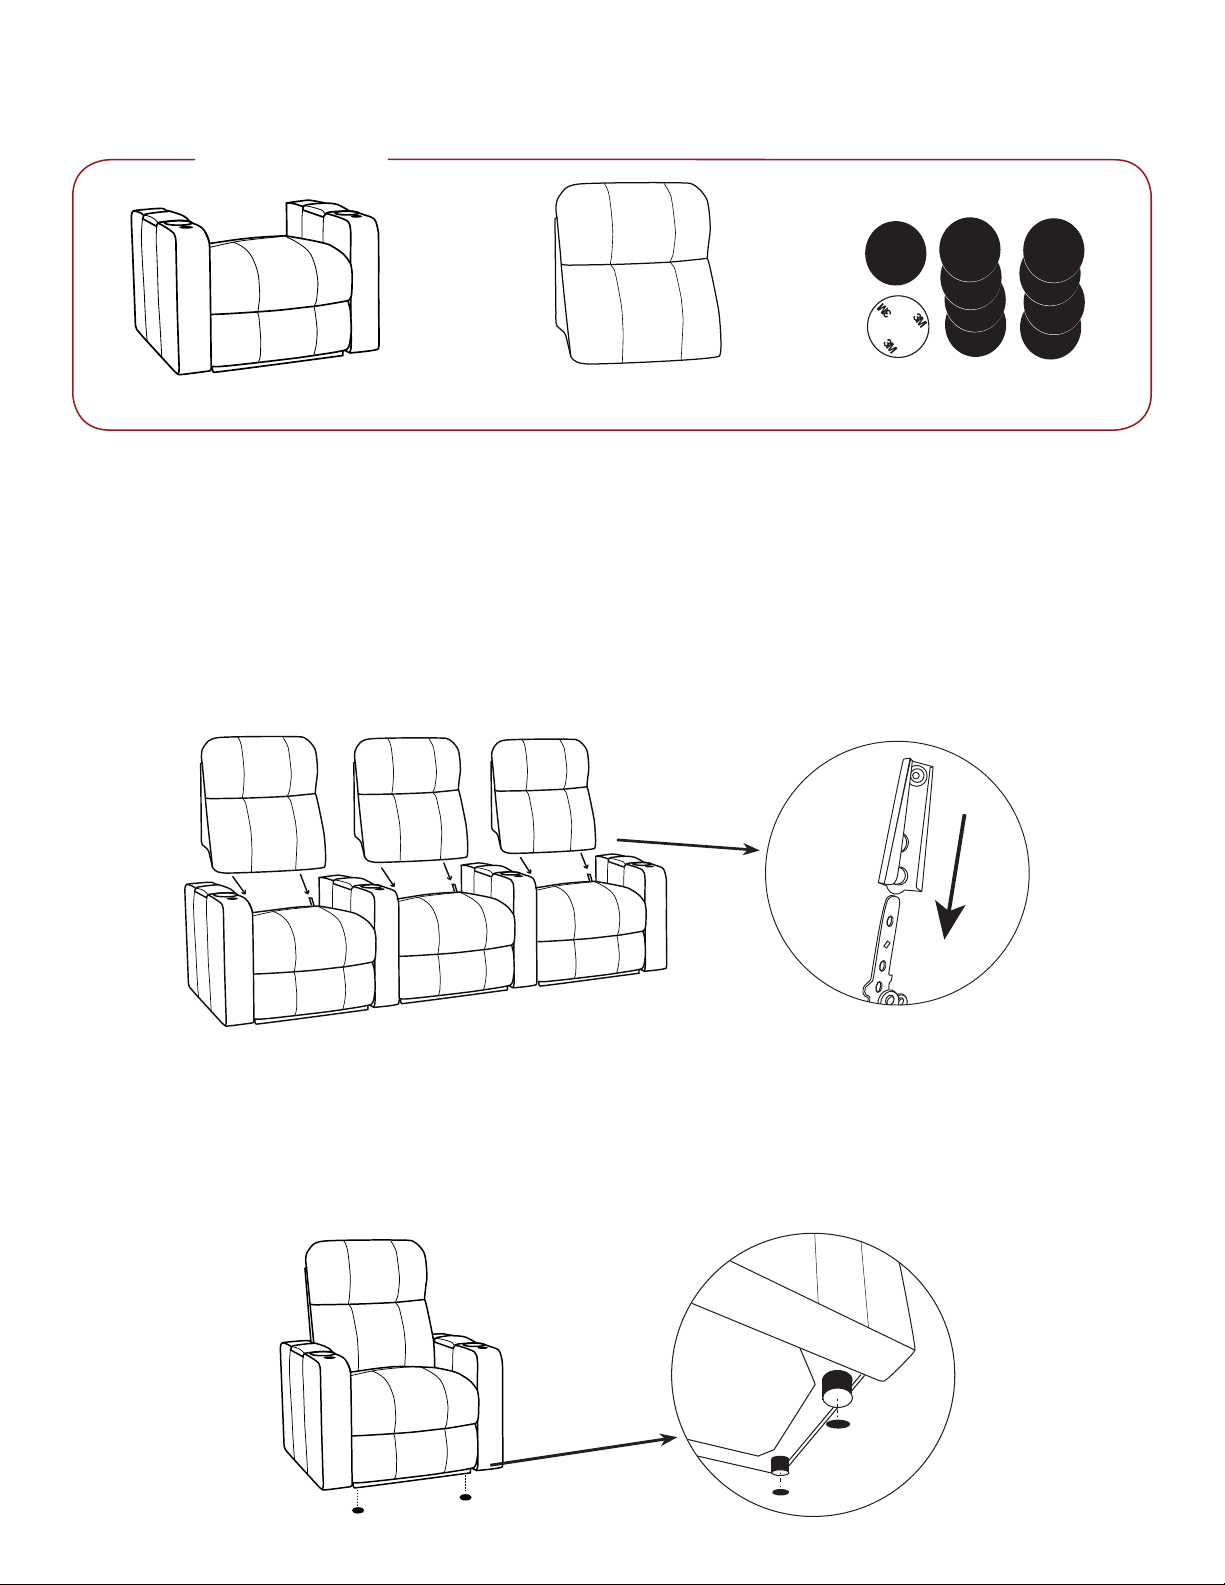
Unpack the box
Seat Base Seat Back Rubber Foot Pads
Please read all instructions carefully before starting the assembly. It is recommended using two adults throughout the
process.
1 - Prep the Furniture
Remove all packaging materials from the seat base and the seat back.
2 - Attach the Seat Back
Slide the metal female receivers located on both sides of the seat back onto the male steel mechanism posts attached to
the seat base. With both hands, firmly push down on the seat backs to lock them into place.
3 - Apply Rubber Foot Pads
Locate the small bag of round rubber foot pads sent with your theater seats. If placing the seats on a hard surface
floor, apply the rubber pads to the bottom of all plastic feet. This will prevent the seats from sliding. Failure to follow this
instruction can cause scratches to your floor. This step is not necessary if the seats are placed on a carpeted floor.
Page 3
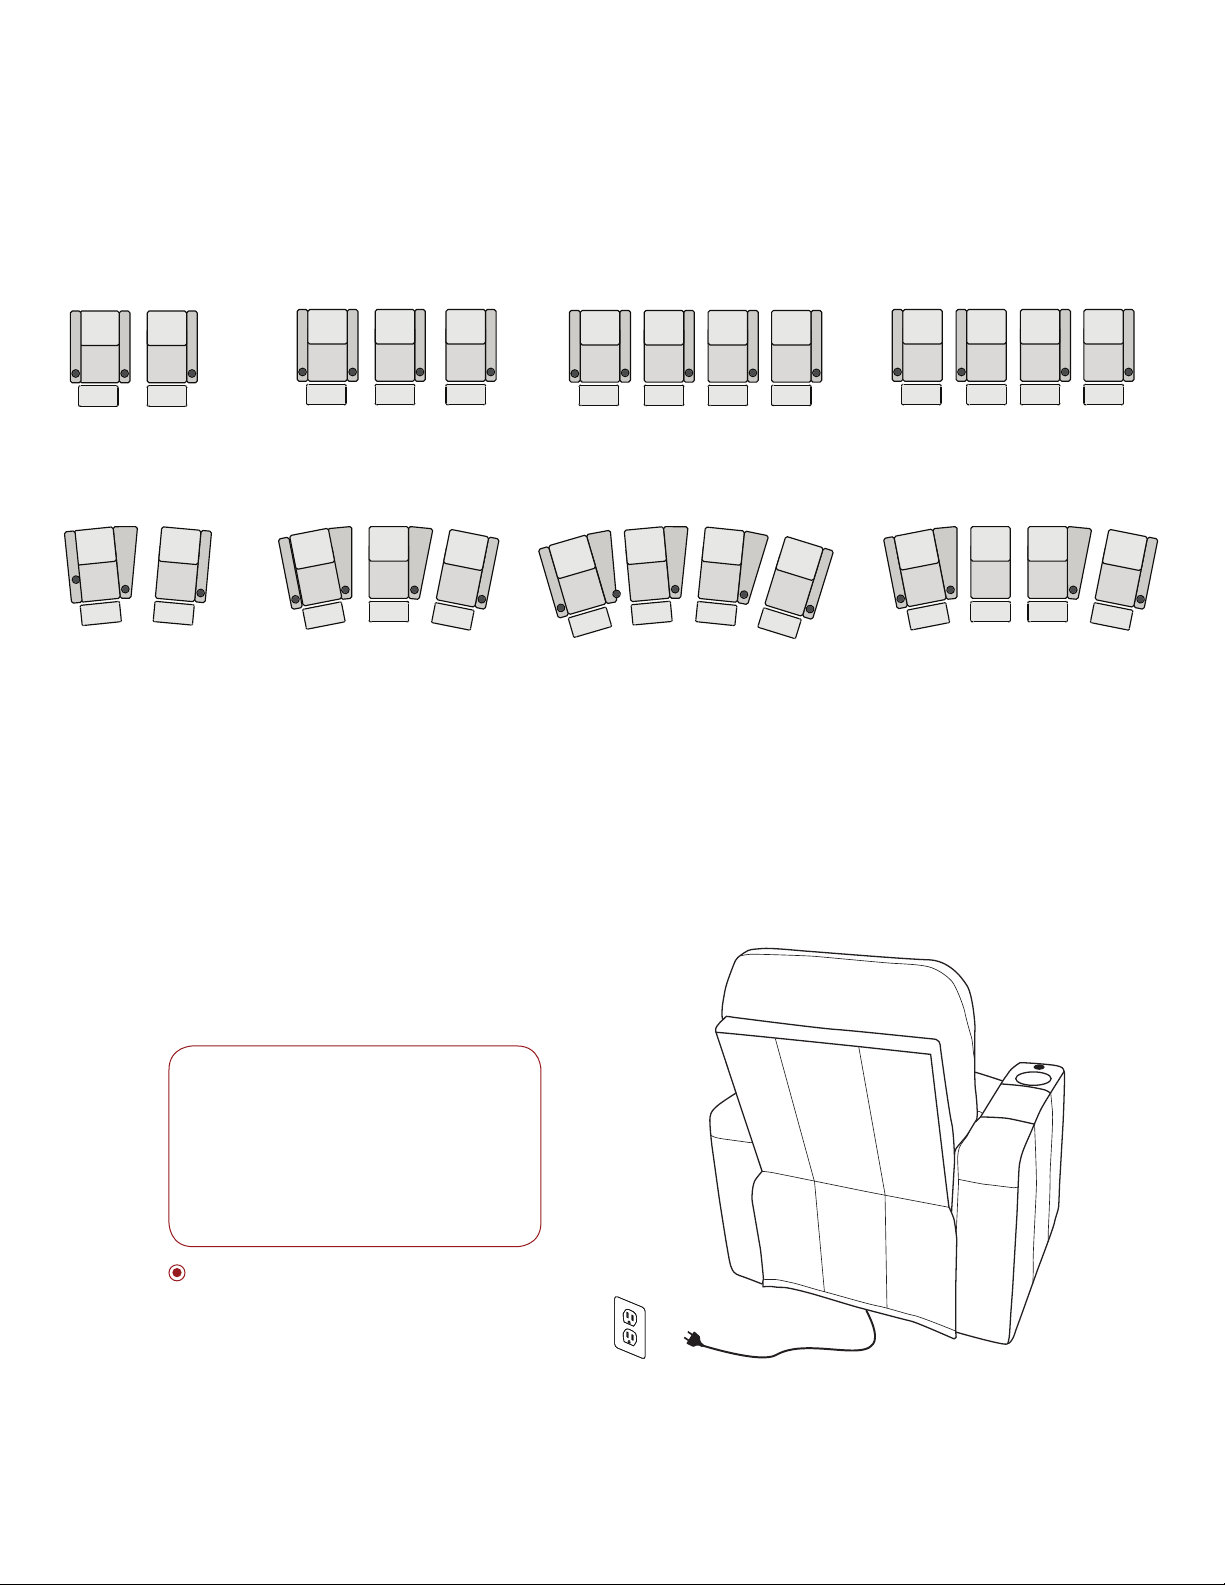
4 - Configure Your Layout
When placing the theater seats, please note that they do not connect to each other. Each seat weighs over 100 pounds
so when placed in position they won’t move.
The diagrams below will assist you in visualizing how to place the seats based on your desired configuration. Please note
there are several ways each configuration can be put together so yours might vary slightly.
2 SEATS STRAIGHT
2 SEATS CURVED
5 - Power On (Power Recline Models Only)
Underneath each theater seat, towards the back, is an electrical cord with a two prong plug. Simply plug this into your wall
outlet.
3 SEATS STRAIGHT
3 SEATS CURVED
4 SEATS STRAIGHT
4 SEATS CURVED
4 SEATS STRAIGHT
WITH MIDDLE LOVESEAT
4 SEATS CURVED
WITH MIDDLE LOVESEAT
If you have purchased multiple
theater seats or rows of seats, we
recommend purchasing a surge
protector, plugging all the seats per
row into it. Please note that each
cord is approximately 8 feet long.
Only 2.8 amps of electricity are
required for each seat.
Page 4

HOW TO RECLINE
Models with Power Recline
• Plug the theater seats into a power source, such as a wall outlet or surge protector.
• Locate the two buttons to recline the seat up and down. Depending on the model purchased this will be situated on
either the rim of the cup holder or on the inside arm.
• Press and hold the button to recline the seat until you have reached your desired position, then release.
• To bring the chair back up follow the same procedure as above, but with the other button.
Models with an Armless Power Recline Seat
• The recline buttons to recline the seat up and down will be located on the side of the frame below the seat cushion.
Models with Manual Recline
• Locate the recline lever. Depending on the model purchased this will be situated on either the inside arm as a latch
handle, or on the inside frame slightly below the seat cushion as a parachute cord.
• Using your fingers, release the lever by pulling it out away from the chair. This will release the footrest.
• To recline the seat even further, use the weight of your back on the backrest and also place the sole of your foot on the
footrest and push outwards until your desired reclined position has been achieved.
• To bring the chair back up, use the weight of your legs and back to push the chair upright and close the foot ottoman
until it locks into place.
LED CUP HOLDERS & BASERAIL*
• Plug the theater seats into a power source, such as a wall outlet or surge protector.
• Locate the button to turn the lights on and off. Depending on the model purchased this will be situated on either the
rim of the cup holder or on the inside arm.
• Press the button once and the lights will come on.
• Press the button again to turn them off.
• If you have an armless seat in your configuration, you will need to locate the cord to the baserail LED Light Strip
and remove any ties holding the extra cable to the frame. You can then attach the LED cable to the extra connector
located on an adjacent seat that contains an arm. The adjacent seat will then control both the lower LED lights for the
two seats.
ACCESSORY DOCK*
The Accessory Dock was designed to enhance your theater seating experience. It is constructed of 100% aluminum, and
situated on each arm in front of the cup holders. It fits a host of accessories (all sold separately), including a swivel tray
table, wine glass holder, iPad & tablet holder, phone holder, LED flex light, and many other items. You simply slide the
accessory into the Accessory Dock and enjoy. Simply remove the accessory when not in use.
* Please note that not all models offer this feature.
 Loading...