

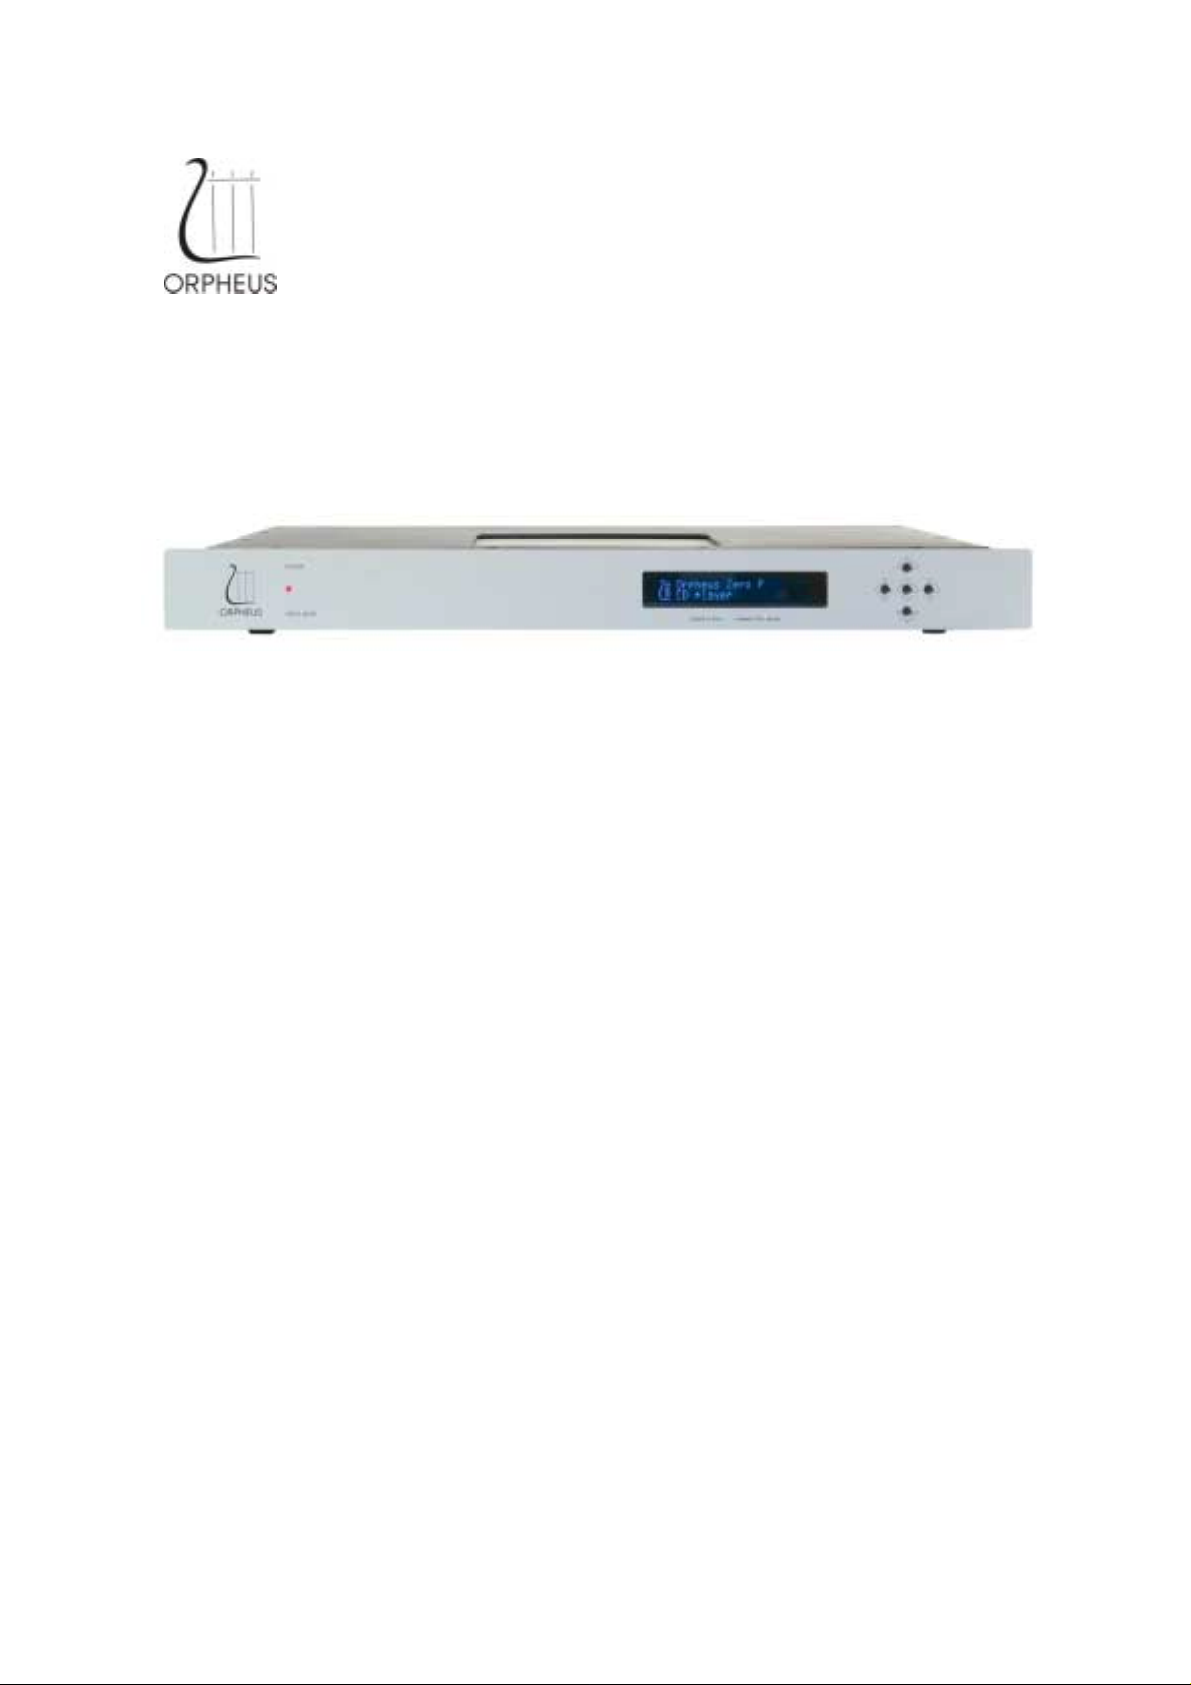
ORPHEUS ZERO
USER MANUAL
INTRODUCTION
FEATURES
• Class 1 product
• CD drive (ORPHEUS ZERO Drive) or player
(ORPHEUS ZERO Pl ayer)
• Multiple formats reader : CD, CD-R, CD-RW
• Software controlled mode switching
• Balanced and unbalanced outputs
• Efficient menu driven operation, display and
navigation buttons
CONTENTS
• Introd uction ............. .......................... .........2
• Front p anel descrip tion ...............................3
• Rear panel drive description ....................... 4
• Rear panel player description ..................... 5
• Top view ....................................................6
• Connections drive ......................................7
• Conne ctions player ....................................8
• Display and menu structure ........................9
• Setup and operations ...............................10
• Setup and operations ...............................11
• Setup and operations ...............................12
• Specifications ...........................................13
ORPHEUS ZERO
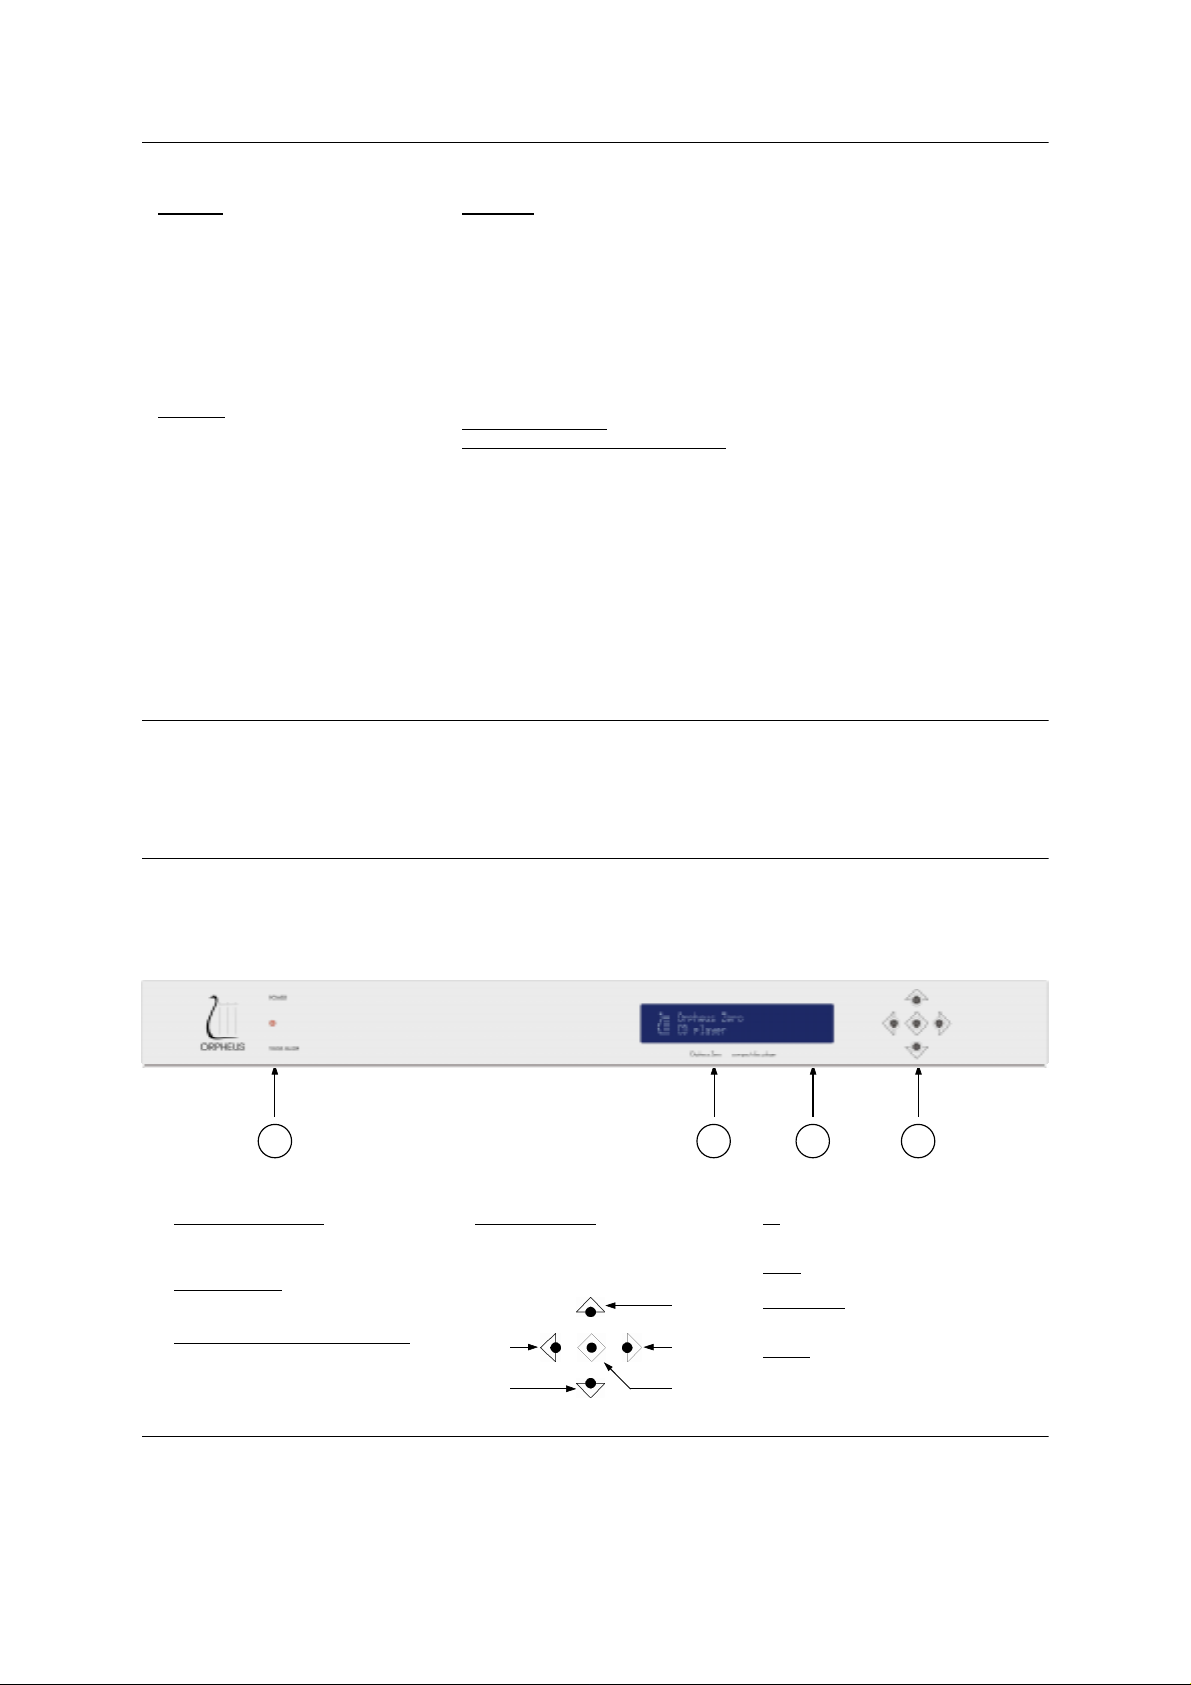
FRONT PANEL
UNPACKING
Fir st check a nd ident ify t he cont ents of your Or-
pheus Zero package, as listed below :
• Orphe us Zero compact disc drive or player
• Power cord
• Orphe us Zero user manual
• Warranty registration card
If any item should be damaged or missing, please
info rm your supplier without delay .
Keep the packing material, you may need it to
transport the unit in the future.
ADVICE AND WARNINGS
READ THIS BEFORE OPERATING YOU R UNIT
• Pleas e read this manual care fully, to ass ure
proper operation and the best possible performance.
• Switch off the unit before connecting or disconnecting any i nput or output wir e.
• Do not touch t he inner pi ns of re ar-p anel co nnectors, electrostatic discharge may cause
permanent damage to the unit.
• Choose the installation location for the unit
car efully. Av oid pla cing i t in dir ect sunlight o r
close to a source of heat. Avoid also locations
subjec t to v ibrat ion and exc essiv e dust , heat,
cold or moisture.
• To reduce the risk of fire or electric shock, do
not expose the unit to rain or moisture.
• Do not use force when operating switches,
knobs and other controls.
• Do not open the chassis or attempt to make
repai rs by yourse lf, as thi s may r esult i n damage to the unit or electrical shock. If a foreign
object should get into the unit, contac t your
local dealer for tec hnical support.
• Whe n planning not to use t he unit f or a lo ng
period of time, it is advisable to disconnect the
power plug from t he wall outlet.
• The power switch does not disconnect the
complete unit from the main line.
• Whe n there is a storm di sco nnect t he po wer
plug to prevent lightning damages.
• Whe n moving t he unit , be s ure to fi rst dis connect the powe r plug and all w ires c onnected
from the unit to other equipment.
• When di sconnecting the power plug from the
wall outlet, always pull directly on the plug,
never pull the cord i tself.
• Do not attempt to clean this unit with water or
chemical solvents, as this may damage the
unit or the finish. Use a clean, dry c loth.
• DANGER : Invisible laser radiation when open
and interlock failed or defeated. AVOID DIRECT EXPOSURE TO BEAM.
• CAUTION : Do not open the chassis. There
are no user serviceable parts inside the Unit;
leave all servicing to your local dealer.
• Keep this manual in a safe place for future reference.
1
1 2 3 4
1. MAIN POWER INDICATOR
Light is red when the unit is operating and
when it is in standby mode. Indicator light is off
when the unit is switched off.
2. DISPLAY WINDOW
Gives all the needed information about CD
playing as well as setup menu.
3. INFRARED REMOTE CONTROL SENSOR
Receives signals from the remote control
transmitter.
ORPHEUS ZERO
4. CONTROL BUTTONS
Control the playing of y our CD a nd t he menu
set up.
LEFT
UP
RIGHT
SELECT DOWN
UP
Enables yo u t o play & pause the C D and to go out
of the menu set up.
DOWN
Used to stop the CD.
LEFT & RIGHT
Used for cho osing tr acks, navigat ing in setup op-
tions and cho osing values in setup options .
SELECT
Used for ent ering menu structure and accessing
menu options as well as confirming choices and
settings.
1
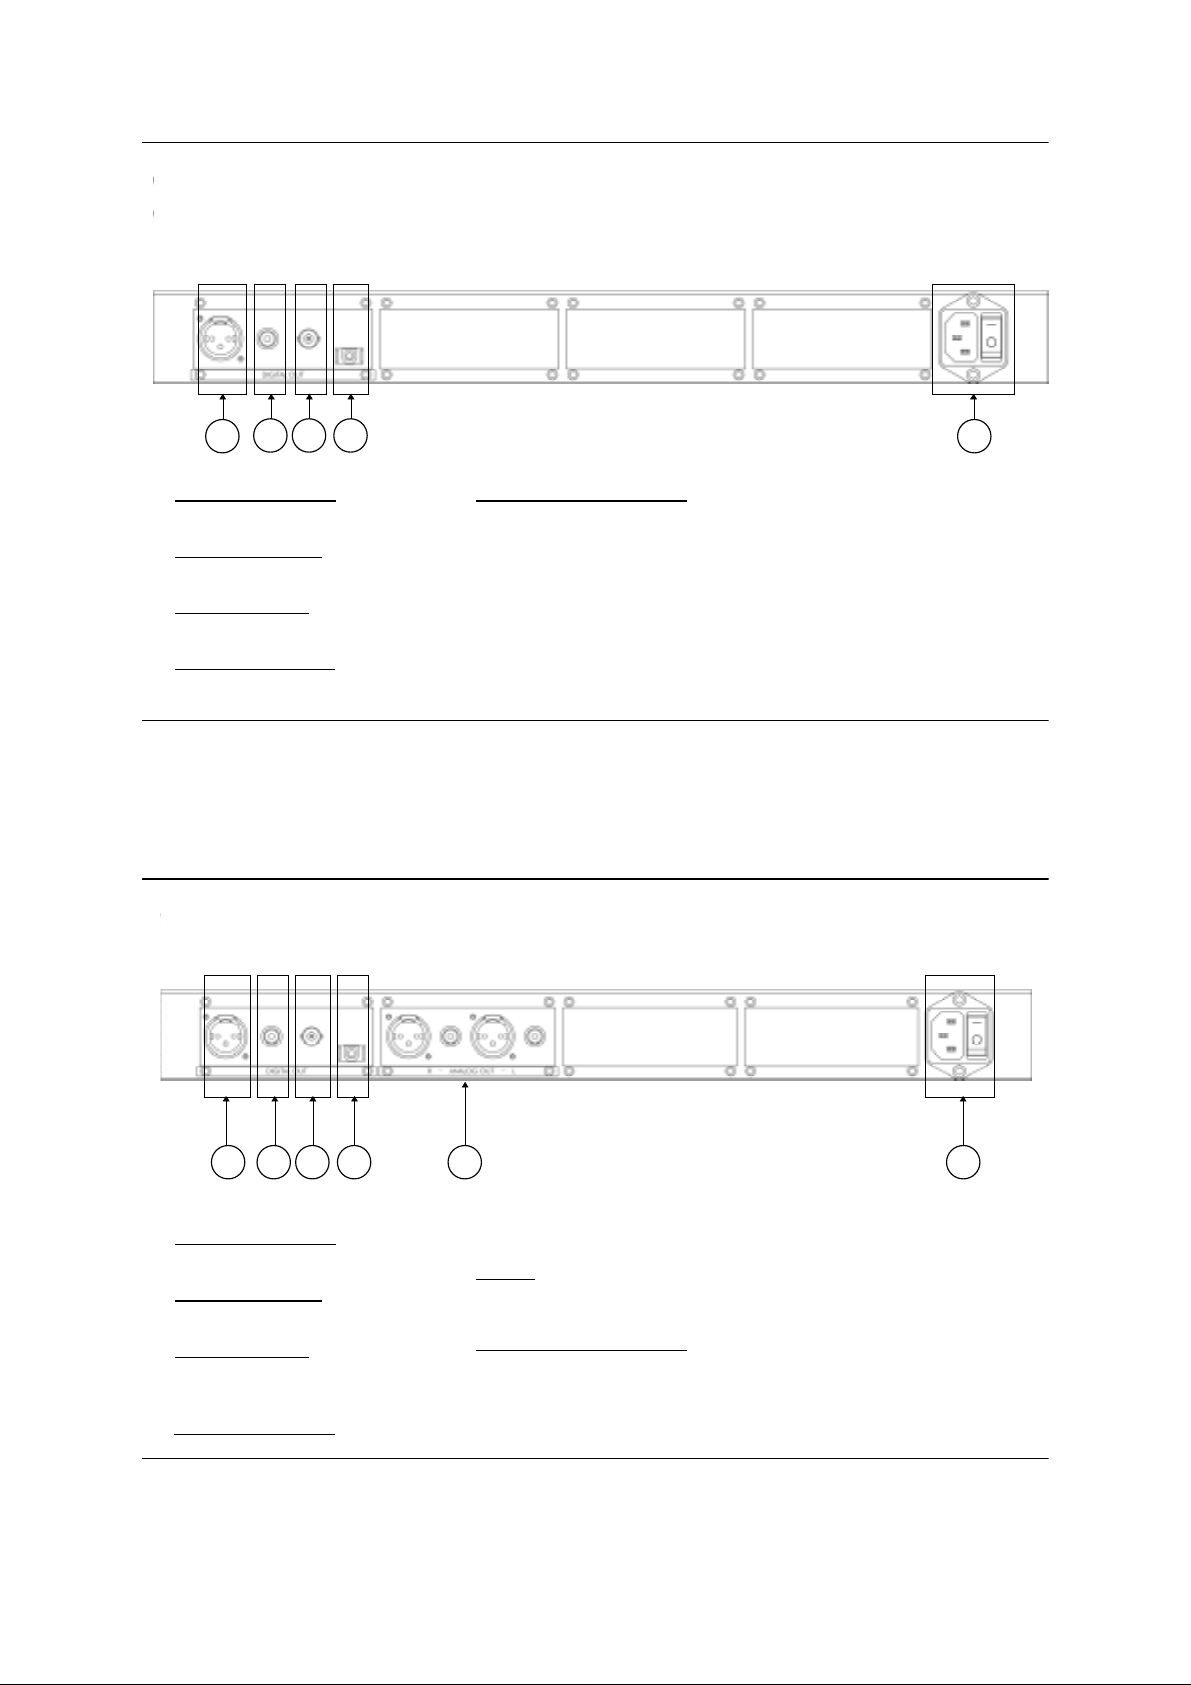
ORPHEUS ZERO REAR PANEL - DRIVE
DIGITAL OUT PUTS
2
1
3 4
5
1. OUTPUT AES/EBU FORMAT
Digital data stream output using an XLR
connector for AES/EBU format.
2. OUTPUT S/PDIF FORMAT
Digital data stream output using an RCA
connectors for S/PDIF format.
3. OUTPUT BNC FORMAT
Digital data stream output using a BNC
connectors.
4. OUTPUT TOSLI NK FORMAT
Digital data stream output using an o pt ical
connector for TOSLINK format.
ORPHEUS ZERO
5. POWER SUPPLY & POWER SWITCH
Power cord connection and main power
switch.
ORPHEUS ZERO REAR PANEL - PLAYER
1
1 2 3 4
1. OUTPUT AES/EBU FORMAT
Digital data stream output using an XLR
connector for AES/EBU format.
2. OUTPUT S/PDIF FORMAT
Digita l data strea m outp ut using an in depen-
dent RCA connectors for S/PDIF format.
3. OUTPUT BNC FORMAT
Digital data stream output using a BNC
connector.
4. OUTPUT TOSLINK FORMAT
ORPHEUS ZERO
5
Digital data stream output using an optical
connector for TOSLINK format.
5. OUTPUTS
Analogue balanced right and left channel out-
6. POWER SUPPLY & POWER SWITCH
Power cord connection and main power
puts on XLR connectors. Unbalanced right
and left channel outputs on RCA connectors.
switch.
6
1

ORPHEUS ZERO TOP VIEW
WARNING
Invisible laser radiation when open and
interlock failed or defeated. AVOID DIRECT EXPOSURE TO BEAM.
ORPHEUS ZERO
CONNECTIONS - DRIVE
USE
The lit opens and closes manually.
Place the CD in the craddle. Close the
lit and the unit is in operation. The CD
will stop automatically when the lit is
opened.
1
A S
Digital data stream outputs to
D/A converter
A : AES/EBU
S : S/PDIF
B : BNC
T : TOSLINK
ORPHEUS ZERO
DIGITAL OUT PUTS
B T
RCA OUTPUT CONNECTOR
2
1 : si gnal in phas e
XLR OUTPUT CONNECTOR
Pin 1 : ground
Pin 2 : signal in phase
Pin 3 : signal o ut of phase
The di gi ta l o ut puts a re t rue f lo a ti ng o utput s . Ea c h
has its own isolation transformer.
1
1 2
3
1

CONNECTIONS - PLAYER
A
A : AES/EBU
S : S/PDIF
B : BNC
T : TOSLINK
ORPHEUS ZERO
A S
Digital data stream outputs to
D/A converter
B T
R : right channel
L : left chann el
Analo gue outputs, balance d to
preamplifier or integrated amplifier.
Analogue outputs, unbalanced
to preamplifier or integrated
amplifier.
CONNECTIONS - PLAYER
RCA OUTPUT CONNECTOR
R
L
R
L
2
1 : si gnal in phas e
2 : ground
XLR OUTPUT CONNECTOR
Pin 1 : ground
Pin 2 : signal in phase
Pin 3 : signal o ut of phase
The balanced analog output is not a floating out-
put. Do not connect pin 3 of the connector to
ground. If you wish to wire the balanced output to
an unbalanced input (with RCA connector),
1
1 2
3
1
A : AES/EBU
S : S/PDIF
B : BNC
T : TOSLINK
ORPHEUS ZERO
A
A S
Digital data stream outputs to
D/A converter
B T
R : right channel
L : left channel
R
Analo gue outputs, balance d to
preamplifier or integrated amplifier.
Analogue outputs, unbalanced
to preamplifier or integrated
amplifier.
L
R
L
RCA OUTPUT CONNECTOR
2
1 : si gnal in phas e
2 : ground
XLR OUTPUT CONNECTOR
Pin 1 : ground
Pin 2 : signal in phase
Pin 3 : signal o ut of phase
The balanced analog output is not a floating out-
put. Do not connect pin 3 of the connector to
ground. If you wish to wire the balanced output to
an unbalanced input (with RCA connector),
1
1 2
3
1

SET UP AND OPERATIONS
QUICK GUIDE
POWER ON
Flip t he ma in po we r s wit c h on t he ri ght ha nd s ide
of the rear panel from 0 to I.
MAIN SC R EEN
After switching on the unit the display window
shows the start up screen shortly. It then switches
to the default screen which allows to play a CD or
entering the menu structure.
PLAY/PAUSE OR STOP A CD
Press
sume playing press
CHOOSING A TRACK / ACCELERATE THE
SPEED OF A TRACK
To choose a track press
tra c k is dis pla y e d. Ho l d do wn either
celerate the speed of the track search forward or
backward
GOING INTO STANDBY
Press
LOST? RELAX...
Let the system return to the main screen automa-
tica lly. Aft er a pprox imat ely 1 0 sec onds o f cont rol
button inactivity the display returns to the previous menu, and finally to the main screen.
^ to pla y a t ra c k. To paus e press ^. To r e -
^.To stop press v.
< or > until the desired
! twice.
< or > to ac-
ORPHEUS ZERO
1
CD DRIVE [OR PLAYER]
START UP DISPLAY
The start up display is shown approximately 2 se-
conds when main power is switched on.
It is then replaced by the main screen.
2
[15] 58:45
MAIN SCREEN
The mai n s c r een is t he de fa ult dis pla y dur ing no r -
mal operation.
It i ndicates the to tal number o f trac ks as well as
the dureation ot the CD.
The indication « NO DISC » implies that no disc
has been placed in the CD cradle.
Open the lit and place the disc in the CD cradle.
Clos e the lit . The display will indic ate « OP EN »
and « READING » .
3a
[01] 01:51
CD PLAYING
To play a trac k press
To pause press
To resume playing press
To stop the track press v or open the lit of the
unit. The display returns to default.
3b
[02] 00:0 0
CD PLAYING - CHANGING TRACKS
To play another track press either
driv e (play er) w ill shif t to pro ceding o r follo wing
track. This is also optional while playing.
Hold dow n
track search forward or backward.
Whi le playing, holding down either
search forward or backwards to find a s pecific
path of the chosen track.
^.
^ again.
^
< or >. The
< or > to accelerate the speed of the
< or > will
ORPHEUS ZERO
SET UP AND OPERATIONS
SETUP>
3c
STANDBY
SETUP MENU
Fro m main sc ree n pre s s
To cho ose betwee n the set up menu options pre ss
< or > untill the desired opt ion is displaye d.
LEAVING SETUP MEN U
At any poi nt i n the set up menu y ou c a n retur n to
the f orme r menu le ve l by pre ss ing
! .
SETUP>
4
STANDBY
STANDBY MODE
Pressing
! puts the unit in to standby mode.
Pre ssing any na vigati on button re sumes nor mal
! to enter setup menu.
^ followed by
SETUP>
5
REPEAT MODE
RE PEAT A CD OR A TR ACK
To enter re peat mode pre ss
This option enables to repeat with the following
opti ons:
• NO REPEAT
• REPEAT TRACK
• REPEAT DISC
To se t re peat mode pres
mode is displayed.
! to confirm.
Press
SETUP>
6
PHASE SELECTION
To enter phase selection press !.
This f unc ti o n gi v e s t he po ss i bi li ty to se lec t phas e.
Normal mode gives the natural per spective of the
music. Inversion mode chnges the absolute
phase by 180 dg.
Options:
• NORMAL
• INVERSION
To se t phas e pr e ss
is displayed. Press
!
< or > until the chosen
< or > until the chosen phase
! to confirm.
SETUP>
7
TIM E DISPLAY
To enter time display mode press !.
The ti me displa y gives precise informati on of ti -
ming rem aining or time elapsed on the track or on
the whole disc.
Options:
• TRACK ELAPSED TIME
• TRACK REMAIN TIME
• DISC ELAPSED TIME
• DISC REMAIN TIME
To select time display press
sen t ime display mode i s displayed.
! to confirm.
Press
SETUP>
8
CD LIG HTING
To enter CD li ght ing mode pres s !.
This lighting is available as an option only when
the CD cradle lit is open. As soon as the lit is closed t he lighting is switched off.
Options:
• ON
• OFF
To se lec t C D light ing pres s
sen option is displayed. Press
< or > untill the cho-
< or > untill t he c ho-
! to confirm.
1
ORPHEUS ZERO
1

SET UP AND OPERATIONS
SETUP>
9
KEY REPEAT RATE
KEY REPEAT RATE
To enter key repeat rate press
Holding down
pressing them. The repetition rate can be adjusted in three intervals.
Options:
• SLOW (0,6 seconds)
• MEDUIM (0,4 seconds)
• FAST (0,2 seconds)
To se t repeat r ate pres
mode is displa yed. P r ess
10
DISPLAY
To enter display mode press
The dis play lightin g can be adjusted from 100% to
20% i n 25 % st e ps. The mai n po we r i ndic a t o r light
on the left of the front panel is adjusted accordingly.
To increase og decrease the value press
Press
ORPHEUS ZERO
< or > is the same as repeate dly
SETUP>
DISPLAY
! to select.
!.
< or > until the chosen
! to confirm.
!.
^ or v.
SPECIFICATIONS
SETUP>
11
NIGHT MODE
NIGHT MODE
To enter night mode press
When night mode i in po sitio n O N the display
turns off automatically approx. 3 seconds after
pressing any button on the remote control.
The unit is still operation and the display lighting
is reactivated by pressing any co ntrol button.
To set night mode press
mode is displayed.
! to confirm.
Press
SETUP>
12
PREFERENCES
To enter preferences press !.
The various settings allow personalized unit confi-
gurat io n. T he pe r s onal se tt i ngs ne ed t o be s ave d
before turning off main power.
It is poss ible to r esto re previo usly sto red s etti ngs
as well as to call back the initial factory settings.
Options:
• SAVE
• RESET
• FACTORY SETTINGS
!.
< or > until the chosen
Press < or > untill the chosen mode is displayed.
! to confirm.
Press
In case of RESET and FACTORY SETTINGS
! to confirm again.
press
FACTORY SETTINGS has following values :
Repeat : NO REPEAT
Phase: NORMAL
Time: TRACK
ELAPSED TIME
Cd lig ht ing : ON
Key repeat rate : MEDIUM
Display : 100%
Night mode: OFF
1
TECHNICAL DATA
Digi tal outputs :
S/PDIF, 75 Ohms, 0.5 V P-P, on RCA connector
AES/EBU, 110 Ohm, 2.5 V P-P, on XLR connec-
tor.
Measurements: 1kHz sinus sampled at 44. 1kHz
with 16bits of resolution
Harmonic distorsion (THD+N) :
0.0009 % @ -0 dBFS
0.0090 % @ -20 dBFS
0.0900 % @ -40 dBFS
0.9000 % @ -60 dBFS
Dynamic range (THD+N @ -60 dBFS): 10 0 dBr
Residual noise from 20 Hz to 22 kHz: unmeasura-
ble
ORPHEUS ZERO
TECHNICAL DATA
Optional analog outputs :
Unbalanced, 2V RMS, on RCA connectors
Balanced, 2V RMS, on X LR connectors
Measurements: 1kHz sinus sampled at 44.1kHz
with 16bit s of resolution
Harmonic distortion (THD+N) :
0.0012 %@ 0dBFS
0.0090 %@ -20dBFS
0.0900 %@ -40dBFS
0.9500 %@ -60dBFS
Dynamic (THD+N @ -60 dBFS) : 100 dBr
Signal to ratio : 115 dBr
Residual noise 20 Hz to 22 kHz : 3,4 µV
Size : 482 x 370 x 44 mm
Weight : 10 kg
Main voltage : selectable
95 - 105 V AC at 50 - 60 kHz
115 - 135 V AC at 50 - 60 kHz
220 - 240 V AC at 50 - 60 kHz
Sta ndby Powe r : 4 W
Power with the lit closed : 6 W
Power with the lit opened : 7 W
COMMENTS
Cons truct ive fee dback is always we lcome.
Please feel free to forward us your comme nts at
the address listed below or to your local dealer or
distributor.
TECHNOLOGY & DESIGN
The unit has been entirely manufactured and as-
semb led in S witzerla nd; co nce ive d a nd des igned
by ANAGRAM Technologies SA.
IMPORTANT NOTICE
Orpheus Laboratories Sàrl reserve the right to
make changes to their products or discontinue
any product or service without notice. Adequate
oper ating sa feguards mus t be used to mini mize
hazar ds. Re production of user manual information
is permi ssible only if it is without alteration and is
accompanied by all relevant conditions, limitations
and notices. Source must be clearly identified
when reproducing user manual information.
ADDRESS
ORPHEUS Laboratories Sàrl
ZI Le Trési 6A
1028 Préverenges
Switzerland
+41 21 804 19 80 ph one
+41 21 804 19 81 fax
info@orpheuslab.com
www.orpheuslab.com
© Orpheus Laboratories Sàrl - 2004
December 2004 - rev. 2
1
 Loading...