

Page 1

Oro Technology Co., LTD
Tire Pressure Monitoring System
W408
User Manual
Page 2

W408 TPMS Specification
1. Tire Sensor’s Specification
Battery life 5~7 years normally use.
Battery Voltage 3.6 V
Operating Humidity Max 95%
Storage Temperature
-40℃ to 125 ℃
Operation Temperature
-30 ℃ to 115 ℃
Operation Frequency 314.6MHz
Transmission Frequency Transmit 1 signal each 30 sec.
Pressure Monitoring Range 0 ~ 350 kPa (or 0~51 psi ; 0~3.5 bar)
Pressure Reading Accuracy
±7 kPa
Temperature Monitoring Range
-30 ℃ to 115 ℃
Temperature Reading Accuracy
±3℃
Module weight
31.6 g ± 1 g
2. Receiver Specification
Operation Voltage 9V ~ 16V
Operating Humidity Max 95%
Normal Operation Voltage
≦200mA
Storage Temperature Range
-40℃ to 90 ℃
Operation Temperature Range
-30℃ to 85 ℃
Tire Pressure Reading Range 0 ~ 350 kPa
Temperature Reading Range
-30 ℃ to 115 ℃
Page 3
W408 TPMS INSTALLATION
1. Tire Sensor Installation:
Step Operation Process Photographs
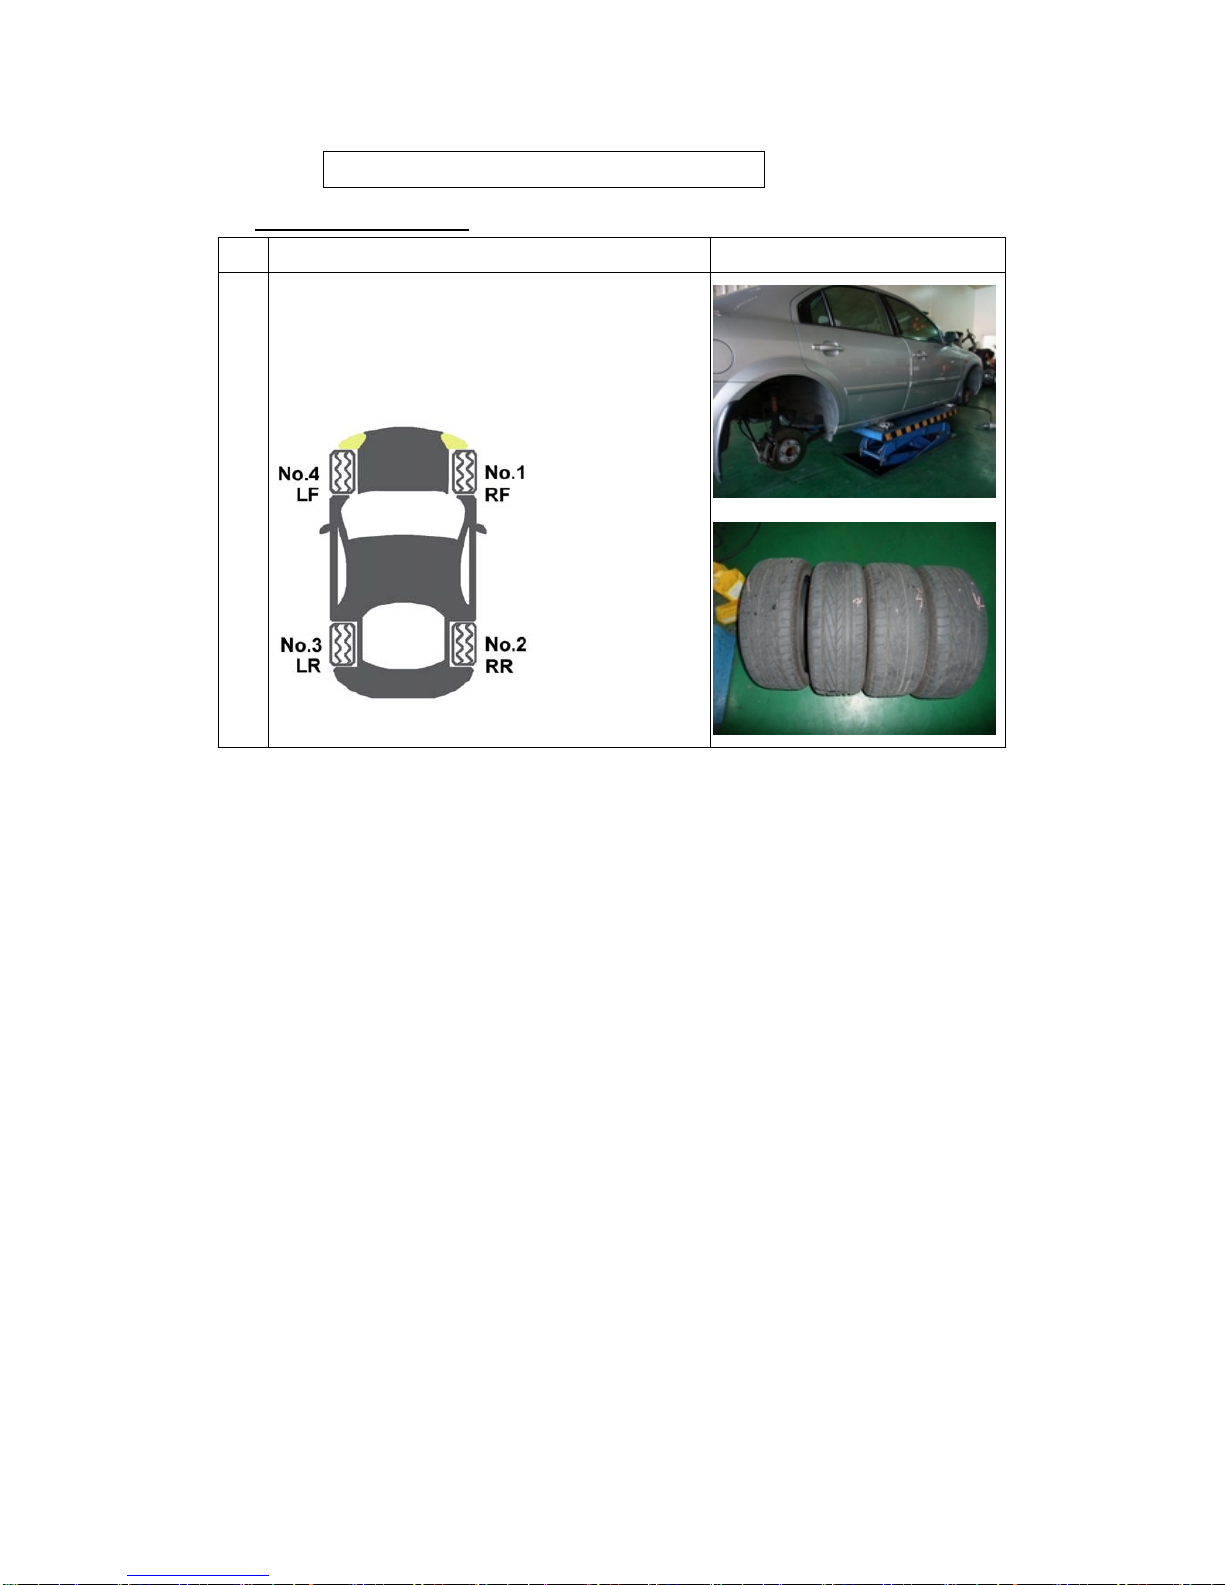
a Take off the 4 tires and mark 1~4 for each tire
position.
No.4 = Left Front Tire ; No.1 = Right Front Tire。
No.3 = Left Rear Ti re ; No.2 = Right Rear Tire。
Page 4
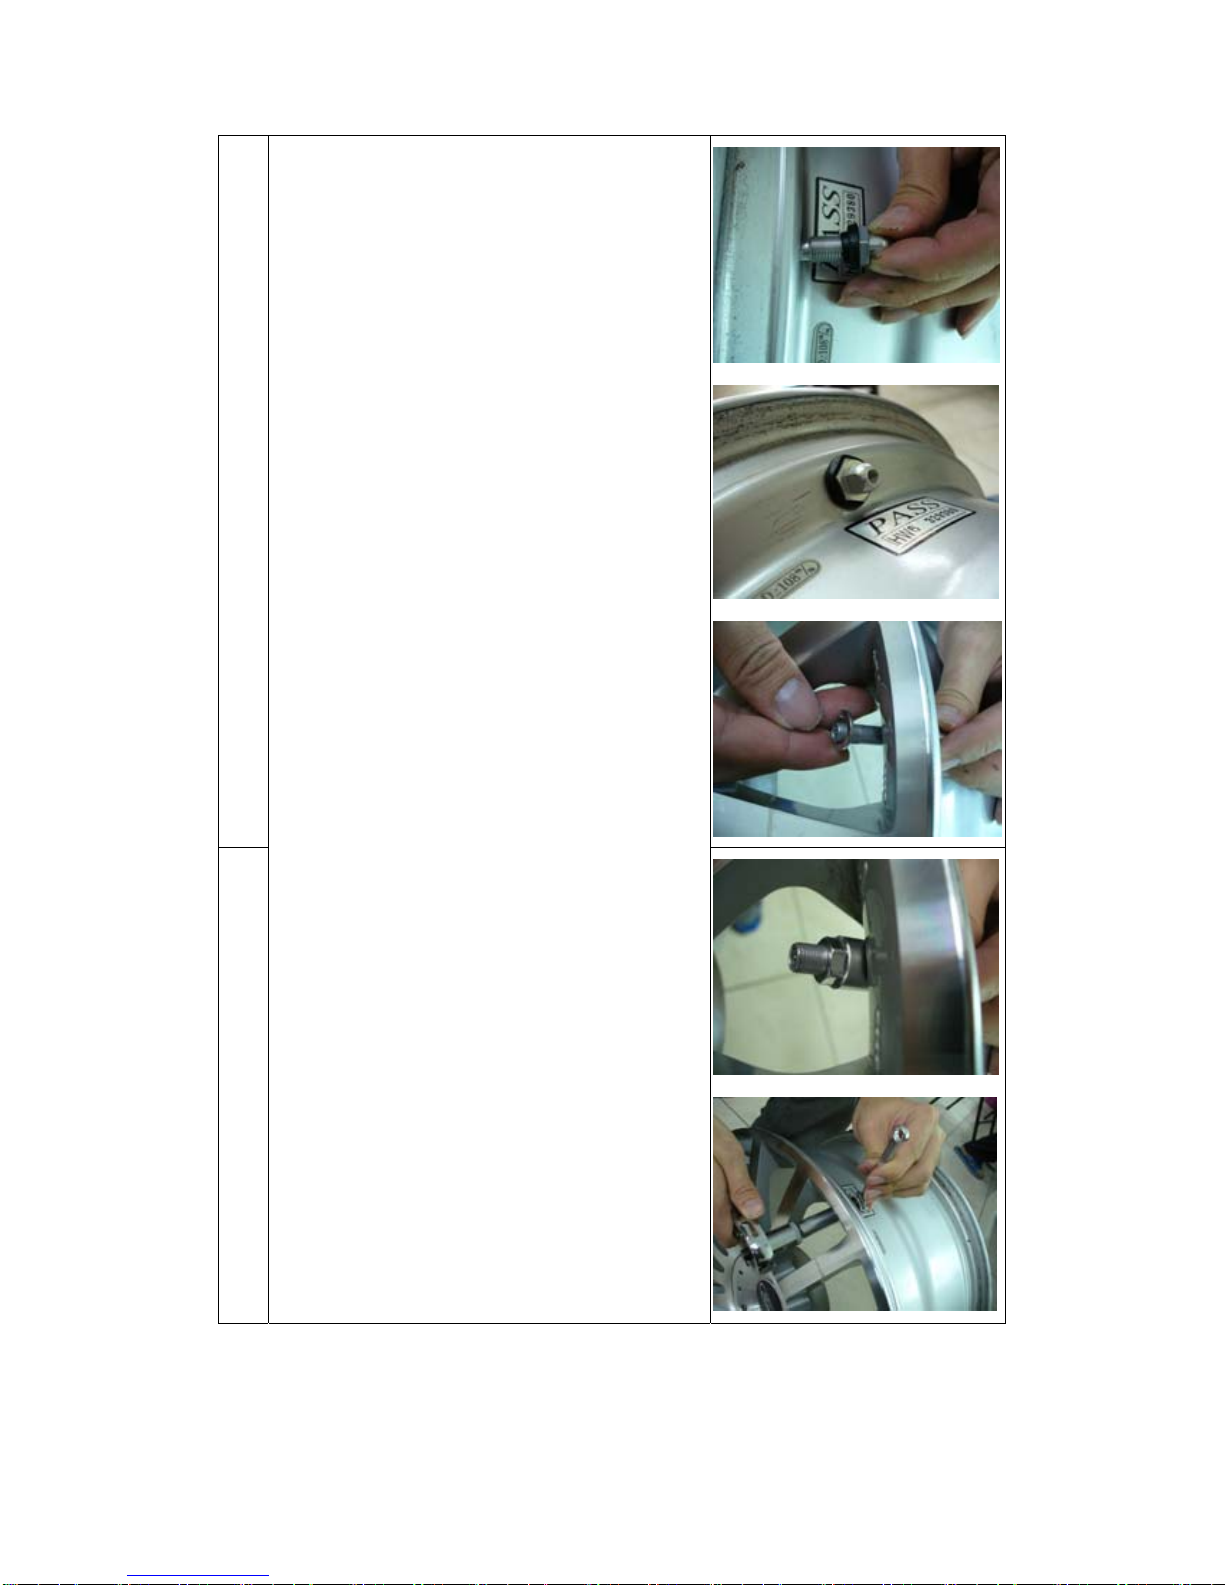
b Take off the tire and bleed the air, then. to change to
the ORO-Technology TPMS valve, follow the steps:
1. Snap in the valve from the internal edge side of
the wheel.
2. Adjust the valve’s angle, and make sure the
valve is vertical to the edge of the wheel.
3. Put on the circle screw (washer)from the outside
of the wheel.
4. Tighten the valve with the nylok screw from the
outside of the wheel.
5. Use the alan key provided to tighten.
b
Page 5
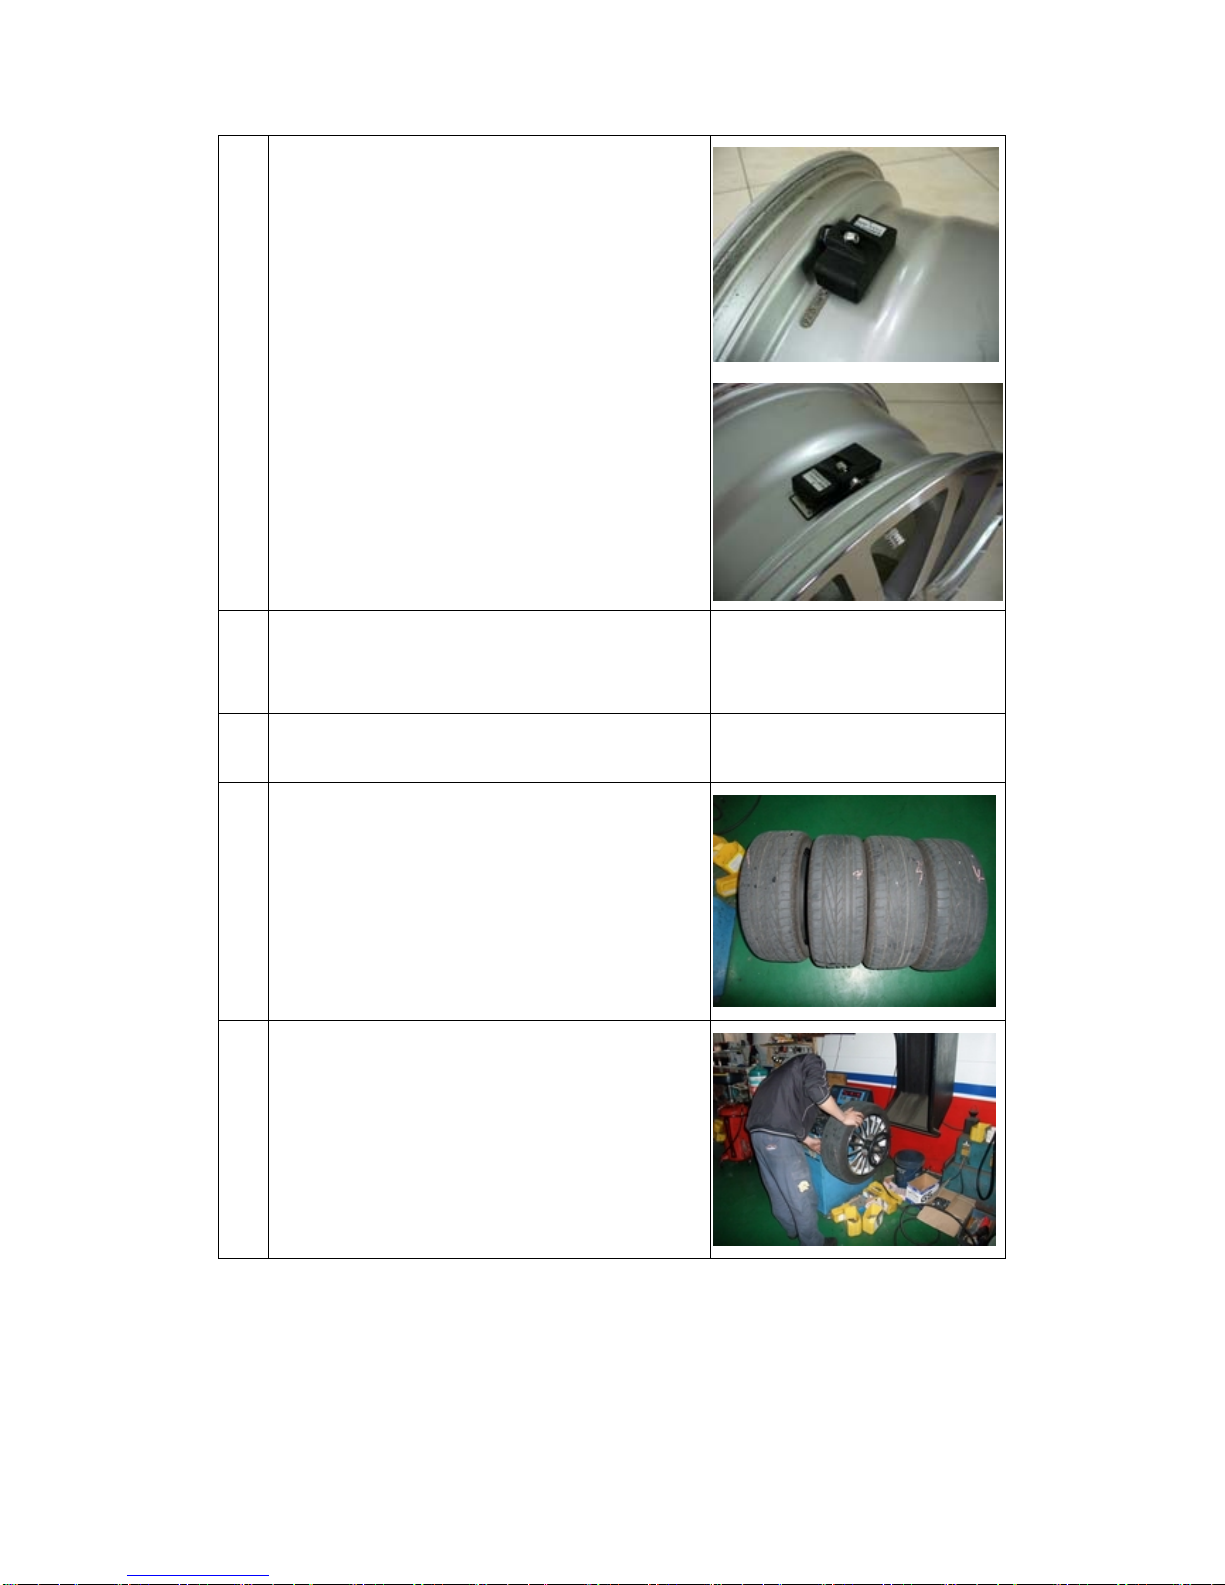
c Put the marked No. 1 tire sensor to the tire which is
marked No. 1. as step a. photo and follow steps:
1. Install the tire sensor to the valve.
2. Use the nylok screw and tighten up with the tire
sensor. (Pls. use the screwdriver which is
included to the accessories bag)
3. Adjust the tire sensor’s angle (paste on the
surface of the wheel), then tight up the with the
nylok screw.
4. Put on the valve’s cap, and finish the installation.
When there is a need to re-install the tire sensor,
please use the new nylok screw in order to prevent
the usage of the old ones.
d Place the No. 2 tire sensor to the tire which is
marked No.2, and set up the other 2 sensors in the
same manner as shown in the step C.
e Make sure there is no other liquid or dust present
around the area of the tire sensor.
f After installation, inflate the tire to the appropriate air
pressure as suggested in each vehicle’s user
manual.
g
Balance the tires with the tire balance machine。
Page 6
h Place the tires back to it’s corresponding position as
shown in the photograph on step a.
Once TPMS is installed correctly, turn on the ignition to start monitoring the tire
pressure/temperature and voltage.
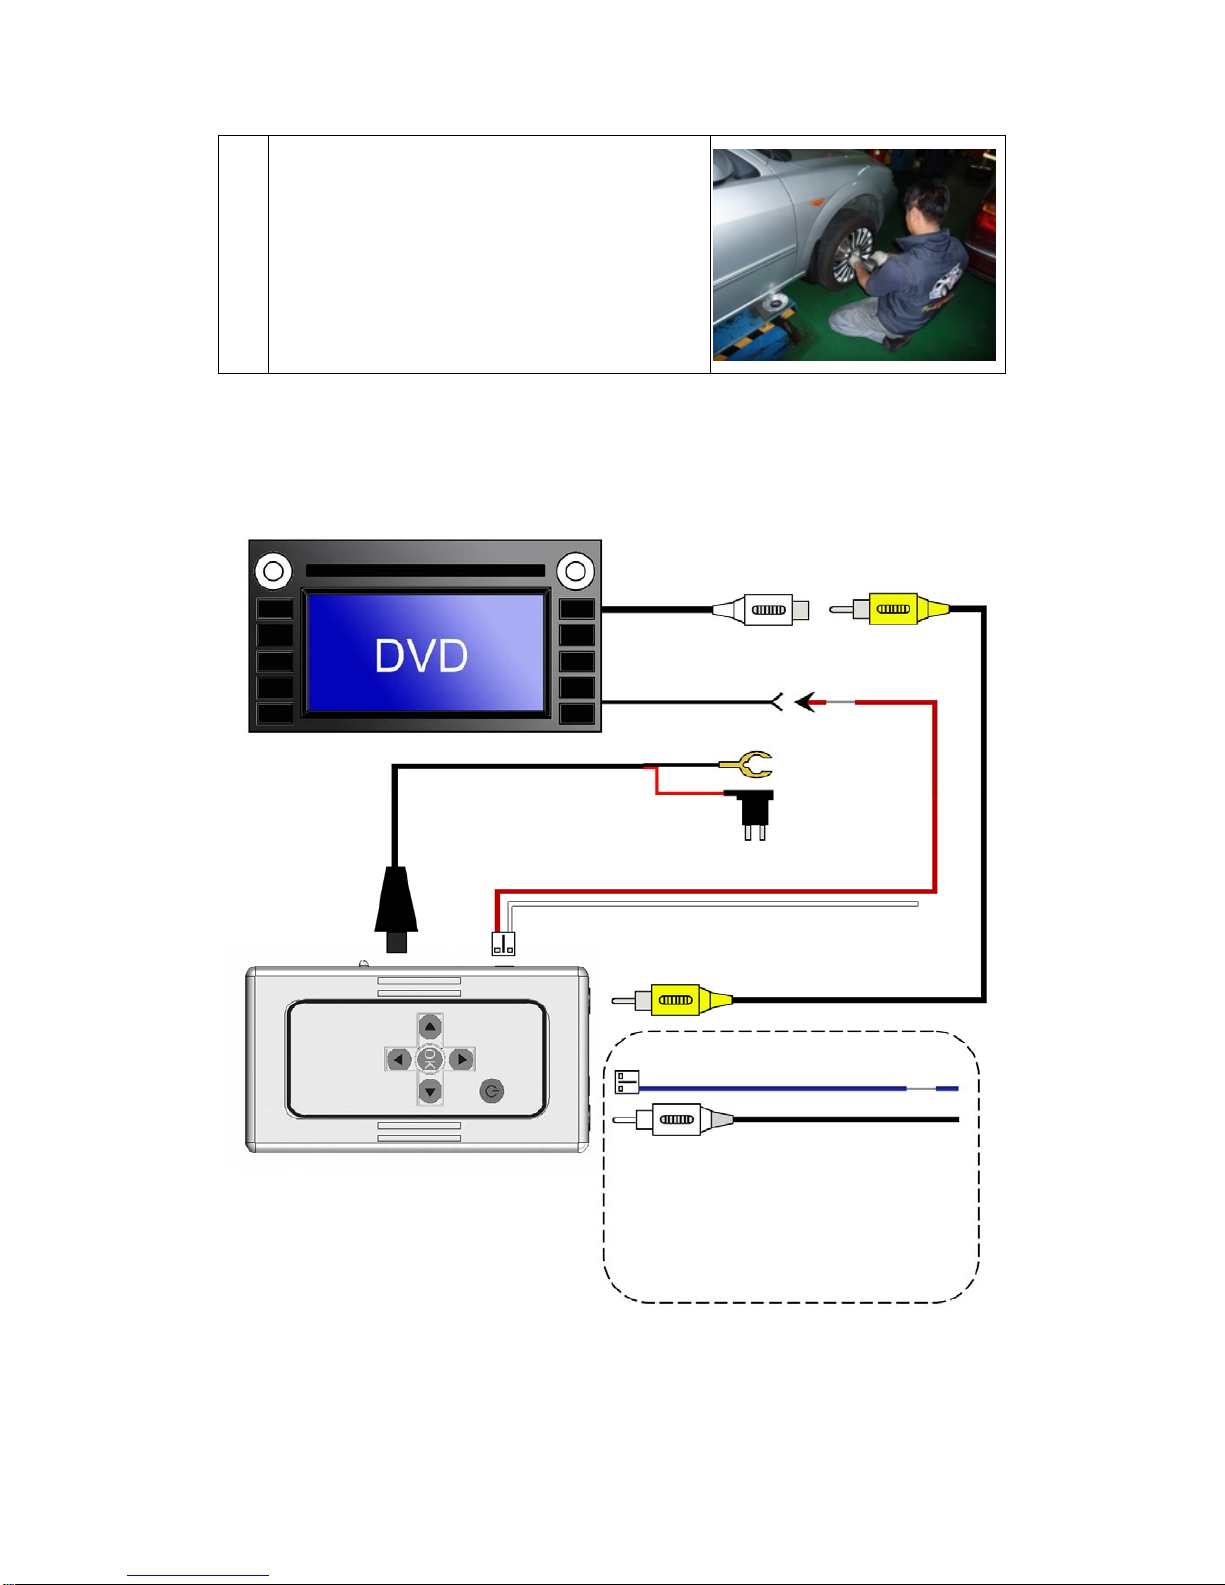
Video Input
Vide o Trigger
BLACK
RED
GROUND
ACC(+12V)
Power Cable
BROWN
WHITE
DVD Trigger( +12V Output )
Video Output
DVD Triger(0V Output)
BLACK Reverse Gear(+12V)
Reverse Car “Video in”
 Loading...