

Orlaco RLED, RLED CAN, RLED CAN Radar, RLED Serial PL User Manual

Monitor 12"
RLED
RLED Serial
RLED CAN
RLED CAN Radar
RLED Serial PL
RLED PL
User manual
Manual No. UM0972050 R1-6
08/2012
English

UM0972050 R1-6
3
UM0972050 R1-6
2
User Manual
ORLACO Monitor 12”
RLED, RLED Serial, RLED CAN,
RLED Radar, RLED Serial PL, RLED PL
Manual No. IM0972050, R1-6
Contents Page
1. Quick Reference 4
2. Getting Started 6
3. Keyboard 7
4. Service menu 10
5. Operator menu 16
6. System overview 18
7. Overview of menus 20
8. Version details 21
Introduction
Check with Orlaco which language versions are available. This
manual contains user instructions. Used photographs and
illustrations give general information and may differ from the
products you use.
Contact your Orlaco dealer if you have questions, additional
information, or want to make changes that are not described in this
manual.
The camera and monitor systems from Orlaco comply with the latest CE, ADR, EMC and mirror-directive regulations. All products are
manufactured in accordance with the ISO 9001 quality management
system, ISO 14001 environmental management systems.
See System Manual SM0973230 for installation.
Contents/Introduction
Article numbers ORLACO Monitor 12” RLED
Used abbreviations
ABC = Auto Backlight Control
AFZ = Auto Focus Zoom
AGC = Automatic Gain Control
BHO = Black Hot
CCC = Compact Color Camera
LUT = Look Up Table
DDE = Digital Detail Enhancement
FFC = Flat Field Correction
FUS = Fusion
I&F = Ice and Fire
NTS = NTSC
OSD = On Screen Display
PIP = Picture in Picture
PTZ = Pan & Tilt Zoom
RB = Rainbow
Stndrd = Std = Standard
TCH = Tachometer
TIC = Thermal Image Camera
WHO = White Hot
ZOO = Zoom
0207900 Monitor 12” RLED
0207910 Monitor 12” RLED Serial
0207920 Monitor 12” RLED CAN
0207930 Monitor 12” RLED CAN Radar
0207950 Monitor 12” RLED Serial PL
0207970 Monitor 12” RLED PL

UM0972050 R1-6
5
UM0972050 R1-6
4
Buttons 3 and 4, setting color saturation
Press the contrast (3) and brightness (4) buttons simultaneously to enable
the setting mode. Set the required color saturation using the minus and plus
buttons. This setting must be set separately for each camera.
Button 5, option/previous menu
Return to the previous menu.
Button 6, minus
Go to the next menu option or move left.
Button 7, plus
Go to the previous menu option or move right.
Button 8, enter
Switch to Standby or in the menus, select or activate the chosen option.
1. Quick Reference
Button 2
Auto backlight control
day/night modes
Button 3
Contrast
Button 4
Brightness
Button 5
Option/previous menu
Button 6
Minus select/setting
Button 7
Plus
+
select/setting
Button 8
Enter /
standby
Button 1
Camera
selection
Button 1, camera selection
Press the camera selection button once. The camera LED flashes to indicate that manual
camera selection is enabled. Use the minus and plus buttons to select the camera. Press
the button again to disable manual camera selection.
Button 2, auto backlight control day/night settings
Press this button to switch between the auto backlight day and night settings.
Button 3, setting the contrast
Press the button once in order to enable the setting mode. Use the minus and plus buttons
to set the required contrast. Press the button again to disable the setting mode.
Button 4, setting the brightness
Press the brightness button once in order to enable the setting mode. Set the required
brightness using the minus and plus buttons. Press the button again to disable the setting
mode.
Keyboard
Below is a brief description of the button functions. See sections 3 and 4 for a more detailed explanation.
Button 5
Button 6
Button 7
Button 8
Button 3
Button 4
Button 5
Button 6
Button 7
Button 2
Button 1
Button
1
Button 8
Button 7
Button 8
Button 3
Button 4
Button 5
Button 6
Button 7
Button 2
Button 8
Button
3
Button 4
Button 5
Button 6
Button 7
Button 8
Button 7
Button 8
Button 4
Button 5
Button 6
Button 7
Button 8
Button 8
Button 3
Button 4
Button 8
Button 6
Button 7
Button 8
UM0972050 R1-6
7
UM0972050 R1-6
6
Button 3
Button 4
Button 5
Button 6
Button 7
Button 2
Button 1
Button 8
Button 7
Button 8
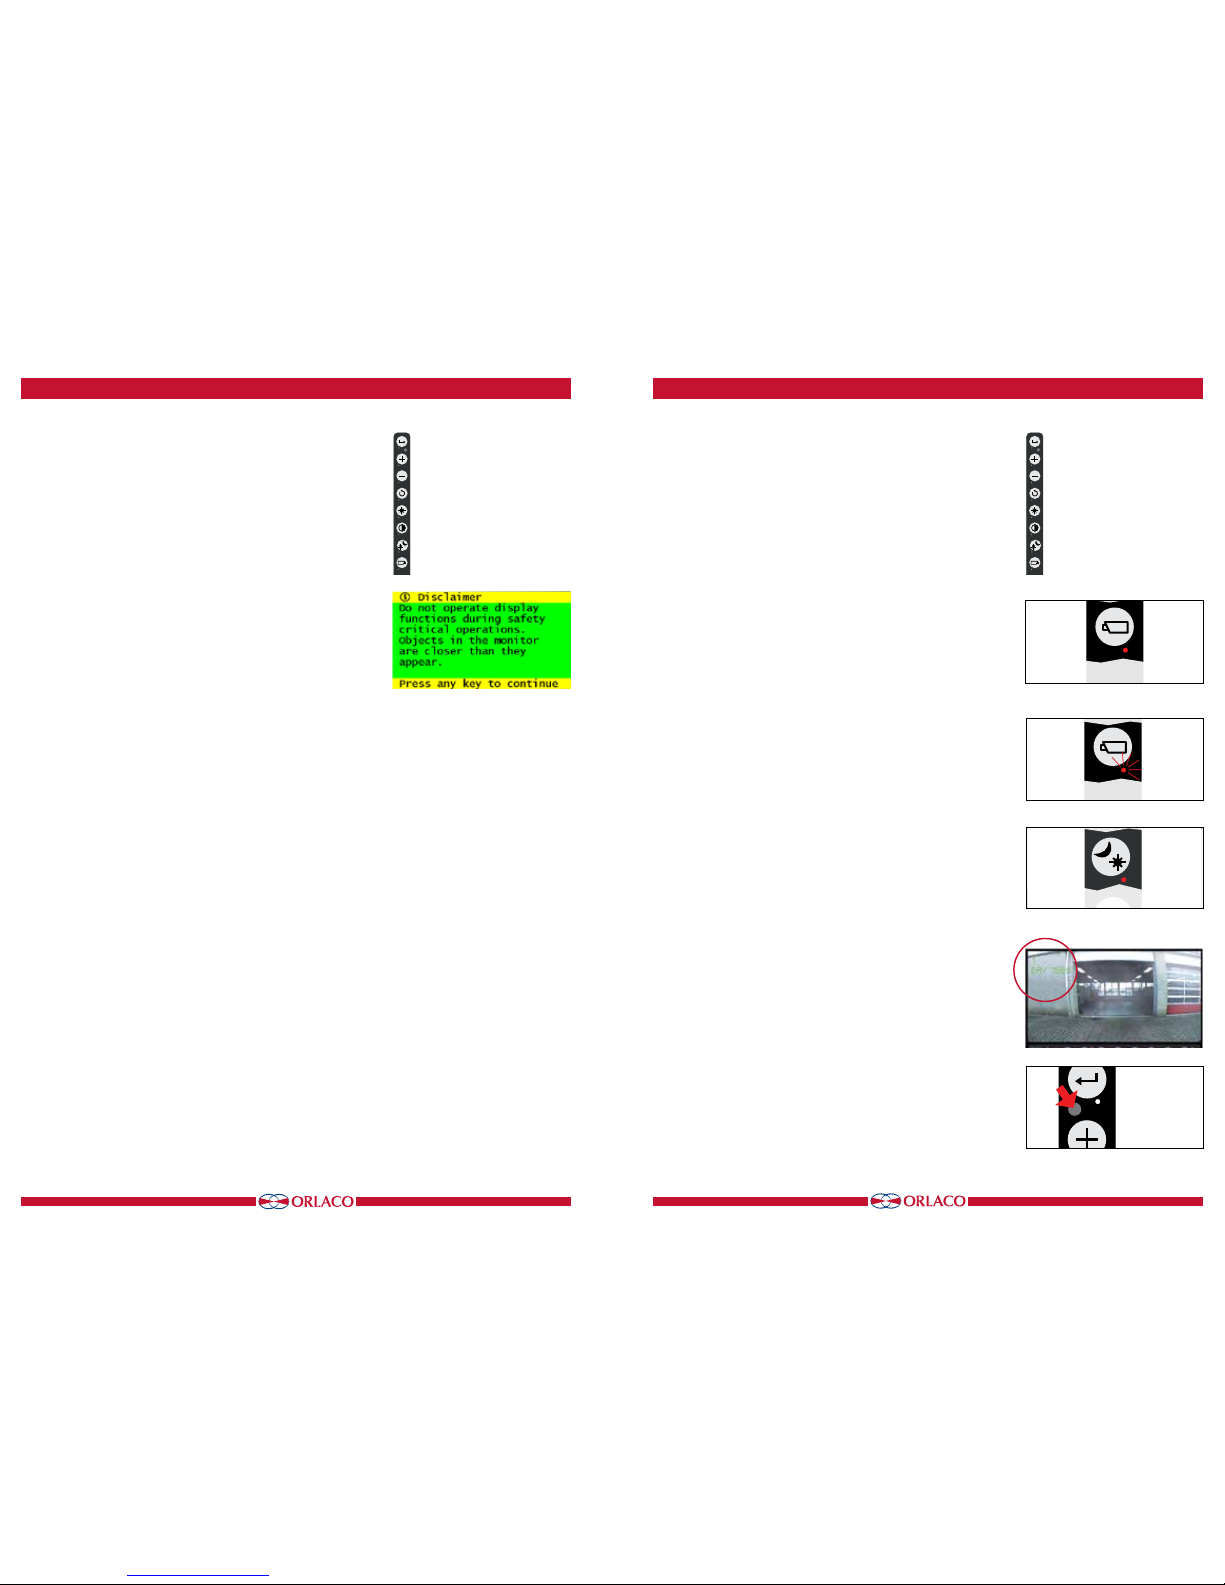
2.1. Disclaimer
When switching on the monitor for the first time, a disclaimer appears in English for 5 seconds (see Figure 1).
Displayed text: Do not operate display functions during safety criti-
cal operations. Objects in the monitor are closer than they appear. If
a different language is subsequently set, the disclaimer text appears
in the set language.
2.2. Description of the keyboard
Button no. 1 = Camera selection
Button no. 2 = Auto LCD backlight control day/night settings
Button no. 3 = Contrast
Button no. 4 = Brightness
Button no. 5 = Option/previous menu
Button no. 6 = Minus selection/setting button (-)
Button no. 7 = Plus selection/setting button (+)
Button no. 8 = Enter/Standby
2.3. Language setting for the OSD (On Screen Display) menu
The OSD menu language is set as English by default. If you would
like to operate the OSD menu in a different language, open the service menu → system settings. See section 4 on page 13. The OSD
menu is available in English, Dutch, German, French, Italian, Polish,
Spanish and Swedish.
Figure 1
2. Getting started
3. Keyboard
3.1. Button 1, camera selection
Press the camera selection button (1) once (see Figure 2). The
camera LED flashes to indicate that manual camera selection is
enabled (see Figure 3). Press the button again to disable manual
camera selection.
Use the minus and plus buttons to select the desired camera.
The other buttons (3 = contrast, 4 = brightness and 3+4 = saturation) can also be used and these functions can be adjusted with the
minus and plus buttons. Disable these functions by reselecting a
camera with the minus and plus buttons.
Manual camera selection has priority over the scan function and the
automatic camera selection. The button function can be disabled
in the service menu via the option 'system settings → keyboard →
keyboard lock'. See system settings for more information (section
4.3. on page 13).
3.2. Button 2, auto LCD backlight control day/night settings
See figure 4.
For a compact camera, press this button to switch between:
• The ABC mode
• The LCD backlight day setting
• The LCD backlight night setting
TIC and AFZ cameras are exceptions. For these, pressing button 2
makes other functions available (see sections 3.8.1. and 3.8.2. on
page 9).
The ABC mode controls the backlight between a minimum (adjustable; see also under service menu on page 16) and a maximum
level depending on the intensity of the ambient light. A light sensor
on the keyboard measures the ambient light (see Figure 6).
In the day and night mode the brightness of the backlight can be
manually set using the minus and plus buttons (the settings are
saved). These settings are not camera dependent and therefore apply for all cameras (see Figure 5).
Figure 6
Figure 2
Figure 3
Figure 4
Button 3
Button 4
Button 5
Button 6
Button 7
Button 2
Button 1
Button 1
Button 8
Button 7
Button 8
Figure 5
Button 8 = Enter/Standby
Button 7 = Selection/setting Plus(+)
Button 6 = Selection/setting Minus(-)
Button 5 = Option/previous menu
Button 4 = Brightness
Button 3 = Contrast
Button 2 = ABC, day/night settings
Button 1 = Camera selection
Button 8 = Enter/Standby
Button 7 = Selection/setting Plus(+)
Button 6 = Selection/setting Minus(-)
Button 5 = Option/previous menu
Button 4 = Brightness
Button 3 = Contrast
Button 2 = ABC, day/night settings
Button 1 = Camera selection
Button 8
Button 7
Button 8
Button 3
Button 4
Button 5
Button 6
Button 7
Button 2
Button 8
 Loading...