


The Sound of Italy
PX100
Digital Keyboard
User’s Manual


SAFETY PRECAUTIONS AND INSTRUCTIONS
WARNING
Make sure that the voltage set is suitable for the instrument (the voltage is
indicated next to the power inlet).
When using electric products, always follow basic precautions, including the
following:
Read all of these instructions before using the product.
To reduce the risk of injury, close supervision is necessary when the product is
used near children.
Do not use this product near water - for example, near a bathtub, washbowl,
kitchen sink, in a wet basement, near a swimming pool, or the like.
This product, either alone or in combination with an amplifier and headphones,
or speakers may be capable of producing sound levels that could cause permanent
hearing loss Do not operate for a long period of time at a high volume level, or at
a level that is uncomfortable. If you experience any hearing loss, or ringing in
your ears, you should consult an audiologist.
The product should be located so that its location, or position, does not interfere
with proper ventilation.
This product should only be located away from heat sources such as radiators,
heat registers, and other products that cause heat.
The product should be connected only to the type of power supply described in
the operating instructions, or as marked on the product.
This product may be equipped with a polarised plug. This is a safety feature. If
you are unable to insert the plug into the outlet, contact an electrician to replace
your obsolete outlet. Do not defeat the safety purpose of the plug.
The power-supply cord of the product should be unplugged from the outlet when
left unused for a long period of time When re-plugging unit, turn on the keyboard
and leave on for 3-5 hours to recharge internal battery. The battery may need to
be replaced after two or three years of use.
Care should be taken so that objects do not fall, and liquids are not spilled, into
the cabinet through openings
The product should be serviced by qualified personnel.
Do not attempt to service the product beyond that described in the maintenance
instructions. All other servicing should be referred to qualified service personnel.

Panel Contents
1. Power Button
2. Main Volume D ial
3. ACC.Volume Button
4. Tempo Button
5. Trans./Tune Button
6. KBD.Mode Button
7. Touch Button
8. Sustain Button
9. Effect Button
10. Chord Button
11. Synchro/Fill In Button
12. Start/Stop Button
13. Intro/Ending Button
14. Metronome Button
15. Voice/Style (Left/Right) Button
16. [+] / [-] Buttons
[0] - [9] Buttons
2
17. Setup Button
18. Chord Dictionary Button
19. Demo/Play Button
20. 3 Steps Button
21. Record Button
22. Play Button
23. LCD Display
Rear Panel
24. Phones
25. DC 12V

Panel Contents
3

LCD Display
LCD DISPLAY
1. VOICE/STYLE/DEMO STATUS
2. VOICE/STYLE/DEMO NUMBER OR FUNCTION VALUE ADJUSTMENT
3. TEMPO
4. BEAT INDICATOR
5. METRONOME
6. CHORD TYPE
7. CONTROLS: CHORD, SPLIT, DUAL, TOUCH, EFFECT,
SUSTAIN, VIBRATO
8. VOICE
9. STYLE
10. SONG
3
1
4
2
5
6
TEMPO
CHORD TYPE
119
dim
6
513
m M 7
augsus4
CHORD SPLIT DUAL TOUCH
VOICE 8
STYLE 9
SONG
10
EFFECT SUSTAIN VIBRATO
7
4
Basic Operation
Turning On the Power
1. Ensure the keyboard is turned off when connecting and
DC POWER
disconnecting the power, and turn the volume control to the
minimum level.
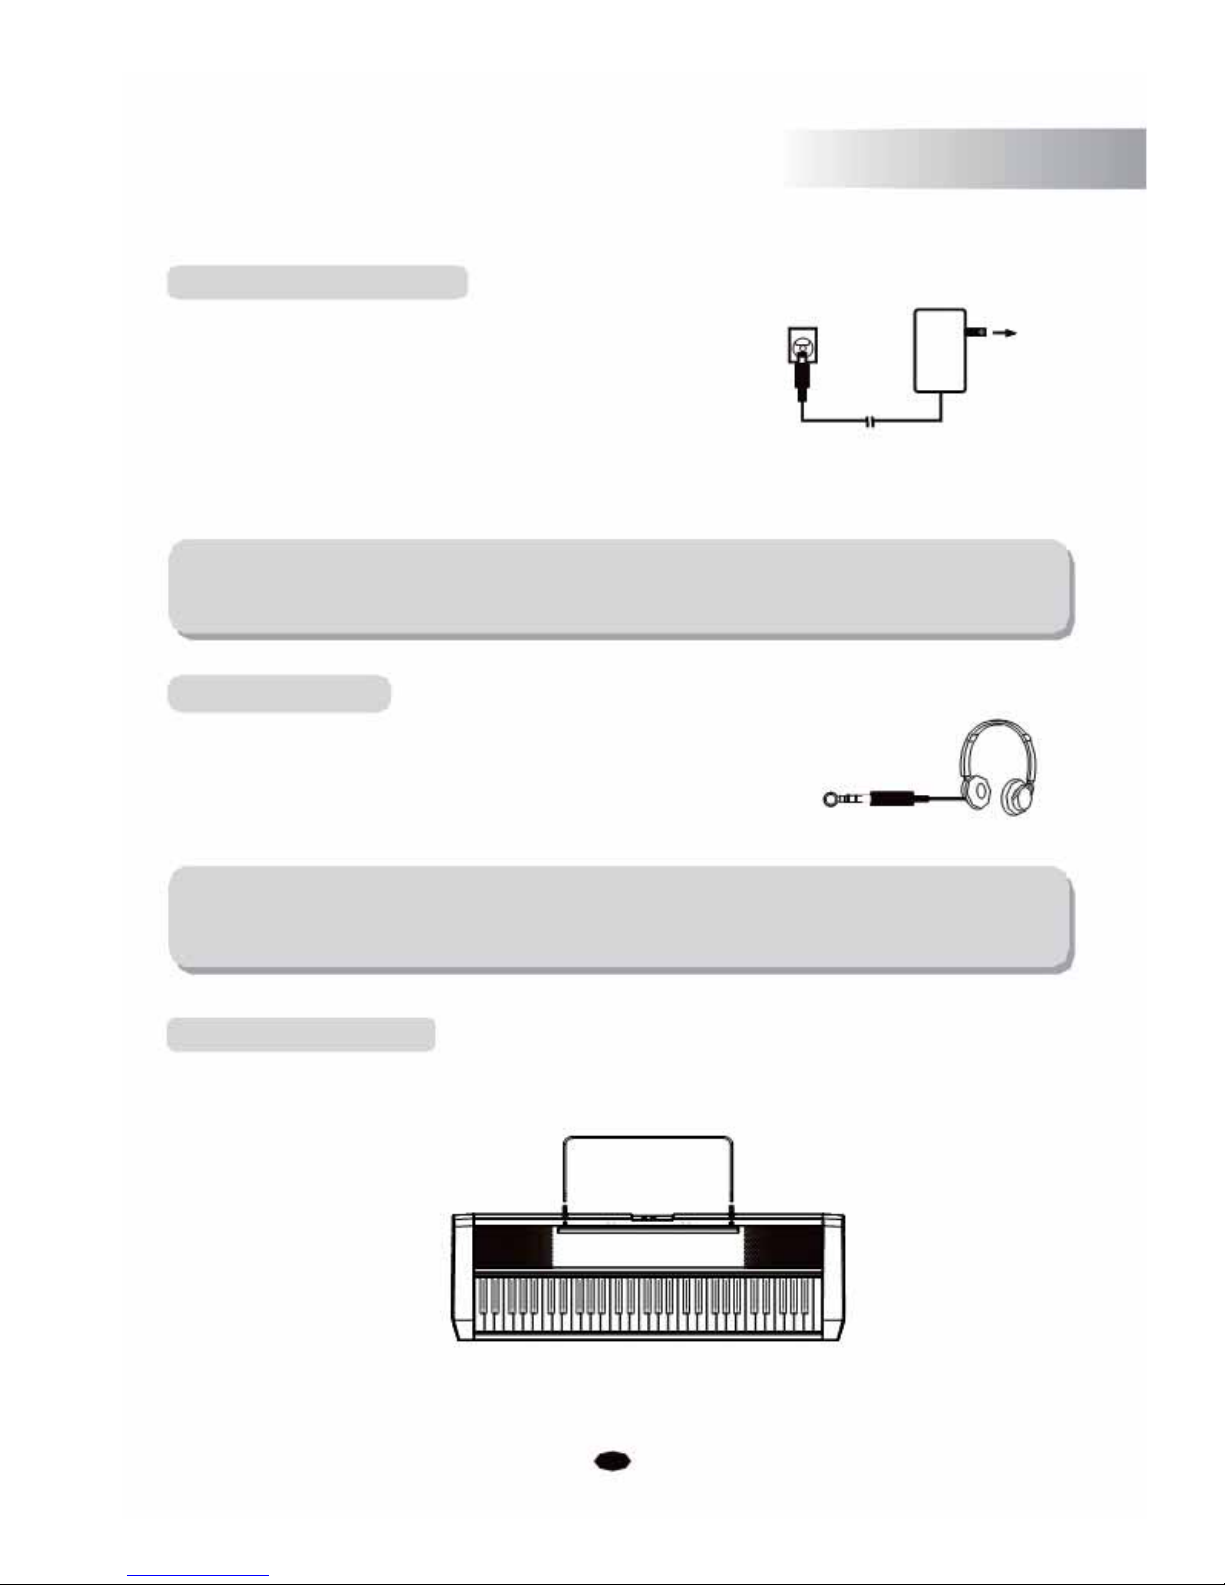
2. Connect the adaptor to the AC mains wall outlet and plug the cord into
the keyboard, then turn the power on.
NOTE:
When the keyboard is not in use, or during a thunderstorm, please
disconnect the power for safety purposes.
Headphone jack
Plug a set of stereo headphones into the phones jack, the
internal speaker system will automatically shut off when
the headphones are plugged in.
PHONES
NOTE:
Never use headphones at a high volume, as high volume levels could cause
permanent hearing damage.
Setting Music Rest
Please set up the music rest as per the instructions below:
5

Basic Operation
Adjusting the Main Volume
Use MASTER VOLUME control to adjust the volume to your
desired level.
MIN MAX
Demo Play
There are 10 preset demo songs and 100 learning songs that you can play individually.
Here's how you can select and play the songs.
1. Press the [DEMO/PLAY] button, then the demo songs will play in sequence.
TEMPO
VOICE
STYLE
DEMO/PLAY 3 STEPS
SONG
CHORD TYPE
dim 6
119
513
m
M7augsus4
CHORD SPLIT DUAL TOUCHEFFECTSUSTAIN VIBRATO
2. Press the [0] ~ [9] numeric buttons or [+/-] buttons to select the demo songs.
01~09 demo: press 01~09
10~99 demo: press 11~99
100~110 demo: hold the [1] button till the LCD displays: 1_ , then enter the tens and units
digits.
3. Press the [DEMO/PLAY ] button again to stop playing.
6

Voices
Your instrument has 129 (
including 128 GM standard voices (patches 01~128)) voices
that you can select and play. (See voice list: p36)
Select a Voice
You can use [+] and [-] buttons or numeric buttons to select the desired voices.
1~9 voice: press 01~09.
10~99 voice: press 10~99.
100~129 voice: hold the [1] button till the LCD displays: 1_ , then enter the tens digit
and single digits.
+0123
-5678
Voice/Style Button
TEMPO
VOICE
STYLE
SONG
4 CHORD TYPE 119
dim6513
mM7
augsus4
9
CHORD SPLIT DUAL TOUCH EFFECT SUSTAIN VIBRATO
Press the [VOICE/STYLE] button to switch between the Voice and Style
mode.
In the "3 Steps" mode, press the [VOICE/STYLE] button to switch between Left or Right
part.
VOICE/STYLE
LEFT/RIGHT
NOTE:
Please read the display on the LCD when pressing [VOICE/STYLE] button.
7

Voices
KBD.Mode Button
1) Split Mode
Your keyboard can be split into two sections, which means that different voices can be played
by the left and right hands at the same time.
Select a Split Voice
Press the [KBD.MODE] button to enter the Split mode, the split voice number and name
displays on the LCD message area.
Use the [+] and [-] buttons or the numeric buttons to select the desired split voice number
(01 though 129).
TEMPO
VOICE
STYLE
KBD.MODE
SONG
CHORD TYPE
dim 6
119
513
m
M7augsus4
CHORD SPLIT D UAL TOUCHEFFECTSUSTAIN VIBRATO
Press the [KBD.MODE] button repeatedly until its indication icon is not showing.
Adjust the Split Voice Volume
Press the [SETUP] button repeatedly to select S.Volume . (See P21)
Change the Split Point
Press the [SETUP] button repeatedly to select .Point (See P26)
2) Dual
This function allows two voices to be combined, so that they play at the same time, producing a
layered sound. This is useful for creating rich orchestral sounds, for example, the layering of Piano
and Strings. When the dual function is off, the voice indicated is VOICE R1.
When the dual function is on, the voice indicated is VOICE R2.
8

Voices
Select a Dual Voice
Press the [KBD.MODE] button twice to enter the Dual Voice mode, the Dual voice number
and name will display on the LCD message area. You can use the [+] and [-] buttons or the
numeric buttons to select the desired dual voice number (01 through 129).
Now, two different sounds can be played at the same time when pressing one key.
TEMPO
VOICE
KBD.MODE
STYLE
CHORD TYPE
SONG
dim 6
119
513
m
M7augsus4
CHORD SPLIT D UAL TOUCHEFFECT SUSTAIN VIBRATO
Press the [KBD.MODE] button repeatedly to exit the Dual Voice mode and its indicator
icon will be invisible.
Adjust the Dual Voice Volume
Press the [SETUP] button repeatedly to select D .Volume . (See P22)
NOTE:
If you don't press any button within 3 seconds of entering the Split/Dual setting
mode, it will exit this menu automatically.
9

Effect
Digital Effect
This instrument has a high quality DSP (Digital Signal Processor) on board which adds
added realism to the keyboard's sound.
Reverb
This function allows you to add reverb to the overall sound, thereby adding a spatial effect
similar to natural room spaces, such as Hall, Stage, Room etc. etc.
There are 8 reverb types to be selected. (Default:02)
Press the [SETUP] button repeatedly to enter Reverb mode. (See P27)
Adjust the Reverb Depth
To adjust the Reverb Depth, Please refer to the Reference: Reverb Depth . (See P27)
Chorus
There are 8 chord types to choose from. (Default:00)
Shimmering, thickening effect. Press the [SETUP] button repeatedly to enter chorus mode
(See P28)
Adjust the Chorus Depth
To adjust the Chorus Depth, Please refer to the Reference: Chorus Depth . (See P28)
Tempo Control Button
The [TEMPO] button is used to control the tempo of Auto Accompaniment, Demo as
well as your recording.
Press the [TEMPO] button to set the desired tempo value (20-280). The tempo (beats per
minute) will appear on the LCD.
Press the [+] and [-] buttons simultaneously in order to restore the default tempo settin
g
You can
use the [+] and [-] buttons or the numeric buttons to select the desired tempo.
TEMPO
VOICE
STYLE
TEMPO SONG
CHORD TYPE
dim 6
119
513
m
M7augsus4
CHORD SPLIT D UAL TOUCHEFFECT SUSTAIN VIBRATO
10

Effect
Transpose Button
The Transpose function allows you to change the key of the instrument in semitone steps,
up to a maximum setting of 12 semitones (a maximum of one octave up or down).
Press the [TRANS./TUNE] button the LCD will display: TRANS, then you can use the [+]
and [-] buttons or the numeric buttons to select the desired transpose value. (Default:00)
TEMPO
VOICE
STYLE
TRANS/TUNE
SONG
CHORD TYPE
dim 6
119
513
m
M7augsus4
CHORD SPLIT D UAL TOUCHEFFECT SUSTAIN VIBRATO
Tune Button
This function makes it possible to tune the pitch of your instrument to match other instruments
Tuning can be set over a 50 cent range. (that's 100 cents total, or one semitone) in 128 (-64~63) step
(approximately 0.8 cents per step).
Press the [TRANS./TUNE] button twice, the LCD will display: TUNE, then you can use the
[+] and [-] buttons or the numeric buttons to select the desired tune value. (Default:00)
TEMPO
VOICE
STYLE
TRANS/TUNE
SONG
CHORD TYPE
dim 6
119
513
m
M7augsus4
CHORD SPLIT D UAL TOUCHEFFECT SUSTAIN VIBRATO
NOTE:
If you don't press any button within 3 seconds of entering the Transpose / Tune
setting mode, it will exit this menu automatically.
11
Effect
Touch Button
The touch function provides three different types of keyboard touch sensitivity that can be
selected to match different playing styles.
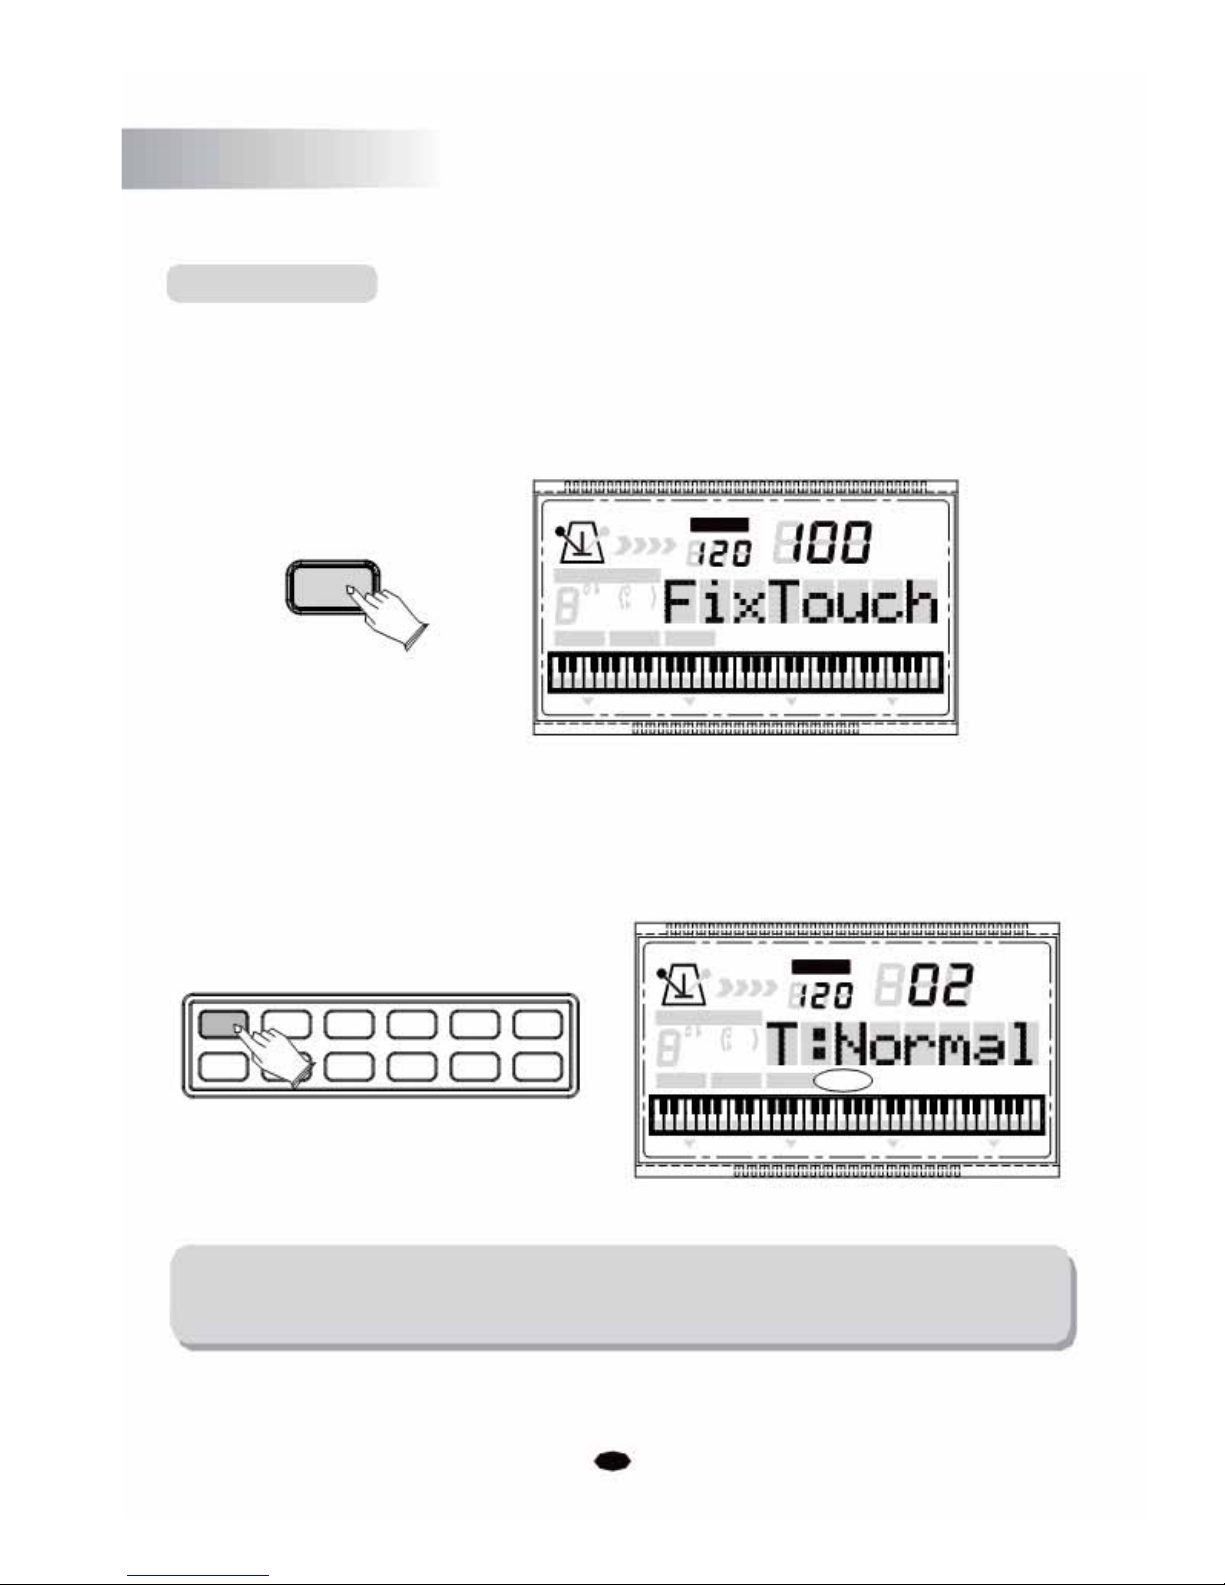
Press the [TOUCH] button. the LCD will display: FixTouch 100, then you can use the [+]
and [-] buttons or the numeric buttons to select the desired
touch sensitivity.
TEMPO
VOICE
TOUCH
STYLE
SONG
CHORD TYPE
dim 6
119
513
m
M7augsus4
CHORD SPLIT
DUAL
TOUCHEFFECTSUSTAIN VIBRATO
Press the [TOUCH] button again, the LCD will display: T:Normal (Default:Normal), then
you can use the [+] and [-] buttons or the
type: 01.Low; 02.Normal; 03.High.
+01234
-56789
numeric buttons to select the touch sensitivity
TEMPO
VOICE
STYLE
CHORD TYPE SONG
119
dim6513
mM7
augsus4
CHORD SPLIT DUAL TOUCH EFFECT SUSTAIN VIBRATO
NOTE:
If you don't press any button within 3 seconds after entering the Touch setting
mode, it will exit this menu automatically.
12

Effect
Sustain Button
The sustain function has the same effect as a damper pedal. Notes will linger on after the
player has removed their fingers from the notes.
Press the [SUSTAIN] button to enter Sustain function and its indicator light will be
on. It can be used as a damper pedal. Turn sustain on to sustain notes after the keys are
released.
TEMPO
VOICE
STYLE
SUSTAIN CHORD TYPE
SONG
dim 6
119 513
m
M7augsus4
CHORD SPLIT D UAL TOUCHEFFECT SUSTAIN VIBRATO
Press the [SUSTAIN] button again to exit the Sustain function and its indicator light will
be out.
Effect Button
The function allows you to activate or deactivate the Reverb and Chorus.
When the instrument is in the powered-on state, the default effect is on and the LCD will
display:
EFFECT
. You can adjust the Reverb and Chorus effect when the Effect function
is enabled.
EFFECT
CHORD TYPE
dim 6
119
513
mM7
augsus4
CHORD SPLIT
13
TEMPO
VOICE
STYLE
SONG
DUAL TOUCH EFFECT SUSTAIN VIBRATO

Effect
Press the [EFFECT] button again to exit the effect function and and its indicator icon will be
invisible.
Chord Button
Press the [CHORD] button to enter the Chord function and its indicator icon will be invisible. The
left hand side of the keyboard from the lowest note, and up to the split point is used to play the
Auto Accompaniment. The various chord types are detected from the notes played, and exciting
and vibrant accompaniment patterns produced.
CHORD
CHORD TYPE
dim
6119
513
mM7
augsus4
CHORD SPLIT
TEMPO
VOICE
STYLE
SONG
DUAL TOUCH EFFECT SUSTAIN VIBRATO
Press the [CHORD] button repeatedly to exit the Chord function and its indicator icon will
be invisible.
14

Auto Accompaniment
The keyboard has a total of 100accompaniment styles which can be used to provide
Fully-orchestrated Auto Accompaniment. When the Auto Accompaniment function is
turned on, this instrument creates fully-orchestrated rhythm , bass and chord accompaniment
based on chord s that you play with the left hand, in the Auto Accompaniment section of the
keyboard (i.e. all keys to the left of the Auto Accompaniment split point). The right-hand
section of the keyboard is available for normal playing.
The default Auto Accompaniment split point is the F
#2 key. The Auto Accompaniment section
of the keyboard consists of all keys to its left.
Selecting a Style
Press the [VOICE/STYLE] button, then the LCD will display: STYLE, then you can use the [+] and
[-] buttons or the number buttons to select styles
01~09 style: press 01~09.
10~99 style: press 10~99.
100 style: hold the [1] button till the LCD displays: 1_ , then enter the tens digit
and single digits. Values outside the range of style number can't be entered.
+0123
-5678
TEMPO
VOICE
STYLE
SONG
4 CHORD TYPE 119
dim6513
mM7
augsus4
9
CHORD SPLIT DUAL TOUCH EFFECT SUSTAIN VIBRATO
NOTE:
By pressing the [VOICE/STYLE] button, you can switch between the Voice and Style
mode (Reference P7:Voice/Style Button).
15

Auto Accompaniment
Starting a Style
Immediate Start
Press the [START/STOP] button to start the style.
START
TEMPO
VOICE
/STOP
STYLE
CHORD TYPE
SONG
dim 6
119
513
m
M
7
augsus4
CHORD SPLIT D UAL TOUCHEFFECTSUSTAIN VIBRATO
Use Synchro Start
Press the [SYNCHRO/FILL IN] button to enter the sync start "waiting" mode, then the
accompaniment will start when you play the first chord on the auto accompaniment section
of the keyboard.
TEMPO
VOICE
SYNCHRO
STYLE
/FILL IN
SONG
CHORD TYPE
dim 6
119
513
m
M7augsus4
CHORD SPLIT D UAL TOUCHEFFECTSUSTAIN VIBRATO
Start the Accompaniment with an Introduction
Any of your instrument accompaniment patterns can be started with an appropriate
introduction by pressing the [INTRO/ENDING] button.
If you press the [SYNCHRO/FILL IN] button and then press the [ INTRO/ENDING] button,
the accompaniment will start from the introduction as soon as a chord is played in the auto
accompaniment section of the keyboard.
16

Auto Accompaniment
TEMPO
SYNCHRO INTRO/
/FILL IN ENDING
CHORD TYPE
dim 6
119
513
mM7
augsus4
CHORD SPLIT DUAL TOUCH
Stopping the Style
You can do this in one of two ways.
Stop immediately
The accompaniment can be stopped at any time by pressing the
[START/STOP] button.
Stop with Ending
VOICE
STYLE
SONG
EFFECT SUSTAIN VIBRATO
START
/STOP
Press the [ INTRO/ ENDING] button, the style stops after the ending section is finished.
INTRO/
ENDING
Intro/Ending
1. Intro
If you press the [INTRO/ENDING]
2. Ending
If you press the [INTRO/ENDING]
TEMPO
VOICE
STYLE
CHORD TYPE SONG
dim
6119
513
mM7
augsus4
CHORD SPLIT DUAL TOUCH EFFECT SUSTAIN VIBRATO
button, the accompaniment will start with an Intro.
button, the accompaniment will stop with an Ending.
17

Auto Accompaniment
Fill In
Whilst a style is playing, pressing the [SYNCHRO/FILL IN] button will trigger a one
measure/bar drum fill in pattern. After the fill in pattern the main style will resume.
SYNCHRO
/FILL IN
CHORD TYPE
dim
6119
513
mM7
augsus4
CHORD SPLIT
Acc Volume
TEMPO
VOICE
STYLE
SONG
DUAL TOUCH EFFECT SUSTAIN VIBRATO
The volume of the auto accompaniment can be adjusted in the range of 00~31.
Press the [ACC.VOLUME] button, then the LCD will display: Acc.Vol. Then use the [+]
and [-] buttons or the numeric buttons toincrease or decrease the value.
TEMPO
VOICE
STYLE
ACC.VOLUME
SONG
CHORD TYPE
dim 6
119
513
m
M7augsus4
CHORD SPLIT D UAL TOUCHEFFECTSUSTAIN VIBRATO
NOTE:
If you don't press any button within 3 seconds of entering the ACC VOLUME setting
mode, it will exit this menu automatically.
18

Auto Accompaniment
Metronome
Metronome is a convenient feature for practice, and it can also provide a solid rhythmic guide
when recording.
The metronome sound can be alternately turned on and turned off by pressing the [METRONOM
E
button.
TEMPO
VOICE
METRONOME
STYLE
CHORD TYPE
SONG
dim 6
119
513
m
M7augsus4
CHORD SPLIT D UAL TOUCHEFFECTSUSTAIN VIBRATO
Time signature
Time signature: 2/2, 1/4, 2/4, 3/4, 4/4, 5/4, 6/4, 3/8, 6/8, 7/8, 9/8, 12/8. (Default: 4/4)
After pressing the [METRONOME] button, You can use the [+] and [-] buttons or the
numeric
buttons to select the t ime signature in about 3 seconds.
TEMPO
VOICE
STYLE
METRONOME
SONG
CHORD TYPE
dim 6
119
513
m
M7augsus4
CHORD SPLIT D UAL TOUCHEFFECTSUSTAIN VIBRATO
19

SETUP
Press the [SETUP] button to enter the menu of function. The default option of the menu
is M.VOLUME . Press the [SETUP] button repeatedly to select the option to be set.
Use [+] and [-] buttons to set the parameter. The option and the parameters are as follows:
Option LCD Display Range Default
Main Voice Volume
M.Volume
0~127
127
Split Voice Volume
S.Volume
0~127
127
Dual Voice Volume
D.Volume
0~127
100
Main Voice Pan
M.Pan
-64~63
0
Split Voice Pan
S.Pan
-64~63
0
Dual Voice Pan
D.Pan
-64~63
0
Main Voice Octave M.Octave
-3~2
0
Split Voice Octave
S.Octave
-3~2
0
Dual Voice Octave D.Octave
-3~2
0
Vibrato
Vibrato
ON/OFF OFF
Time Signature
2/2, 1/4, 2/4, 3/4,
Tick:4/4
4/4, 5/4, 6/4, 3/8,
4/4
6/8, 7/8, 9/8, 12/8
Split Point S.Point
0~60
19
Reverb Type Reverb 0~8 02
Reverb Level R.Level
0~127
80
Chorus Type Chorus 0~8
00
Chorus Level C.Level
0~127
36
EQ BASS EQ:Bass
-6~6
00
EQ TREBE1 EQ:Trebel -6~6 00
NOTE:
It will exit the function menu if operation is not executed within 3 seconds.
20

SETUP
Main Voice Volume
In this function you can set the Main Voice Volume.
Press the [SETUP] button to select M. Volume , then use [+] and [-] buttonso rthe
numeric buttons to increase or decrease the value. Range: 0 ~127. (Default:127)
TEMPO
SETUP
CHORD TYPE
dim
6119
513
mM7
augsus4
CHORD SPLIT DUAL TOUCH EFFECT
Split Voice Volume
In this function you can set the Split Voice Volume.
Press the [SETUP] button r epeatedly to select S. Volume
VOICE
STYLE
SONG
SUSTAIN VIBRATO
, then use [+] and [-]
buttonso rthe numeric buttons to increase or decrease the value. Range: 0 ~127.
(Default:127)
TEMPO
VOICE
SETUP
STYLE
CHORD TYPE
SONG
dim 6
119
513
m
M7augsus4
CHORD SPLIT D UAL TOUCHEFFECT SUSTAIN VIBRATO
21

SETUP
Dual Voice Volume
This function allows you to set the Main Voice Volume.
Press the [SETUP] button repeatedly to select D. Volume , then use [+] and [-]
buttonso rthe numeric buttons to increase or decrease the value. Range: 0 ~127.
(Default:100)
TEMPO
VOICE
SETUP
STYLE
CHORD TYPE
SONG
dim 6
119
513
m
M7augsus4
CHORD SPLIT D UAL TOUCHEFFECT SUSTAIN VIBRATO
Main Voice Pan
This function allows you to set the stereo position of each orchestration part in order
to create a broad stereo image of your sound.
Press the [SETUP] button repeatedly to select M. Pan , then use [+] and [-]
buttonso rthe numeric buttons to set the pan value: From -64 to 63. (Default:00)
TEMPO
VOICE
SETUP
STYLE
SONG
CHORD TYPE
dim 6
119
513
m
M7augsus4
CHORD SPLIT D UAL TOUCHEFFECT SUSTAIN VIBRATO
NOTE:
The numbers ranging from -64 to -1 cannot be selected by selected by numeric
buttons.
22

SETUP
Split Voice Pan
In this function you can set the stereo position of each orchestration part to create a
board stereo image of your sound.
Press the [SETUP] button r epeatedly to select S. Pan , then use [+] and [-] buttons
or
the numeric buttons to set the pan value: From -64 to 63. (Default:00)
TEMPO
VOICE
SETUP
STYLE
CHORD TYPE
SONG
dim 6
119
513
m
M7augsus4
CHORD SPLIT D UAL TOUCHEFFECT SUSTAIN VIBRATO
NOTE:
The numbers ranging from -64 to -1 cannot be selected by the numeric buttons.
Dual Voice Pan
In this function you can set the stereo position of each orchestration part to create a
board stereo image of your sound.
Press the [SETUP] button repeatedly to select D.Pan , then use [+] and [-] buttons
or the numeric buttons
SETUP
NOTE:
to set the pan value.Range: -64 ~ 63. (Default:00)
TEMPO
VOICE
STYLE
SONG
CHORD TYPE
dim
6119
513
mM7
augsus4
CHORD SPLIT DUAL TOUCH EFFECT SUSTAIN VIBRATO
The numbers ranging from -64 to -1 cannot be selected by the numeric buttons.
23

SETUP
Main Voice Otave
This function allows you to set the main voice octave.
Press the [SETUP] button repeatedly to select M. Octave , then use [+] and [-]
buttonso rthe numeric buttons to set the value. Range:-3~2. (Default:00)
TEMPO
VOICE
SETUP
STYLE
CHORD TYPE
SONG
dim 6
119
513
m
M7augsus4
CHORD SPLIT D UAL TOUCHEFFECT SUSTAIN VIBRATO
NOTE:
The numbers ranging from -3 to -1 cannot be selected by the numeric buttons.
Split Voice Otave
This function allows you to set the Split voice octave.
Press the [SETUP] button r epeatedly to select S. Octave , then use [+] and [-]
buttonso rthe numeric buttons to set the value. Range:-3~2. (Default:00)
TEMPO
VOICE
STYLE
SETUP CHORD TYPE
SONG
dim 6
119 513
m
M7augsus4
CHORD SPLIT D UAL TOUCHEFFECT SUSTAIN VIBRATO
NOTE:
The numbers ranging from -3 to -1 cannot be selected by the numeric buttons.
24
SETUP
Dual Voice Otave
This function allows you to set the Dual voice octave.
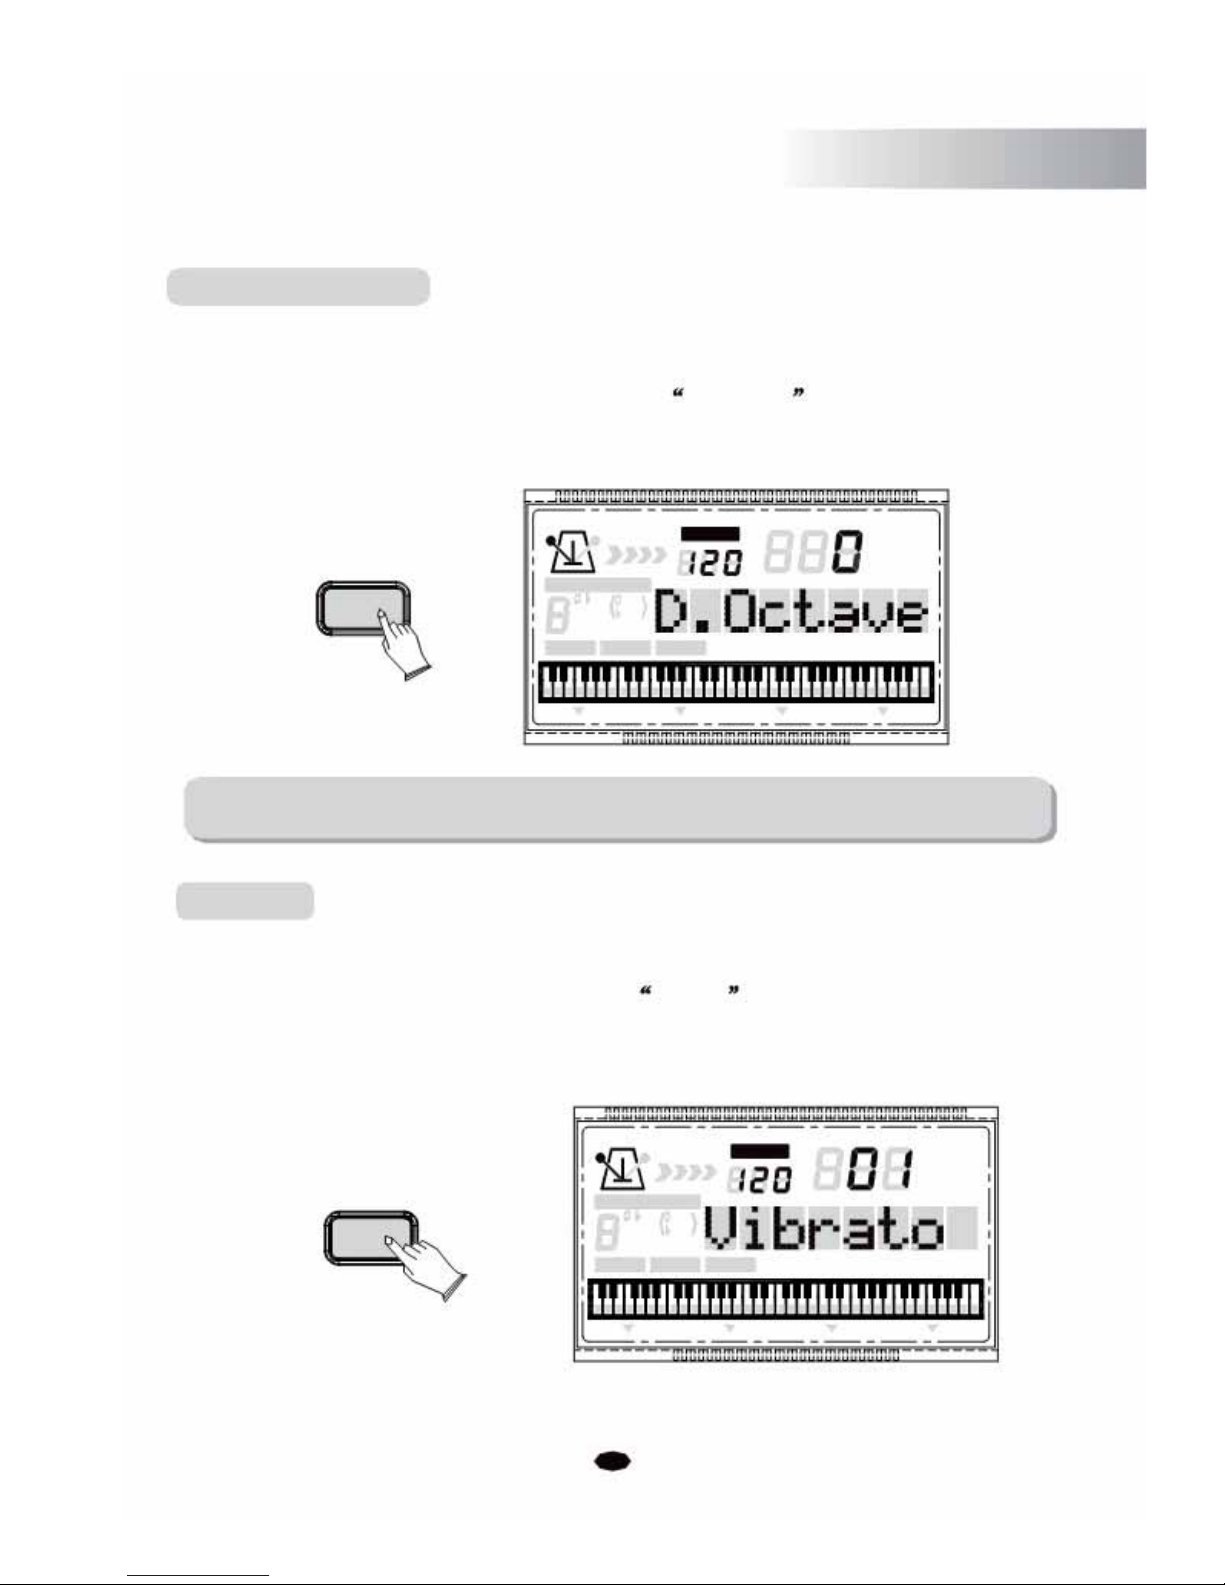
Press the [SETUP] button repeatedly to select D. Octave , then use [+] and [-]
buttonso rthe numeric buttons to set the value. Range:-3~2. (Default:00)
SETUP
CHORD TYPE
dim
6119
513
mM7
augsus4
CHORD SPLIT
NOTE:
TEMPO
VOICE
STYLE
SONG
DUAL TOUCH EFFECT SUSTAIN VIBRATO
The numbers ranging from -3 to -1 cannot be selected by the numeric buttons.
Vibrato
The function allows you to switch the Vibrato on/off.
Press the [SETUP] button
r epeatedly
to select Vibrato , then use [+] and [-] buttons to
control to switch it on or off (Default:OFF). The Vibrato function will produce different
tremolo or vibrato Effect to your performance.
TEMPO
VOICE
STYLE
SETUP CHORD TYPE
SONG
dim 6
119 513
m
M7augsus4
CHORD SPLIT D UAL TOUCHEFFECT SUSTAIN VIBRATO
25
SETUP
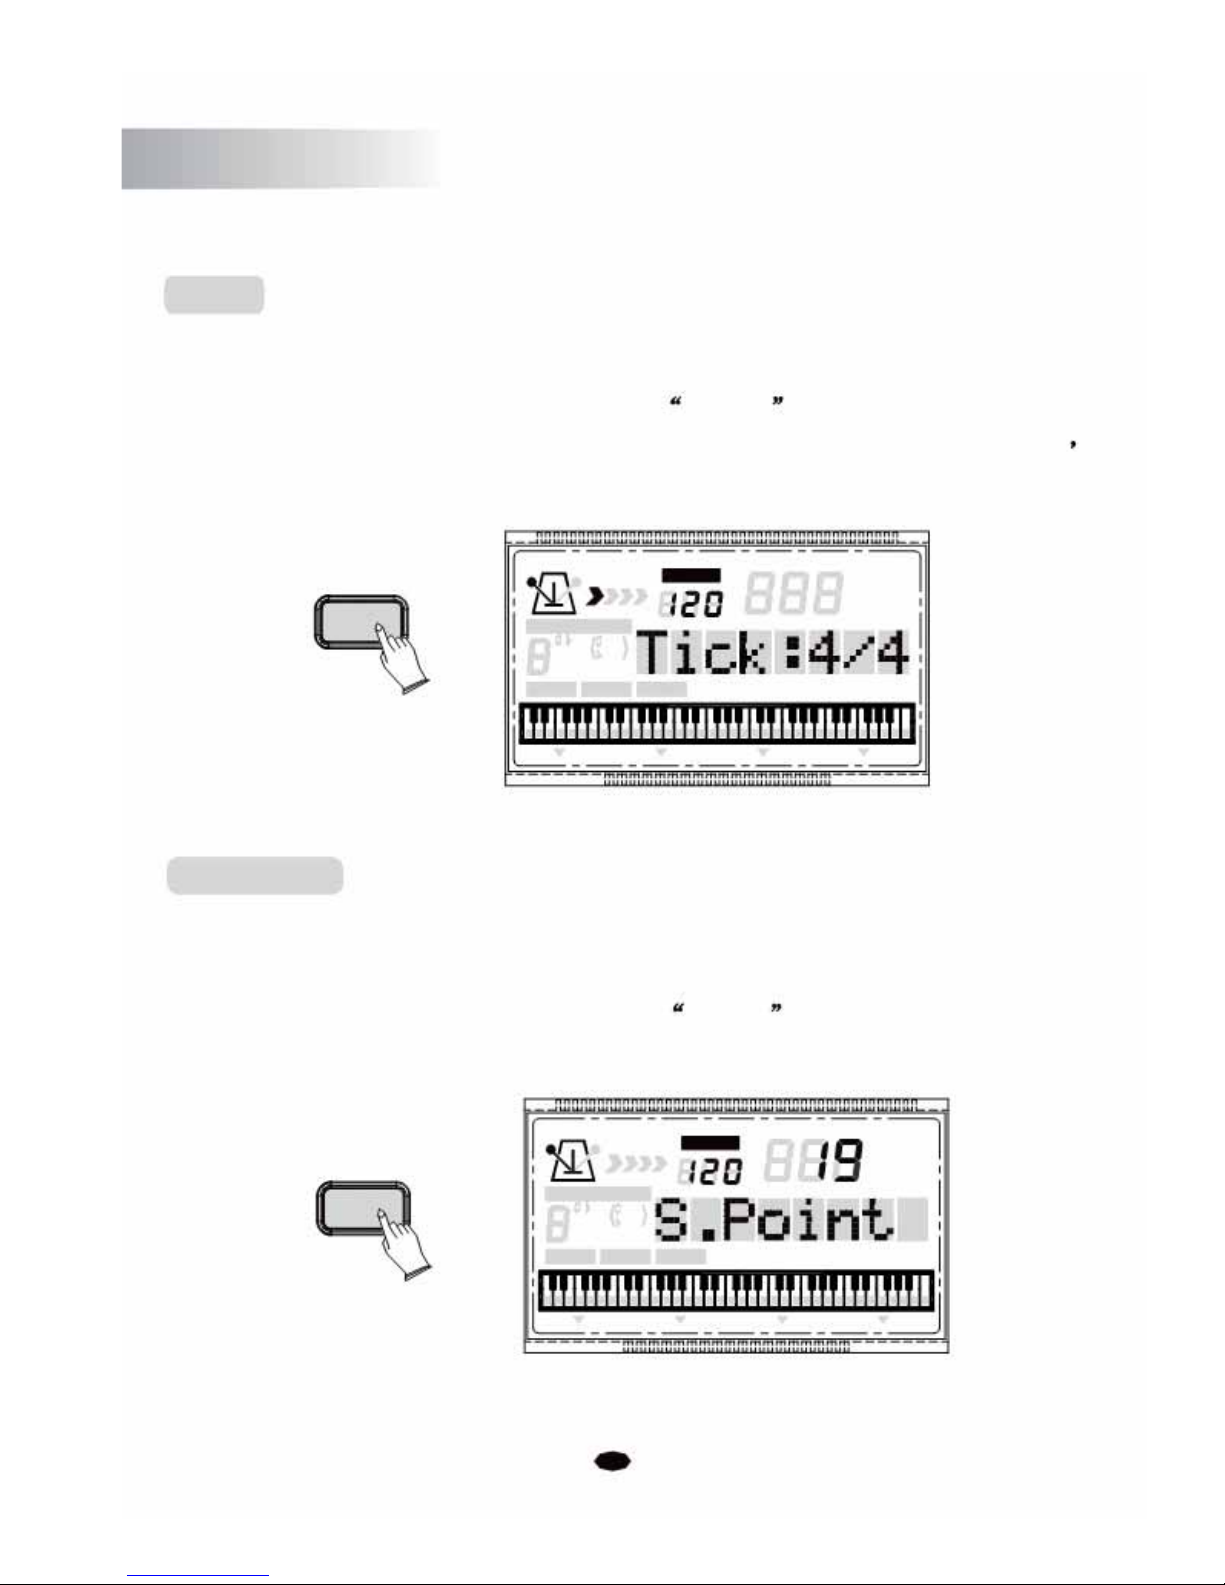
Tick
In this function you can change the time signature
Press the [SETUP] button repeatedly to select Tick 4/4 , then use [+] and [-] buttons
or
the numeric buttons to select the time signature:2/2, 1/4, 2/4, 3/4, 4/4, 5/4, 6/4, 3/8
6/8, 7/8, 9/8, 12/8. (Default: 4/4)
SETUP
TEMPO
VOICE
STYLE
CHORD TYPE
SONG
dim 6
119
513
m
M7augsus4
CHORD SPLIT D UAL TOUCHEFFECTSUSTAIN VIBRATO
1
Sp
lit Point
Allows you to set the split point between the left hand and right hand sides, for when
your keyboard is in Split mode.
Press the [SETUP] button repeatedly to select S. Point , then use [+] and [-]
buttonsorthe numeric buttons to change the split point. Range:0~60. (Default:19)
TEMPO
VOICE
SETUP
STYLE
CHORD TYPE
SONG
dim 6
119
513
m
M7augsus4
CHORD SPLIT D UAL TOUCHEFFECT SUSTAIN VIBRATO
26

SETUP
Reverb
Press the [SETUP] button r epeatedly to select Reverb , then use [+] and [-] buttons
or the n
umeric buttons to set the value. Range: 0~8. (Default:02)
TEMPO
VOICE
STYLE
SETUP
SONG
CHORD TYPE
dim 6
119513
m
M
7
augsus4
CHORD
SPLIT
DUAL TOUCHEFFECT
SUSTAIN VIBRATO
No reverb effect is produced when you select 00 Reverb
R1e
verb Depth
This function allows you to adjust the reverb depth for the voice section.
Press the [SETUP] button repeatedly to select R.Level , then use [+] and [-] buttons
or the numeric buttons to adjust the value.
SETUP
Range : 0-127 . (Default:80)
TEMPO
VOICE
STYLE
SONG
CHORD TYPE
dim 6
119
513
m
M7augsus4
CHORD SPLIT D UAL TOUCHEFFECTSUSTAIN VIBRATO
27

11.
SETUP
C1h
orus
Press the [SETUP] button repeatedly to select Chorus , then use [+] and [-] buttons
or the n
umeric buttons to set the value. Range:0~8. (Default:00)
SETUP
TEMPO
VOICE
STYLE
SONG
CHORD TYPE
dim
6119
513
mM7
augsus4
CHORD SPLIT DUAL TOUCH EFFECT SUSTAIN VIBRATO
No chorus is produced when you select 00 Chorus
Chorus Depth
This function allows you to adjust the chorus depth for the voice section.
Press the [SETUP] button repeatedly to select C.Level , then use [+] and [-] buttons
or
the numeric buttons to adjust the value. Range: 0-127. (Default:36)
TEMPO
VOICE
STYLE
SETUP SONG
CHORD TYPE
dim 6
119
513
m
M7augsus4
CHORD SPLIT D UAL TOUCHEFFECTSUSTAIN VIBRATO
28
SETUP
EQ Bass
This function allows you to set the EQ Bass for the voice.
Press the [SETUP] button repeatedly to select EQ Bass , then use [+] and [-] buttons
or
the
numeric
buttons to adjust the value. Range : -6~6. (Default:00)
TEMPO
VOICE
STYLE
SONG
CHORD TYPE
SETUP dim 6
119 513
m
M7augsus4
CHORD SPLIT D UAL TOUCHEFFECT SUSTAIN VIBRATO
NOTE:
The numbers ranging from -6 to -1 cannot be selected by the numeric buttons.
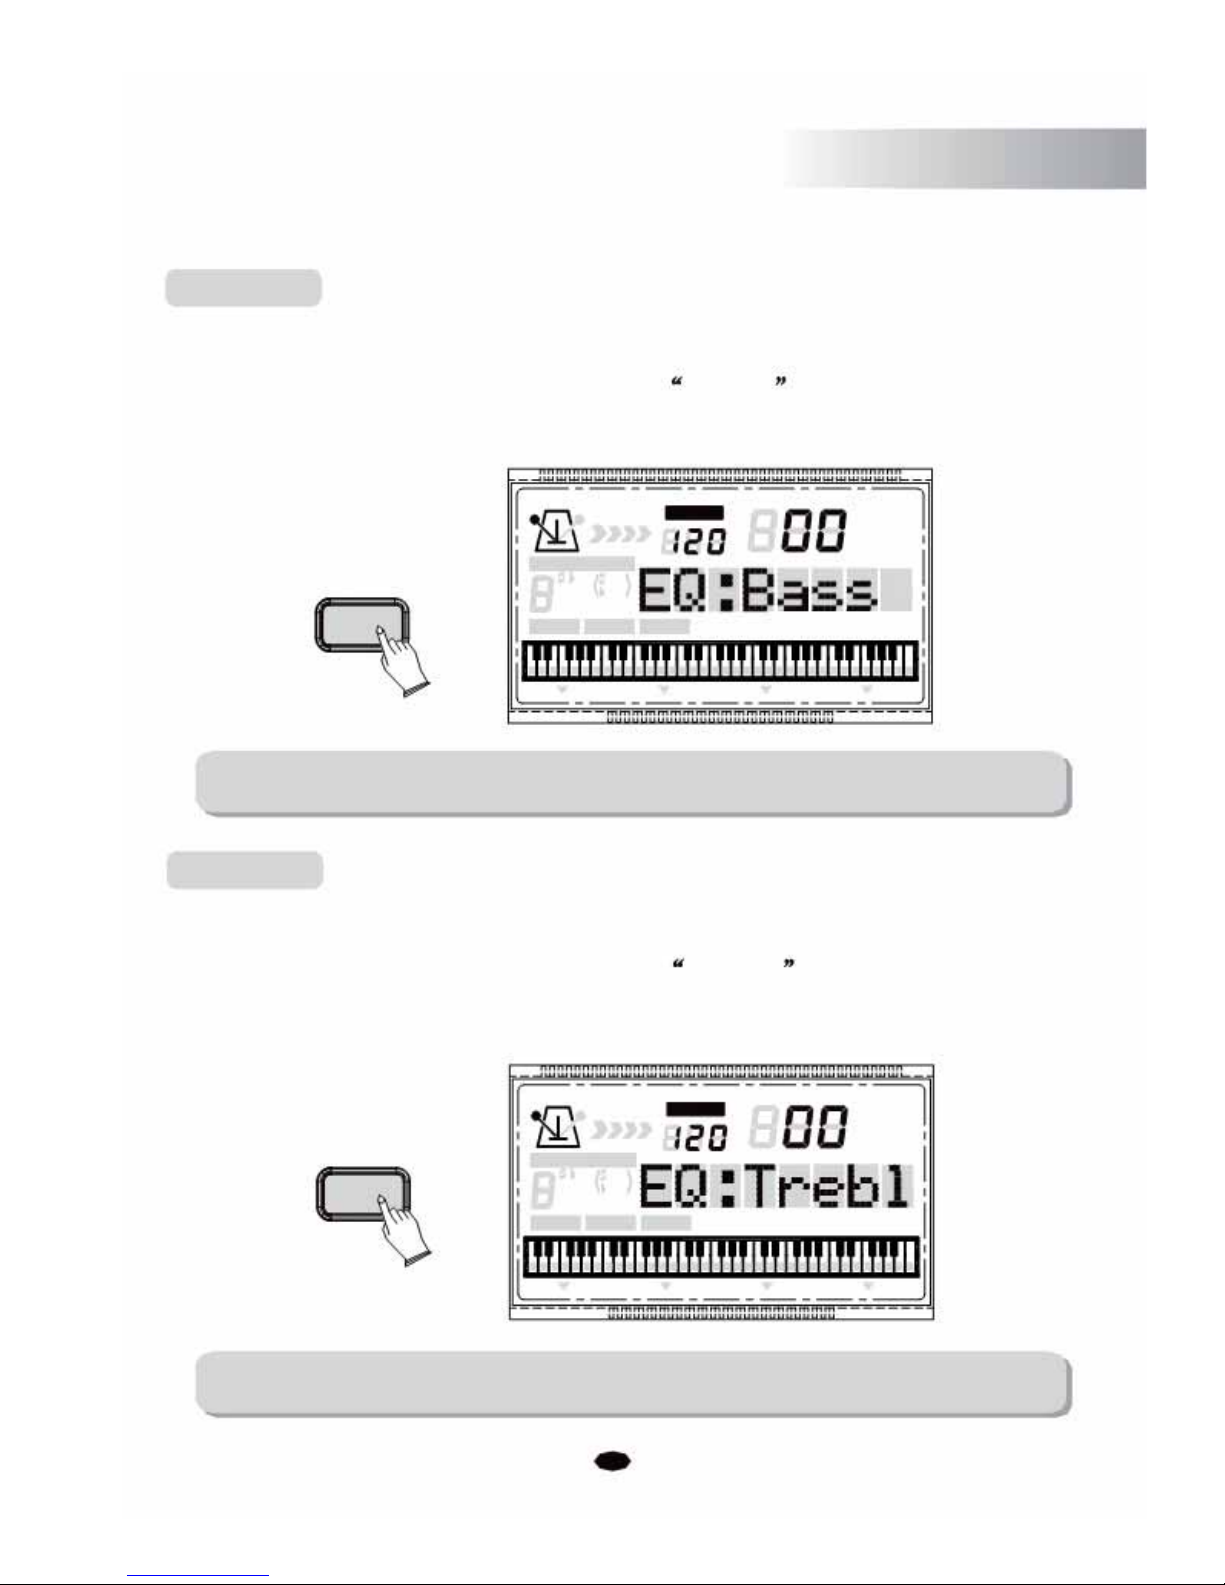
EQ Treble
This function allows you to set the EQ Treble for the voice.
Press the [SETUP] button repeatedly to select EQ Trebl , then use [+] and [-] buttons
or the
numeric buttons
SETUP
NOTE:
to adjust the value. Range : -6~6 . (Default:00)
TEMPO
VOICE
STYLE
SONG
CHORD TYPE
dim 6
119
513
mM7
augsus4
CHORD SPLIT DUAL TOUCH EFFECT SUSTAIN VIBRATO
The numbers ranging from -6 to -1 cannot be selected by the numeric buttons.
29
SETUP
Your instrument allows you to record and play back complete songs, including chord
sequences created by using the Auto Accompaniment feature and melody.
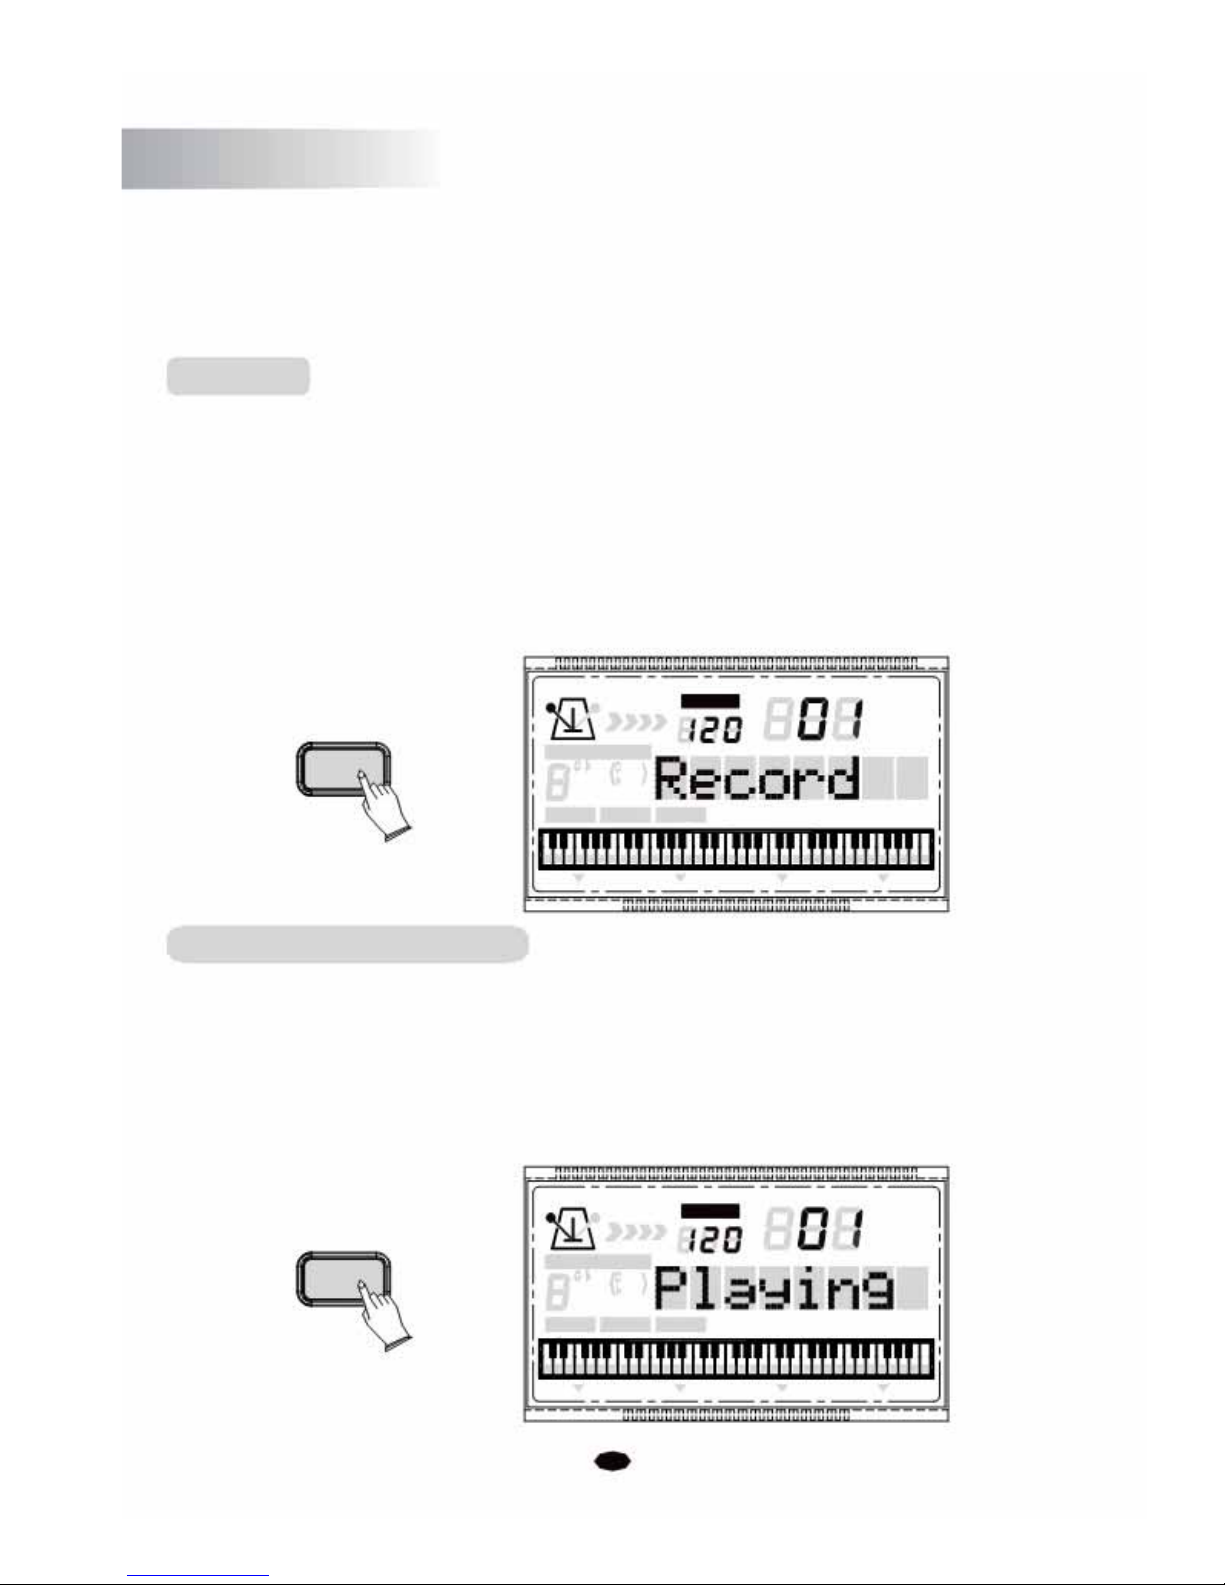
Record
Start Recording
Press the [RECORD] button, the LCD will display:
Record
. Then play any key on
the keyboard to start recording.
Stop Recording
Press the [RECORD] button again to stop recording, then the LCD will display:
End
.
TEMPO
VOICE
RECORD
STYLE
CHORD TYPE
SONG
dim 6
119
513
m
M7augsus4
CHORD SPLIT D UAL TOUCHEFFECT SUSTAIN VIBRATO
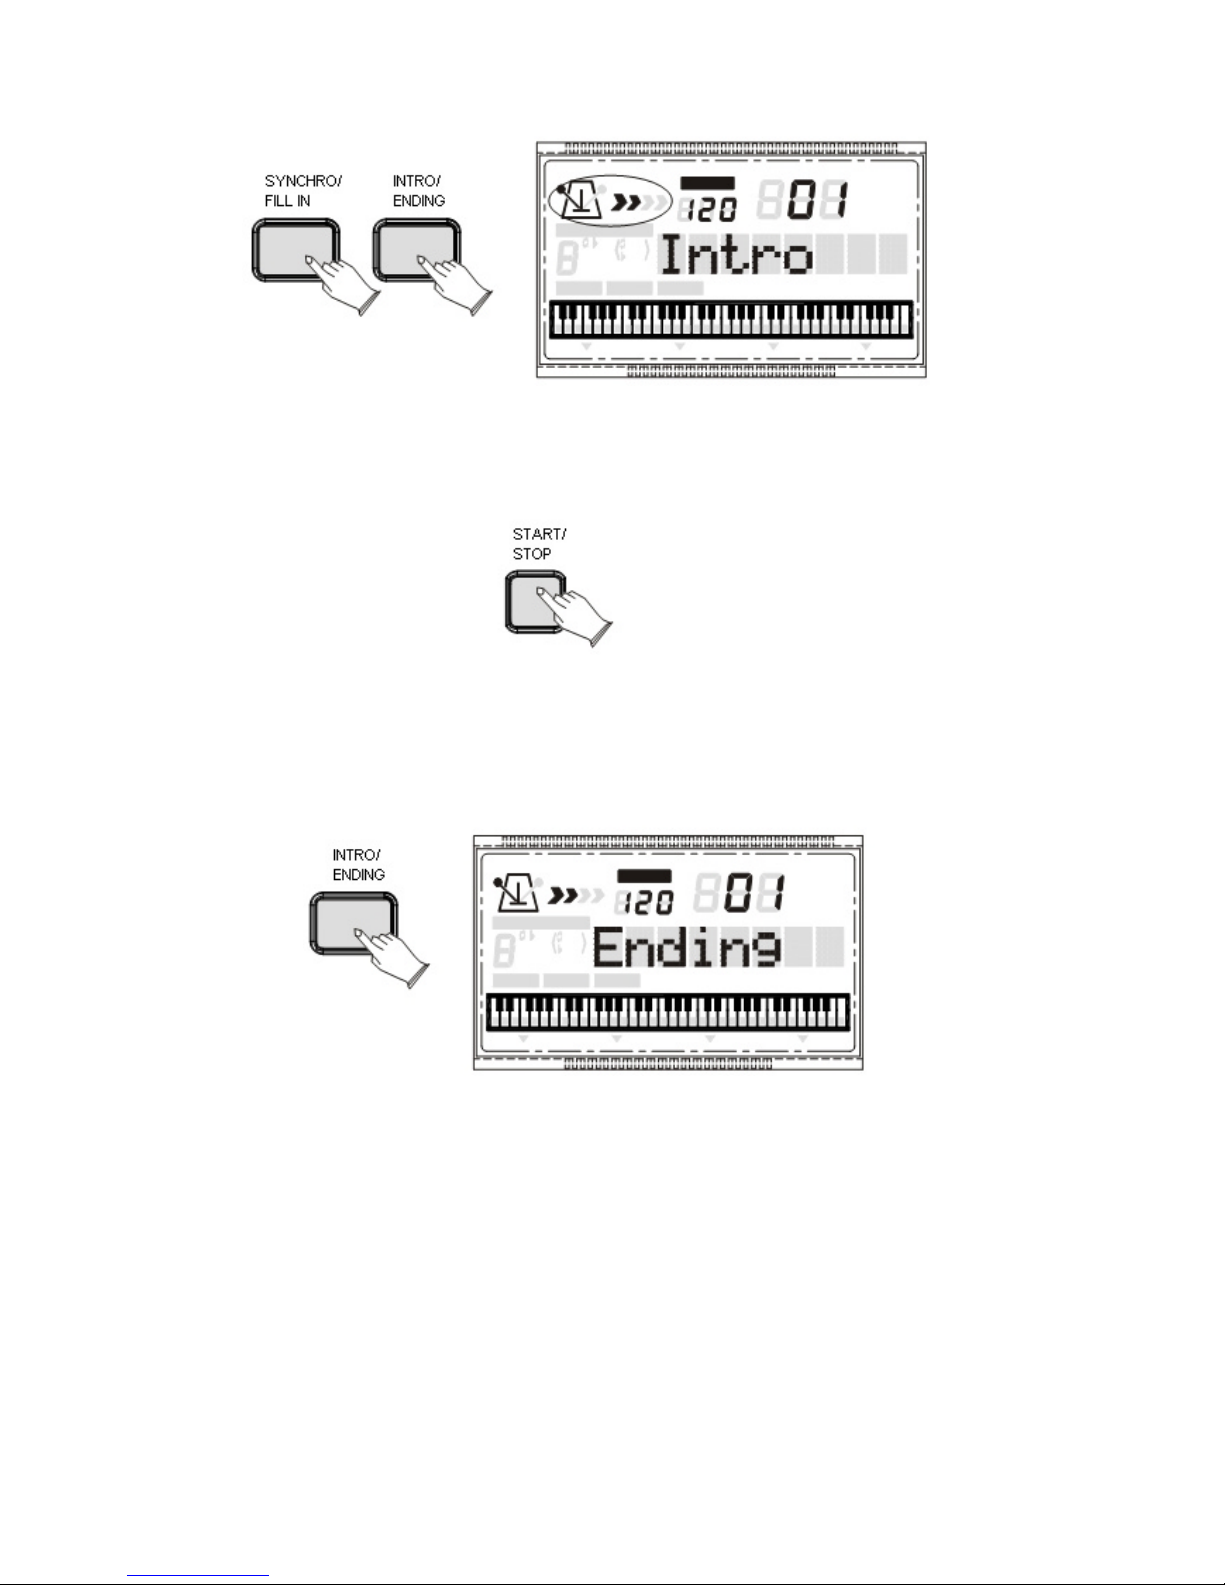
Listening to Your Recording
Press the [PLAY] button to start playback and the LCD will display:
Playing
.
Accompaniment and melody playback will stop automatically when all recorded data
has been played back.You can also stop playback at any time by pressing the [PLAY]
button again.
TEMPO
VOICE
PLAY
STYLE SONG
CHORD TYPE
dim 6
119
513
m
M7augsus4
CHORD SPLIT D UAL TOUCHEFFECT SUSTAIN VIBRATO
30

Teaching Function
Your instrument has a teaching function which can teach a beginner how to play a song.
There are three teaching steps for you to learn by playing the songs step by step.
Learn 1
Press the [3 STEPS] button to select Lesson1R to enter the step one mode. When you
play a key on the keyboard, the teaching song will be played note by note. Making
it easy and fun for you to learn.
3 STEPS
Learn 2
TEMPO
VOICE
STYLE
SONG
CHORD TYPE
dim
6119
513
mM7
augsus4
CHORD SPLIT DUAL TOUCH EFFECT SUSTAIN VIBRATO
Press the [3 STEPS] button repeatedly to select Lesson2R to enter the step two mode.
The teaching song will continue until you play the correct key on the keyboard. You
can quickly master these songs in a very short time.
3 STEPS
TEMPO
VOICE
STYLE
CHORD TYPE
SONG
dim 6
119
513
m
M7augsus4
CHORD SPLIT D UAL TOUCHEFFECT SUSTAIN VIBRATO
31

Teaching Function
Learn 3
Press the [3 STEPS] button r epeatedly to select Lesson3R to enter the step three
mode. You can play the song with the instrumentation playing. Now you can play this
song by yourself.
If you pause your playing for 5 seconds, the current learning LEFT/RIGHT melody will
automatically play.
TEMPO
VOICE
STYLE
3 STEPS
SONG
CHORD TYPE
dim 6
119
513
m
M7augsus4
CHORD SPLIT
DUAL
TOUCHEFFECTSUSTAIN VIBRATO
LCD Display
When the 3 Step Learning function is enabled, the LCD will display the note position
which should currently sound. If you correctly play the notes as shown on the LCD,
it's corresponding note name will disappear from the LCD.
Left/Right
Press the [3 STEPS] button. The LCD will display:
Lesson 1R
. To select the
learning mode by pressing the [3 STEPS] button repeatedly until the desired
mode is
active.
Then press the [LEFT/RIGHT] button again to select the Left or Right mode:
R : Right learning mode.
L : Left learning mode.
Press the [DEMO/PLAY] button to enter the Learing mode.
32

Chord Dictionary
The Chord Dictionary function allows you to look up chords. When you want to quickl
y
learn how to play a certain chord, the Dictionary function will help you to look up th
e
individual notes of the chord.
Press the [CHORD DICTIONARY] Button
CHORD
DICTIONARY
Select the Chord Root
Press the root note of the Chord you want to look up. This needs to be in the Chord Root
section of the keyboard. For examle:
C#/Db D#/Eb F#/GbG#/AbA#/Bb
CDEFGAB
Select the Chord Type
After pressing the Chord Root, select the Chord Type you want to look up in the Chord Type
section of the keyboard. The Chord Type includes Major Triad, Minor Triad and Seventh
Chord. Then the LCD will display the Chord Type and key position you
currently want to look up. If you press the correct key as the notes shown on the LCD, the
beep will sound.
TEMPO
VOICE
M(9) mM7 m(9)m7(9) m
7b5
STYLE
CHORD TYPE
SONG
dim 6
119
513
m
M7augsus4
CHORD SPLIT D UAL TOUCHEFFECTSUSTAIN VIBRATO
MM6
M7
Mm6m77
33

Appendix
Auto Accompaniment Fingering
1.Single Finger
Mode
SINGLE Finger Mode makes it simple to produce beautifully orchestrated accompaniment
using major, seventh, minor and minor-seventh chords by pressing a minimum number of
keys in the Auto Accompaniment section of the keyboard. The accompaniment produced is
perfectly matched to the currently selected accompaniment style.
2.Major Chords
If you press a C key in the left-hand section of the
keyboard, for example, a C-major accompaniment will
be played. Press another key in the left hand section of
the keyboard to select a new chord. The key you press
will always determine the "root" of the chord played
(i.e. C
for a C chord).
3.Minor Chords
Simultaneously press the root key and ANY black key to
its left.
4.Seventh Chords
Simultaneously press the root key and ANY white key to
its left.
5. Minor-Seventh Chords
Simultaneously press the root key and both ANY white
and ANY black key to its left.
34
C
Cm
C7
Cm7

Appendix
6.Fingered Mode
Fingered Mode is ideal if you already know how to play chords on a keyboard, since it allows yo
u
to supply your own chords for the Auto Accompaniment feature. The instrument will detect the
following chord types:
Example for C chords
Name
[M]
[6]
[M7]
[M7(#11)]
[(9)]
[M(9)]
[6(9)]
[aug]
NormalVoicing Display
1-3-5
C
1 -(3)-5-6 C 6
1 -3 -(5 )-7 or 1 - (3)-5-7
CM7
1-(2)-3-#4-(5)-7 or #
CM7( 1 1)
1-2-3-#4 -(5)-7
1-2-3-5
C(9)
1-2-3-(5)-7
CM7(9)
1-2-3-(5)-6
C6(9)
1-3-# 5
Caug
C
CM
7
C 69
C
6
CM 7
#11
CMadd CM 9
Caug Cm
[m] 1 -b3-5
[m6] 1-b3-5-6
[m7] 1-b3-(5)-b7
[m7b5]
1-b3-b5-b7
[m(9)]
1-2-b3-5
[m7(9)]
1-2-b3 -(5)-b7
[m7(11)] 1-(2)-b
3 -4-5-(b7 )
[mM7]
1-b3 -(5)-7
[mM(9)]
1-2-b3 -(5)-7
[dim]
1-b3-b5
[dim7]
1-b3-b5-6
1-3-(5)-b
7 or
1-(3)-5-b7
Cm
Cm6
Cm7
Cm7 5 b
Cm(9)
Cm7(9)
Cm7(11)
CmM7
CmM7(9)
Cdim
Cdim7
C7
Cm6 Cm7 Cm7 b 5
C9 Cm9 Cm11
CmM7 CmM9 Cdim
Cdim7 C7 C7sus4
#11
[7sus4]
[7(9)]
[7(#11)]
1-4-(5)-
b7
C7sus4
1-2-3-(5)-b 7
C7(9)
1-(2)-3-#4-(5)-b 7or
b C7( # 11)
C
7
9
C 7 C7 13
b9 b13 # 9
[7(13)]
[7(b9)]
[7(b13)]
[7(#9)]
[M7aug]
[7aug]
[sus4]
[1+2+5]
1-2-3-
#4 -(5)-7
1-3-(5)-6-b 7
C7(13)
1-b2 -3-(5)-b7
C7(b 9)
1- 3-5-b6-
b 7
C7(b13)
1-#2 -3-(5)-b7
C7(# 9)
1-(3)-#5-7
CM7aug
1-3-#5-b7
C7aug
1-4-5
Csus4
1-2-5 C
C7 C7 C7
CM7aug C7aug Csus4
C1+2+5
This instrument will be able to detect certain chord inversions, however because some chords can be
named differently depending on the inversion, certain chords such as m7, m7 b5, 6, m6, sus4, aug, dim7,
6(9), m7(11), 1+2+5 need to be played in the root position to correctly produce the desired chord. (An
example of this is a chord A minor 7 shares the same notes as a C6th chord, the difference being the
order of the note positions).
35

Appendix
Voice List
NO
PROGRAM CHANGE
BANK VOICE NAME NO
PROGRAM CHANGE
BANK VOICE NAME NO
PROGRAM CHANGE
BANK
VOICE NAME
Standard Drum
36

Appendix
Style List
NO STYLE NAME NO STYLE NAME NO STYLE NAME
8 BEAT 35 LATIN DISCO 70 MAMBO
01 8BEAT MODERN 36 DISCO 71 SALSA
02
MERSEY BEAT 37
DISCO PARTY
72 BEGUINE
03 SURF POP 38 DISCO FEVER 73 REGGAE
04
ROCK SHUFFLE 39
NEWYORK DISCO
74 SWINGY REGGAE
05 60'S ROCK SWING&JAZZ BALLROOM
06
HARD ROCK 40
BIG BAND FAST
75 DANCE BAND
07 8BEAT 41 BIG BAND MID 76 ENGLISH WALTZ
08
80'S ROCK 42
BIG BAND BALLD
77 FOXTROT
16 BEAT 43 JAZZ CLUB 78 QUICK FOXTROT
09
16 BEAT1 44
SWING
79 QUICKSTEP
10 16 BEAT2 45 JAZZ BALLAD 80 TANGO
11
POP SHUFFLE 46
DIXIE LAND
81 HABENERA TANGO
12 GUITAR POP 47 RAGTIME 82 PASODOBLE
13
JAZZ ROCK
48 STRIDE PIANO 83
SAMBA
14 SWING FUNK 49 MODERN JAZZ 84 CHACHA
15
POP ROCK
R&B
85 JIVE
BALLAD 50 SOUL 86 RHUMBA
16
PIANO BALLAD
51 DETROIT POP 87 VIENNESE WALTZ
17 LOVE SONG 52 RHYTHM&BLUES
TRADITIONAL
18
6/8 MODERN
53 6/8 SOUL 88 2/4 MARCH
19 6/8 SLOW ROCK 54 TWIST 89 6/8 MARCH
20
SHOW BALLAD
55 ROCK&ROLL 90 2/4 POLKA
21 PO P B ALL AD 5 6 BOOGI EWOOGIE 91 6/8 POLKA
22
16BEAT BALLAD
57 6/8 BLUES 92 TARANTELLA
DANCE 58 3/4 GOSPEL 93 SIR TAKI
23 RAP 59 GOSPEL SHUFFLE 94 SCOTTISH REEL
24 DANCE POP
COUNTRY 95 HAWAIIAN
25 HOUSE 60 COUNTRY 8 BEAT 96 MARIACHI
26 SWING HOUSE 61 COUNTRY POP
WALTZ
27 CLUB DANCE 62 COUNTRY SWING 97 SWING WALTZ
28 CLUB LATIN 63 COUNTRY 2 STEP 98 JAZZ WALTZ
29 GARAGE 64 COUNTRY BALLAD 99 WA LTZ
30 TECHNO 65 BLUE GRASS 100 FRENCH WALTZ
31 DANCE 8BEAT 66 COUNTRY WALTZ
32 HIP HOP
LATIN
33 CHILL OUT 67 MERENGUE
DISCO 68 BOSSANOVA
34 70'S DISCO 69 POP BOSSA
37

Troubleshooting Hints
When the instrument is turned on or off, a
Popping sound is temporarily produced.
When using a mobile phone, noise is produced.
Using a mobile phone in close proximity to the
instrument may produce interference.
This is normal and indicates that the instrument
is receiving electrical power.
To prevent this, turn off the mobile phone or use it
further away from the instrument.
Not all of the voices seem to sound, or the The instrument is polyphonic up to a maximum
sound seems to cut off. of 32 notes including Dual voice, Split Voice,
auto accompaniment, song, and Metronome.
Notes exceeding this limit will not sound.
The Auto Accompaniment does not sound
properly.
Make sure that the Auto Accomp Volume
Function is set to an appropriate level.
Is the Split Point set to an appropriate key for the
chords you are playing? Set the Split Point to an
appropriate position on the keyboard.
Is the chord indicator showing in the LCD
display? If it is not showing, press the CHORD
button so that it does show.
No sound produced by the keyboard, but the Check that the master volume control is not set
lights and screen work. to minimum.
Check that nothing is plugged into the
headphone socket.
The sound of the voice changes from note to
note.
This is normal. The digital tone generation uses
multiple recordings (samples) of an instrument
across the range of the keyboard; The actual
sound of the voice may be slightly different
from note to note.
The volume is too soft.
The sound quality is poor.
The rhythm stops unexpectedly or will not play.
The recorded data of the song, etc. does not
play correctly.
The LCD display suddenly goes dark, and all
panel settings are reset.
The batteries are low or dead. Replace all six
batteries with completely new ones, or use the
supplied AC adaptor.
If you have lost or damaged your AC adaptor,
please contact your nearest store for a correct
replacement adaptor.
An incorrect AC mains adaptor which is not rated
sufficiently can cause malfunction or damage.
To completely restore all settings as per factory
Perform a factory reset, Please refer to content in
settings
this owner's manual. All of the user setting will
be erased and the default factory settings will be
applied to the instrument.
Power suddenly and unexpectedly turns off, This is normal and the Auto Power Off function
after a period of not touching the keys.
may have been activated. If you need to disable
the Auto Power Off function, please see how to
do this in the owner's manual.
The sustain pedal or footswitch seems to T he polarity of the footswitch needs to be
produce the opposite effect. Example pressing correctly detected.Make sure the jack plug for
the footswitch deactivates the sustain, and the footswitch is connected. Switch the
releasing the footswitch triggers the sustain. instrument on whilst not touching the pedal.
38

Specifications
Keyboards:
61 standard-size keys with touch sensitivity.
Display:
Multi-function LCD display.
Polyphony:
32
Note Polyphonic
Voices:
129 PCM voices
Voice Control:
Volume, Sustain, Vibrato, Tune, Transpose, Octave
Effect:
Reverb (8 types), Reverb level, Reverb on/off
Chorus (8 types), Chorus level, Chorus on/off
EQ:
BASS: [-6,+6], TREBLE: [-6,+6]
Styles:
100
Style Features:
Synchro, Start/stop, Intro/Ending, Acc. Volume
Keyboard Control:
Normal, Chord, Split, Dual, 3 levels of touch
sensitivity and fixed touch select
Demo
10 demo songs +100 learning songs
learning function:
3 Steps learning with left/right part ON/OFF
Song recording:
RealTime recoring
Others:
Metronome, Chord Dictionary
Interface:
DC 12V, Headphone
Speakers:
Yd120: 6W/4ohm*2
Dimensions (W x D x H ):
945mm* 304mm* 100mm
Weight: 4.3
Kg
10505807V2.0
39


1
The Sound of Italy
PX100
Digital Keyboard
Manuale d’Uso

2

3
ISTRUZIONI E MISURE DI SICUREZZA
AVVISO IMPORTANTE
Accertarsi che il voltaggio impostato sia adatto allo strumento (il voltaggio è indicato a fianco
della presa di corrente.
Quando si utilizza un'apparecchiatura elettrica, si devono sempre rispettare le basilari norme di
sicurezza, tra cui:
1 Leggere le istruzioni prima di utilizzare lo strumento.
2 Per ridurre il rischio di incidenti, occorre prestare particolare attenzione quando lo
strumento viene utilizzato in presenza di bambini.
3 Non utilizzare il prodotto in prossimità di acqua, ad esempio vicino ad una vasca da
bagno, ad un lavandino o un lavabo, in un seminterrato umido, vicino ad una piscina o
simili.
4 Il prodotto, utilizzato da solo o in combinazione con un amplificatore e cuffie oppure
altoparlanti, può produrre livelli sonori che potrebbero arrecare danni permanenti
all'udito. Non utilizzare a lungo lo strumento a volume elevato o ad un volume comunque
intollerabile. In caso di insorgenza di deficit uditivo o di ronzio alle orecchie, consultare
uno specialista.
5 Collocare lo strumento in modo tale che sia possibile un'adeguata ventilazione.
6 Lo strumento deve essere collocato lontano da fonti di calore come radiatori, diffusori di
aria calda e altri dispositivi che producono calore.
7 Lo strumento deve essere esclusivamente collegato all'alimentazione specificata nel
manuale o indicata sullo strumento.
8 Questo prodotto può essere dotato di spina polarizzata. Si tratta di un dispositivo di
sicurezza. Se non siete in grado di inserire la spina nella presa, rivolgetevi ad un
elettricista per sostituire la vecchia presa. Non rinunciate agli scopi di sicurezza della
spina.
9 Il cavo di alimentazione dello strumento dovrebbe essere scollegato dalla presa della
corrente in caso di inutilizzo per un lungo periodo di tempo.
10 Fare attenzione a non far cadere oggetti o liquidi, che potrebbero penetrare nello
strumento attraverso le fessure.
11 La manutenzione deve essere effettuata da personale qualificato nei seguenti casi:
A sono stati danneggiati il cavo di alimentazione e la spina;
B sono caduti oggetti o liquidi all'interno dello strumento;
C lo strumento è rimasto esposto alla pioggia;
D lo strumento non sembra funzionare in modo corretto oppure le sue prestazioni
risultano notevolmente alterate;
E il prodotto è caduto o la struttura esterna è stata danneggiata.

4
ATTENZIONE
Non modificare la spina fornita con lo strumento. Qualora non fosse adatta, far installare
un'adeguata presa della corrente da un elettricista qualificato.
DISPLAY MULTI-INFORMAZIONI
I messaggi visualizzati sul Display multi-informazioni possono non corrispondere sempre alle
pagine relative al display. Si tratta solamente di esempi delle numerose funzioni dello strumento.
CLAUSOLA ESONERATIVA
Le informazioni contenute in questo manuale sono state revisionate molto attentamente. A causa
del continuo impegno volto a migliorare lo strumento, le specifiche dello strumento potrebbero
essere diverse da quelle indicate nel manuale. Tali specifiche sono soggette a variazioni senza
preavviso.
CURA E MANUTENZIONE DELLO STRUMENTO
La tastiera da Voi acquistata è uno strumento di qualità e merita di essere trattata con cura. Vi
preghiamo di seguire attentamente le poche avvertenze sotto elencate per conservarla al meglio
per molti anni.
- Non aprire mai lo strumento e non toccare mai i circuiti interni.
- Spegnere sempre lo strumento dopo l'uso tramite l'apposito interruttore.
- Pulire lo strumento con un panno o una spugna umida. In caso di sporco particolarmente
ostinato, usare un detergente neutro. Non usare mai solventi o alcool.
- Non collocare lo strumento vicino a motori elettrici, lampade al neon o a fluorescenza in
quanto potrebbero creare disturbi.
- Nella maggior parte dei casi, per evitare interferenze, è sufficiente cambiare posizione
allo strumento.
- Tenere lo strumento al riparo da polvere, umidità e temperature elevate.
- Accertarsi che il voltaggio della rete locale corrisponda a quello indicato sulla targa posta
nella parte posteriore dello strumento. Collegare l’alimentatore alla presa di corrente.
- Non collegare elettrodomestici, luci al neon o sistemi di lampade alogene alla stessa presa
di corrente.
- Prima di accendere lo strumento, accertarsi che il sistema di amplificazione e gli
altoparlanti esterni siano spenti.
- Nel caso di strumenti computerizzati, picchi, sovratensioni transitorie e cadute di tensione
possono provocare interruzioni. Se lo strumento smette di funzionare a causa di un
disturbo della linea elettrica, spegnerlo per alcuni secondi e poi riaccenderlo.
- Non scollegare mai il l’alimentazione senza aver prima spento lo strumento mediante
l'apposito interruttore.

5
INDICE
PANNELLO DI CONTROLLO
6 DISPLAY
7 OPERAZIONI DI BASE
8 - Accendere lo strumento
8 - Presa cuffia
8 - Regolazione Volume generale
9 - Pulsante DEMO/PLAY
9 VOICES
– SUONI
10
- Selezione dei suoni
10
- Pulsante Voice/Style
10
- Pulsante KBD.Mode
11
EFFECT
– EFFETTI
13
- Effetti digitali
13
- Pulsante Tempo (per il controllo del tempo)
13
- Pulsante Traspose
14
- Pulsante Tune
14
- Pulsante Tuch
15
- Pulsante Sustain
16
- Pulsante Effect
16
- Pulsante Chord
17
AUTO ACCOMPANIMENT
18
- Selezion
degli St
ili (Ritmi
)
18
- Avviamento immediato di uno stile
19
- Intro/Ending
19
- Intro/Ending
Fermare lo Stile
20
- Fill In
21
- Volume Accompagnamento
21
- Metronomo
22
SETUP PARAMETRI
23
RECORDING
33
- Registrare
33
- Ascoltare le proprie registrazioni
33
FUNZIONI
LEARNING
34
DIZIONARIO DEGLI ACCORDI
36
APPENDICE
37
- Diteggiatura per l’auto accompagnamento
38
- Sound List
39
- Lista
degli Sti
li
40
CONSIGLI
PER RISOL
VERE
I PROBLEMI
41
SPECIFICHE
42

6
Pannello Frontale
1. Pulsante Power
2. Controllo del Volume Generale
3. Pulsante ACC.Volume
4. Pulsante Tempo
5. Pulsante Transp./Tune
6. Pulsante KBD.Mode
7. Pulsante Touch
8. Pulsante Sustain
9. Pulsante Effect
10. Pulsante Chord
11. Pulsante Synchro/Fill In
12. Pulsante Start/Stop
13. Pulsante Intro/Ending
14. Pulsante Metronomo
15. Pulsante Voice/Style (Left/Right)
16. Pulsanti [+] / [-]
Pulsanti [0] / [9]
17. Pulsante Setup
18. Pulsante Chord Dictionary
19. Pulsante Demo/Play
20. Pulsante 3 Steps
21. Pulsante Record
22. Pulsante Play
23. Display LCD
Pannello Posteriore
24. Phones
25. DC – 12V

7
Pannello Frontale/Posteriore
Display LCD
1. Voice / Style / Demo
2. Voice / Style / Numero Demo o Variazioni dei valori delle funzioni
3. Tempo
4. Indicatore Beat
5. Metronomo
6. Tipo di accordo
7. Controlli: accordo, split, dual, touch, effetti, sustain e vibrato
8. Voice
9. Stile
10. Song

8
OPERAZIONI DI BASE
Accendere lo strumento
1. Assicurarsi che la tastiera sia spenta e che il volume sia al minimo, prima di collegarla
alla rete.
2. Collegare l’alimentatore alla presa dicorrente e poi alla tastiera, a questo punto potete
accendere la tastiera.
3. Premere il pulsante Power ON/OFF per accendere o spegnere lo strumento. Se lo
strumento non viene utilizzato per un lungo periodo si spegnerà in modo automatico.
NOTE: Quando la tastiera non viene usata o durante un temporale, consigliamo di scollegare
l’alimentatore dalla tastiera.
Presa per la Cuffia
Collegando una cuffia stereo alla presa jack, il sistema di altoparlanti interni si disattiverà in
maniera automatica.
NOTE: Non usare le cuffie ad alto volume, potrebbero causare danni permanenti.
Installare il leggio
Prego voler installare il leggio come da illustrazione seguente.

9
Regolazione Volume Generale
Usare la manopola di controllo del Volume generale per regolare a vostro piacimento il Volume
dello strumento.
Pulsante DEMO/PLAY
Ci sono 10 brani demo preimpostati e 100 canzoni per il modo LEARNING.
Ecco come è possibile selezionare e riprodurre i brani.
1. Premere ilpulsante [DEMO/PLAY], a quel punto partiranno tutte le DEMO in sequenza.
2.
3. Premere i pulsanti numerici dallo [0] al [9] oppure usare i pulsanti [+] e [-] per
selezionare la DEMO desiderata.
01- 09 DEMO: Premere 01 – 09
10 – 99 DEMO: Premere 11 – 99
100 – 110 DEMO: tenere premuto il pulsante [1] fino a che non apparirà sul display 1_
e quindi digitare i numeri delle decine e delle unità.
4. Premere di nuovo il pulsante [DEMO/PLAY] per fermare la DEMO.

10
VOICES - SUONI
Il vostro strumento dispone di 129 suoni. Da 1 a 128 sono i suoni del formato GM standard ed il
numero 129 comprende i suoni del drum kit. (vedere Voice List a pag. )
Selezione dei suoni
Premere i pulsanti numerici dallo [0] al [9] oppure usare i pulsanti [+] e [-] per selezionare il
suono desiderato.
1 – 9 Voice: premere 01 – 09
10 – 99 Voice: premere 10 – 99
100 – 129 Voice: tenere premuto il pulsante [1] fino a che non apparirà sul display 1_ adesso
digitare i numeri delle decine e delle unità.
Pulsante Voice/Style
Premere il pulsante [Voice/Style] per scegliere se selezionare la modalità Voice o la modalità
Style.
Nota: Nel modo “3 STEPS” (vedi paragrafo Funzione Learning), premere il pulsante
[Voice/Style] per scegliere tra la parte Left o Right.
NOTE: Seguire i cambiamenti sul display mentre si preme il pulsante [Voice/Style].

11
Pulsante KBD. Mode
1) Modalità Split
La vostra tastiera può essere splittata (divisa) in due sezioni, questo significa che si possono
usare due suoni diversi, uno per la mano destra e uno per la mano sinistra.
Seleziona una voce split
Premere il pulsante [KBD.MODE] per accedere alla modalità Split, il numero di Voice Split
viene visualizzato sul display LCD.
Usare i pulsanti [+] e [-] o i pulsanti numerici per selezionare il numero di Voice Split desiderato
(01 se 129).
Premendo il pulsante [KBD.MODE] più volte, il display visualizza il modo relativo ( SPLIT –
DUAL – tutta tastiera).
Regolazione volumi (Split)
Premere il pulsante [SETUP] (se necessario più volte) per selezionare “S.Volume”. Usare i
pulsanti [+] e [-] per modificare il volume del suono Split ( a sinistra della tastiera).
Cambiare il punto di Split
Premere il pulsante [SETUP] più volte per selezionare “S.Point”. Usare i pulsanti [+] e [-] per
modificare il punto di Split.
2) Dual
Questa funzione permette di combinare e quindi suonare contemporaneamente due suoni.
Questo è utile per creare suoni ricchi e orchestrali, per esempio miscelando pianoforte e archi.
Quando la funzione DUAL non è attiva la voce indicata sul display è VOICE R1.
Quando la funzione DUAL è attiva, la voce indicata sul display è VOICE R2.

12
Selezione DUAL Voice
Premere due volte il tasto [KBD.MODE] per entrare in modalità Dual Voice, il numero di Dual
Voice e il nome verranno visualizzati sul display.
È possibile utilizzare i pulsanti [+] e [-] o i pulsanti numerici per selezionare il numero di dual
voice desiderato (da 01 a 129).
Ora, due suo ni possono essere suonati assieme.
Premere ripetutamente il tasto [KBD.MODE] per uscire dalla modalità Dual Voice.
Regolare il volume del Dual Voice
Premere il tasto [SETUP] per selezionare “D. Volume”. Usare i pulsanti [+] e [-] per modificare
il volume del suono Dual.
NOTA: Se non si preme alcun tasto entro 3 secondi dal momento in cui si accede alla modalità di
impostazione Split / Dual, lo strumento esce automaticamente dalla pagina.

13
EFFETTI DIGITALI
Questo strumento ha un DSP ( Digital Signal Processor) di alta qualità per la generazione degli
effetti riverbero e chorus che aggiunge realismo al suono della tastiera .
Reverb
Questa funzione consente di aggiungere l’effetto di Riverbero al suono, aggiungendo così un
effetto spaziale e natu rale, come suonare in ambienti diversi Hall (grande sala), Stage
(palcoscenico) e Room (stanza).
Ci sono 8 tipi di riverbero seleziona bili. (Default : 02 )
Premere il pulsante [ SETUP ] per accedere alla modalità “Reverb”. Usare i pulsanti [+] e [-] per
selezionare i vari tipi di riverbero: 01-Room 1, 02-Room 2, 03-Room 3, 04-Hall 1, 05-Hall 2,
06-Plate, 07-Delay, 08-Pan Delay
È possibile regolare la profondità di riverbero. Vedi paragrafo Reverb Depth.
Chorus
Ci sono 8 tipi di accordi da scegliere . (Default : 00 ).
Premere ripetutamente il tasto [ SETUP ] per accedere alla modalità “Chorus”. Usare i pulsanti
[+] e [-] per selezionare i vari tipi di chorus: Chorus 1 – Chorus 8.
Regolare il Chorus Depth
Per regolare la profondità del Chorus. Vedi paragrafo Chorus Depth.
Pulsante Tempo
Il pulsante [ TEMPO] è utilizzato per controllare sia il tempo del ritmo e accompagnamento
automatico, sia delle Demo, così come delle brani registrati.
Premere il pulsante [ TEMPO] e quindi usare i pulsanti [+] e [-] per per impostare il valore del
tempo desiderato (min 20 – max 280). Il tempo ( espresso battiti al minuto ) apparirà sul display.
Premere i pulsanti [ + ] e [ - ] contemporaneamente al fine di ripristinare l'impostazione del
tempo di default .

14
Pulsante TRANSPOSE
La funzione Transpose permette di cambiare la tonalità naturale dello strumento (DO), fino ad un
valore massimo di 12 semitoni (un massimo di un'ottava sopra o sotto il DO centrale).
Premere il tasto [TRANS / TUNE.] Il display visualizza: TRANS, utilizzare [+] e [-] o i tasti
numerici per selezionare il valore di trasposizione desiderato (-12 / +12). (Default: 00 = DO ).
Pulsante TUNE
Nel caso in cui la trasposizione di semitoni non sia del tutto sufficiente e si renda necessaria una
intonazione più accurata, è ancora possibile intervenire con la funzione “Tune”.
Questa funzione permette di regolare l'intonazione del vostro strumento fino ad un intervallo di
50 cent (dove il totale è 100 cent , o un semitono).
Premere due volte il tasto [TRANS / TUNE], il display visualizzerà: TUNE, quindi è possibile
utilizz are i pulsanti [+] e [-] o i tasti numerici per selezionare il valore desiderato. Il valore del
Pitch varia da –64 a +63.
Per riportare il “Tune” al valore originale selezionare il valore di default 00.
NOTA: Se non si preme alcun tasto entro 3 second i mentre si cerca di entrare nell’ impostazione
Transpose / Tune, si uscirà automaticamente da questo menu.

15
Pulsante TOUCH
La funzione “Touch” fornisce tre diversi tipi di sensibilità al tocco della tastiera, che possono
essere selezionati a piacere.
Premendo il pulsante [TOUCH] il display LCD visualizza: “FixTouch” (Valore Fisso) con valore
100. Fix Touch permette di fissare il volume del suono al livello preferito quando si suona senza
la dinamica. Utilizzare i pulsanti [+] e [-] o i tasti numerici per selezionare la sensibilità al tocco
desiderata. Più il valore selezionato sarà alto, più sarà alto il volume (127 = Max Volume), più il
valore selezionato sarà basso, più sarà basso il volume (00 = Min Volume)
Premere nuovamente il pulsante [TOUCH], il display LCD visualizza: T: Normal
(Default: Normal), quindi è possibile utilizzare i pulsanti [+] e [-] o i tasti numerici per
selezionare il tipo di dinamica desiderato: 01.Low (Hard), 02.Normal; 03.High (Soft).
NOTA: Se non si preme alcun tasto entro 3 secondi mentre si cerca di entrare nell’ impostazione
Tuch, si uscirà automaticamente da questo menu.

16
Pulsante SUSTAIN
Questa funzione simula il pedale Damper del pianoforte acustico ed allunga il tempo di
decadimento delle note suonate sulla tastiera.
Premere il pulsante [SUSTAIN] per entrare nella funzione Sustain e il suo indicatore sarà
acceso. Attiva la sezione Sustain ON per mantenere sostenute le note dopo che i tasti sono stati
lasciati.
Premere nuovamente il pulsante [SUSTAIN] per uscire dalla funzione Sustain e il suo indicatore
sarà spento.
Pulsante EFFECT
La funzione consente di attivare o disattivare il Reverb e Chorus.
Quando lo strumento è acceso, l'effetto di default è acceso e il display visualizza: EFFECT.
È possibile regolare il Reverb e Chorus quando la funzione Effect è abilitata.
Premere nuovamente il pulsante [EFFECT] per uscire dalla funzione Effect e i l suo indicatore
sarà spento.

17
Pulsante CHORD
Premere il pulsante [CHORD] per entrare nella funzione Auto Accompagnamento e il suo
indicatore sarà acceso.
Quando la funzione [CHORD] viene selezionata, la tastiera si divide in due parti. La parte
sinistra è viene usata per suonare gli accompagnamenti automatici, la parte destra per suonare la
melodia.
Il lato sinistro della tastiera dalla nota più bassa, fino al punto di divisione viene utilizzato per
riprodurre l'accompagnamento automatico. I vari tipi di accordi vengono rilevati dalle note
suonate.
Premere nuovamente il pulsante [CHORD] per uscire dalla funzione Chord e il suo indicatore
sarà spento.

18
ACCOMPAGNAMENTO AUTOMATICO
La tastiera ha un totale di 100 stili che possono essere utilizzati per fornire un accompagnamento
automatico. Quando la funzione di accompagnamento automatico è attiva, questo strumento crea
un ritmo completo di arrangiamenti (percussioni, basso e di accordi) nella sezione Auto
Accompaniment della tastiera (vale a dire tutti i tasti a sinistra del punto di spli).
Il punto di Split dell’accompagnamento automatico di default è il tasto F # 2.
Selezione degli Stili
Premere il pulsante [VOICE / STYLE], per selezionare sul display: STYLE.
È quindi possibile utilizzare i pulsanti [+] e [-] o i tasti numerici per selezionare lo stile
desiderato..
01 - 09 Style: premere 01 - 09.
10 - 99 Style: premere 10 - 99.
100 Style: premere il pulsante [1] fino a che non apparirà sul display 1_ e quindi digitare 0 0.
NOTA: Premendo il tasto [VOICE / STYLE], è possibile passare dalla modalità Voice a Style.

19
Avvio immediato di uno stile.
Premere il pulsante [START / STOP] per avviare lo stile.
Avvio di uno stile con Synchro Start
Premere il tasto [SYNCHRO / FILL IN] per entrare in modalità “Sync/Start”. Quando la
funzione SYNCHRO è attivata, il ritmo prescelto inizia non appena si suona la prima nota con la
mano sinistra lella pporzione della tastiera per l’accompagnamento ( a sinistra del punto di Split).
INTRO/ENDING
Premendo questo pulsante prima di azionare il ritmo, quest' ultimo inizierà con un'introduzione
(INTRO) per poi continuare con il ritmo normale. Se si preme ENDING con il ritmo già in
funzione, lo strumento esegue una variazione finale (ENDING) al termine della quale tutta la
sezione ritmica si ferma automaticamente.
Se si preme il pulsante [SYNCHRO / FILL IN] e quindi premete il pulsante [INTRO /
ENDING], l'accompagnamento inizierà con l’ introduzione, appena suonate un accordo nella
sezione della tastiera di accompagnamento.
20
Stop immediato
L'accompagnamento può essere interrotto in qualsiasi momento premendo il pulsante [START /
STOP].
Stop con Ending
Se si preme ENDING con il ritmo già in funzione, lo strumento esegue una variazione finale
(ENDING) al termine della quale tutta la sezione ritmica si ferma automaticamente.

21
FILL IN
Produce una variazione tra due battute (BAR) del ritmo. Di solito viene usato per sottolineare la
fine di una frase musicale.
Volume dell’ Accompagnamento
Il volume dell'accompagnamento automatico può essere regolato da 00 a 31.
Premere il tasto [ACC.VOLUME], il display LCD visualizzerà: Acc.Vol.
Quindi utilizzare i pulsanti [+] e [-] o i tasti numerici per aumentare o diminuire il valore.
NOTA: Se non si preme alcun tasto entro 3 secondi si attiva la modalità di default VOLUME
ACC e si esce automaticamente da questo menu.

22
Metronomo
Il metronomo è una comoda funzione ed un grande aiuto quando si fa pratica in un esercizio
musicale, e può anche fornire una guida ritmica durante la registrazione.
Il metronomo può essere acceso o spento premendo il pulsante [METRONOME].
Selezione Metronomo
Sono disponibili diversi tipi di Metronomo: 2/2, 1/4, 2/4, 3/4, 4/4, 5/4, 6/4, 3/8, 6/8, 7/8, 9/8 e
12/8. Il Metronomo settato all’accenzione è 4/4.
Dopo aver premuto il pulsante [METRONOME], è possibile utilizzare i tasti [+] e [-] oppure i
pulsanti numerici per selezionare il metronomo desiderato.

23
SETUP
Premere il tasto [SETUP] per accedere al menu delle funzioni. L'opzione di default del menu
è M.Volume.
Premere il tasto [SETUP] per selezionare l'opzione da impostare.
Usare i pulsanti [+] e [-] per impostare il parametro.
Le opzione e i parametri sono i seguenti:
Opzioni
LCD Display
Range
Def
ault
Main Voice Volume
M.Volume
0 – 127 127 Split Voice Volume
S.Volume
0 – 127 127 Dual Voice Volume
D.Volume
0 – 127 100 Main Voice Pan
M.Pan
-64 – 63 0
Split Voice Pan
S.Pan
-64 – 63 0
Dual Voice Pan
D.Pan
-64 – 63 0
Main Voice Octave
M.Octave
-3 – 2 0 Split Voice Octave
S.Octave
-3 – 2 0
Dual Voice Octave
D.Octave
-3 – 2 0
Vibrato
Vibrato
ON/OFF
OFF Time Signature
Tick: 4/4
2/2, 1/4, 2/4, 3/4,
4/4, 5/4, 6/4, 3/8,
6/8, 7/8, 9/8, 12/8
4/4 Split Point
S.Point
0 – 60 19 Reverb Type
Reverb
0 – 8 02 Reverb Level
R.Level
0 – 127 80 Chorus Type
Chorus
0 – 8 00 Chorus Level
C.Level
0 – 127 36 EQ Bass
EQ:Bass
-6 – 6 00
EQ Trebel
EQ:Trebel
-6 – 6 00
NOTA: Il programma uscirà dal menu funzioni se l'operazione non viene eseguita entro 3
secondi.

24
VOLUME GENERALE
È possibile selezionare il Volume massimo raggiungibile dallo strumento tramite il cursore
volume.
Premere il pulsante [SETUP] per selezionare “M.Volume”, usare i pulsanti [+] e [-] o i tastini
numerici per aumentare o diminuire il valore del volume. Il valore varia da 0 (min) a 127 (max).
Volume della Sezione Split
Questa funzione permette di regolare il volume della sezione Split dello strumento.
Premere il pulsante [SETUP] per selezionare “S.Volume”, usare i pulsanti [+] e [-] o i tastini
numerici per aumentare o diminuire il valore del volume (range). Il valore varia da 0 (min) a 127
(max).

25
Dual Voice del Volume
Questa funzione consente di impostare il volume della sezione Dual dello strumento.
Premere il tasto [SETUP] per selezionare “D. Volume”, quindi usare i pulsanti [+] e [-]
o i tasti numerici, per aumentare o diminuire il valore. Il valore varia da 0 (min) a 127 (max).
Effetto Generale PAN
In questa pagina è possibile impostare l'effetto stereo Panoramic di ogni suono per creare un
piacevole effetto stereo.
Premere il tasto [SETUP] per selezionare “M. Pan”, quindi usare i pulsanti [+] e [-]
o i tasti numerici per impostare il valore di Pan.
Range da -64 (suono tutto a sinistra) a +63 (suono tutto a destra). Default: 00 (suono al centro
degli altoparlanti).
NOTA: I numeri che vanno da -64 a -1 non possono essere selezionati con i pulsanti numerici.

26
PAN della Sezione Split
In questa pagina è possibile impostare l' effetto stereo Panoramic per i suoni della sezione Split.
Premere ripetutamente il tasto [SETUP] per selezionare “S. Pan”, quindi usare i pulsanti [+] e [-]
o i tasti numerici per impostare il valore di Pan. Range da -64 (suono tutto a sinistra) a +63
(suono tutto a destra). Default: 00 (suono al centro degli altoparlanti).
NOTA
I numeri che vanno da -64 a -1 non possono essere selezionati con i pulsanti numerici.
PAN della Sezione Dual Voice
Premere ripetutamente il tasto [SETUP] per selezionare “D. Pan”, quindi usare i pulsanti [+] e [-]
o i tasti numerici per impostare il valore di Pan della sezione Dual. Range da -64 (suono tutto a
sinistra) a +63 (suono tutto a destra). Default: 00 (suono al centro degli altoparlanti).
NOTA: I numeri che vanno da -64 a -1 non possono essere selezionati con i pulsanti numerici.

27
Cambio Ottava
Questa funzione permette di cambiare l’Ottava naturale dello strumento.
Premere il pulsante [SETUP] ripetutamente, per selezionare “M.Octave”, usare i pulsanti [+] e [-]
oppure i tasti numerici per impostare il valore. È possibile cambiare l’ottava fino a – 3 ottave o a
+ 2 ottave.
NOTA
I numeri che vanno da -3 a -1 non possono essere selezionati con i pulsanti numerici.
Cambio Ottava sezione Split Voice
Questa funzione permette di cambiare l’Ottava naturale dello strumento alla sezione Split Voice.
Premere il pulsante [SETUP] ripetutamente, per selezionare “S.Octave”, usare i pulsanti [+] e [-]
oppure i tasti numerici per impostare il valore. È possibile cambiare l’ottava fino a – 3 ottave o a
+ 2 ottave.
NOTA: I numeri che vanno da -3 a -1 non possono essere selezionati con i pulsanti numerici.

28
Cambio Ottava sezione Dual Voice
Questa funzione permette di cambiare l’Ottava naturale dello strumento alla sezione Dual Voice.
Premere il pulsante [SETUP] ripetutamente, per selezionare “D.Octave”, usare i pulsanti [+] e [-]
oppure i tasti numerici per impostare il valore. È possibile cambiare l’ottava fino a – 3 ottave o a
+ 2 ottave.
NOTA: I numeri che vanno da -3 a -1 non possono essere selezionati con i pulsanti numerici.
Vibrato
La funzione permette di accendere o spegnere il Vibrato ON/OFF.
Premere il pulsante [SETUP] ripetutamente per selezionare Vibrato, quindi usare i pulsanti [+] e
[-] per accendere o spegnere (Default: OFF).
La funzione Vibrato produrrà un effetto tremolo o vibrato al suono selezionato.

29
Tick - Metronomo
In questa funzione è possibile cambiare il tempo del metronomo.
Premere il pulsante [SETUP] fino a selizionare “Tick” 4/4, quindi usare i pulsanti [+] e [-] per
selezionare l'indicazione del tempo: 2/2, 1/4, 2/4, 3/4, 4/4, 5/4, 6/4, 3/8, 6/8, 7/8, 9/8, 12/8.
Split Point
Consente di impostare il punto di split tra la mano sinistra e la mano destra, quando la tastiera è
in modalità Split.
Premere il pulsante [SETUP] per selezionare “S. Point”, quindi usare i pulsanti [+] e [-] o i
pulsanti numerici per cambiare il punto di divisione.
Range: 0 ~ 60. (Default: 19)

30
Riverbero Digitale
Premere il pulsante [SETUP] per selezionare “Reverb”, quindi usare i pulsanti [+] e [-] oppure i
tasti numerici per impostare il valore.
Range: 0 ~ 8. (Default: 02)
Nessun effetto riverbero viene prodotto quando si seleziona “00 Reverb”
Profondità del Riverbero
Questa funzione consente di regolare la profondità del riverbero per la sezione vocale.
Premere il pulsante [SETUP] per selezionare “R.Level”, quindi usare i pulsanti [+] e [-] oppure i
tasti numerici per regolare il valore.
Range: 0-127. (Default: 80)

31
Chorus
Premere ripetutamente il tasto [SETUP] per selezionare “Chorus”, quindi usare i pulsanti [+] e [-]
oppure i tasti numerici per impostare il valore.
Range: 0 ~ 8. (Default: 00)
Nessun effetto chorus viene prodotto quando si seleziona “00 Chorus”
Profondità del Chorus
Questa funzione consente di regolare la profondità del chorus per la sezione vocale.
Premere il pulsante [SETUP] per selezionare “C.Level”, quindi usare i pulsanti [+] e [-] oppure i
tasti numerici per regolare il valore.
Range: 0-127. (Default: 36)

32
EQ Bass
Questa funzione consente di impostare l'EQ Bass del suono.
Premere il pulsante [SETUP] per selezionare “EQ Bass”, quindi usare i pulsanti [+] e [-] oppure i
tasti numerici per regolare il valore.
Range: -6 ~ 6. (Default: 00)
NOTA
I numeri da -6 a -1 non possono essere selezionate dai tasti numerici.
EQ Treble
Questa funzione consente di impostare l'EQ Treble del suono.
Premere il pulsante [SETUP] per selezionare “EQ Trebl”, quindi usare i pulsanti [+] e [-] oppure
i tasti numerici per regolare il valore.
Range: -6 ~ 6. (Default: 00)
NOTA: I numeri da -6 a -1 non possono essere selezionate dai tasti numerici.

33
Song Recording
Lo strumento consente di registrare e riprodurre canzoni complete, tra cui sequenze create
utilizzando la funzione di accompagnamento automatico e melodia.
Record - Avviare la registrazione
Premere il pulsante [RECORD], il display LCD visualizzerà:“Record”.
Premere un tasto qualsiasi della tastiera per avviare la registrazione.
Interrompere la registrazione
Premere nuovamente il pulsante [RECORD] per interrompere la registrazione, poi il display
LCD visualizzerà:“Fine” (END).
Ascoltare la propria registrazione
Premere il tasto [PLAY] per avviare la riproduzione e il display LCD visualizzerà:”Play”.
La riproduzione e la melodia si interromperanno automaticamente quando tutti i dati registrati
Sono stati riprodotti.
Si può anche interrompere la riproduzione in qualsiasi momento premendo nuovamente il tasto
[PLAY].

34
Funzione Learning.
Lo strumento dispone di una divertente funzione “apprendimento” (Learning) per aiutare un
principiante a suonare un breve brano .
Ci sono tre fasi di “apprendimento” per imparare passo dopo passo.
Learn 1
Premere il tasto [3 STEPS] per selezionare “Lesson1R” sul display per entrare nella fase 1.
Premere quindi il tasto [DEMO/PLAY] ed sulla tastiera stilizzata sul display appare la prima
nota che deve essere suonata. Se nessuna nota viene indicata, ripremere quella appena suonata
fino a che una nuova nota è indicata sulla tastiera del display.
Notate che se si commette un errore premendo il tasto sbagliato, il suono prodotto sarà comunque
quello della nota esatta.
Un modo facile e divertente per imparare.
Learn 2
Premere ripetutamente il pulsante [3 STEPS], selezionare “Lesson2R” per entrare nella fase 2.
Premere quindi il tasto [DEMO/PLAY] ed sulla tastiera stilizzata sul display appare la prima
nota che deve essere suonata. Se nessuna nota viene indicata, ripremere quella appena suonata
fino a che una nuova nota è indicata sulla tastiera del display.
Notate che se preme il tasto sbagliato, il brano non continua e lo strumento rimane in attesa della
nota esatta.

35
Learn 3
Premere ripetutamente il tasto [3 STEPS], selezionare “Lesson3R” per entrare nella 3.
Premere il tasto [DEMO/PLAY] ed il brano inizierà a suonare.
Il display indica le note da suonare.
Display LCD
Quando la funzione 3 Step Learning è attiva, il display LCD visualizza la posizione della nota
che dovrebbe suonare.
Se si suona correttamente le note come indicato sul display LCD, il nome corrispondente alla
nota scomparirà dal display LCD.
Left/Right
È possibile esercitarsi sul brano della funzione Learning in modo separato: parte Sinistra (Left) e
parte Destra (Right) del brano
Premere il pulsante [3 STEPS]. Il display LCD visualizzerà: “Lesson 1R”.
Premere il pulsante [Left/Right] per selezionare la modalità Left/Right:
“R”: modalità di apprendimento Right.
“L”: modalità di apprendimento Left.
Premere il pulsante [DEMO / PLAY] per entrare nella modalità Learing.

36
CHORD DICTIONARY
La funzione Chord Dictionary consente di verificare la composizione degli accordi. Quando si
vuole imparare velocemente a suonare un certo accordo, la funzione Dictionary vi aiuterà a
guardare le singole note dell'accordo.
Premere il pulsante [CHORD DICTIONARY].
Selezione del tipo di accordo
Premere il tipo di accordo che si desidera suonare sulla parte destra della tastiera.
Per esempio:
Dopo aver premuto la nota relativa all’accordo, selezionare il tipo di accordo che si desidera
cercare nella sezione Chord Type della tastiera. Il tipo di accordo comprende Maggiori , Minori e
Settima.
Poi il display LCD visualizzerà il tipo di accordo e la posizione della nota che attualmente si
vuole cercare. Se si preme la nota corretta come indicata sul display LCD, lo strumento suonerà
un bip.

37
APPENDICE
Accompagnamento automatic
Modalità Single Finger
La modalità Single Finger rende semplice produrre splendidi accompagnamenti orchestrali,
utilizzando accordi maggiori, settima, minori e minori settima, premendo un numero minimo di
tasti nella sezione Auto Accompaniment della tastiera. L'accompagnamento prodotto si abbina
perfettamente allo stile di accompagnamento attualmente selezionato.
Accordi Maggiori
Per esempio, se si preme il tasto DO (C) nella parte sinistra della tastiera, un accompagnamento
Do Maggiore (C-major) verrà suonato. Premere un altro tasto nella sezione di sinistra la tastiera
per selezionare un nuovo accordo. Il tasto premuto sarà sempre la "radice" dell'accordo suonato.
Accordi Minori
Premere contemporaneamente la nota relativa all’accordo e qualsiasi tasto nero alla sua sinistra.
Accordi Settima
Premere contemporaneamente la nota relativa all’accordo e qualsiasi tasto bianco alla sua
sinistra.
Accordi Minori-Settima
Premere contemporaneamente la nota relativa all’accordo ed un tasto bianco e uno nero
QUALSIASI alla sua sinistra.

38
Modalità Fingered
La modalità Fingered è l'ideale se si sa già come suonare gli accordi su una tastiera, in quanto
consente di fornire le proprie note alla funzione di accompagnamento automatico.
Ricordare la corrispondenza delle note: C=DO, D=RE, D=MI, F=FA, G=SOL, A=LA, B=SI.
Lo strumento è in grado di rilevare i seguenti tipi di accordi:
NAME
NORMAL VOICING
DISPLAY
[M] 1-3-5 C [6] 1-(3)-5-6 C6 [M7]
1 -3-
(5)-7 o 1
-
(3)-5-7 CM7
[M7(#11
)]
1-(2)-3-#4-(5)-7
1-2-3-#4-(5)-7
CM7(#11)
[(9)] 1-2-3-5 C(9)
[M(9)]
1-2-3-
(5)-7 CM7(9)
[6(9)]
1-2-3-
(5)-6 C6(9)
[aug]
1-3-#5
Caug
[m] 1-b3-5 Cm [m6]
1-b3-5-6
Cm6
[m7]
1-b3-
(5)-b7 Cm7
[m7b5]
1-b3-b5-b7
Cm7 5b
[m(9)]
1-2-b3-5
Cm(9)
[m7(9)]
1-2-b3-
(5)-b7 Cm7(9)
[m7
(11)]
1-
(2)-b
3-4-5-(b7)
Cm7(11)
[mM7]
1-b3-
(5)-7 CmM7
[mM(9)]
1-2-b3-
(5)-7 CmM7(9)
[dim]
1-b3-b5
Cdim
[dim7]
1-b3-b5-6
Cdim7
[7] 1-3-(5)-b7
1-(3)-5-b7
C7 [7sus4]
1-4-
(5)-b7 C8sus4
[7(9)]
1-2-3-
(5)-b7 C7(9)
[7(#11)]
1-
(2)-3-#4-(5)-b7
1-2-3-#4-(5)-7
C7(#11)
[7(13)]
1-3-
(5)-6-b7 C7(13)
[7(b9)]
1-b2-3-
(5)-b7 C7(b9)
[7(b13)]
1-3-5-b6-b7
C7(b13)
[7(#9)]
1-#2-3-
(5)b7
C7(#9)
[M7aug]
1-
(3)-#5-7 CM7aug
[7aug]
1-3-#5-b7
C7aug
[sus4]
1-4-5
Csus4
[1+2+5]
1-2-5 C
Questo strumento sarà in grado di rilevare alcuni tipi di accordo e inversioni, però, perché alcuni
accordi possono essere denominati in modo diverso a seconda inversione, alcuni accordi come
m7, m7 b5, 6, m6, sus4, aug, dim7, 6 (9), m7 (11), 1 +2 +5 hanno bisogno di essere suonati nella
posizione principale e di produrre correttamente l'accordo desiderato. (Un esempio di questo è un
accordo A minore7 che ha le stesse note come un accordo C6th, la differenza è l'ordine delle
posizioni delle note).

39 Sound List
1 Gran
d Piano
44 Contrabass
87 Fifths
2
Brigth Piano
45 Tremolo Strings
88 Bass+Lead
3
Electric Grand
46 Pizzicato Strings
89 New Age
4
Honky Tonk
47 Orchestral Harp
90 Warm Pad
5
El. Piano 1
48 Timpani
91 Polisynth
6
El. Piano 2
49 String Ensem.
1 92 Choir 7 Harpsichord
50 String Ensem. 2
93 Bowed Pad
8
Clavinet
51 Synth Strings 1
94 Metallic Pad
9
Celesta
52 Synth Strings 2
95 Halo Pad
10
Glockenspiel
53 Choir Aahs
96 Sweep Pad
11
Music Box
54 Choir Oohs
97 Rain 12 Vibraphone
55
Synth Voice
98 Sound Track
13
Marimba
56 Orchestral Hit
99 Crystal
14
Xylophone
57 Trumpet
100 Atmospere
15
Tubolar Bells
58 Trombone
101 Brightness
16
Dulcimer
59 Tuba
102 Goblins
17
Drawbar Organ
60 Muted Trumpet
103 Echoes
18
Percussi
ve Org.
61 French Horn
104 Sci-Fi 19 Rock Organ
62 Brass Section
105 Sitar 20 Church Organ
63 Synth Brass 1
106 Banyo
21
Reed Organ
64 Synth Brass 2
107 Shamisen
22
Accordion
65 Soprano Sax
108 Koto 23 Harmonica
66 Alto Sax
109 Kalimba
24
Tango Accord.
67 Tenore Sax
110 Bag Pipe
25
Nylon Guitar
68 Baritone Sax
111 Fiddle
26
Steel Guitar
69 Oboe
112 Shanai
27
Jazz Guitar
70 English Horn
113 Thinkle Bell
28
Clean Guitar
71 Basson
114 Agogo
29
Muted Guitar
72 Clarinet
115 Ste
el Drum
30
Overdriven Guit.
73 Piccolo
116 Wood Block
31
Distortion Guitar
74 Flute
117 Taiko Drum
32
Guitar Harmaon.
75 Recorder
118 Melodic Tom
33
Acoustic Guitar
76 Pan Flute
119 Synth Drum
34
Finger Bass
77 Blown Bottle
120 Reverse Cymba
l 35 Pick Bass
78 Shakuhachi
121 Guit. Fret Noise
36
Fretless Bass
79 Whistle
122 Breath Noise
37
Slap Bass 1
80 Ocarina
123 Seashore
38
Slapp Bass 2
81 Square
124 Birds 39 Synth Bass 1
82 Sawthooth
125 Telephone
40
Synth Bass 2
83 Calliop
e
126 Helicopter
41
Violin
84 Chiff
127 Applause
42
Viola 85
Charang
128 Gunshot
43
Cello 86
Voice
129 Percussions

40
LISTA DEGLI STILI
NO STYLE NAME
NO STYLE NAME
NO STYLE NAME
8 BEAT
DISCO
LATIN
1 8BEAT MODERN
34 70’S DISCO
67 MERENGUE
2 MERSEY BEAT
35 LATIN DISCO
68 BOSSANOVA
3 SURF POP
36 DISCO
69 POP BOSSA
4 ROCK SHUFFLE
37 DISCO PARTY
70 MAMBO
5 60’S ROCK
38 DISCO FEVER
71 SALSA
6 HARD ROCK
39 NEWYORK DISCO
72 BEGUINE
7 8BEAT
SWING & JAZZ
73 REGGAE
8 80’S ROCK
40 BIG BAND FAST
74 SWINGY REGGAE
16 BEAT
41 BIG BAND MID
BALLROOM
9 16 BEAT1
42 BIG BAND BALLAD
75 DANCE BAND
10 16 BEAT2
43 JAZZ CLUB
76 ENGLISH WALTZ
11 POP SHUFFLE
44 SWING
77 FOXTROT
12 GUITAR POP
45 JAZZ BALLAD
78 QUICK FOXTROT
13 JAZZ ROCK
46 DIXIE LAND
79 QUICKSTEP
14 SWING FUNK
47 RAGTIME
80 TANGO
15 POP ROCK
48 STRIDE PIANO
81 HABENERA TANGO
BALLAD
49 MODERN JAZZ
82 PASODOBLE
16 PIANO BALLAD
R & B
83 SAMBA
17 LOVE SONG
50 SOUL
84 CHACHA
18 6/8 MODERN
51 DETROIT POP
85 JIVE
19 6/8 SLOW ROCK
52 RHYTHM&BLUES
86 RHUMBA
20 SHOW BALLAD
53 6/8 SOUL
87 VIENNESE WALTZ
21 POP BALLAD
54 TWIST
TRADITIONAL
22 16BEAT BALLAD
55 ROCK&ROLL
88 2/4 MARCH
DANCE
56 BOOGIEWOOGIE
89 6/8 MARCH
23 RAP
57 6/8 BLUES
90 2/4 POLKA
24 DANCE POP
58 3/4 GOSPEL
91 6/8 POLKA
25 HOUSE
59 GOSPEL SHUFFLE
92 TARANTELLA
26 SWING HOUSE
COUNTRY
93 SIRTAKI
27 CLUB DANCE
60 COUNTRY 8 BEAT
94 SCOTTISH REEL
28 CLUB LATIN
61 COUNTRY POP
95 HAWAIIAN
29 GARAGE
62 COUNTRY SWING
96 MARIACHI
30 TECHNO
63 COUNTRY 2 STEP
WALTZ
31 DANCE 8BEAT
64 COUNTRY BALLAD
97 SWING WALTZ
32 HIP HOP
65 BLUE GRASS
98 JAZZ WALTZ
33 CHILL OUT
66 COUNTRY WALTZ
99 WALTZ
100 FRENCH WALTZ

41
CONSIGLI PER RISOLVERE I PROBLEM I
Problema Soluzione
-
Quando lo strumento viene acceso o spento, si
sente uno schiocco.
Questo è normale e indica che lo strumento
riceve alimentazione elettrica.
-
Quando si utilizza un telefono cellulare, viene
prodotto un rumore. Utilizzando un telefono
cellulare nelle immediate vicinanze dello
strumento può produrre interferenze.
Per evitare questo, spegnere il cellulare o usatelo
lontano dallo strumento.
-
Non tutte le voci sembrano suonare, o il suono
sembra interrompersi.
Lo strumento è polif
onico fino a un massimo. di 32
note, tra cui il Dual Voice, Split Voice,
Auto Accompaniment, Song, e Metronome.
Le note che superano questo limite non
suoneranno.
-
L'accompagnamento automatico non suona
correttamente.
Assicurarsi che
:
-il volume dell' Auto Accomp.
sia impostato su un livello appropriato.
-i l punto di Split sia impostato su un tasto
appropriato per gli accordi che si stanno suonando.
-i mpostare il punto di splittaggio in una posizione
appropriata sulla tastiera.
-l 'indicatore chord sia visualizzato sul display
LCD. Se non è visualizzato, premere il pulsante
CHORD.
-
Nessun suono prodotto dalla tastiera, ma i led e il
display sono accesi.
Verificare che il controllo del volume master non
sia al minimo.
Controllare che nulla sia collega to alla
presa per cuffie.
-
Il suono cambia da nota a nota.
Questo è normale. La generazione sonora digitale
usa campionamenti multipli di un particolare
strumento per creare il suono sull’intera tastiera,
per questo motivo in alcuni suoni si potrebbero
sentire delle piccole differenze.
-
Il volume è troppo basso
.
-La qualità del suono è scarsa.
-Il ritmo si arresta in modo imprevisto o non suona.
-I dati registrati della canzone, ecc.. non vengono
riprodotti correttamente.
-Il display LCD si spegne improvvisamente, e
vengono ripristinate tutte le impostazioni del
pannello.
Le batterie sono scariche o esaurite. Sostituire tutte
e sei le batterie con altre del tutto nuove, o
utilizzare l'adattatore CA in dotazione.
Se avete perso o danneggiato l'adattatore CA,
rivolgersi al più vicino negozio per un adattatore
sostitutivo.
Un errato alimentatore CA può causare
malfunzionamenti o danni.
-
Per ripristinare completamente tutte le
impostazioni, come da impostazioni iniziali
Eseguire un reset, si prega di fa
re riferimento al
contenuto di questo manuale. Tutte le impostazioni
utente saranno cancellate e le impostazioni di
fabbrica saranno applicate allo strumento.
-
Improvvisamente e inaspettatamente si spegne,
dopo un periodo che non si suona.
Questo è norma
le, è la funzione di spegnimento
automatico che potrebbe essere attivata. Se è
necessario disabilitare la funzione di spegnimento
automatico, vedere come farlo nel manuale d’uso.
-
Il pedale o pedale sustain sembra produrre l'effetto
opposto. Esempio, premendo il pedale disattiva il
sustain, e rilasciando il pedale innesca il sustain.
La polarità del pedale deve essere rilevata
correttamente. Assicurarsi che il connettore jack
per il pedale sia collegato. Accendere lo strumento,
senza toccare il pedale.
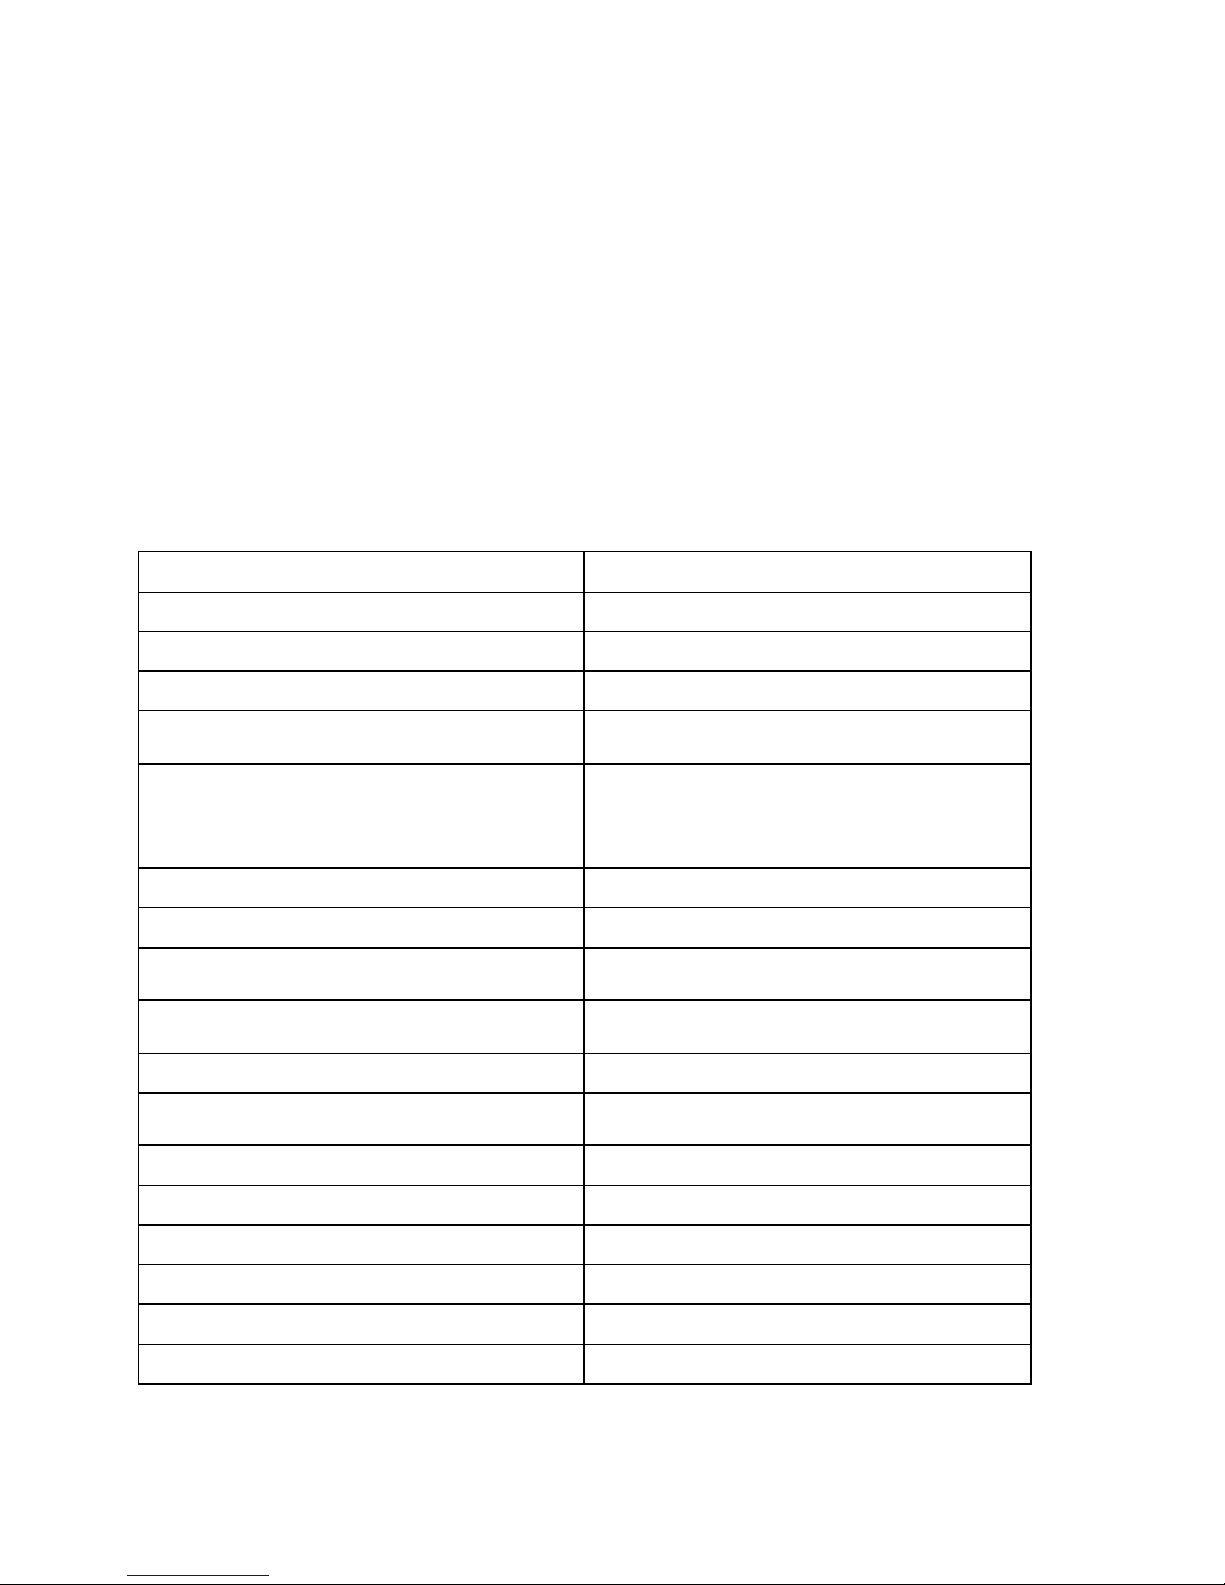
42
RESET
Se fosse necessario cancellare completamente la memoria interna (RAM), è possibile resettare lo
strumento.
1 - Assicurarsi che lo strumento sia spento.
2 - Premere allo stesso momento i pulsanti [+] e [-].
3 - Accendere lo strumento mentre si premono i pulsanti [+] e [-].
4 - Il display mostrerà RESETING.
Non resettare lo strumento se non è necessario. Tutte le informazioni che avete
programmato verranno automaticamente cancellate dal interno della memoria RAM. Le
impostazion i di fabbrica programmate verranno automaticamente ripristinate.
SPECIFICHE:
Tastiera:
61
tasti
standard
-
size
con touch
sensitivity.
Display:
Display LCD
Multi
-
fun
zione
.
Polifonia:
32 Note
di
Pol
ifonia.
Suoni :
129
suoni
PCM
.
Controlli del suono:
Vo
lume, Sustain, Vibrato, Tune, Transpose,
Octave
Effe tti:
Ri
verb
ero
(8 tip
i), Livello del Ri
verb
ero,
Riverbero on/off
Chorus (8 tipi), Livello del Chorus, Chorus
on/off
EQ:
BASS: [
-
6,+6], TREBLE: [
-
6,+6]
Sti li:
100
Caratteristiche degli stili:
Synchro
,
Start/stop, Intro/Ending,
Acc.Volume
Controlli Tastiera:
Normal, Chord, Split, Dual,
3 li
vel
li di
touch
Sensitivity e fissare il tocco selezionato
Demo
10 demo songs +100 learning songs
Funzioni di apprendimento:
3 Step di apprendimento con
la parte
sinistra/destra ON/OFF
Song recording:
Registrazione in tempo reale
Altro :
Metronomo
, Chord Dictionary
Interfaccia:
DC 12V,
Cuffia
Altoparlanti :
Yd120: 6W/4ohm x 2
Dimensioni (WxDxH ):
945mm
x 304mm x 100mm
Peso:
4.3Kg

43

44
 Loading...