

Orion Technology X20, X30 Quick Start Manual
Quick Guide
1
Overview
3
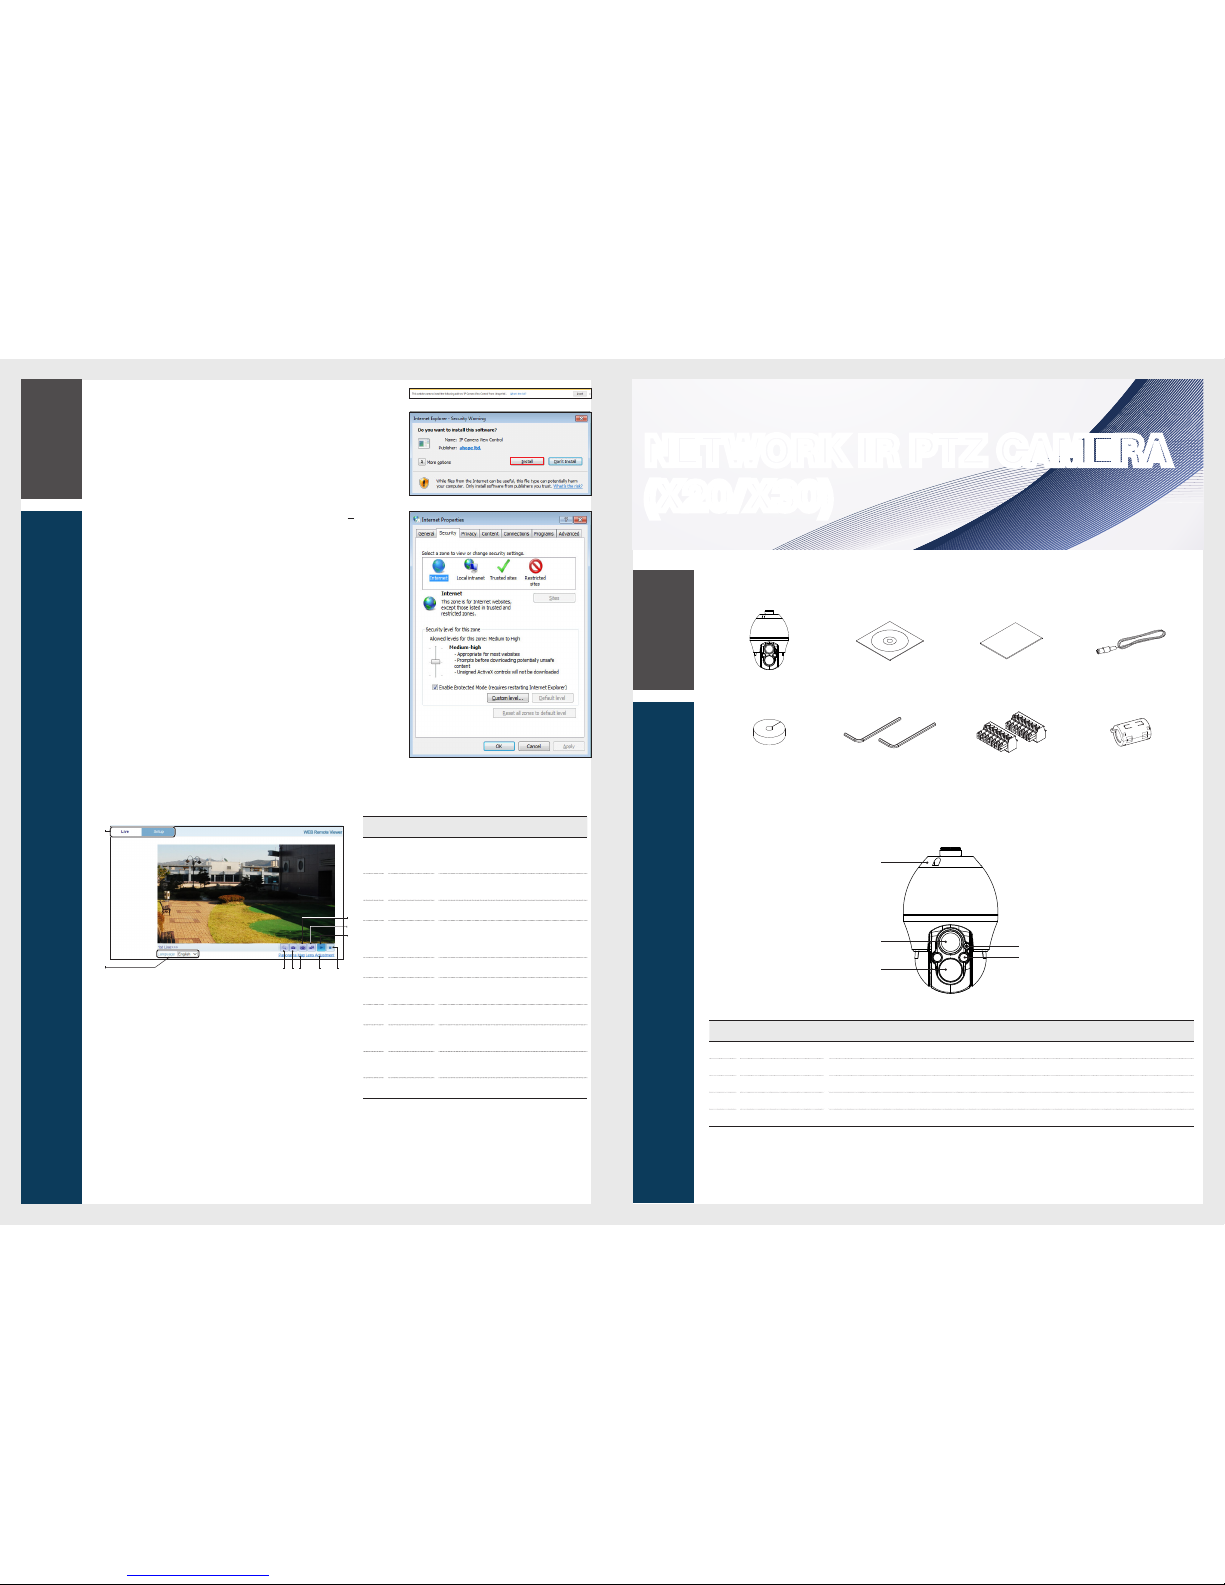
Web Viewer
Item
Name Descripti on
a
Display
Selected
Tab
Consists of Live and Setup menu.
b
Language
You can select in which language the Web
Viewer is displayed.
c
Full Screen
Displays the image in full scre en.
d
Stream
Change
If selecting Dual Stre am, the streams are
shifted in the order of the 1st (the first
stream)
<
2nd (the second stream).
e
Playback Starts to transmit the imag e manually.
f
Digital
Zoom
Zooms in or out on t
he screen.
g
Capture Saves current image as .jpg imag e file.
h
Panorama
Map
Conveniently control PTZ with the Panorama
Map.
i
Lens
Adjustment
Adjusts the zoom (zoom in/out) and focus of
lens.
j
Stop
Stops transmittin g the image manually.
Learning the Live screen
3.
You should run the activities afte r installing corre sponding Active-X.
4.
If the Active-X installation wind ow does not appear in the top right area for a
long time (longer than 1 minu te), change the
“
Internet Optio ns” settings.
5.
"Control Panel > Inter net Options > Security" menu, press [Cu stom
level...] button.
6.
Select all the ActiveX-related optio ns as available.
NETWORK IR PTZ CAMERA
(X20/X30)
What's Included
Camera CD Manual Quick Guide BNC Cable
Cable Sponge L-Wrench (4mm 1ea, 2.5mm 1ea) 7-position Terminal Block (2ea) Ferrite Core
At a Glance
Appearan ce
Item Name Descripti on
a
Mount Adaptor Accessory for co nnecting a camera to a bracket.
b
Zoom Camera Camera with ZOOM LENS.
c
Zoom IR LED IR angle is automatically adju sted by optical zoom. IR LED is on when zoom ratio is above x2.
d
Illumination Sen sor Detects incoming ligh t to control the IR LED.
e
Wide angle IR LED IR LED is on when zoom ratio is below x2.
b
f jihg
a
c
d
e
e
d
c
b
a
How to connect to the camera
Since the network set tings of your network camera are not configured by factor y default, you cannot acces s to WebRA. To configure
your network, run the
“
MDload” in CD to check the IP and access to your camera.
1.
Press <Search> but ton to search for the network came ra linked to your
network.
2.
The search results are displ ayed if finished. You can distinguish your networ k
c
amera(s) by checking its mode l information. Click your desired apparatus
whose network sett ings you want to configure in the list.
3.
Select “DHCP” or “STATIC” for <Network Type> in bottom left. If selectin g
“
STATIC”, enter the values for IP Address, Subnet Ma sk, Gateway, and DNS
information, and then pre ss <Apply>.
4.
The list is automaticall y updated in a moment. Check if all the values look
correc
t and finish the network enviro nment settings.
1
Overview
2
Connecting
3
Web Viewer
Connecting to External Device
Installati on monitor
Connect the video ou tput cable of the network camera with the installati on monitor.
You can watch the video input from the installed ca mera in the monitor.
J
You should not use the installation monitor co ntinuously as it is only designed to check the vide o output during the camera installation pro cess.
Connecting wi th power supply
Connect the power cable.
A ferrite core accesso ry is included to be used when connecting the net work cable in order to suppress electromagne tic noise.
2
Connecting
Connecting to the net work
To connect with a PC ina local networ k
If you connect the network ca mera with a PC in the same network, you can perform monito ring and setting process by using the PC's Web
Viewer.
1.
Connect the networ k port on the back panel with a router or hub.
2.
Connect a local PC with a router or hub.
3.
Enter the address in “http://IP address:web servic e port” format in address window of the web browse r or dedicated soft ware
program at local PC.
Ex : http://192.168.0.23:80 web service port is set as 80 by factor y default. You can modify the port nu mber in Network Setup screen.
4.
Enter your ID and password to log in. You can watch the monitoring screen af ter login.
J
You must register your login password when acc essing for the first time.
To change your password, refer to "How to
connect".
To connect with a PC in remote network
You can access the network camera fr om your PC through the internet.
1.
Connect router's networ k port directly with static IP LAN cable or with the ADSL mo dem.
2.
If using a router, you should configure the port for warding settings.
You can get relevant support from your route r manufacturer or qualified installati on company for how to configure the port forwarding of your router.
When you access the netwo rk camera from your PC via internet, make sure to access the following site.
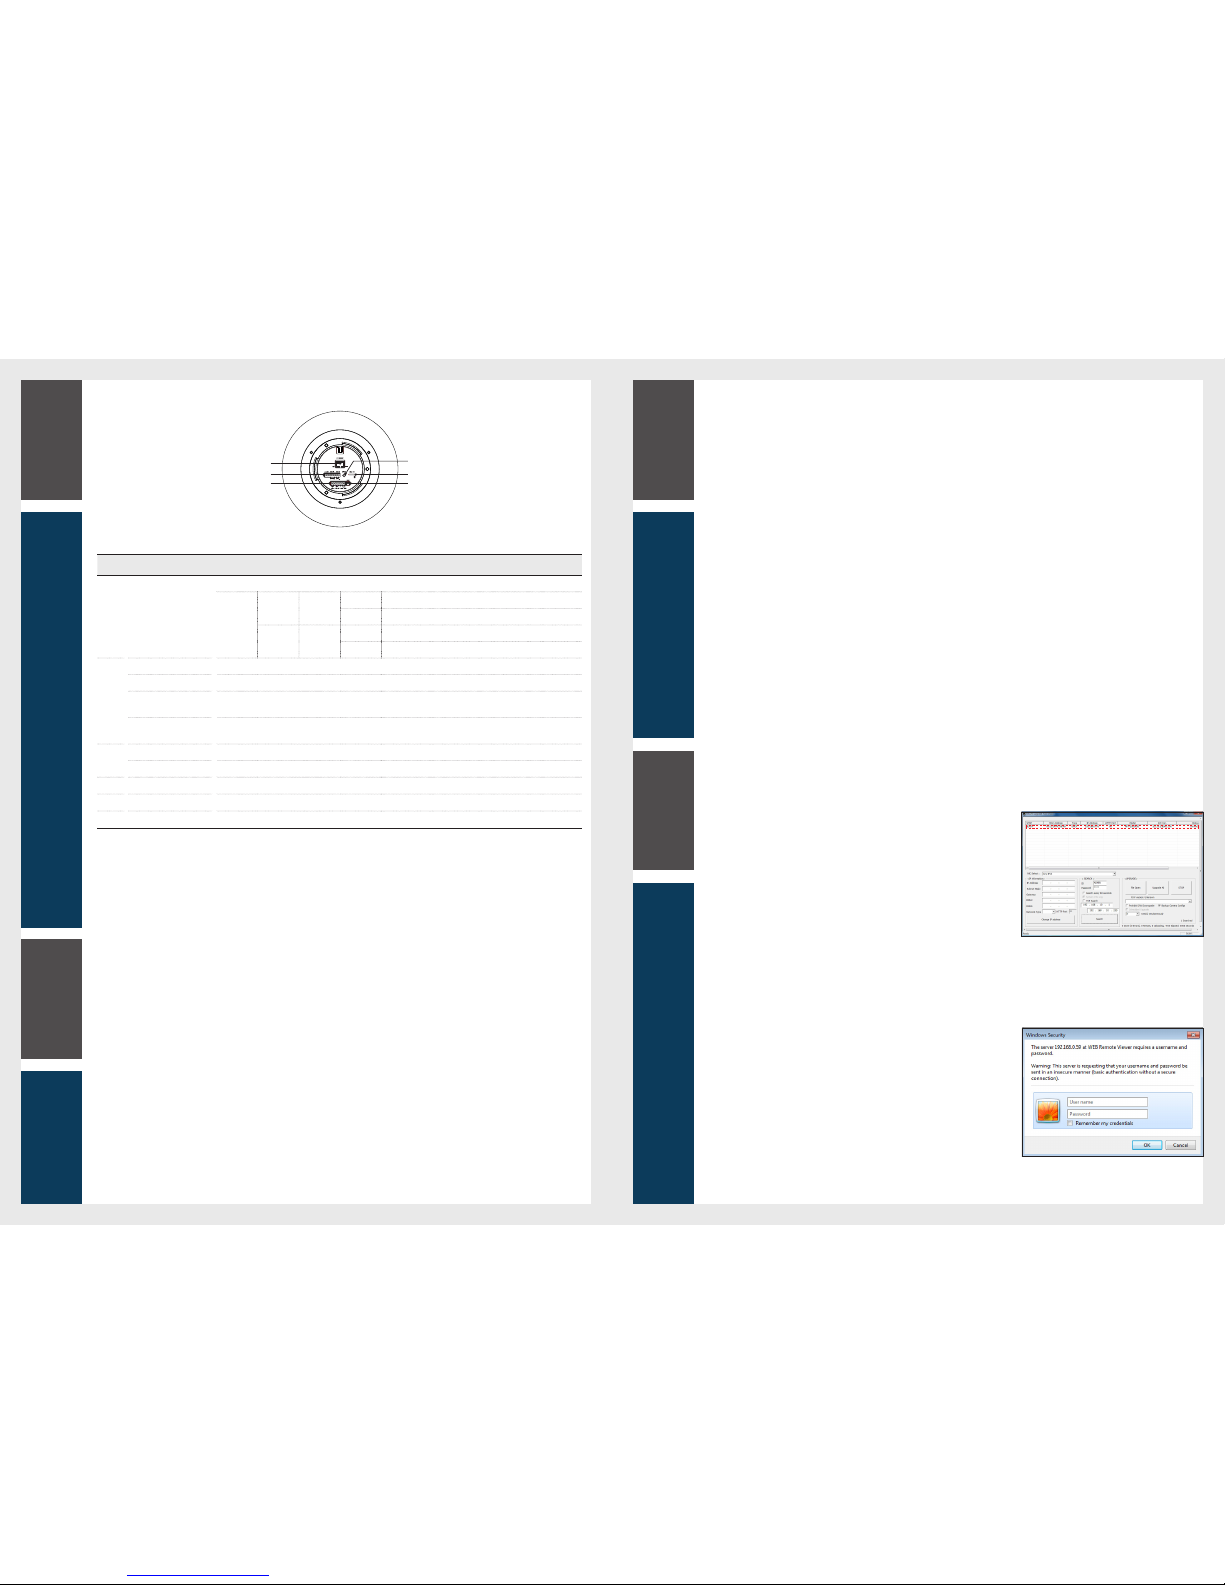
Bottom View of Instal lation Base
Item Name Descripti on
a
Network
Used to connect the networ k.
Status
LED
LINK Orang e
On Connection to 10/100Mbps Network / LAN.
Unlit No network con nection established.
ACT Green
On Camera is booting up.
Flash Firmware Upload in progress.
b
Power Connector Us ed to connect to a power cable.
Audio In terminal Audio in (line level), for line-in mo no signal (only left channel is used from a stereo signa l).
Audio Out terminal
The Audio output (line leve l), which could be connec ted to a line output of a microphone system or an acti ve
speaker with a built-in ampli fier.
RS-485
For PTZ control, connec t this line to keyboard and DVR. To control multiple camera s at the same time, RS-485
communicatio n lines of them are connected in parallel.
c
Alarm Out terminal Two relay output (2A : AC120V / DC24V).
Alarm In terminal Two analog (
dry contact) alar m input.
d
Video Output Terminal Analog video out term inal which is used in installing.
e
Micro SD Card Slot Allows a Micro SD card to be inserte d.
f
Reset Button Press this button to restore the came ra configuration to its factory default setting s.
Web Viewer
1.
Security page (Inte rnet Explorer) is displayed. Click <Conti nue to this website (not recommended).>.
2.
Enter your ID and password in the ID input window.
Default user name : ADMIN
Password : 1234
d
e
f
a
b
c
 Loading...