

Orion Technology OT-T10G User Manual
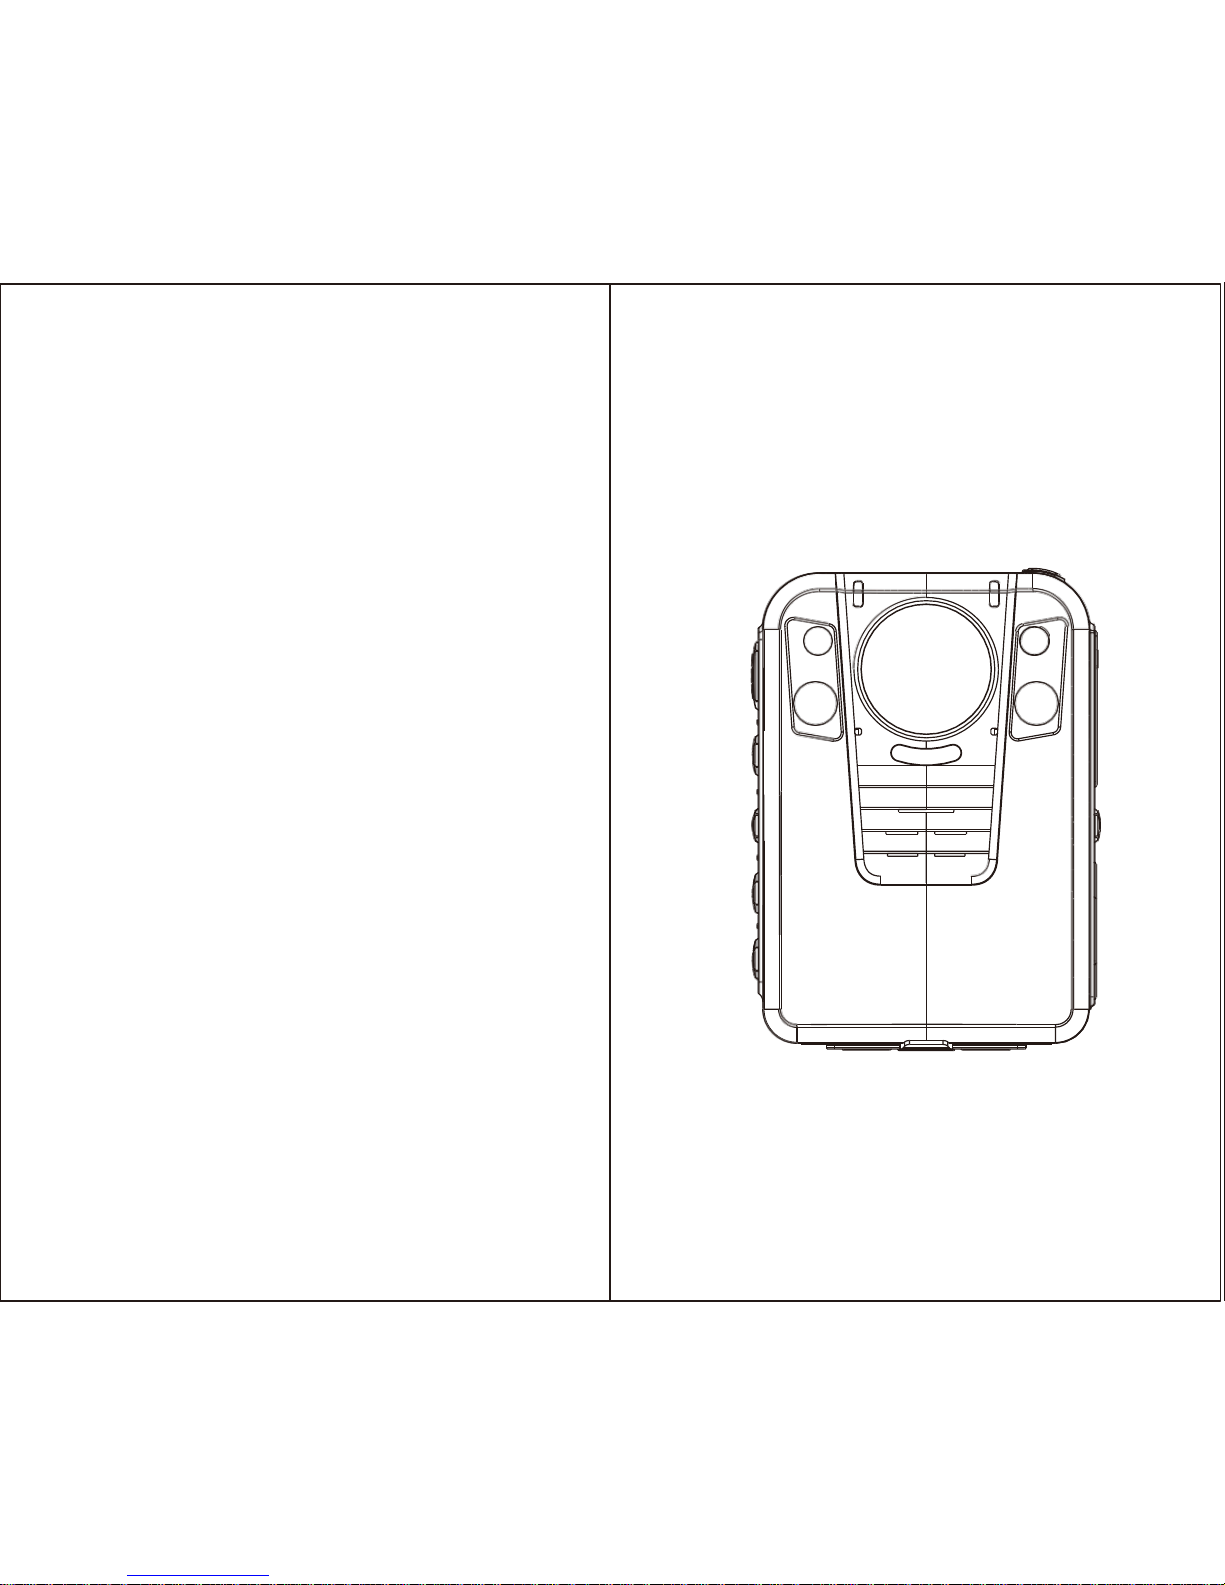
Overview
Power Indicator
Working Indicator
Las er l ight
Photoresistor
Police Body Camera is a video recording system
that is typically utilized by law enforcement to
record their interactions with the public, gather
video evidence at crime scenes, and has been
known to increase both officer and citizen
accountability.
Main Specification
Ambarella Chip
Full HD 1080p @30fps video support
2x IR lights, 1x Fill-light, 1x Laser light
Removable battery, single battery with 1950mAh
Up to 128GB storage support.(Optional)
Weight: 170g
Dimensions: 85*61*31mm
Working Temperature: -20~50 degrees Celsius
Working RH: 40%~80%
Storage Temperature: -20~50 degrees Celsius
Storage RH: 93% (40 degrees Celsius)
Standby time: 14 hours
Continuous Recording: 5 hours (Single battery fully
charged, IR off, 640*480 video resolution)
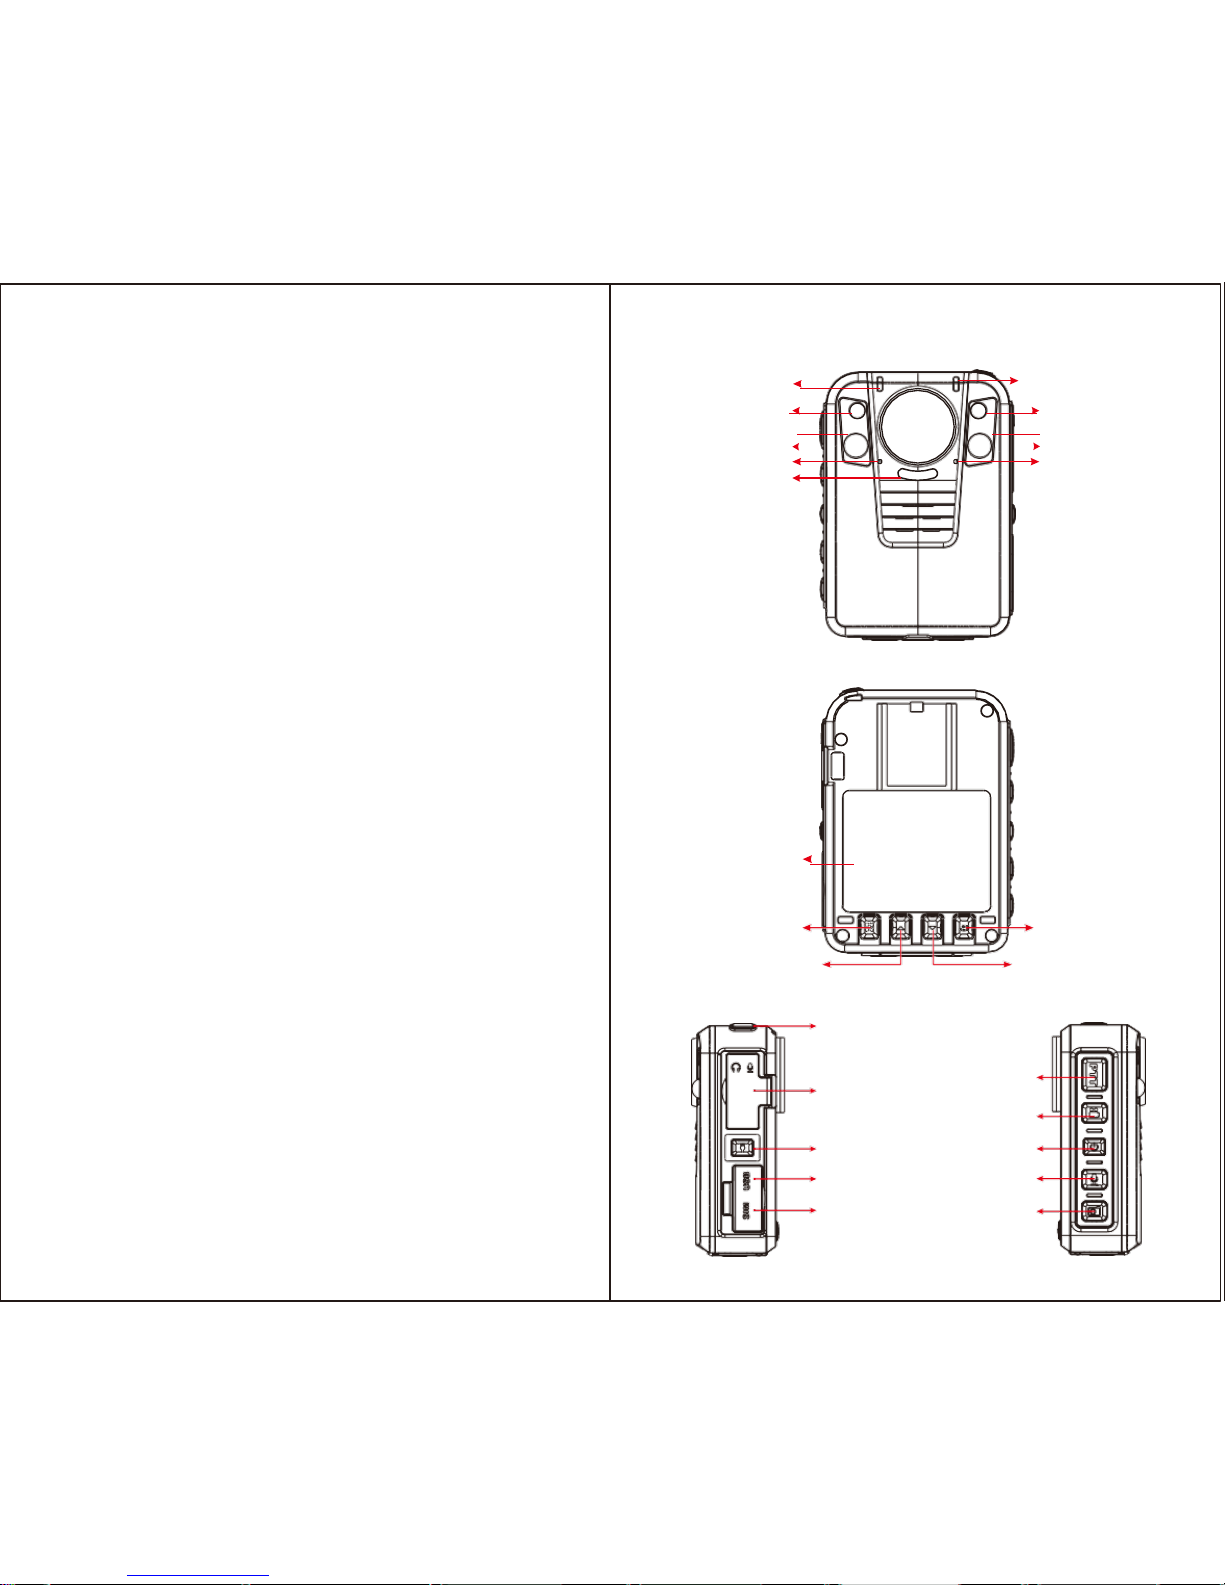
IR LED
Mic
White LED
Display
Menu
Up
Reset
Muti-functional
Interface
IR/Laser Light
USB Port
SIM Card
IR LED
Mic
Playback
Down
PTT
Video Record
Power
Audio Recording
Photographing
01
02

Basic Operation:
Power on/off:
Press and hold the Power button for 2 sec to turn
on the camera, and activate Standby/Preview Mode.
Press and hold for 2 sec to turn off the camera
when camera is powered on.
Video Recording:
A. To record a video, press the “Video Record”
button on the right side of the device (second button
with a video recorder symbol on it). The unit will give
one short audio chirp. A ”red point” will appear, and
timer shows the recording time.
B. Press the “Video Record” button again to stop
recording. The “red point” will disappear, and timer
stops. The unit will stop recording and save the
video.
C. When the unit is powered off, if the user presses
the “Video Record” button, the device will turn on
and automatically start video recording.
D. If recording during the night or in the dark, long
press and hold the “IR/Laser Light” button. The IR
lights will turn on and the device will enter into Night
Mode. The video recorded in the dark will be in
black and white.
Photographing:
A. To take photos, press the “Photographing” button
(the last button on the left side of the device with a
symbol of camera on it). The unit will start taking
pictures similar to a digital camera.
B. To take photos while video recording, press the
“Photographing” button and the unit will capture a
photo of the picture recorded at that time without
interrupting the video recording.
C. To take photos at night or in the dark, press and
hold “IR/Laser Light” button to go into Night Mode
and turn on the IR lights. Photos taken in Night Mode
will be black and white.
Sound Recording:
A. To record audio only, press the “Audio Recording”
button (located below the Camera button with a
microphone symbol on it). The unit will give one
short chirp briefly and a recording timer will appear
on the LCD screen display.
B. To stop recording, press the “Audio Recording”
button again. The unit will vibrate give one short
chirp again and return to the video preview. The
audio recording will end and will be saved as an
audio file.
03
04
 Loading...