

Orion Technology OR-4534i, OR-815i Quick Manual
WDR BULLET
NETWORK CAMERA
Quick Guide
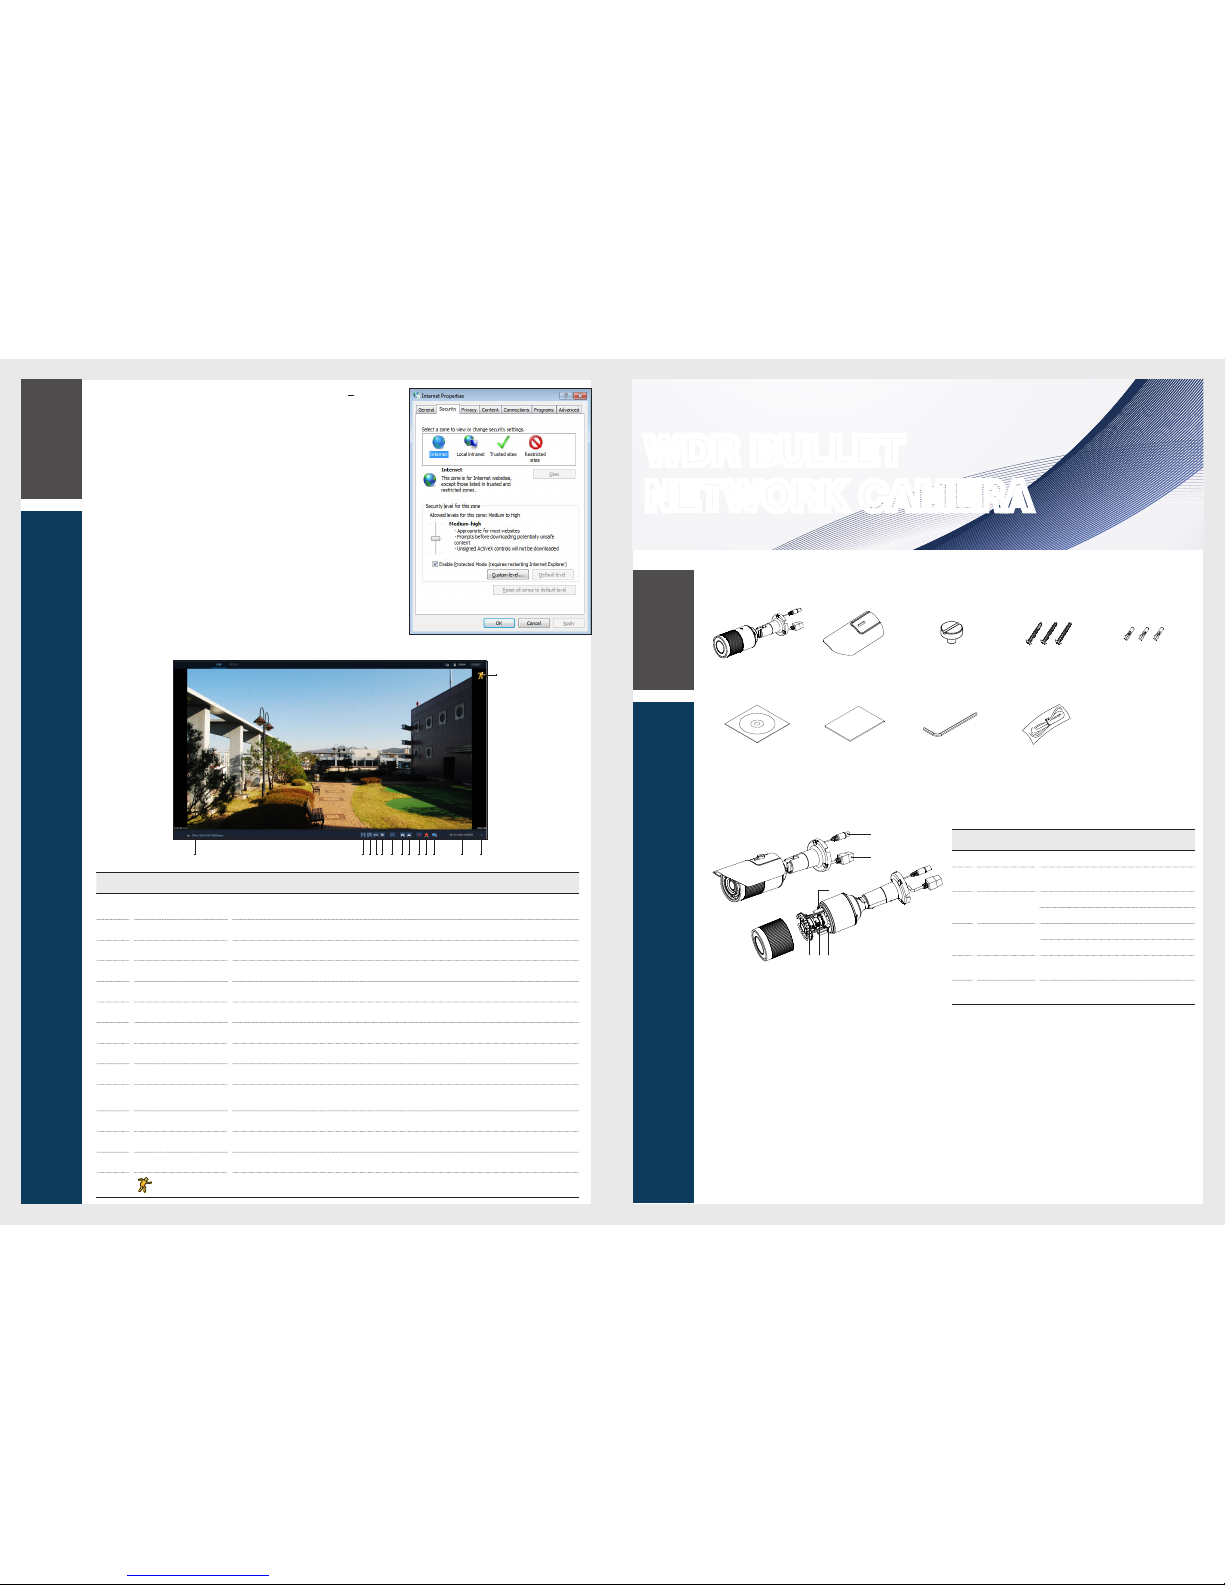
What's Included
Camera Sun Shield Sun Shield Fixing Screw
3 Screws
(PH / M4 X 30)
3 Plastic Anchors
CD Manual Quick Guide L Wrench BNC Cable
At a Glance
4
Web Viewer
Item
Name Descript ion
a
Audio In Jack Connect to mic.
b
Network
Used to connect the PoE cable betwe en power
supply and network.
c
Focus control
lever
N Focusing on a near object (Ne ar)
F Focusing on a far object (Far)
d
Zoom control
lever
T Zo om in (Tele)
W Zoom ou t (Wide)
e
CVBS out
Analog video out termi nal which is used in
installing.
f
Factory Reset
Press this button to restore the camera
configuration to its factor y de
fault settings.
edc
b
f
a
Item Name Descripti on
a
Stream Change
If selecting Dual Stre am, the streams are shifted in the order of the 1st (the first stream)
<
2nd (the second
stream).
b
Full Screen Displays the image in full sc reen.
c
Multi Window Plays the video in two screens.
d
OSD Display or hide the OSD menu on the scree n.
e
Freeze Stops transmittin g the image manually.
f
Mute Used to mute the sound.
g
Snapshot S aves current image as .jpg image file.
h
Print Prints cu rrent screen.
i
Panic Record Start the panic reco rding.
j
Alarm
Turns on if an event occurs. It does not turn on if no reaction to the event is yet defined. Cli ck this to check
the information of the event that occu rred.
k
Stream Status Click to display the network info rmation.
l
Timeline Date Display the current time an d date.
m
Event Status/Inform ation Click to see the event status, network info rmation, streaming session, storage status, an d system status.
n
A motion is detected by the connected cam era.
Learning the Live screen
bae f gh k l minjcd
5.
"Control Panel > Inter net Options > Security" menu, press [Cu stom
level...] button.
6.
Select all the ActiveX-related optio ns as available.
1
Overview

2
Installatio n
Web Viewer
1.
Security page (Inte rnet Explorer) is displayed. Click <Conti nue to this website (not recommended).>.
2.
Enter your ID and password in the ID input window.
Default user name : ADMIN
Password : 1234
3.
You should run the activities afte r installi ng corresponding Active-X.
4.
If the Active-X installation wind ow does not appear in the top right area for a
long time (longer than 1 minu te), c
hange the “Internet Optio ns” settings.
Connecting to External Device
Installati on monitor
Connect the video ou tput cable of the network camera with the installati on monitor.
You can watch the video input from the installed ca mera in the monitor.
J
You should not use the installation monitor co ntinuously as it is only designed to check the vide o output during the camera installation pro cess.
Connecting wi th power supply
Connect the PoE (Power Over Ethern et) cable between the power supply and the network por t.
J
If your network camera is ins talled as standalone setup, the power should be suppli ed by PoE Hub.
How to connect to the camera
Since the network setti ngs of your network ca mera are not configured by factory default, you cannot access to WebRA . To configure your
network, run the
“
MDload” in CD to check the IP and access to your camera.
1.
Press <Search> but ton to search for the netwo rk camera linked to your
network.
2.
The search results are displ ayed if finished. You can distingui sh your network
camera(s) by checking its mod el information. Click your desired apparatu s
whose network sett ings you want to configure in the list.
3.
Select “DHCP” or “STATIC” for <Network Type> in bottom left. If selectin g
“
STATIC”, enter the values for IP Address, Subnet Ma sk, Gateway, and DNS
information, and then pre ss <Apply>.
4.
The list is automaticall y updated in a moment. Check if all the values look
correct and finish the net work environment settings.
Installing
Installing on the ce iling
You can install the camera on the ceiling, and th en adjust and fix its angle.
1.
Fix the bottom surface of the cam era on the ceiling by using the screws supplied.
It must be installed in a place whe re it can bear the camera's weight.
It is recommended to injec t silicon into the gap between the camera and the ceilin g for secure waterp roofing.
Installing on a wall
You can install the camera on a wall, and then adjust and fix its an gle.
1.
Fix the bottom surface of the cam era on a wall by using the screws supplied.
It must be installed in a place whe re it can bear the camera's weight.
2.
Mount your camera on the wall by using the scre ws supplied.
It is recommended to injec t silicon into the gap between the camera and the wall for secure water proofing.
Installing su n shield
You can install the sun shield to avoid strong light such as dir ect sunlight or electric light.
1.
Fix your camera at your desire d angle.
2.
Align the provided suns hield’s hole to the camera’s hole and fix it by fastening screws.
Adjusting Zoom and Focus
Adjust the zoom/focus of the came ra lens to view a clear image of the monitored target.
1.
Turn to disassemble the front cover as shown in the pictu re.
2.
Turn the zoom/focus control lever towards the lef t to loosen and then rel ease.
3.
Move the zoom/focus control leve r towards W (Wide)/ T (Tele) or F (Far)/N (Near) to
adjust the zoom and focus of the lens.
4.
To fix the adjusted location after adjustme nt, turn the zoom/focus control lever
clockwise ca refully.
5.
Turn the front cover again to attach.
Connecting to the net work
To connect with a PC ina local networ k
If you connect the network ca mera with a PC in the same network, you can perform monito ring and setting process by using the PC's Web
Viewer.
1.
Connect the networ k port on the back panel with a router or hub.
2.
Connect a local PC with a router or hub.
3.
Enter the address in “http://IP address:web servic e port” format in address window of the web browse r or dedicate d softwa re
program at local PC.
Ex : http://192.168.0.23:80 web service port is set as 80 by factory default. You can modify the po rt number in Network Setup screen.
4.
Enter your ID and password to log in. You can watch the monitoring screen af ter login.
J
You must register your login password when acc essing for the first time.
To change your password, refer to "How to connect".
To connect with a PC in remote network
You can access the network camera fr om your PC through the internet.
1.
Connect router's networ k port directly with static IP LAN cable or with the ADSL mo dem.
2.
If using a router, you should configure the port for warding settings.
You can get relevant support from your route r manufacturer or qualified installati on company for how to configure the port forwarding of your router.
When you access the netwo rk camera from your PC via internet, make sure to access the following site.
3
Connecting
4
Web Viewer
3
Connecting
 Loading...