

Orion Technology GST-894i User Manual

H.264 IP
CAMERA
USER MANUAL
MODEL: DOME IP CAMERA
2013/8/12

IMPORTANT SAFETY INSTRUCTIONS
1. Read these instructions.
2. Keep these instructions.
3. Heed all warnings.
4. Follow all instructions.
5. Do not use this device near water.
6. Clean only with a dry cloth.
7. Do not block any of the ventilation openings. Install in accordance with the manufacturer’s instructions.
8. Do not install near any heat sources, such as radiators, heat registers, stoves, or any other devices that produce heat.
9. Protect the power cord from being walked on or pinched, particularly at plugs, power outlets, or the point where the
cord exits the device.
10. Only use attachments or accessories specified by the manufacturer.
11. Use only with a cart, stand, tripod, bracket, or table mount specified by the manufacturer or sold with the device.
When a cart is used, use caution when moving the cart/device combination to avoid injury from the cart tipping over.
12. Unplug this device during lightning storms or when unused for long periods of time.
13. Refer to qualified service personnel for all servicing needs. Servicing is required when the device has been damaged in
any way, such as when the power supply cord or plug is damaged, liquid spills or objects fall onto the device, the device
is exposed to rain or moisture, the device does not operate normally, or has been dropped.
14. Caution: Danger of explosion if the battery is not properly replaced. Replace only with the same or equivalent type of
battery.
15. These servicing instructions are for use by qualified service personnel only. To reduce the risk of electric shock, do not
perform any servicing other than that contained in the operating instructions unless you are qualified to do so.
USA & CANADA: USE CLASS 2 POWER SUPPLY ONLY
This product was tested with a UPS to satisfy EN 61000-4-11 test conditions (voltage dips and short interruptions test)
under the EN 50130-4: 2011 standard.
2

Table of Contents
IMPORTANT SAFETY INSTRUCTIONS ....................................................................................................................................... 2
1. Product Features ................................................................................................................................................................. 5
2. Installation .......................................................................................................................................................................... 6
3. Accessing the Camera ....................................................................................................................................................... 12
3.1 Access from a Browser ................................................................................................................................................ 12
3.2 Accessing the IP Camera from the Internet ................................................................................................................ 12
3.3 Adjusting the Image .................................................................................................................................................... 13
3.4 Live View ..................................................................................................................................................................... 13
3.5 Video Stream Types .................................................................................................................................................... 13
3.6 How to Stream H.264 .................................................................................................................................................. 14
4. Setup ................................................................................................................................................................................. 14
4.1 Analog Output ............................................................................................................................................................. 14
4.2 Video ........................................................................................................................................................................... 15
4.2.1 Codec .................................................................................................................................................................... 15
4.2.2 Camera ................................................................................................................................................................. 17
4.3 Audio ........................................................................................................................................................................... 18
4.4 Live .............................................................................................................................................................................. 19
4.4.1 Setup .................................................................................................................................................................... 19
4.4.2 Privacy Mask ........................................................................................................................................................ 20
4.5 SD CARD ...................................................................................................................................................................... 21
4.5.1 Config ................................................................................................................................................................... 21
4.5.2 Event .................................................................................................................................................................... 22
4.5.3 Periodical .............................................................................................................................................................. 23
4.6 FTP ............................................................................................................................................................................... 24
4.6.1 Config ................................................................................................................................................................... 24
4.6.2 Event .................................................................................................................................................................... 25
4.6.3 Periodical .............................................................................................................................................................. 26
4.7 Event ........................................................................................................................................................................... 26
4.7.1 Alarm Port ............................................................................................................................................................ 26
4.7.2 Motion .................................................................................................................................................................. 27
4.7.3 Mapping ............................................................................................................................................................... 27
4.8 Network ...................................................................................................................................................................... 28
4.8.1 IP Setup ................................................................................................................................................................ 28
3

4.8.2 Service Port .......................................................................................................................................................... 30
4.8.3 RTP ....................................................................................................................................................................... 31
4.8.4 E-mail ................................................................................................................................................................... 32
4.8.5 DDNS .................................................................................................................................................................... 33
4.8.6 UPnP ..................................................................................................................................................................... 33
4.9 System ......................................................................................................................................................................... 34
4.9.1 User ...................................................................................................................................................................... 34
4.9.2 Date/Time ............................................................................................................................................................ 34
4.9.3 Maintenance ........................................................................................................................................................ 35
4.9.4 Information .......................................................................................................................................................... 35
5. Accessory List & Dimensions (mm) ................................................................................................................................... 36
Accessory List .................................................................................................................................................................... 36
Dimensions (mm) .............................................................................................................................................................. 37
4
1. Product Features
This IP Camera is a high-performance H.264 network camera designed for demanding security installations. It delivers
crisp, clear images that disclose every detail thanks to a top quality progressive CMOS sensor and advanced image
processing.
This IP Camera is supported by a wide variety of video management software solutions and provides a perfect solution
for securing banks, offices, airports, and other facilities over an IP network.
The optimal Power over Ethernet (IEEE 802.3af) connection to the IP Camera allows power to be delivered over the
network, eliminating the need for a power outlet and reducing installation costs. Continuous power can also be
guaranteed with a central Uninterruptible Power Supply (UPS).
This IP Camera offers a comprehensive set of network security and management features. This includes support for portbased network control (IEEE 802.1X), which allows the camera to be connected to a network secured with this control as
well as HTTPS encryption to provide a secure connection between the IP Camera and remote monitoring software. It
also allows for authentication of the video source. Network video products are powerfully managed with the IP Camera
Management Tool, which is provided on the Installation CD that comes with each IP Camera unit.
Network Connector: This IP Camera connects to the network via a standard network cable and automatically detects the
speed of the local network segment (10BaseT/100BaseTX Ethernet). This socket can also be used to power the IP
Camera via Power over Ethernet (PoE). The camera automatically senses the correct power level when using a PoE (Class
2) switch, router, or injector.
Reset Button: Press this button to restore the camera settings to the factory default configuration.
5
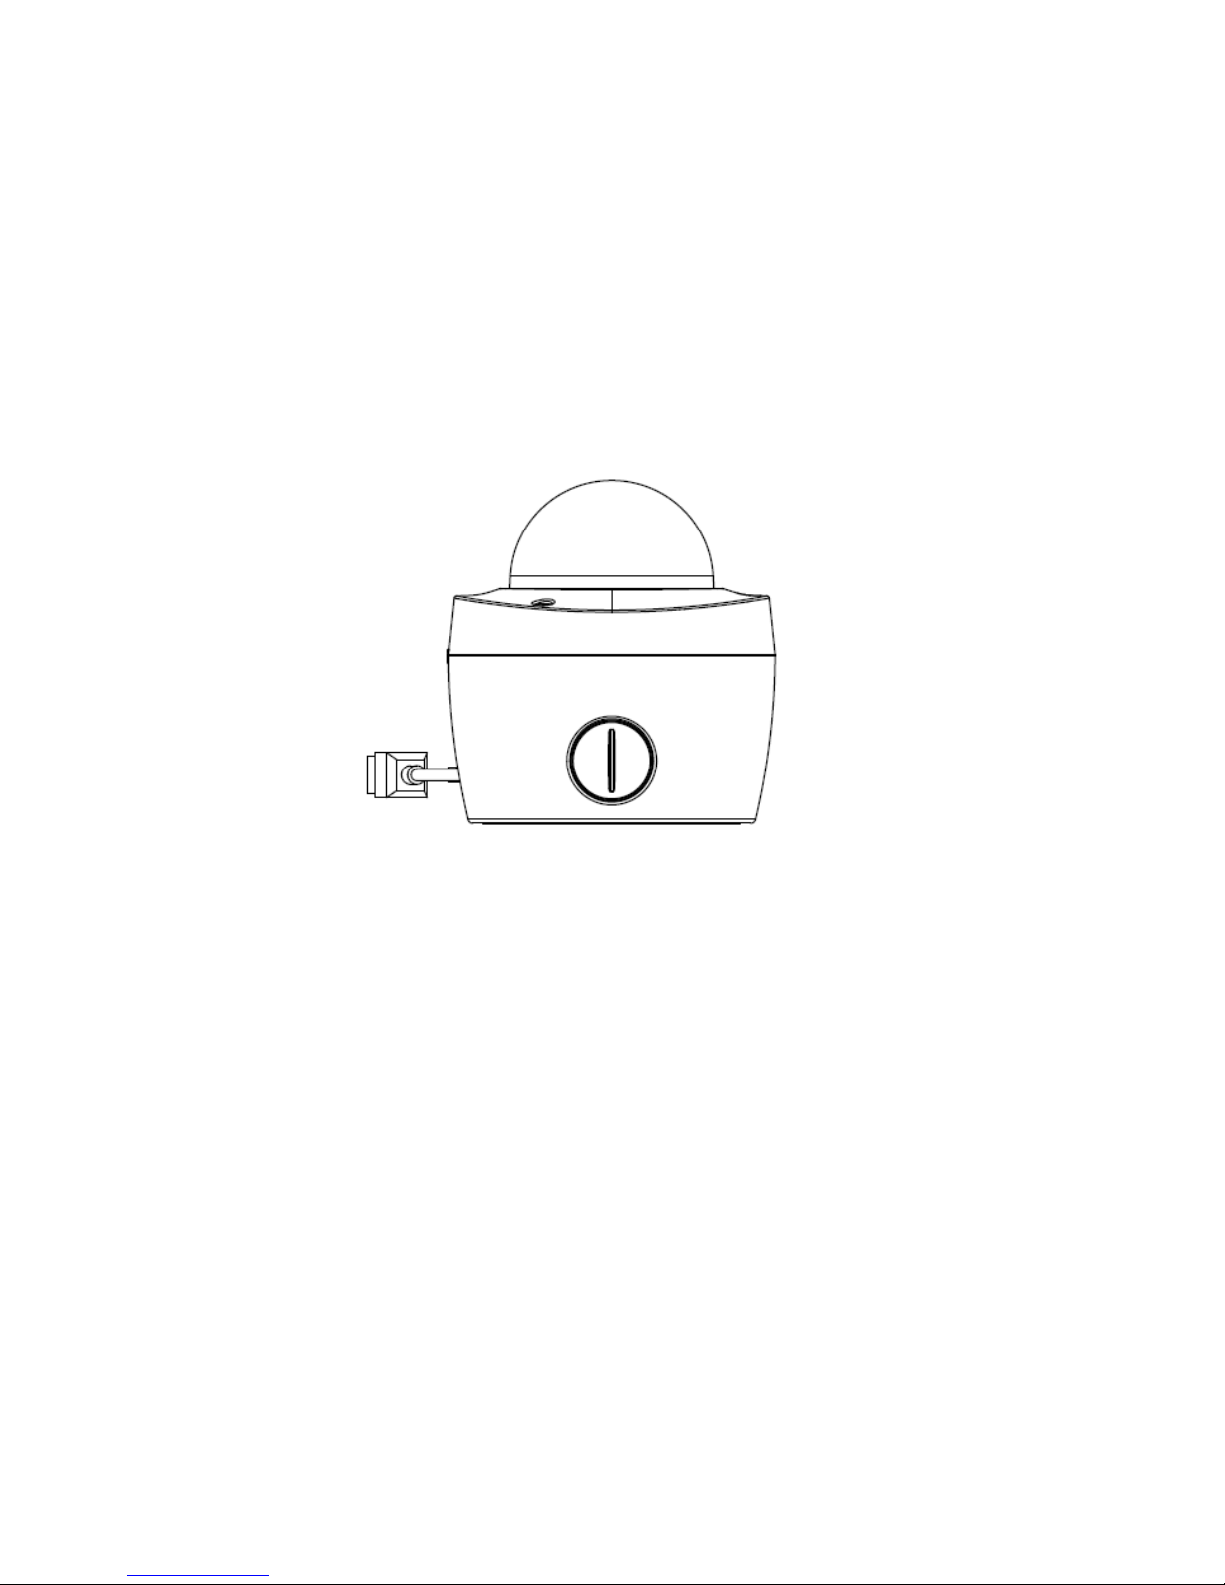
2. Installation
1. Remove the Dome Cover:
a. Loosen four Trox (T20) and remove dome cover.
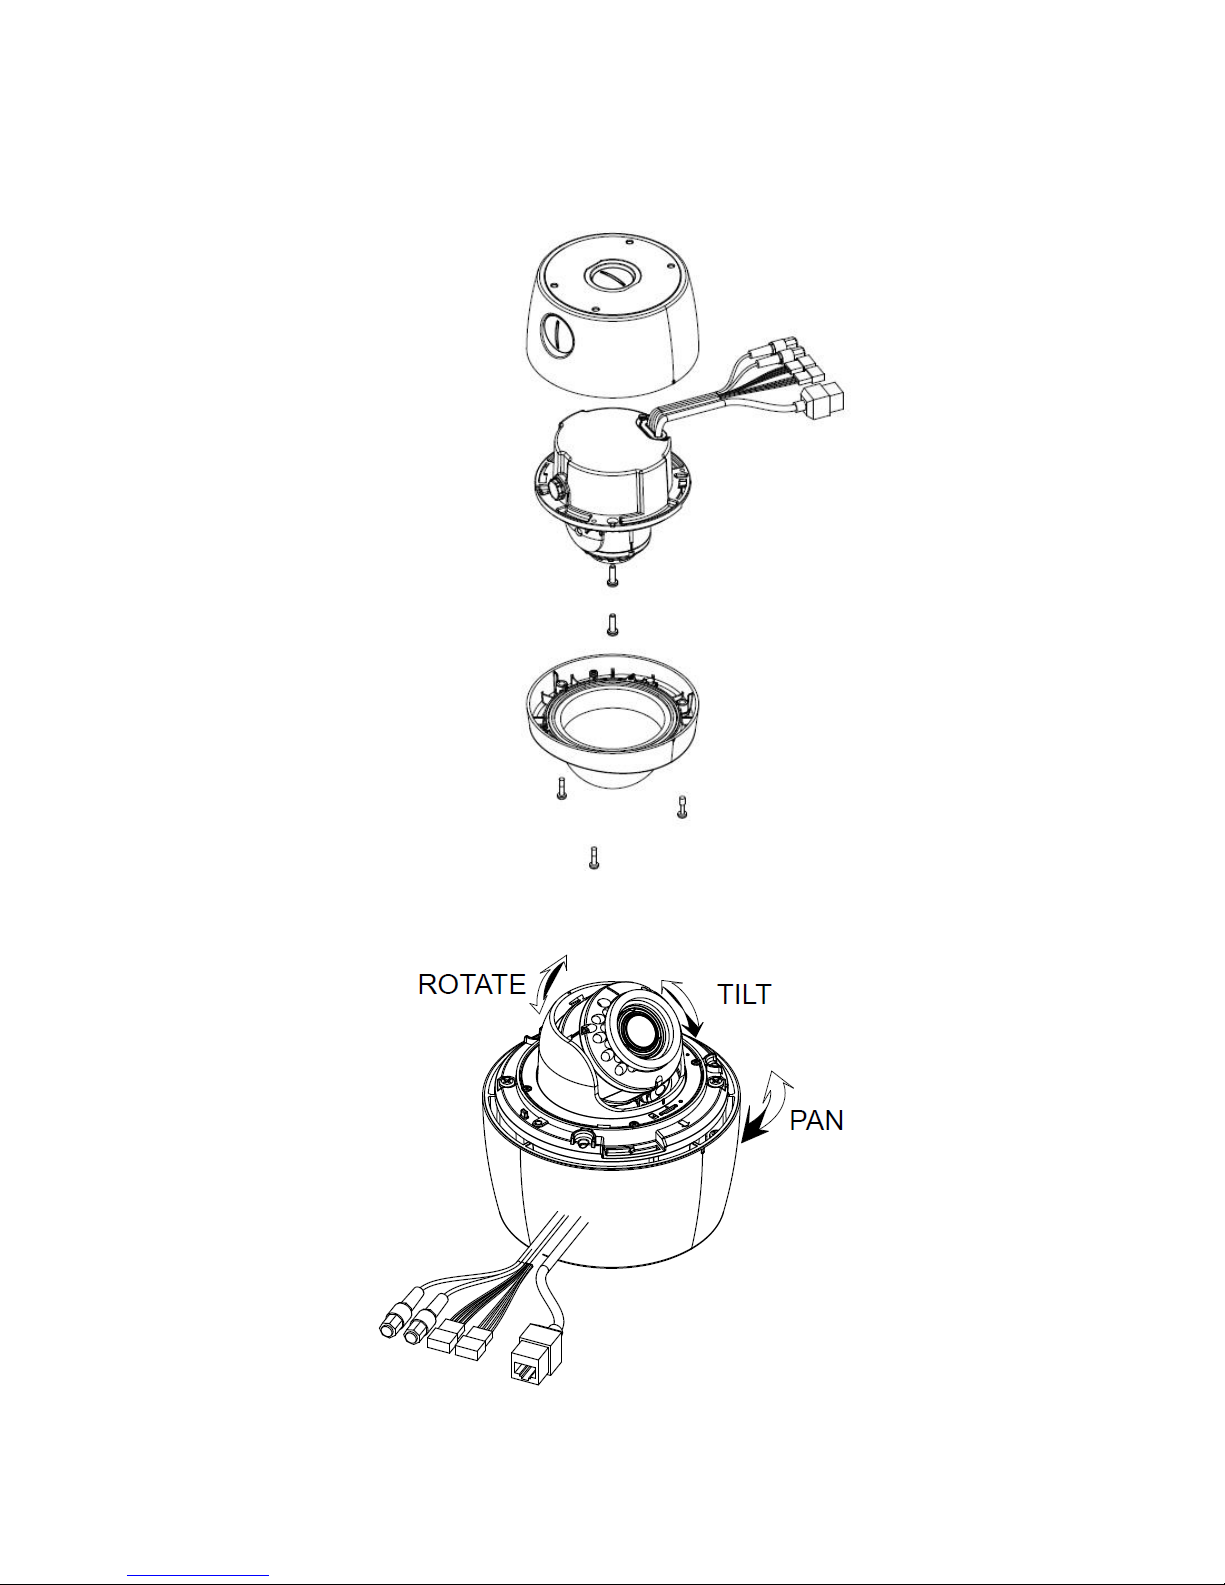
2. Control:
a. Adjust the IP Camera lens up/down/left/right to fit the desired position.
6
7
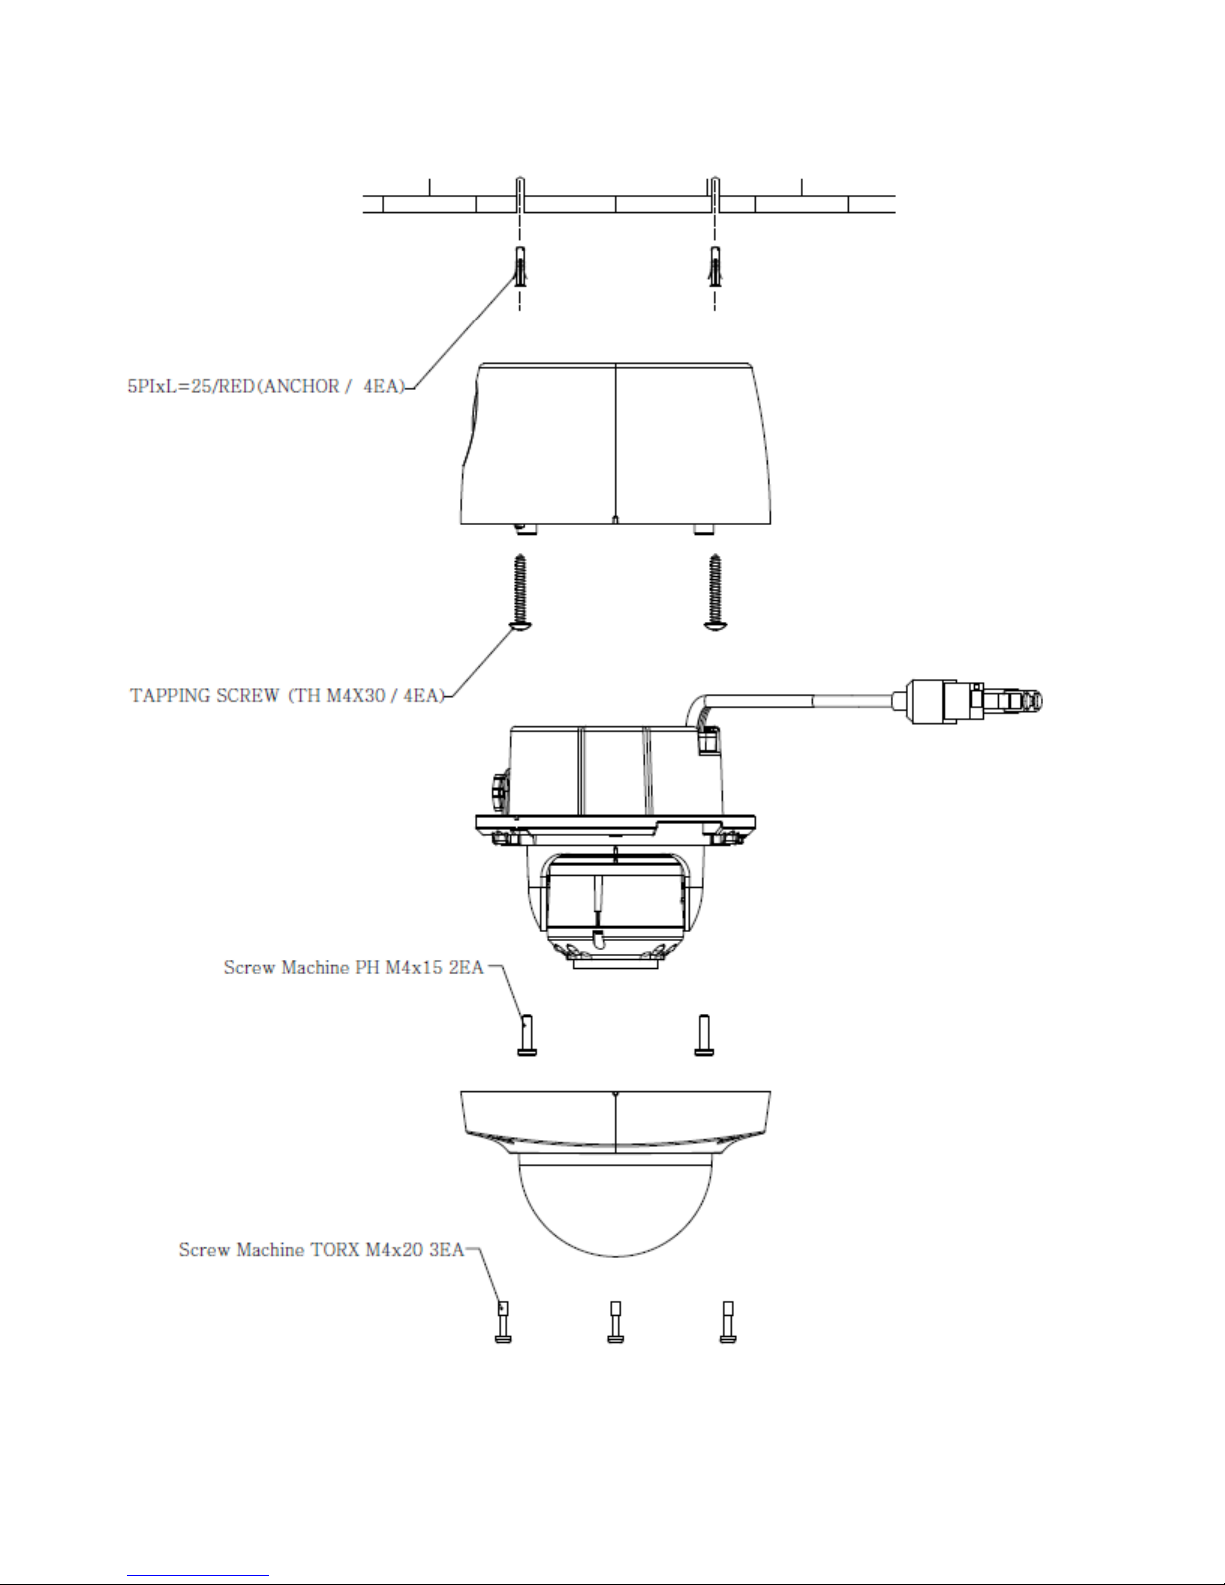
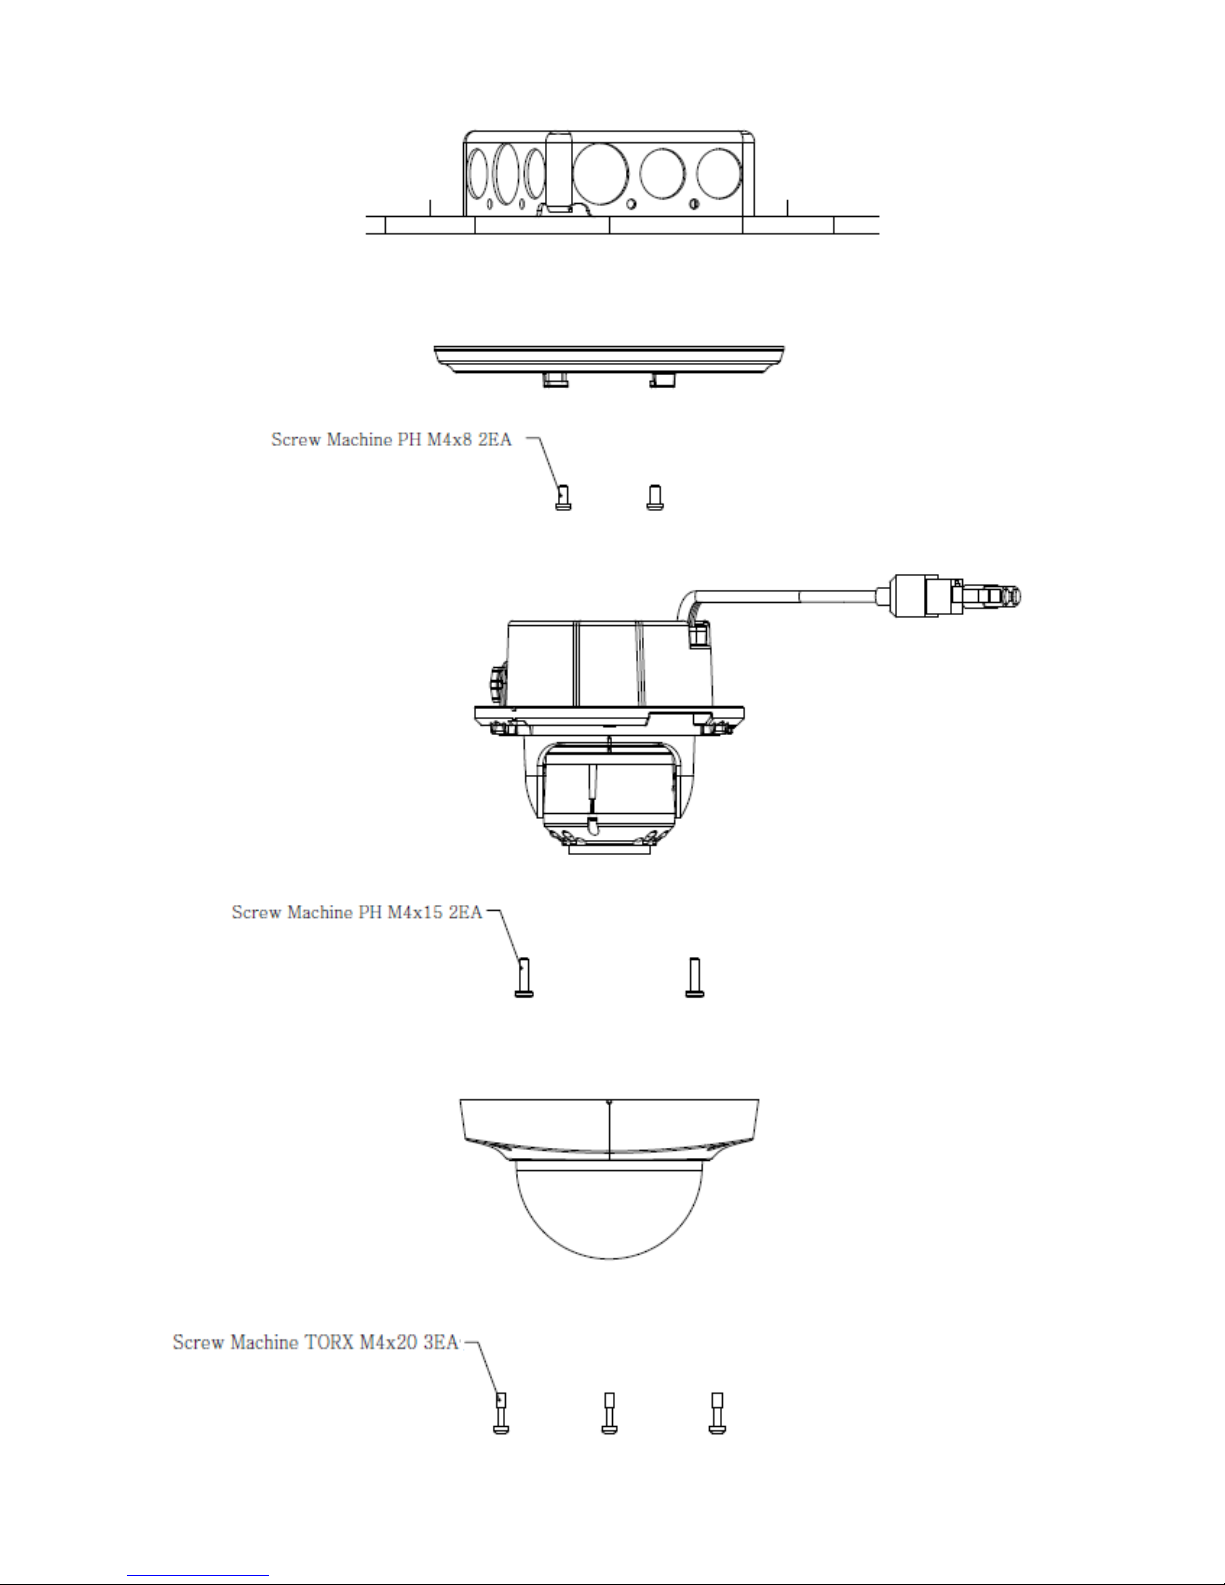
3. Surface Mount:
8
4. In ceiling Mount:
9
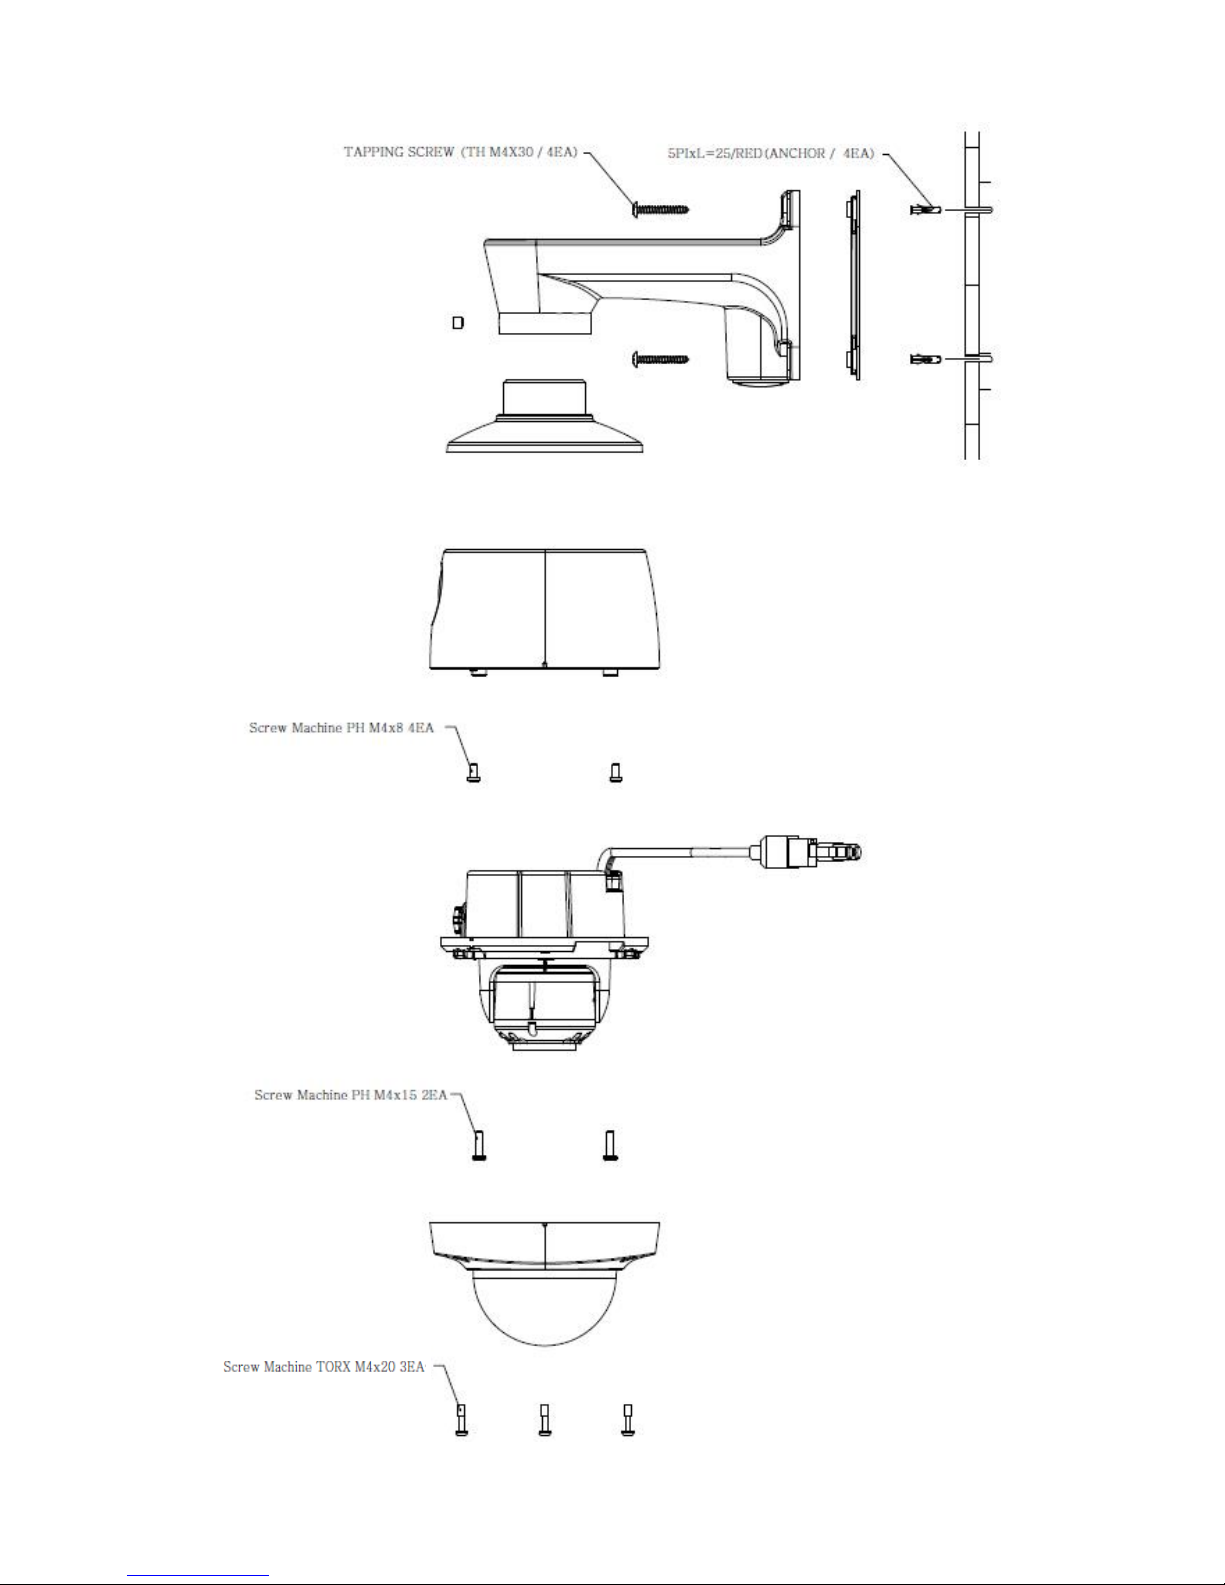
5. Wall Bracket Mount:
10
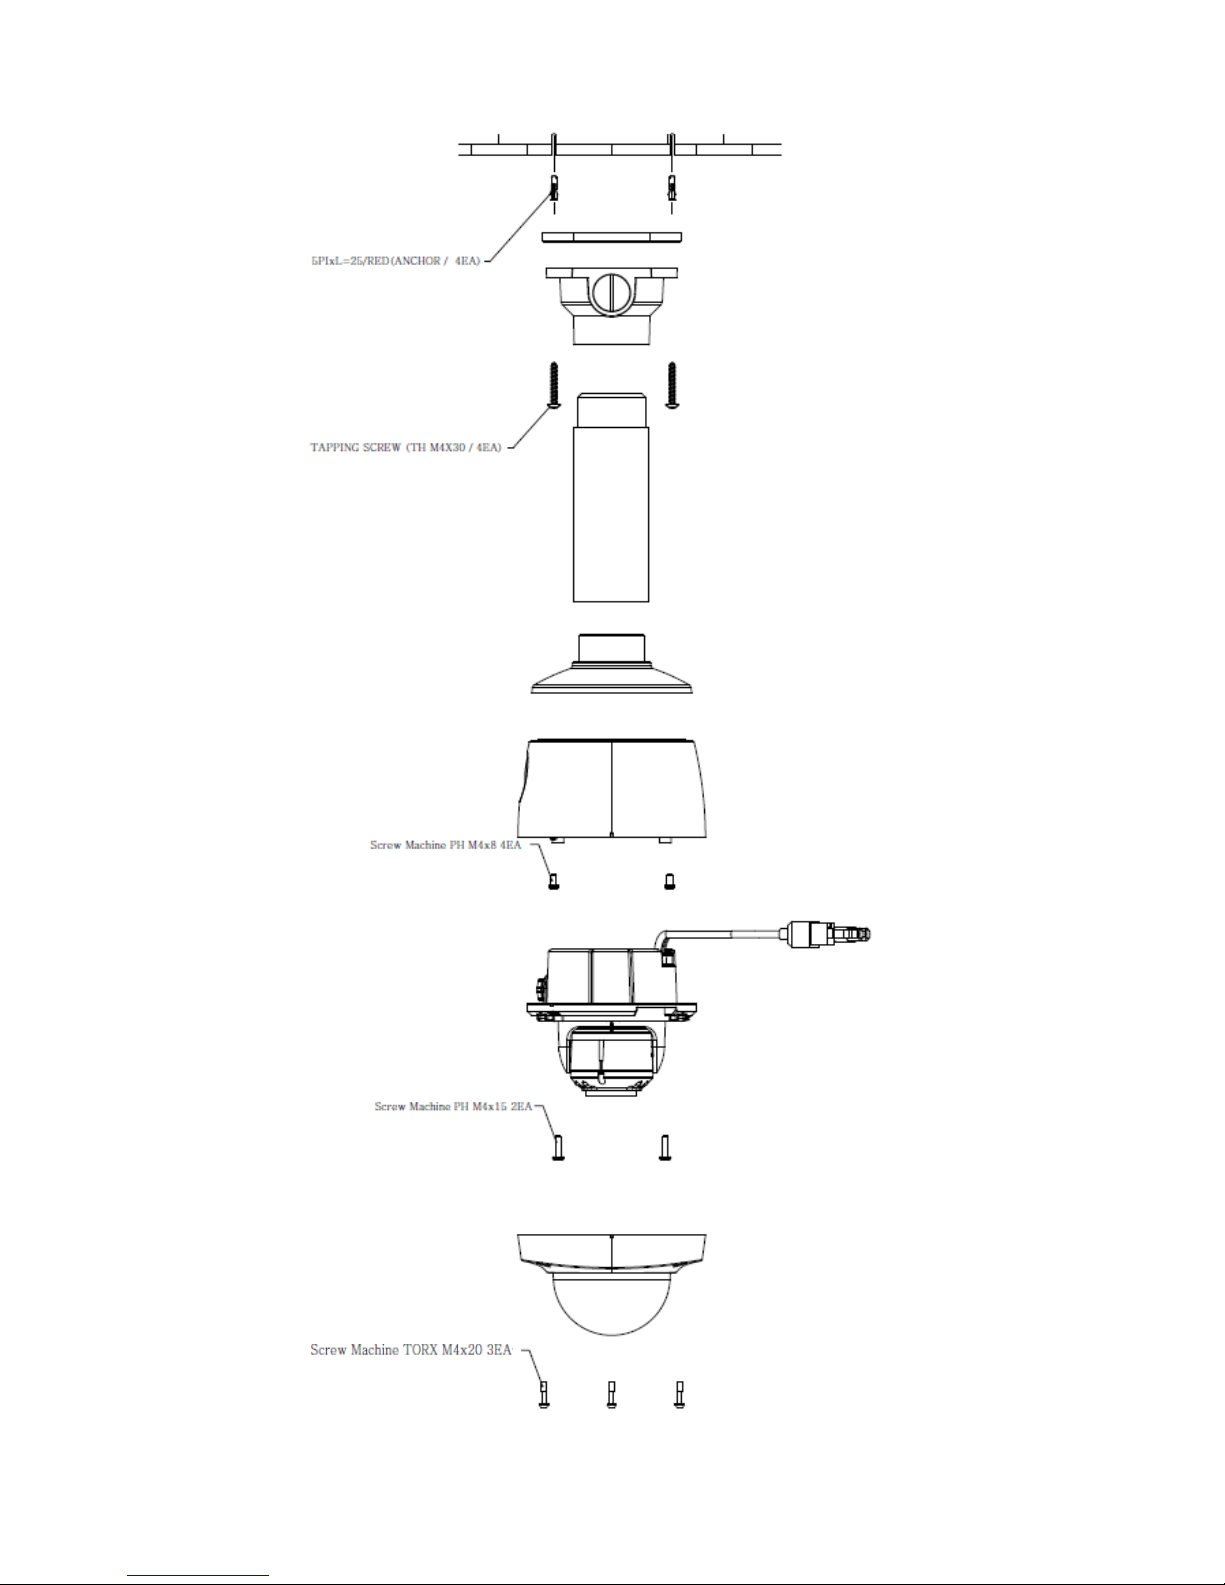
6. Ceiling Mount:
11
3. Accessing the Camera
Follow the instructions in the IP Camera Installation Guide to install the camera. This IP Camera can be accessed
on most standard operating systems and web browsers. For the best performance, Windows 7 and Internet
Explorer 9 (32bit) is recommended.
3.1 Access from a Browser
1. Open a web browser (Internet Explorer 9 32 bit recommended).
2. Enter the IP address or host name of the IP Camera in the Location/Address field of the browser and press
Enter.
3. A dialog box will pop up to Log-In. The default user name is ADMIN and the default password is 1234.
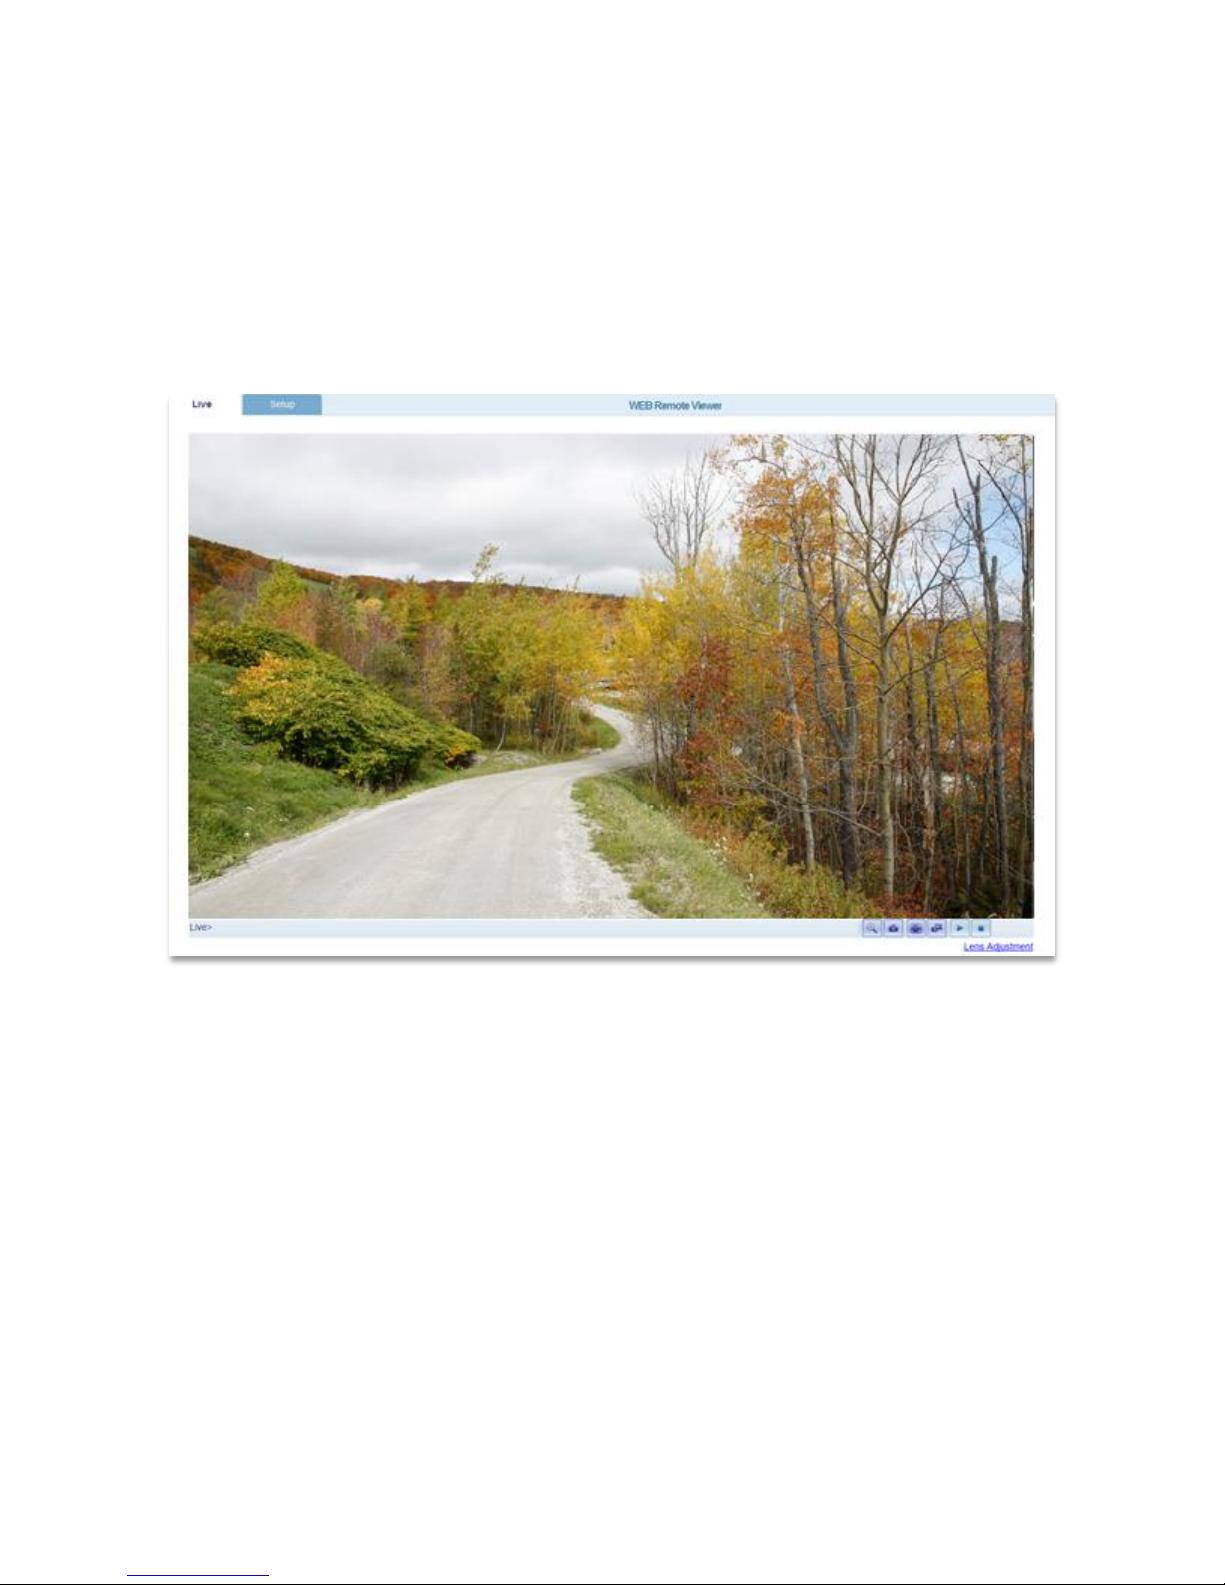
4. The IP Camera’s Live View will now be displayed on the web browser.
Note: The layout of the live view page for the IP Camera may have been customized to meet specific requirements.
Consequently, some of the examples and functions featured here may differ from a user’s experience.
3.2 Accessing the IP Camera from the Internet
Once installed, the IP Camera is accessible on the Local Area Network (LAN). Configure the router/firewall to allow
incoming data traffic to access the IP Camera from the Internet. For security reasons, this is usually done through
a specific port. Please refer to the router/firewall documentation for further information and instructions.
12
 Loading...