

User’s Manual for LCD Monitor
320LEDK and 420LEDK

Note: Please read this Manual carefully before using the product!
Do not attempt to disassemble the product. If the product does not work, please contact us or our
dealer in your area.
Contents
I. Special Functions ...................................................................................... 4
II. Important Safety Precautions ................................................................... 4
III. Installation and Connection ..................................................................... 7
Packing List ................................................................................................................................ 7
Power Connection ..................................................................................................................... 7
Interfaces................................................................................................................................... 7
IV. Keys on the Control Panel ........................................................................ 9
V. Remote Control ...................................................................................... 11
VI. Basic Operations ................................................................................... 13
Startup ..................................................................................................................................... 13
Standby ................................................................................................................................... 13
Signal Source Selection ........................................................................................................... 14
Menu Operations .................................................................................................................... 14
Image ....................................................................................................................................... 15
Sound ...................................................................................................................................... 17
Settings .................................................................................................................................... 18
PC ............................................................................................................................................ 18
USB Multimedia Function ....................................................................................................... 19
VII. Display Mode ....................................................................................... 19
VGA Display Mode................................................................................................................... 19
HDMI Display Mode ................................................................................................................ 20

DVI Display Mode .................................................................................................................... 20
VIII. Accessory List ..................................................................................... 21
IX. Specifications ........................................................................................ 22
320LEDK .................................................................................................................................. 22
420LEDK .................................................................................................................................. 23
X. China ROHS Compliance ......................................................................... 24

I. Special Functions
1. Flicker-free and low-radiation LCD screen.
2. High-grade LCD screen, featuring high brightness, high contrast and wide viewing angle; quick
response, greatly reducing the ghosting of moving image.
3. Multiple input interfaces.
4. Progressive image processing with advanced motion compensation technology, eliminating
jaggies and blurring on the edge of moving images completely.
5. Dynamic contrast technology, improving definition and contrast of various images obviously.
6. Supporting high-definition progressive scan input: YPbPr, HDMI and DVI.
7. Enabling easy operation of all functions through remote control.
8. Energy-saving design.
9. (001\ 002\ 003\ 004\ 005\ 006) Input ports: VGA, component, S-Video, Video, HDMI, DVI and
USB; (007/008) input ports: VGA, Video and HDMI.
10. Supporting video output.
II. Important Safety Precautions
Thanks for purchasing our high-performance multi-functional LCD monitor. The product has
passed our rigid tests before delivery. However, improper use may cause electric shock or fire. To
ensure your safety and prolong the service life of the product, please read these safety precautions
carefully before use so as to follow them in use.
* In the following cases, please remove the power plug from the power outlet and contact our
maintenance personnel for repair:
a. The power cord or power plug is damaged or worn out;
b. The product falls down or the housing is damaged;
c. Although you perform all operations according to the instructions, the product cannot work
properly;
d. An external object or some liquid enters the product;

e. The product emits abnormal sound or smell.
* There is dangerous high voltage inside the product. No user
serviceable components are contained therein. For your
safety, you are not allowed to disassemble the product for
any repair. Please contact qualified maintenance personnel
for repair.
* Put the product in a well-ventilated place free of extreme
temperature and moisture. Do not expose it to direct
sunlight.
* The ventilation holes in the housing are designed to protect
the product against overheating and ensure the inside
components are durable and reliable. Be careful not to block
the holes.
* Do not embed the product into any place or device unless it
is well-ventilated.
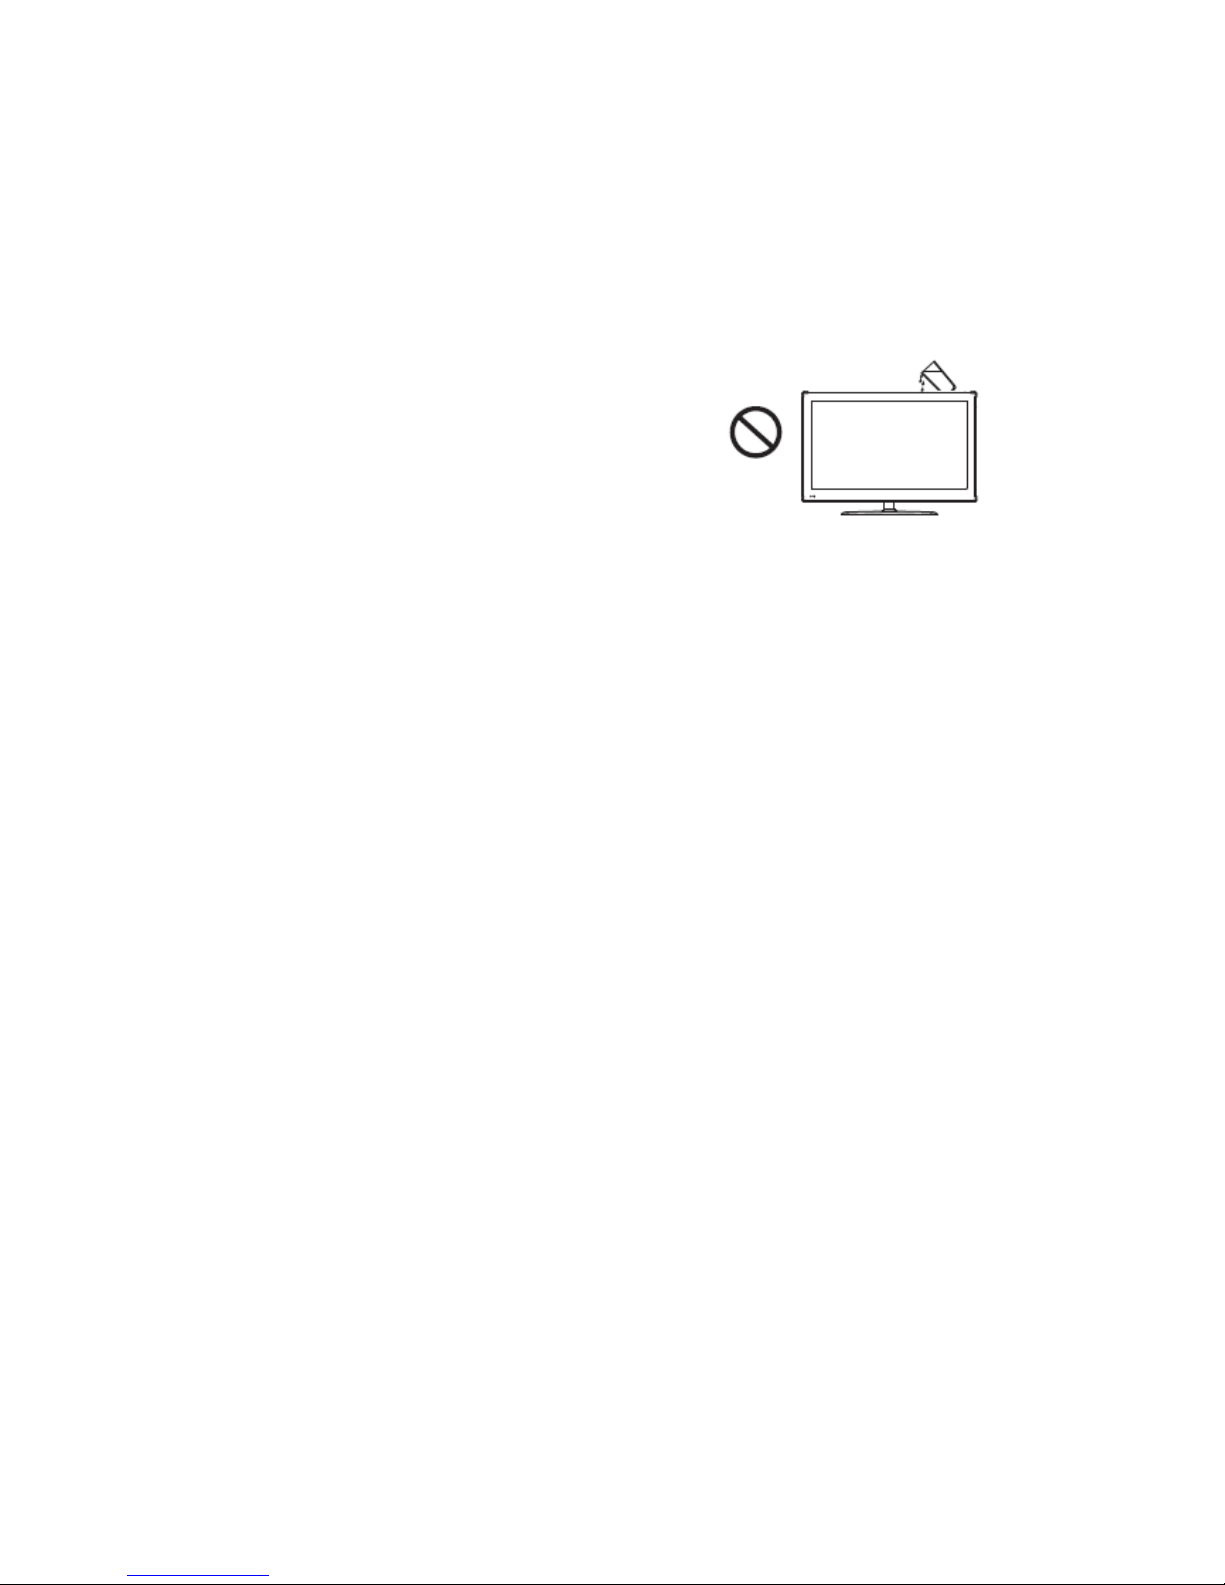
* Do not put the product on a rough surface, or it could fall
down and get damaged.
* Keep the product away from all water sources, or humid
basement and other similar environments.
* Remove the power cord before cleaning the product. Do not
use any liquid cleanser or spray cleanser but a slightly wet
soft cloth to clean the product. Never use any alcohol, solvent or ammonia-contained liquid to
wipe the screen.
* Read and understand all operating instructions and nameplate contents before use, and keep this
Manual carefully for future reference.
* It is dangerous to use any accessory other than that recommended by us.
* Protect the power cord from being stepped by any person or pressed by any object.
* Do not overload the power socket or extend the power cord, or there could be a risk of fire or
electric shock.
* Do not use any hard object to knock on, press or scratch the screen, or it could be easily
damaged.
* The technical parameters provided both in this Manual and on the outer package are subject to
change without further notice; in case of any difference between actual operation and the
descriptions herein, the former shall prevail.
* The product uses a power plug or an appliance coupler as the disconnection device; when
placing the product, check if the power cord or plug can be easily removed.
* Keep the product away from water drops and splashes. Do
not put any container filled with water (or any other
liquid) on the product, or there could be a risk of fire or
electric shock.
* Insert the power plug into the power socket reliably.
Unreliable connection could cause sparkles or fire.
* Do not put any inflammable or explosive object nearby the product.
* Do not insert any sharp or metal object or pour any liquid into the signal connector or ventilation
holes, or there could be a risk of short circuit, product damage or electric shock.
* Do not use the product immediately after moving it from a low-temperature place to a
high-temperature place, or install it in front of any air conditioner, for it could have a fault due
to condensation.
* Be careful not to impact the product, especially the screen, when moving it. If you move the
product in a cart, be careful to prevent it from falling down due to sudden brake, excessive
force or rough floor.
Warning:
The product is a Grade A product, so it could cause radio interference in the living
environment. In this case, the user needs to take feasible measures against interference.
III. Installation and Connection
Packing List
1. 1 LCD monitor; 2. 1 User’s Manual; 3. 1 remote control; 4. 1 pair of AAA (1.5V) batteries; 5. 1
power cord (or provided with the monitor).
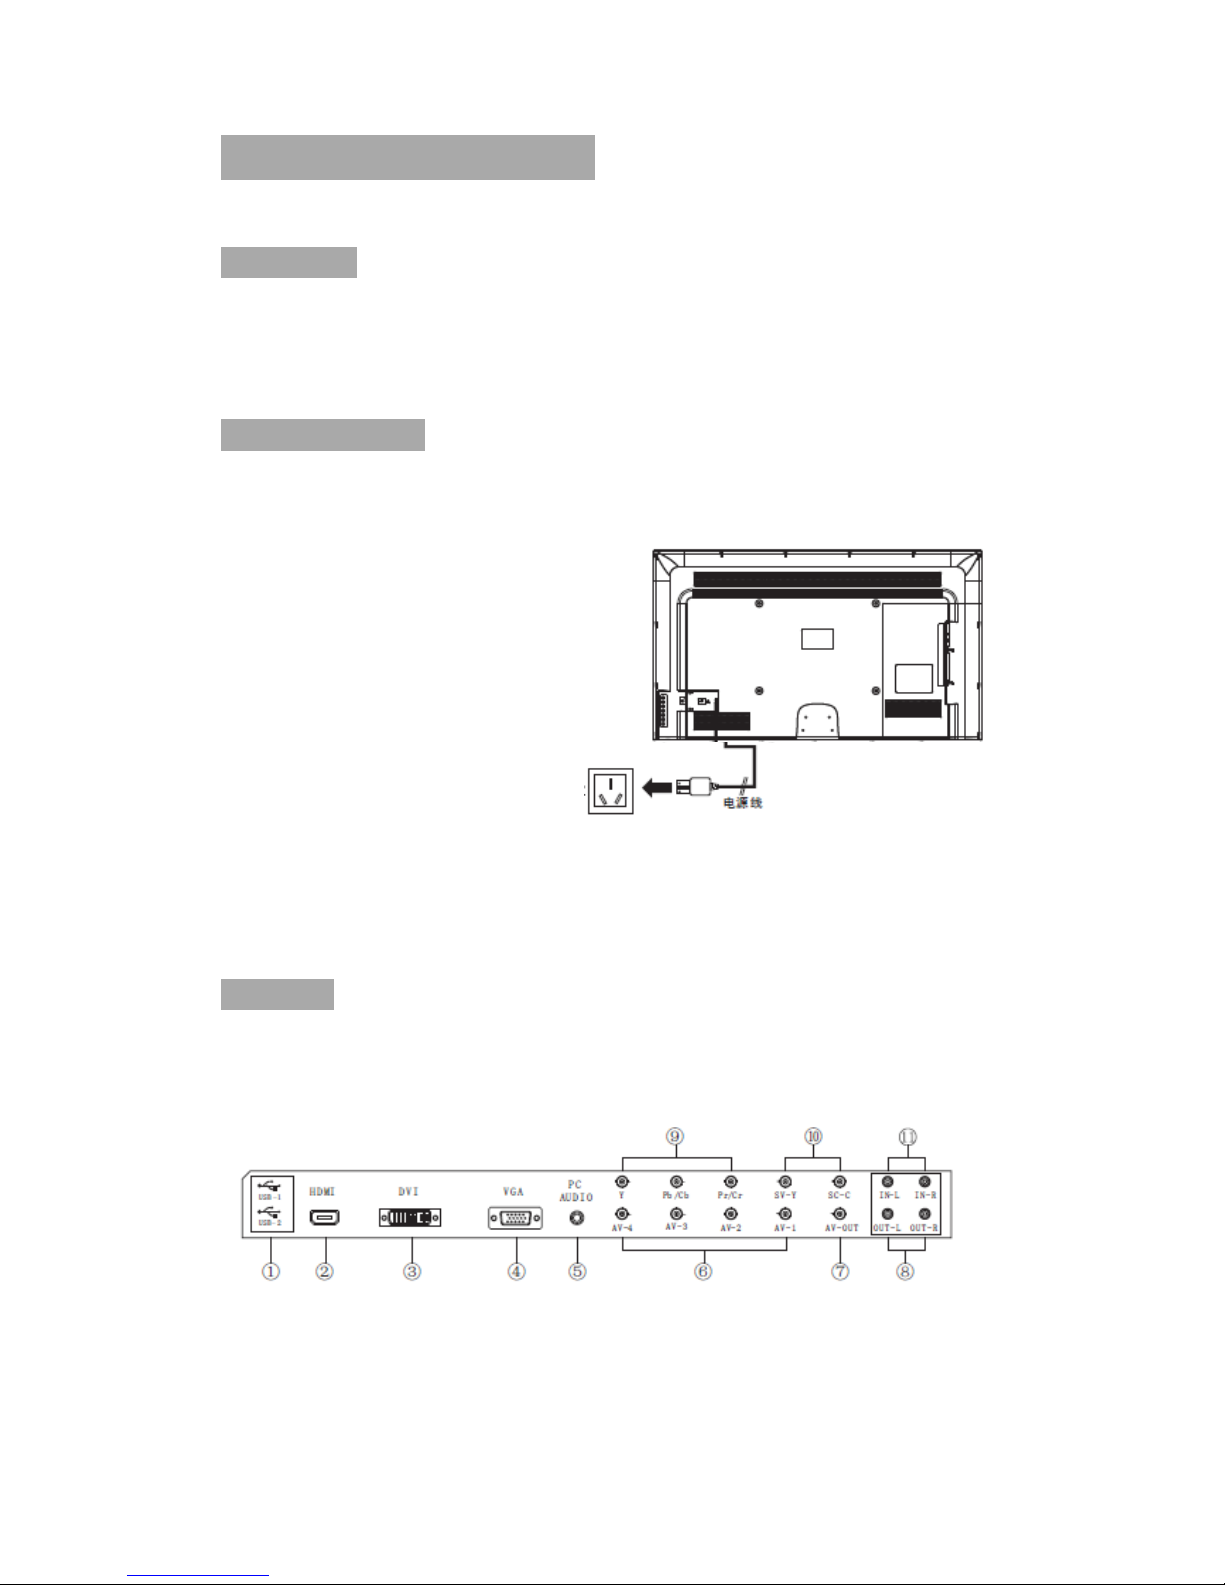
Power Connection
Note:
1. The product uses AC 100-240V 60/50Hz.
2. Please disconnect the product from power source if it will not be used in a long time.
To power socket AC 100-240V, 60/50Hz
Interfaces
32" and above (001\002\003\004\005\006) interfaces:
1. USB interface; 2. HDMI; 3. DVI; 4. VGA interface; 5. PC audio interface; 6. Video input
interface; 7. Video output interface; 8. Audio output interface (L/R); 9. YPbPr/YCbCr input
interface; 10. S-VIDEO input interface; 11. Audio input interface.
Power cord
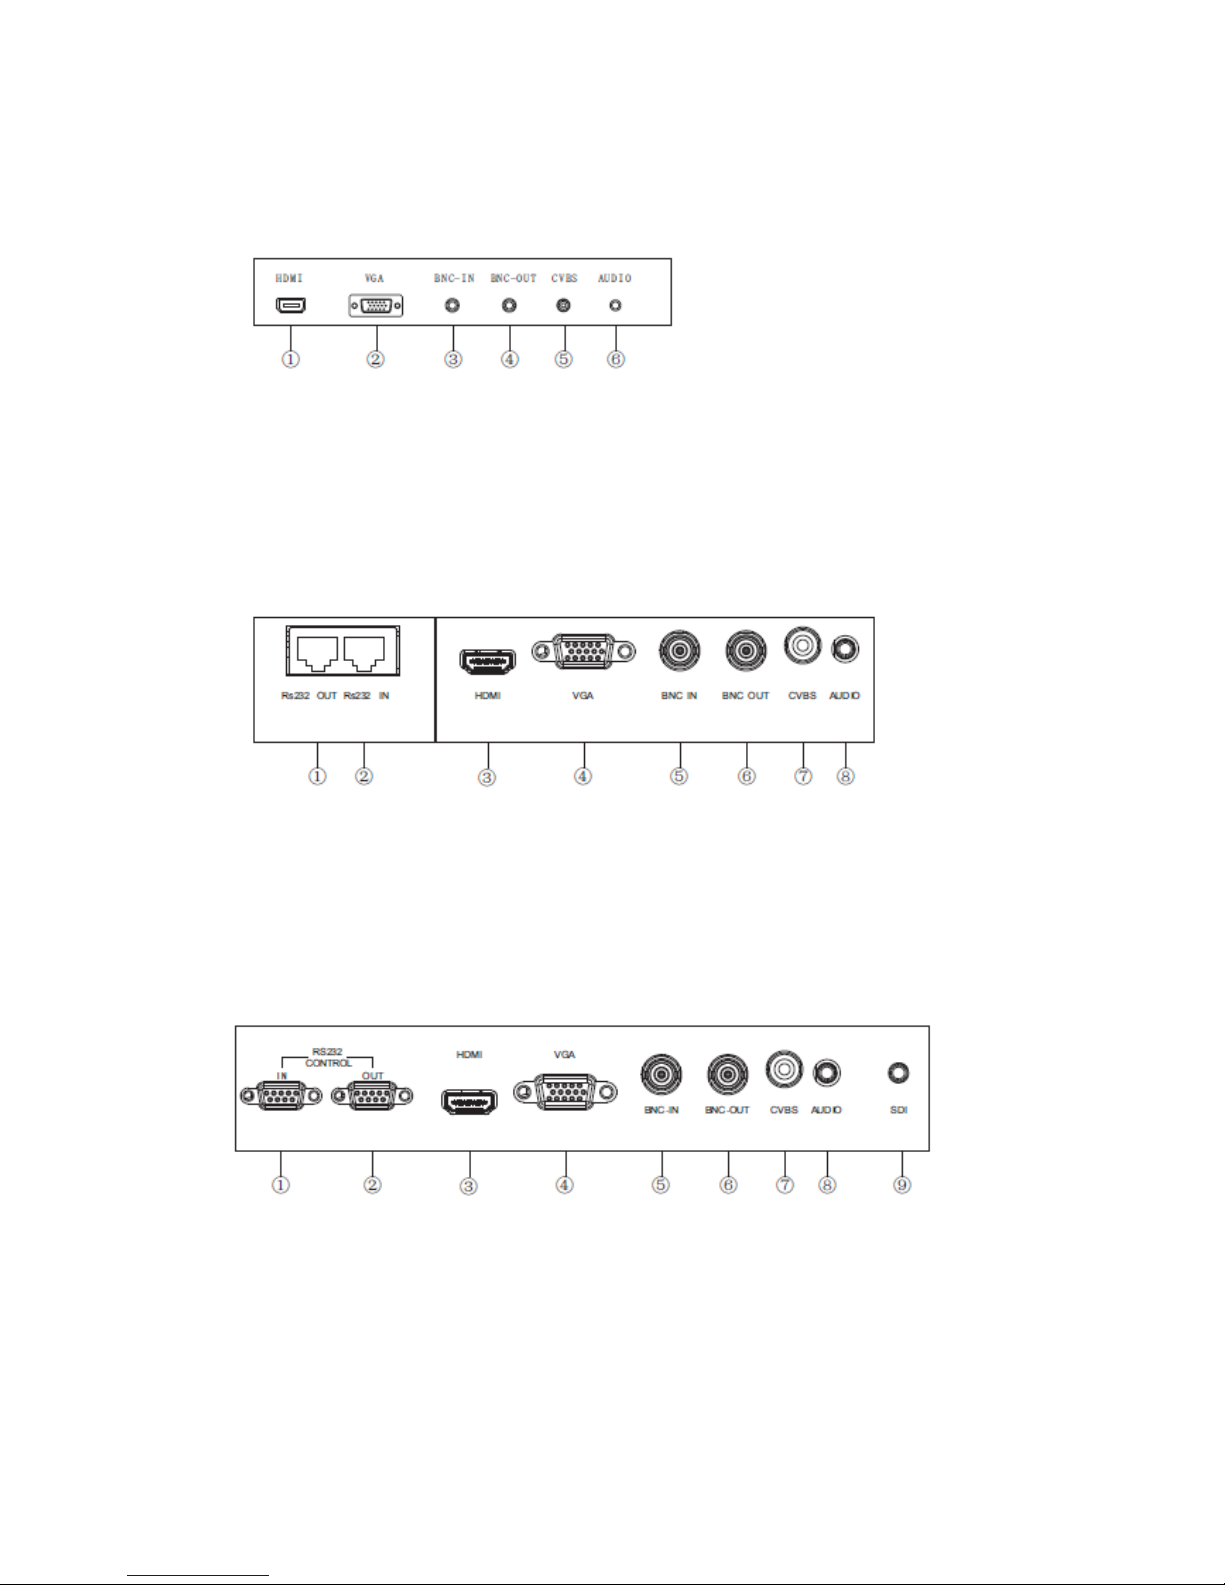
2. Below 32" (001\002\003\004\005\006) and 007 interfaces;
1. HDMI; 2. VGA interface; 3. BNC input interface; 4. BNC output interface; 5. CVBS input
interface; 6. Audio input interface.
(008) interfaces:
1. Rs232 OUT interface; 2. Rs232 IN interface; 3. HDMI; 4. VGA interface; 5. BNC input
interface; 6. BNC output interface; 7. CVBS input interface; 8. PC audio interface;
(002-S) interfaces:
1. Rs232 IN interface; 2. Rs232 OUT interface; 3. HDMI; 4. VGA interface; 5. BNC input
interface; 6. BNC output interface; 7. CVBS input interface; 8. PC audio interface; 9. SDI.

IV. Keys on the Control Panel
Keys on the control panel (001\002\003\004\005\006)
1. The remote control reception window and indicator.
2. SOURCE: Press it to enter the signal source selection menu to select a signal source.
3. +/-: In OSD menu operations, press them to select the item to be adjusted.
4. : VOL +/- keys; in OSD menu operations, press them to adjust the analog value of the
selected item.
5. MENU: Press it to enter the main menu.
6. : Power/standby key.
Note: The actual keys may be different from the picture. Please refer to the actual product.
Keys on the control panel (007\008)

1. The remote control reception window and indicator.
2. : Power/standby key.
3. MENU: Press it to enter the main menu.
4. : VOL +/- keys; in OSD menu operations, press them to adjust the analog value of the
selected item.
5. UP/DOWN: In OSD menu operations, press them to select the item to be adjusted.
6. SOURCE: Press it to enter the signal source selection menu to select a signal source.
Note: The actual keys may be different from the picture. Please refer to the actual product.

V. Remote Control
Installing the batteries:
Remove the battery compartment cover and install two AAA batteries (1.5V) into the battery
compartment, and make sure the polarities of batteries are aligned with the polarity symbols “+”
and “-” inside the battery compartment.
(Note: The actual appearance of the remote control may be different from the picture. Please
refer to the actual product.)
Keys on the Remote Control
Key
Description
Standby
Switch between working mode and standby mode
Power/Standby
Numeric Keys
Sound Mode
VOL +/- Keys
Mute
Image Mode
OK
Cursor Keys
Menu

Mute
Turn off the sound
Numeric keys
Input numeric value
Sound mode
Switch sound modes
Image mode
Switch image modes
Cursor keys
Up/down keys: Select an item to be adjusted;
Left/right keys: Adjust the analog value of the selected item
VOL +/-
Increase/decrease the volume
Menu
Display the main menu
Source
Display the signal source selection menu
OSD
Display the on-screen display information
Timer
Set timer to auto power off
Zoom
Switch the display modes
Color temperature
Switch the color temperature
OK (OK)
Confirm the current operation
Play ( )
Used for operations in USB mode
Pause ( )
Stop ( )
Rotate ( )
Previous ( )
Next ( )
Fast rewind ( )
Fast forward ( )
Precautions:
1. The remote control should aim at the reception window. Do not leave any obstacle between the

remote control and the reception window, or normal operation may be interfered.
2. Protect the remote control against violent vibration. Do not put or use the remote control in
direct sunlight, or the heat could cause it to deform.
3. The remote control may not work if the reception window is exposed to direct sunlight or strong
light. Please change the direction of the light or product, or get closer to the reception window
to operate the remote control.
4. Low battery voltage could lead to a shorter remote control distance. Please replace the battery
soon. If the remote control is to be kept idle for a long time, please remove the battery to avoid
the corrosion to the remote control caused by battery leakage.
5. Do not use batteries of different types or mix new batteries with old ones. Always replace the
batteries in pairs.
6. Do not put the batteries in fire, or charge or disassemble them, or charge, short circuit,
disassemble, heat or burn used batteries. Please dispose of waste batteries in accordance with
local environmental regulations.
VI. Basic Operations
Startup
Insert the power plug into the power socket, press the “ ” key on the control panel to turn on the
monitor; or press the “Standby” key on the remote control to turn on the monitor.
Standby
Press the “Standby” key on the remote control to enter the standby state.
★ Tips
The product adopts the energy-saving technology:
① If no signal is input in On state, the monitor will enter the standby state automatically after
about 5 min;
② When the auto power-off time arrives, the product will enter the standby state automatically;
③ If it is required to disconnect from the power completely, remove the power plug;

Signal Source Selection
Press the “Source” key on the remote control or the “SOURCE” key on the control panel to enter
the “Input Source” menu, press the up/down cursor keys on the remote control or the “▲/▼” keys
on the control panel to select a signal source, such as Video 1, Video 2, Video 3, Video 4, S-Video,
Component, PC, HDMI, DVI, USB 1 and USB 2. Then press the “OK” key on the remote control
or the “MENU” key on the control panel to switch to the selected input signal source.
Menu Operations
Press the “Menu” key on the remote control or the “MENU” key on the control panel to display
the main menu:
1. Press the left/right cursor keys on
the remote control or the “ ” keys on
the control panel to select a menu, like
[Image], [Sound], [Menu] or [PC].
2. Press the down cursor key on the
remote control or the “▼” key on the
control panel to enter the selected menu.
Below 32" (001/002/003/004/005/006/007)
and (008)
(002-S)
32" and above
(001/002/003/004/005/006)
Input Source
Video
Video
Input Source
Input Source
Video 1
Video 2
Video 3
Video 4
S-Video
Component
PC
Image mode
Contrast
Brightness
Color saturation
Color tone
Soft
4:3

3. Press the up/down cursor keys on the remote control or the “▲/▼” keys on the control
panel to select an item to be adjusted.
4. Press the left/right keys on the remote control or the “ ” keys on the control panel to
change or set the analog value of the selected item.
5. When the main menu appears on the screen, you can press the “Menu” key to exit from the
main menu. When a submenu appears on the screen, you can press the “Menu” key to return to the
previous menu. Press the “Source” key to enter the “Input Source” menu and press it again to exit.
6. In menu operations, the currently inoperable items will turn grey.
7. The User’s Manual describes the menu
operations under Video 1 as an example; menu
operations for other signal sources are
basically identical.
Image
Select to enter the submenu [Image],
press the up/down cursor keys on the remote
control or the “▲/▼” keys on the control
panel to select an item to be adjusted, and then
press the left/right cursor keys on the remote
control or the “ ” keys on the control panel to change the analog value or status of the
selected item. (See the table below)
★ Tips
The analog values of contrast, brightness,
color saturation, color tone and definition
adjusted by the user will be saved
automatically as the user mode.
★ Image Mode shortcut keys on remote
control: Press the “Image Mode” key on the
remote control to switch among four modes as
follows: Standard, Soft, User and Bright.
Adjust Select Menu: Exit
(Series other than 002-S)
Adjust Select Menu: Exit
Image mode
Contrast
Brightness
Color saturation
Color tone
Definition
Soft
4:3
Standard
(002-S)
Adjust Select Menu: Exit
Image mode
Contrast
Brightness
Color saturation
Color tone
Definition
Soft
4:3
9300K

Item
Function
Description
Image mode
Adjust the overall image effect
“[Standard], [Soft], [User] or [Bright]”
Contrast
Adjust the overall image layering
The bigger the analog value (0-100),
the higher the layering
Brightness
Adjust the overall image brightness
The bigger the analog value (0-100),
the higher the brightness
Color
saturation
Adjust the color depth
The bigger the analog value (0-100),
the darker the color
Color tone
Adjust the color tone
The bigger/smaller the analog value
(0-100), the greener/more purple the
tone
Definition
Adjust the image definition
The bigger the analog value (0-100),
the higher the definition
Aspect ratio
Adjust the image display scale
[Full Screen], [4:3], [PC], [Movie] or
[Subtitle] (vary with the input signal)
Color
temperature
Adjust the overall color temperature
[Standard], [Warm] or [Cold] (series
other than 002-S)
[3200K], [6500K], [9300K] and
[13000K] (002-S)
Noise
reduction
Set the noise reduction level
[Medium], [High], [Off] or [Low]

Sound
Select to enter the submenu [Sound], press
the up/down cursor keys on the remote control or the
“▲/▼” keys on the control panel to select an item to
be adjusted, and then press the left/right cursor keys on
the remote control or the “ ” keys on the control
panel to change the analog value or status of the
selected item. (See the table below).
★ Tips
① Normally, please set the balance to 0.
② The analog values of treble and bass adjusted by the user will be saved automatically by the
product as the user mode.
★ Shortcut keys on remote control
Sound Mode: Press the “Sound Mode” on the remote control to switch among four modes as
follows: Standard, Music, Movie and User.
Mute: Turn on/off the mute mode.
VOL +/- keys: Press the “VOL +/-” keys on the remote control to adjust the volume.
Item
Function
Description
Sound mode
Select a sound effect
[Standard], [Music], [Movie] or [User]
Treble
Adjust the treble
The bigger the analog value (0-100),
the higher the treble
Bass
Adjust the bass
The bigger the analog value (0-100),
the higher the bass
Balance
Adjust the balance between left and
right tracks
Slide to the left/right to increase the
left-track/right-track volume
(L50-R50)
Sound mode
Treble
Bass
Standard
Adjust
Select Menu: Exit
Sound mode
Treble
Bass
Standard

Settings
Select to enter the submenu [Settings],
press the up/down cursor keys on the remote
control or the “▲/▼” keys on the control panel
to select an item to be adjusted, and then press
the left/right cursor keys on the remote control or
the “ ” keys on the control panel to adjust
the status of the selected item. (See the table below)
Item
Function
Description
Menu language
Set the menu language
[Chinese] or [English]
Menu display time
Set the menu display time
[15s], [30s], [45s] or [60s]
Menu transparency
Set the menu transparency
The bigger the analog value (0-100),
the higher the transparency
Blue screen
Set whether it displays blue
screen or not if no signal is input
[On] or [Off]
Sleep timer
Set a time for auto standby
[Off], [15min], [30min], [45min],
[60min], [90min], [120min] or
[240min]
Reset
Restore the factory default
settings
Restore the factory default settings
PC
Select to enter the submenu [PC], press the
up/down cursor keys on the remote control or the
“▲/▼” keys on the control panel to select an item to
be adjusted, and then press the left/right cursor keys on
the remote control or the “ ” keys on the control
panel to change the analog value or status of the
selected item. See the table below.
Menu language
Menu display time
Menu transparency
Chinese
60s
0
Adjust
Select Menu: Exit
Auto adjustment
Horizontal position
Vertical position
Adjust
Select Menu: Exit

Item
Function
Description
Auto adjustment
Auto adjust the screen
Press the right key on the remote control to
auto adjust to the best display effect
Horizontal position
Adjust the horizontal position
Move the screen display left and right
Vertical position
Adjust the vertical position
Move the screen display up and down
Frequency
Adjust the frequency
Adjust the frequency to adjust stability and
definition
Phase
Adjust the phase
Adjust the phase of the pixel frequency
USB Multimedia Function
Insert the USB storage device to the USB interface
of LCD monitor, press the “SOURCE” key on the remote
control or control panel to select the USB signal source,
and then press the “OK” key.
VII. Display Mode
VGA Display Mode
No.
Mode
Resolution
Refresh rate
1
VGA
720×400
70 Hz 2 640×480
60 Hz
3
SVGA
800×600
60 Hz
4
XGA
1024×768
60 Hz
5
WXGA
1360×768
60 Hz
6
WUXGA
1920×1080
60 Hz
Photo Music Movie Text

The operating mode 1920×1080@60Hz is applicable for all models except
24B32/32B61/19B16/19B22/32B22.
HDMI Display Mode
No.
Mode
Resolution
Refresh rate
1
SD
720×480
60 Hz
2
720×576
50 Hz
3
1280×720
50 Hz
4
1280×720
60 Hz
5
HD
1920×1080
50 Hz
6
1920×1080
60 Hz
DVI Display Mode
No.
Mode
Resolution
Refresh rate
1
VGA
720×400
70 Hz
640×480
60 Hz
2
SVGA
800×600
60 Hz
3
XGA
1024×768
60 Hz
4
SXGA
1360×768
60 Hz
5
WXGA
1600×900
60 Hz
6
WUXGA
1920×1080
60 Hz
The operating mode 1920×1080@60Hz is applicable for all models except
24B32/B61/19B16/19B22/32B22.

VIII. Accessory List
* The package shall include the following items:
Item
Name
1 LCD monitor
1 power cord
(provided with Series B32 and B61)
1 User’s Manual
1 remote control
[1 pair of AAA batteries (1.5V)]
1 Warranty Card
User’s
Manual
Warranty
Card

IX. Specifications
320LEDK
Model name
32" (008)
Physical resolution
1366 × 768
Pixel pitch
0.51075 (H) mm × 0.51075 (V) mm
Response time
6 ms
Brightness
300 cd/m2 Contrast
1200:1
Viewing angle
176°/176°
Chroma
16.7M
System functions
Contrast, brightness, definition, color saturation, color tone, signal
switching, color temperature adjustment, refresh rate switching and
running state display
Control mode
RS232 centralized control (optional) and key control (infrared remote
control)
Input voltage
AC 100-240V
Power consumption
75 W
Dimension
732.4 mm × 431.9 mm × 70.6 mm (thickness)
Net weight/gross
weight
5.5 Kg/7.5 Kg (carton)
Wall mounting holes
100 mm × 100 mm
Installation method
Through the wall mounting holes (screw size: M4)
Housing material
Plastic
Environmental
protection standard
All components and packing materials comply with the international
environmental protection standards

420LEDK
Model name
42" (008)
Physical resolution
1920 × 1080
Pixel pitch
0.4833 (H) mm × 0.4833 (V) mm
Response time
6 ms
Brightness
300 cd/m2 Contrast
1200:1
Viewing angle
176°/176°
Chroma
16.7M
System functions
Contrast, brightness, definition, color saturation, color tone, signal
switching, color temperature adjustment, refresh rate switching and
running state display
Control mode
RS232 centralized control (optional) and key control (infrared remote
control)
Input voltage
AC 100-240V
Power consumption
150 W
Dimension
963.3 mm × 558.9 mm × 70.6 mm (thickness)
Net weight/gross
weight
11 Kg/13.5 Kg (carton)
Wall mounting holes
300 mm × 200 mm
Installation method
Through the wall mounting holes (screw size: M6)
Housing material
Plastic
Environmental
protection standard
All components and packing materials comply with the international
environmental protection standards

X. China ROHS Compliance
Names and contents of toxic and hazardous substances or elements contained in the product
Component
Toxic and Hazardous Substance
Pb
Hg
Cd
Cr6+
PBB
PBDE
Screen
×
○ ○ ○ ○ ○
Housing
○ ○ ○ ○ ○
○
PCB assembly*
×
○ ○ ○ ○ ○
Power cord and
connecting cables
×
○ ○ ○ ○ ○
Metal parts
○ ○ ○ ○ ○
○
Packing materials*
○ ○ ○ ○ ○
○
Remote control
×
○ ○ ○ ○ ○
Loudspeaker
×
○ ○ ○ ○ ○
Accessories*
○ ○ ○ ○ ○
○
*: PCB assembly includes the PCB and its electronic components;
Packing materials include the carton and Styrofoam, etc.;
Other accessories include User’s Manual and so on;
○: The toxic and hazardous substance contained in all homogeneous materials of the
component does not exceed the limit requirement prescribed in the GB/T26572-2011
standards.
×: The toxic and hazardous substance contained in one or more homogeneous materials
of the component exceeds the limit requirement prescribed in the GB/T26572-2011
standards.
Provided by our material suppliers and verified by us, the data in the table above
indicates that the product contains hazardous substances. Due to the
limitation of the existing technology, the hazardous substances in some
materials cannot be replaced, although we have been striving to make

improvement for it.
The product has an Environmental Friendly Use Period of 10 years. The pollution control
symbol is shown on the right.
The EFUP is valid only when the user operates in normal conditions specified in the User’s
Manual.
Indicative Description of Regulations on Recycling and Disposal of Waste Electrical
and Electronic Products
When you no longer need this product or its service life expires, please send it to a qualified
recycling station in your area for recycling according to the Regulations on Recycling and
Disposal of Waste Electrical and Electronic Products, in order to protect the Earth.
This manual is only for reference; in case of any difference between the product and the
descriptions herein, the product shall prevail without further notice.
V1.1
 Loading...