

Page 1
INSTRUCTION MANUAL
Orion® StarShoot™ HD Video/
Web Broadcasting Camera
#52099
Providing Exceptional Consumer Optical Products Since 1975
Customer Support:
www.OrionTelescopes.com/contactus
Corporate Offices:
89 Hangar Way, Watsonville CA 95076 - USA
Copyright © 2014 Orion Telescopes & Binoculars
All Rights Reserved. No part of this product instruction or any of its contents
may be reproduced, copied, modified or adapted, without the prior written
consent of Orion Telescopes & Binoculars.
IN 514 Rev. A 04/14
Page 2
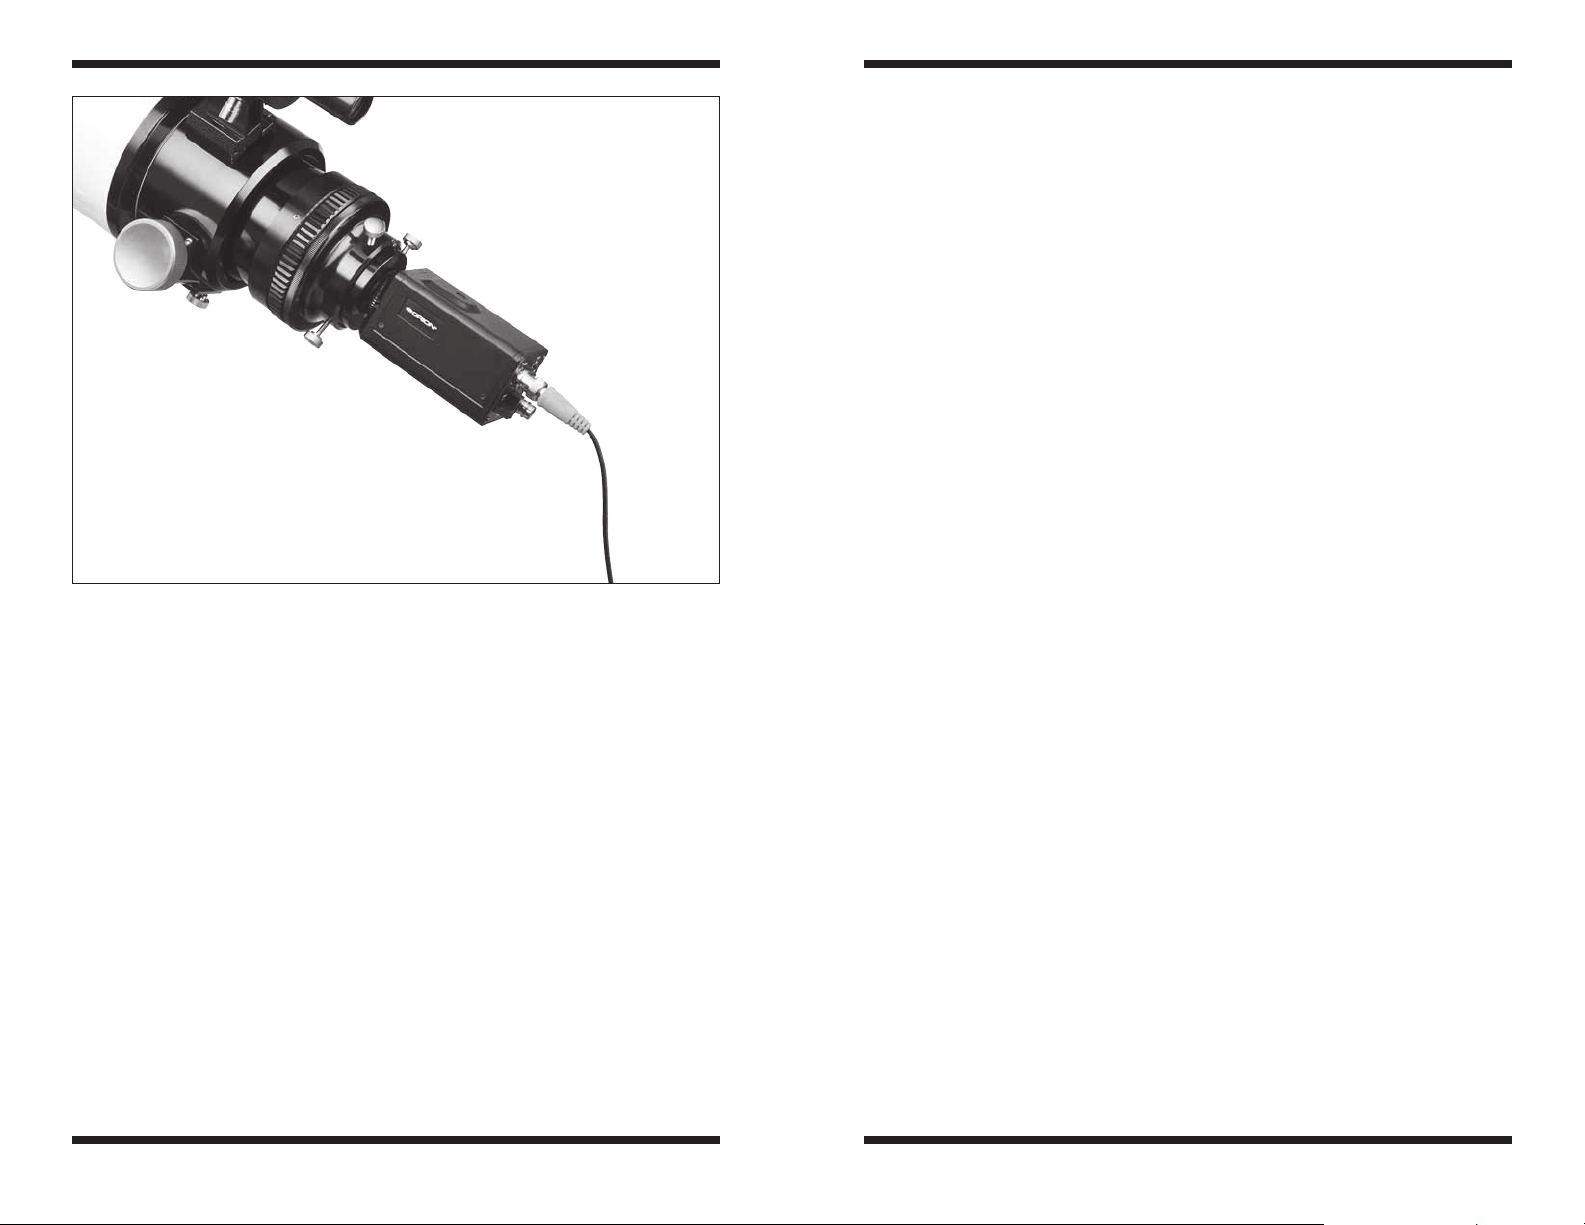
Figure 1. The SSHD attached to telescope for solar system imaging.
Congratulations on your purchase of the Orion StarShoot HD Video/Web Broadcasting Camera (SSHD).
The SSHD is a high resolution color video camera designed for Real-Time Live
observation of solar system objects (Moon, Planets and Sun with solar filter and
limited bright deep space objects).
The SSHD outputs analogue SD Video (CVBS) for standard TV’s in NTSC or
PAL region formats.
The SSHD also outputs digital uncompressed HD Video (HD-SDI) up to 1080p
resolution for HD TV’s and Projectors in HDMI format.
The SSHD also outputs digital uncompressed HD Video (HD-SDI) for Broadcast
industry compliance SMPTE 292.
The SSHD can be used for the following purposes:
• Lunar Imaging
• Planetary Imaging
• Solar Imaging
• Limited Deep Space Imaging (Bright Objects)
• Terrestrial Imaging
A computer is not required to use the SSHD as the manual buttons on rear of
camera controls all functions. However the included camera control software
enables a much more convenient method to control the SSHD camera features
by use of buttons, sliders and drop down menus.
The included video capture device enables the user to view and capture live
video in SD format on their computers.
Together with the video capture device the SSHD can be setup to broadcast live
video over the internet using services such as nightskiesnetwork.com
Parts List
• Orion StarShoot HD Video Camera (SSHD)
• 1.25" Nosepiece
• HDMI Convertor box and control cable (AUX)
• 24V Power Adapter
• 50ft serial extension cable
• 50ft BNC cable
• 50ft RCA cable
• 20ft HDMI cable
• BNC to RCA adapter
• USB to RS-232 Adapter
• USB Video Capture device
• Capture and Control software
• Manual
Video Resolution
The SSHD outputs both High Definition (HD-SDI/HDMI) video as well as
Standard Definition (SD/CVBS) video. The included HDMI convertor box converts the HD-SDI signal into a HDMI signal so that the output can be used on
standard HD-TV’s and HD-Projectors.
The HD and SD signals are outputted at the same time which gives the user the
benefit of having an SD viewing device near the camera and telescope for focusing and at the same time have the ability for the HD/HDMI viewing or recording
device to be located elsewhere.
For example a telescope could be placed outside with a small TV, Laptop or
Orion LCD-DVR (sold separately) for focusing while inside the audience could
be watching the HD signal on HD-TV or HD-Projector in the comfort of their own
home.
2 3
Page 3
In order to view on a standard TV (SD):
• Connect one end of BNC cable to HD-SDI output on back of SSHD.
• Connect other end of BNC cable to the HD-SDI IN on the HDMI
Convertor box.
• Connect 24V power adapter to HDMI Convertor box.
• The red LED on camera will light up to show that the camera is receiving
power.
• Connect RCA cable to SSHD by connecting RCA cable to CVBS output
using RCA to BNC adapter.
• Plug opposite end of RCA cable into TV RCA input.
• Select RCA input channel on TV.
Video should now be seen on TV screen.
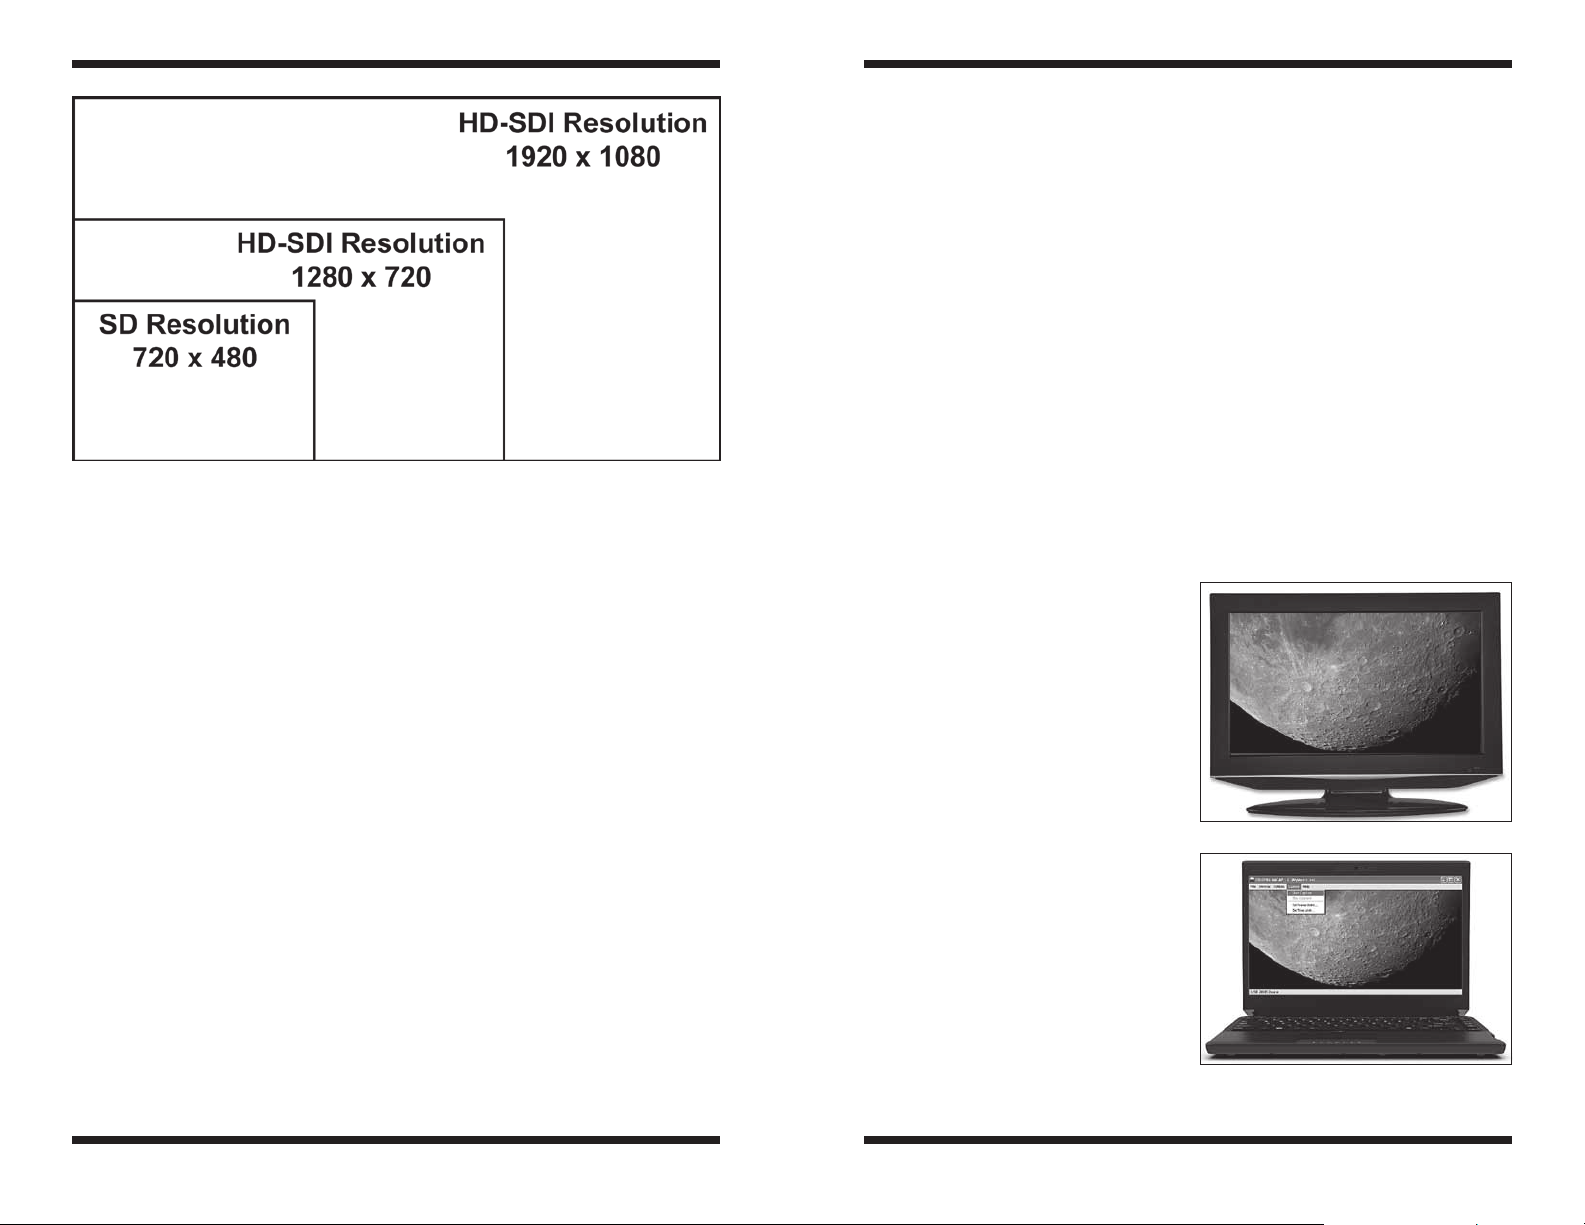
Figure 2. Standard Definition (SD) video resolution compared to High Definition (HD)
video resolution.
The HDMI output can be used on a computer monitor with Digital input (DVI) by
using a standard HDMI to DVI adapter (not included).
Viewing on TV
Users have the option to view in HD or SD or BOTH at the same time.
The SSHD uses a one cable solution in order to provide power, computer control
(RS-232) and HD video signal from the SSHD to the HDMI Convertor box. This
not only simplifies connections but also reduces weight on the camera and hence
the telescope.
An additional RCA cable (included) is used for the SD video signal.
See Figure 20 for cables types.
See Figure 21 for HDMI convertor box connections.
In order to view on a HD TV or HD Projector (HD):
• Connect one end of BNC cable to HD-SDI output on back of SSHD.
• Connect other end of BNC cable to the HD-SDI IN on the HDMI
Convertor box.
• Connect HDMI cable to HDMI Convertor box and HD-TV or HD-Projector
• Connect 24V power adapter to HDMI Convertor box.
• The red LED on camera will light up to show that the camera is
receiving power.
Video will now be seen on HD-TV screen.
Viewing on Computer or Laptop
in SD
In order to view and capture video in SD (720x480) on computer or laptop first
install drivers and capture software for the included video capture device (see
capture device instructions for details).
• Follow previous instructions
to view on standard TV (SD)
with the exception that the RCA
output cable should be plugged
directly into the video capture
device video input (yellow plug)
instead of a TV.
Viewing on
Computer or
Figure 3. TV as a displaying device.
Laptop in HD
In order to view and capture video in
HD (720p/1080p) on computer or laptop a HD capture device must be used.
We recommend the Orion HD Video
Capture Device (Sold separately).
Figure 4. Laptop as a displaying /
capture/broadcasting device.
4 5
Page 4
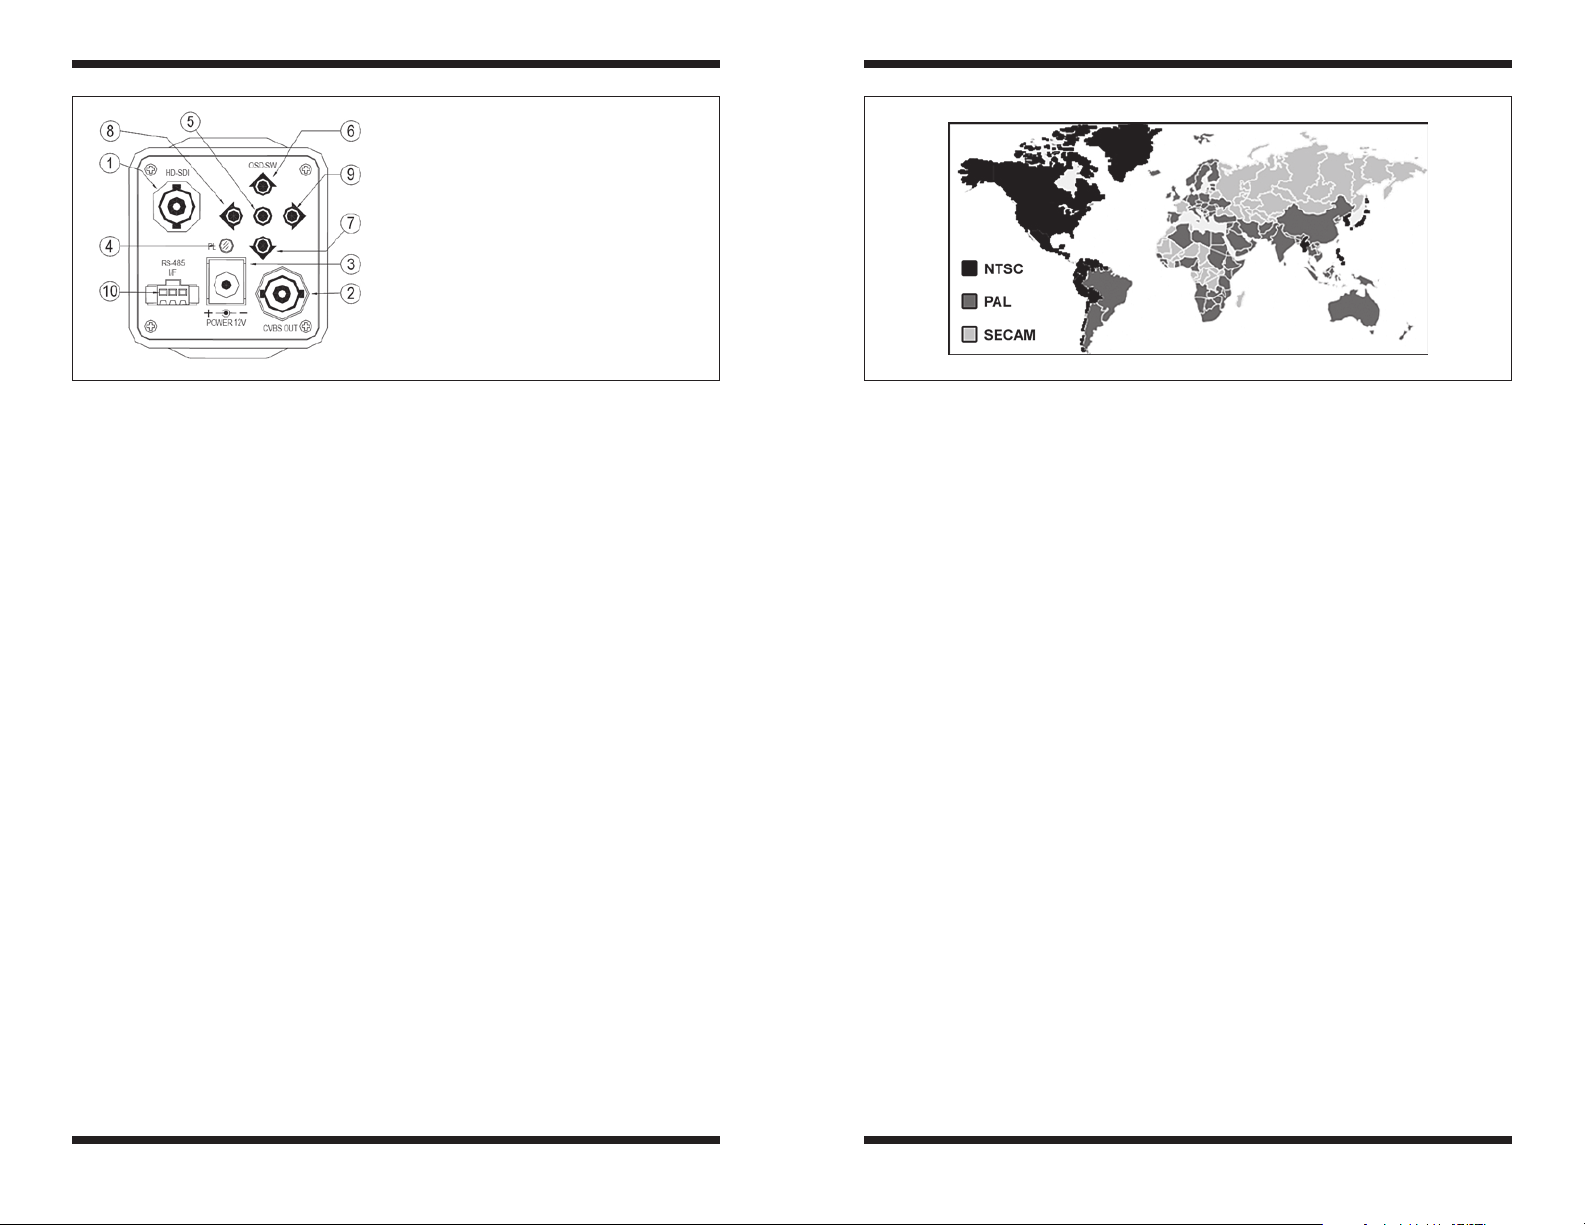
1. HD Video Out (SDI)
2. SD Video Out (CVBS)
3. Power In DC-Jack (disabled – power
comes from BNC cable instead)
4. Power On LED
5. “Center” Button
6. “Up” Button
7. ”Down” Button
8. ”Left” Button
9. ”Right” Button
10. RS-485: not used – control comes from
BNC cable instead)
Figure 5. Rear of Camera Figure 6. Worldwide TV formats
Operating Without a Computer
Camera Settings using buttons
The SSHD can be operated via computer software or alternatively manually by
using the buttons on the back of the camera. This option is beneficial for those
who do not wish to use a computer.
Using camera buttons
Press and hold center button to activate menu options.
Press left, Right, Up and Down to select and adjust.
Press exit to leave.
See section SSHD Manual Menu for available menu options
Selecting Video Format for Your
Country (SD TV Signal)
For standard TV there are 3 main broadcasting formats NTSC, PAL and SECAM
(Figure 6).
The SSHD can output NTSC or PAL TV signals from the SD /CVBS output.
For North America select NTSC.
For United Kingdom, Republic of Ireland, Australia, majority of European countries and China select PAL.
For SECAM countries some SECAM TV’s will also accept a PAL signal otherwise
either NTSC or PAL can be viewed and recorded on PC using the included Video
Capture Device.
See Region Map for all other countries (Figure 6).
NTSC/PAL TV System Selection
• For NTSC, turn on the power while pressing the [UP] button.
• For PAL, turn on the power while pressing the [RIGHT] button.
Enabling or Disabling SD and HD
Video Output
HD/SD (enable/disable):
• For HD enable or disable, turn on the power while pressing the
[LEFT] button,
• For SD enable or disable, turn on the power while pressing the
[DOWN] button.
Show Basic system setting:
• Turn on the power while pressing the [CENTER] button.
Note: Other camera controls are found via the On Screen Display Menu (OSD)
using the manual buttons or by using the computer control software. See relevant
sections for details.
Operating With a Computer
First install the Camera control software from CD. Future updates will be available on the product support page on the Orion website.
• Connect control cable to HD Convertor box AUX port.
• Connect serial extension cable to control cable and HD Convertor box.
• Connect other end of serial cable directly into COM port on computer.
6 7
Page 5

• If no COM port exist on
computer (such as the case in
most laptops) then use included
USB to RS-232 adapter and
drivers. See the USB to Serial
device manual for details.
• Run HD Camera control
Figure 7. Com Port settings.
software.
• Select COM PORT (number will
vary according to your computer
see below) and select open
COM Port (Figure 7).
• The SSHD can now be
controlled via computer.
Please note no menu options will function until the camera control software
has a valid open COM port. Once a
Figure 8. SetCOM.exe tool.
valid COM port has been opened, the
menu options will activate allowing
user selection.
The COM port number can be located
Figure 9. Com Port settings.
using either SetCOM.exe tool (Figure 8) provided on the USB to Serial device
CD or by looking at the COM setting of the USB to serial adapter (Prolific) from
within Device Manager (Windows) (Figure 9).
The SetCOM.exe tool also provides a convenient way to reassign the device to
another COM Port.
Computer Control Software
Select the tabs at the top of the submenus to navigate between submenus
(Figure 10).
Setup Menu
Display Control (Fi g u r e 11)
Figure 10. Submenus.
Figure 11. Display Control.
HDV Mode Frame Rate Resolution Bit Depth Scan
720P60
(74.25MHz/16 bit)
1080P30
(74.25MHz/16 bit)
720P30
(74.25MHz/16 bit)
720P30
(37.125MHz/16bit)
720P30
(74.25MHz/8 bit)
1080i60
(74.25MHz/16 bit)
Figure 12. HDV display modes.
60 FPS 1280 x 720 16 bit Progressive
30 FPS 1920 x 1080 16 bit Progressive
30 FPS 1280 x 720 16 bi t Progressive
30 FPS 1280 x 720 16 bi t Progressive
30 FPS 1280 x 720 8 bit Progressive
60 FPS 1920 x 540 16 bit Interline
• Full
• Wide
Aspect button – Toggles aspect ratio
SDV Display Mode
Select SDV Display mode to suit your TV from the following drop down menu
choices:
• 4:3
HDV Display Mode
Select from the 6 available HDV Display modes to best match users viewing or
recording devices. For best results we recommend either the largest resolution
1080P30 mode or 720P60 as this mode has the fastest frame rate (Figure 12).
8 9
Page 6

Figure 13. Presets.
Presets (Figure 13 )
Quick Button Shortcuts
Five preset button icons are available as shortcuts to setting multiple parameters
at the same time.
Pressing the icon button will set multiple parameters to enable quick setup times
and helps tailor camera settings to best match user’s telescope configuration.
Users can modify settings within the submenus and then press the save button
for the software to assign current settings to that particular Preset button.
The settings that are saved and can be recalled via preset buttons are:
• ALC
• Fixed Shutter
• AES
• Slow Shutter
• AGC
• Peak Control
• Priority
Luminance Menu (Figure 14)
ALC – Auto Luminance Control
Auto Luminance Control (ALC) indicates the image sensor’s ability to automatically adjust in diverse lighting conditions to yield the most vivid video image
possible.
When ALC is active AES will be turned off automatically.
Fixed Shutter
When Fixed Shutter is active AES will be turned off automatically.
Figure 14. Luminance submenu.
When Fixed Shutter is active the following shutter speeds are available.
NTSC: (1/30s ~ 1/1000s)
1/30, 1/50, 1/60, 1/100, 1/120, 1/180, 1/350, 1/500, 1/750, 1/1000, 1/2000,
1/4000, 1/10000
PAL: (1/30s ~ 1/1000s)
1/25, 1/50, 1/60, 1/100, 1/120, 1/180, 1/350, 1/500, 1/750, 1/1000, 1/2000,
1/4000, 1/10000
Shutter speed should be selected to best suit the object being observed and the
telescope being used.
For low light objects Fixed Shutter should be turned OFF.
AES – Auto Electronic Shutter (Rolling shutter)
AES is used when a manual or fixed iris lens is fitted and the shutter speed will
respond to the amount of light to keep the signal at optimum level.
AES allows changing the iris level automatically without using the auto iris lens.
Note: AES is not normally used for astronomy.
Slow Shutter (Sense Up)
Sense-Up: An image processing technology which allows user selectable digital
slow shutter speeds in order to allow extra light into a camera thereby providing
higher sensitivity in low light conditions.
The minimum frame integration is 1/15 second for NTSC (1/12 for PAL).
The maximum frame integration is 8 seconds (NTSC and PAL).
Set Fixed Shutter SPEED (ALC) to OFF for sense-up frame integration.
10 11
Page 7

For bright solar system objects such as the Moon and planets sense up should
be set at a minimum or off and the fixed shutter speed should be set to the fastest
speed possible to prevent blurring due to atmospheric conditions.
Low light objects require a high value sense up setting such as 8 seconds.
AGC – Analogue Gain Control
Select Checkbox to activate
Auto Gain – When Active use slider to modify gain
Manual Gain – When Active use slider to modify gain
Peak Control
Adjust Peak ratio for highlight suppression
Priority
Select between AGC and slow shutter
Figure 15. The Color submenu.
Color Menu (Figure 15)
SDV Enhance Level – ADVANCED SETTING
Adjust sliders to enhance image
HDV Enhance Level – ADVANCED SETTING
Adjust sliders to enhance image
XDR
Dynamic range setting function based upon adaptive tone mapping
Eclipse
Used to block areas with saturated lighting
Gamma
Gamma Correction Function. Select according to viewing device.
FOG
Used to enhance low contrast image in foggy/snow weather conditions
DNR
Digital noise reduction (Off, Low, Middle, High)
Sharpness
Used to enhance image
Color
Color Mode
Auto (Default) – Automatically switches between Mono and Color based upon
the lighting conditions
Mono – black and white image
On – color mode activated
Off – same as mono
White Balance
AWB – Auto White Balance
AWB is a preset type function whereby white color in the scene is detected
and white balance is automatically adjusted, then the setting status is stored. It
automatically memorizes the adjusted white balance value every time the AWB
button is turned on.
AWB is most suitable for environment with little change in light source.
Select checkbox and adjust slider as desired.
ATW – Auto Tracking Balance
ATW functions by detecting white color in the scene at a color temperature from
3200 to 10000 Kelvin. The color temperature is being monitored continuously and
the white balance is set automatically by internal controller.
ATW is most suitable for viewing objects with changing color temperature and
which can make the picture color look more natural.
Select checkbox and adjust slider as desired.
12 13
Page 8

Figure 16. The Utility menu.
Color Suppress Level
Adjust slider to suppress unwanted color
Color Gain Level
Adjust slider to increase or decrease the color gain
Color Tone (R-Y, B-Y Color Space) – ADVANCED SETTING
Adjust sliders R-Y and B-Y to tune image
UV Matrix (YUV/RGB Conversion) – ADVANCED SETTING
U – Adjust R, G and B sliders to tune image
V – Adjust R, G and B sliders to tune image
Utility Menu (Figure 16)
Digital Magnification
Mode
Zoom Off – Turns off Digital Magnification
Zoom On – When active use Magnitude slider and position sliders
Auto Pan – When active use Auto Panning sliders to set speed of auto pan
Auto Panning
When Auto Pan Mode is selected adjust the Auto X Speed and Auto Pan Y Speed
sliders to control the speed of the panning search.
Cross Hair
When button active displays white cross hairs on screen to aid in centering target
or to point to desired position on screen.
Select On button to activate.
Use X and Y sliders to position cross hair.
Press Center button to re-center cross hairs.
Misc
H Flip
When button active flips image in the Horizontal plane.
V Flip
When button active flips image in the Vertical plane.
Negative
When button active inverts image colors.
Color Bar
When button active displays color bars on screen to aid in tuning image.
Freeze
When button active freezes screen at the last frame and does not update frame
until deactivated.
Title
Select checkbox to activate.
Click on text box and enter text (up to 22 characters long) then press U P DATE
button to download text to camera and view text output on screen.
YPOS
Toggle Y Pos button to select screen Y position of text.
Magnitude
When Zoom Mode is ON Adjust slider to adjust digital magnification.
Position
When Zoom Mode is ON adjust X Position and Y Position Sliders to adjust position of magnified view.
14 15
Using the Camera for the First Time
We recommend using the camera for the first time in daylight to become familiar
with the software interface and camera settings.
1. Setup your telescope and use an eyepiece to locate an object outside that is
200 yards or more away.
Page 9

2. Setup SSHD and viewing device
as explained in viewing on TV or
Computer section.
3. Remove the eyepiece and insert
the SSHD (with 1.25" nosepiece)
into the 1.25" eyepiece holder on
your telescope.
4. If the image is white on the screen,
it’s overexposed. Adjust luminance
submenu settings (ALC, Shutter
speeds, Gain) as needed to reduce
the brightness and blurring.
5. Focus telescope until you get a
sharp image on your computer screen.
6. Experiment with the different camera settings. First use the presets to
become familiar with each, then tune and resave each to get the best views
for your particular telescope.
Recording Video
The SD video can be recorded onto computer via the included Video Capture
Device.
The HD video can be recorded onto computer via the Orion HD Capture Device
(Sold Separately)
In order to capture video and use post processing software the video signal must
be recorded onto your computer in a standard movie format.
Included with the SSHD is an SD video capture device. This device will record
video from the SD output of the camera up to 720x480 (SD resolution) in uncompressed AVI format (See Video Capture Device instructions for details).
In order to capture the full resolution HDMI output signal a HD capture device
must be used.
We recommend the Orion HD Video Capture Device (Sold Separately).
Figure 17. Planetary imaging. Jupiter
and moons Io and Callisto.
Planetary Imaging
Planetary imaging is also referred to as Solar System imaging, and includes the
Moon, the Sun (with a proper full aperture solar filter!), the planets, and miscellaneous objects in Earth’s orbit such as the International Space Station (ISS). The
SSHD is capable of capturing all these objects in real time.
Just about any telescope is suitable for the SSHD when imaging the planets.
The longer the focal length of the telescope, the larger and more detailed the
images will appear. Unlike deep space astro-imaging, you actually want to have
a long focal length and focal ratio for planetary imaging. Adding a 2x, 3x or higher
Barlow to the telescope to increase magnification is not uncommon for planetary
imaging (F igu re 17). The planets and other solar system objects are relatively
bright and can be imaged with a darker or “slower” focal ratio.
High power planetary imaging often leaves the best focus up to your eyes when
monitoring the live image. Use the digital zoom tool to aid in focus.
Use the fastest shutter speeds for your telescope and increase gain and other
luminance settings as desired. Experiment with your telescope and camera to
find the optimum settings for your particular setup.
The best planetary images will be obtained by aligning and stacking (combining) many individual images in order to improve image contrast, brightness, and
detail.
A great way to obtain images for stacking is to take several seconds of video of
the planet, then import the video into post processing software. Since the SSHD
has a maximum frame rate of 50/60 frames per second, you can literally obtain
hundreds of images for stacking in seconds! You save time by taking one video
instead of dozens of individual pictures!
It is recommended to capture hundreds (or even thousands) of frames when
planetary imaging. The large amount of frames can then be processed using
stacking and aligning software such as RegiStax to give the best results.
Since you will be taking multiple images over a period of time, it is important you
have a decent polar alignment in order to keep the planet within the field of view
of the camera. To this end, having a motor drive (at least single-axis) will also be
helpful. Otherwise, you will periodically need to rotate the R.A. slow-motion knob
to keep the planet within the camera’s field.
We recommend a telescope mounted on a motorized altitude-azimuth or German
Equatorial mount. You can potentially capture the Moon or a planetary image with
a telescope that does not track, however you may not get optimum results. The
sky moves 15 arcseconds per second! If you are imaging through a long focal
length telescope, you essentially need to track the object or unwanted blurring
co uld o c c ur.
Fainter objects will require longer shutter speeds whereas bright objects like
Jupiter or the Moon will require very shorter shutter speeds. Adjust as needed
for the object you are imaging.
Once you have achieved focus and good luminance and color, you are ready to
capture and save images to your computer.
View and Stack
After you have captured your images, you can review them in RegiStax, a freeware program downloadable from the provided web link in the CD Launcher. Mac
users can use the Lynkeos tool to align and stack their images.
We recommend stacking a minimum of 50 images or more. The individual
images have low bit depth (255 brightness level counts), and background noise.
16 17
Page 10

Figure 18. Lunar imaging.
Terrestrial
Imaging
Nature and scenic imaging is possible
with the SSHD when used with a telescope or wide field lens.
Use the X and Y flip when image is
reversed or upside down.
When using with a telescope the aperture may need to be stopped down
(reduced in size) in order to reduce the
brightness during daytime.
Internet
Broadcasting
Figure 19. NightSkiesNetwork.com.
Additionally, the individual images may be very soft since if you’re imaging at
high power, with or without the use of a Barlow. Stacking will improve the potential sharpness when processing in RegiStax. Stacking several hundred or more
images is sometimes appropriate to get the most possible detail.
Lunar Imaging
Lunar imaging requires fast shutter speeds due to the high brightness of the
moon. Similar techniques used to align and stack planetary images can also
be used for lunar image processing. Full resolution Live Lunar images on a HD
device can be stunning when imaged under favorable conditions (Figure 18).
The current phase of the moon will dictate the exposure setting due to the vast
difference in brightness during each phase.
For group viewing use the text display and position cross hairs to point to craters
or other features for your audience (Figure 18 ).
Solar Imaging
Warning: Always use a full aperture Solar Filter when observing the Sun.
With a properly fitting full-aperture solar filter attached to your telescope, you can
use the SSHD to take images of the Sun and the sunspots on its surface.
(Filters available through Orion. Check the catalog or OrionTelescopes.com for
more information).
Much like planetary and lunar imaging, solar imaging requires fast frame rates
and shutter speeds.
When using the SSHD with the
included video capture device it is
possible to use services such as
NightSkiesNetwork.com, ustream.
com, livestream.com to show your
views live across the internet to a
worldwide audience. See websites for
details.
Figure 20. Cable types.
Connections And
Cables
Tips
Focusing
One of the hardest things to do in planetary imaging is achieving good focus.
You can make this process easier by
simply watching the Live Video window
to focus. Depending upon the viewing
conditions you may notice that the
image goes in and out of focus, this is
due to viewing conditions. This is to be expected and one of the reasons why
post processing software can bring out the best in your captured images. Focus
as best as possible with the average frame being at best focus to ensure more in
focus frames than out of focus. Image processing software can then be used to
Figure 21. Connections to the HD
Convertor Box.
18 19
Page 11

select the best frames to combine for best results and can also reject the poorest frames.
Use the digital zoom feature to aid in focusing.
First zoom in on the target, focus, then zoom back out.
Refocus often throughout your imaging session. This ensures at least some of
your images will have an excellent focus. It is also not uncommon for telescope
movements to alter the focus slightly, so be sure to refocus for any new astroimaging targets.
Choosing a Site for Astro-imaging
Once you have a focused image, you may find your image shifting and washed
out. This can be caused by many environmental factors. Poor seeing (movement
of molecules in the air, such as heat rising) and poor transparency (moisture,
smoke, or other sky contaminants) will all serve to reduce image quality. That is
why most major astronomical telescopes are on high mountains in thin air, to get
above much of the seeing and transparency problems. Also, wind will move your
telescope and affect images. Your eyes viewing through an eyepiece can change
slightly to compensate for disturbances like these, but the camera cannot. Keep
these factors in mind when choosing an observing site for astronomical imaging.
For the best astro-images, we recommend finding a location with dry air, some
altitude, and away from city or streetlights. Even a nearby hilltop in the countryside can provide better viewing conditions than many convenient backyard
locations.
Using Focal Reducers and Barlow Lenses
Focal reducers serve to decrease the focal length of your telescope. This increases the field of view seen by the camera (decreases camera magnification). This
can be useful for obtaining images of wider objects, such as the full Moon or a
landscape vista.
Barlow lenses, or other tele-extenders, increase the focal length of your telescope, which makes the camera field of view narrower (increases camera magnification). This is useful for high-power planetary images. Keep in mind that when
the focal length is doubled, the image will become four times dimmer, so a longer
exposure may be necessary.
For best planetary imaging, you should shoot with an effective focal ratio (telescope focal length ÷ telescope aperture) of f/20 or greater. This will give you a
good combination of image brightness and image scale for planets. For most
telescopes, a Barlow lens will be required to obtain this focal ratio. For example,
Schmidt-Cassegrain telescopes usually have a focal ratio of f/10. A 2x Barlow
lens doubles the effective focal length of the telescope, which makes the focal
ratio f/20. Similarly, a 3x Barlow lens will yield of focal ratio of f/30. You can also
try using multiple Barlows to obtain even greater effective focal ratios. There is a
limit to how large a focal ratio your telescope and seeing conditions can handle,
however. Experimentation will be needed to see what your telescope is capable
of in the seeing conditions on a given night. If the image appears somewhat
dim and fuzzy on the computer screen, you may want to consider removing the
Barlow lens.
(Focal Reducers and Barlow lenses available through Orion, check the catalog
or OrionTelescopes.com for more information).
Solar Filter
Warning: Always use a full aperture solar filter when viewing the sun.
With a properly fitting full-aperture solar filter attached to your telescope, you can
use the SSHD to take video of the Sun and the sunspots on its surface.
(Solar filters available through Orion, check the catalog or OrionTelescopes.com
for more information).
Flip Mirror
As easy as flipping a switch, the Imaging Flip Mirror enables the astro-photographer to find, center and focus a target visually with a 1.25" telescope eyepiece,
then photograph it with a camera. All without swapping out any equipment. It’s
a real timer saver, making the normally tedious task of focusing with the camera alone easier and quicker. (Available through Orion, check the catalog or
OrionTelescopes.com for more information).
Care and Maintenance
When the SSHD is not in use, remove the nosepiece then attach the dust cap.
This prevents dust from accumulating on the SSHD’s optical window. The optical window should only be cleaned if significant dust builds up for if the window
is touched. Any quality optical lens cleaning tissue and optical lens cleaning
fluid specifically designed for multi-coated optics can be used to clean the glass
surface of the SS HD’s optical window. Never use regular glass cleaner or cleaning fluid designed for eyeglasses. Before cleaning with fluid and tissue, blow
any loose particle off the surface with a blower bulb or compressed air. Then
apply some cleaning fluid to a tissue, never directly on the optics. Wipe the
optical surface gently in a circular motion, then remove any excess fluid with a
fresh lens tissue. Use caution, rubbing too hard may cause scratches. (Cleaning
products available through Orion, check the catalog or OrionTelescopes.com for
more information).
20 21
Page 12

720p25/30/50/60;1080p25/30;1080/50/60 selectable by
OSD or PC
SD video format: 4:3/16:9
Image aspect : Nor.(16:9) or Full(4:3)
000,1/10000.
ALC Off/On/FLC ALC(Auto lighting control) level control, with FLC(flicker less) function
AES Off/On AES(Auto exposure shutter ) level control
FIXED SHUTTER Off/On 1/30(1/25),1/50(1/60),1/100,1/120,1/180,1/350,1/500.1/750,1/1000,1/200 0,1/4
PEAK AV ER AGE Off/On Adjust image PEAK ratio, for highlight suppression
Luminance Menu1/4
SSHD Manual Menu
BACK LIGHT Off/On Brightness compensation for dark area
XDR OFF/LOW/Middle/HIGH Digital WDR function which is based on adaptive tone mapping.
GAMMA CONTROL CRT/LCD/ 1.00 Gamma correction function
signal up to 36dB
AGC AUTO/FIX Electronic sensitivity compensation which can amplify to enhance low video
SLOW SHUTTER OFF/LIMIT TIME Electronic sensitivit y compensation which be by frame accumulation tech.
DNR OFF/LOW/Middle/HIGH To reduce random image noise
DAY / NIGHT DAY/NIGHT/COMPUL ICR-SET, Control mode: auto or by External control mode
FOG REDUCTION OFF/LOW/Middle/HIGH To enhance the low contrast image such as snow, fog, haze
ECLIPSE OFF/LOW/Middle/HIGH To block the area which is saturation of lighting in the image.
Luminance Menu2/4
adjusted by Horizontal and Vertical
SHARPNESS ON/OFF Image enhance
ENHANCE HDV/SDV Both HD(high definition)Video and SD(standard definition) video can be
COLOR MODE MONO/OFF/ON/AUTO Be changeable from color to B/W automatically or fixed in color
WHITE BALANCE ATW/AWB Auto tracing white balance and auto while balance –one push
UV M ATRIX U-MATRIX/ V-MATRIX U or V- axis, R/G/B color adjustable.
COLOR GAIN GAIN CONTROL Color gain adjustable.
COLOR TONE R-Y/ B-Y Color vector adjustable.
LANGUAGE ENGLISH/JAPANESE/CHINESE(TRADITIONAL/SIMPLIFIED)
TITLE OFF/ON TITLE can be set with display.
Color Menu3/4
Setup Menu4/4
MOTION DETECT Motion detection is on or off
DIGITAL ZOOM Zoom ration selectable, and Pan / tile movable
H / V REVERSE Mirror and flip
DISPLAY MODE HD video format:
DEFAULT LOAD/SAVE/FACTORY OSD parameter set ting load or saving
SPECIAL FUNCTION SPECIAL FUNCTION (1/2) PRIORITY Priority selectable, AGC first or SLOW SHUTTER first.
DIGITAL OUT YUV422 Spec. setting
CROSS LINE Crossline can be displayed with moving by V or H axis
FREEZE Image freeze
COLOR BAR Color Bar can be displayed
POSI / NEGA Show positive image or negative
SPECIAL FUNCTION (2 /2) PRIVACY MASK Image masking
22 23
COMM ID Set camera ID number for comm.
Page 13

Specifications
Camera Sensor: Sharp color CCD Sensor
Sensor format: 1/3"
Resolutions: 1920 x 1080
1280 x 720
720 x 480
Pixel Size: 3.75µm x 3.75µm
Exposure Range: 1/10000s to 8s
Frame Rate: Selectable 30/60 FPS
A/D Conversion: 16 bit
IR Cut filter: Yes
Mounting: 1.25" nose piece
One-Year Limited Warranty
This Orion product is warranted against defects in materials or workmanship for a
period of one year from the date of purchase. This warranty is for the benefit of the
original retail purchaser only. During this warranty period Orion Telescopes & Binoculars
will repair or replace, at Orion’s option, any warranted instrument that proves to be
defective, provided it is returned postage paid. Proof of purchase (such as a copy of
the original receipt) is required. This warranty is only valid in the country of purchase.
This warranty does not apply if, in Orion’s judgment, the instrument has been abused,
mishandled, or modified, nor does it apply to normal wear and tear. This warranty gives
you specific legal rights. It is not intended to remove or restrict your other legal rights
under applicable local consumer law; your state or national statutory consumer rights
governing the sale of consumer goods remain fully applicable.
For further warranty information, please visit www.OrionTelescopes.com/warranty.
Orion Telescopes & Binoculars
Corporate Offices: 89 Hangar Way, Watsonville CA 95076 - USA
Customer Support: www.OrionTelescopes.com/contactus
Copyright © 2014 Orion Telescopes & Binoculars
All Rights Reserved. No part of this product instruction or any of its contents may
be reproduced, copied, modified or adapted, without the prior written consent of
Orion Telescopes & Binoculars.
24
 Loading...