

ORIGO SA422WS User Manual

1
User manual
601120 - Origo - Usermanual.indd 1 2015-06-18 13:30:48
2
User manual
N
SE
GB
FI
DK
We recommend that you spend some time reading this
instruction manual in order that you fully understand all
the operational features. You will also find some hints
and tips to help you resolve any issues.
English............ 2
Svenska............9
Norsk............ 15
Suomi ............ 21
Dansk............ 27
601120 - Origo - Usermanual.indd 2 2015-06-18 13:30:48
GB
3
SMOKE ALARM FOR WIRELESS CONNECTIONS.
MODEL ORIGO SA422WS.
Congratulations on the purchase of your
new smoke alarms. We recommend that you
spend some time reading this instruction manual in order that you fully understand all the
operational features.
You will also find some hints and tips to help you resolve any issues. Read all the safety instructions carefully before use and keep for future reference.
The Housegard ORIGO SA422WS smoke alarm is designed to detect smoke particles. It also has a built-in
temperature sensor that sets o an alarm if the temperature exceeds 54–70°C (depending on the speed
of the temperature rise detected.) The Housegard smoke alarm is designed to give an early warning if a
fire occurs, but its operation depends on correct positioning and maintenance.
FEATURES
» Optical smoke alarm for wireless connections
» Built-in heat detection
» High sensitivity and stability
» Test and pause function
» LED diode indicates normal operation
» Low battery warning
» Compact and stylish design
» Wirelessly connect up to 30 pcs
TECHNICAL SPECIFICATIONS
Model No: ORIGO SA422WS
Detection type: Photoelectric chamber
Power source: 2 pcs AA/LR6 Alkaline
batteries
Standby current: <4 uA
Alarm current: <40 mA
Working frequency: 433 MHz
Transmission distance: >20 m
Alarm sound level: 85 dB /3 m
Operating temperature 5 °C to 45 °C
Ambient humidity: 10 % - 90 %
Sensitivity: 0,09 ~ 0,16 dB/m
Temperature sensor: 54-70 °C (EN-54)
IMPORTANT SAFETY INFORMATION
» The smoke alarm is battery-powered. The smoke alarm will not work without batteries, or if the
batteries are dead, removed or not correctly connected. Only use the specified type of battery. DO
NOT connect the smoke alarm to any type of detector or equipment other than what is stated in this
manual.
» The test button provides a full test of all the smoke alarm’s functions. No other test methods are requi-
red. Test smoke alarms every week to check that they are working properly.
» Do not remove or disconnect the batteries to stop false alarms, as this will cause the smoke alarm to
lose important functionality. Open a window or ventilate the air around the smoke alarm to stop the
alarm and/or press the pause button.
» The smoke alarm must be installed in line with all local and national rules and regulations on installa-
tion.
» The smoke alarm is intended for use in houses. In apartment blocks, each apartment should be fitted
with its own smoke alarm. This smoke alarm is not suitable for use in non-residential buildings. The
smoke alarm is not a replacement for a complete alarm system as required under law or by the fire
safety authorities.
» There may be reasons why a person in a household might not hear the alarm (e.g. noise, deep sleep,
impaired hearing). If you suspect that a person in the household will not hear the smoke alarm, specialist alarms should be installed. If a person in the household has impaired hearing, special alarms should
be installed to alert the person via sound, light and vibrations.
» The smoke alarm detects combustion particles in the air (smoke). It does not react to flames or gas.
The smoke alarm is designed to give o an audible alarm if a fire is developing.
» No smoke alarms are entirely reliable and they cannot give a 100% guarantee to protect life and pro-
perty against fire. The smoke alarm is no replacement for insurance. Homeowners and tenants should
take out life and home insurance.
» The smoke alarm should be tested every week and replaced every 10 years.
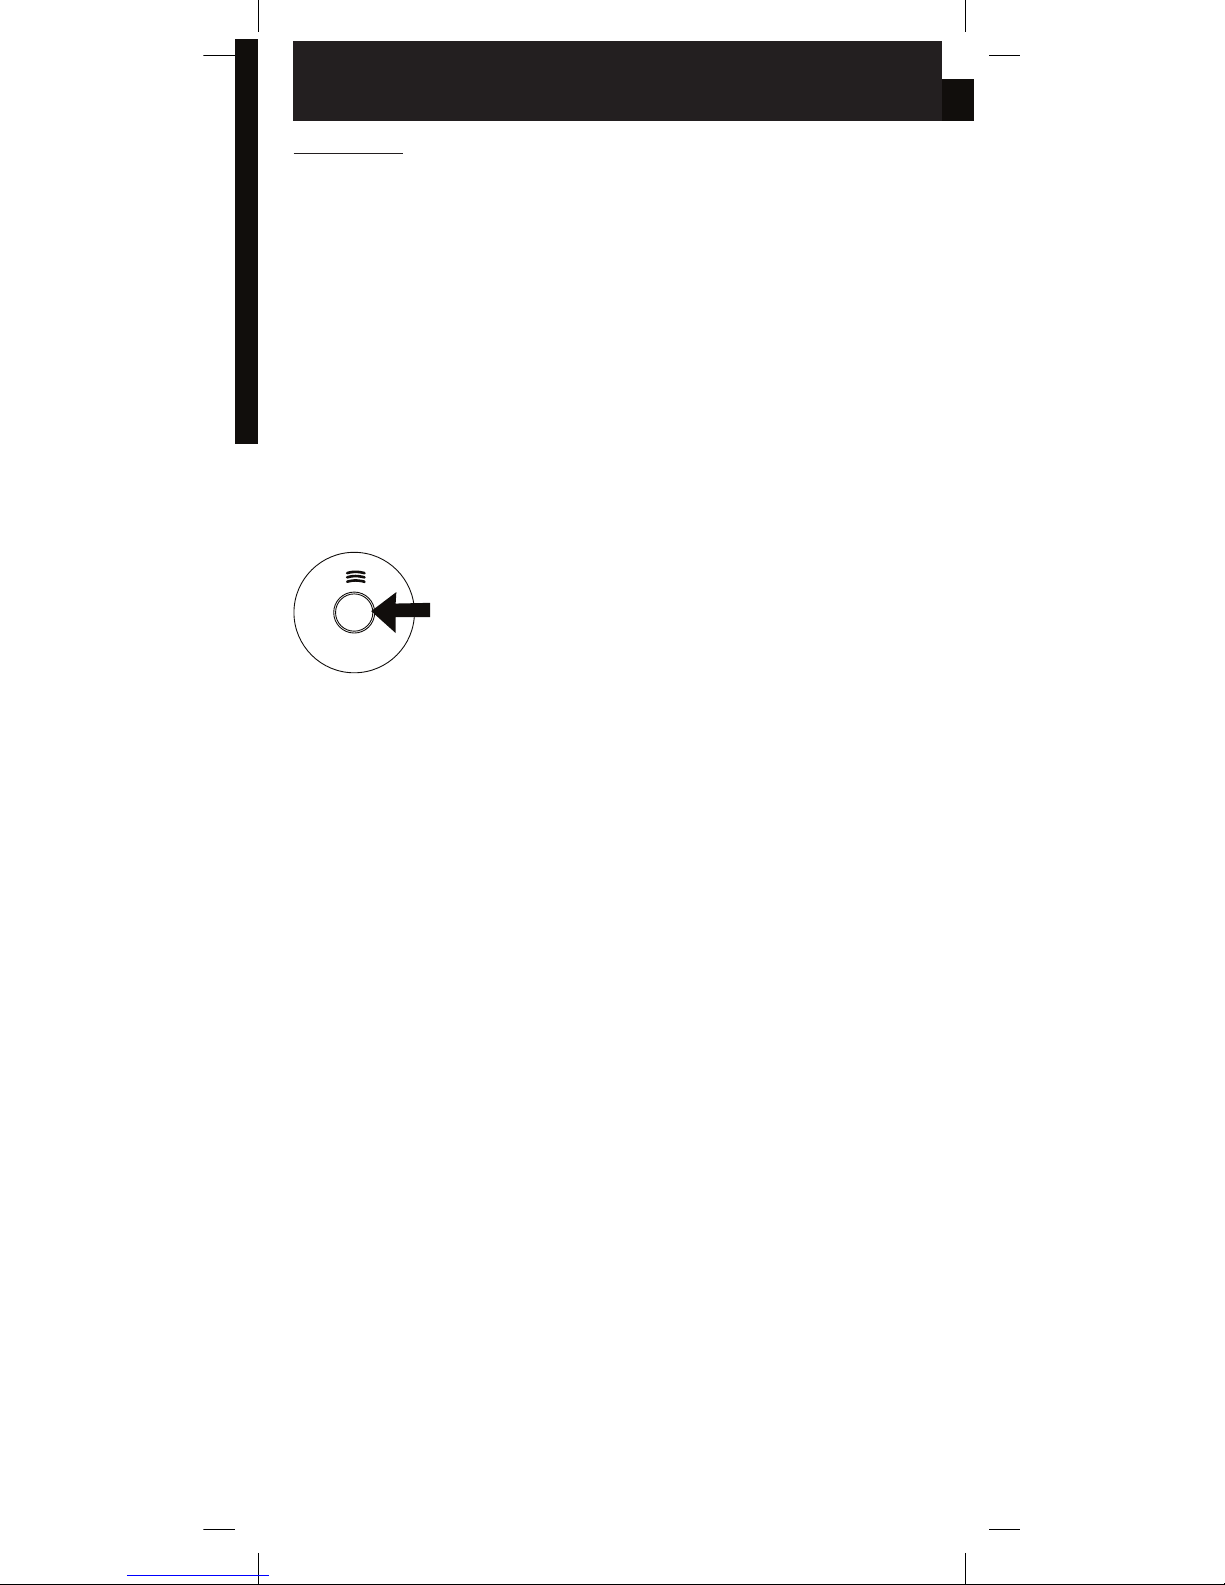
Combined TEST and
PAUSE button.
English
USER MANUAL
601120 - Origo - Usermanual.indd 3 2015-06-18 13:30:48

4
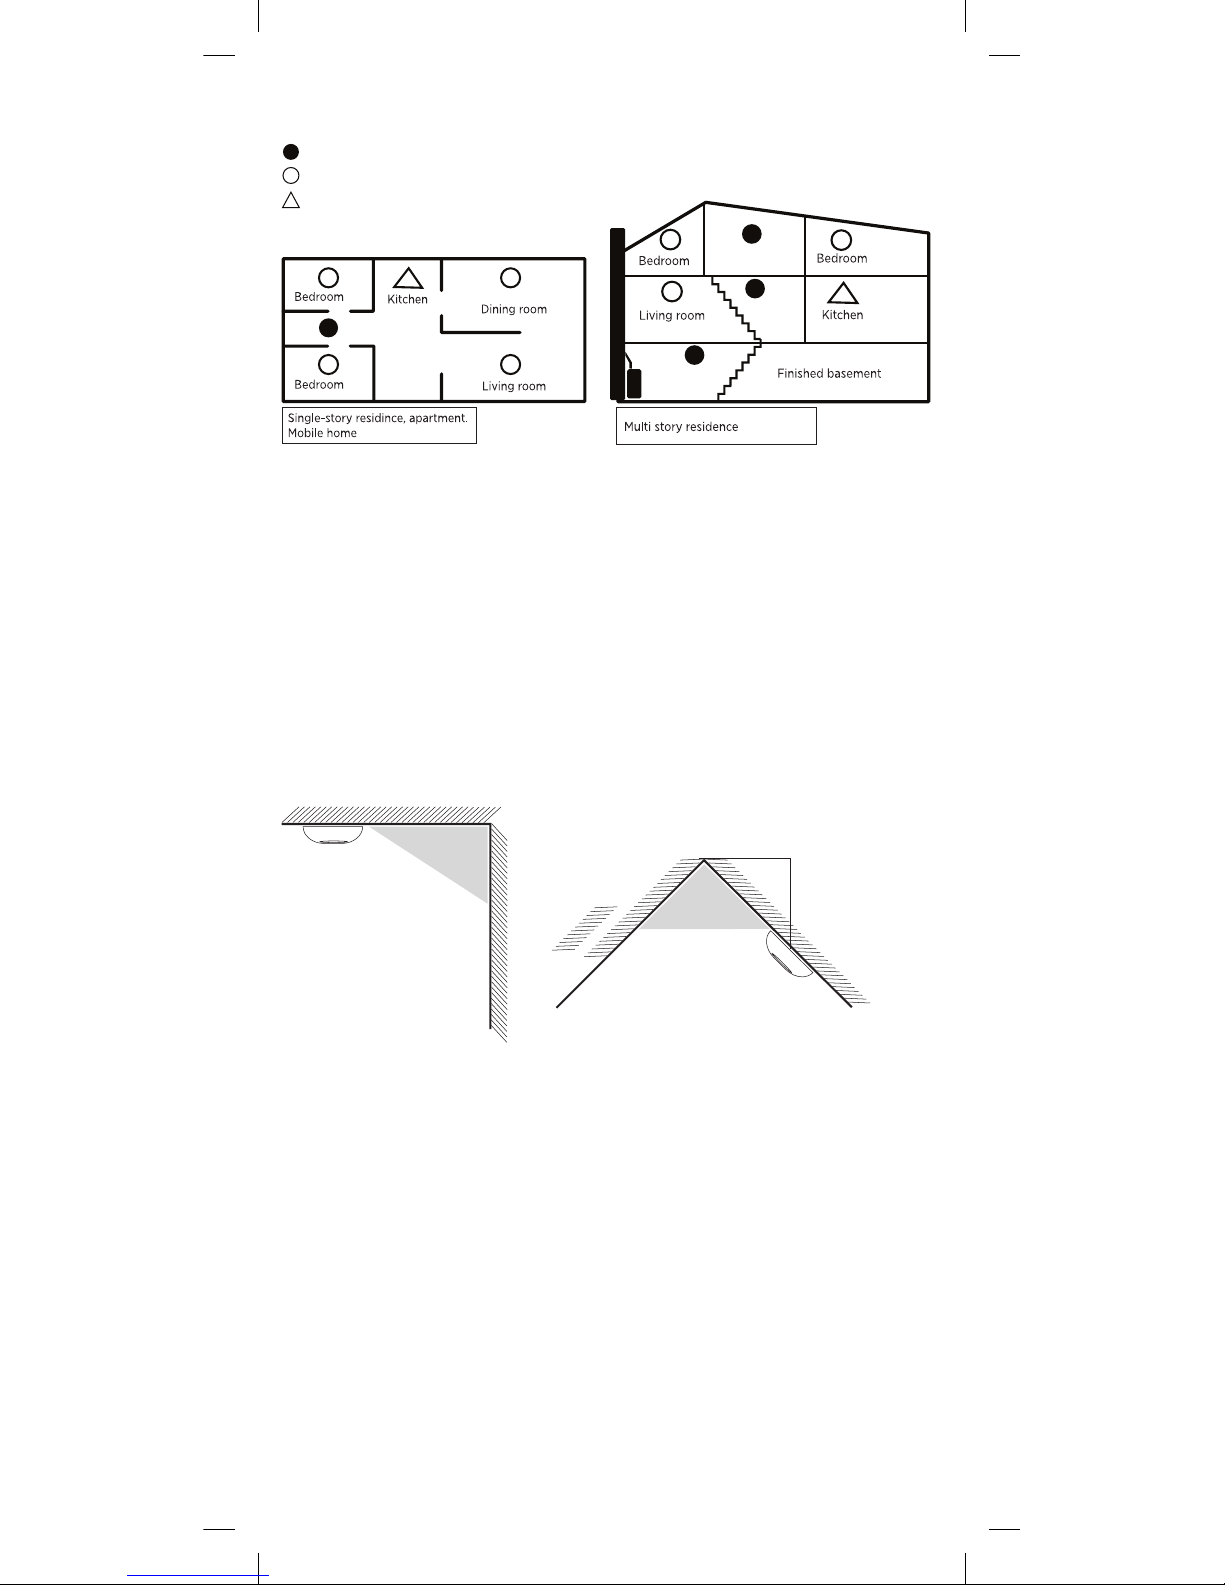
POSITIONING THE SMOKE ALARM
For the smoke alarm to give an early warning, it needs to be installed where the fire occurs. Housegard
therefore recommends that you install a smoke alarm in every room and on all floors.
» Install a smoke alarm in all separate bedrooms and in rooms commonly occupied.
» In homes with several storeys, a smoke alarm should be installed at the top of every staircase between
each storey.
» In the basement, a smoke alarm should be installed on the ceiling at the foot of the stairs.
» In bedrooms where people sleep with closed doors, there should always be a smoke alarm fitted in the
bedroom.
» Install a smoke alarm in every room where there is a potential risk of fire.
» Install a smoke alarm at each end of corridors, if they are longer than 9 metres.
» Install the smoke alarm in the middle of the ceiling. If this is not possible, install the smoke alarm on
the wall at least 0.5 m from any corner and at least 10–15 cm from the ceiling. (Wall-mounting is not
recommended).
KEY:
Minimal protection
Recommended/more substantial protection
Smoke alarms with a pause function are recommended
SMOKE ALARMS SHOULD NOT BE PLACED
IN THE FOLLOWING LOCATIONS
» In the kitchen, near the cooker, where smoke from cooking could cause false alarms.
» In areas of high air humidity, such as bathrooms or near dishwashers or washing machines, where
steam and moisture could cause false alarms.
» Near fans and ventilation ducts, where air flows may prevent smoke from reaching the smoke alarm.
» Near light sources and electrical equipment that emit an electromagnetic field.
» Near a fireplace or stove with an open fire.
» At the top of a V-shaped ceiling, where air pockets could stop the smoke from reaching the smoke
alarm.
» In a garage, where exhaust fumes could cause false alarms.
» In dusty and dirty areas, where the dust and dirt could damage the smoke alarm.
» In rooms where the temperature may fall below 5 °C or rise above 45 °C, or in rooms with large tem-
perature variations.
WARNING: Incorrect positioning may lead to reduced reliability and false alarms.
50 cm
100 cm
601120 - Origo - Usermanual.indd 4 2015-06-18 13:30:48

GB
5
PREPARING AND PROGRAMMING
Important: The ORIGO SA422WS smoke alarms are equipped with transmitters and receivers, so
they can communicate with each other. For this function to work, the smoke alarms must be programmed to link up.
WIRELESS TRANSMITTER/RECEIVER
» Radio frequency: 433 MHz
» RF receiver: < 5 mA
» RF receiver: < 10 mA
» Range: > 20 metres
IMPORTANT: The signal range may vary depending on position, the design of the building and
its materials. Make sure that all the installed
smoke alarms are within signal range.
PROTECT YOUR HEARING
Smoke alarms emit a loud audible signal. We
recommend that you always use earplugs or other
hearing protection when programming and testing
your smoke alarms.
FITTING THE BATTERIES AND TESTING EACH SMOKE ALARM
Twist o the smoke alarm’s mounting plate and install 2 x AA/ LR6 batteries. Make sure you have the
right polarity +/- . Test each smoke alarm by pressing the test button for around 5 seconds. The alarm
should emit three short audible signals with around 1.5 seconds between them. Then release the test
button. Repeat with all the smoke alarms that are being installed.
PROGRAMMING THE SMOKE ALARMS TO COMMUNICATE WITH EACH OTHER
Choose one of the smoke alarms as the main unit and mark it with an M on the back, so you know which
one it is later on. The main unit is used to send the radio code to the other alarms, so they all connect up.
1. Press the main unit’s test button for around 12 seconds, until the LED light stays on continuously. The
main unit is now in programming mode and ready to transmit the radio code to the other alarms. The
main unit remains in programming mode for around 30 seconds, before returning to normal mode.
2. While the main unit is in programming mode, take the slave unit and press the test button for around
1 second, until the LED light begins to flash. Then release the button. Both the main unit and the slave
unit’s LED lights should now flash quickly for 2 seconds. This shows that the two are connected.
3. Repeat step 2 with all the slave units that are being connected to the same system.
DELETING THE PROGRAMMING (Re-setting)
1. Press and hold in the test button for around 16 seconds, until the LED light begins to flash quickly.
Then release the button.
2. Once the LED light is lit, quickly press the test button twice. If re-setting is successful, the smoke alarm
will give out a short audible signal.
3. Repeat steps 1 and 2 with all the units that need re-setting.
WARNING: There are a number of factors that could interfere with the wireless communication. You
should therefore test the smoke alarms every week to check that the units are communicating properly.
601120 - Origo - Usermanual.indd 5 2015-06-18 13:30:48

6
HOW TO INSTALL YOUR
SMOKE ALARM
1. Remove the mounting plate on the back of the
smoke alarm by twisting it anticlockwise.
2. Install the mounting plate in the chosen position on the ceiling. Take care to position your
smoke alarm properly.
3. Place the smoke alarm against the mounting
plate and twist the smoke alarm clockwise until
it clicks into place.
4. Press the test button to test the smoke alarm.
OPERATION
During normal operations, the smoke alarm’s LED
flashes every 40 seconds. This means that the
battery and the unit are working correctly. If the
alarm detects smoke, it will emit a loud, pulsing
warning sound and the red LED will emit a pulsing
light until the smoke has gone.
MEANING OF THE DIFFERENT LED AND ALARM
SIGNALS
STATUS RED LED ALARM SIGNAL DESCRIPTION
Normal mode Flashes once every 40
seconds
None Smoke alarm has
power and is working
normally.
Change battery/ low
battery
Flashes once every 40
seconds
Short audible signal
every 40 seconds
The battery needs replacing. See section on
replacing the battery.
Fault warning None Short audible signal
every 40 seconds
Indicates a fault with
the smoke alarm.
Pause mode Flashes every 8
seconds
None Smoke alarm is in pau-
se mode. See section
on pause function.
STATUS LED LIGHT ALARM
Smoke alarm detects smoke Flashes 3 repeated audible signals of 0.5 seconds, with
0.5 seconds between them.
Smoke alarm detects a rise in
temperature
Flashes 3 repeated audible signals of 0.2 seconds, with
0.1 seconds between them.
Wirelessly connected units
receive a signal from an alarm
that has gone o
Flashes 2 repeated audible signals, with 1.2 seconds
between them.
ALARM SIGNALS
The ORIGO SA422WS emits various alarm signals. The alarm that has detected smoke or heat emits a
dierent audible signal, which allows you to identify which smoke alarm has gone o.
601120 - Origo - Usermanual.indd 6 2015-06-18 13:30:48

GB
7
CAUSES AND REMEDIES FOR FALSE ALARMS
A smoke alarm detects and reacts to smoke particles in the air. The smoke particles set o the smoke
alarm. This function means that the smoke alarm will also react to dust particles, moisture or other particles in the form of pollen, insects and so on. These factors are usually the cause of a false alarm.
CAUSE OF ERROR ACTION
Steam and moisture. A false alarm may occur if the smoke
alarm is placed too close to a bathroom, laundry room, or
other location with high air humidity.
Place the smoke alarm at least 2 metres from any
bathroom, laundry room, or other location where high air
humidity may occur.
Dust and dirt. Since air passes freely through the detection
chamber, the smoke alarm will always attract some dust
and pollen particles. This can lead to a false alarm. The
smoke alarm may also become more sensitive for this
reason, which could cause false alarms. In addition, dirt
will collect over time, as the smoke alarm ages, which may
result in false alarms.
Regularly vacuum the smoke alarm, using a plastic nozzle
to avoid damaging the electronics. Avoid fitting smoke
alarms in places with a lot of dust and dirt. You can put a
‘hat’ over the smoke alarm or remove it entirely while you
are carrying out renovation work at home that involves
sawing, sanding, etc.
Draughts, dust and air flows. False alarms may be caused
by the smoke alarm being placed too close to doors,
windows, ventilation systems, fans, air ducts, heat pumps
or suchlike. This can lead to dust particles being carried up
into the detection chamber.
Do not install smoke alarms in a draughty location, close to
windows or doors, ventilation, fans, air ducts, heat pumps
or suchlike. Find a better location for the smoke alarm,
further away from draughts and air flows.
Temperature variations. Temperature variations may lead
to condensation in the detection chamber. This may happen, for example, if the smoke alarm is placed in a room
where windows are opened for ventilation in the winter,
or close to exits, balcony doors or other places that switch
between hot and cold.
Avoid fitting smoke alarms in rooms with rapid temperature changes or close to windows and doors that are
frequently opened and closed. Move the smoke alarm to a
place with a more even and stable temperature.
Generally unfavourable positions. Incorrect positioning in
an unstable indoor environment, a draughty area, close
to electronic apparatus (EMC) and lighting may cause a
false alarm.
Place smoke alarms at least 5 metres from open fires,
stoves or other heating devices; 2 metres from ventilation
ducts, heat pumps and air conditioning; 1 metre from light
bulbs and fluorescent tubes.
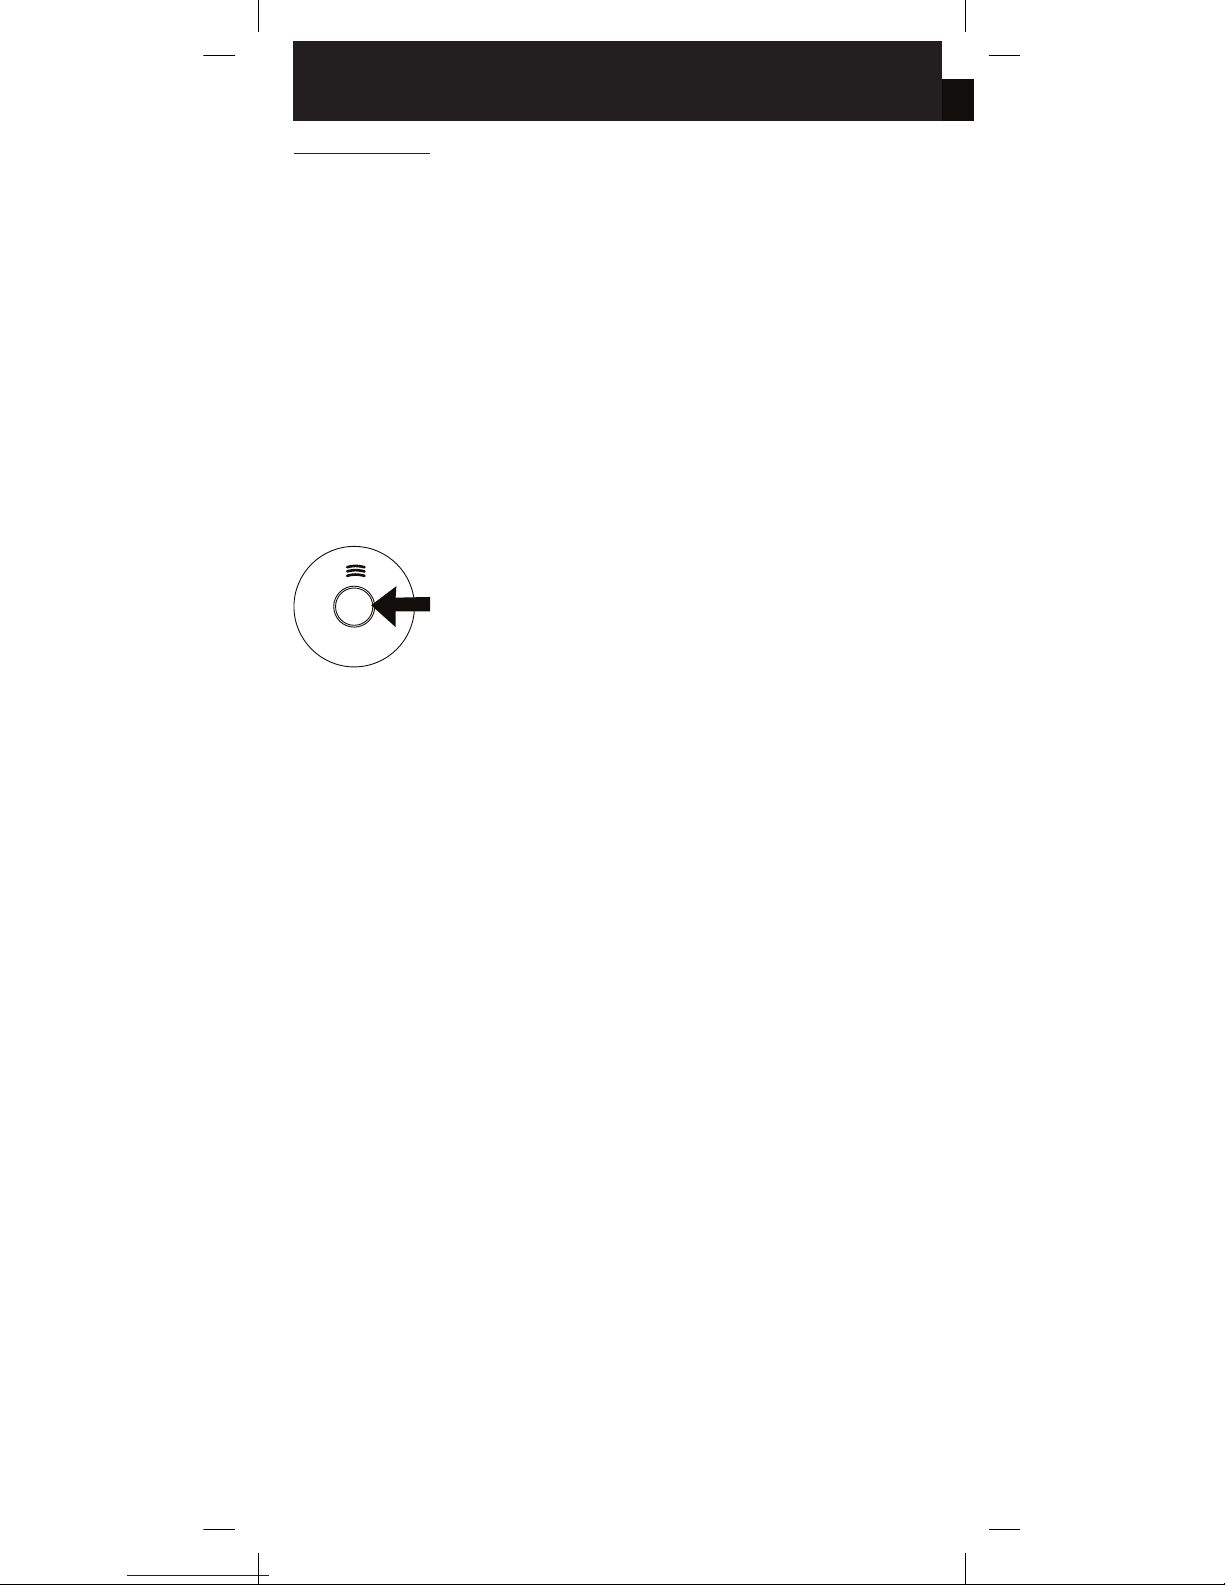
TESTING THE SMOKE ALARM
Test your smoke alarm by pressing the test button
and holding it in for around 5 seconds. The smoke
alarm will respond by emitting an alarm signal.
When you release the test button, the alarm signal
will stop after 10 seconds.
IMPORTANT: When testing connected alarms, it
can take up to 30 seconds for all the connected
alarms to respond/emit a signal. Hold the test
button in until all the smoke alarms have emitted
the alarm signal.
1. Always test all alarms after installation to ensure that they are functioning properly.
2. The test button performs a full test of all
functions. Never use a naked flame to test the
smoke alarm, since this can destroy the alarm.
3. Test your smoke alarm routinely once a week.
4. Always test your smoke alarms after a long
period of absence from the home and always
when you return from a holiday.
5. Always stand at arm’s length when testing your
smoke alarm to avoid damage to your hearing.
FOR YOUR SAFETY! NEVER IGNORE A SMOKE
ALARM THAT HAS GONE OFF. WHEN YOU
HEAR THE ALARM SIGNAL, YOU MUST GIVE IT
YOUR FULL ATTENTION AND ACT
ACCORDINGLY.
PAUSE FUNCTION
The smoke alarm has a combined button for the
test and pause function. The pause function allows
you to stop the alarm signal if it goes o due to
a false alarm, for example. Activate the pause
function by pressing the test/pause button while
the unit is emitting the alarm signal. The alarm will
stop for 10 minutes.
The smoke alarm will be reset at normal sensitivity
once the 10 minute pause is over. If necessary,
press the pause button again to put the alarm
back on pause.
If you have smoke alarms connected in series, you
can pause all the connected units by pressing the
test/pause button on the unit that is emitting the
alarm signal.
CLEANING AND MAINTENANCE
The smoke alarm should be cleaned regularly, and
at least twice a year. Clean your smoke alarm by
vacuuming externally along the opening to the
detection chamber to remove dust and dirt.
IMPORTANT: Do not try to open the cover to
clean inside the smoke alarm. This will negate the
warranty.
601120 - Origo - Usermanual.indd 7 2015-06-18 13:30:49
8
REPLACING THE BATTERY
How often the battery needs replacing depends on the type of battery. It is recommended that you replace batteries routinely once a year, preferably on a particular date. Alternatively, replace the battery when
the smoke alarm emits the low battery signal (short audible signal every 40 seconds).
1. Twist the smoke alarm anticlockwise to remove it from the mounting plate.
2. Take out the old batteries.
3. Insert new batteries. Check the correct polarity +/-.
4. Place the smoke alarm against the mounting plate and twist the smoke alarm clockwise until it clicks
into place.
5. Press the test button to test the smoke alarm.
TYPE OF BATTERY
Voltage: DC 1.5 V
Type: AA / LR6 Alkaline batteries
Battery life: Approx. 18 months
Recommended batteries: GP15A, Energizer E91
TROUBLESHOOTING
PROBLEM ACTION
The smoke alarm gives o no signal when tested.
» Take the smoke detector down and check
that the batteries are fitted correctly.
» Check that the batteries still have some
charge.
The smoke alarm flashes and emits a short audible signal
every 40 seconds.
» This indicates low battery charge.
» Replace the batteries.
The smoke alarm goes o when there is no smoke, or
when cooking, etc.
» Clean the smoke alarm. See also section on
false alarms.
» Change the location of the smoke alarm. See
section on false alarms.
WARRANTY
This smoke alarm comes with a 5-year limited warranty against manufacturing defects. (Valid from date
of purchase.) The batteries are not covered by the warranty. Liability under the warranty is limited to the
value of an equivalent smoke alarm. Defective smoke alarms should be returned to the retailer, along with
a description of the problem. If the claim is approved, the faulty goods will be replaced with a new smoke
alarm of the same or an equivalent type. Any claim must be accompanied by a receipt confirming the date
of purchase.
0359
GPBM Nordic AB
15
6011208080-CPR-0515
EN 14604:2005/AC:2008
Certificate: 0359-CPR-00463
GPBM NORDIC AB | Argongatan 2 B | SE-431 53 Mölndal | Sweden
Contact: info@housegard.com
Frank Willy Ottesen
Technical Manager
601120 - Origo - Usermanual.indd 8 2015-06-18 13:30:49
S
9
SVENSKA
BRANDVARNARE FÖR TRÅDLÖS SERIEKOPPLING.
MODELL ORIGO SA422WS.
Grattis till ditt köp av dina nya brandvarnare. Vi rekommenderar att du tar dig tid att läsa den här bruksanvisningen så att du helt förstår alla funktioner.
Du kommer även att finna en del tips och råd som hjälper dig att lösa eventuella problem samt hur du
undviker dem. Läs hela denna bruksanvisning noggrant innan du installerar produkten och spara den för
framtida bruk.
Housegard brandvarnare ORIGO SA422WS är konstruerad för att känna av rökpartiklar. Den har dessutom en inbyggd temperatursensor som larmar om temperaturen överstiger 54-70 °C. (Beroende av
hur snabb temperaturökning som registreras.) Housegard brandvarnare är konstruerade att ge en tidig
varning om en brand skulle uppstå, vilket förutsätter korrekt placering och underhåll.
EGENSKAPER
» Optisk brandvarnare för trådlös seriekoppling
» Inbyggd temperaturvarnare
» Hög känslighet och stabilitet
» Test- och pausfunktion
» LED-diod visar normal funktion
» Signal vid låg batterispänning
» Kompakt och snygg design
» Kan anslutas i serie med upp till 30 st
TEKNISKA DATA
Modellnummer: ORIGO SA422WS
Detektionsprincip: Optisk detektionskam-
mare
Strömkälla: 2 st AA / LR6 Alkaliska
batterier
Strömförbrukning vid drift: <4 uA
Strömförbrukning vid larm: <40 mA
Radiofrekvens : 433 MHz
Räckvidd, fri sikt: >20 m
Larmsignal: 85 dB /3 m
Temperaturområde: 5 °C till 45 °C
Luftfuktighet: 10% - 90%
Sensitivitet: 0,09 ~ 0,16 dB/m
Temperatursensor: 54-70 °C (EN-54)
VIKTIG SÄKERHETSINFORMATION
» Brandvarnaren behöver batterier för att fungera. Brandvarnaren fungerar inte utan batterier eller om
batterierna är urladdade, tas bort eller inte är rätt anslutna. Använd endast avsedd batterityp. Anslut
INTE brandvarnaren till andra typer av detektorer eller kringutrustning än som anges i denna manual.
» Testknappen ger ett fullgott test för brandvarnarens alla funktioner. Andra testmetoder behövs inte.
Testa brandvarnarna varje vecka för att kontrollera att de fungerar ordentligt.
» Ta inte bort eller koppla ifrån batterierna för att stoppa falsklarm, då förloras brandvarnarens viktiga
funktion. Öppna fönster eller ventilera luften runt brandvarnaren för att stoppa larmet och/eller tryck
på pausknappen.
» Brandvarnaren ska installeras i enlighet med alla lokala och nationella bestämmelser för installation.
» Brandvarnaren är avsedd att användas i enbostadshus. I flerbostadshus ska varje bostad utrustas
med egna brandvarnare. Denna brandvarnare är inte lämplig för användning i byggnader som inte är
bostäder. Brandvarnaren är inte en ersättning för ett fullvärdigt larmsystem som krävs enligt lag eller
av brandmyndighet.
» Det kan finnas faktorer som gör att en person i hushållet inte hör larmet (t ex buller, djup sömn, dålig
hörsel). Om du misstänker att en person i hushållet inte kommer att höra brandvarnaren bör specialvarnare installeras. Om en person i hushållet har nedsatt hörsel bör speciella larm installeras vilka
uppmärksammar personen genom ljud, ljus och vibrationer.
» Brandvarnaren upptäcker förbränningspartiklar i luften (rök). Den reagerar inte på, flammor eller gas.
Brandvarnaren är konstruerad att avge en larmsignal om en brand håller på att utvecklas.
» Inga brandvarnare har en absolut tillförlitlighet och ger inte 100% garanti för att liv och egendom
skyddas mot brand. Brandvarnaren är ingen ersättning för försäkring. Husägare och hyresgäster bör
teckna liv- och husförsäkring.
» Brandvarnaren bör testas varje vecka och bytas ut vart tionde år.
Kombinerad TEST
och PAUSE-knapp.
BRUKSANVISNING
601120 - Origo - Usermanual.indd 9 2015-06-18 13:30:49
10
PLACERING AV BRANDVARNARE
En förutsättning för att brandvarnaren ska kunna ge tidig varning är att den är installerad där branden
uppstår. Housegard rekommenderar därför att du installerar en brandvarnare i varje rum och på alla
våningar.
» Installera brandvarnare i alla separata sovrum och i alla rum där man vistas.
» I bostäder med flera plan bör brandvarnaren installeras högst upp i varje trappa mellan varje vånings-
plan.
» I källare bör brandvarnaren monteras i taket vid foten av trappan.
» I sovrum där man sover med stängd dörr bör det alltid finnas en monterad brandvarnare inne i
sovrummet.
» Installera brandvarnare i varje rum där det finns potentiella brandrisker.
» Installera brandvarnaren i varje ände av korridor om den är längre än 9 meter.
» Montera brandvarnaren i mitten av taket. Om detta inte är möjligt, montera brandvarnaren på väggen
minst 0,5 m från hörn och minst 10-15 cm från taket ( Montering på vägg rekommenderas inte.)
BRANDVARNARE BÖR INTE PLACERAS PÅ FÖLJANDE PLATSER
» I köket nära spisen där rök från matlagning kan orsaka oönskade larm.
» I områden med hög luftfuktighet såsom badrum eller nära diskmaskin eller tvättmaskin där vattenån-
ga och fukt kan utlösa falsklarm.
» Nära fläktar och ventilationskanaler där luftströmmar kan hindra rök att nå fram till brandvarnaren.
» Nära ljuskällor och elektrisk utrustning som avger elektromagnetiska fält.
» I närheten av spis eller kamin med öppen eld.
» Högst upp i V-formade tak, där luftfickor kan orsaka att röken inte når fram till brandvarnaren.
» I garage där avgaserna kan orsaka oönskade larm.
» I dammiga och förorenade områden där damm och smuts kan skada brandvarnaren.
» I rum där temperaturen kan falla under 5 °C eller stiger över 45 °C, eller i rum med stora temperatur-
variationer.
VARNING: Felaktig placering kan leda till minskad driftssäkerhet och falsklarm.
50 cm
100 cm
FÖRKLARING:
Minimalt skydd
Rekommenderat/utökat skydd
Brandvarnare med pausfunktion
rekommenderas
601120 - Origo - Usermanual.indd 10 2015-06-18 13:30:49
 Loading...