


Installation Manual
Model:
CSUB10N
CSUB10NCE
V 1.1
10” IN-WALL SUBWOOFER

844·674·4461
TECHSUPPORT@ORIGINACOUSTICS.COM
Table of Contents
Introduction 1
Installation Requirements and Recommendations 1
CSUB10NCE: What’s Included 1
Required Tools/Items 2
Location 2
Amplifier 2
Enclosure Installation 3
1) Installing the Wire 3
2) Installing the Enclosure 4
3) Attach the Wire to the Enclosure 5
4) Drywall 5
Bale Instruction 6
Installation Requirements and Recommendations 6
CSUB10N: What’s Included 6
Required Tools/Items 7
Bale Installation 8
1) Installing the Subwoofer Bale 8
2) Painting the Grille 9
3) Mounting the Grille 9
4) Making Amplifier Adjustments 10
Specifications 12
Technical Assistance 13
Warranty 14
Limited Lifetime Warranty 14
Requirements and Warranty Coverage 15
Return Process 15

1WWW.ORIGINACOUSTICS.COM
CSUB10N & CSUB10NCE INSTALLATION MANUAL
Introduction
Thank you for purchasing the CSUB10NCE In-Wall Subwoofer. At
Origin Acoustics, we take pride in providing you with a high quality
product. All of Origin Acoustics’ subwoofers are designed to have
excellent sound quality, longevity, and a simple installation process.
This subwoofer is designed for new construction installations
only. For your installation convenience, it’s sold in two parts: the
CSUB10NCE enclosure that’s installed before the drywall, and the
CSUB10N that’s installed aer the drywall.
This instruction booklet covers the necessary information for a
smooth installation of your Composer Subwoofer enclosure (CSUB10NCE), including: the tools you will need, step-by-step instructions
for installation, and all warranty information. The instructions for
the bale (CSUB10N) aren’t included in this manual, but can be
found with the bale or online at www.originacoustics.com. If for
any reason you experience problems or if you have installation
questions please call us at (844) 674-4461. Hours of operation are
8:00am to 5:00pm (Pacific Time), Monday through Friday.
Installation Requirements
and Recommendations
CSUB10NCE: What’s Included
(CSUB10N Bale sold separately)
• Enclosure
• Subwoofer bale placeholder
• New Construction mounting system
• Mounting brackets x2
• Mounting suspension cable
• Mounting bracket screws x8
2
844·674·4461
TECHSUPPORT@ORIGINACOUSTICS.COM
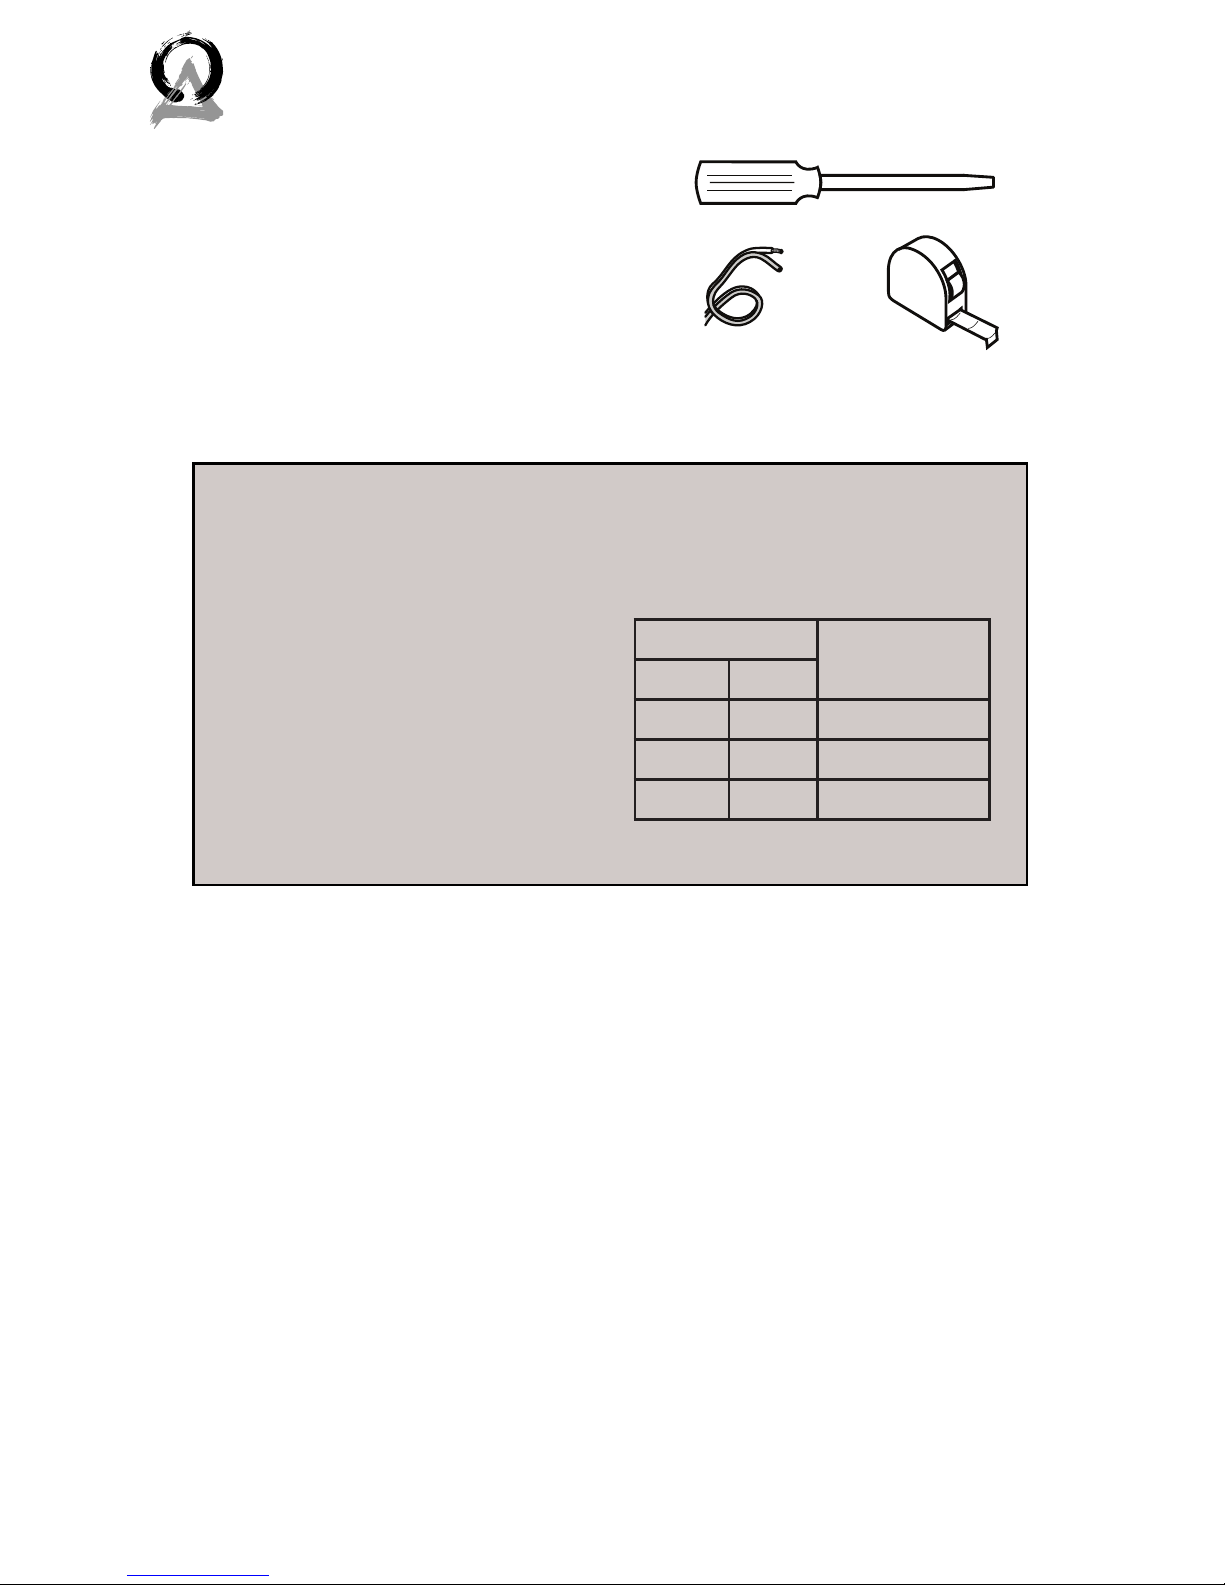
Required Tools/Items
• Screwdriver
• Speaker wire
• Tape measure
For this setup, use a multistranded wiring designed for
amplifier to speaker connections.
The gauge of wire used can have
an impact on the performance
of your speakers, and we
recommend choosing the largest
wire size that is practical for your
installation. Which gauge to select
depends on the length of wire to
be used on any particular speaker.
In general the shorter the run the
smaller the wire size you can use,
however you can never go wrong
by using a thicker gauge.
Wire Length Recommended
Gauge
Feet Meter
0-100 0-30 18
50-150 15-45 16
100+ 30+ 14
Speaker Wire Recommendations
Location
The location of your subwoofer(s) will have a large impact on
sound quality. For best results, install the subwoofer so the bottom is close to the ground and in either corner in the front of the
room. If you’re installing two subwoofers in the room, the best
option is one in each corner in the front.
Amplifier
This subwoofer has been designed to work with an Origin Subwoofer amplifier, either the SubA150 or the SubA500.
32
1
Figure 2.1: Tools
3WWW.ORIGINACOUSTICS.COM
CSUB10N & CSUB10NCE INSTALLATION MANUAL
Enclosure Installation
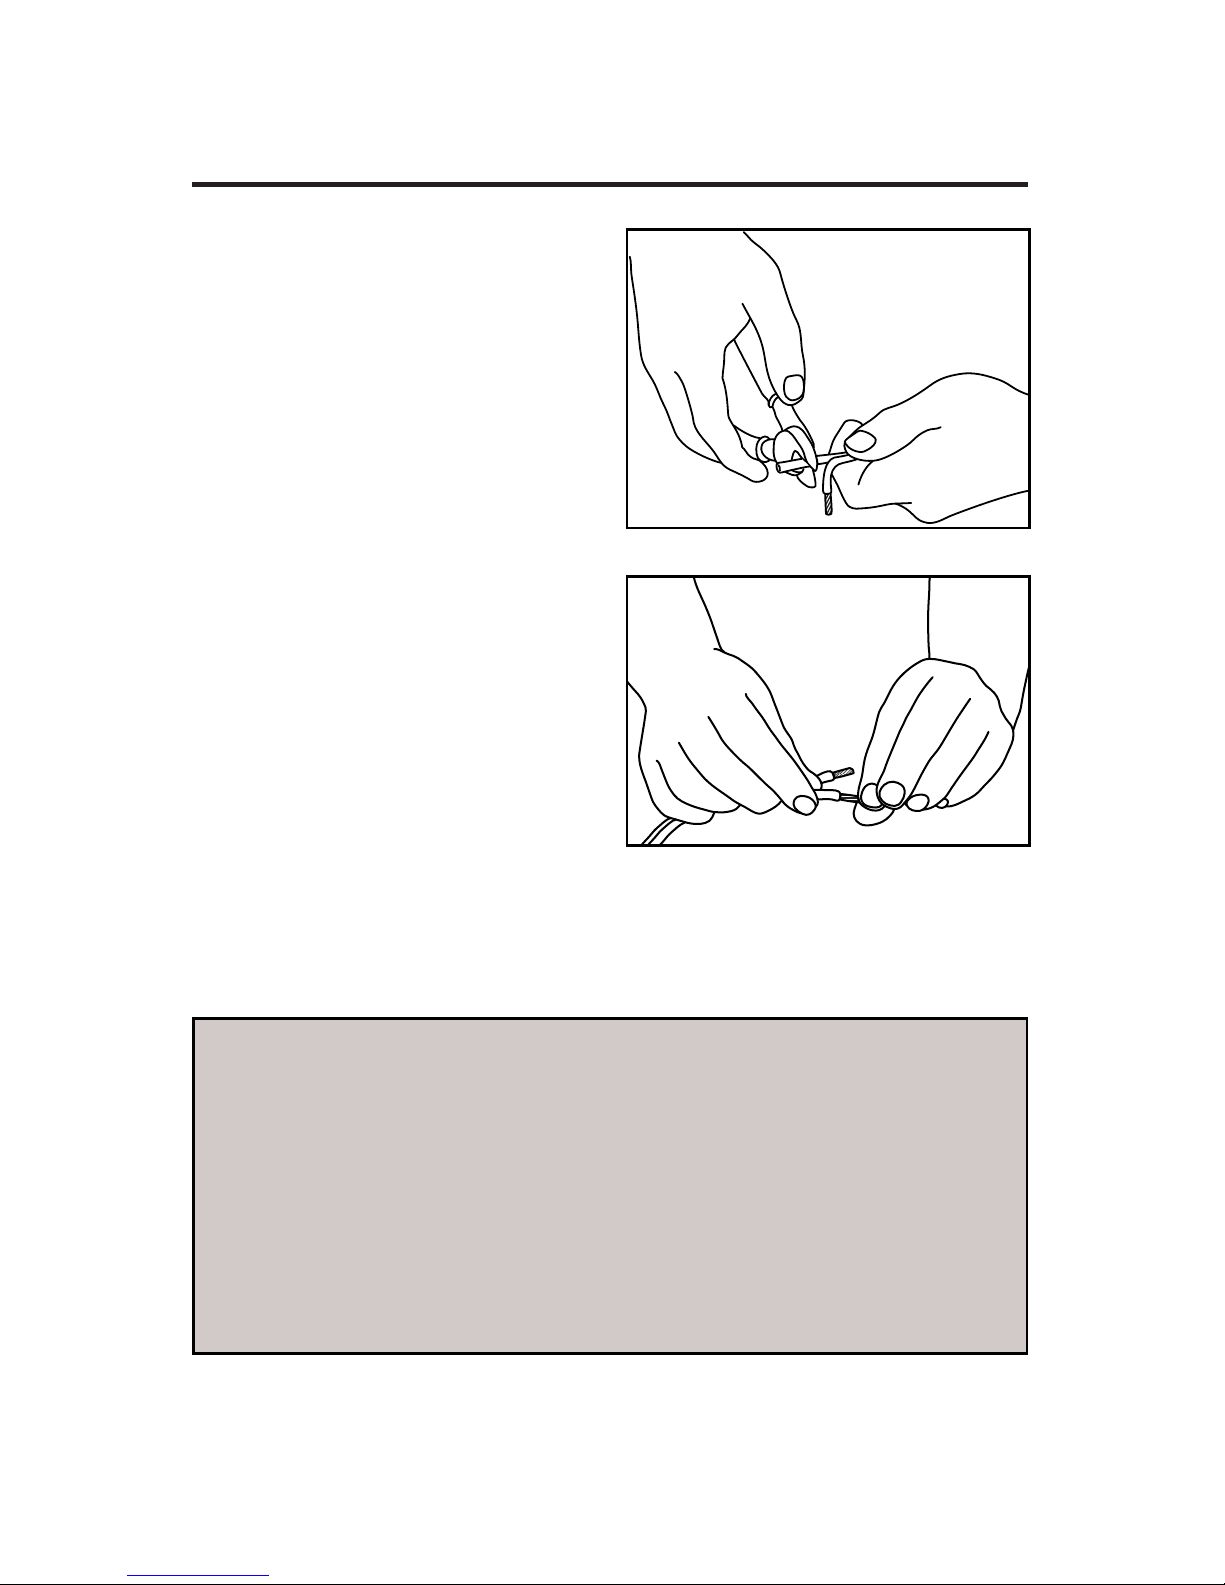
1) Installing the Wire
Strip ¼ to ½ inches (6 to 12
mm) of the insulation o both
ends of the wire. To avoid stray
strands, twist them at the end.
Connect the wire to the amplifier, but don’t plug in the
amplifier AC just yet. Route the
wire through the walls to the
subwoofer location.
You will need a wire that has at least two conductors; one that can be
identified as the positive and the other as the negative. All two conductor
wires have some means of identifying which conductor is which, but at
times this identification may be subtle. It’s crucial that you keep track of
which wire you use for positive (+) and negative (-). Typically if the wires
are colored red and black or copper and silver, but sometimes other colors or patterns are used. You can choose whichever color of wire you want
to be positive and negative as long as you remain consistent throughout
the install.
About Speaker Wire
Figure 3.1: Installing the Wire
4
844·674·4461
TECHSUPPORT@ORIGINACOUSTICS.COM
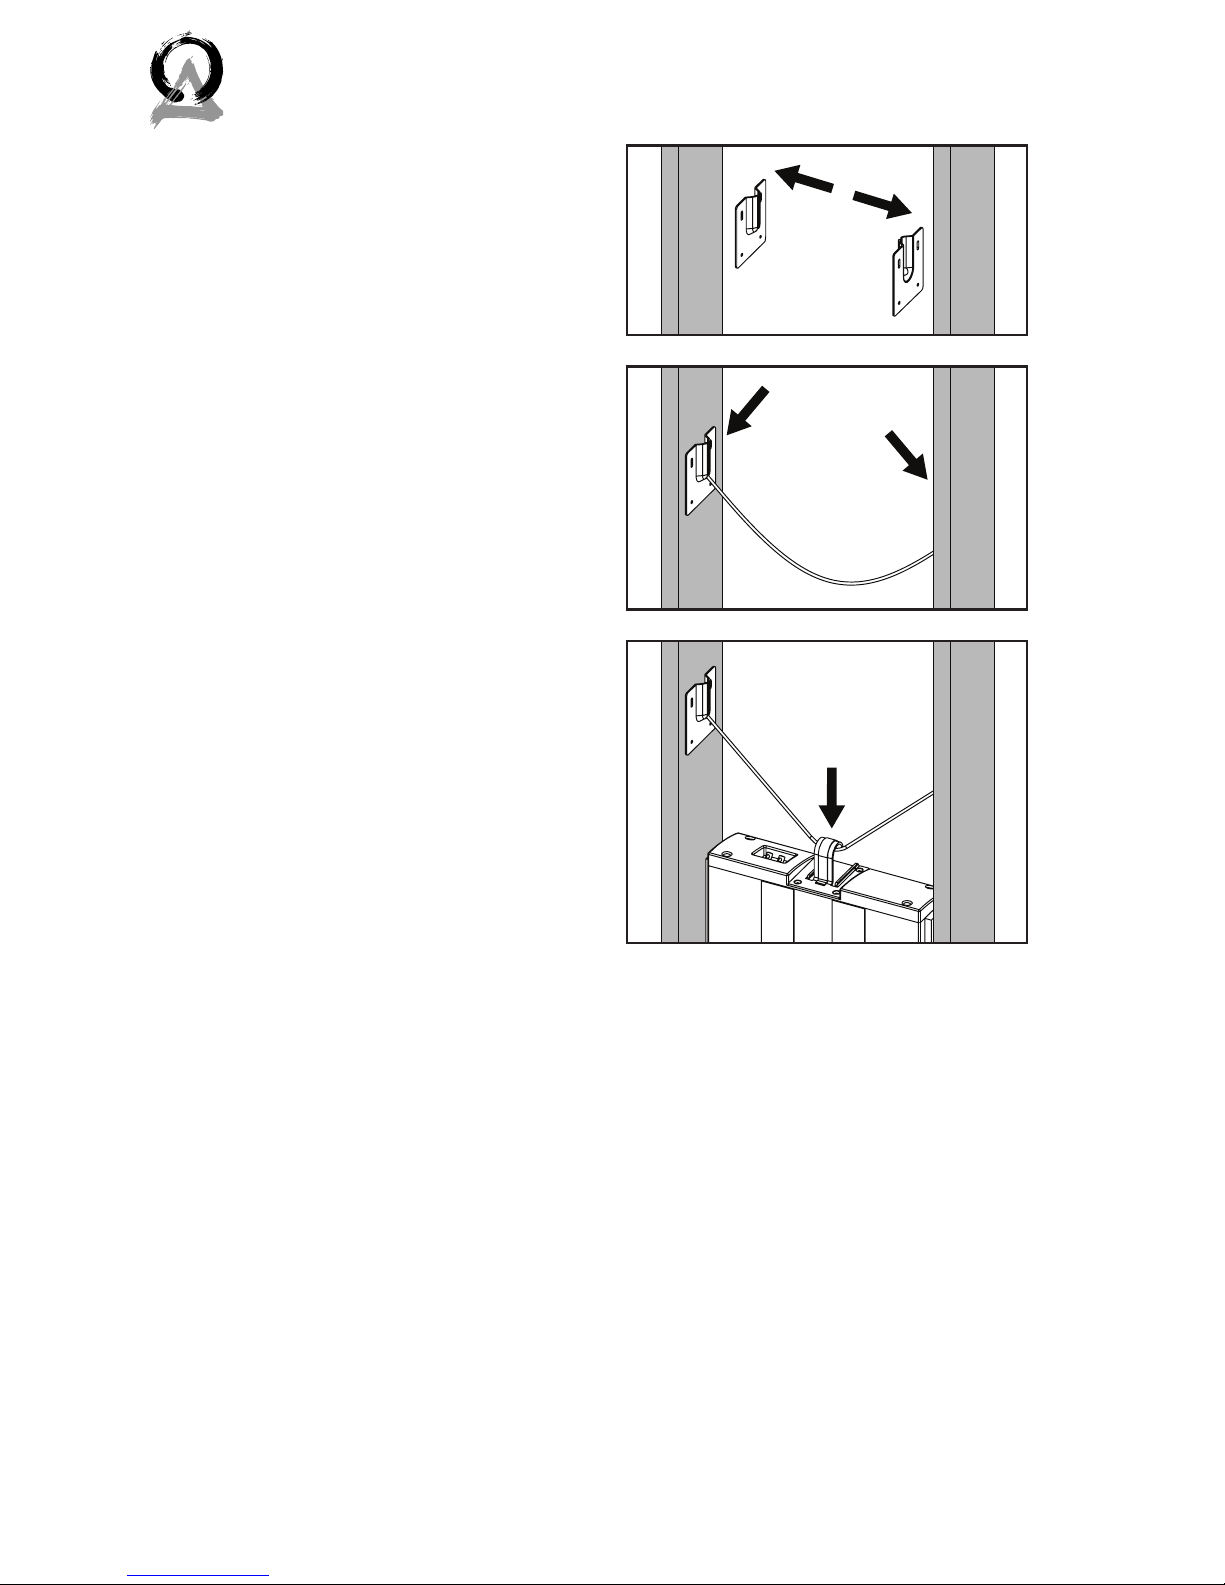
2) Installing the
Enclosure
Using the 8 provided screws,
attach the two mounting brackets to the studs so that they are
facing each other. Once everything’s installed, the distance
between the bottom of the subwoofer and the bottom of the
bracket will be about 49”. So
when you know how far o the
floor the subwoofer should be,
add that number to 49”, and install the brackets at that height.
For example, if you want the
subwoofer to be about a foot
o the floor, install the bottom
of the brackets about 61” (49” +
12”) o the floor.
Insert the ends of the suspension cable into the mounting
brackets. Hang the enclosure
from the suspension cable.
There are several ends on one
side of the suspension cable so
that you can adjust the height
of the enclosure.
Figure 4.1: Suspension Install

5WWW.ORIGINACOUSTICS.COM
CSUB10N & CSUB10NCE INSTALLATION MANUAL
3) Attach the Wire to the Enclosure
Depending on how you ran the
wires to the subwoofer location, the wires can be attached
to the connectors at the top or
bottom of the enclosure. Push
on the end of the connector
and insert the wire.
4) Drywall
The drywall is now ready to go up. The placeholder plate should
not be removed until the subwoofer is installed. Install the drywall to the edge of the plate, but do not tape or mud the gap. The
gap should not be larger than ⅛” (3mm).
The drywall screws should be no further apart than 12”, or 8”
along the edge.
Figure 5.1: Connecting Wire

6
844·674·4461
TECHSUPPORT@ORIGINACOUSTICS.COM
Baffle Instruction
Thank you for purchasing the CSUB10N In-Wall Subwoofer. At Origin
Acoustics, we take pride in providing you with a high quality product.
All of Origin Acoustics’ subwoofers are designed to have excellent
sound quality, longevity, and a simple installation process.
This subwoofer is designed for new construction installations
only. For your installation convenience, it’s sold in two parts: the
CSUB10NCE enclosure that’s installed before the drywall, and the
CSUB10N bale that’s installed aer the drywall.
This instruction booklet covers the necessary information for a
smooth installation of your Composer Subwoofer bale (CSUB10N),
including: the tools you will need, step-by-step instructions for installation, troubleshooting tips for any errors that may occur, and
all warranty information. This manual assumes you’ve already installed the enclosure, and doesn’t cover those installation steps. The
instructions for the enclosure (CSUB10NCE) can be found with the
enclosure or online at www.originacoustics.com. If for any reason
you experience problems or if you have installation questions please
call us at (844) 674-4461. Hours of operation are 8:00am to 5:00pm
(Pacific Time), Monday through Friday.
CSUB10000N: What’s Included
• Bale with 10” aluminum woofer
• Grille
• Screws (x4)
• Hex-drive
Installation Requirements
and Recommendations

7WWW.ORIGINACOUSTICS.COM
CSUB10N & CSUB10NCE INSTALLATION MANUAL
Required Tools/Items
• Screwdriver that can hold
hex-wrench
1
Optional Tools/Items
• Can of spray paint
• Can of compressed air
For painting the grille
For painting the grille
Figure 7.1: Tools

8
844·674·4461
TECHSUPPORT@ORIGINACOUSTICS.COM
Baffle Installation
1) Installing the Subwoofer Bale
When you’re ready to install the
bale, start by removing the
placeholder plate.
Connect the speaker wires from
the enclosure to the woofer terminals. Note that the terminals
are sized dierently to assure
that they get connected to the
proper woofer terminals.
Insert the bale into the enclosure. Make sure it’s right-sideup by keeping an eye on the
orientation of the logo. Use the
four screws to firmly attach the
bale to the enclosure, but do
not overtighten.
We recommend testing the
system at this time to ensure
the subwoofer is installed and
working properly.
Figure 8.1: Connecting Wire
Figure 8.2: Inserting
the Bale

9WWW.ORIGINACOUSTICS.COM
CSUB10N & CSUB10NCE INSTALLATION MANUAL
2) Painting the Grille
In some situations the subwoofer may look better if the
color matched the walls, ceiling, or trim in the room. This
can be accomplished by painting the grille. The grille must be
painted with spray paint. Most
hardware stores will mix a can
of paint to match the color you
need.
Before painting, carefully
remove the thin cloth on the
underside of the grille. Lightly
spray the front of the grille
with the paint from a distance,
being careful not to plug any
of the holes. Diluting the paint
with paint thinner will lessen
the risk of filling any holes. If
a hole is plugged, use a can of
compressed air to open it. Once
the paint is dry, put the cloth
back on the grille.
Figure 9.1: Remove Cloth
Figure 9.2: Spray Grille
3) Mounting the Grille
Fit the grille over the subwoofer and press into place.

10
844·674·4461
TECHSUPPORT@ORIGINACOUSTICS.COM
4) Making Amplifier Adjustments
1. “Crossover” should be the first adjustment you set. But you
can always come back and fine tune this later.
• If you are using the LFE output from a home theater
receiver, set the crossover frequency on the subwoofer
amp as high as you can since you will be controlling this
on the receiver’s set-up routine.
• For most applications you can simply set the subwoofer
amplifier’s crossover frequency to 80Hz (straight-up on
our SubA150 amp). When using an LFE output, set it to
80Hz.
• If your front speakers are small you may want to try setting the crossover closer to 100Hz (about 1 o’clock on our
SubA150 amp).
2. “Phase” adjustment should come next. This adjustment can
have a subtle eect but it is definitely worth doing. You won’t
need to sweat getting it exact; the important thing is to avoid
getting it really wrong.
• When tuning by ear:
a. If you are using a home theater receiver, during set-
up there will be section asking you to enter the distance from the listener to the speakers. You should
do this before proceeding. If you are using a receiver
that does not have this feature, don’t worry, the following steps will still get everything right.
b. For source material, a test CD with a 80Hz or 100Hz
test tone (either sine wave or ⅓ octave pink noise) is
best but anything with constant bass can also work

11WWW.ORIGINACOUSTICS.COM
CSUB10N & CSUB10NCE INSTALLATION MANUAL
well.
c. Set the volume so that the bass level sounds ap-
proximately right to slightly bass heavy.
d. You will want to be in the critical listening area. Have
a helper adjust the phase control until the bass level
sounds the loudest. If you are using music or video
tracks for this test, listen for the mid-bass level as
the low bass will be unaected. At this stage you’re
listening for the loudest bass, not the best.
• When tuning by measurement. You will use the same
method as above except:
e. replace your your ear with an SPL meter. An inex-
pensive SPL meter works fine or you can download
a free app for use on your phone.
f. Sorry, but the music CD with constant bass won’t
work here. You will need to use a test CD.
3. “Volume” will complete your subwoofer amplifier set-up.
• When tuning by ear. Play some source material that has
bass content you are familiar with. Simply adjust the volume until the bass level sounds in balance with the rest
of the sound. Try several music and video tracks paying
special attention to deep male vocals with an ear towards making them sound natural. Be sure to try several
locations in the listening area and adjust to get the best
average.
• You shouldn’t attempt tuning by measurement unless
you have the sophisticated equipment that can measure
full bandwidth and you know what you’re doing.

12
844·674·4461
TECHSUPPORT@ORIGINACOUSTICS.COM
Specifications
Model Number (Enclosure) CSUB10NCE
Model Number (Bale) CSUB10N
Part Number (Enclosure) CSUB10000NCE
Part Number (Bale) CSUB1000AN
Woofer Cone Material Aluminum
Woofer Diameter 10” (254mm)
Frequency Response 30Hz-250Hz
Impedance 8Ω
Power Handling 100-500 watts
Sensitivity 88dB
Amplifier Requirements SUBA500, SUBA150
Cutout Dimensions 10.55x 10.55” (268 x 268mm)
Dimensions (Enclosure)
3.5 x 13 x 44” (88 x 330 x
1120mm)
Dimensions (Enclosure) w/
Grille
14.15 x 14.15” (360 x 360mm)
Dimensions (Bale)
3.5 x 13 x 44” (88 x 330 x
1120mm)
Dimensions (Bale) w/ Grille
3.5 x 13 x 44” (88 x 330 x
1120mm)
Dimensions (Grille) 14.15 x 14.15” (360 x 360mm)

13WWW.ORIGINACOUSTICS.COM
CSUB10N & CSUB10NCE INSTALLATION MANUAL
If you have any questions or concerns about installing or using
this product, you can reach us through one of the following methods:
Phone: (844) 674-4461
Hours of operation: 8:00am - 5:00pm (Pacific Time), Mon - Fri
Email: techsupport@originacoustics.com
If you are having technical trouble, please include the model number and briefly explain what steps you took to resolve the problem
in your email, or be prepared to answer these questions over the
phone. If you are considering returning the product, it’s required
that you contact Origin Acoustics prior to any return attempts.
This way we can determine if the issue can be resolved without
returning the product, or if needed we can provide instructions
and support for the return process.
Technical Assistance

14
844·674·4461
TECHSUPPORT@ORIGINACOUSTICS.COM
Origin Acoustics warrants to the original retail purchaser only that
this Origin Acoustics product will be free from defects in materials
and workmanship, provided the speaker was purchased from an
Origin Acoustics authorized dealer.
If the product is determined to be defective, it will be repaired or
replaced at Origin Acoustics’ discretion. If the product must be
replaced yet it is no longer manufactured, it will be replaced with
a model of equal to or greater value that is the most similar to
the original. If this is the case, installing the replacement model
may require mounting modifications; Origin Acoustics will not be
responsible for any such related costs.
Limited Lifetime Warranty
Warranty

15WWW.ORIGINACOUSTICS.COM
CSUB10N & CSUB10NCE INSTALLATION MANUAL
This warranty may not be valid if the product was purchased
through an unauthorized dealer. This warranty only applies to
the individual that made the original purchase, and it cannot be
applied to other purchases. The purchaser must be prepared to
provide proof of purchase (receipt). This warranty will not be valid if the identifying number or serial number has been removed,
defaced, or altered.
This warranty does not cover the following:
• Accidental damage
• Damage caused by abuse or misuse
• Damage caused by attempted repairs/modifications by
anyone other than Origin Acoustics or an authorized dealer
• Damage caused by improper installation
• Normal wear, maintenance, and environmental issues
• Damage caused by voltage inputs in excess of the rated
maximum of the unit
• Damage inflicted during the return shipment
Before making any return attempts, it is required that you first
contact Origin Acoustics. Return product to Origin Acoustics
or your dealer, either in person or by mail. It’s preferable if the
product is returned in the original packaging. If this isn’t possible,
the customer is responsible for insuring the shipment for the full
value of the product.
This warranty is in lieu of all other expressed or implied warranties.
Some states do not allow limitations on implied warranties, so this
may not apply depending on the customer’s location. (For more
information, see Magnuson-Moss Warranty Act.)
Return Process
Requirements and Warranty Coverage

©2016 Origin Acoustics. All copyrighted, trademarked and
patented elements mentioned herein are the sole property of
Origin Acoustics.
 Loading...