

Oriental Pacific TC1572LCD Operating Instructions Manual
Fri) please
26 inch
Wide Screen LCD Television
Operating Instructions
Model: TC1572LCD
Please read these instructions carefully and retain for future reference.
For assistance during normal working hours (8:30am - 5pm, Mon contact Oriental Pacific International Ltd.
New Zealand call: 0800 89 85 80
Email: service@orientalpacific.com

1.0 IMPORTANT SAFETY INSTRUCTIONS
When using any electrical apparatus always observe safety regulations and use basic safety
precautions to reduce the risk of fire, electric shock and personal injury, including the following:
Read, Keep and Follow these instructions, heeding all Warnings.
WARNING! No objects filled with liquid, such as vases, shall be placed on this equipment or in any
position where liquid may fall into this equipment or any other electrical apparatus.
WARNING! Do not insert any objects into any openings of this equipment or any other electrical
apparatus.
WARNING! Do not use this apparatus near water. To avoid the risk of fire or electric shock, do not
expose this apparatus to rain or moisture. The apparatus shall not be exposed to dripping or
splashes and is strictly for indoor use only.
WARNING! Clean only with a lint free cloth to wipe the display screen. Do not use
cleaning agents or harsh abrasives as these will damage the TV display and void all
warranty claims. Refer specific cleaning section. (Page 25)
WARNING! DO NOT block any ventilation openings. Keep away from curtains, newspapers and
restricted areas. Install in accordance with any specific manufacturer’s instructions. Always allow a
sufficient gap around the apparatus to avoid overheating.
WARNING!
apparatus (including amplifiers) that produce heat. Do not leave in direct sunlight.
WARNING!
apparatus.
WARNING! Connect to a suitable 230-240V ~ 50 Hz power supply only.
WARNING! Keep out of reach of young children. This apparatus is not suitable for use by young
children or infirm persons without supervision. Young children must be supervised to ensure that they
do not play with the apparatus. Ensure young children have enough knowledge to operate the
equipment safely if they do have access to this equipment.
WARNING! Do not abuse or damage a power cord. If any power cord is damaged, it must be
replaced by the manufacturer, its service agent or a similarly qualified person in order to avoid a
hazard. A replaceable cord must be replaced with an authorised replacement from an authorised
service agent only.
WARNING! Only use attachments/accessories specified by the manufacturer.
WARNING! Unplug completely from the power source this apparatus during lightening storms or
when unused for long periods of time.
WARNING! Attention is drawn to the environmental aspects of disposing of any battery.
WARNING! Refer all servicing to qualified personnel. Servicing is required when the apparatus has
been damaged in any way, such as when the power supply cord or plug is damaged, liquid has been
Do not install near any heat sources such as radiators, gas heaters, stoves or other
Do not place any naked flame source, such as lighted candles on any electrical
1

spilled or objects have fallen into the apparatus, the apparatus has been exposed to rain or moisture,
by
does not operate normally, or has been dropped.
WARNING! For household use only, this apparatus is not intended for commercial use.
WARNING! If this apparatus is to be used by a third party, please supply these instructions with it.
WARNING! No liability will be accepted for any personal injury or damage caused
failure to follow these instructions.
2

Table of Contents
CONTENTS
PAGE
1.0 Important Safety Instructions 1-2
2.0 Features & General Information 4
3.0 Unpacking & Assembly Procedure 5
4.0 Location & Components 6-7
4.1 Locating the unit 6
4.2 Components (front) 6
4.3 Components (rear) 7
5.0 Remote Control 8
5.1 Setup 8
5.2 Operating range 8
6.0 Remote Control Functions 9
6.1 Description 9
7.0 Setup 10
7.1 Connection 10
8.0 Tuning TV 11-12
9.0 DVD Connection Setup 13-14
9.1 DVD quick setup guide 13
9.2 SCART connection 14
10.0 Operating Guide 15-17
10.1 Signal source selection 15
10.2 Channel selection (TV mode) 15
10.3 Volume adjustment 16
10.4 Recall 16
10.5 Display channel number 16
10.6 Picture modes 16
10.7 Sound modes 16
10.8 Still mode 17
10.9 Zoom function 17
10.10 Mute 17
11.0 Using the Channel Menu 18-19
11.1 Skip 18
11.2 Set channel number 18
11.3 Sound system 18
11.4 Manual search 19
11.5 Fine tuning 19
11.6 Channel edit 19
12.0 Using the Picture Parameters Menu 20
12.1 Adjusting picture settings 20
13.0 Using the Audio Settings Menu 20
13.1 Adjusting audio settings 20
14.0 Using the PIP (Picture in Picture) Menu 21
14.1 Selecting PIP size mode 21
15.0 Using The Sleep Menu 22
15.1 Selecting sleep mode 22
16.0 Using the General Settings Menu 22
17.0 Teletext Operation 23-24
18.0 Troubleshooting 25
19.0 Cleaning 25
20.0 Specifications 26
Guarantee Card 27
16.1 Adjusting General Settings 22
3

2.0 Features
••••
Multimedia Television receiver, video monitor and PC display all in one
•••• Wider viewing angle (170° H + 170° V)
•••• 200-Channel storage
••••
Sleep timer
•••• 252-page memory Teletext
•••• NICAM
••••
Dual SCART interface
••••
Multi language on screen display (OSD)
NOTE
Due to product improvement the details and/or specifications of this product may vary slightly from
the details in this manual.
PREPARATION
Please read this manual carefully before use. Take particular care to read the safety instructions
listed before beginning connection and installation of this equipment. Make sure that you know how
the equipment functions and how to operate it safely.
IMPORTANT
Carefully unpack the equipment (see below), making sure that all accessories are found. Dispose of
any unwanted packaging such as plastic bags that may be dangerous to young children. It is
recommended that you keep the main packaging in case of future transporting requirements.
Ensure that you have all the accessories. You should have:
1 x LCD display with Desktop Base carton
1 x Wall bracket assembly pack
NOTE FOR WALL INSTALLATION an independent professional installation company is
recommended. Warranty claims will become void if damage to unit is caused by improper wall
installation. PLEASE CONTACT ORIENTAL PACIFIC for advice on wall mount installation: 0800 89
85 80 or email: service@orientalpacific.com
Ensure that all equipment and accessories are in good order. Check for any damage. Report any
damage or missing parts immediately to the retailer. Do not attempt to use this equipment if it has
been damaged in any way.
WARNING!
transporting. Warranty to this equipment will be void if damaged through any accident, mistreatment,
tampering, incorrect installation or other improper use. Refer warranty conditions (Page 27).
This equipment is extremely delicate, treat with extreme care when installing, moving or
4
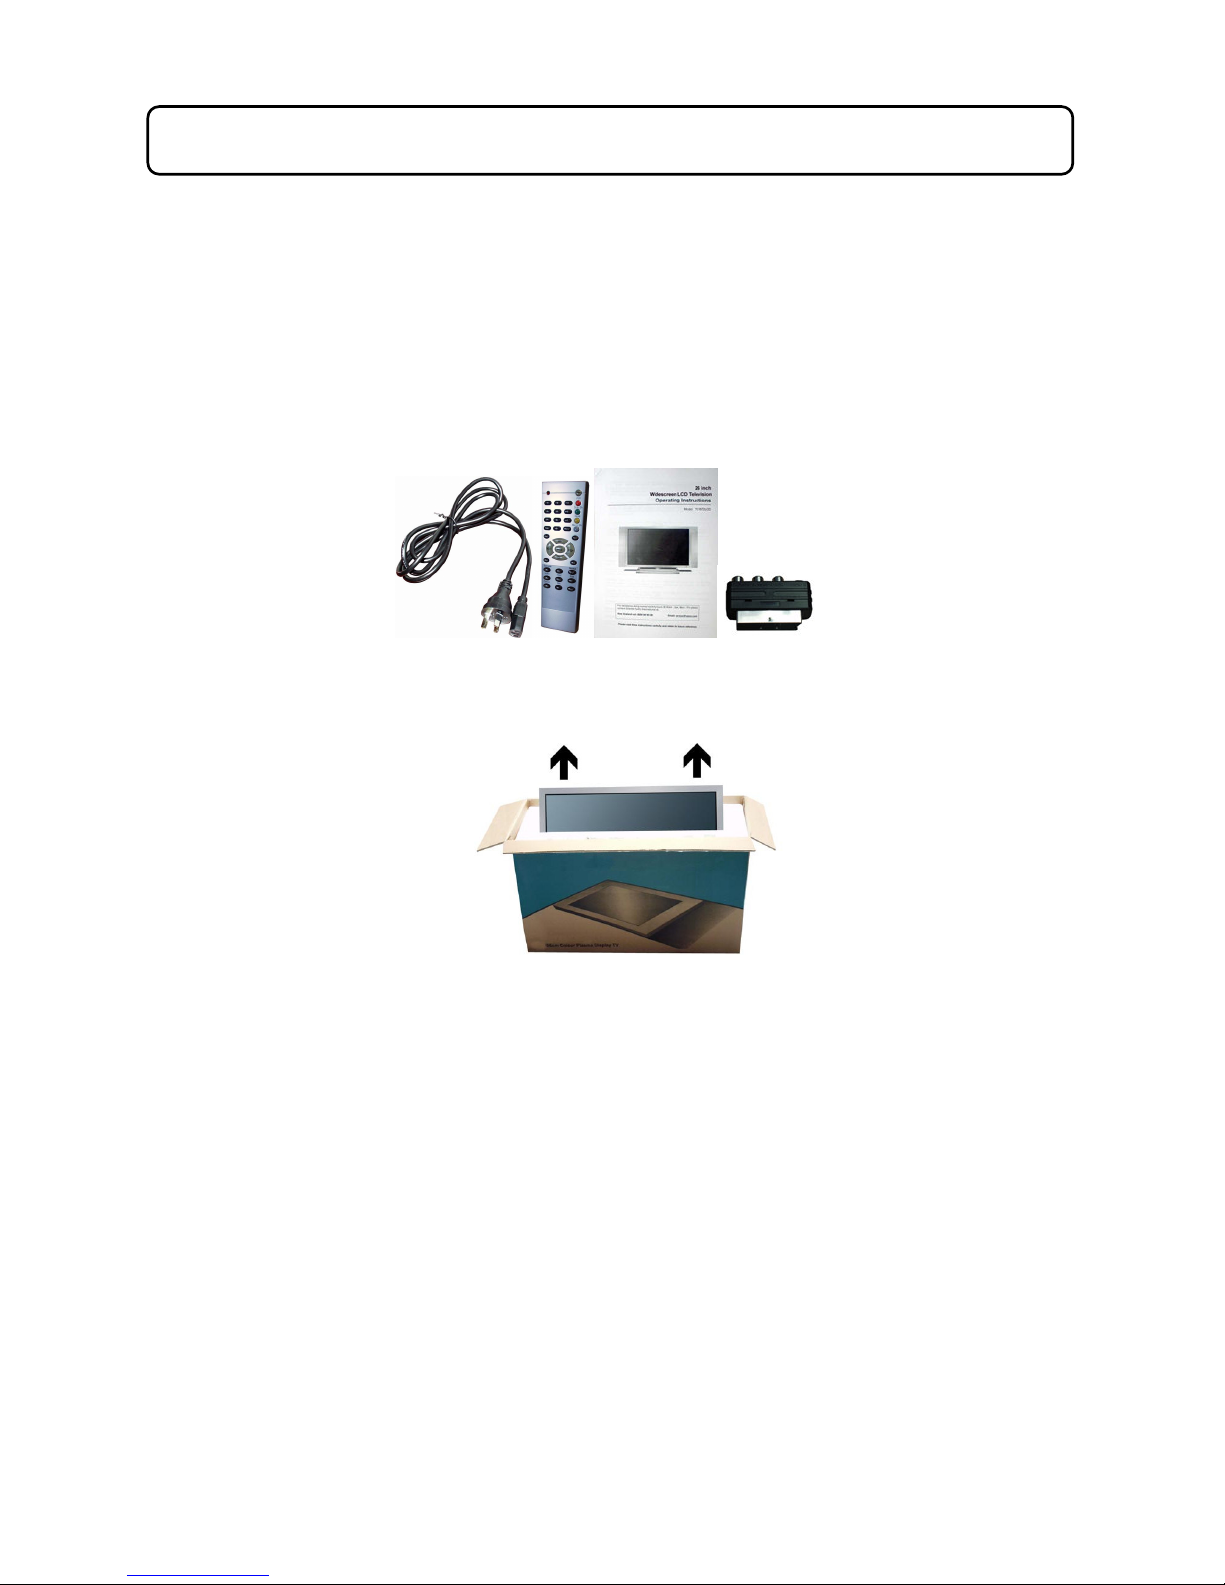
3.0 Unpacking the package
WARNING!
1. Check all packages have been received. You should have 1 LCD Display with Desktop Base
This equipment is heavy, please use 2 people to carry and handle with care.
Carton, and 1 Wall Bracket Assembly Carton.
And the accessories:
1 x Instruction manual
1 x Remote control
1 x Power cord
2 x SCART to RCA adaptor
2. Carefully open the LCD Display carton and lift the LCD TV out and place on the sturdy
platform.
Basic unpacking is now complete. Refer to section 4.0 Location & Components & section 8.0
Tuning TV in this manual for tuning and connection guide.
5
4.0 LOCATION & COMPONENTS
Please read safety instructions for specific installation safety.
4.1 LOCATING THE UNIT (BASE MOUNT ONLY)
Place on the floor or a sturdy platform only. Do not place in an area of foot traffic. Ensure the set
cannot be accidentally knocked over.
Do not place in direct sunlight or where sunlight will hit the screen. Allow suitable ventilation around
the equipment. Do not cover.
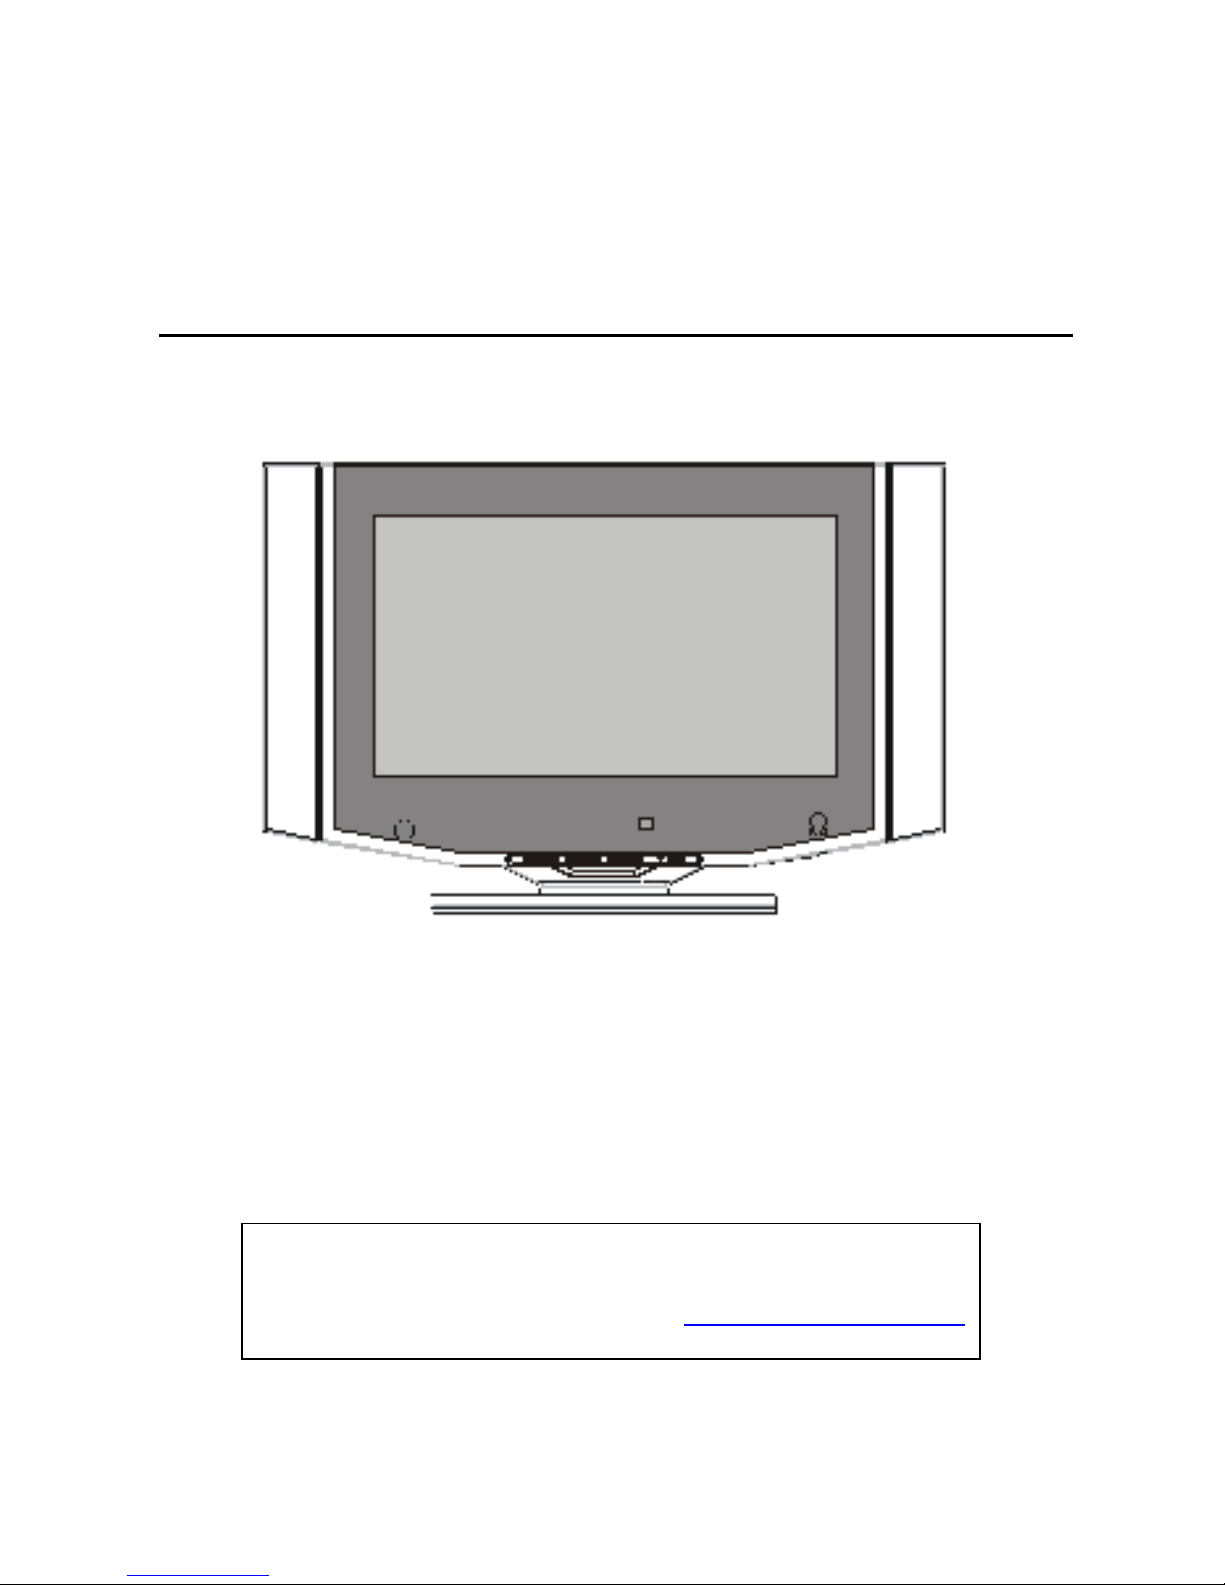
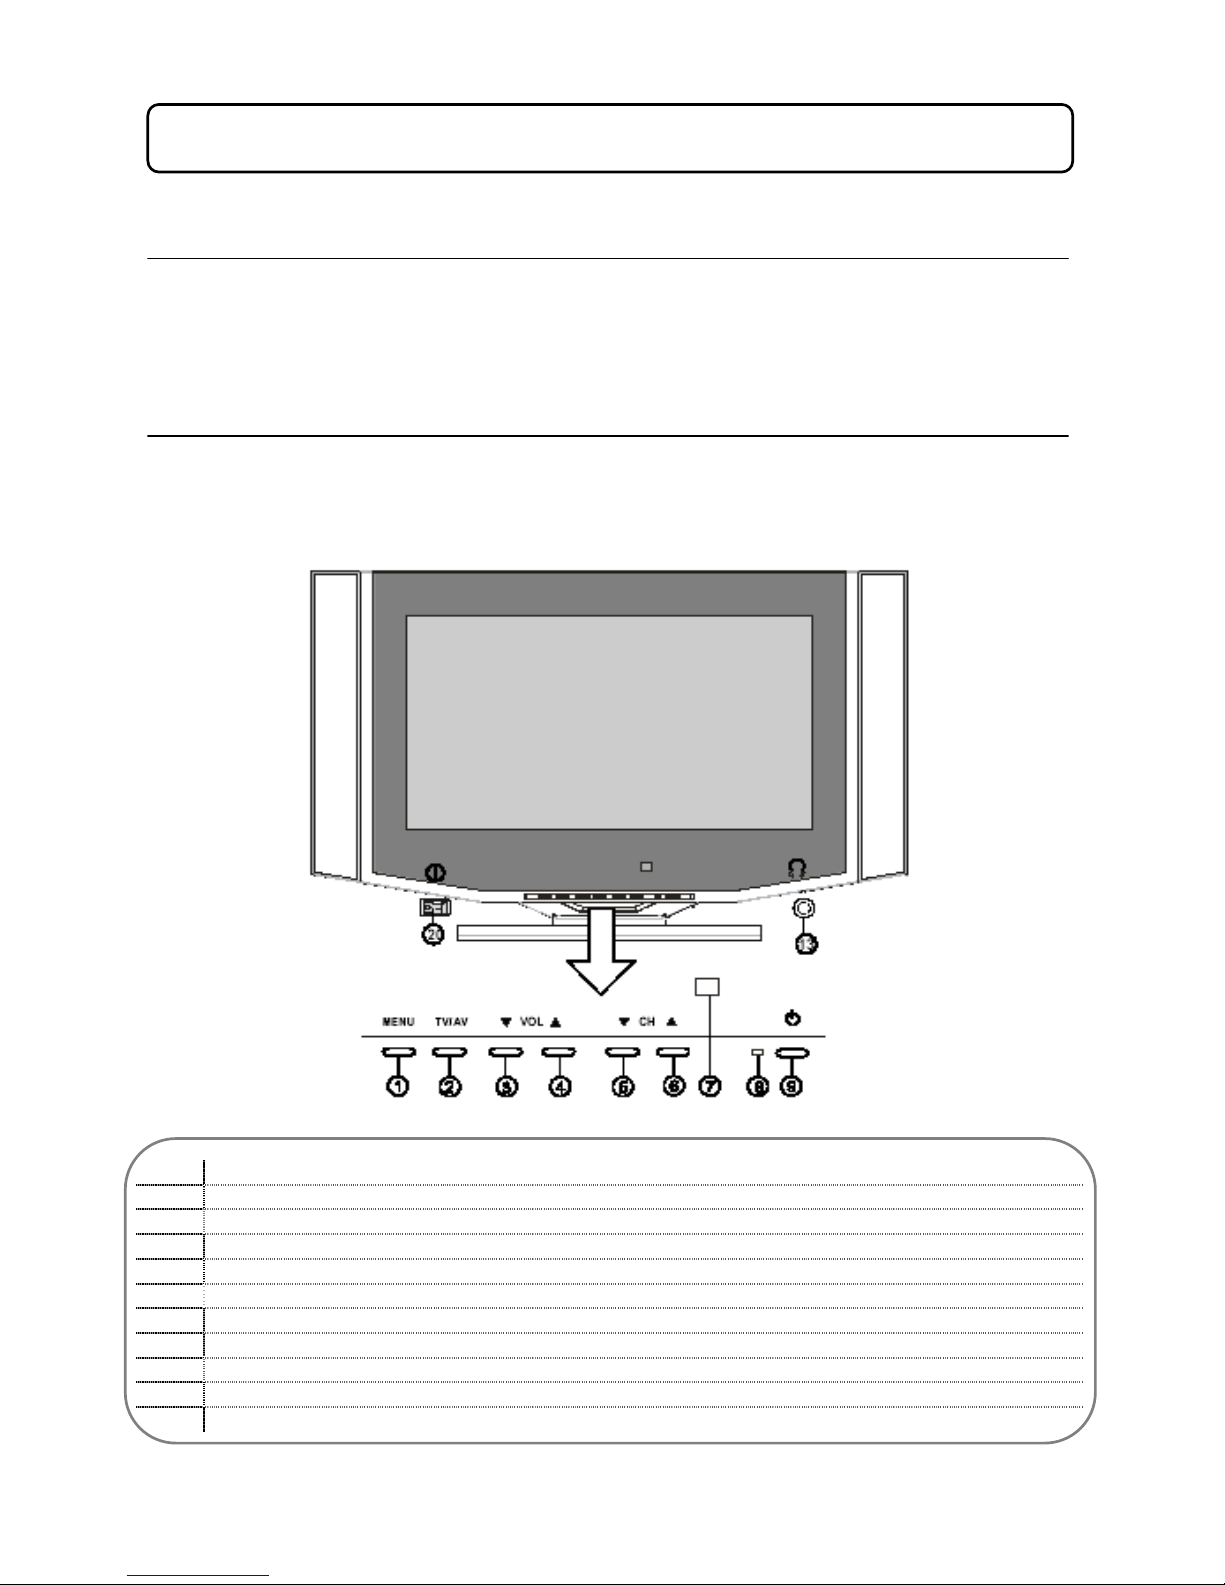
4.2 COMPONENTS (FRONT)
This set is equipped with all input and output terminals required for connection on the rear.
The set may be operated by remote control or by direct use of the front panel function buttons.
Located on the front of the set under the panel are the following controls.
1 Menu Button
2 Source Select Button
3 Volume Down / Cursor Left
4 Volume Up / Cursor Right
5 Channel Down / Cursor Down
6 Channel Up / Cursor Up
7 Remote Sensing Window
8 Power Indicator
9 Standby Button
13 Headphone Output Jack
20 Power Switch (ON/OFF)
6
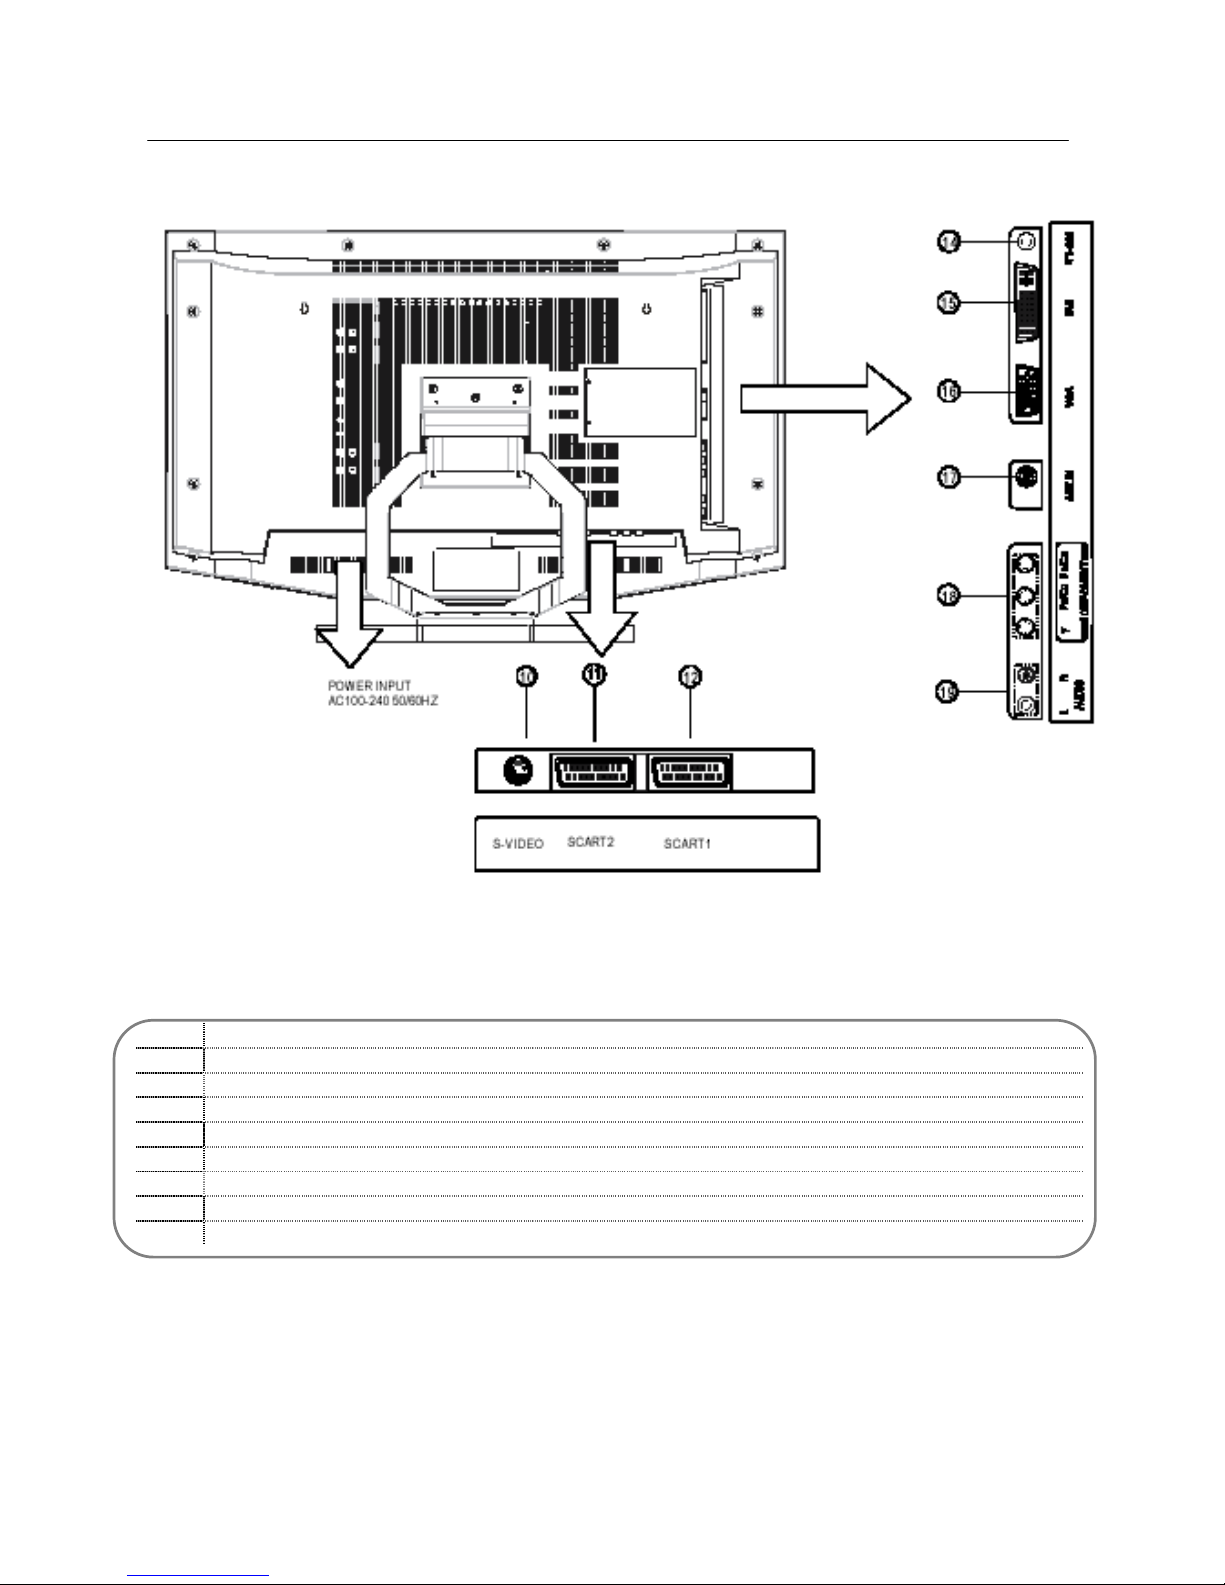
4.3 COMPONENTS (BACK)
Located on the back of the set are the following controls.
10 S-Video Input
11 SCART 2 Input (AV2)
12 SCART 1 Input (AV1)
14 RS232C Input (factory use only)
15 DVI Input
16 PC VGA Input
17 Antenna Input
18 Y/Pb/Pr/Y/Cb/Cr Input
19 Audio Input
7
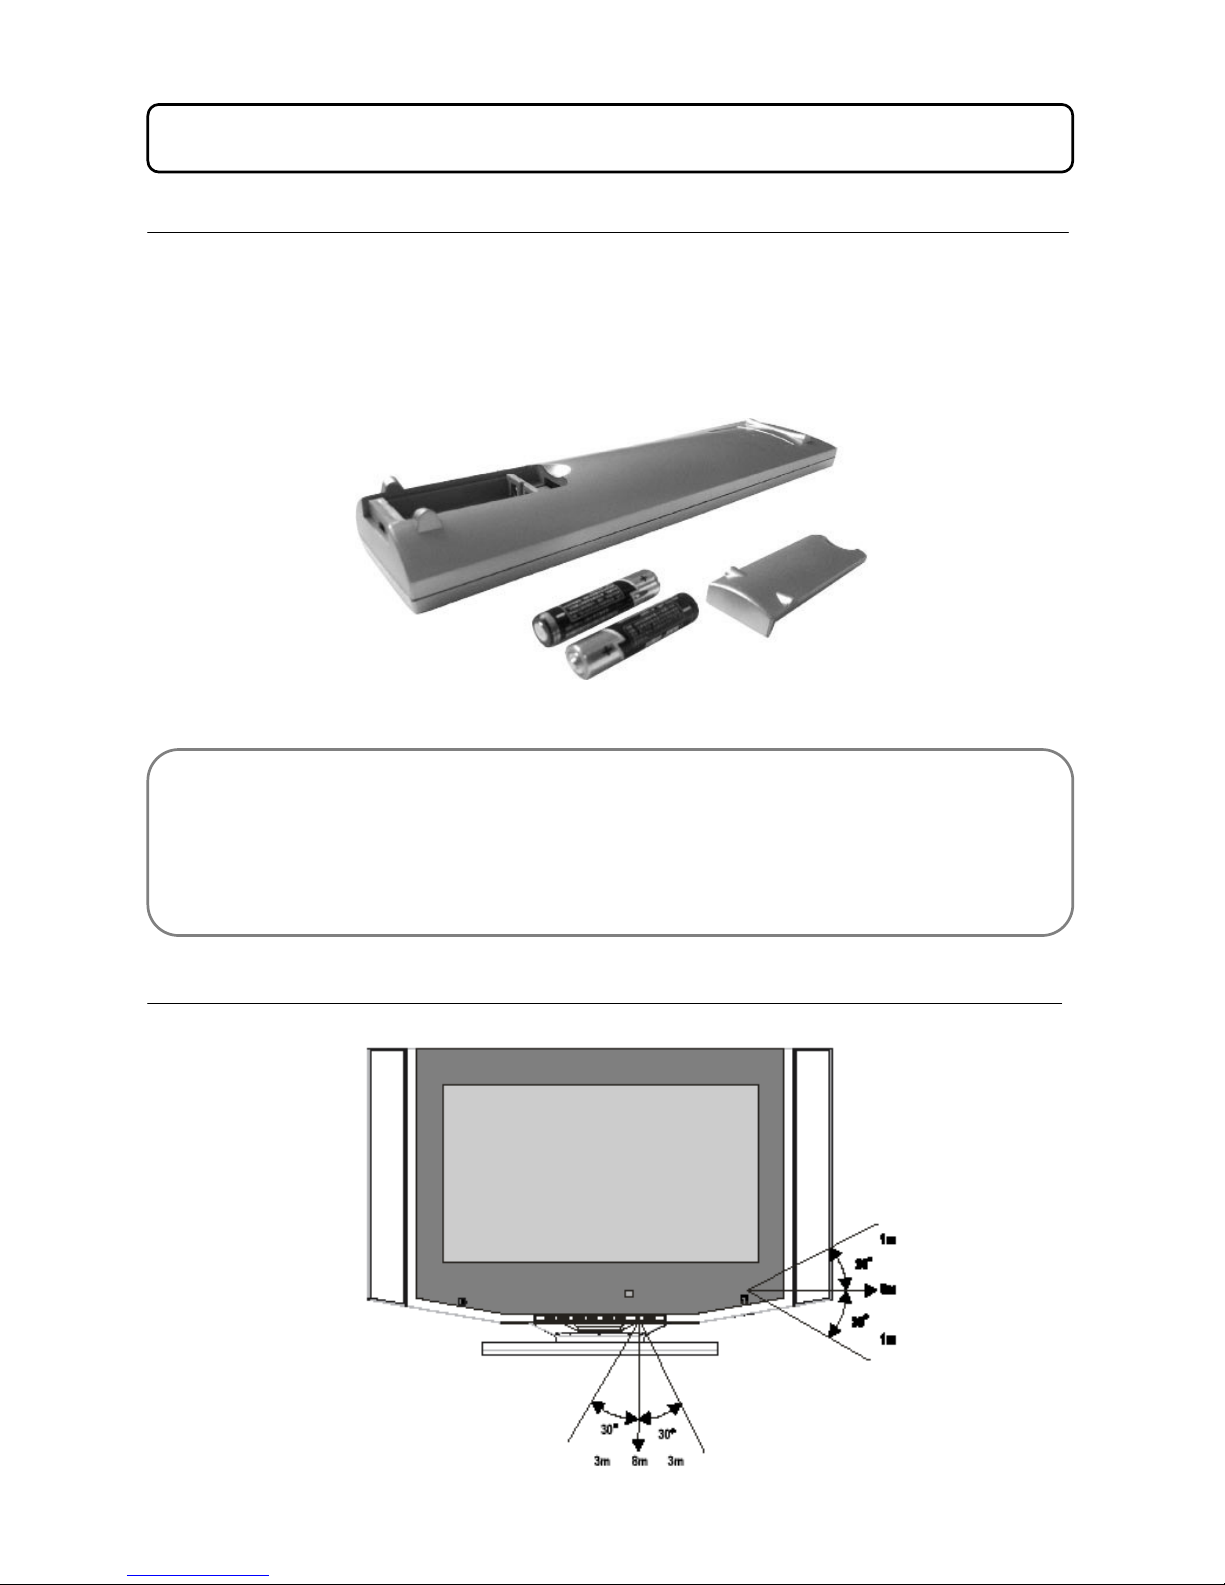
5.0 REMOTE CONTROL
es regularly, as batteries that are low on power may leak. Leaking batteries will
damage the remote controller. Leaking battery damage will not be covered by the warranty of this
e batteries from the
5.1 SETUP
Your remote controller offers all the functions needed to operate this set.
Please note that in standby mode the set is still connected to the mains supply.
The remote requires two “AAA” size batteries to operate. To fit simply slide the back cover off the
remote and install the batteries as directed. Ensure correct polarity or the remote will not function.
BATTERY CARE NOTE:
Do not mix battery types. Always use batteries of the same type and brand.
Check batteri
equipment. If you are not using the remote for long periods, please remove th
remote controller.
5.2 REMOTE OPERATING RANGE
8
 Loading...