

Page 1
V-MUL-007-C(A0)
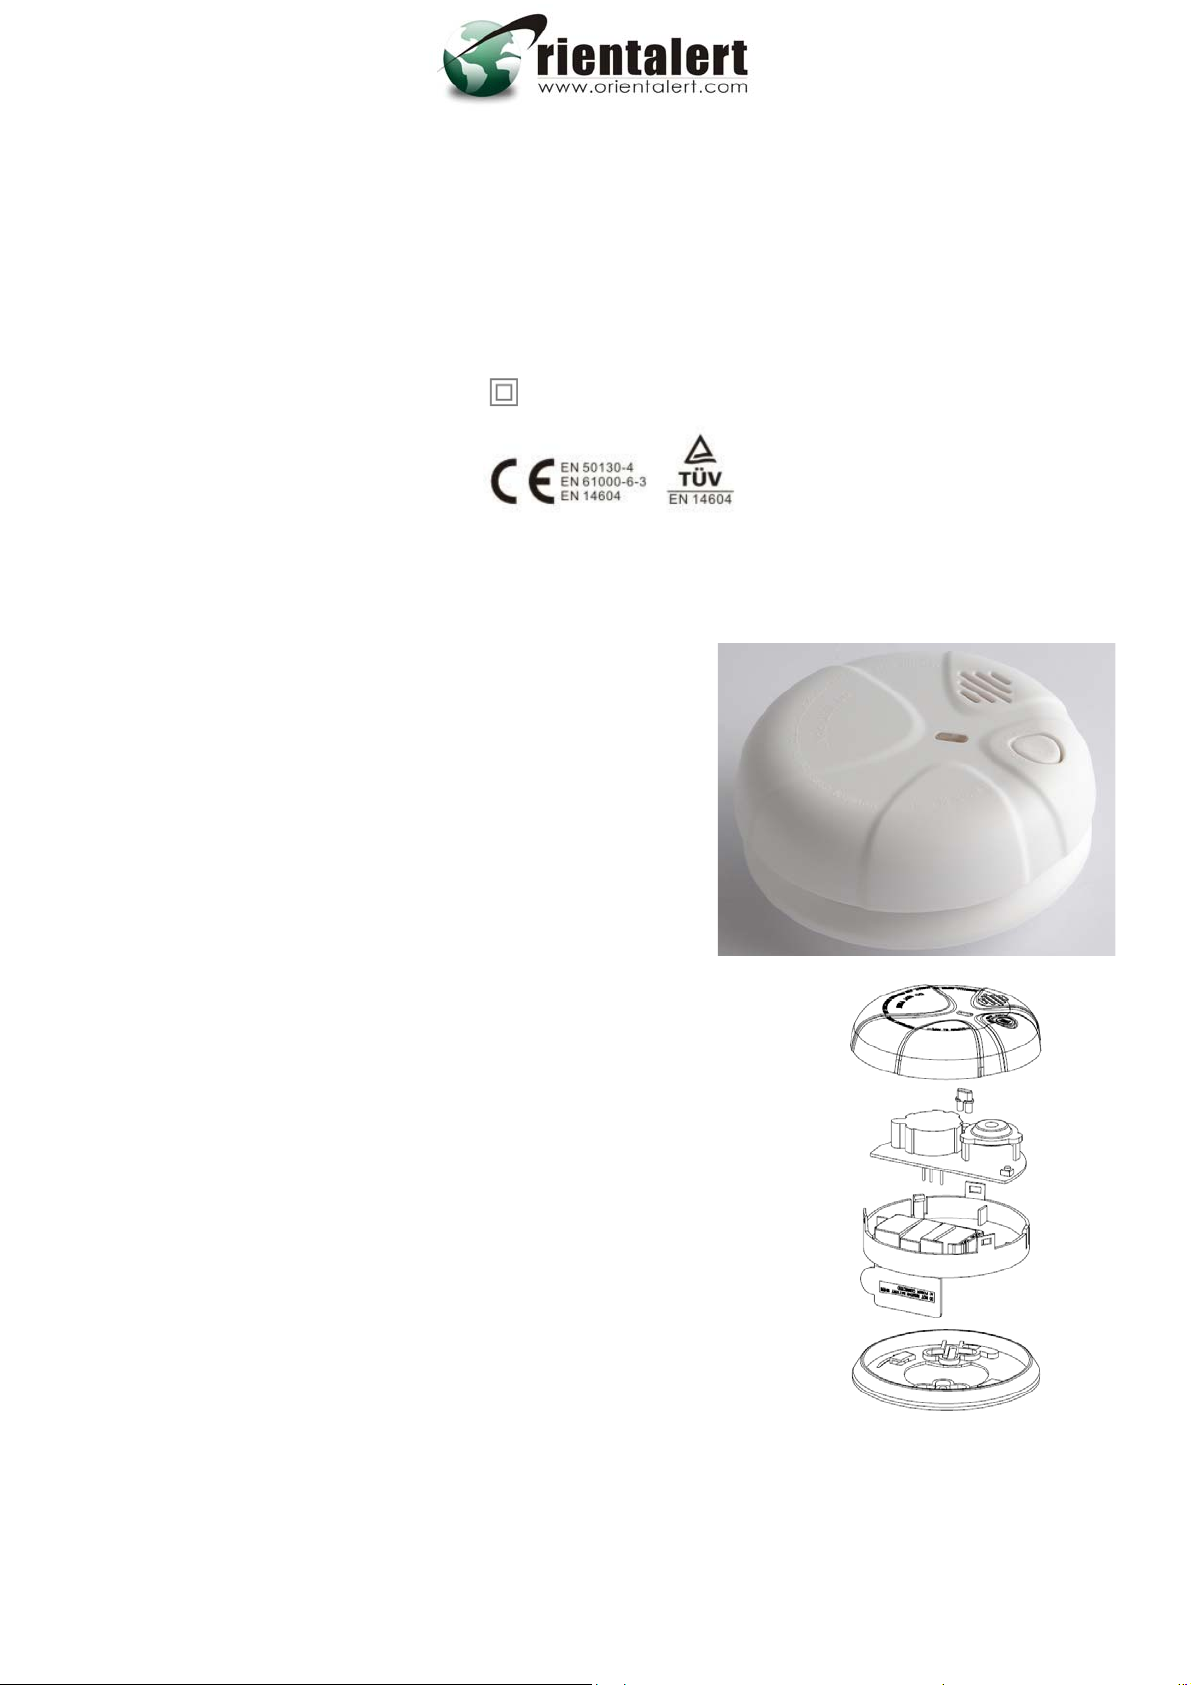
Smoke Alarm User’s Manual
Please read and save this manual
PHOTOELECTRIC SMOKE ALARM
MODEL: VST-S588
Class II Apparatus
Photoelectric smoke alarms are generall detecting smoldering fires
which smolder for hours before burst ces of these fires may include
cigarettes burning in couches or bedding.
AIN FEATURES
M
¾ DC operated photoelectric type smoke alarm
¾ Photoelectric sensor for slow smoldering fires
¾ Self-Test button
Non-radioactive technology for environmental friendly
¾
¾ High and stable sen
¾ Quick fix mounting bracket for easy installation
¾ Fitting and battery tamper-resist feature
¾ LED operation in
¾ Extra loud alarm sound over 85 dB
¾ Low-battery and battery missing
¾ Auto-reset when smoke clears
sitivity
dicator
warning indicator
SPECIFICATION
¾ Model Number: VST-S
¾ Detection Type: Photoelectric Chambe
¾ Power Source: 9
¾
Standby Current: 15uA max
¾ Alarm Current:
¾ Alarm Sound Level 85 Decibels at 3
¾ Operation T em perature: 5℃to 45℃
¾ Ambient Humidity: 10%-90%
¾ Sensitivity to Smoke: 3.0-6.0 %Obs /m
¾ Compact size: 110mm diameter
¾
30mA max
V DC Battery
IMPORTANT SAFETY INFORMATIO
1 . This smoke alarm requi s constant workin . This smoke alarm WILL
NOT work if DC power i no nnected or has fail
is removed, drained or improperly connected. DO
NOT use any other kind of battery except as specified.
re g 9-volt battery to operate properly
s t co ed or been interrupted for any reason AND the battery
y more effective at
ing into flame. Sour
588
r
meters
N
Page 2

D O NOT connect this smoke alarm to any other type of smoke alarm or auxiliary device. It is designed as
a stand alone unit.
2 .The Test button accurately tests all smoke alarm functions. Do not use any other test method. Test smoke
alarm weekly to ensure proper operation.
3
. DO NOT remove or disconnect battery to quiet unwanted alarms. This will remove your protection.
Open windows or fan the air around smoke alarm to silence it
4 w all local and national electrical and building codes for installation.
. Observe and follo
5 . This smoke alarm is designed to be used inside a single room only. In multi-room buildings, each
individual living unit should have its own s
this smoke alarm is not a substitute for a complete alarm system.
6 example, if a fire starts in a remote part of
. Smoke may not reach the smoke alarm for many reasons. For
the home, on another level, in a chimney, wall, roof, or on the other side of a closed door
reach the smoke alarm in time to alert household members. A smoke alarm will not promptly detect a fire
except in the area or room in which it is installed.
7 e. The alarm sound is loud in order to
. Smoke alarms may not alert every household member every tim
alert individuals to a potential danger. However, there may be limiting circumstances where a household
member may not hear the alarm (i.e. outdoor or indoor noise, sound sleepers, drug or alcohol usage, the
hard of hearing, etc.). If you suspect that this smoke alarm may not alert a household member, install and
maintain specialty smoke alarms. Household mem
respond to it to reduce the risk of damage, injury, or death that may result from fire. If a household
member is hearing impaired, install special smoke alarms with lights or vibrating devices to alert
occupants.
8
. Smoke alarms can only sound their alarms when they detect smoke. Smoke alarms detect combustion
particles in the air. They do not sense heat, flame, or gas. This smoke alarm is designed to give audible
warning of a developing fire. However, many fires are fast-burning, explosive, or intentional. Others are
caused by carelessness or safety hazards. Smoke may not reach the smoke alarm QUICKLY ENOUGH to
ensure safe
9 . Smoke alarms have limitations. This smoke alarm is not foolproof and is not warranted to protect lives
or property from fire. Smoke alarms are not a substitute for insurance. Homeowners and renters are
responsible for insuring their own lives and property. In addition, it is possible for the smoke alarm to fail
at any time. For this reason, you must test the smoke alarm weekly and replace every 10 years.
N tion, we recommend that you install a smoke alarm in every room.
ote: For best protec
R
ECOMMENDED LOCATIONS FOR SMOKE ALARMS
In
stalling Smoke Alarms in Single-Family Residences
M additional
inimum coverage is one unit on every floor, in every sleeping area, or in every bedroom. For
coverage, Orientalert recommends you install units in all rooms, halls, storage areas, a
w
here temperatures normally remain between 5℃ and 45℃.
escape.
moke alarms. Do not install in non-residential building s. And
, smoke may not
ber must hear the alarm’s warning sound and quickly
nd finished attics,
More specifically, install Smoke Alarms:
On every level of your home, including finished attics.
Inside every bedroom, especially if people sleep with doors closed.
In the hall near every sleeping area. If your home has multiple sleeping areas, install a unit in each. If a hall
is over 12 meters (40feet) long, install an alarm at each end.
At the top of the first-to-second floor stairway.
IMPORTANT!
Page 3
Specific requirements for Smoke Alarm installati
A
on vary from state to state. Check with your local Fire
Brigade for current requirements in your area.
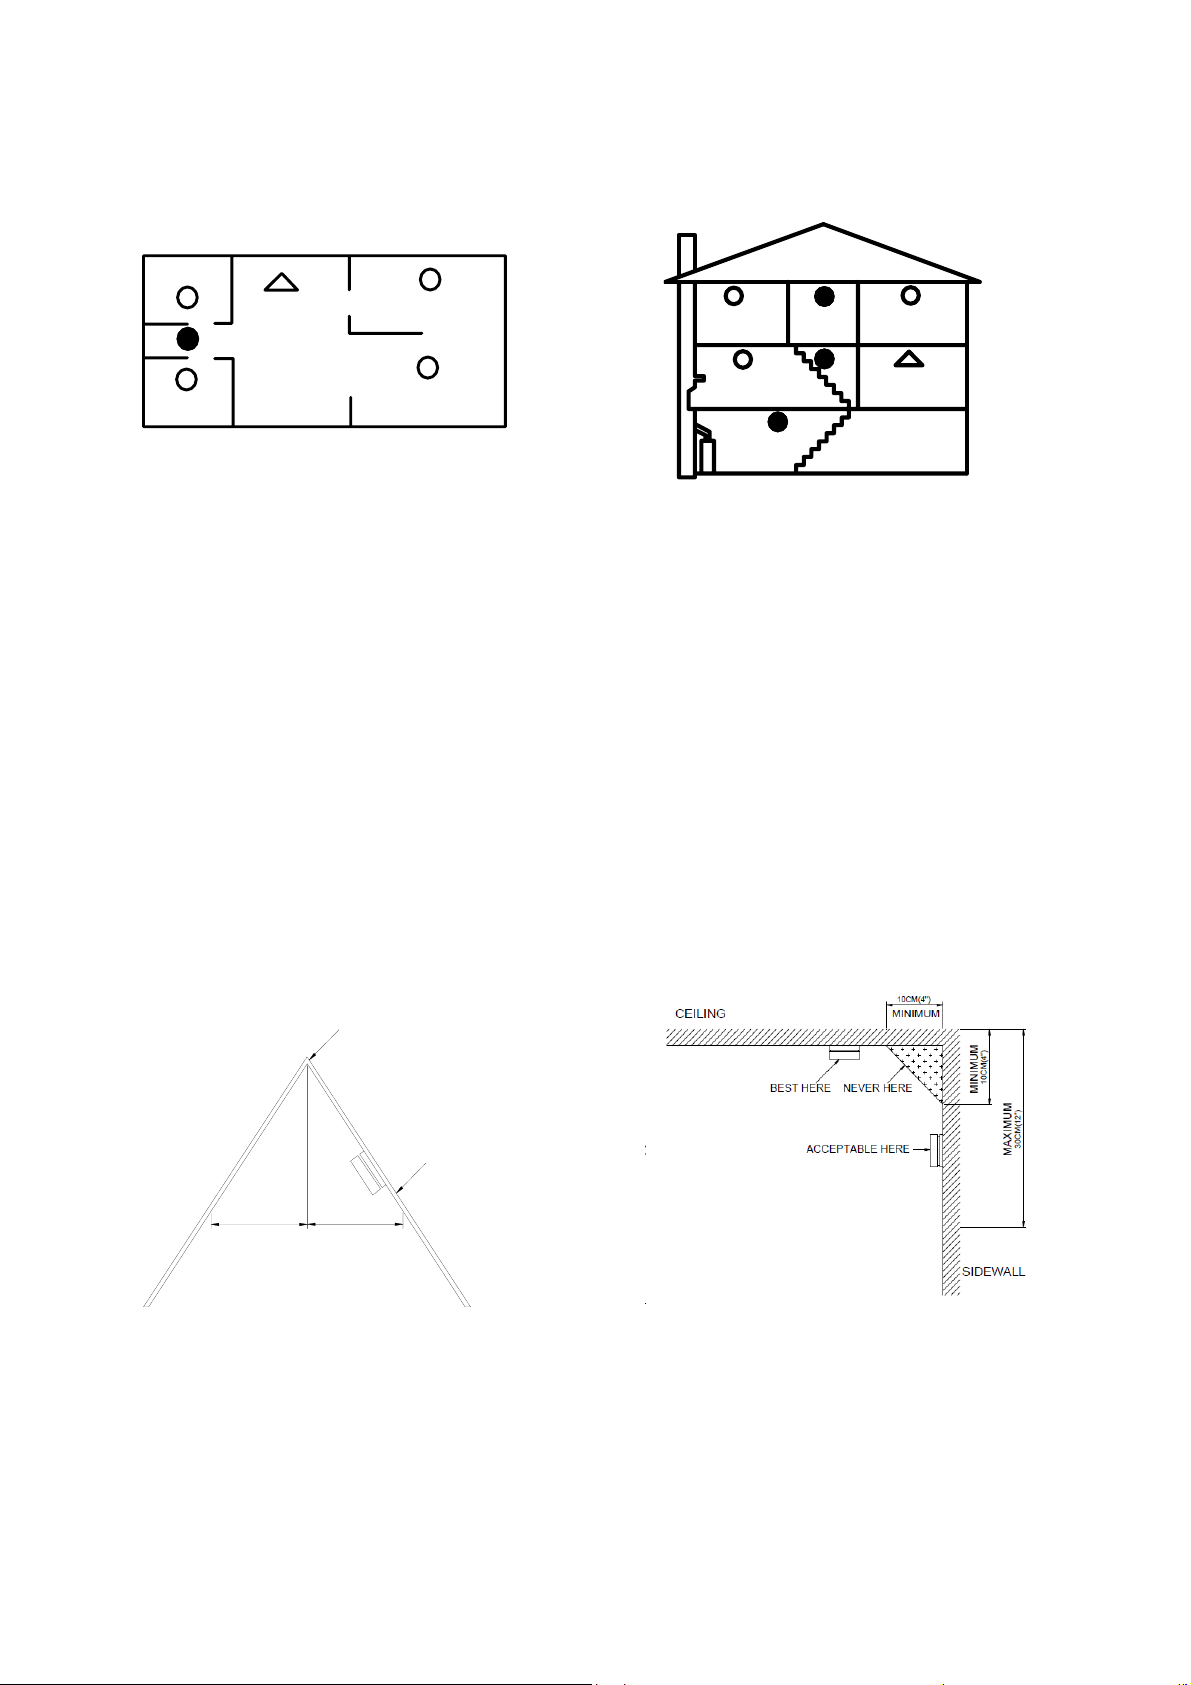
See “Recommended Locations for Smoke Alarm” Diagram follow
ing.
BEDROOM
KITCHEN
DINING ROOM
BEDROOM
HALL
BEDROOM
BEDROOM
SINGLE-STORY RESIDENCE,APARTMENT,
MOBILE HOME
LIVING ROOM
LIVING ROOM
MULTI-STORY RESIDENCE
KITCHEN
FINISHED BASEMENT
KEY:
●Minimum required smoke alarm locations
tions
○Recommended additional smoke alarm loc
△Smoke alarms with hush features recomm additional protection
a
ended for
IMPORTANT SMOKE ALARM PLACEMENT AND EXCEPTION INFORMATION
1. Install a smoke alarm as close to the cent of the ceiling as possible. If this is not practical, mount no
cl
oser than 4 inches from a wall or corner. Also, if local codes allow, install smoke alarms on walls,
between
4 and 12 inches from ceiling/wall intersections.
2. Install a minimum of two smoke alarms in
3. Install a smoke alarm in each room that is divided b
at least 8 inches, or coming up from the floor).
4
. Install a smoke alarm in lived-in attics or attics which house electrical equipment like furnaces, air
conditioners, or heaters.
er
every home, no matter how small the home.
y a partial wall (either coming down from the ceiling
DO NOT INSTALL SMOKE ALARMS
NYWHERE
IN THIS AREA
0.9M(3ft)
HORIZONTAL DISTANCE
FROM PEAK
1. Near appliances or areas where normal combustion re
heaters). Use specialized smoke alarm with unwanted
2. In areas with high humidity, like bathrooms or areas
0.9M(3ft)
gularly occurs (kitchens, near furnaces, hot water
alarm control for this areas.
near dishwashers or washing machines. Install at
least 10 feet away from these areas.
3. Near air returns or heating and cooling supply vents.
could blow smoke away from the detector, interrupting i
4. In rooms where temperatures may fall below 5℃ or rise
Install at least 3 feet away from these areas. The air
ts alarm.
above 45℃.
Page 4
5. In extremely dusty, dirty, or insect-infested areas where loose particles interfere with smoke alarm
operation.
WARNING: Incorrect orientation will result in a decrease in operational effectiveness.
HOW TO INSTALL THIS SMOKE ALARM
WARNING: Smoke alarm installation must be in
accordance with the requirements of any national local codes that may apply.
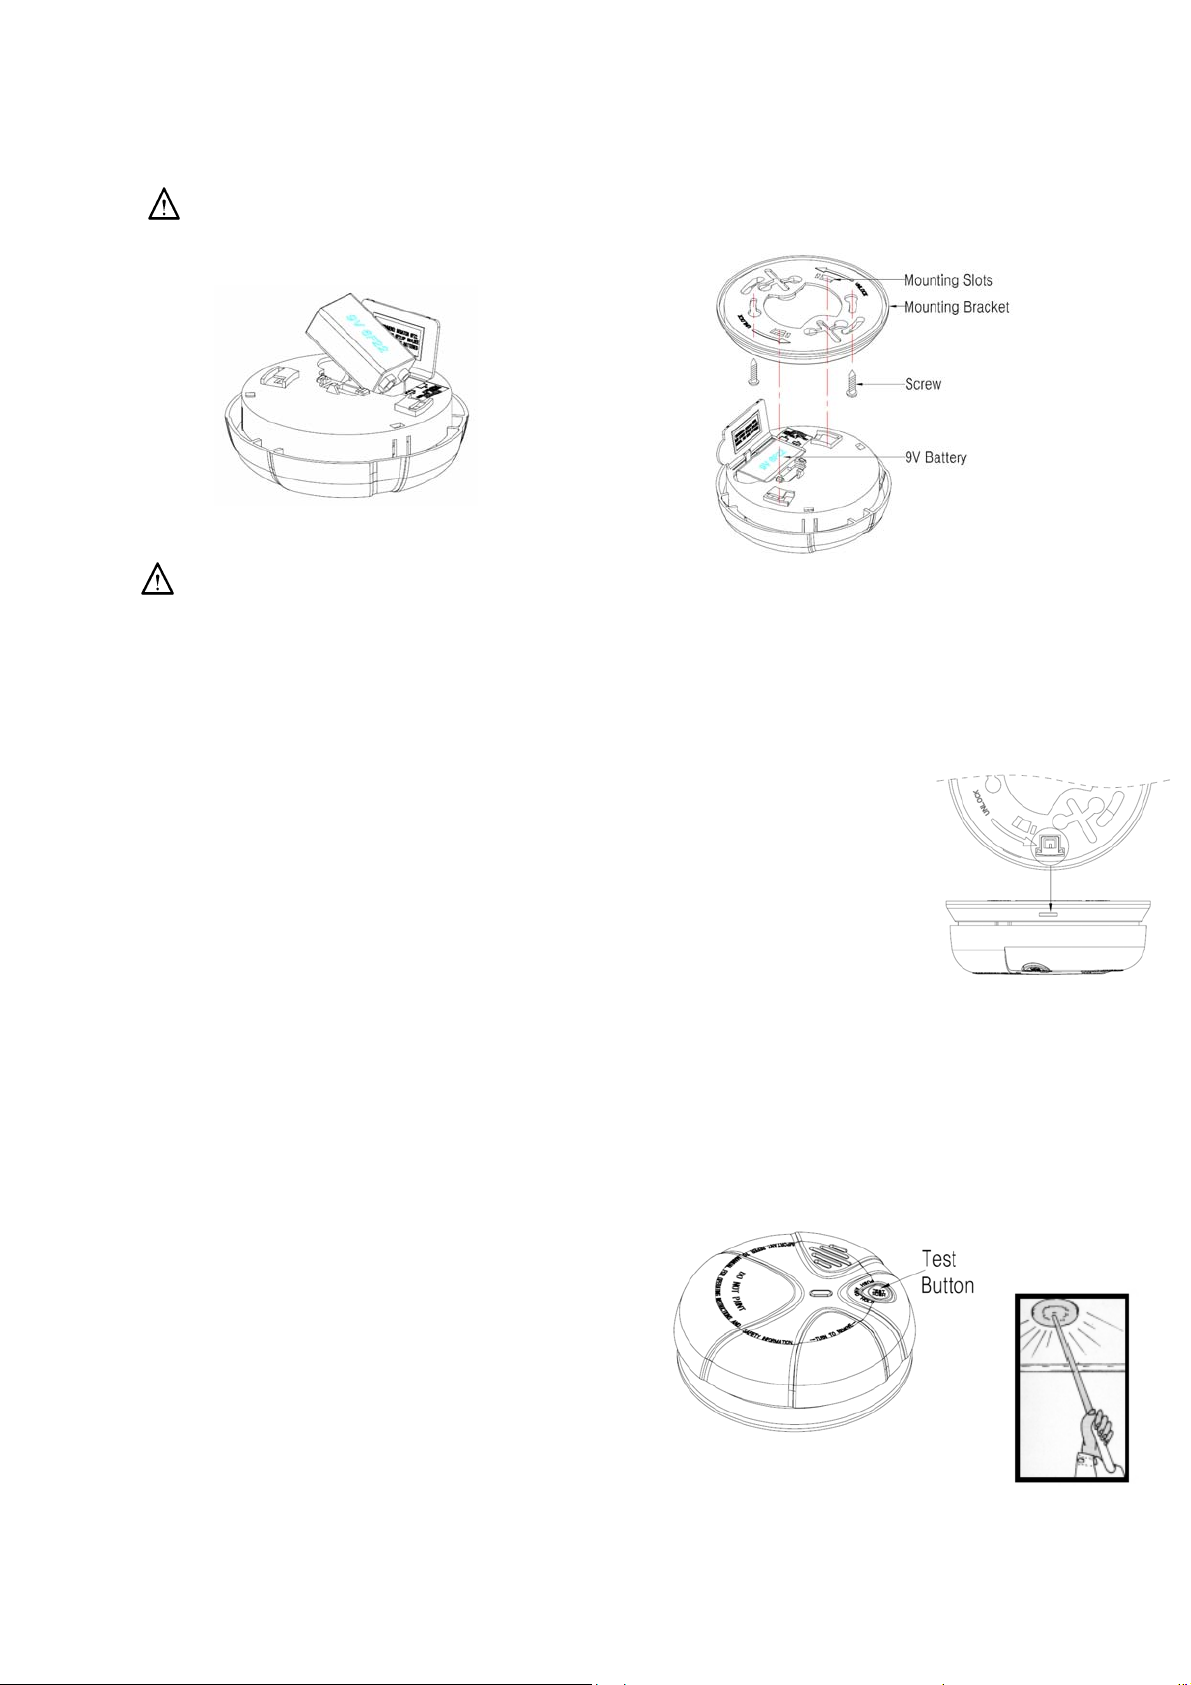
1. Remove the mounting plate by turning it counterclockwise at the back of the smoke alarm.
(To later
pins are exactly the
2. In
stall the mounting plate to ceiling or wall with mounting screws.
3. Lift open battery pocket door.
. Conn connector inside battery
4 ect new 9-volt battery to battery pocket. Be sure battery is
securely connected. Red LED may blink briefly when battery
5
. Close battery pocket door, snapping it into place.
6
. Position smoke alarm to mounting plate and turn clockwise to lock into place. To engage
tamper-resist feature, insert pin into notch on edge of smoke alarm after alarm is
properly positioned in base.
7
. Push test button to test smoke alarm. See TESTING THE SMOKE ALARM.
PERA TING YOUR SMOKE ALARM
O
Onc has been installed A RED indicator light (LED) should flash approximately once a
e the smoke alarm
min roperly.
ute to indicate the battery is healthy and the unit is operating p
If smoke is detected
flashing quickly until the air is clear.
TES ARM
TING THE SMOKE AL
1. Test each smoke alarm to be sure it is installed correctly
and operating properly.
2. The push-to-test button accurately tests functions. Do not
use an open flame to test this smoke alarm. You may
ignite and damage the smoke alarm or your home.
3. Test smoke alarms weekly and upon returning from
vacation or when no one has been in the household for several days.
4. S smoke alarm when testing.
tand at arm’s length from the
TEST ALL SMOKE ALARMS WEEKL Y BY DOING THE FOLLOW
engage tamper-resist feature, twist out and set aside one of the pins molded into plate. Both
same.)
is installed.
, the unit will emit a load pulsating alarm and a RED indicator light (LED) will be
ING STEPS:
Page 5

1. Firmly push the TEST button, and the smoke alarm will sound a loud beep.
The alarm will stop sounding after releasing th
2. If smoke alarm does not sound, please retest the smoke alarm.
e TEST button.
DANGER: If the alarm sounds, and smoke alarm is not being tested, the smoke alarm is sensing
smoke. THE SOUND OF THE
AND ACTION.
ALARM HORN REQUIRES YOUR IMMEDIATE ATTENTION
MAINTENANCE AND CLEANING
ddition to weekly testing, t
In a his smoke alarm requires yearly battery replacement and periodic cleaning to
remove dust, dirt, and debris.
BA
TTERY REPLACEMENT
Replace battery at least once a year or immediately when t
Bat
teries should be replaced regularly as necessary.
he low battery signal sounds once a minute.
WARNING: Do not use any other type of battery, except as specified in this manual.
Do not use rechargeable batteries.
CAUTION: If the battery is incorrectly replaced, the smoke alar
cause damage.
Plea
se use high quality batteries to ensure long term performance.
1. T
urn smoke alarm counterclockwise to detach it from the mounting plate.
2. G
ently pull down smoke alarm.
3. R om the compartment.
emove battery fr
4. Insert a new 9-volt battery to connector. NOTE POLARITY OF CONNECTIONS.
Ensure the metal tab is fully depressed wh
5. Using the Push-to-Test button, test the smoke alarm to verify 9V DC battery.
See “
TESTING THE SM
. Reattach the smoke alarm to the mounting plate by turning smoke alarm clockwise until it snaps into
6
place. Insert the two tamperproo
properly positioned in base.
7. Test the smoke alarm using “Test” button. See “
CH
OOSING A REPLACEMENT BATTERY:
The unit requires one sta teries are acceptable as replacements:
Power #6F22, Megaton #6F22; New Leader #6F22; Gold Peak #1604; Eveready #522, #1222;
olden
G
Golden
hardware stores.
Power G6F22; Golden Power GL6F22A or equivalent quality models available from electrical or
ndard 9V battery. The following bat
OKE ALARM”
f tabs back into the notch on edge of smoke alarm after alarm is
en the battery has been fitted.
TESTING THE SMOKE
m will not operate and may
ALARM”
CLEANING
lean the smoke alarm at least once a month to remove dust, dirt, or debris
C . Using the soft
rush or wand attachment to a vacuum
b cleaner, vacuum all sides and cover of smoke alarm. Be
ure all the vents are free of debris. If necessa
s ry, use a damp cloth to clean smoke alarm cover.
MPORTANT: Do not attempt to remove the cover to clean inside the smoke alarm. T
I his will
d your warranty.
voi
P
RACTICE FIRE SAFETY
Page 6

If u have not pushed the test button, it is warning of a
the smoke alarm sounds its alarm horn, and yo
dangerous situation. Your immediate response is necessary. To prepare for such occurrences, develop
fam
ily escape plans, discuss them with all household members, and practice them regularly.
1. E of a smoke alarm and explain what the sound means.
xpose everyone to the sound
. Determine two exits from each room and an escape route to the outside from each exit.
2
3
. Teach all household members to touch the door and use an alternate exit if the door is hot. Instruct them
not to open the door if the door is hot.
4. Teach household members to crawl along the floor to stay below dangerous smoke, fumes and gases.
5. Determine a safe meeting place for all members outside the building.
WHAT TO DO I
1. Do not panic;
2. Leave the building as quickly as possible. Touch doors to feel if they are hot before opening
an alternate exit if necessary. Crawl along the floor, and do not stop to collect anything.
3. Meet at a pre-arranged meeting place outside the building.
4. Call the fire department from outside the building.
5. Do not go back insi
These guidelines will assist you in the
practice fire safety rules and prevent hazardous situations.
N CASE OF FIRE
stay calm.
them. Use
de a burning building. Wait for the fire department to arrive.
event of a fire. However, to reduce the chance that fires will start,
TROUBLESHOOTING
WARNING: DO NOT disconnect battery to quiet an unwanted alarm. This will remove your
protection. Fan the air or open a window to remove smoke or dust.
PROBLEM
SOLUTION
Sm move smoke alarm from mounting plate and check that battery is oke alarm does not sound when 1 Re
tested. properly attached to connector.
NOTE: Push test button for at least 2 Clean smoke alarm.
five seconds while testing!
Smoke alarm beeps about once a Replace battery. See battery replacement in the maintenance and
minute. cleaning section.
S ance and cleaning
moke alarm sound unwanted 1 Clean smoke alarm. See cleaning in the mainten
alarms intermittently or when section
residents are cooking, taking 2 Move smoke
showers, etc. PLACEMENT
The alarm sounds different than
I’m used to. It starts and stops.
Manufactur
er: Xi
amen Vs-Top Electronics Co., Ltd.
2nd flo
Haicang ,Xiamen, China.
Tel: 0086-592-6017 11
E-mail:
or, No-107 Xiaguang Road, Xinya istrict,
info@vs top.com Website: www.orientalert.com
The alarm is operating correctly. This alarm features the
internationally recog
sound pattern is 3 short beeps followed by a 2 second pause and then
repeats.
700 Fax: 0086-592-60177
-
alarm to a new location. See SMOKE ALARM
nized horn signal for evacuation. The alarm
ng Industrial D
 Loading...