

Organized Living freedomRail 3 Drawer OBox Assembly Manual
freedomRail Assembly Instructions
3 Drawer OBox
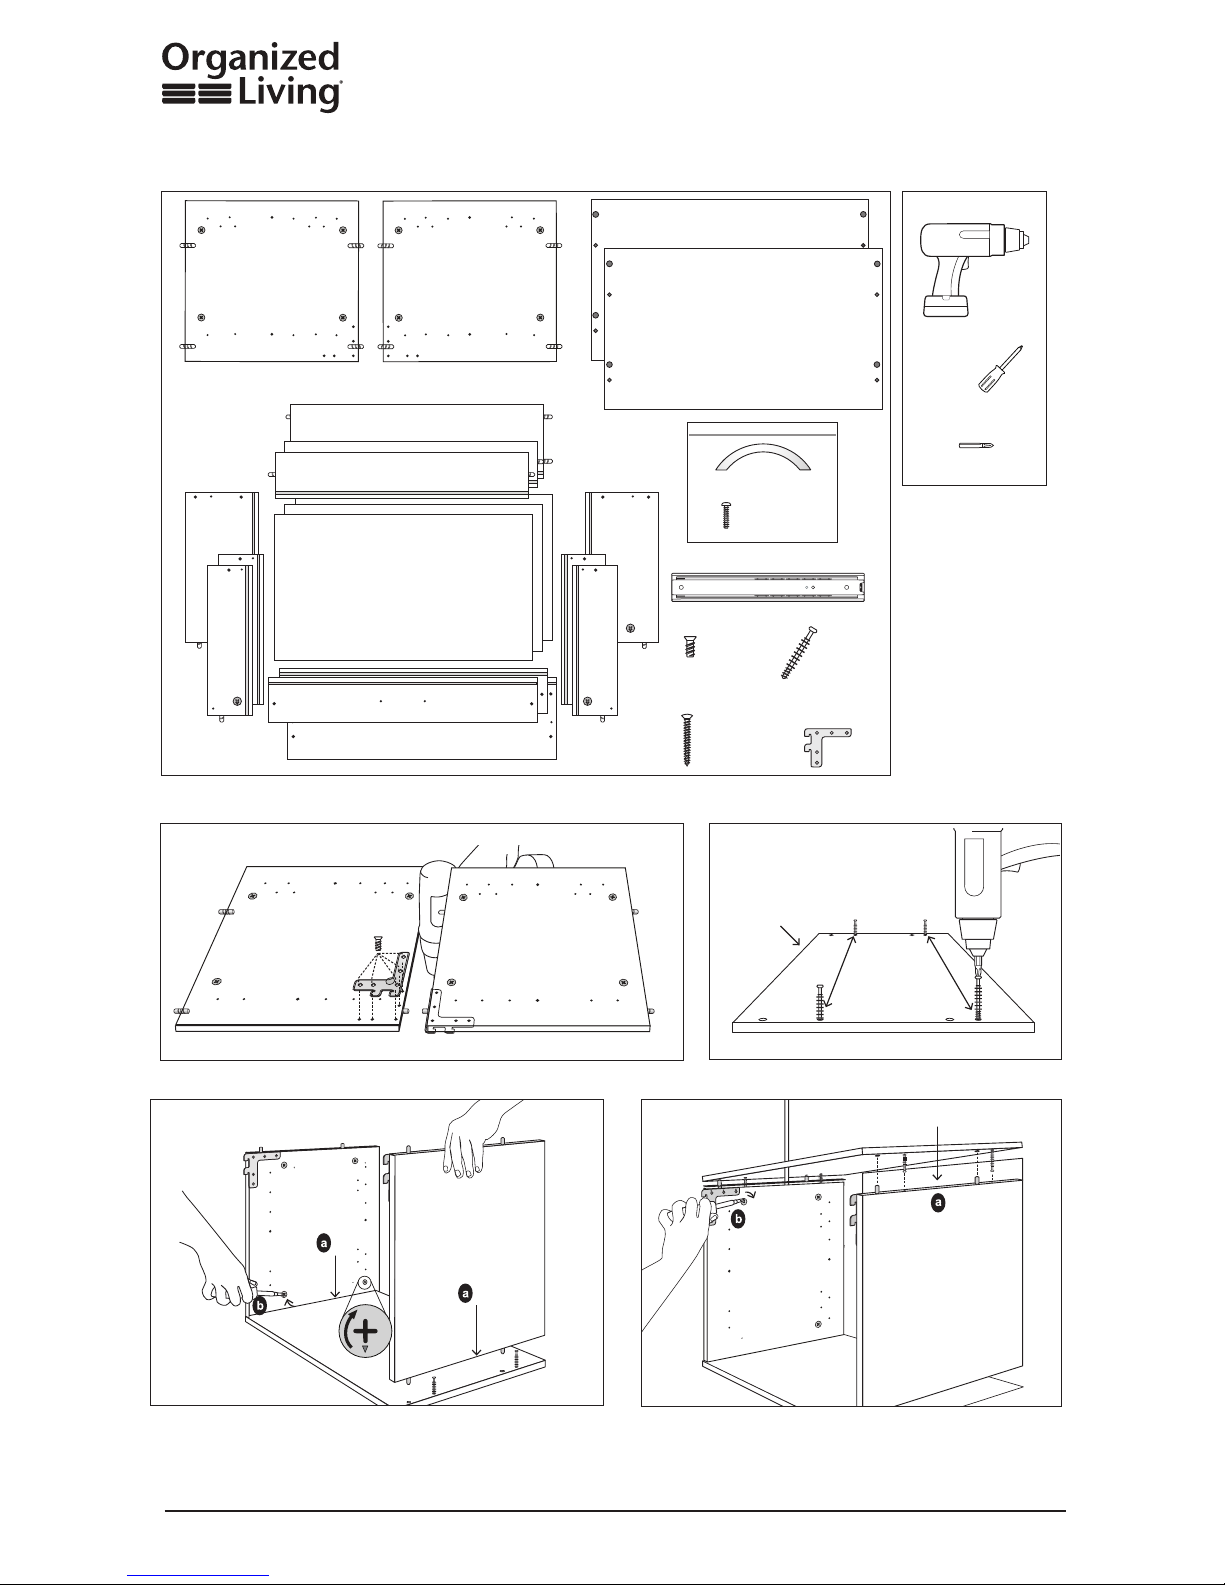
Contents of Package
Assembling the 3 Drawer OBox
Tools Required
Power Drill
#2 Phillips
Screwdriver
#2 Phillips Driver
Left Side
of OBox
(Inside View)
(1) Large Drawer Back
(Inside View)
(2) Small Drawer Backs
(Inside View)
(3) Drawer Bottoms
(1) Large
Drawer
Right Side
(1) Large
Drawer
Left Side
(2)
Small
Drawers
Right
Sides
(2) Small Drawer Fronts
(1) Large Drawer Front
Bottom
(Inside View)
(6)
(3) Handles
Machine Screws
(For Drawer Pulls)
(6) Full Extension Drawer Glides
(34) Euroscrews
(6) 1 /" Wood Screws
(14) Connector Bolts
Hanging
Brackets
(2)
Right Side
of OBox
(Inside View)
Top
(Inside View)
(2)
Small
Drawers
Left
Sides
Step 1: Attach Hanging Brackets
Step 2: Install Connector Bolts
Left Side
Right Side
Back Edge
Back Edge
Bottom
Install (4) Connector Bolts into small holes on Top and Bottom Panels.
Step 3: Attach Sides
Cam
Lock
Open
(a) Attach Sides to Bottom. (b) Tighten Cams by turning clockwise until snug.
(a) Attach Top. (b) Tighten Cams by turning clockwise until snug.
Step 4: Attach Top
Attach Hanging Brackets to Sides using Euroscrews. (If using Power Drill, set torque to low setting.)
Top
Smaller Holes for
Connector Bolts
1
Over
Proper Care for an OBox: Use Goo Gone™ or Simple Green® with a rag or putty knife to remove any excess glue or marring that was caused by shipping or assembly.
freedomRail Assembly Instructions
3 Drawer OBox
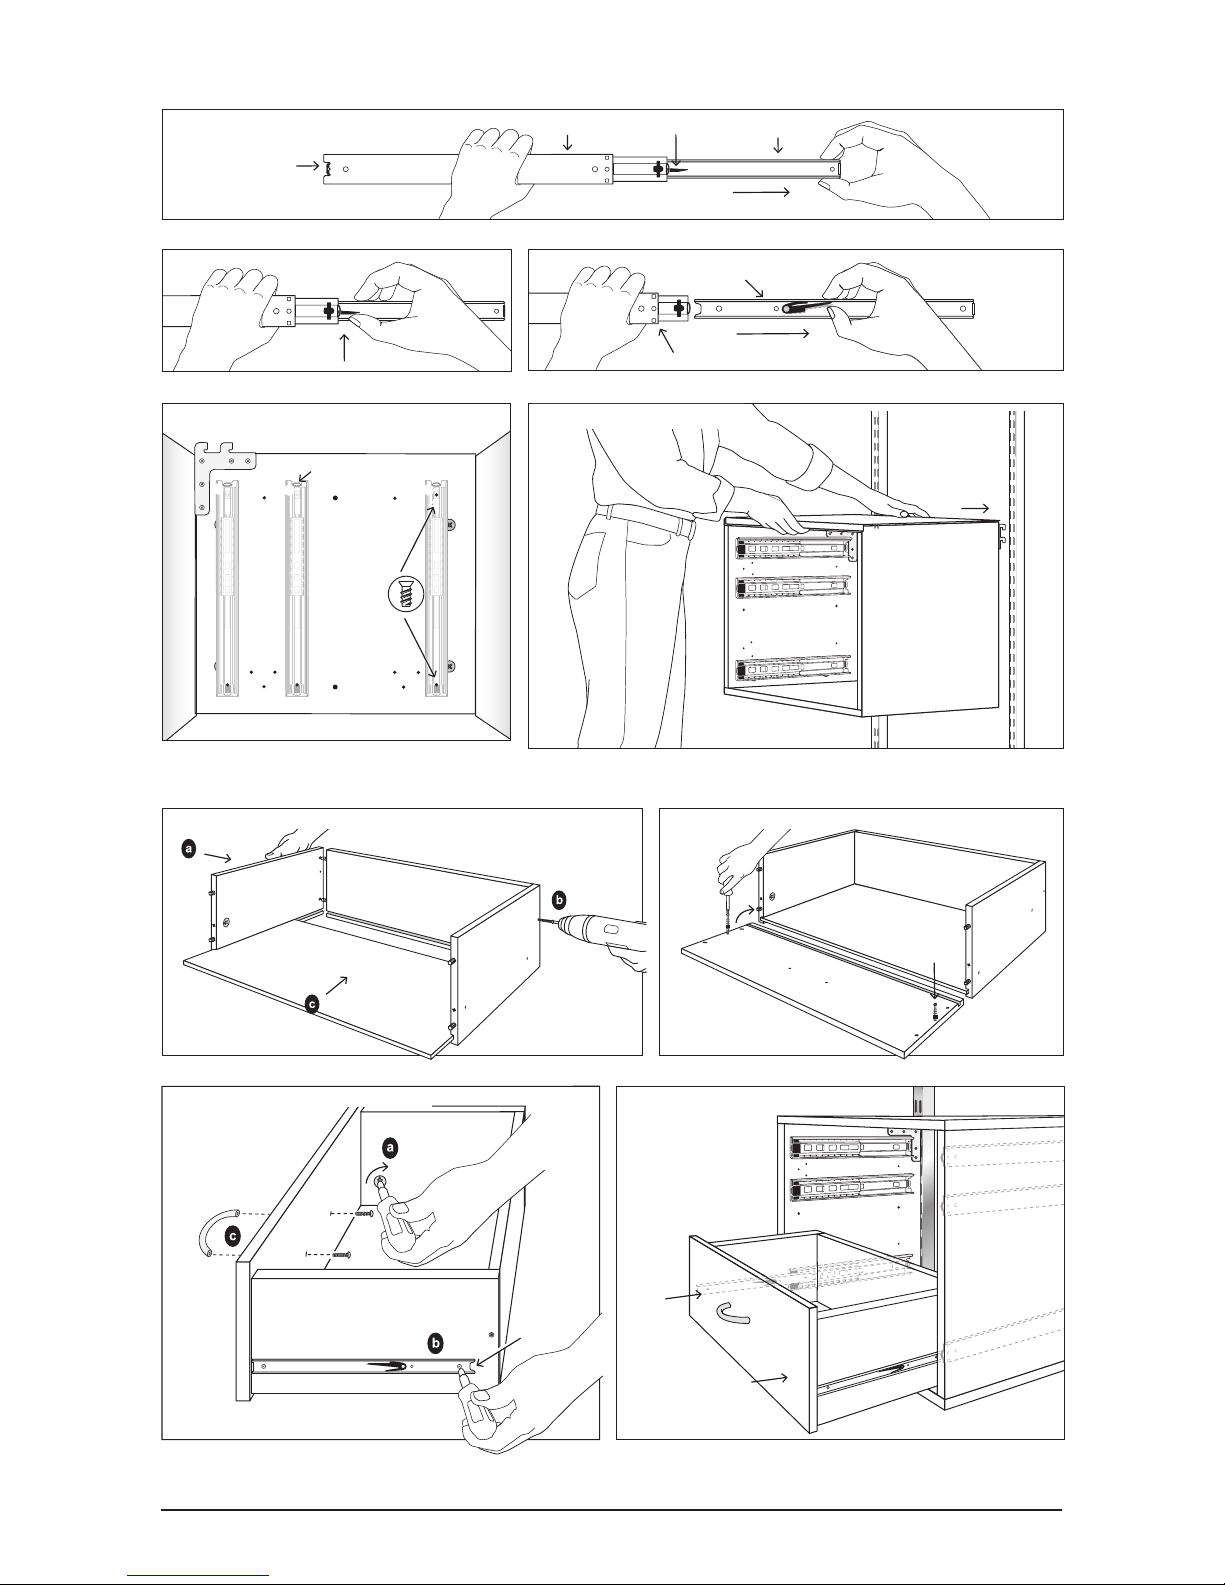
Installing Glides
Assembling/Inserting Drawers
1
2
3
Step 5: Separate Glides
Black Tab
Outer Glide
Attaches to Drawer
Attaches to OBox
Notched
End
Bumper
Step 6: Attach Outer Glides to OBox
Step 7: Mount OBox onto Uprights
Step 10: Attach Drawer Glides and Drawer Pull
Step 11: Insert Drawers
(a) Attach Sides to Back. (b) Secure with 1 /" Wood Screws. (c) Slide in Bottom.
(a) Lock cam by turning clockwise / turn. Turn until snug.
(b) Attach Inner Glides to Drawer with Euroscrews. Notched End should be at back.
(c) Attach Handle with Machine Screws.
(a) Position Drawer on Glides and push in Drawer completely. Repeat Steps 9, 10, 11, and 12
for (2) Small Drawers. NOTE: To remove Drawers, push the Black Tab while pulling out the Drawer.
(b) Mount Nameplate to Drawer Front with Screws provided.
Screw in Connector Bolts and attach Front.
Mount OBox onto Uprights by inserting Hanging Brackets into the innermost track of each Upright. Two people
recommended for installation.
Turn OBox on its side. Attach Outer Glides with Euroscrews. Install Outer
Glides in holes 1, 2, and 3. Repeat for other sides.
Inner Glide
(a) Pull out Inner Glide to expose Black Tab.
(b) Separate Inner Glide from Outer Glide by pushing the Black Tab while pulling Glide sections apart.
4 5
6
OBox Front
Bumper
Step 8: Attach Drawer Panels
OrganizedLiving.com
1-800-669-3225
June 2015
©2015 Organized Living
Bloomington, IN 47403
2
Step 9: Attach Front Panel Connectors
 Loading...