

Page 1
3651 N. Hwy 89 • Chino Valley, AZ 86323
3651 N. Hwy 89 • Chino Valley, AZ 86323
(928) 636-7080 • www.p-a-g.net
(928) 636-7080 • www.p-a-g.net
Before starting installation
NOTE
Kit parts are prefaced by the word kit and appear in
bold print.
1. Carefully read all warnings and instructions completely before beginning.
PRE-RUNNER TIRE CARRIER
INSTALLATION INSTRUCTIONS
ALL PICKUPS KIT # 86300
WARNING
DO NOT install the tire carrier if the wheel offset is
greater than 8" or the “T” handle does not thread into
the tire carrier at least 1”.
WARNING
Always wear eye protection when operating power
tools.
WARNING
Use extreme caution when working near the fuel lines
and the fuel tank. A spark could cause an explosion or
fire resulting in serious personal injury and property
damage.
2. Verify all parts have been received in this kit by
checking the parts list at the end of this document.
3. Only install this kit on the vehicle for which it is
specified. If anytime during the installation you
encounter something different from what is outlined
in the instructions, call technical support at (928)
636-7080.
NOTE
This tire carrier will accommodate wheels with an offset of about 8” or less as shown. Before installing the
tire carrier, measure the wheel offset to determine if
the tire carrier will accommodate the wheel.
StraightedgeMeasure Here
1 Pre-Runner Tire Carrier - Kit 86300
Page 2
Install kit
5. Using holes in plates of kit tire carrier as a template,
mark bed.
NOTE
The kit front leg can be positioned as needed to best
fit the application.
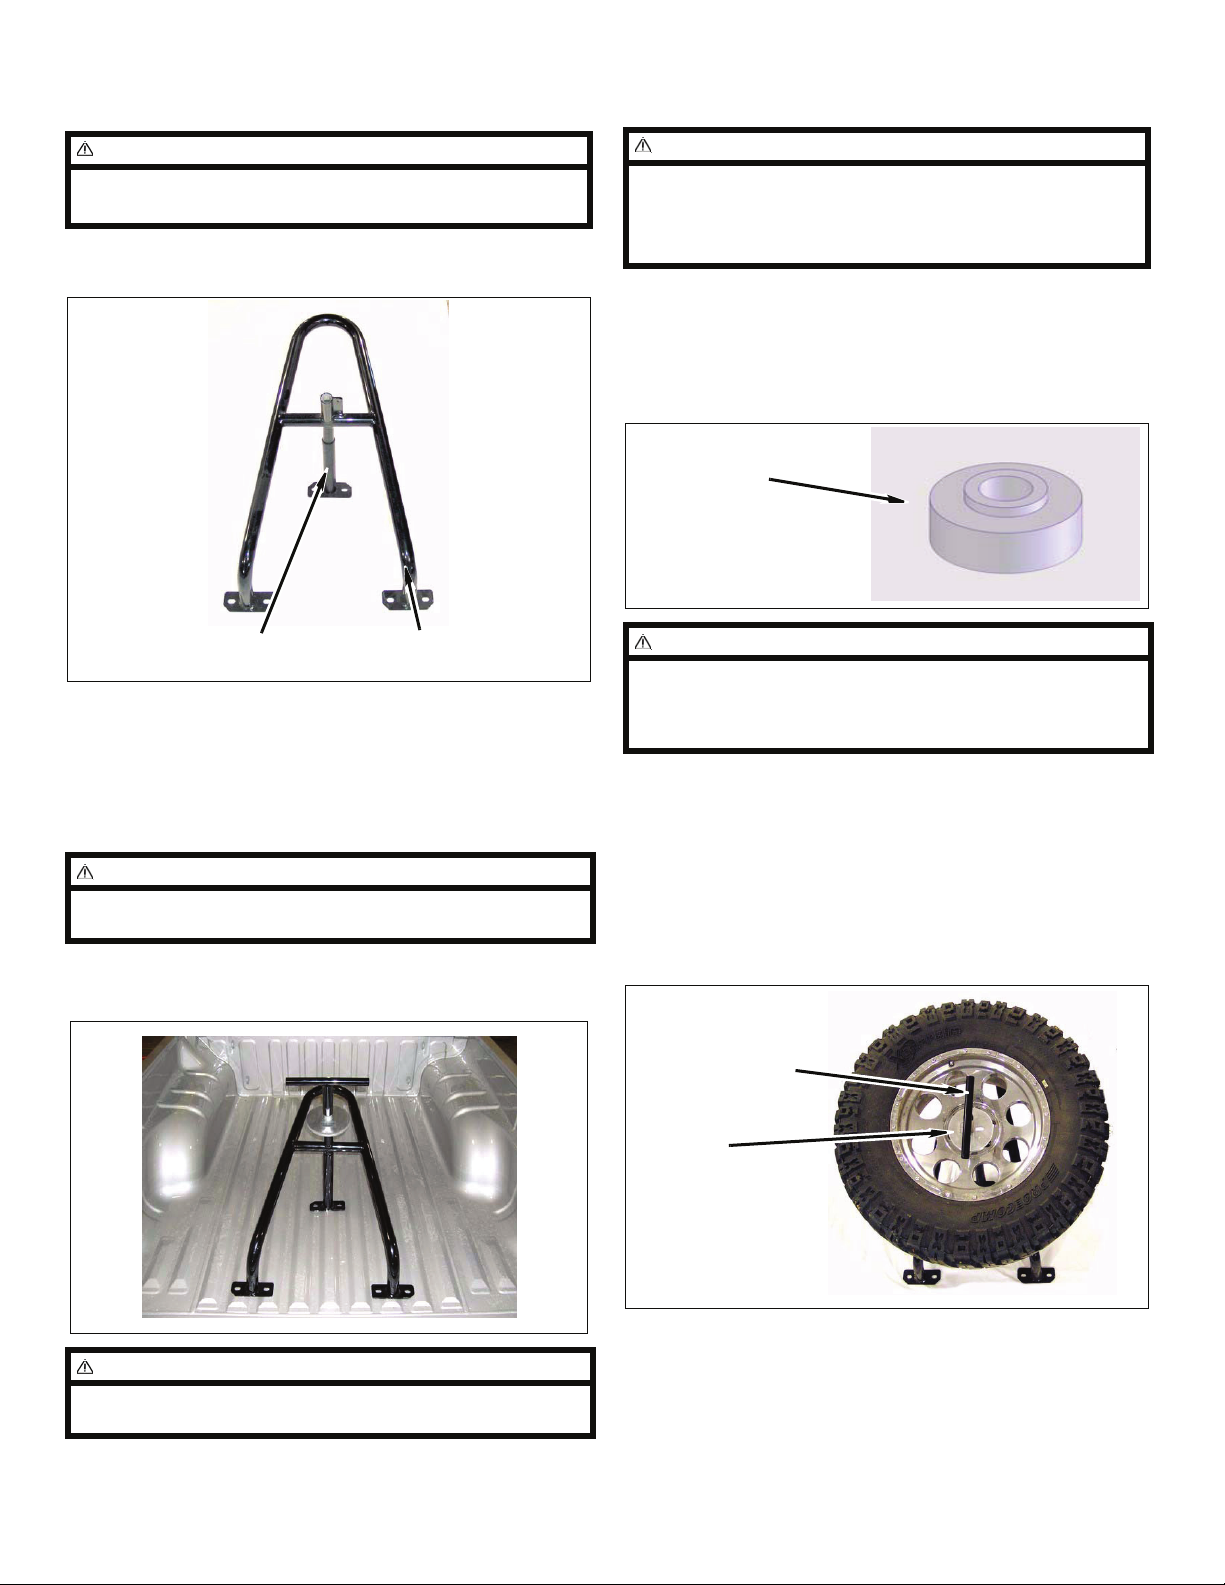
1. Slide kit front leg onto kit tire carrier.
Kit Front Leg Kit Tire Carrier
2. Secure kit front leg to kit tire carrier with kit bolt
(3/8” x 1”) and kit washer (3/8” USS).
CAUTION
Check under truck bed to make sure nothing will interfere with drilling or installation of mounting hardware.
Check for frame crossmembers, fuel tank, fuel hoses,
electrical wires, etc.
6. Drill 3/8” holes in bed where marked.
7. Secure kit tire carrier to bed with kit bolts (3/8” x
1/2”), kit washers (3/8” USS), kit bushings
1
(shock), and kit nuts (3/8” nylock).
Kit Bushing
NOTE
The kit bushings are to be used to fill the gap between
the mounting bracket and the valley on the ridge of the
bed. The bushing is not required if the mounting location is on top of the ridge in the bed.
3. Install kit lock bar on kit tire carrier with kit bolts (5/
16” x 1”) and kit nuts (5/16” serrated flange).
NOTE
The hole in the kit lock bar accommodates a pad lock
that will prevent tire theft.
4. Set kit tire carrier in bed to determine installed position .
NOTE
Make sure the tire will not interfere with the tailgate
when it is closed.
Install spare tire
1. Set spare tire on kit tire carrier.
2. Set kit spacer (Urethane Disc) and kit disc (tire
retainer) on wheel.
Kit “T“ Handle
Kit Disc
(Tire Retainer)
3. Thread kit “T“ handle into kit tire carrier until it con-
tacts kit disc (tire retainer). Rotate kit “T“handle at
least an additional two turns.
4. Install lock (not provided in kit) if applicable.
2 Pre-Runner Tire Carrier - Kit 86300
Page 3
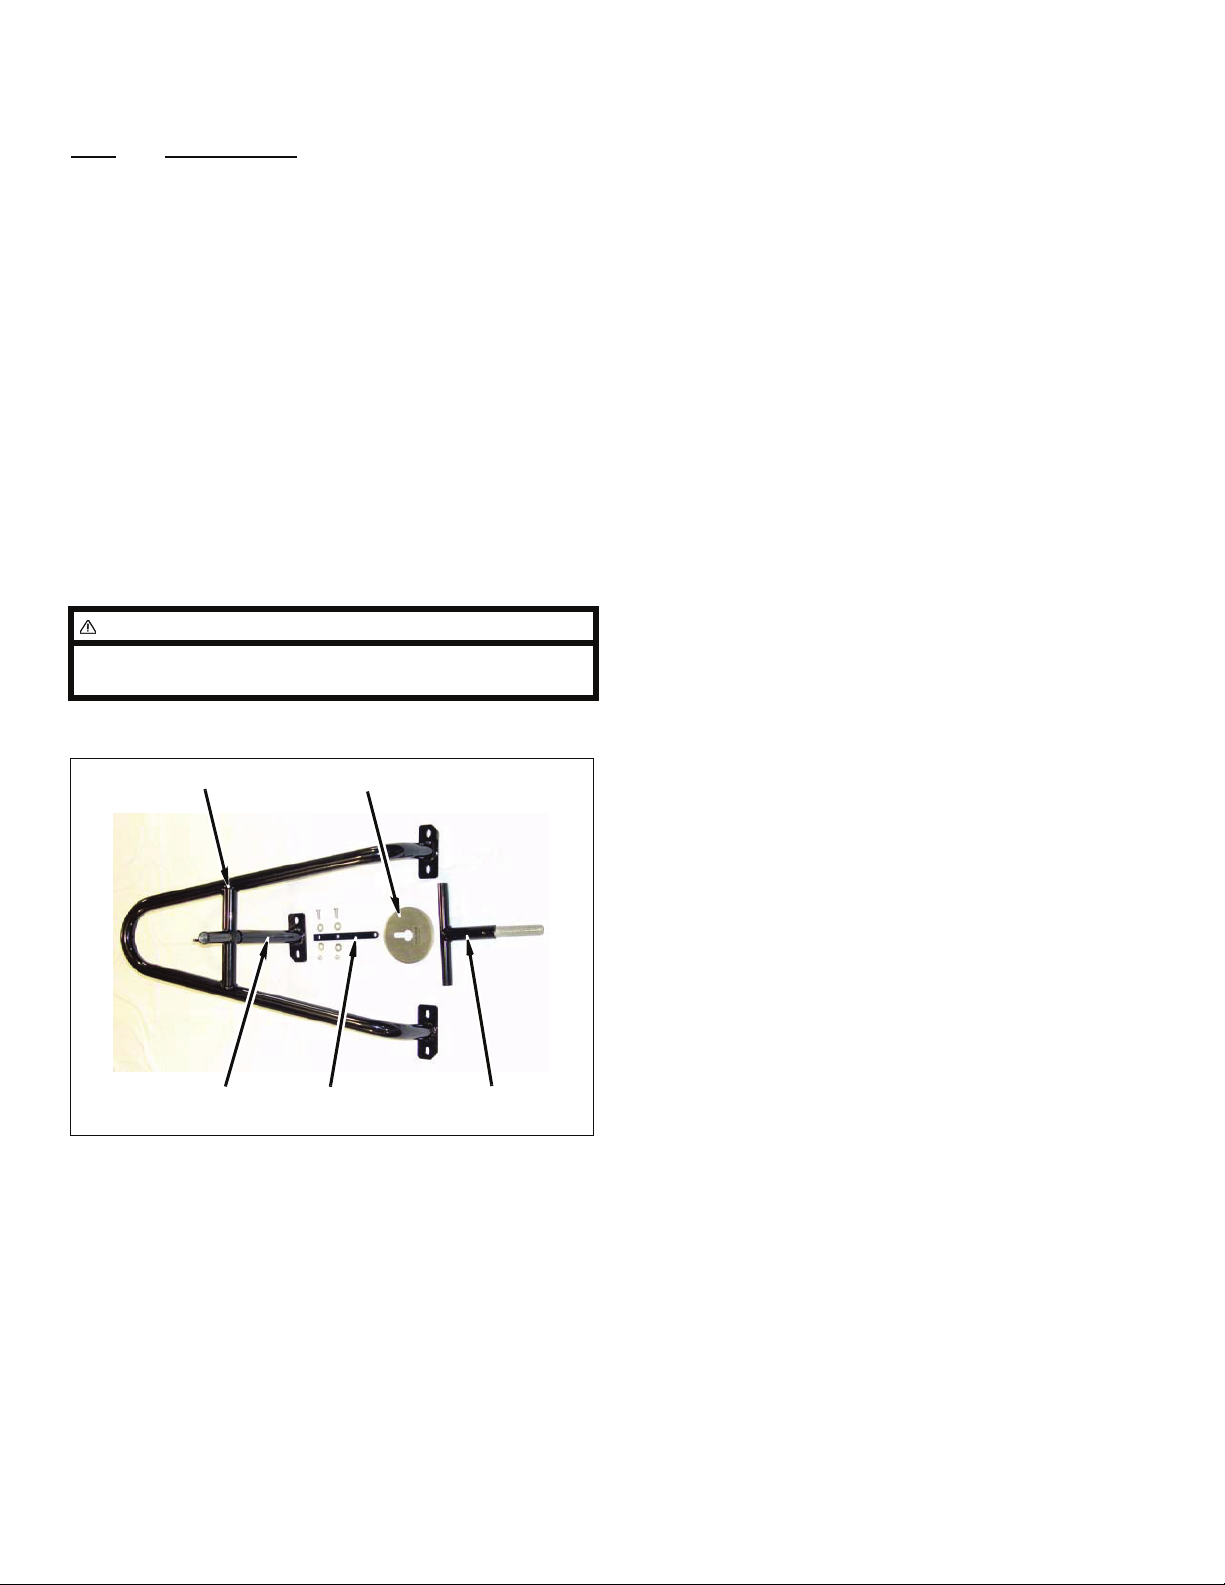
Parts list
Qty. Description
2 Bolt, 5/16” x 1”
1 Bolt, 3/8” x 1”
6 Bolt, 3/8” x 1
6 Bushing, shock
1 Disc, tire retainer
1 Front leg
1 Lock bar
2 Nut, 5/16” serrated flange
6 Nut, 3/8” Nylock
1 Spacer, Urethane Disc
1“T“ Handle
1 Tire carrier
12 Washer, 3/8” USS
NOTE
Depending on the vehicle configuration and mounting
location, some parts may not be used.
1/2”
Tire Carrier
Front Leg
Disc (Tire Retainer)
Lock Bar “T“ Handle
Rev. 01 Copyright 03/06
Performance Automotive Group
www.p-a-g.net
3 Pre-Runner Tire Carrier - Kit 86300
 Loading...