

Page 1
Before Starting Installation
NOTE
Kit parts are prefaced by the word kit and appear in
bold print.
3651 N Highway 89 • Chino Valley, AZ 86323
(928) 636-7080 • www.p-a-g.net
JEEP CHEROKEE XJ,
HD ROCK RAILS
INSTALLATION INSTRUCTIONS
1984-2001 4Dr. XJ KIT# 84460
WARNING
Before you install this kit, read and understand all
instructions, warnings, cautions, and notes in this
instruction sheet and in the vehicle owner’s manual.
CAUTION
Proper installation of this kit requires knowledge of the
factory recommended procedures for removal and
installation of original equipment components. We recommend that the factory shop manual and any special
tools needed to service your vehicle be on hand during
the installation. Installation of this kit without proper
knowledge of the factory recommended procedures
may affect the performance of these components and
the safety of the vehicle. We strongly recommend that
a certified mechanic familiar with the installation of similar components install this kit.
1. Carefully read all warnings and instructions completely before beginning.
2. Verify all parts have been received in this kit by
checking the parts list at the end of this document.
NOTE
If parts are missing from kit, please be prepared to provide the following information:
1. Name of purchase location
2. Bar Code on side of box
3. Date above bar code
4. Date inside box cover
5. Inspector # from inside box cover
3. Only install this kit on the vehicle for which it is
specified. If at anytime during the installation you
encounter something different from what is outlined
in the instructions, call technical support at (928)
636-7080.
4. Special tools needed:
a. Hand Drill
b. 1/4”, 5/16” Drill Bit
c. Center punch
5. Park vehicle on a clean, dry, flat, level surface and
block tires so vehicle cannot roll in either direction.
WARNING
Always wear eye protection when operating power
tools.
WARNING
Before you install this kit, block the vehicle tires to prevent the vehicle from rolling.
JEEP XJ ROCK RAILS 1 Kit # 84460
Engine Compartment
1. Disconnect both battery cables. Disconnect nega-
tive cable first, then positive cable.
Page 2
Install Kit
1. Remove any mud flaps, etc. that my cause issues
when installing kit rock rails.
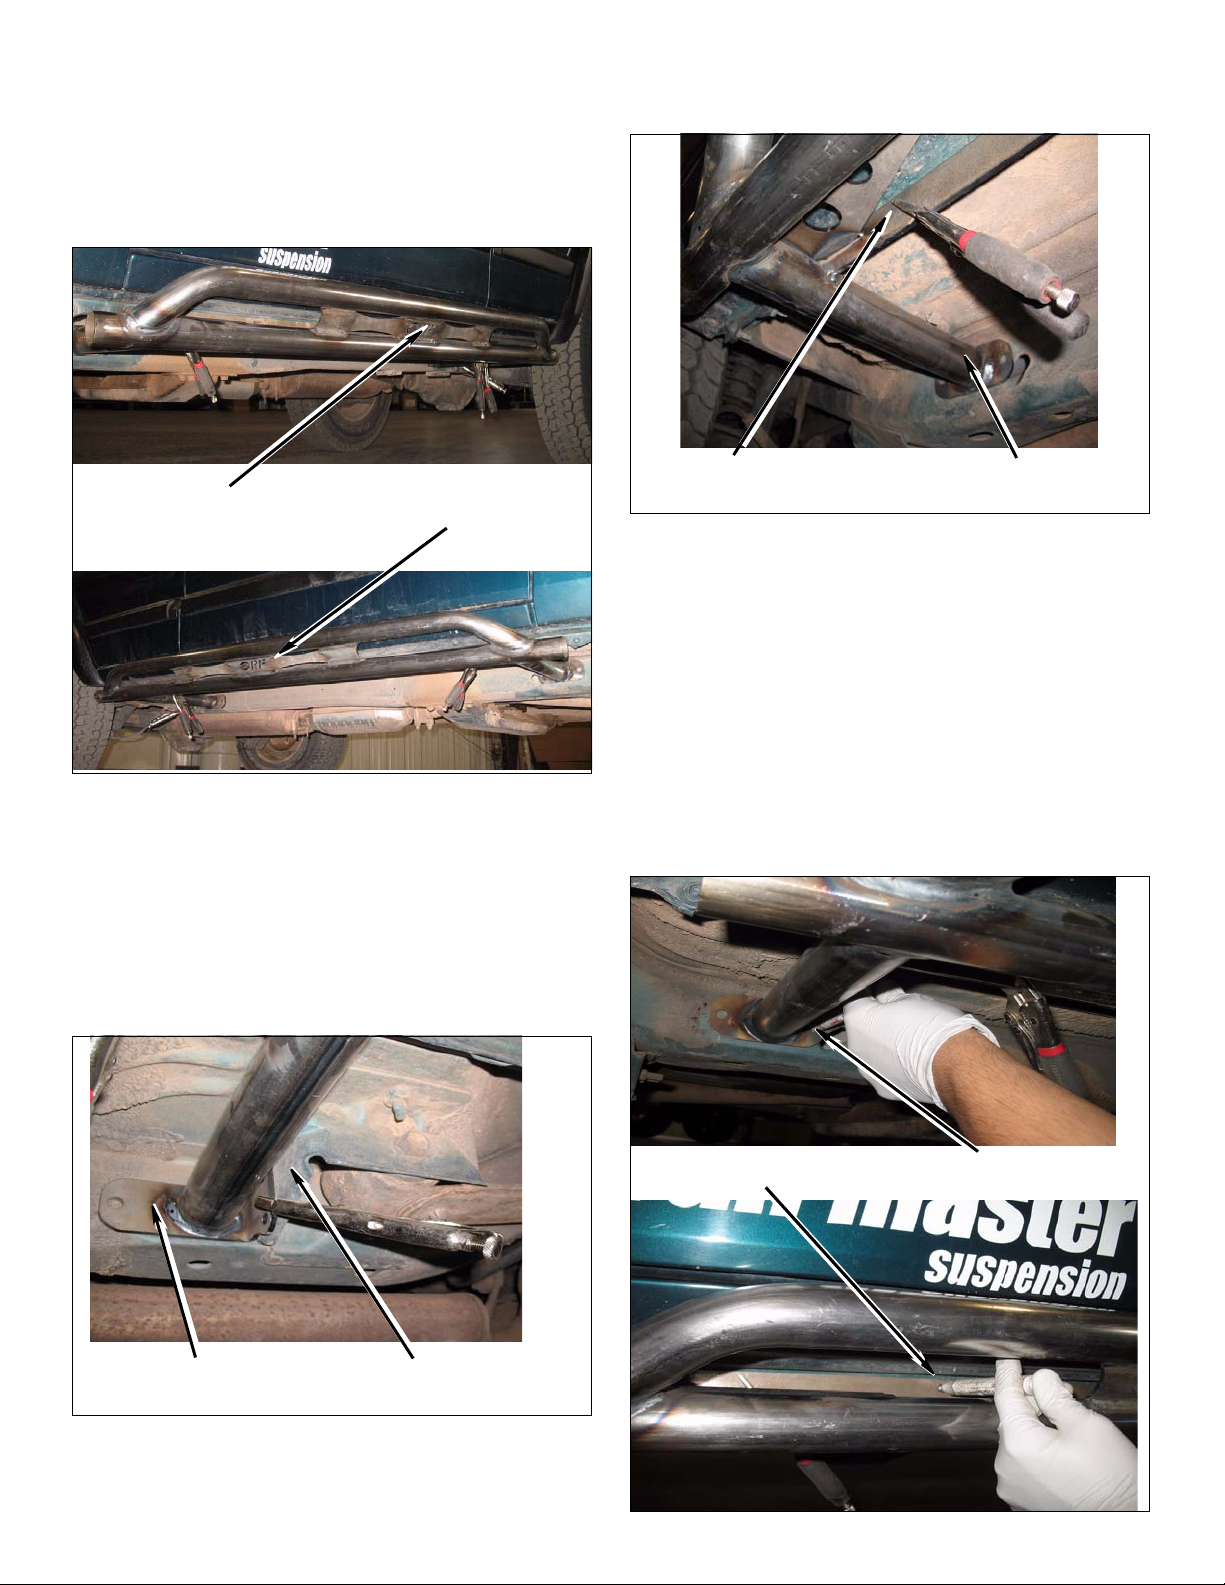
2. Layout driver and passenger side kit rock rail
assemblies along side of vehicle.
6. Use a C-Clamp or vise grip pliers to secure the kit
rock slider seam mount to the outside of unit-body
rocker seam.
Dvr. Side kit
Rock Rail
3. Clean up all dirt, undercoating, etc. from unit-body
frame area, including the outside of the unit-body
rocker seam.
4. Place jack stands under kit rock slider and move kit
rock slider into position.
5. Use a C-Clamp or vise grip pliers to secure th e rear
kit rock slider frame mount to the rear spring
hanger.
Psg. Side kit
Rock Rail
Seam Mount Clamped Kit Rock Rail Mount
7. Use the jack stands under the kit rock rail frame
mounts as extra support for squaring up the mount-
ing pads to the unit-body frame rail. (Note: Be sure
the kit rock rail frame mounts sit flush & centered
with the unit body frame. Shims may be used to
achieve correct position.)
8. NOTE: Before marking all drill holes, be sure your
doors open without contacting your kit rock rails.
9. Continue by using a pencil or marker to mark three
holes on unit-body frame rail, two holes on spring
hanger mount, four holes on unit-body rocker seam
for drilling.
Rocker Seam Marked Frame Rail Marked
Spring Hanger MountKit Rock Rail Mount
JEEP XJ ROCK RAILS 2 Kit # 84460
Page 3
10. Remove template (kit rock slider) from side of
vehicle.
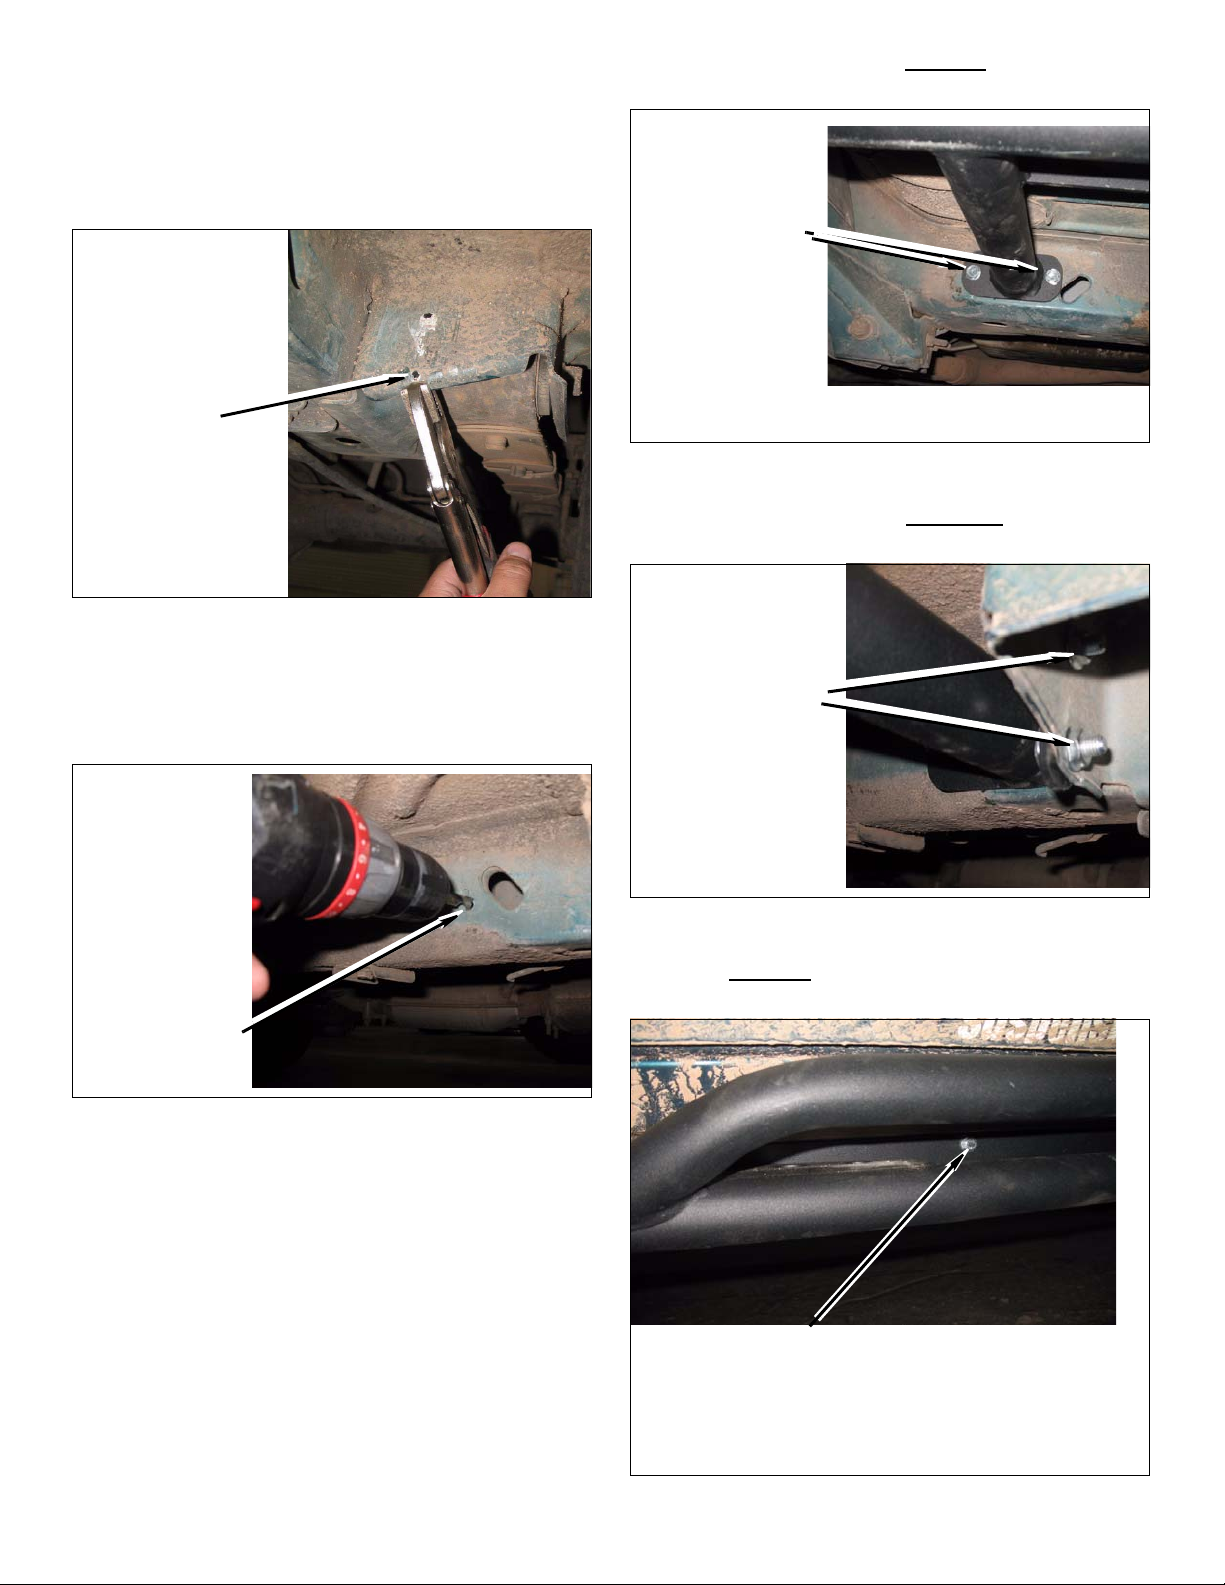
11. Using vise grips, straighten small section of rear
spring hanger seam where marked hole has been
made. (Note: This step will allow you to drill and
install hardware properly.)
Vise Grip:
Straighten
small section of
rear spring
hanger seam
12. Use a hammer and center punch to locate center of
mounting holes marked in step 9.
13. Using a 5/16” drill bit, drill three holes on unitbody frame rail and two holes at spring hanger
mount.
frame rail mounting bolts. DO NOT over tighten bolts
completely at this time. Leave 1/8” gap.
Install three kit
(3/8”-16x1” self
tapping bolts)
unit-body frame
rail mounting bolts
19. Install two kit (5/16”-18x1” bolt, washer, flange
nut) through kit rear rock rail frame mount & rear
spring hanger seam. DO NOT
completely at this time. Leave 1/8” gap.
Install two kit
(5/16”-18x1” bolt,
washer, flan ge nut)
unit-body frame rail
mounting bolts
tighten bolts
Drilling Frame
Rail
14. Using a 1/4” drill bit, drill four holes on unit-body
rocker seam.
15. Optional: Use metal primer to coat rocker body and
frame rail holes to prevent corrosion.
16. Install kit Urethane End Caps.
17. Reposition kit rock slider onto unit-body frame and
rocker seam.
18. Install three kit (3/8”-16x1” self tapping bolts)
through kit front rock rail frame mounts unit-body
20. Install four kit (1/4”-20x1” bolt, washer, flange
nut) through kit rock rail seam mount & rocker
seam. DO NOT
Leave 1/8” gap.
Install two kit (1/4”-20x1”
bolt, washer, flange nut )
unit-body frame rail
mounting bolts
tighten bolts completely at this time.
JEEP XJ ROCK RAILS 3 Kit # 84460
Page 4
21. Tighten the frame mounting hardware.
**DO NOT over tighten or strip out can occur**
Accessories
22. Tighten the spring hanger seam mounting hardware
23. Tighten the rocker seam mounting hardware.
24. Repeat steps 1-23 for remaining Kit Rock Slider.
25. Reinstall any asseccories, fender flares, mud flaps,
etc. that were removed prior to installation of kit
Rock Rails.
After Completing Installation
Engine Compartment
1. Connect both battery cables. Connect positive cable
first, then negative cable.
Miscellaneous
1. Check all fasteners to ensure they are tight.
2. Ensure all wires, hoses, cables, etc. are properly
connected and there is ample slack.
WARNING
Retorque all fasteners after 200 miles and after off road
use. All body lift components should be visually
inspected and fasteners retorqued during routine vehicle servicing.
NOTE
All warranty information, instruction sheets, and other
documents regarding the installation of this product
must be retained by the vehicle owner
contained in the instructions and on the warranty card
will be required for any warranty claims. The vehicle
owner needs to understand the modifications made to
the vehicle and how they affect vehicle handling and
performance. Failure to provide the customer with this
information can result in damage to the vehicle and
severe personal injury.
. Information
The following accessories are also available:
Kit# 84450: 4Dr. Side Armor
Kit# 83202: Rock Slider Front Bumper
Kit# 83203: Rock Slider Front Winch Bumper
Kit# 83209: Rock Slider Rear Bumper
Kit Parts List
Qty. Description
1 Rock Rail (Drivers side)
1 Rock Rail (Passenger side)
6 Bolt, Tapping (3/8” x 1”)
4Bolt, (5/16” x 1”)
4 Nut, Flange (5/16”)
4 Washer, SAE (5/16”)
8Bolt, (1/4” x 1”)
8 Nut, Flange (1/4”)
8 Washer, SAE (1/4”)
4 End Cap, Urethane
JEEP XJ ROCK RAILS 4 Kit # 84460
 Loading...