

Page 1
3651 N Highway 89 • Chino Valley, AZ 86323
(928) 636-7080 • www.p-a-g.net
JEEP WRANGLER JK 2 DOOR
JEEP WRANGLER JK 4 DOOR
ROCKER PANEL W/BAR
INSTALLATION INSTRUCTIONS
2 DOOR MODELS
2007-2012 KIT# 84207
4 DOOR MODELS
‘2007-2012 KIT# 84307
WARNING
Before you install this kit, read and understand all
instructions, warnings, cautions, and notes in this
instruction sheet and in the vehicle owner’s manual.
CAUTION
WARNING
Many states and municipalities have laws restricting
bumper heights and vehicle lifts. Consult state and
local laws to determine if the changes you intend to
make to the vehicle comply with the law.
WARNING
Always wear eye protection when operating power
tools.
Proper installation of this kit requires knowledge of the
factory recommended procedures for removal and
installation of original equipment components. We recommend that the factory shop manual and any special
tools needed to service your vehicle be on hand during
the installation. Installation of this kit without proper
knowledge of the factory recommended procedures
may affect the performance of these components and
the safety of the vehicle. We strongly recommend that
a certified mechanic familiar with the installation of similar components install this kit.
WARNING
Before you install this kit, block the vehicle tires to prevent the vehicle from rolling.
NOTE
Performance Automotive Group recommends using
the Loctite® supplied in the kit on the threads of all kit
nuts and bolts unless specified otherwise in these
instructions.
1 Rocker Panel w/Bar - Kit 84207 & 84307
Page 2
Before Starting Installation
Body
NOTE
Kit parts are prefaced by the word kit and appear in
bold print.
1. Carefully read all warnings and instructions com-
pletely before beginning.
2. Verify all parts have been received in this kit by
checking the parts list at the end of this document.
NOTE
If parts are missing from kit, please be prepared to provide the following information:
1. Name of purchase location
2. Bar Code on side of box
3. Date above bar code
4. Date inside box cover
5. Inspector # from inside box cover
3. Only install this kit on the vehicle for which it is
specified. If anytime during the installation you
encounter something different from what is outlined
in the instructions, call technical support at (928)
636-7080.
1. Prepare to Install Rocker Panel
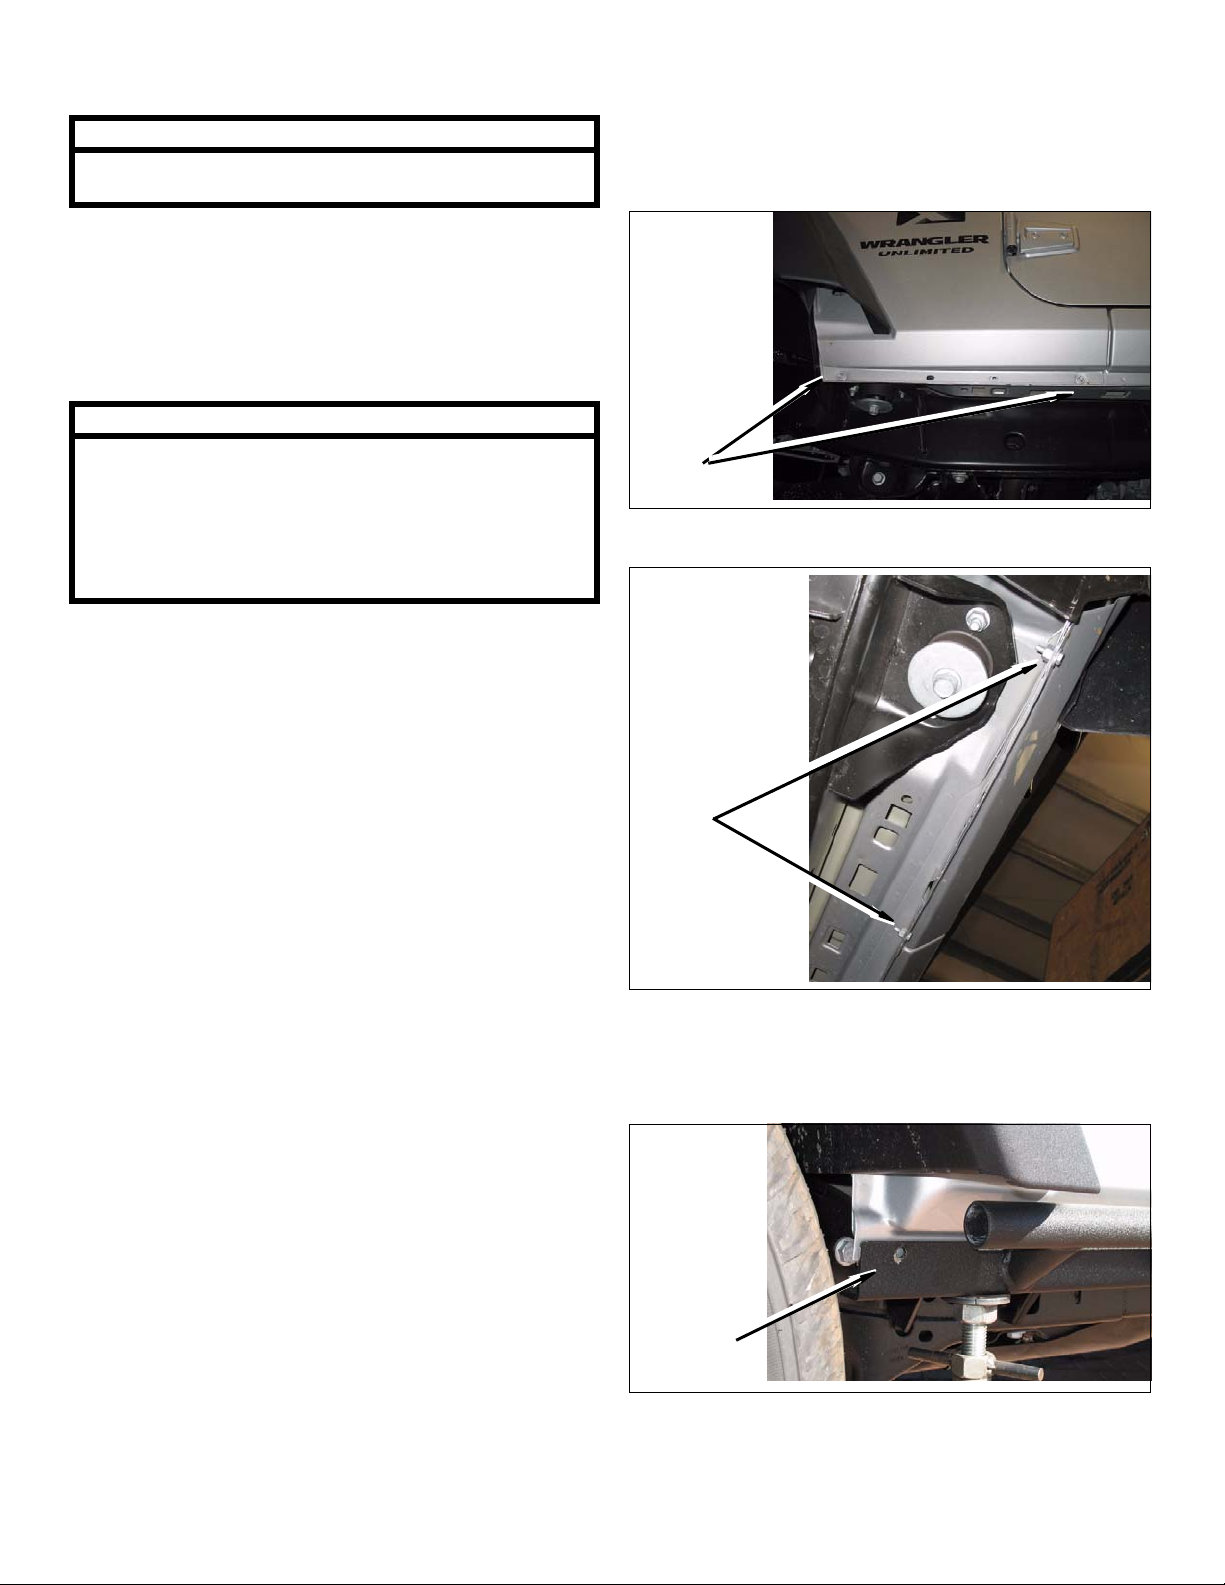
a. Remove two bolts from body seam.
Bolts
b. Cut off two weld nuts on back of body seam.
4. Special tools needed:
a. Die grinder or similar tool capable of cutting
metal.
b. Drill and 3/8 drill bit.
5. Park vehicle on a clean, dry, flat, level surface and
block tires so vehicle cannot roll in either direction.
Cut Off
Weld
Nuts
c. 2 Door Model: Position driver side kit rocker
panel on vehicle. Mark and center punch last
mounting hole on body seam using rocker panel
as templete.
Mark
Body
Seam to
Drill
d. Remove kit rocker panel from vehicle.
e.
2 Rocker Panel w/Bar - Kit 84207 & 84307
Page 3
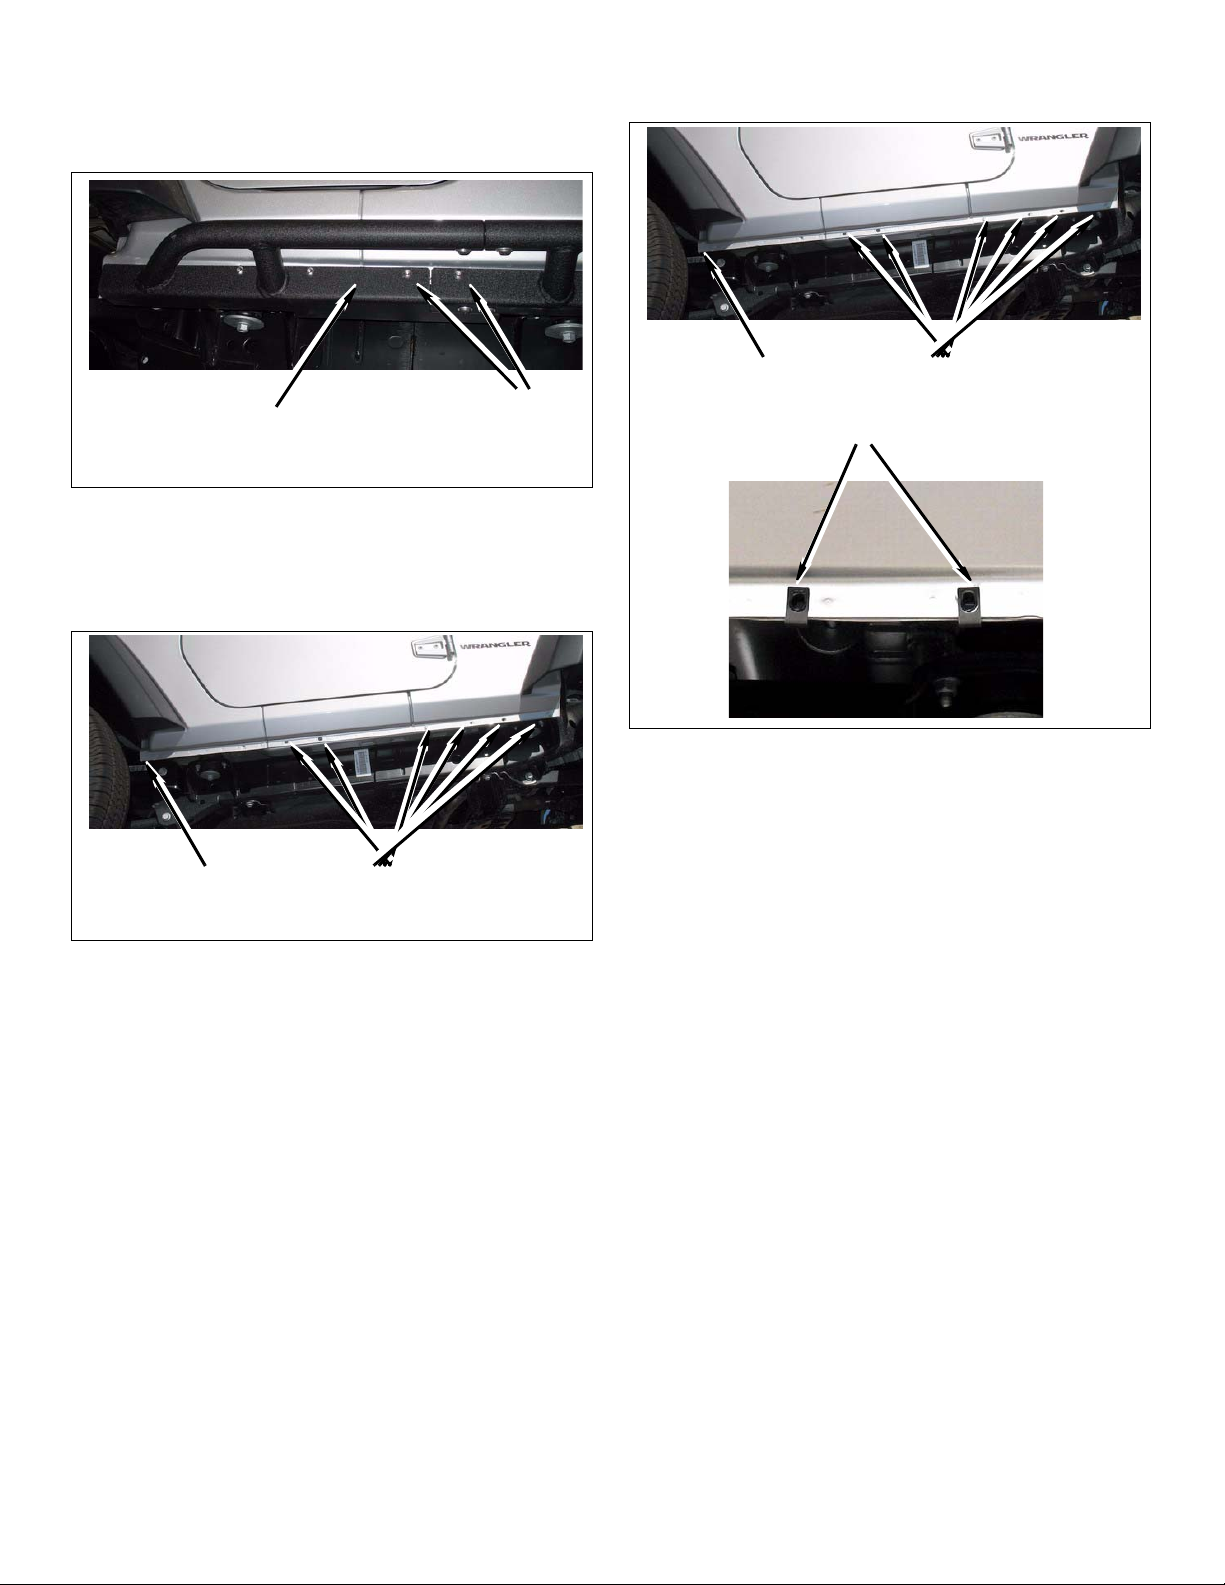
f. 4 Door Model: Position driver side kit rocker
panel assembly on vehicle. Mark and center
punch two mounting holes on body seam using
rocker panel as templete.
k. 4 Door Mode: Install ten kit u-nuts on body
seam.
Kit rocker panel
assembly
g. Remove kit rocker panel from vehicle.
h. 2 Door Model: Drill marked hole using 3/8” drill.
Enlarge remaining six holes to 3/8”.
Drill Mark
Location
to 3/8”.
Enlarge
Six Holes
to 3/8”.
Mark
Body
Seam to
Drill
Install
one u-nut
Install Six
u-nuts
u-nuts
i. 4 Door Model: Drill two marked holes using 3/8”
drill. Enlarge 8 holes on body seam to 3/8”
j. 2 Door Model: Install seven kit u-nuts on body
seam.
3 Rocker Panel w/Bar - Kit 84207 & 84307
Page 4
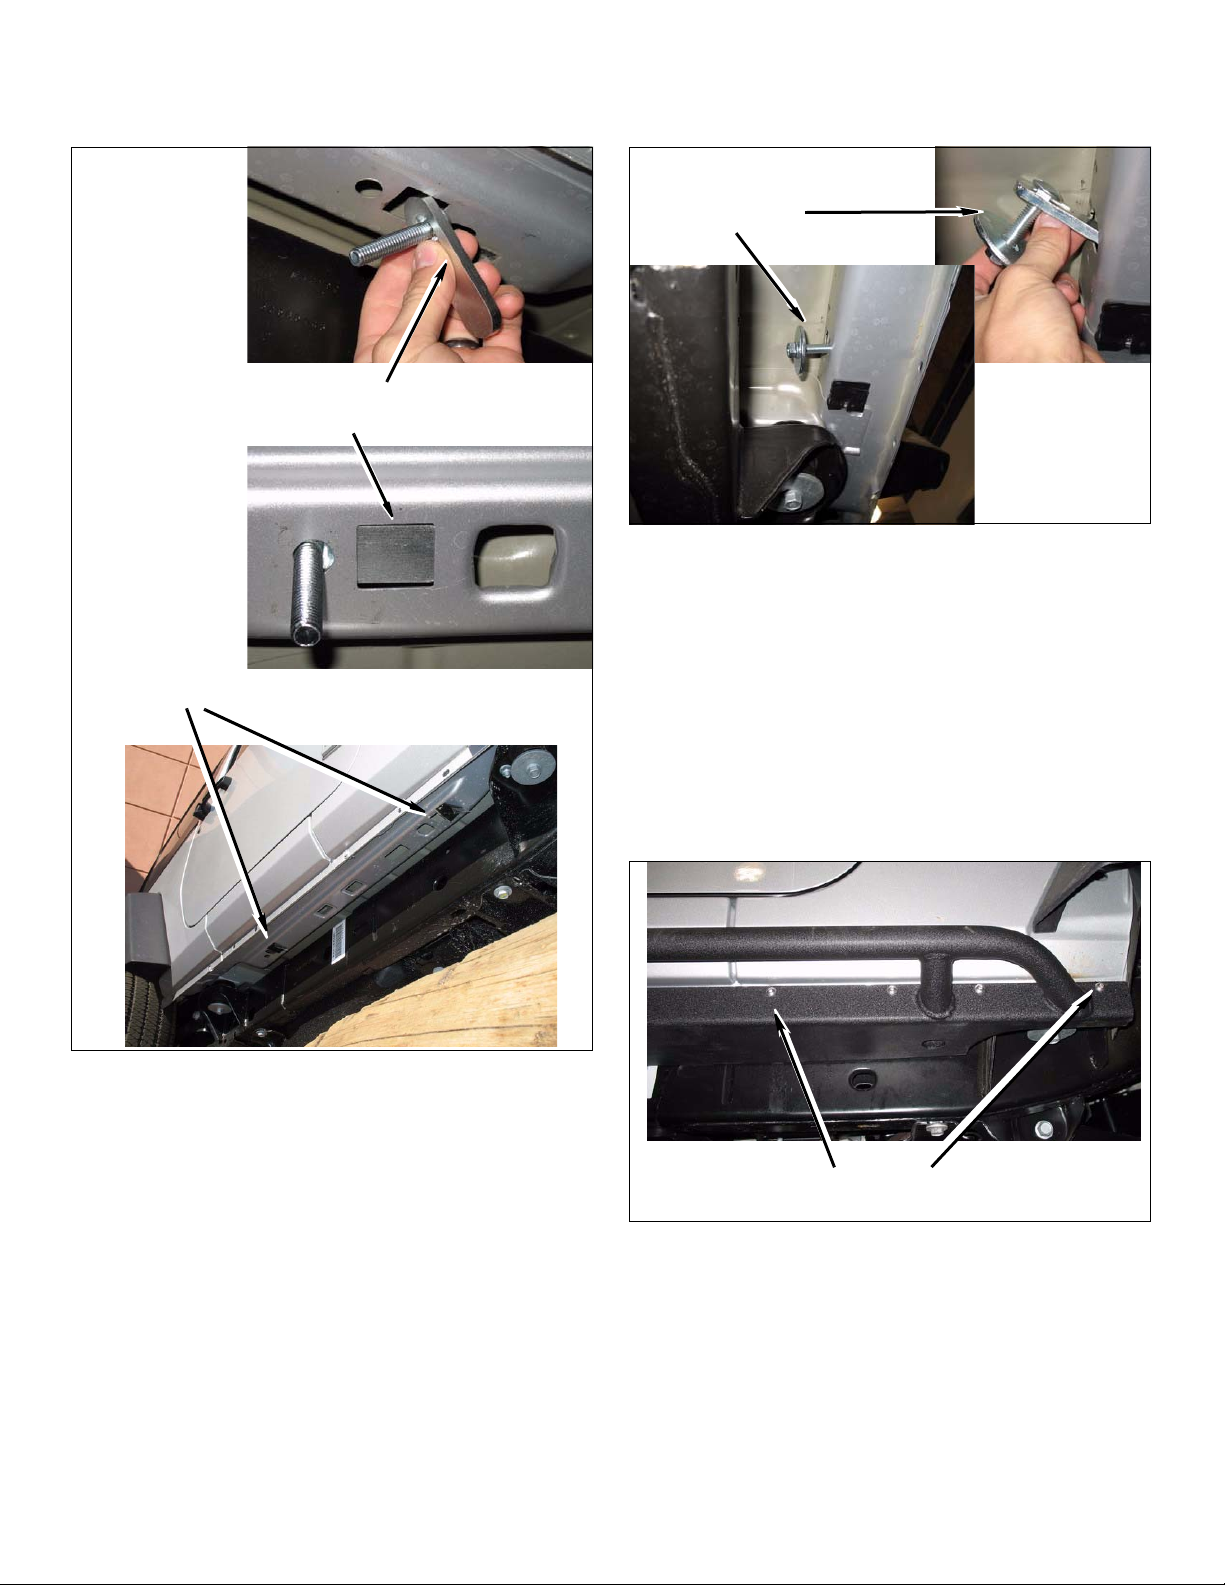
l. 2 and 4 Door Models: Install kit bolt (3/8” x 2.0”
carriage), and kit hanger in two locations as
shown.
Kit bolt (3/8” x 2.0” carriage)
and Kit Hanger
Install in Two
Locations
m. 4 Door Model: Install kit bolt (3/8” x 2.0” car-
riage), kit washer (2” OD x 1/2” ID), kit nut (3/8
flange) and kit hanger in rear body opening.
Kit bolt (3/8” x
2.0” carriage)
and Kit Hanger
2. Install Rocker Panel
a. Install kit rocker panel on vehicle making sure
kit bolts (3/8” x 2.0” carriage) align with holes in
kit rocker panel.
b. 2 Door Model: Install seven kit bolts (5/16” x 1”
button head)
c. 4 Door Model: Install ten kit bolts (5/16” x 1”
button head).
Kit bolts (5/16” x 1”
button head)
4 Rocker Panel w/Bar - Kit 84207 & 84307
Page 5
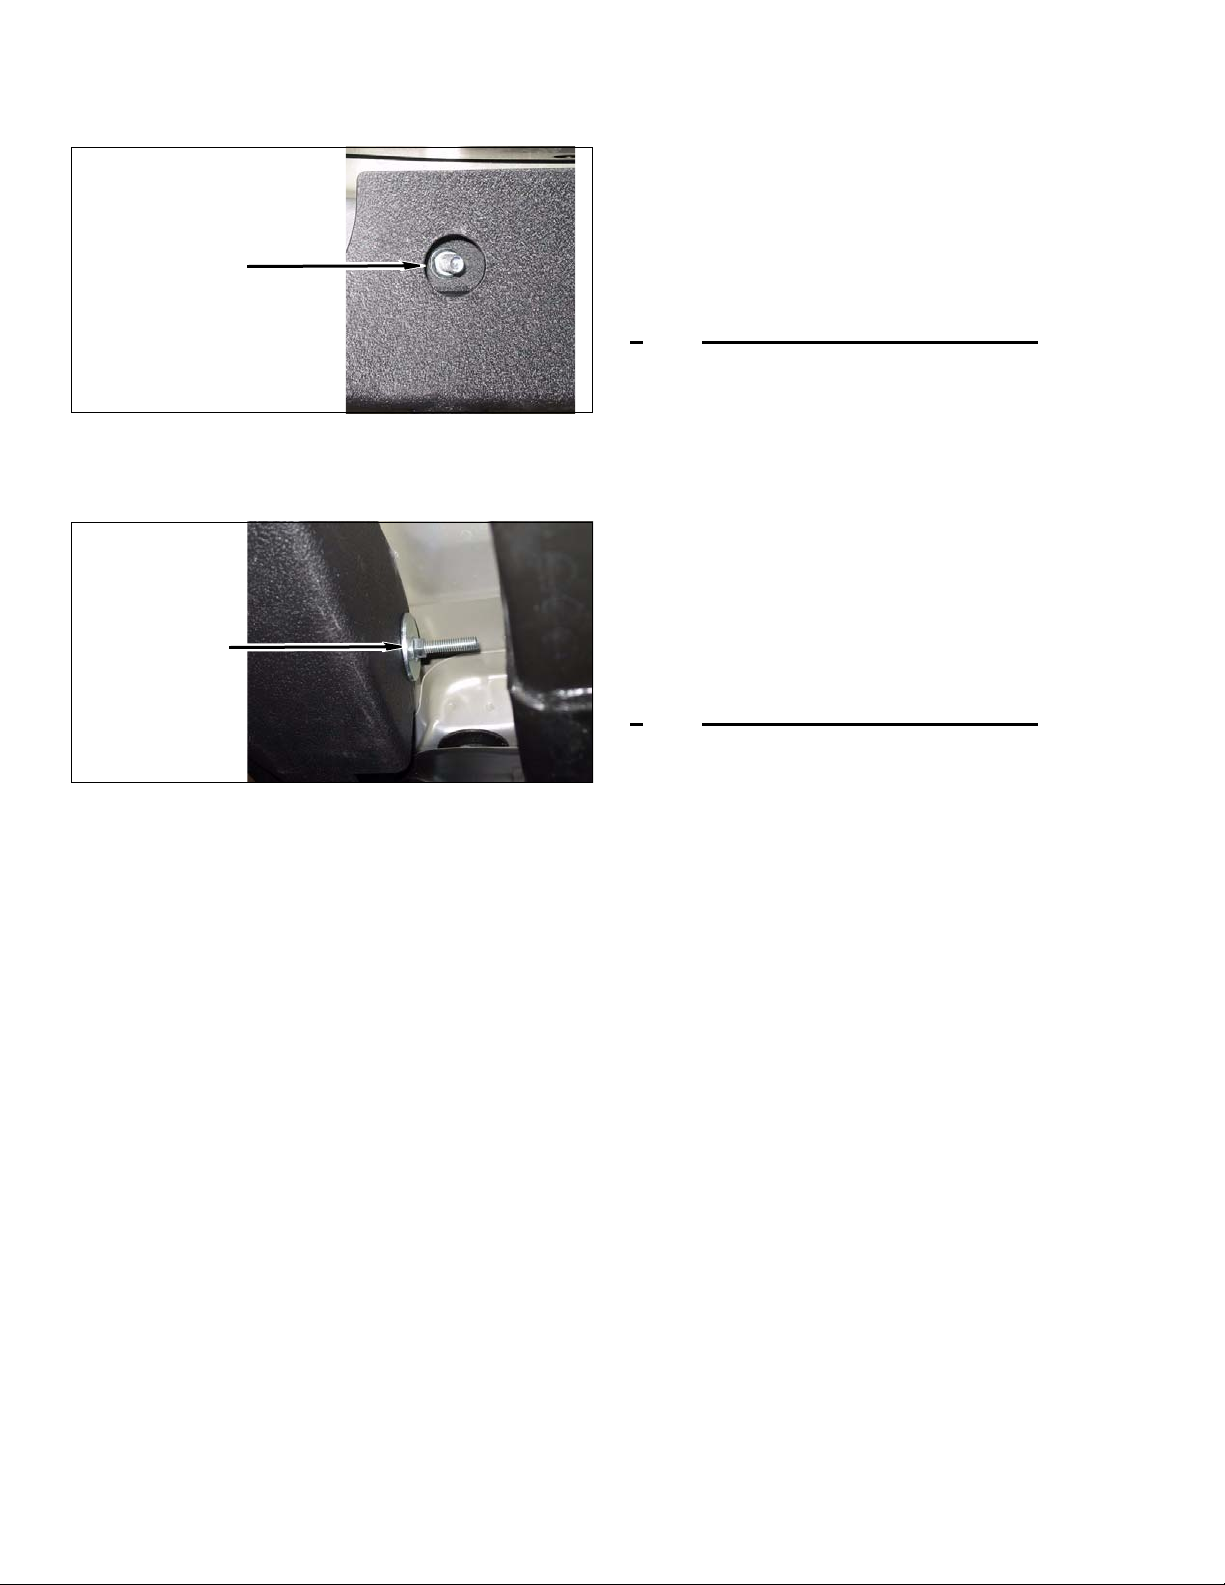
d. 2 and 4 Door Models: Install two kit nuts (3/8”
flange) on two kit bolts (3/8” x 2.0” carriage) on
lower side of kit rocker panel.
Kit Parts List
Qty. Description
KIT # 84207 (2 Door)
Kit nuts (3/8”
flange)
e. 4 Door Model: Tighten kit nut (3/8” flange) on
kit bolt (3/8” x 2.0” carriage) on side of kit
rocker panel.
Kit nuts (3/8”
flange)
f. Repeat above steps on passenger side.
Accessories
1 Panel (rocker protection, driver)
1 Panel (rocker protection, passenger)
1 84207BAG (Hardware bag kit)
14 U-Nut (5/16”)
14 Bolt (5/16 x 1” stainless bu tt on head)
4 Hanger (3” oval, slotted)
4 Bolt (3/8” x 2” carriage)
4 Nut (3/8” flange)
KIT # 84307 (4 Door)
1 Panel (rocker protection, driver)
1 Panel (rocker protection, passenger)
1 84307BAG (Hardware bag kit)
6 Hanger (3” oval, slotted)
2 Washer (2” OD x 1/2” ID)
20 Bolt (5/16 x 1” stainless bu tt on head)
6 Bolt (3/8” x 2” carriage)
6 Nut (3/8” flange)
20 U-Nut (5/16”)
4 Washer (5/16” USS)
The following accessories are also available:
Kit# 84310: 2Dr. Rock Armor
Kit# 84320: 4Dr. Rock Armor
Kit# 83204: Front OEM Foglight Bumper
Kit# 83210: Rock Slider Stinger Front Bumper
Kit# 83218: Rock Slider Rear Bumper w/ LED
Kit# 84330 / 84331 / 84332: 2Dr. Quarter Armor
Kit# 84340 / 84341 / 84342: 4Dr. Quarter Armor
Kit# 85209: Rotopax Tire Carrier w/ 3 gal Cans
5 Rocker Panel w/Bar - Kit 84207 & 84307
 Loading...