

Page 1
Page 2

EN
PAIR OF PMR446 TWO WAY PERSONAL RADIOS
MODEL: TP393
Safety Instructions..........................................................................3
Features..........................................................................................4
Key Features ..................................................................................5
LCD Display Icons..........................................................................5
Starting operation
Battery Installation...................................................................6
Using Li-ION rechargeable battery...............................................6
Recharging the battery..............................................................7
Charging with the AC/DC Adaptor..............................................8
General operation
Powering the unit On/Off.............................................................8
Using the PMR............................................................................8
Speaking to other radio...............................................................9
Listening to other radio................................................................9
Using a PTT Earphone................................................................9
Adjusting speaker volume (15 Levels).........................................9
TX Timeout function.................................................................10
Menu operation
Menu Flow chart.................................................................10
Select channel......................................................................10
CTCSS code.........................................................................11
FM Radio..... ..........................................................................11
Call Tone..... .........................................................................12
Scrambler Function...............................................................13
1
Page 3

EN
VOX (Hands-free Function) ..........................................................13
Stop Watch...... .........................................................................14
Baby Monitor.... .........................................................................15
Roger Beep (On/Off).. ...............................................................15
Auto Power Off ..... ....................................................................16
Scanning Channels.. ...................................................................16
Key Lock...................................................................................16
Technical Specifications
Channel frequency table.............................................................17
About oregon scientific...............................................................19
EU-Declaration of conformity ......................................................19
2
Page 4
EN
Thank you for selecting the Oregon ScientificTM TP393 as your product of
choice. This product is a portable, easy-to-use two-way radio transceiver that
you can use to contact your family and friends at shopping malls, amusement
parks, sports events, beaches, forests and so on. You can also use is as a
vital communications tool in a neighborhood watch.
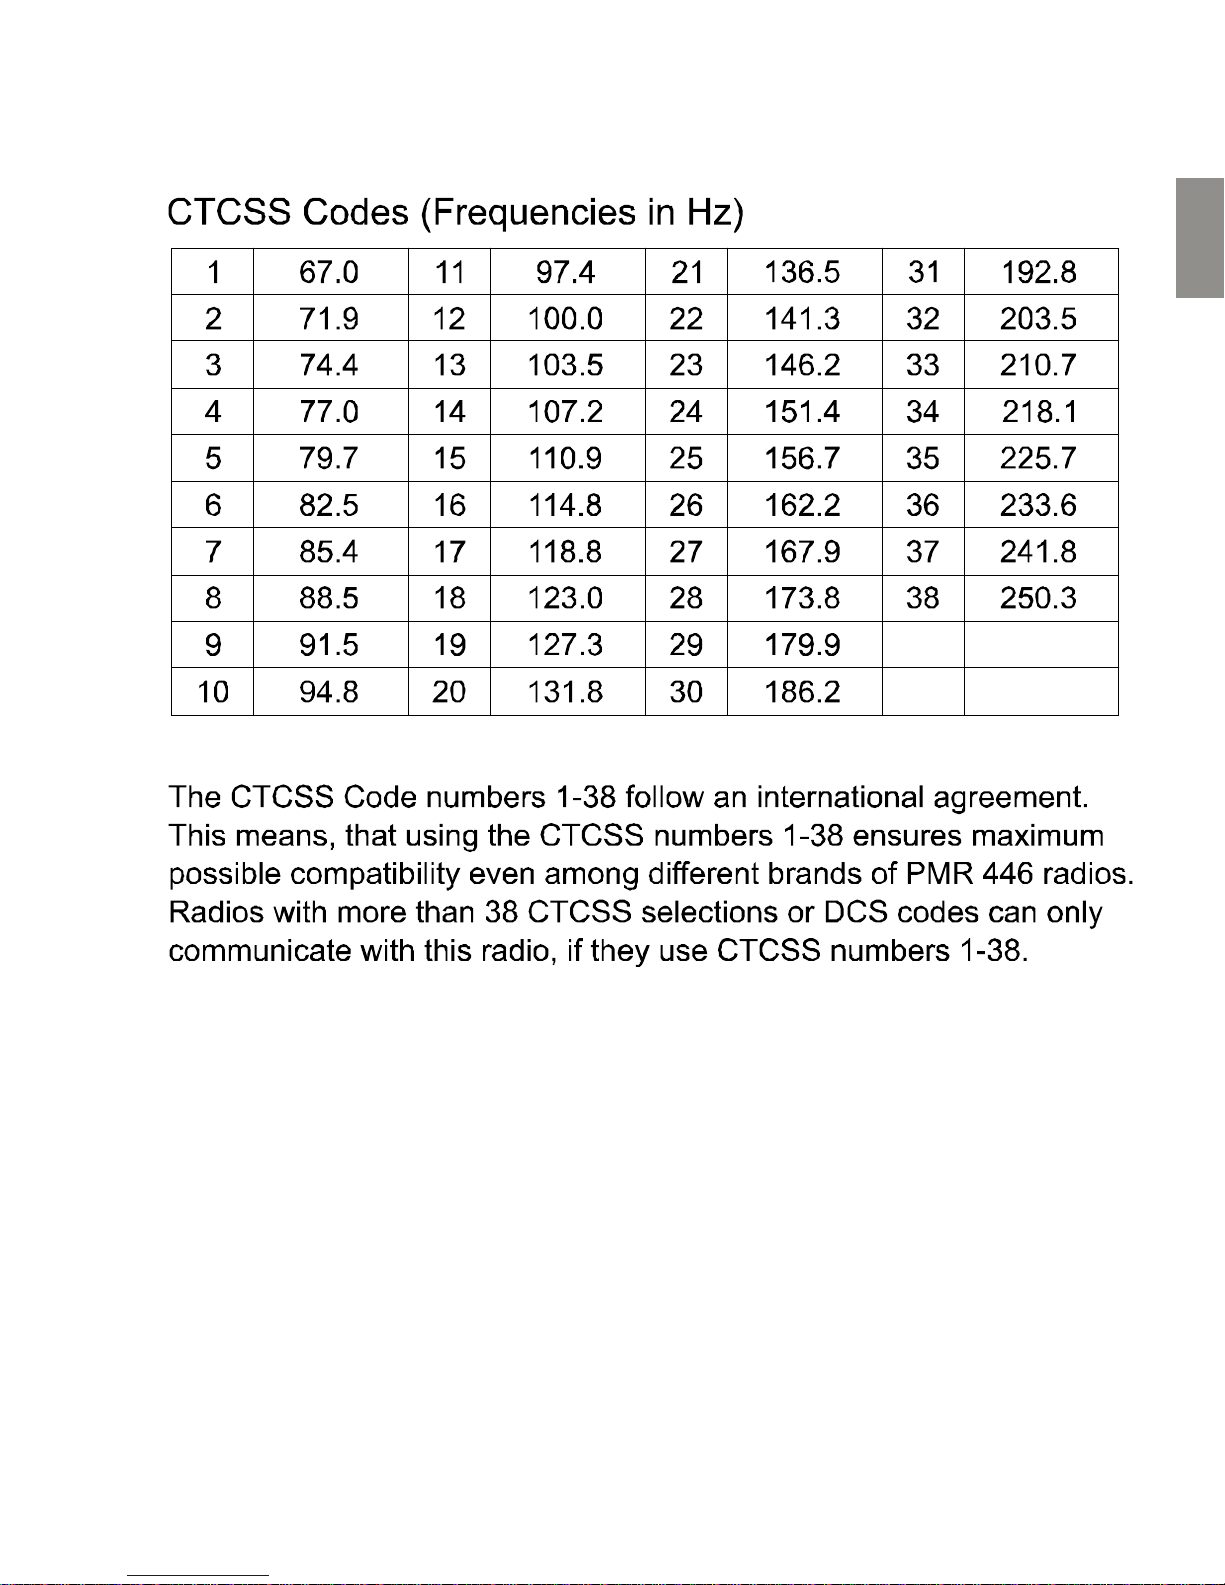
The transceiver has 8 channels and 38 CTCSS (Continuous Tone Coded
Squelch System) codes. If someone else is using the same channel as you,
you can select another channel or use the CTCSS feature. Talk with another
person if you are both tuned to the same channel and/or CTCSS code.
Please note that the use of this item is subject to applicable regulations of
the country where used.
NOTE: Please read this information carefully before you
use the two-way radio.
General Instructions
1. Keep the antenna at least 2.5 cm away from your head and body.
2. Do not attempt to modify the radio. The radio is designed to comply
with CE & R & TTE.
Environmental conditions
1. Avoid placing this radio for prolonged periods of time in direct
sunlight or temperatures below-20oC or above 60oC .
2. Turn off the radio wherever posted notices restrict the use of
radios or cellular telephones.
3. The LCD display is made of glass & maybe damaged if dropped
or impacted.
4. Don’t use the radio in a high humidity, dusty or explosive environment.
3
Page 5

EN
Battery
1. This radio is designed to use 3.7V Li-Ion rechargeable battery.
The battery included with the radio has a protection circuit to
protect the battery from internal short circuit and over charge.
2. Avoid any contact with conductive materials such as jewelry,
keys, or beaded chains and the exposed terminals of the battery.
Contact could complete an electrical circuit (short circuit) and
caused the battery to over heat and could cause damage or injury.
3. Only replace batteries with the same or equivalent type
recommended by the manufacturer.
1. PMR446 MHZ Frequency range (free use within most European
countries)
2. 8 Channels
3. 38 CTCSS codes
4. FM Radio: 88 ~ 108 MHZ
5. Scrambler Function: 4 settings selectable
6. VOX: 3 Levels of Sensitivity
7. Roger Beep On / Off
8. Auto Power Off (APO)
9. Call Tone
10. Scan
4
Page 6
EN
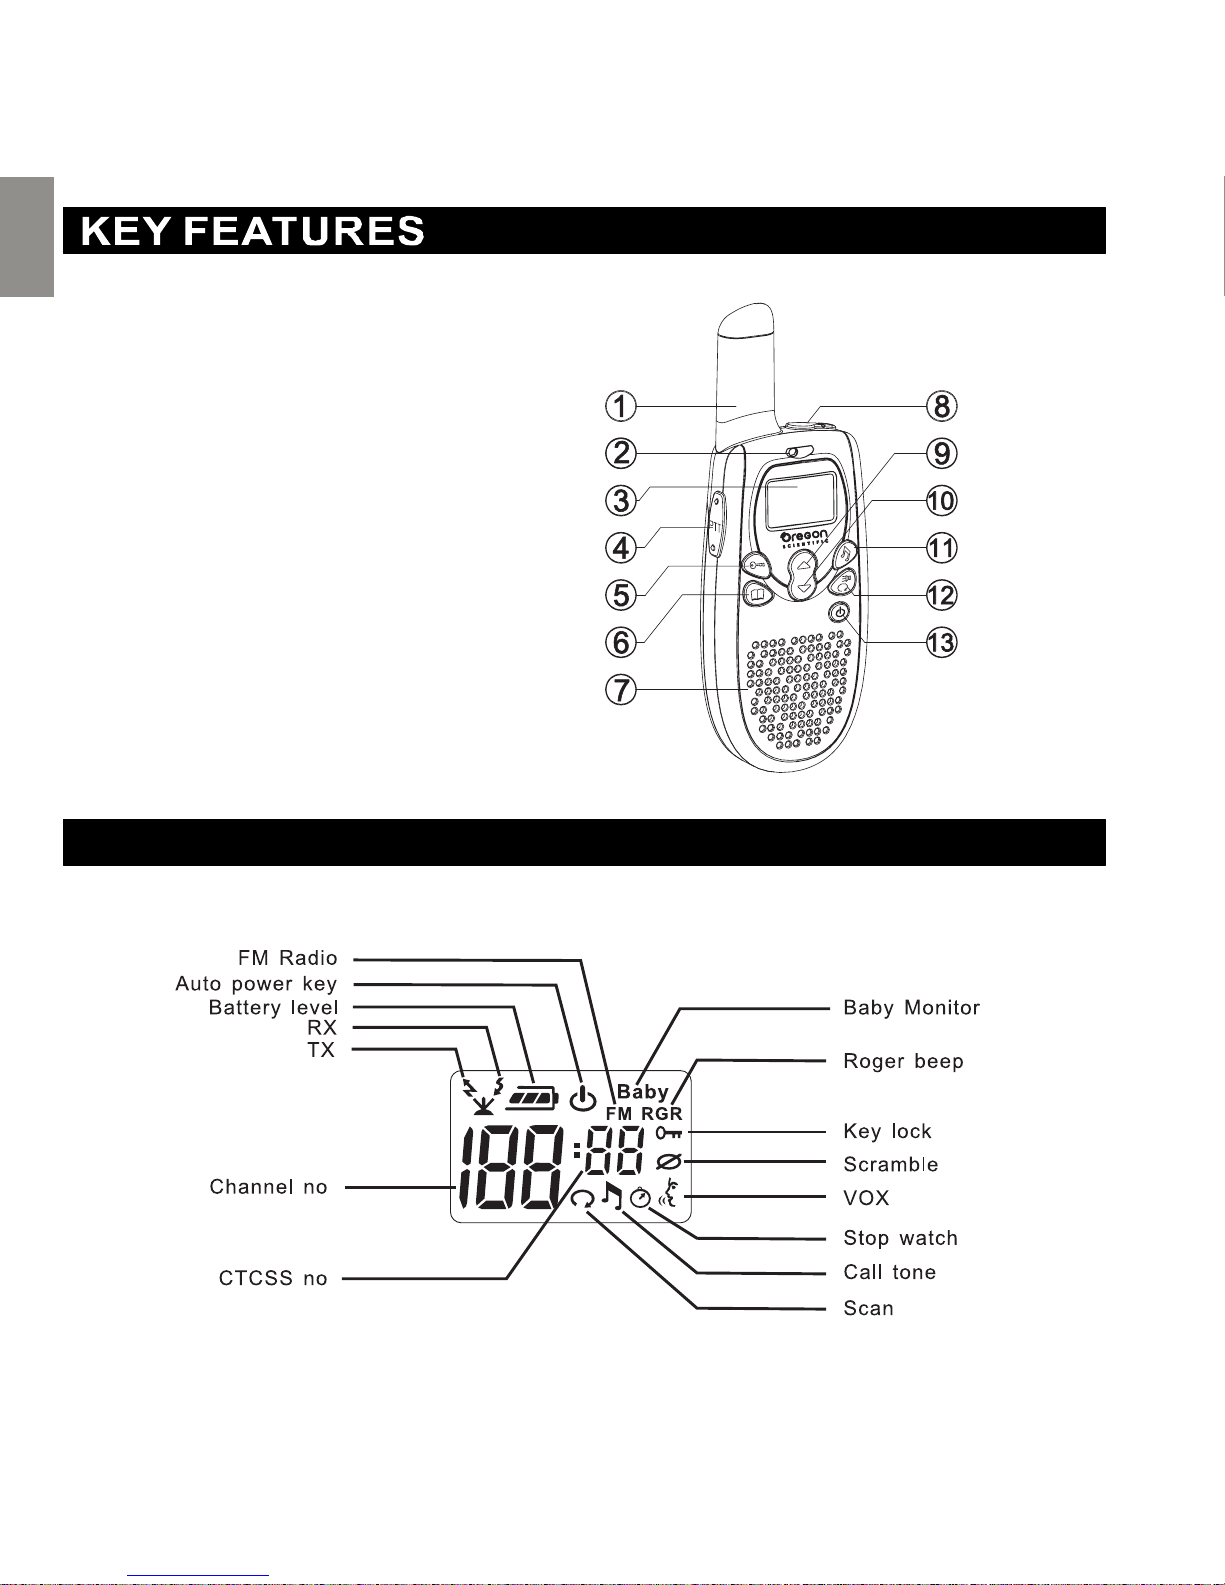
LCD DISPLAY ICONS
1. Antenna
2. Microphone
3. LCD lens
4. PTT Key
5. Key Lock Key
6. Menu Key
7. Speaker
8. Earphone & Wall Charger Jack
9. Up Key
10. Down Key
11. Call Tone Key
12. Scan / Monitor Key
13. Power On / Off Key
5
Page 7
EN
STARTING OPERATION
BATTERY INSTALLATION
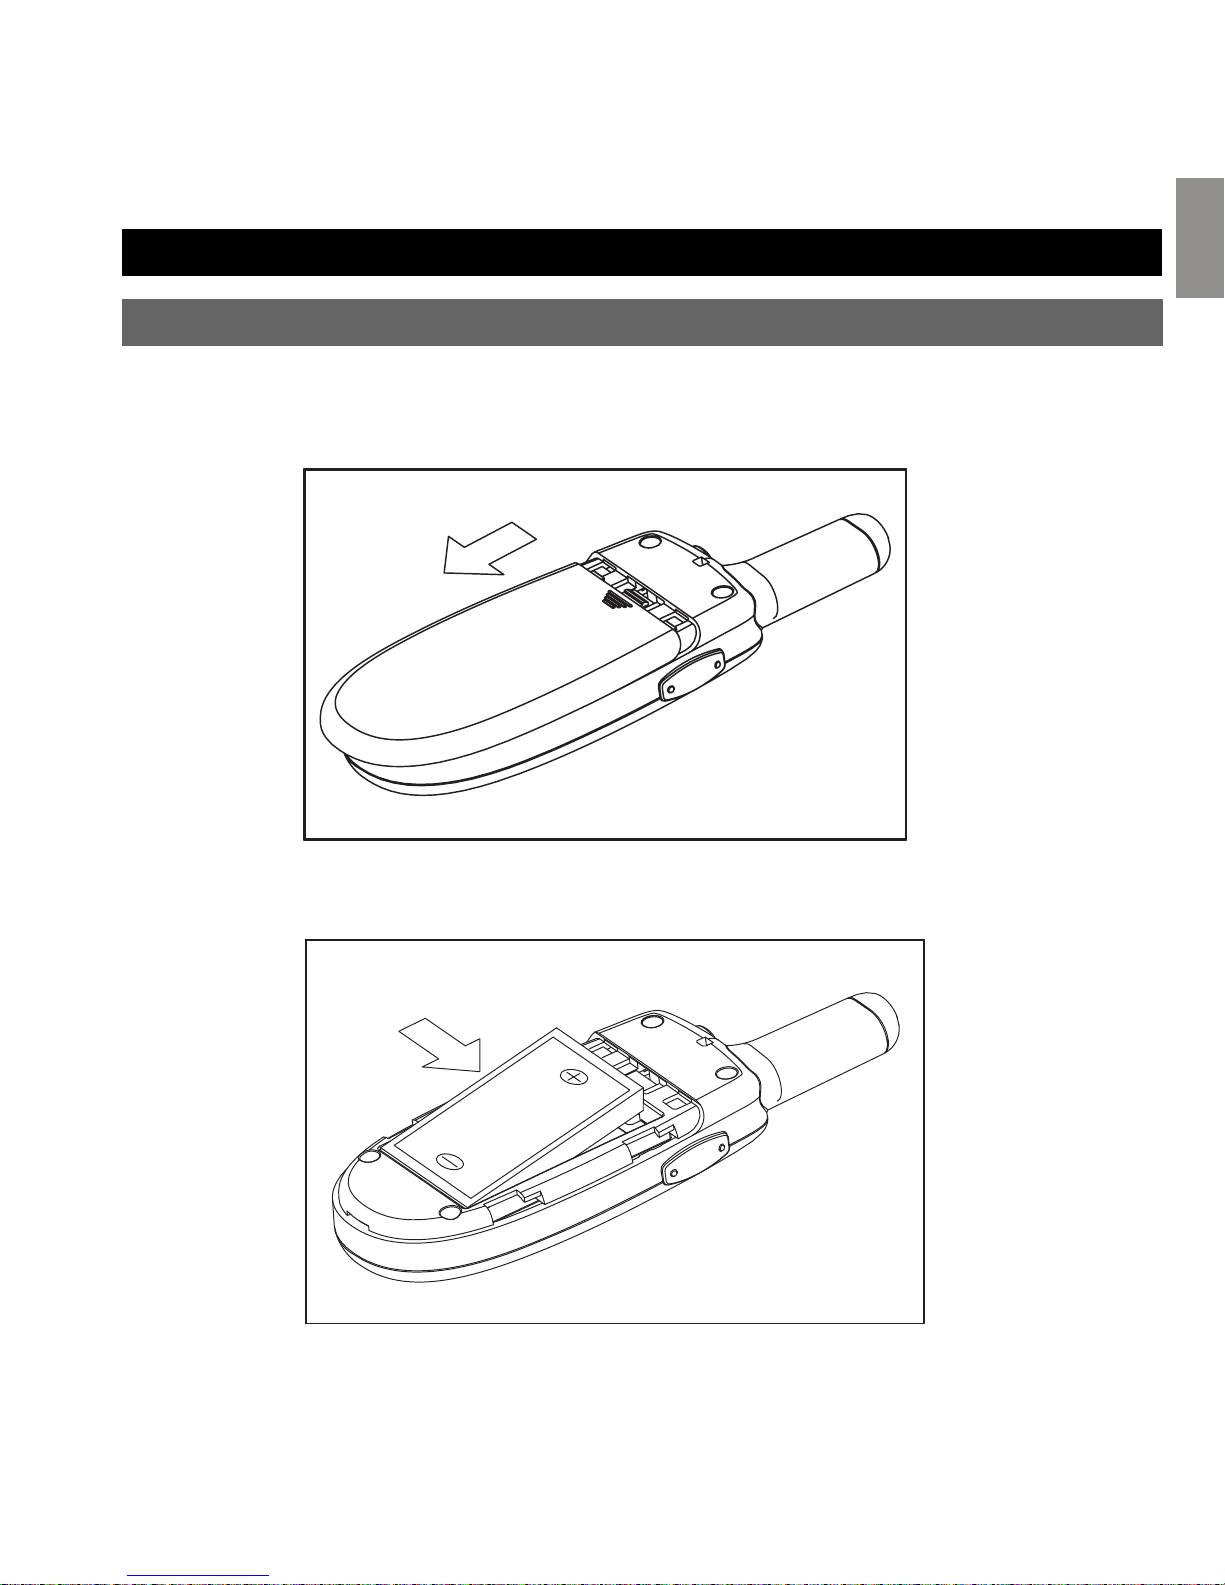
Using Li-Ion Rechargeable Battery
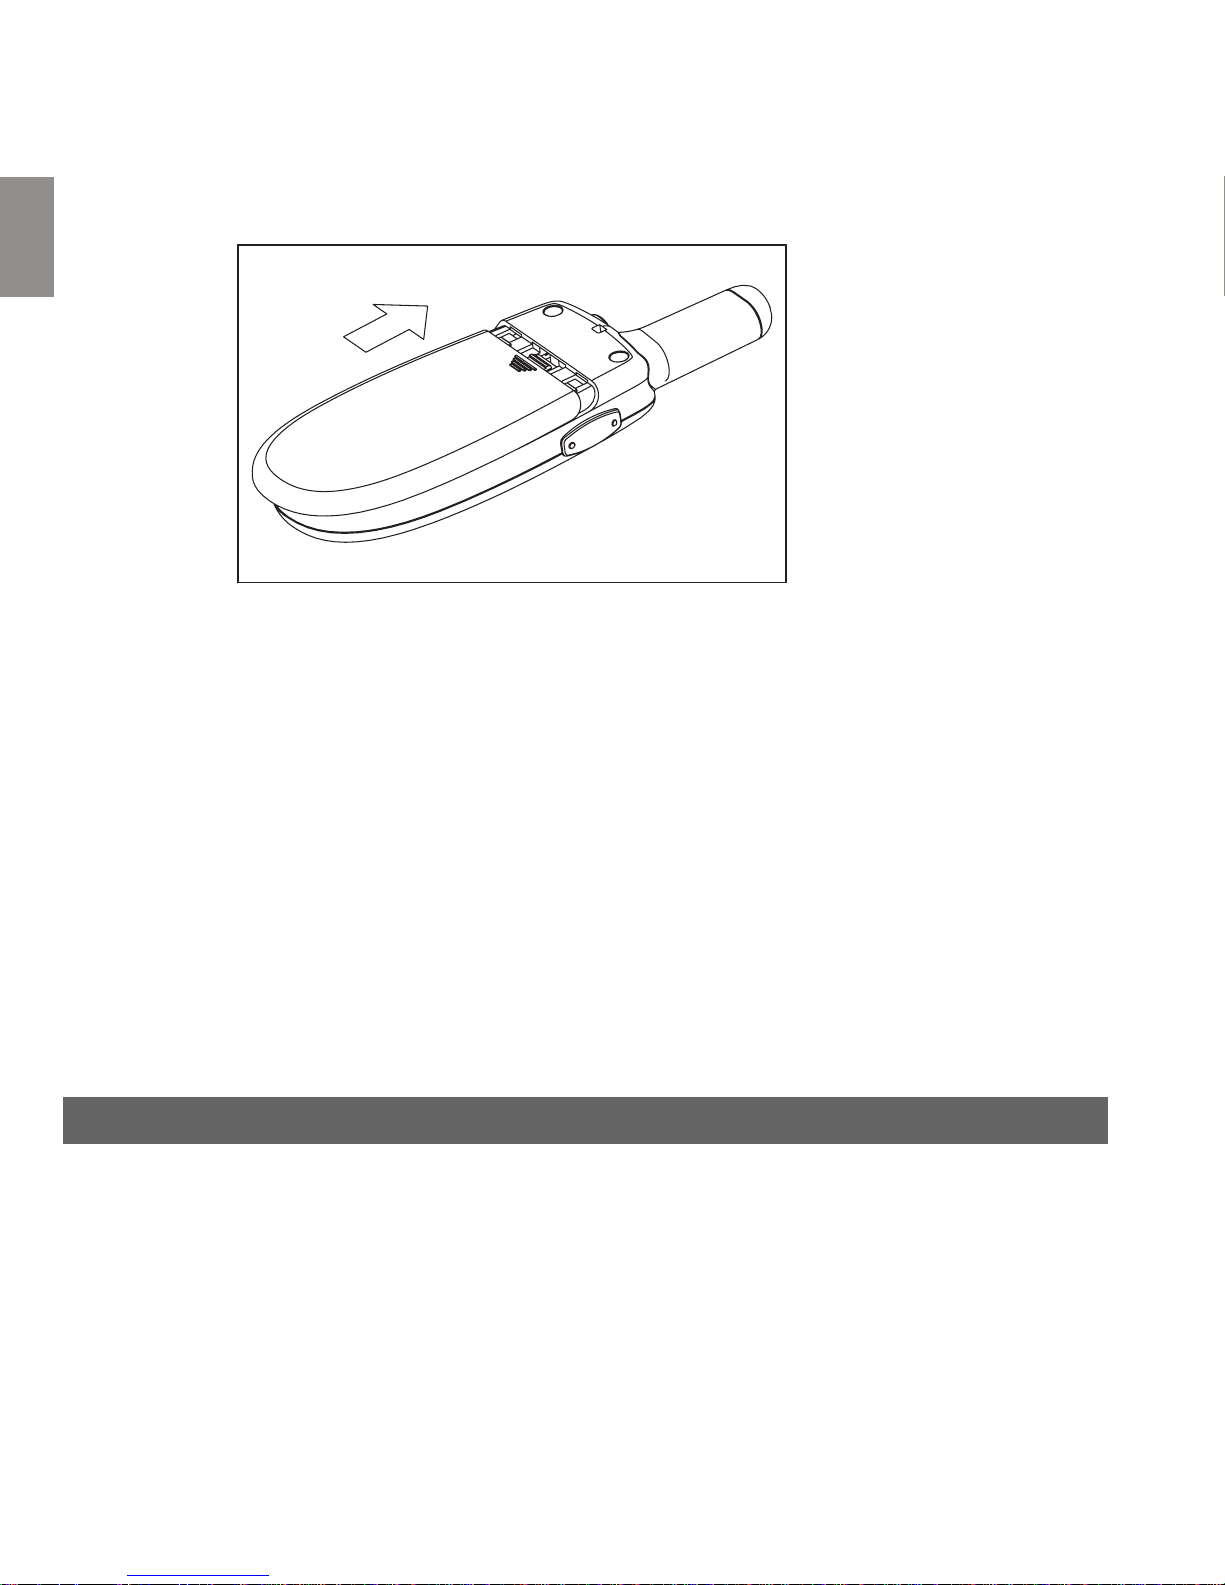
1. Press the top end of battery door and slide it down
2. Follow +/- direction to install the Li-ION battery pack into the
compartment
6
Page 8
EN
3. Then push up the battery door to close
Warning:
1. Reversing the polarities of battery could damage the unit and the
battery.
2. If you’re not going to use the unit for a long period of time e.g several
weeks, please take out the battery.
3. Please dispose of old and defective batteries in a safe &
environmentally friendly manner (for example. Batteries must be
discharged before disposal.
4. Do not dispose of batteries in a fire.
RECHARGING BATTERY
When the LCD display shows the battery level is low, you must charge
the battery with the enclosed AC/DC Adaptor. The battery has a built-in
charging current limit circuit, when the battery fully charged, the circuit
will cut the charge current automatically to protect the battery.
7
Page 9
EN
CHARGING WITH THE AC/DC ADAPTOR
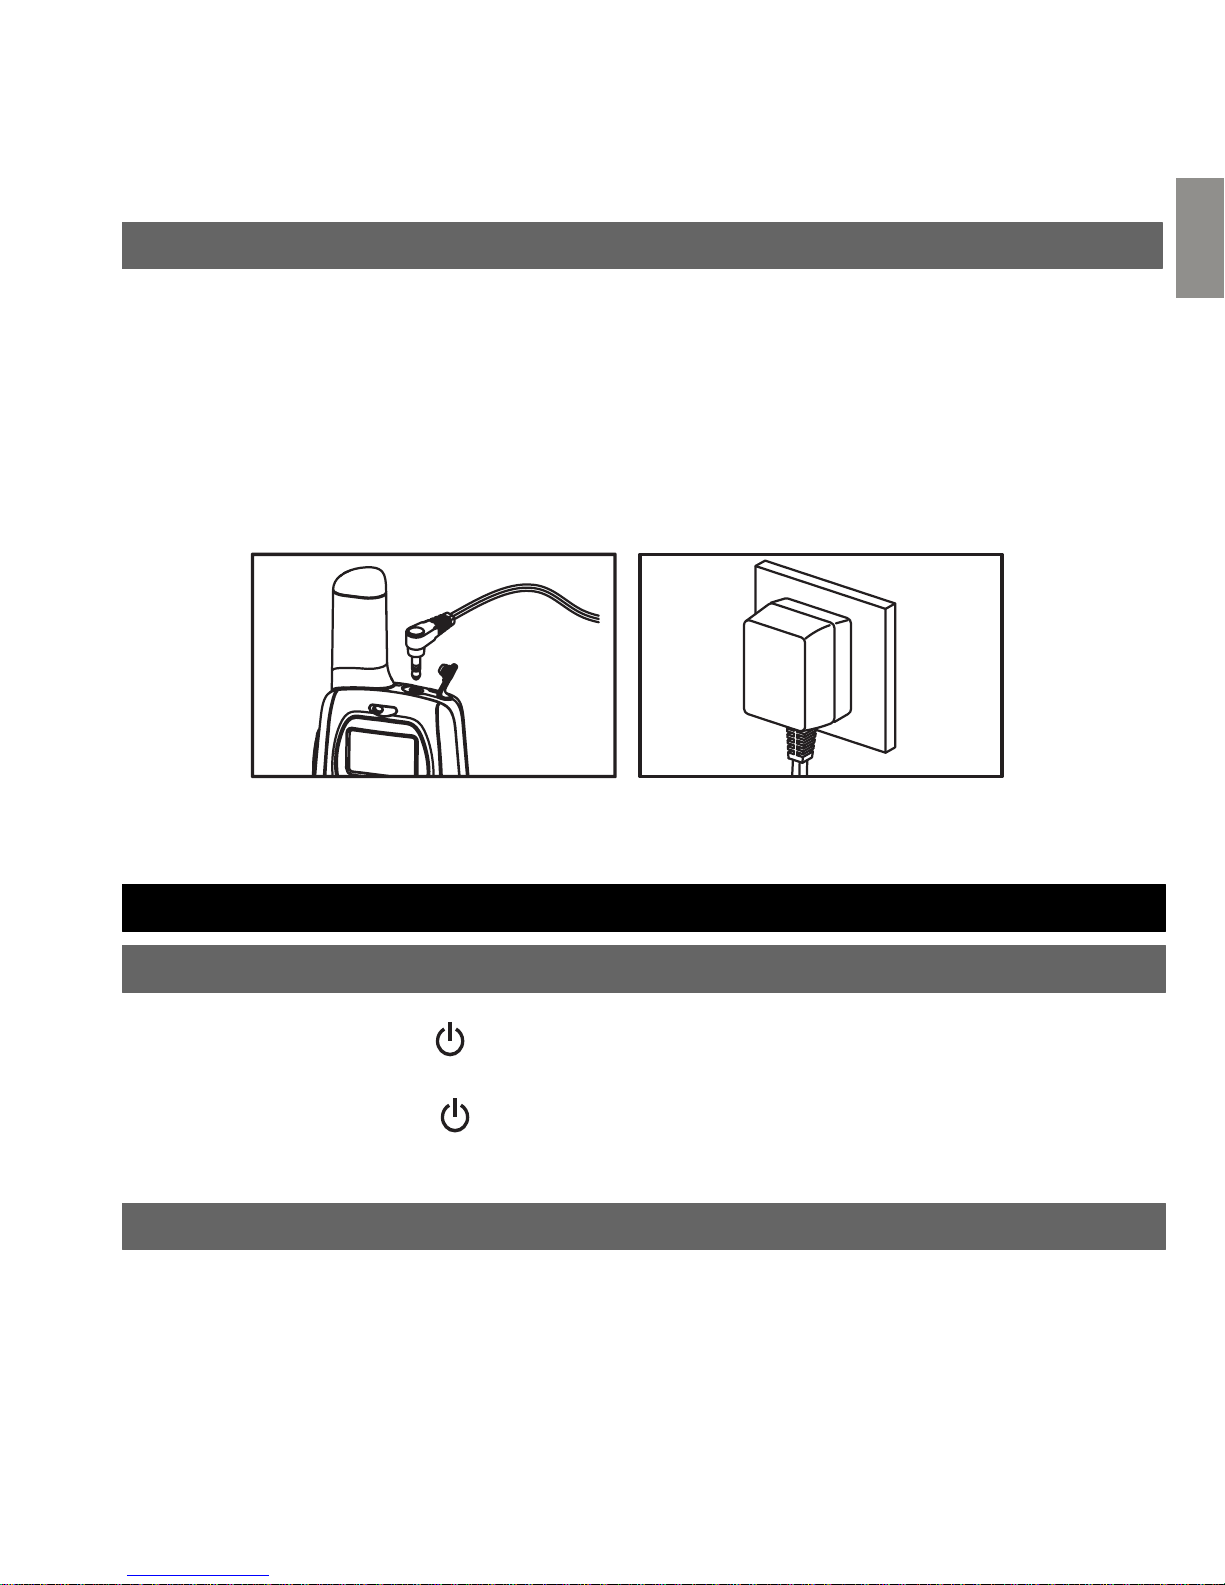
1. Plug the adaptor into the wall socket and plug the other end into
the earphone jack.
2. The unit will automatically turn off, LCD backlight turn on in “RED”
and have no display.
3. Charge time is around 4 hours. Once fully charged, the LCD backlight
will turn to ‘Green’.
During charging, the unit will slightly warm.
Warning: To avoid damage to the unit, use original accessories
GENERAL OPERATION
POWER ON/OFF
1. To switch on, press“ ”key, the LCD display shows the Channel
no. and battery level icon.
2. To switch off, press“ ”key, the 2 seconds until LCD display turns
off.
USING THE PMR446
The unit has 8 main channels & 38 CTCSS codes. You can communicate
with any other PMR446 radio that is using the same main channel &
CTCSS code.
8
Page 10
EN
SPEAKING TO OTHER RADIOS
1. Press & hold the PTT key, the RED LCD backlight will turn on &
show icon.
2. Hold the unit in a vertical position with the Microphone 5-8cm
from the mouth and then speak with normal voice.
3. When you have finished speaking, release the PTT key and you
will hear a beep tone.
LISTENING TO OTHER RADIOS
1. The radio will automatically play received transmissions.
2. While you press the PTT key, you cannot listen to other radios.
3. Adjust volume control if necessary.
USING A PTT EARPHONE
1. Plug the external Mic / earphone set into the headset socket.
2. Press and hold the PTT button on the earphone to speak.
3. Release the PTT key to listen.
4. Adjust volume control if necessary.
5. Make sure that -if equipped- the mode switch at the Mic/Earphone
set is on “PTT” position.
ADJUSTING SPEAKER VOLUME (15 LEVELS)
1. In PMR446 mode, just press the key to increase the volume.
2. Press the key to decrease the volume.
3. In FM broadcast mode, these keys normally adjust the receiving
frequencies. To use the keys for volume up/down, please press
first to switch over to volume setting!
9
Page 11
EN
TX TIME OUT FUNCTION
1. TX time out function can avoid accidental transmission and
prolong the battery life.
2. The unit will stop transmitting and sound a warning tone when
PTT is hold over 60 seconds. You then need to release PTT and
press it again for further transmission.
MENU OPERATION
MENU FLOW CHART
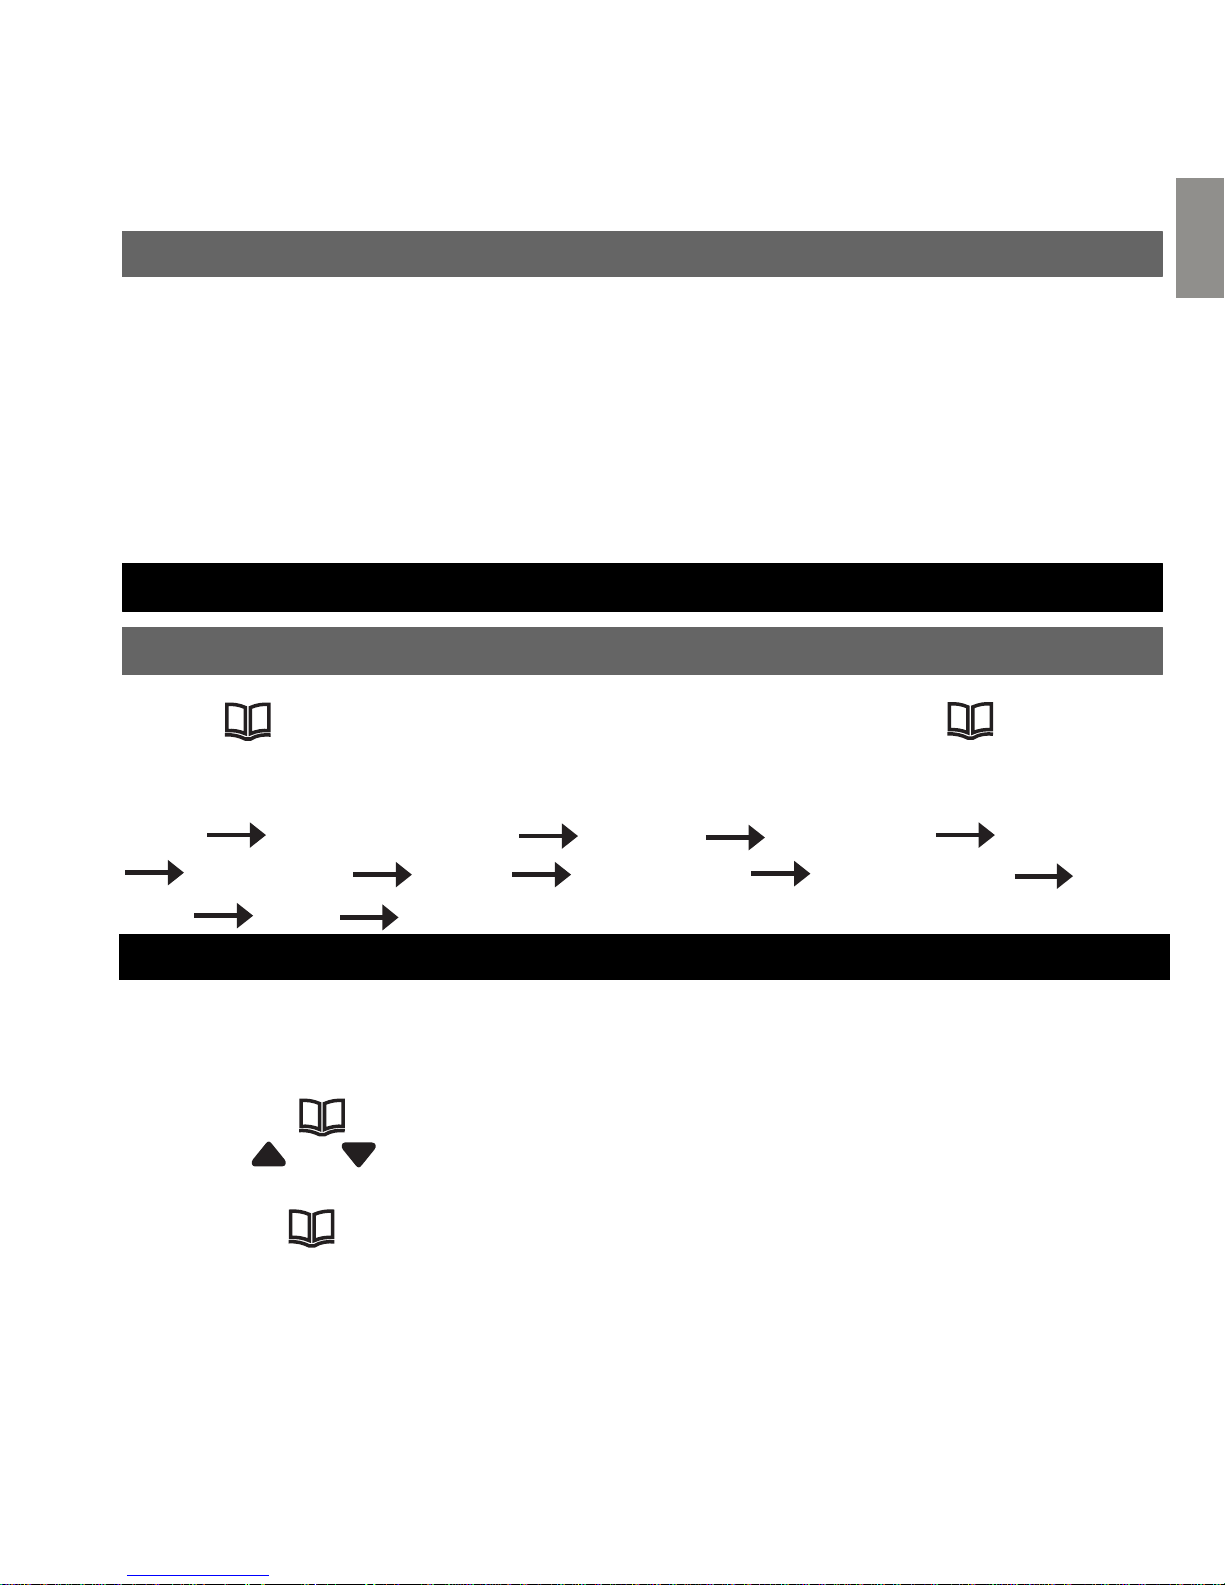
Press “ ”once to enter main channel selection. Press “ ”
consequently again for next function selection, the different menu
steps appear in following sequence:
Menu PMR 446 channel CTCSS FM Radio Call tone
Scrambler VOX Stop watch Baby monitor Roger
beep APO Menu
SELECT CHANNEL
You can communicate with any other user who is using the same PMR
446 channel.
To set the PMR 446 operating channel
1. Press the“ ”key once, the channel number display will flash.
2. Press“ ”, “ ”key to select your desired main channel.
3. Press the “PTT” key to confirm and quit.
4. Or press“ ”key once, the last selection will be confirmed and the
menu will switch to the next function.
10
Page 12
EN
This function can help you to identify your group of users among the
same channel. Only the users with the same CTCSS code setting can
listen and talk to each other, so the CTCSS mode is like a sub code
for your closed user group. Please note that selecting a CTCSS code
does not assure total privacy: In radio communication, any PMR 446
radio can listen to all communications on the same channel when using
the default standard setting with CTCSS = 0 (off).
1. Press the“ ”key twice, the CTCSS code display will flash.
2. Press“ ”,“ ”key to select your desired the CTCSS code (1~38, 0
is off)
3. Press the “PTT” key to confirm and quit
4. Or press“ ”key once, the last selection will be confirmed and the
menu will switch to the next function.
FM BROADCAST RADIO
You can listen to FM broadcast radio with the speaker or through earphone.
Select FM broadcast radio frequency
1. Press“ ”key 3 times.
2. LCD will display FM radio frequency.
3. Press and hold “ ” or “ ” key to scan FM radio frequency.
4. It will stop when it finds a FM radio channel. The LCD will display the
frequency and you can listen to the FM radio.
5. You can continue to scan for the FM radio frequency you preferred.
11
Page 13
EN
SSelect receiving volume in broadcast mode
Select receiving volume in broadcast mode
1. Press“ ”key once (in broadcast mode, this key toggles between
frequency setting and volume setting).
2. Press “ ” or “ ” to adjust the volume when listening to FM radio.
3. Press“ ”key again to exit volume setting and to return back to
frequency setting mode.
Priority of PMR 446 during broadcast mode
1. Even when your radio is in broadcast mode, the radio still monitors
the PMR 446 frequency range for received calls or signals. If an
incoming PMR 446 signal is detected, the unit will automatically switch
to PMR mode & you can listen to the PMR 446 transmissions.
2. If you do not press PTT to answer, the unit will auto switch back to FM
broadcast radio mode after the PMR 446 transmission finished.
3. If you press PTT key to transmit, the unit will exit the FM broadcast
radio mode & stay on PMR 446 mode now.
4. After finishing PMR communication, you can press “ ” 3 times
again to re-enter the FM broadcast mode again. The unit will then
receive on the last FM broadcast radio frequency you had selected
before.
CALL TONE
You can use Call Tones (melodies) to get the attention of other people
with radios on the same channel and CTCSS tone. You can also use
Call Tones as the signal of the start or end of a transmission.
1. Press “ ” key, LCD displays icon and your call tone will be
transmitted to nearby receivers set at the same channel.
2. There are 10 different call tones to choose from.
12
Page 14
EN
Selecting Call Tone
1. Press“ ” key four times, LCD display shows the icon and call
tone number will flash.
2. Press “ ” or “ ” key to select your desired the call tone.
3. Press the “PTT” key to confirm and quit.
4. Or press“ ” key once, the last selection will be confirmed and
enter into next function selection.
SCRAMBLER FUNCTION
You can enjoy privacy to talk within your group by selecting the same
scrambler setting as your group member does. There are 4 different
scrambler settings available)
1. Press“ ”key 5 times, LCD display icon.
2. Press “ ” or “ ”key to select a scrambler setting from 1 to 4.
OF means normal function = scrambler off.
3. Press PTT to confirm and quit.
4. Or press“ ”key once, the last selection will be confirmed and
enter into next function selection.
5. After turning on scrambler function, LCD will display icon.
6. Please make sure that all other group members of Your PMR
network PMR use the scrambler function with the same setting.
It is normal, that all users must use the same radio model,
because different manufacturers may use different scrambling
methods, which are not compatible.
VOX(HANDS-FREE FUNCTION)
The unit has a built-in voice activated circuit (VOX) function. You can
enjoy talking and listening without pressing PTT key. You can use this
function preferably with an external earphone (please note that the
selected earphone must be suitable for VOX operation.
13
Page 15
EN
To turn on VOX function
1. Press“ ”key six times, LCD displays the icon and the VOX
sensitivity digit display will flash.
2. Press “ ” or “ ”key to select of , 1, 2,3 for OFF, Low, Medium &
High sensitivity.
3. After turning on VOX, LCD will display icon.
4. Press “PTT” to confirm and quit.
5. Or press“ ”key once, the last selection will be confirmed and
enter into next function selection.
6. You can plug in the earphone for hands-free talking & listening.
Please speak close to the Mic in order to activate VOX function.
Make sure that the earphone is set to VOX mode (if equipped with
a switch) before it is plugged in!
STOP WATCH
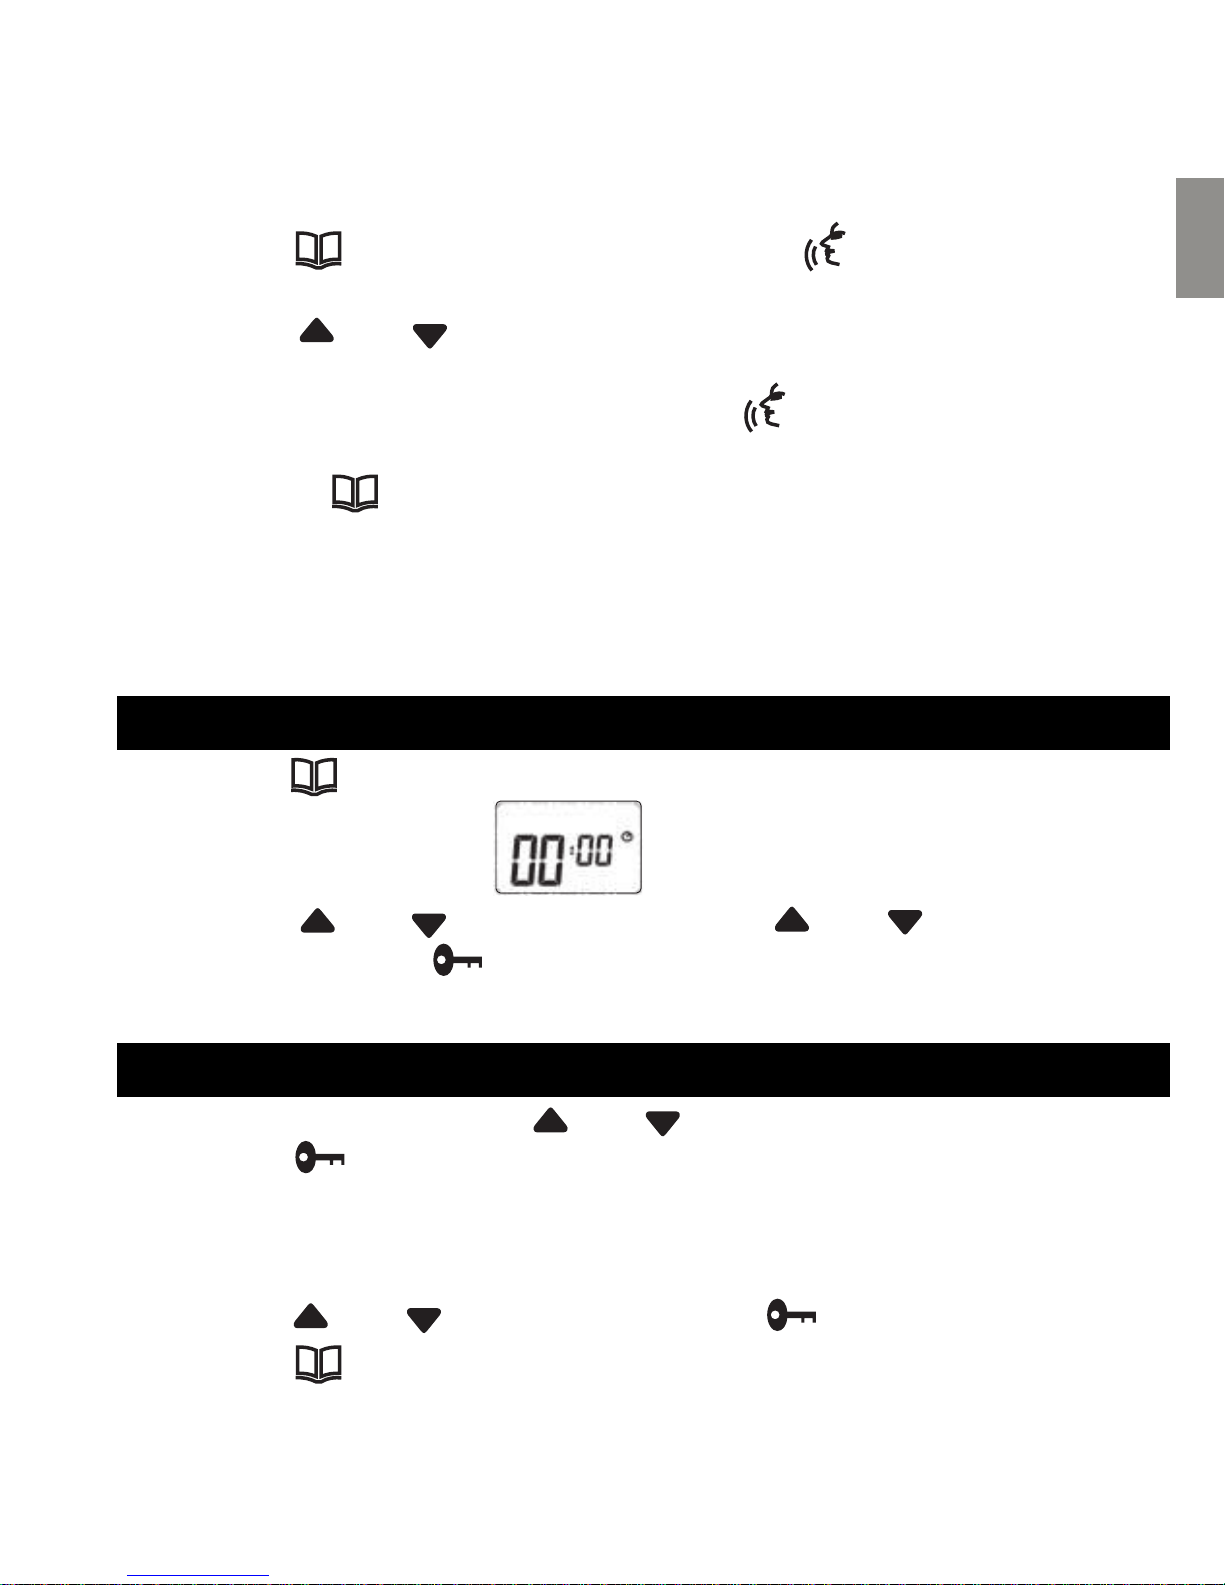
1. Press“ ”key 7 times, LCD displays:
2. Press “ ” or “ ”key to start and press“ ” or “ ”key to stop.
3. And then press “ ” key to reset.
LAP TIME
1. To get a lap time, press“ ” or “ ”key to start.
2. Press“ ”key, it will stop to show the lap time while stop watch
is running.
3. Then press key lock key again to switch back to stop watch mode
and show the running time.
4. Press“ ” or “ ”key to stop and press“ ”key to reset.
5. Press“ ”key 4 times to exist.
14
Page 16
EN
BABY MONITOR
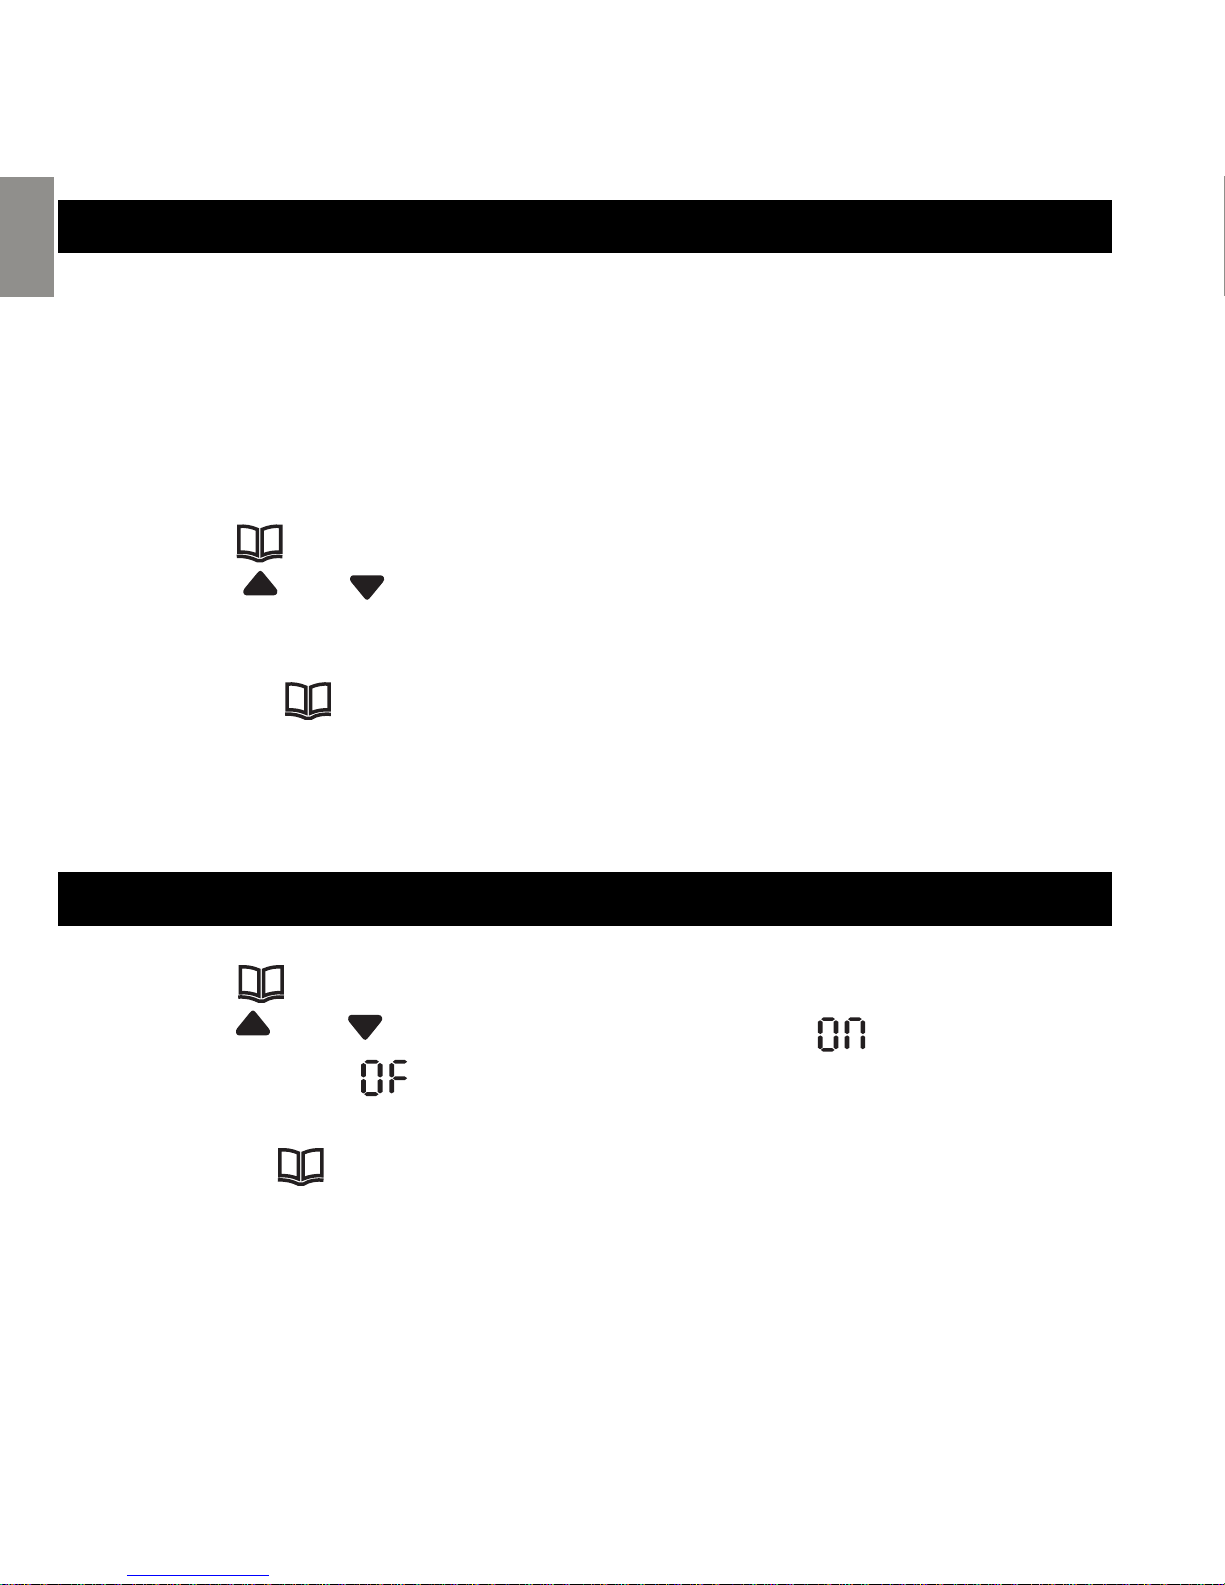
This function can be used not only to monitor babies or handicapped
persons, but as well for acoustical monitoring of rooms. The function is
similar to VOX operation, but is especially adjusted for baby and sound
monitoring.
One radio is set to baby monitor mode, and another radio remains in
normal mode and is used to receive the transmissions of the baby¡¦s unit.
To activate one radio as baby monitor:
1. Press“ ”key 8 times, LCD display will show the “Baby” icon.
2. Press “ ” or “ ” key to monitor sensitivity level from 1 to 3 (low to high
level), OF is turn OFF this function.
3. Press” PTT” to confirm and quit.
4. Or press“ ”key once, the last selection will be confirmed and enter
into next function selection.
5. After turn on this function, LCD displays the “Baby”icon.
The roger beep function enables a short tone signal which is transmitted
after releasing the PTT button.
ROGER BEEP(ON/OFF)
1. Press“ ”key 9 times, the LCD will display “Roger” .
2. Press“ ” or “ ” key to turn on (display shows icon) or turn off
(display shows icon)
3. Press “PTT” to confirm and quit.
4. Or press“ ”key once, the last selection will be confirmed and enter
into next function selection.
5. After turning on roger beep, LCD will display the “RGR” icon.
15
Page 17
EN
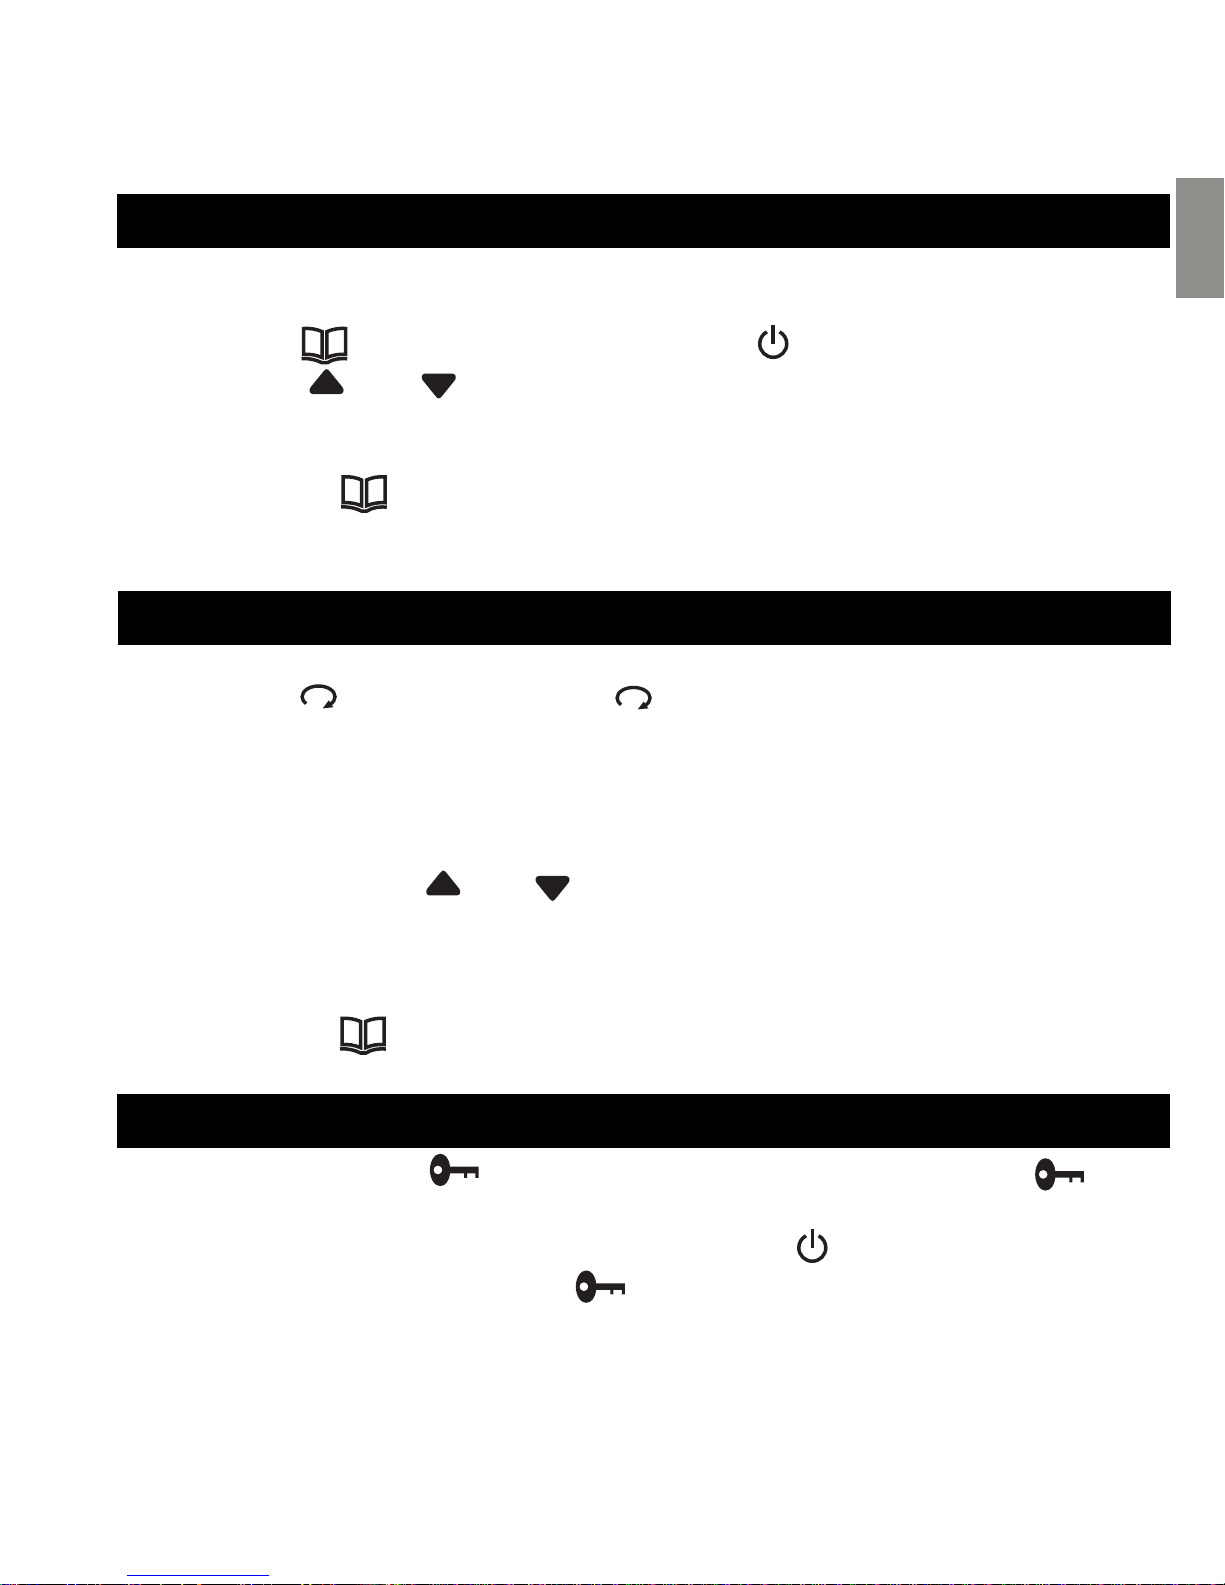
AUTO POWER OFF(APO)
This function may help to save battery energy in case that you should
forget to switch off a radio after use.
1. Press“ ”key 10 times, LCD displays icon.
2. Press “ ” or “ ” key to select auto power off time from 0 to 12
hours.
3. Press “PTT ” button to confirm and quit.
4. Or press“ ”key once to quit.
5. After turning on this function, LCD will display the icon and will
automatically turn off the radio at designated time.
SCANNING CHANNELS
1. Press“ ”key, LCD displays icon. It will start to scan all
channels automatically.
Note: If you press and hold the button longer than 2 seconds, it
will break the squelch noise and listen to the current channel.
2. The unit scans all channels one by one. It will stay on the occupied
channel. Press“ ” or “ ”key to continue scanning.
3. If there is no signal, it will continue to scan.
4. Press the “PTT” key and it will stay on the scanned channel and quit
scan function.
5. Or press“ ”key once, the last selection will be confirmed and
enter into next function selection.
KEY LOCK
1. Press and hold“ ”key for 1.5 seconds, LCD displays the
icon.
2. All keys are locked except the “ PTT ” and keys.
3. To unlock, press and hold“ ”key for 1.5 seconds again.
4. In FM broadcast mode, this key works as toggle switch between
the frequency setting and the volume setting too.
16
Page 18
EN
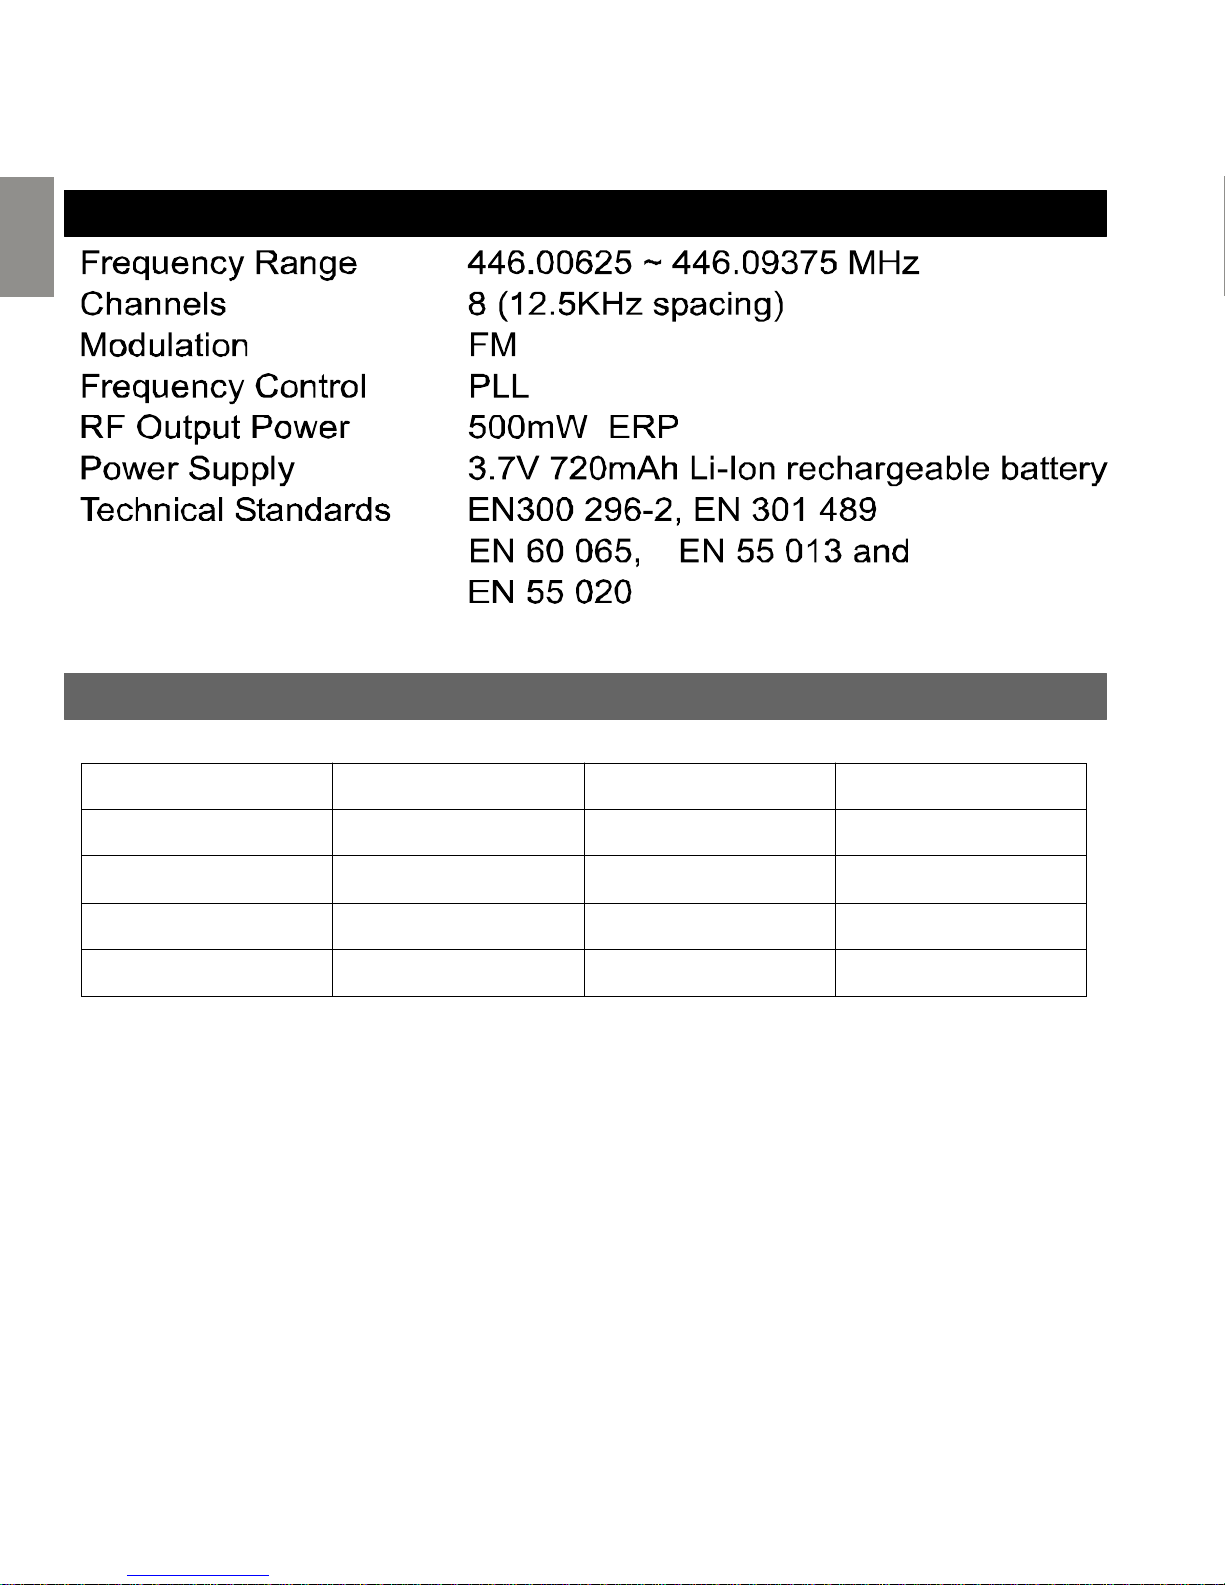
TECHNICAL SPECIFICATIONS
CHANNEL FREQUENCY TABLE
Channel no.
Frequency
Channel no.
Frequency
1
2
3
4
5
6
7
8
446.00625
446.01875
446.03125
446.04375
446.05625
446.06875
446.08125
446.09375
17
Power supply: Ten Pao Industrial Co. Ltd-G060040D25
In put: AC230V 50Hz 80mA
Output: DC 6V 400mA 2.4VA
Battery pack: Feng Yuan in Electronic Co.Ltd-FYX053048A,
3.7V 720mAh Li-lon Rechargeable batteries pack
Page 19
EN
18
Page 20

EU-DEKLARATION OM ÖVERENSSTÄMMELSE
SW
Härmed deklarerar Oregon Scientific att PMR446 Tvåvägs
kommunikationsradio (modell: TP393) uppfyller kraven och andra relevanta
regler enligt direktivet 1999/5/EC.
En kopia på undertecknad och daterad Överensstämmelsedeklaration finns
tillgänglig på förfrågan via Oregon Scientific kundservice.
LÄNDER SOM OMFATTAS AV ÖVERENSSTÄMMELSEN
Alla EU-länder, Schweiz och Norge
20
Page 21

 Loading...