

Oregon DT38 USER MANUAL

For Ages 6 & UP
Accelerator
ECLIPSE
About your Accelerator Eclipse Learning PC
Features
60 Activities
• 19 Vocabulary /
Spelling / Grammar
• 7 Math Challenges
• 23 Games / Memory / Logic
• 11 Tools / Computer Skills
Including: Word Processor,
Calculator, Data Bank
Certificate and Greeting
Card Printing
(Printer not included)
Multimedia
• Large LCD Display
• Digital Sound
Expandability
• Increase learning potential
with our Smart Cards
(each sold separately)
Peripherals
• Compatible with the
following Hewlett-Packard,
Epson and Canon printers :
- HP LaserJet 4 series
- HP LaserJet 5 series
- HP LaserJet 6 series
- HP Laser 1100 series
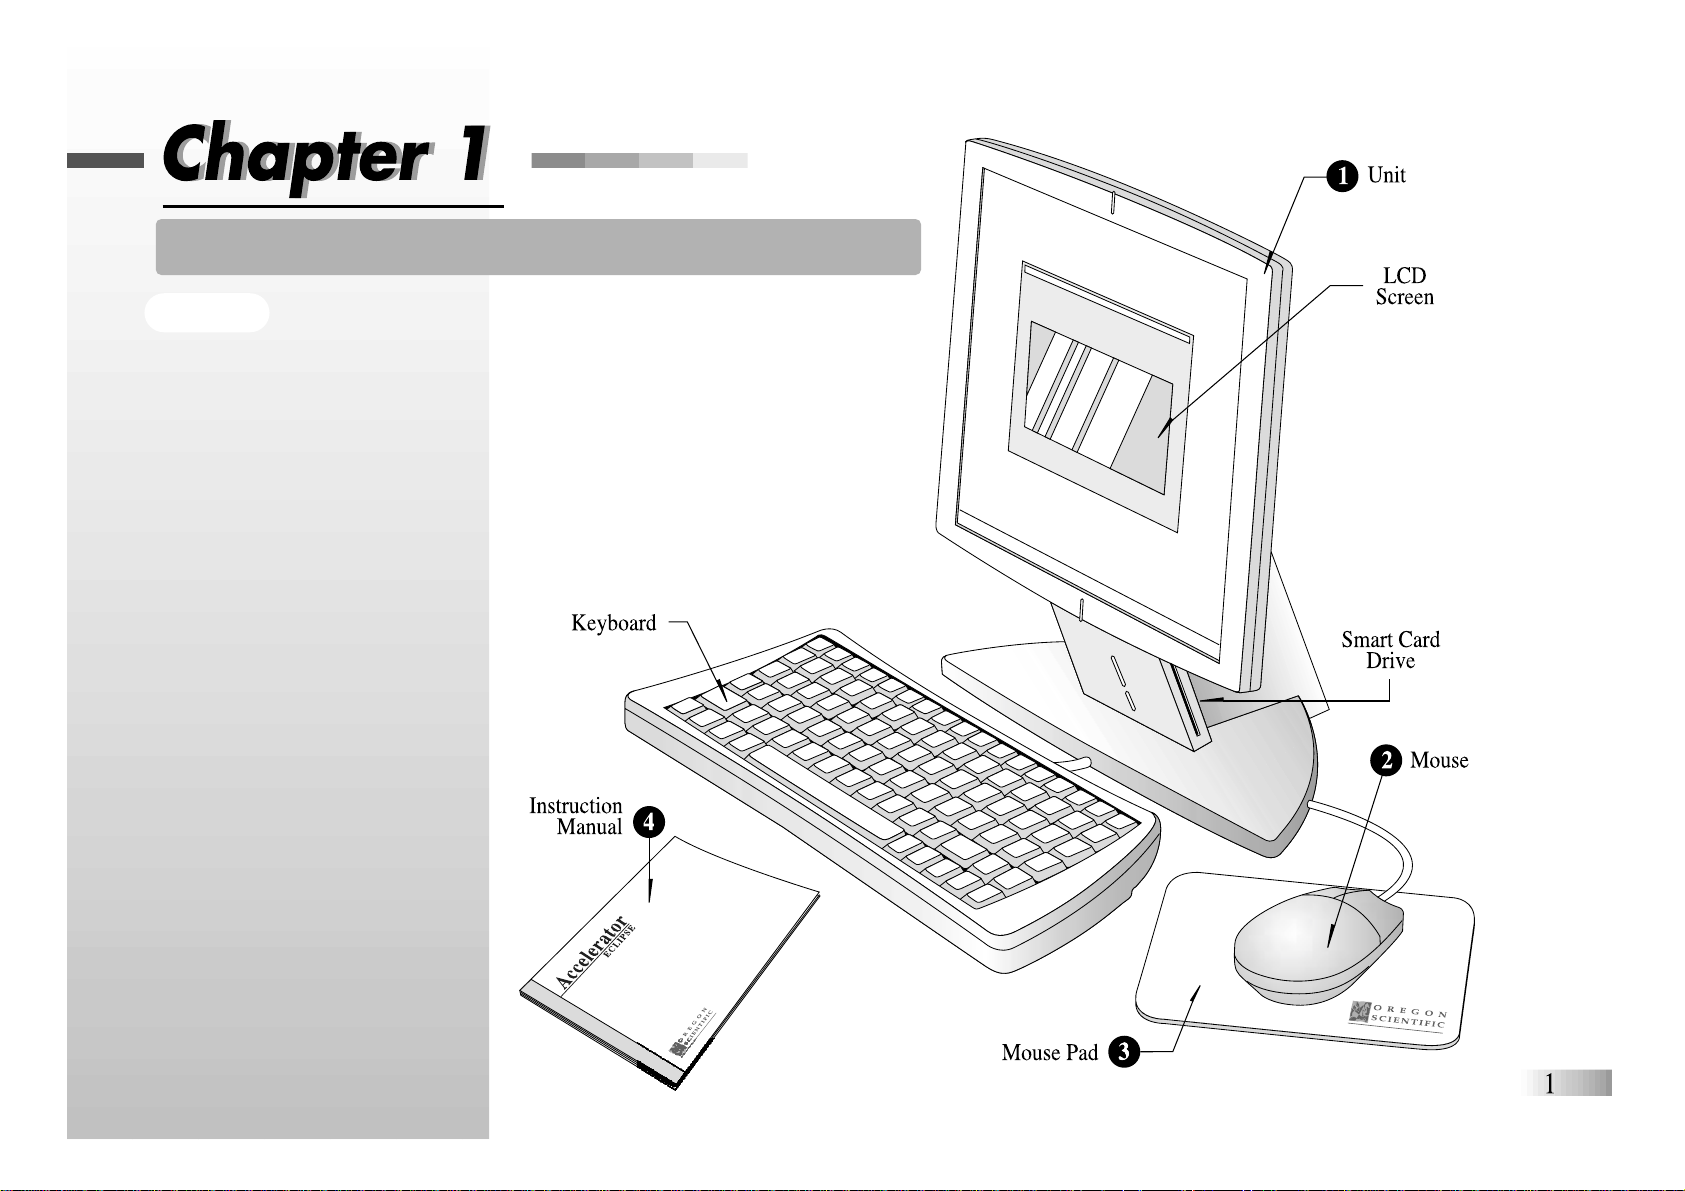
The Accelerator Eclipse Learning
PC is supplied with the following
parts. Please contact your retailer
should any parts be missing.
1 - Unit
2 - Mouse
3 - Mouse Pad
4 - Instruction Manual
- HP Laser 2100 series
- HP DeskJet 500C
- HP DeskJet 695C/697C
- HP DeskJet 1120 series
- Canon BJC 240/255sp
- Canon BJC 4200sp
- Canon BJC 4300/4310sp
- Epson Stylus Color 400/440
- Epson Stylus Color 600/640
- Epson Stylus Color 700/740
NOTE:
The Accelerator Eclipse
Learning PC may not be
compatible with Windows-
only printers.
Hewlett-Packard is a trademark
of Hewlett-Packard Co.
Epson is a registered trademark
of Seiko Epson Corp.
Canon is a registered trademark
of Canon Inc.
Getting Started
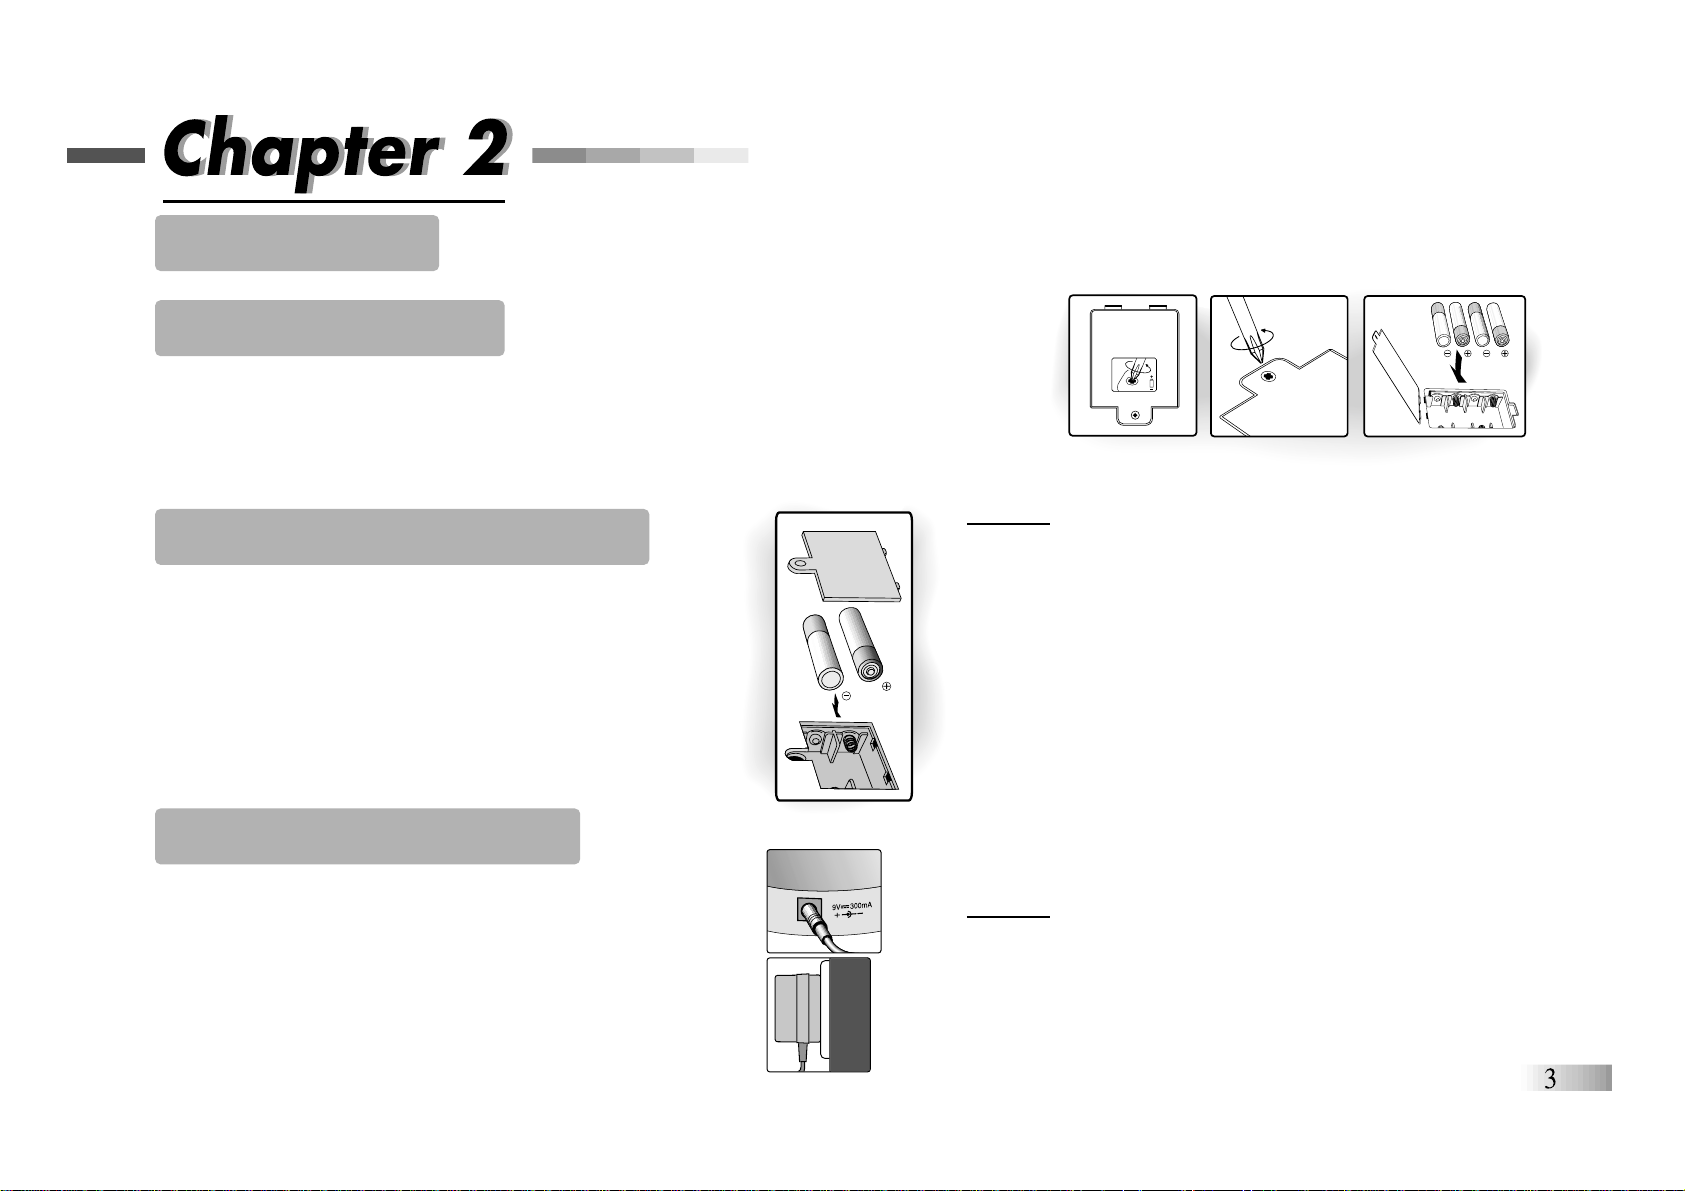
The Accelerator Eclipse Learning PC operates on 4 AA size batteries (not included) and
2 AAA size back-up batteries (not included) or a 9V AC adaptor (sold separately).
Battery Installation
1. Make sure the unit is turned off.
2. Using a Phillips screwdriver, open the big battery cover at the back of the unit.
3. Insert 4 AA size batteries. (Note the correct polarity: +, - ).
4. Replace the cover.
Back-up Battery Installation
1. Make sure the unit is turned off.
2. Using a Phillips screwdriver, open the
small battery cover at the back of the unit.
3. Insert 2 AAA size batteries (Note the correct polarity: +, -).
4. Replace the battery cover.
NOTE: Back up batteries are essential for the
retention of stored data.
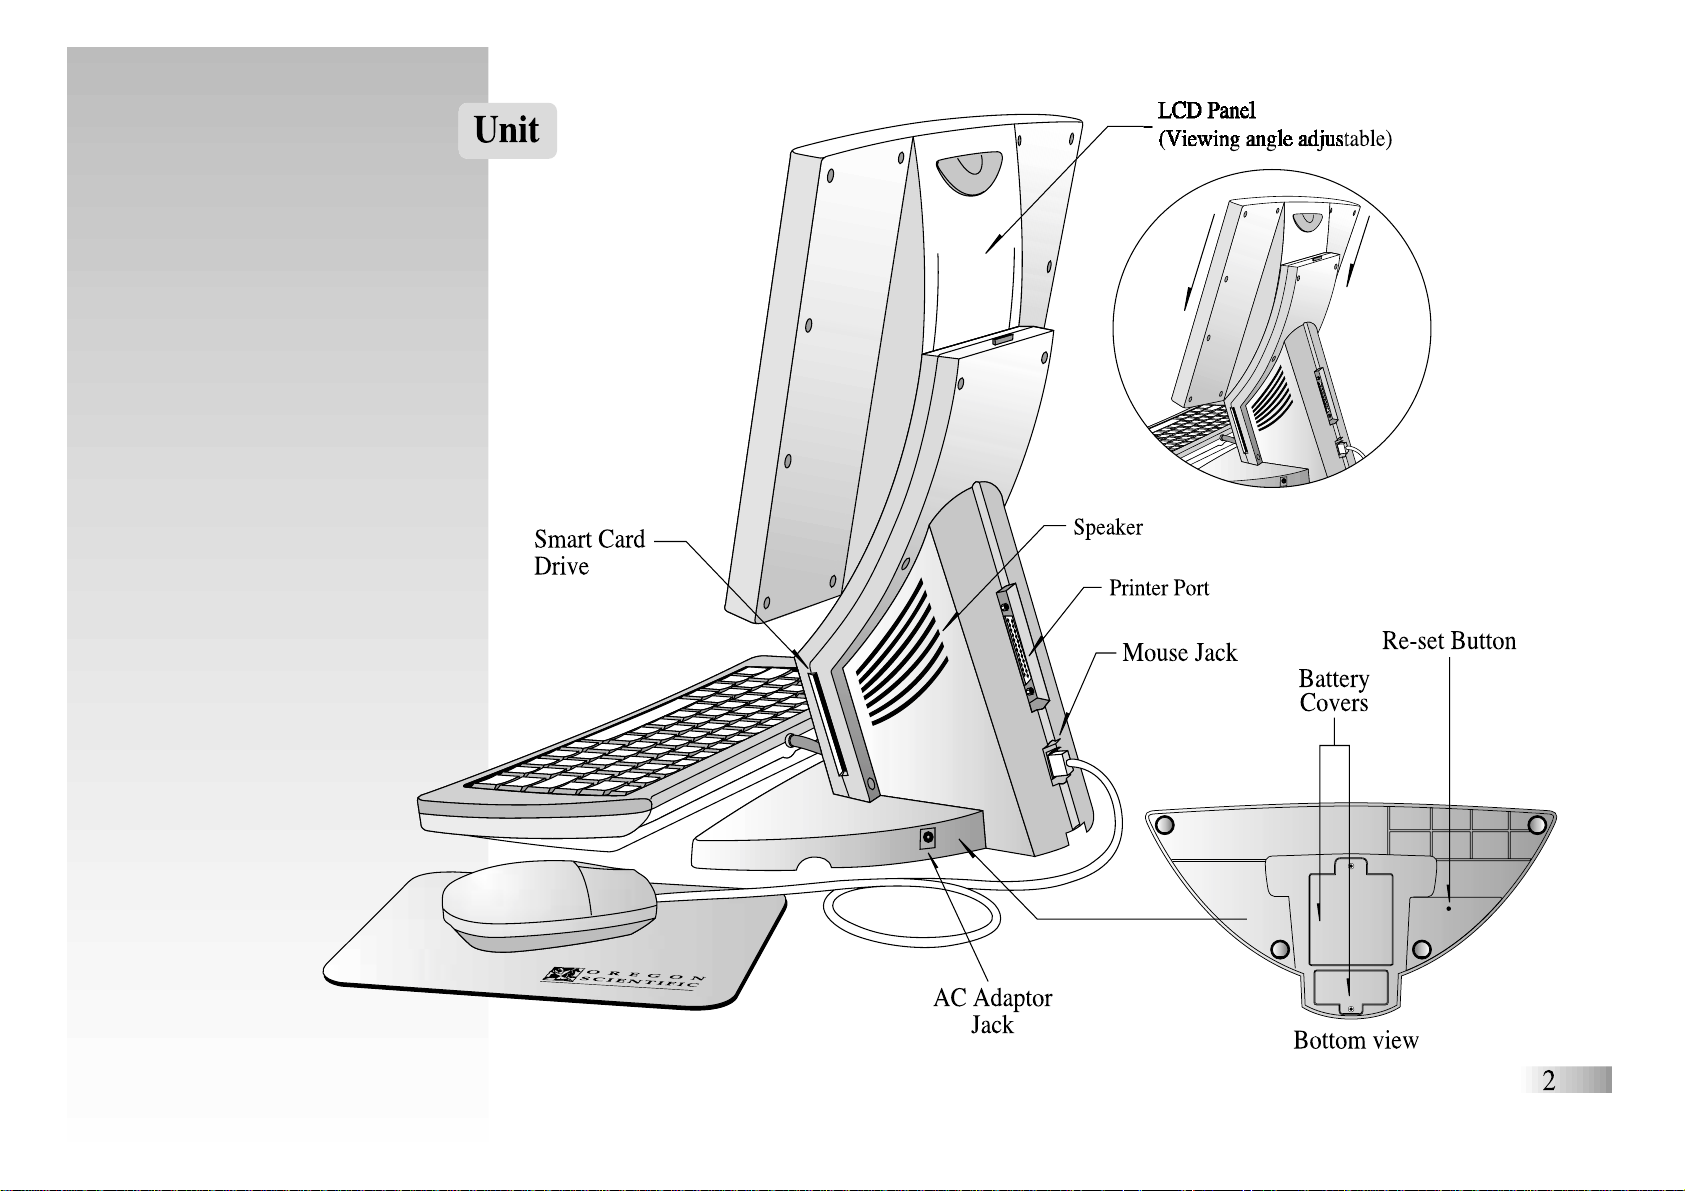
AC Adaptor Connection
Plug the adaptor into the adaptor jack
on the right side of the unit.
Plug the adaptor into a wall outlet.
Power failure may corrupt data stored in memory.
To reset your Accelerator Eclipse,
see "Memory Failure" in the Trouble Shooting section.
Caution
• Different types of batteries or new and used batteries are not to
be mixed.
• Only batteries of the same or equivalent type as recommended
are to be used.
• Remove all batteries when replacing.
• Remove batteries from the unit if the unit is not going to be
used for long periods.
• Do not dispose of batteries in fire.
• Non-rechargeable batteries are not to be recharged.
• Rechargeable batteries are to be removed from the toy before
being charged.
• Rechargeable batteries are only to be charged under adult
supervision.
• Exhausted batteries are to be removed from the toy.
• The supply terminals are not to be short-circuited.
Caution
• The unit must not be connected to more than a 9V power supply
• The unit must only be used with the recommended adaptor.
• The adaptor is not a toy.
• The supply terminals are not to be short-circuited.
• Toys liable to be cleaned with liquid are to be disconnected
from the transformer before cleaning.
Auto-off
The learning PC will be automatically turned off after about 5 minutes of no input from the player.
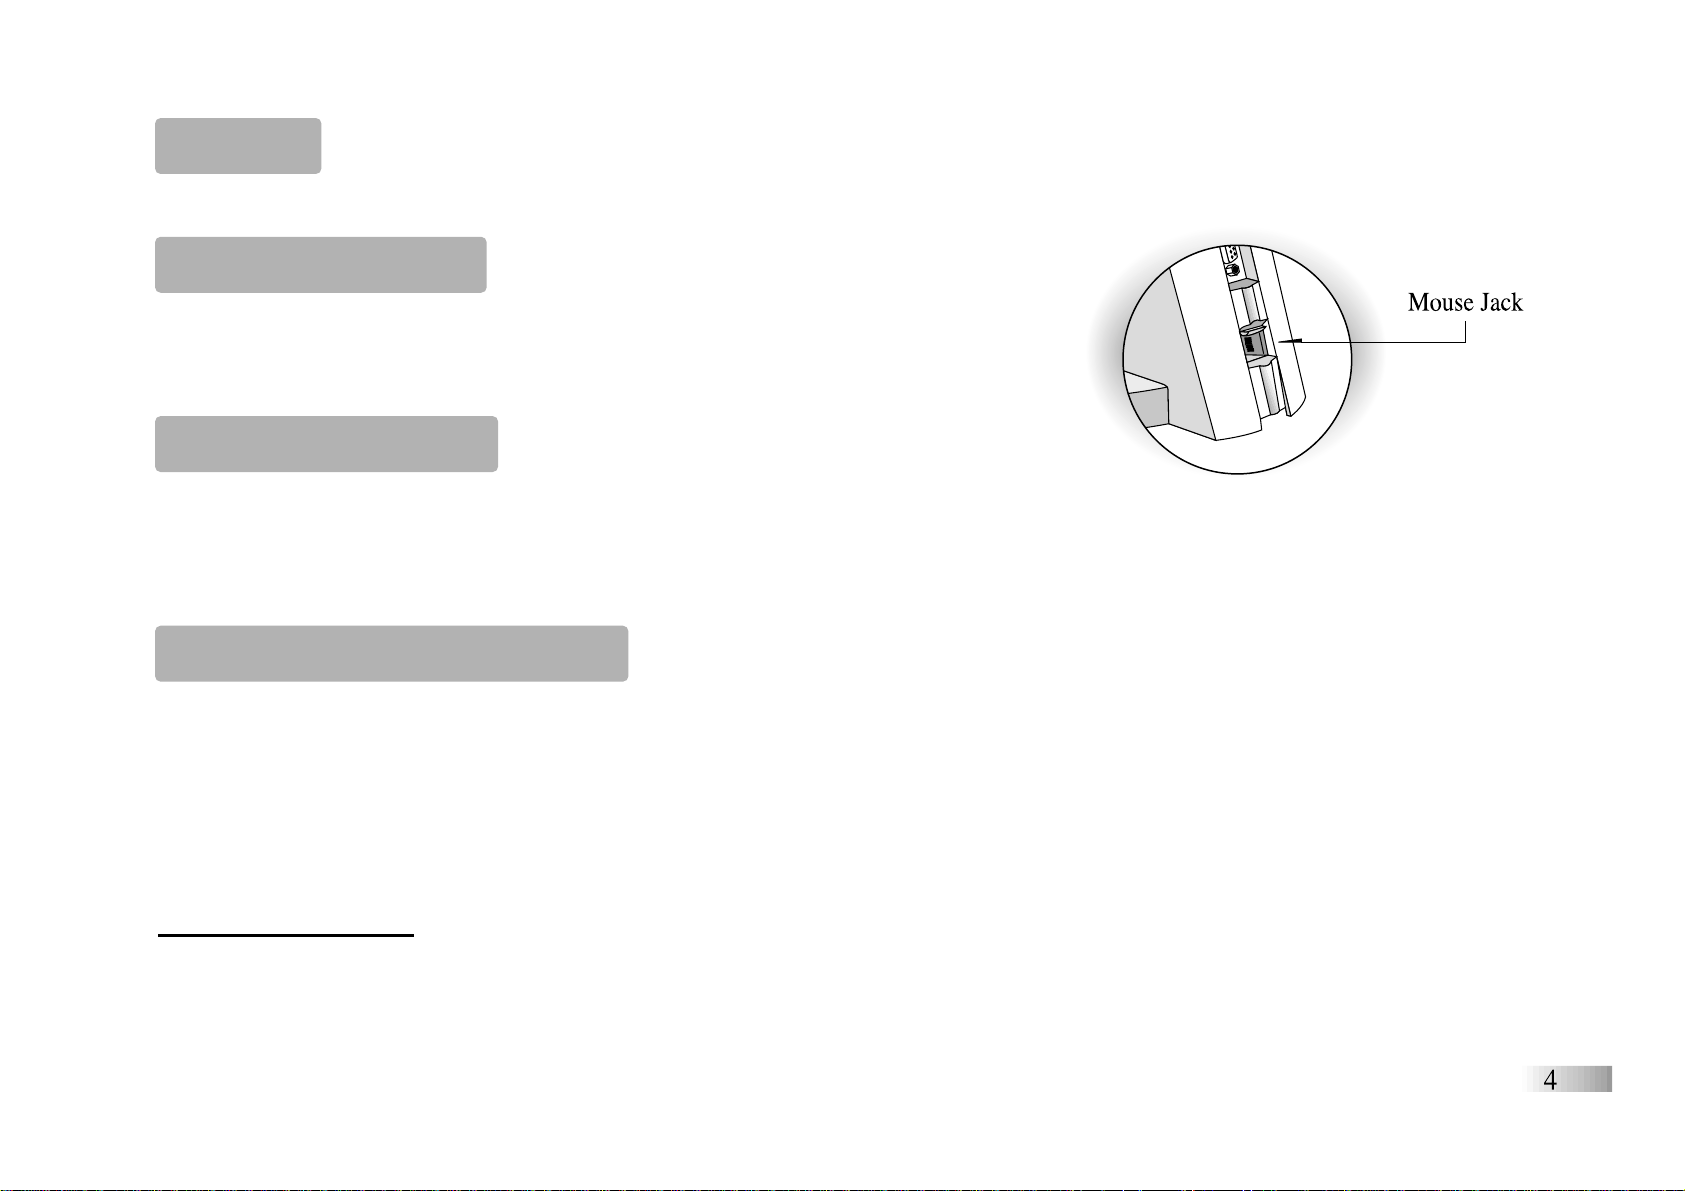
Mouse Connection
Ensure the unit is turned OFF. Lift the mouse jack port cover at the back
of the unit and plug the mouse into the mouse jack.
To ensure the mouse is kept clean, keep it on a clean mouse pad.
Printer Connection
The printer port is located on the back of the unit.
If you wish to change the printer for a different model you must turn the
learning PC off to reset its printer configuration memory.
NOTE: When using the AC adaptor, connect the printer only after the learning PC is turned on.
Cleaning and Maintenance
The unit should be regularly examined for damage to the cord, plug, enclosure and other parts. In the event of
such damage, the unit must not be used with the adaptor until the damage has been repaired.
Always disconnect the power supply before cleaning.
Wipe the unit with a dry cloth.
Do not get the unit wet.
Do not dismantle the unit.
Cleaning the Mouse
Turn the round mouse-ball cover in a counter-clockwise direction and lift open the cover.
Take the ball out, wipe the ball and the inside of the mouse with a dry cloth to clean out all the dust.
Starting the Accelerator Eclipse Learning PC
Turn on your Accelerator Eclipse Learning PC using the [On] button
located at the upper right corner of the keyboard.
At the end of your session, remember to turn off the power using
the [Off] button at the upper left corner of the keyboard.
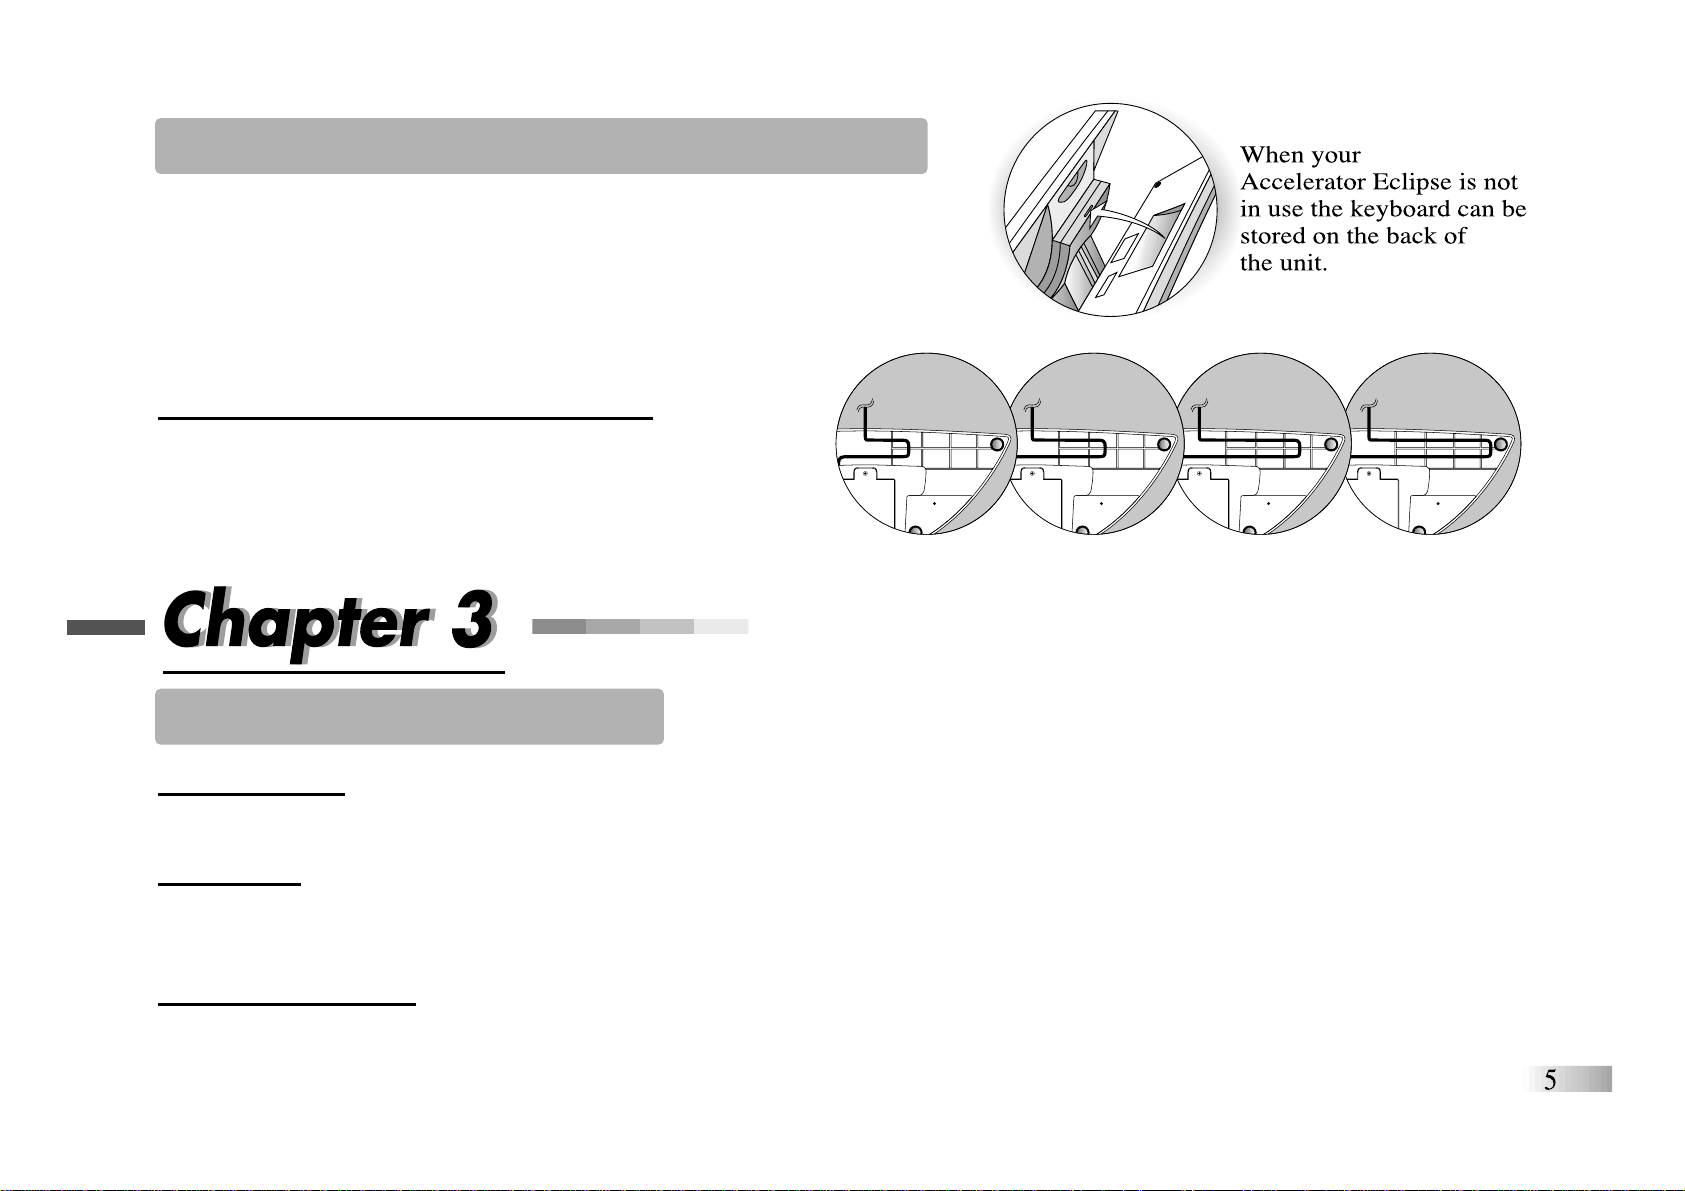
Adjusting the Keyboard Cable Length
The keyboard cable can be shortened by winding it
through the cable routing at the bottom of the unit.
Useful Features and Controls
The Keyboard
The keyboard operates in the same way as a real computer keyboard.
The Mouse
Move the mouse in the direction that you want to move the arrow cursor and click the left button on the desired
selection. (See Chapter 7 -- How to Make a Selection and Submit Your Answer).
The Cursor Buttons
The directional cursor buttons control the arrow cursor and can be used as an alternative to the mouse. Press
the button with the desired direction arrow on it to move the arrow cursor in that direction. The [PgUp] and
[PgDn] buttonsfunction as the left and right mouse buttons respectively.
Cursor Arrow
The mouse or the cursor buttons can control the cursor arrow.
The Flashing Cursor
This shows you the position in which the next keyboard entry will appear.
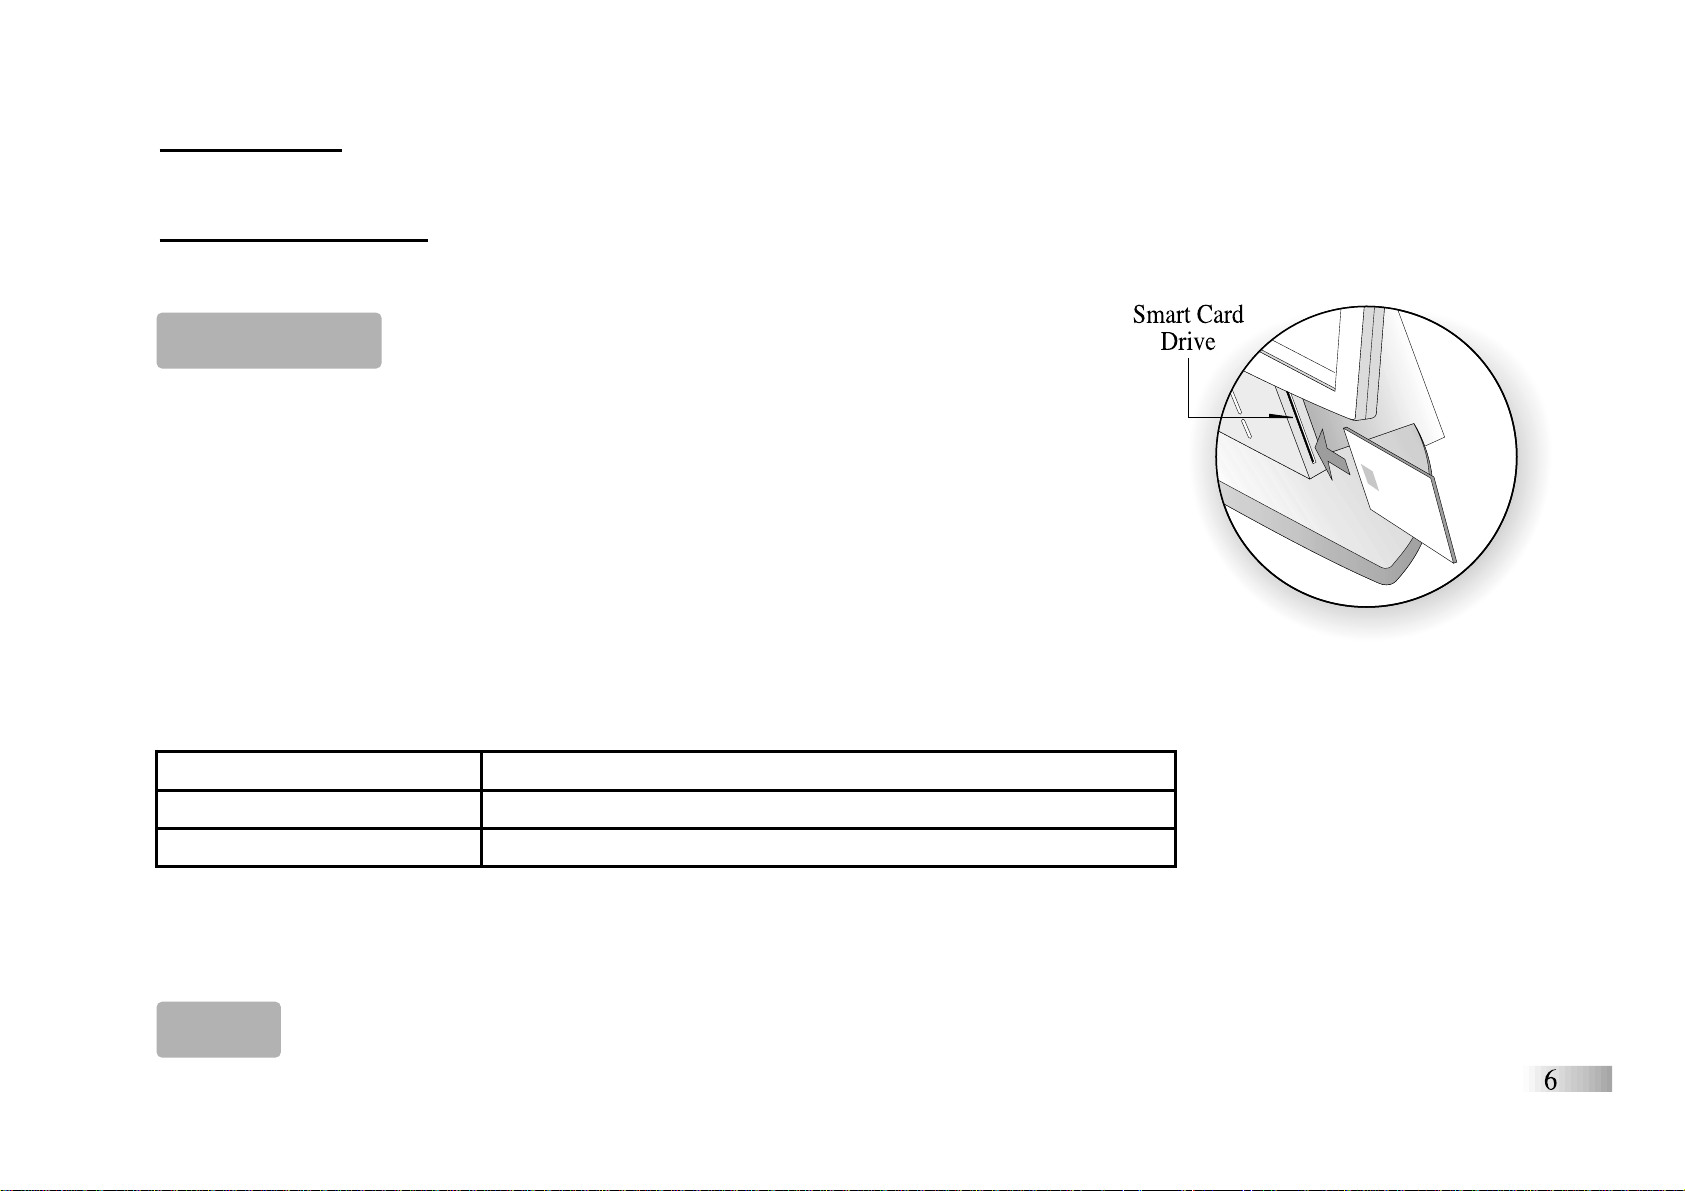
Smart Card (Sold separately)
Caution: Do not scratch or damage the metal contact plate of the Smart Card.
Only insert Oregon Scientific Smart Cards into the Smart Card drive.
1. Plug the Smart Card into the Smart Card drive on the right side of the unit.
The current activity will be interrupted and the Smart Card animation begins.
After the animation, the Smart Card menu screen appears.
2. Use the mouse or directional cursor button to scroll through the titles.
3. Press [Enter] to play the displayed activity.
Expansion questions for the following activities are included on each Smart Card.
Name of Smart Card Activities
Word Fun Splash, Mark Smart, Rhyme Time
Spelling Fun Word in Word, Sounds Like, Sir Plus
Vocabulary Fu Word Squirt, Twin Terms, Opposites
While the Smart Card is plugged in, only those activities on the Smart Card are available. To play other games
in the learning PC, unplug the Smart Card.
Demo
When the [Demo] button is pressed, you will be shown a demonstration of some of the exciting features and
activities on the Accelerator Eclipse Learning PC.
Volume
The volume level can be adjusted between high and low. To toggle the volume hold down the [Function] key and press F1.
Contrast
You can adjust the screen contrast to compensate for different lighting conditions.
Hold down the [Function] key and press F2. Each time it is pressed the contrast will increase it until it reaches
the maximum level. Pressing the button again will make it return to the lowest contrast.
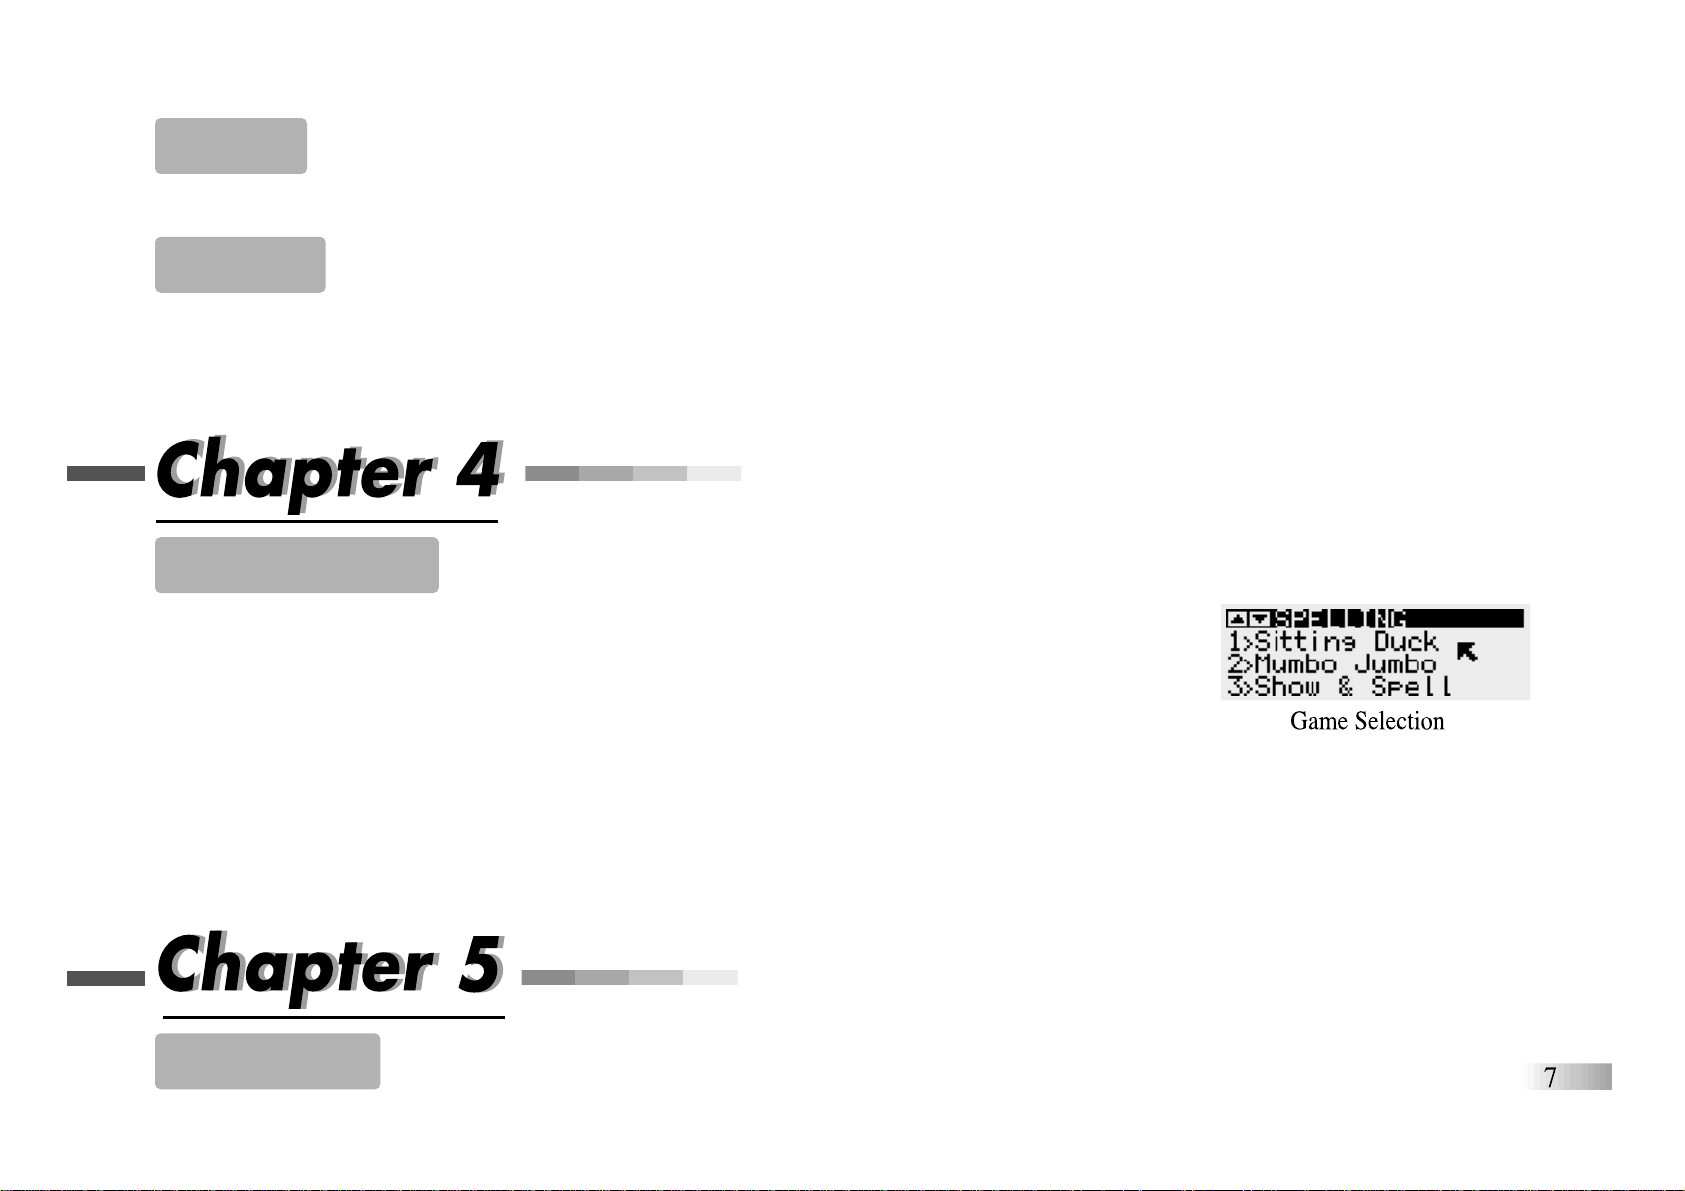
Game Selection
First select a game category either by using the game category menu or by pressing one of the
Function keys: F1 Spelling; F2 Word; F3 Vocabulary; F4 Math; F5 Games; F6 Memory;
F7 Logic; F8 Tools; F9 Keyboarding. Select a category from the menu either with the mouse
or with the left and right directional cursor keys and the [Enter] button. When you have chosen
a game menu you can scroll through the game names by moving the arrow cursor to the top or
bottom of the screen, or by clicking on the arrow icons at the top left of the screen.
Choose the game you want to play either by pressing the corresponding number key or by moving the arrow cursor over the
name and pressing either the left mouse button or the [Enter] key. If no game is selected after about 20 seconds, the
Accelerator Eclipse Learning PC will automatically make a selection for you. Pressing the [Esc] key at anytime will move
you one step back through the selection process.
Game Rules
(These apply to most games)

Attempts
Game questions come in groups of 10.
You will be given 3 attempts to answer each question.
Points are awarded according to the number of attempts taken to answer each question correctly.
T
ime Limit
Each attempt to answer a question is timed (one minute for levels 1-5, 30 seconds for level 6).
If you are unable to answer the question in the allotted time period, it is counted as an incorrect attempt.
The clock resets after each incorrect attempt.
Scores
If the question is answered correctly in the first attempt, 10 points are awarded.
If the question is answered correctly in the second attempt, 6 points are awarded.
If the question is answered correctly in the third attempt, 3 points are awarded.
Score 85 points or higher after a group of 10 questions to go to the higher level of difficulty.
A score of 60 points or lower will return you to the lower difficulty level.
Help
Press [Help] to repeat the audio instruction prompt.
Hints
For selected activities, you can press the [Hint] button to get a clue to help you.
Repeat
For selected activities, press [Repeat] to see the animated vocabulary word again.
Answer
If you are stuck then you can get the answer to the current question and move on to the next. You will get no
points for doing this. Hold down [Function] and press F3 to see the answer.
Pause
You can pause an activity by pressing the Oregon Scientifc logo key. The Accelerator Eclipse will periodically
emit a sound to warn you that it is paused. Press any key to resume play.
Summary Screen
After a round of questions, a summary screen appears to show the score of the last round, and whether you go
up a level, go down a level or stay at the same level. The summary screen will disappear and the game will
resume automatically.
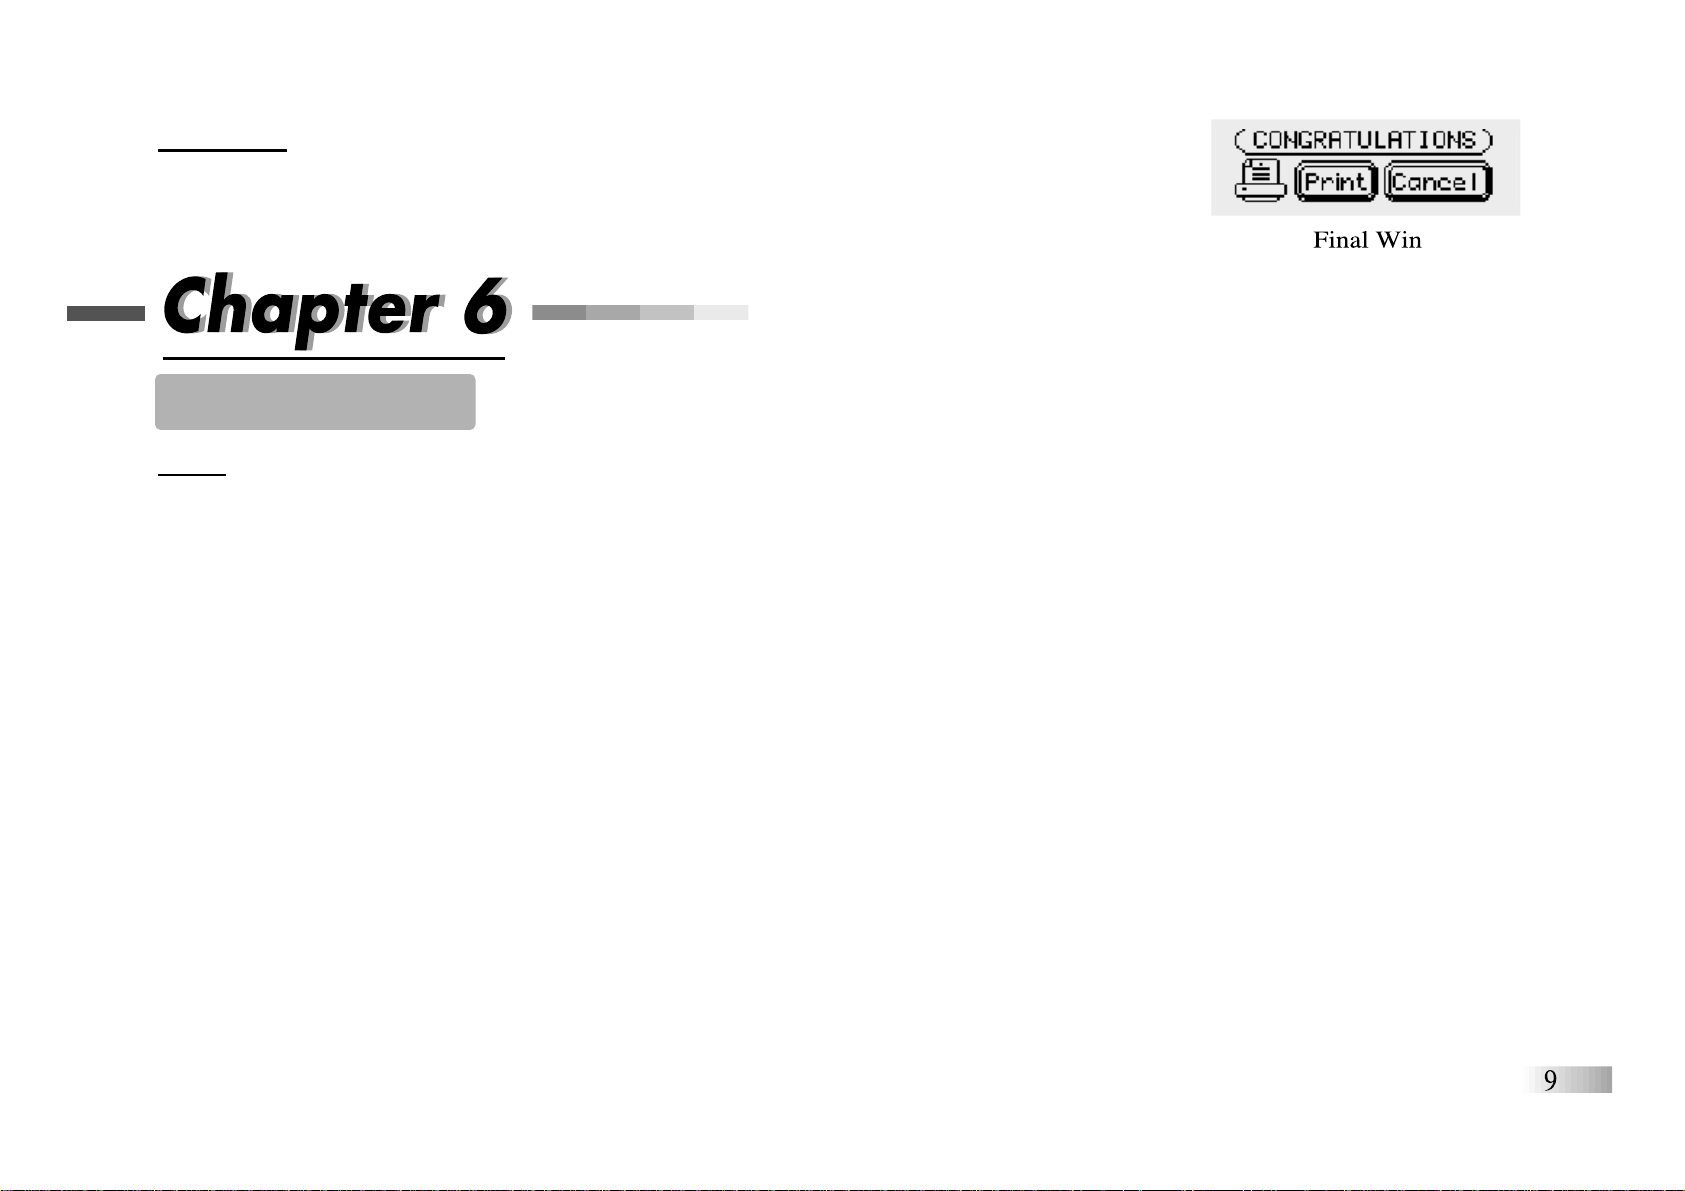
Final Win
After completing all six levels of an activity, you can print out a certificate of your
accomplishment. Select the [Print] icon to print the certificate or [Cancel] to return
to the Menu screen.
Two-Player Mode
Basic
Most games follow a basic format in the two-player mode.
1. Initiate the two player mode by pressing [Player 1/2] on the keyboard after the first question
appears in the current activity. The Accelerator Eclipse will ask for the players' names.
2. Player 1: Type in your name and press [Enter].
3. Player 2: Type in your name and press [Enter].
The two-player mode screen disappears, and the names are saved.
The game is played in the same way as the one player version except that the players must compete to answer the
questions. The first player to hit their button (Player 1: the [A] button; Player 2: the [/] button), is awarded an attempt
to answer thequestion first.
1. If the first player answers the question correctly, points are awarded to the first player, and the game continues.
2. If the first player answers the question incorrectly, the second player is invited to answer the question.
3. If the second player is correct, points are awarded to the second player, and the game continues.
4. If the second player is incorrect, the correct answer is revealed, and the game continues.
 Loading...