

Page 1

DDM328 Eng Cover R9 OP 5/9/05, 6:13 PM1
Music Orbit + Music Station
Portable MP3 / WMA / CD Player
with Stereo Speaker Dock
Model: DDM328
User Manual
Page 2
SAFETY AND MAINTENANCE
The Music Orbit + Music Station Portable MP3 / WMA /
CD Player with Stereo Speaker Dock are designed to
give you years of service if handled properly. All safety
and operating instructions in this user manual should
be read before using the products, and retained for future
reference. Ensure that you heed all warnings to minimize
product malfunction and reduce the chances of incurring
personal injury. Before using the units, observe the
following guidelines to ensure proper care and
maintenance.
The lightning flash with arrowhead
symbol within an equilateral triangle, is
intended to alert the user to the presence
of uninsulated "dangerous voltage" within
the products enclosure that may be of
sufficient magnitude to constitute a risk
of electric shock to persons.
• Do not subject the units to extreme impact, shock or
fluctuations in humidity.
• Do not expose the units to dripping and splashing
and ensure that no objects filled with liquids, such
as vases, are placed on the units.
• Do not leave the units exposed to direct sunlight for
long periods of time. This may deform or discolour
the cabinet and may also cause malfunction.
• Do not place the units near heat sources such as
radiators, heat registers, stoves or other apparatus
that produce excessive heat.
• Keep your units in a dry, well-ventilated place to
prevent it from molding. Do not use or store the units
in locations that may adversely affect the product
such as rain, snow, moisture, dust or desert.
• For added protection for the product during a
lightning storm, or when it is not used for long periods
of time, unplug the units from the wall outlet and
disconnect any cables. This will prevent damage to
the products due to lightning and power-line surges.
• Stains on the units should be wiped off with a soft,
lint-free cloth. If they are heavily stained, wipe them
with a cloth soaked in water-diluted neutral detergent
and wrung well, then wipe clean. Never use alcohol,
solvent, chemical, paint thinner or benzene to clean
the units. Remember to unplug the units from any
electrical socket or AC adaptor first before cleaning.
AUDIO CDs, MP3-CDs, WMA-CDs / DISC LENS
EN
The exclamation point within an equilateral
triangle is intended to alert the user to the
presence of important operating and
maintenance (servicing) instructions in the
literature accompanying the appliance.
CLASS 1 LASER PRODUCT
means that the player's laser
construction makes it
inherently safe so that the
legally prescribed maximum
permissible radiation values
can never be exceeded.
PLAYER, LINE REMOTE AND SPEAKER DOCK
CAUTION
• Using any equipment or devices other
than those described and specified in these operating
instructions, or tampering with the units in any way,
can result in dangerous exposure to radiation.
• The player employs a laser. Do not attempt to
disassemble the casing. The laser beam is harmful
to the eyes.
• The use of controls or adjustments or performance
of procedures other than those specified herein may
result in exposure to hazardous radiation.
• To avoid electrical shock, do not open any cabinet
or touch any exposed circuitry. Refer servicing to
qualified personnel only.
• Avoid touching the player lens. If you do, you may
damage the lens and the player may not operate
properly.
• Do not insert any foreign objects or drop anything
into any openings as this could cause serious
damage, possibly resulting in fire.
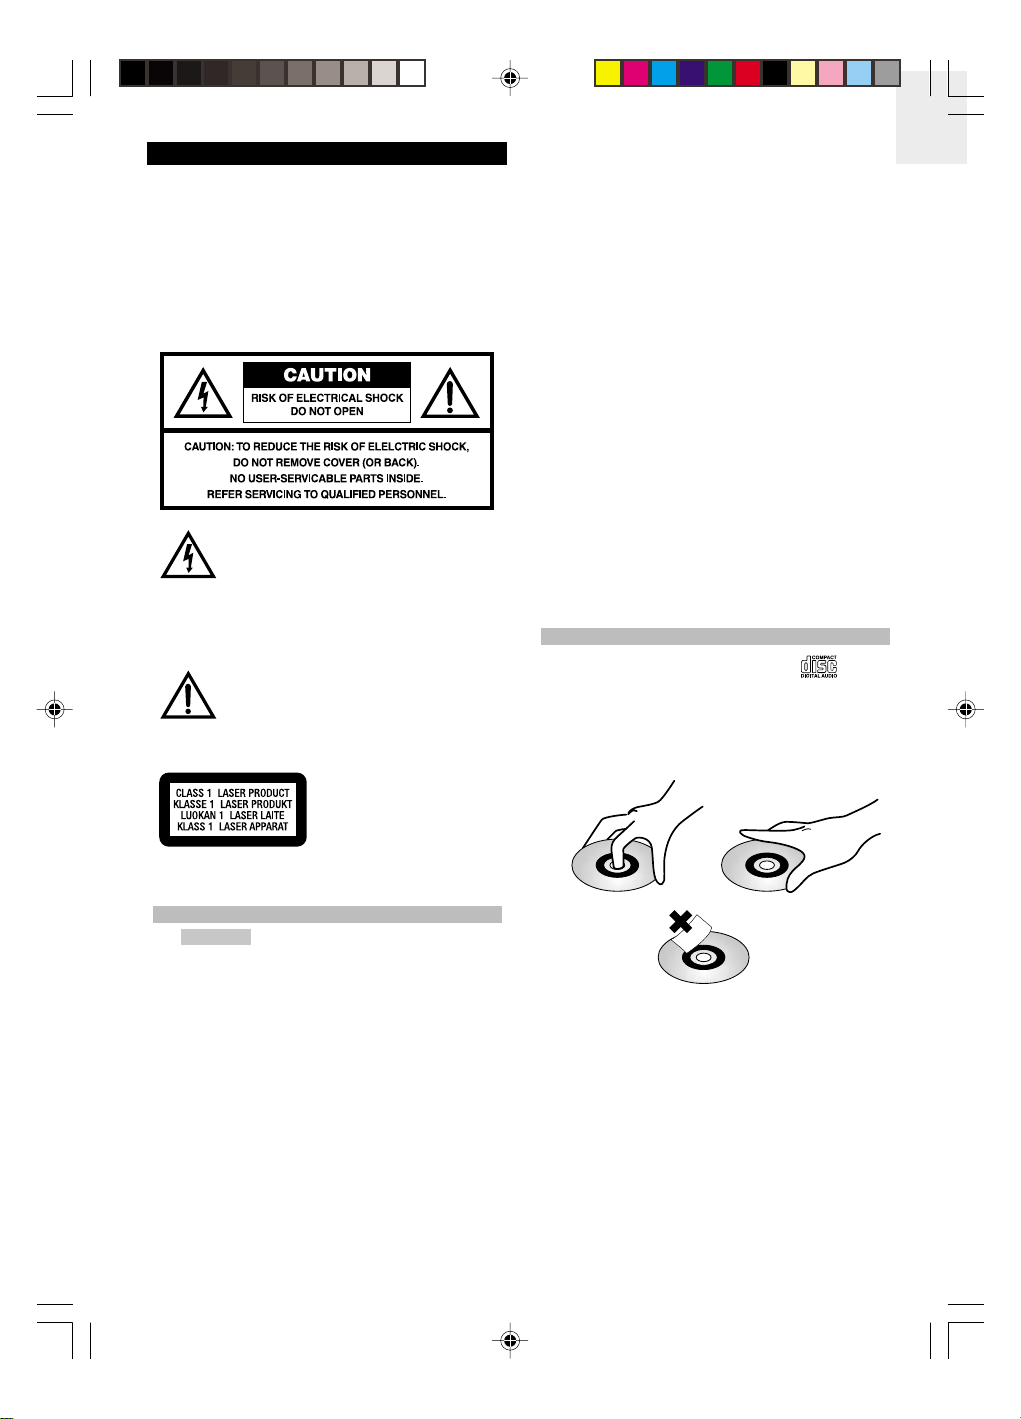
Use only digital audio CDs that have the
• Never write or attach any stickers on an audio or
MP3 / WMA CD. Hold CDs by the edges, or by one
edge and the hole. Do not touch the signal surfaces.
Store CDs in its box after use with the label facing
up.
AC ADAPTOR
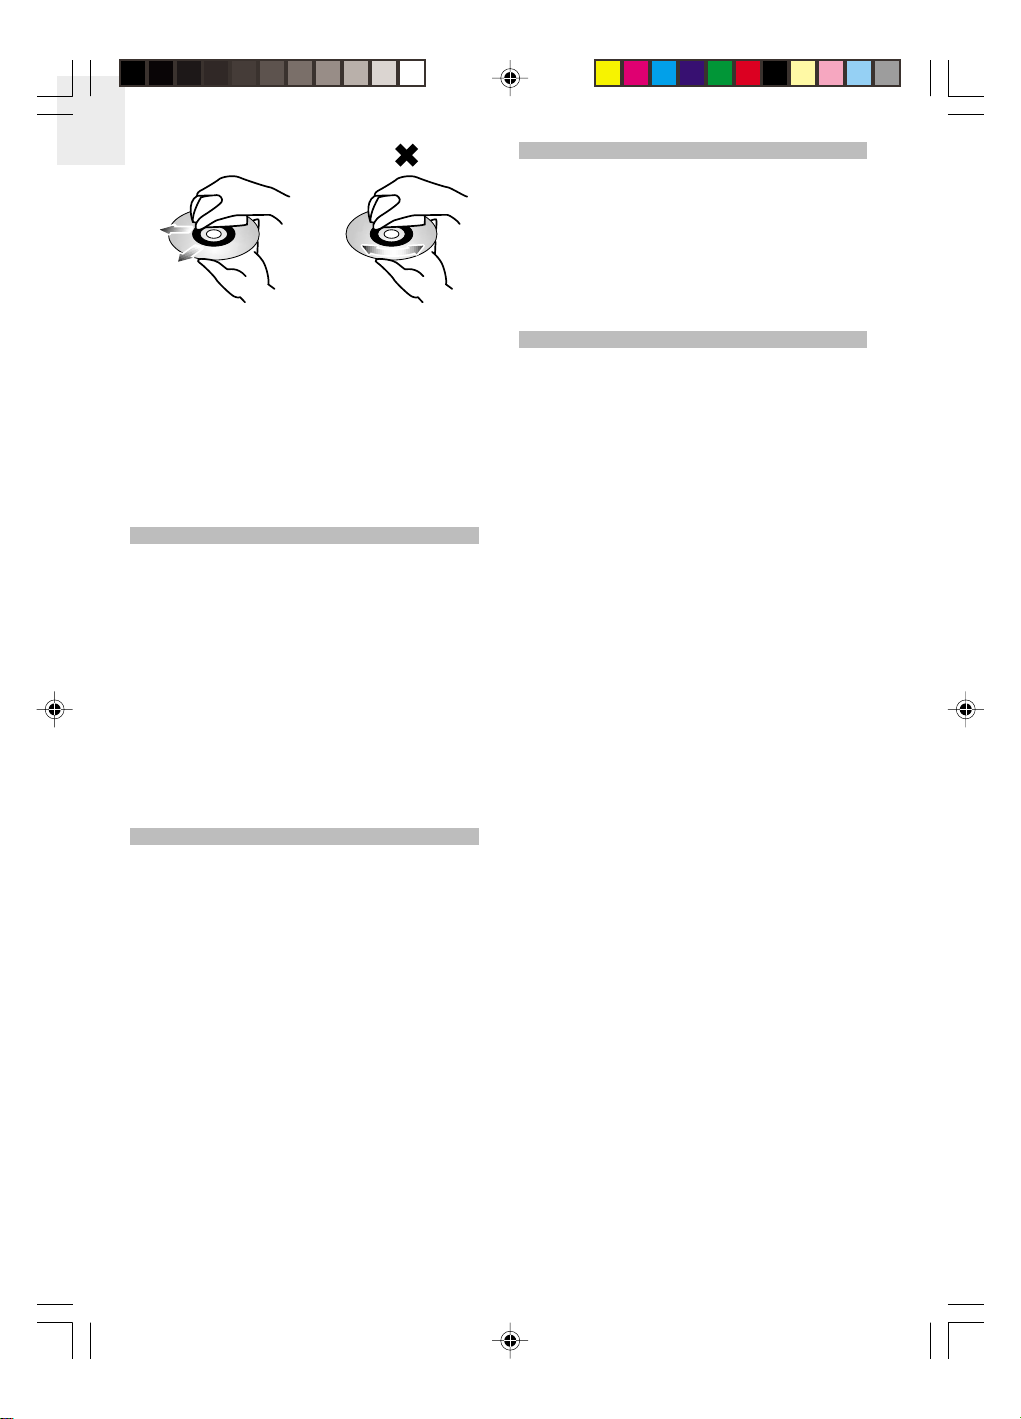
• If a disc becomes dirty, wet a soft, lint-free cloth in
water, wring it out well, wipe the dirt away gently,
and then remove any water drops with a dry cloth.
Wipe discs from the inner edge of the disc toward
the outer perimeter in a straight line. Never wipe the
disc in a circular motion since circular scratches are
likely to occur and could cause noise during
playback.
logo.
DDM328 Eng R9 OP 5/9/05, 10:01 AM1
1
Page 3
EN
• Do not use record cleaning sprays or antistatic
agents on discs. Also, never clean discs with
benzene, thinner, or other volatile solvents that may
cause damage to disc surface.
• To prevent the player's disc lens from accumulating
dust or dry particles, use a camera lens brush /
blower and blow on the lens, then wipe lightly with
the brush to remove dust.
• If the disc lens is covered with fingerprints, clean
with a cotton swab starting in the middle and working
toward the outside edge.
RECHARGEABLE / DRY BATTERIES
To prevent battery damage, electrolyte leakage and
short-circuiting, heed the following points.
• Do not peel off the covering on batteries and do not
use if covering has been peeled off.
• Ensure the battery polarity is correctly aligned when
putting the batteries in the unit.
• Do not mix together different types or brands of
batteries or old and new batteries.
• Remove all batteries if you do not intend to use the
player for a long time.
• Do not attempt to recharge AA batteries.
• Do not allow metal objects to touch the battery
terminals as this may cause short-circuiting and
increase the chance of fire and personal injury.
HEADPHONES
• Do not listen with your headphones at a high volume.
• If you experience a ringing in your ears, reduce
volume or discontinue use.
• Do not use while operating a motorized vehicle.
• Discontinue use if you experience discomfort with
the headphones that directly contact your skin.
Continued use may cause rashes or other allergic
reactions.
SERVICING THE PRODUCT
• The units should be serviced by qualified service
personnel if:
• The AC power supply cord or AC adaptor has
been damaged.
• Objects or liquids have gotten into the units.
• The units have been exposed to rain or excessive
moisture.
• The units do not operate normally or exhibits a
marked change in performance.
• The units have been dropped or the casing has
been damaged.
• When parts need replacing, ensure the authorized
service center uses parts specified by the
manufacturer or parts that have the same
characteristics as the original parts. Unauthorized
substitutes may result in fire, electric shock or other
hazards.
• Upon completion of any service or repairs to the
products, ask the service technician to perform safety
checks to determine that the products are in proper
operating condition.
AC ADAPTOR
• This units should be operated only from the type of
power source indicated on the marking label. If you
are not sure of the type of power supply to your home,
consult your product dealer or local power company.
For products intended to operate from battery power,
or other sources, refer to operating instructions.
• Do not touch the adaptor with wet hands, forcibly
bend it in any way, or place heavy objects on top of
it.
• Connect only the AC adaptor provided with the unit.
• When unplugging the AC adaptor from the wall,
always pull the plug or connector, not the cord.
• Do not overload wall outlets, extension cords, or
integral convenience receptacles as this can result
in a risk of fire or electric shock.
• Leaving the AC adaptor connected can cause the
batteries to go flat. Disconnect the AC adaptor from
the power outlet after recharging the batteries, and
disconnect all power sources if the units will not be
used for a long period of time.
DDM328 Eng R9 OP 5/9/05, 10:01 AM2
2
Page 4

Music Orbit + Music Station
Portable MP3 / WMA / CD Player
with Stereo Speaker Dock
Model: DDM328
USER MANUAL
CONTENTS
Safety and Maintenance .......................................... 1
Player, Line Remote and Speaker Dock ................ 1
Audio CDs, MP3-CDs, WMA-CDs / Disc Lens ...... 1
Rechargeable / Dry Batteries ................................ 2
AC Adaptor ............................................................ 2
Headphones .......................................................... 2
Servicing the Product ............................................ 2
Contents ................................................................... 3
Introduction .............................................................. 4
Unpacking .................................................................4
Product Overview .................................................... 4
Audio Player .......................................................... 4
Line Remote .......................................................... 4
Headphones .......................................................... 5
Speaker Dock ........................................................ 5
Getting Started ......................................................... 6
Using the AC Adaptor ............................................ 6
Using Rechargeable Batteries ............................... 6
Using AA Batteries (Optional) ................................ 7
Connecting the Line Remote and Headphones .....7
Docking the Player to the Speaker Dock ............... 7
Inserting the Player ................................................7
Using the Speaker Dock AC Adaptor ..................... 8
Charging the Player's Batteries ............................. 8
Basic Operations ..................................................... 8
Adjusting Volume ...................................................9
Pause / Stop / Play ................................................ 9
Skipping Tracks ..................................................... 9
Selecting Different Directories
(MP3 / WMA CDs Only) .........................................9
Removing Discs .....................................................9
Hold Function ........................................................ 9
ESP (Electronic Shock Protection) ....................... 10
Clock and Radio ..................................................... 10
Clock ....................................................................10
Radio ................................................................... 10
Program Play Mode (Playlist) ............................... 10
Audio CDs ............................................................ 11
MP3 / WMA CDs .................................................. 11
Repeat and Random Playback .............................. 12
Normal Playback .................................................. 12
Programmed Playback of Playlist
(Audio and MP3 / WMA discs) .............................12
Equalizer ................................................................. 13
Using the Player with an Audio System ............... 13
Troubleshooting .....................................................13
Specifications .........................................................14
Music Orbit Portable MP3 / WMA / CD Player ..... 14
Music Station Stereo Speaker Dock .................... 14
About Oregon Scientific ........................................ 15
FCC Statement ....................................................... 15
Declaration of Conformity .................................... 15
EC-Declaration of Conformity ...............................15
3
EN
DDM328 Eng R9 OP 5/9/05, 10:01 AM3
Page 5
EN
U
B
S
m
o
d
e
p
ro
g
ESP
8
INTRODUCTION
Thank you for selecting the Oregon ScientificTM Music
Orbit + Music Station Portable MP3 / WMA / CD Player
with Stereo Speaker Dock as your personal products of
choice. The ultra-slim and lightweight unit player is just
15.7 mm thick, and along with the line remote, can easily
fit the unit into a travel bag and take it anywhere to listen
to your favourite music tracks using long-lasting
rechargeable batteries.
With support for CD text and ID3 tagging, the unit is
compatible with CD, CD-R and CD-RW discs and MP3
and WMA audio formats. It features sound and playback
effects such as a 5-band equalizer, 120-second antishock protection, and programmable playlist. For
extended playback, the unit comes with an external
battery case that uses AA batteries.
The Speaker Dock plug-and-play docking station is a
perfect compliment to the player. Simply insert the player
into the Speaker Dock and it begins audio playback,
with the Speaker Dock itself serving as an external active
speaker and as a battery charging station for the player.
From the Speaker Dock, the unit's playback options
including equalizer, sound effects, volume, and
programmable playlist can be set. The unit features an
FM/AM radio with up to 40 preset stations.
UNPACKING
When you unpack your Music Orbit + Music Station
Portable MP3 / WMA / CD Player with Stereo Speaker
Dock, make sure to keep all the packing materials in a
safe place, in case you need to later return it for servicing.
PRODUCT OVERVIEW
AUDIO PLAYER
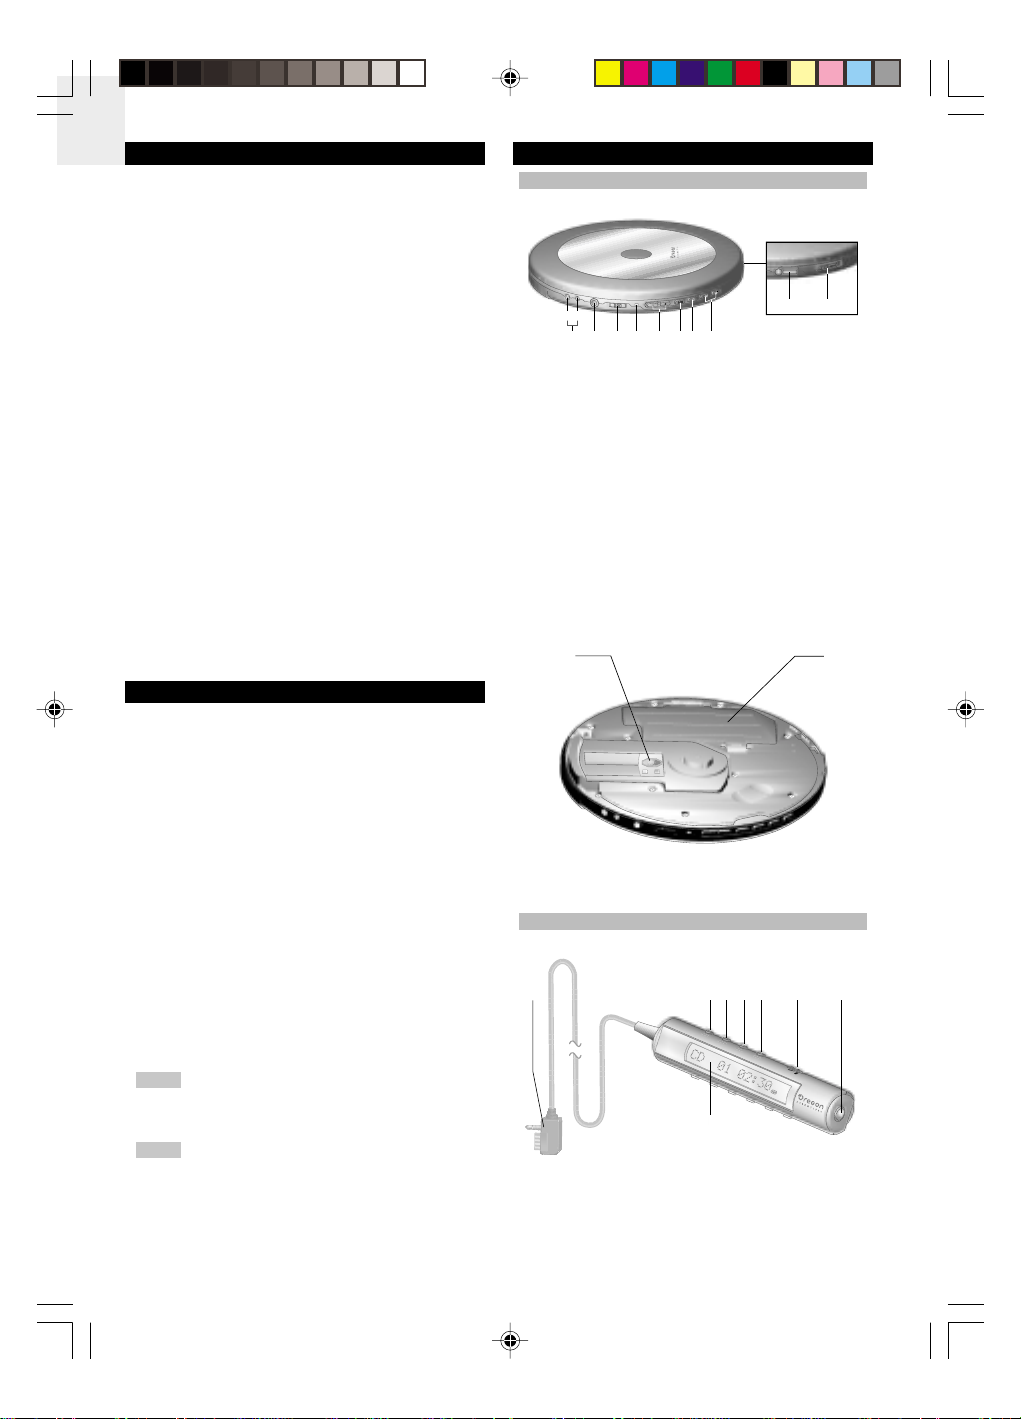
OUTSIDE VIEW
a
b
12 345 678
1. Input jacks
a. DC IN 4.5V
b. EXT BATT (External battery)
2. Line-out jack
3. Hold / Off / Chg (Charging) switch
4. Charging LED indicator
5. Volume control (- VOL +) button
6. Play / Pause button
7. Stop / Off button
8. Skip / Search (Fast forward / Rewind) button
9. Line remote jack
10. Open lid
INSIDE VIEW
12
9 10
In this box you will find:
• Music Orbit + Music Station Portable MP3 / WMA /
CD Player with Stereo Speaker Dock
• Line remote with LCD
• In-ear headphones
• 2 rechargeable batteries
• External battery case
• AC adaptors (player and Speaker Dock)
• Carrying case
• Lint-free cloth
• User manual
• Warranty card
NOTE
Please observe the local regulations regarding
the disposal of packing materials, dead batteries and
old equipment.
This equipment has been designed and
NOTE
manufactured to meet international safety standards but,
like any electrical equipment, care must be taken if you
are to obtain the best results and safety is to be assured.
DDM328 Eng R9 OP 5/9/05, 10:01 AM4
1. Lens
2. Rechargeable battery compartment
LINE REMOTE
FRONT VIEW
12
345 6 7
1. Connector
2. EQ button
3. Mode button
4. Info / Prog button
5. ESP button
4
Page 6

6. Hold switch
7. Headphone jack
8. LCD display
BACK VIEW
12345 6
SPEAKER DOCK
FRONT VIEW
1
2
3
4
5
6
EN
7
8
9
10
11
12
1. Skip / Search (Rewind / Fast Forward) button
2. Stop / Off button
3. Play / Pause button
4. Volume - button
5. Volume + button
6. Clip
LINE REMOTE LCD DISPLAY
2
1
1. LCD (displays track length, track number, directory
number, ID3 tag, etc.)
3
4
PROG
56 7 8
2. Repeat 1
3. Repeat all
4. Repeat directory
5. ESP
6. Prog
7. Battery indicator
8. Random
HEADPHONES
2
1
13
1. LCD display
2. FM / AM button
3. tune+ button
4. tune- button
5. Stop button
6. Four-way directional controller
a. Volume up (+) / down (-) buttons
b. Fast forward / rewind buttons
c. mem- / mem+ buttons
7. Slot-in mechanism for CD player
8. Power on / off (Standby) button
9. Info / Prog button
10. EQ button
11. mode button
12. Play / Pause button
13. External speaker
BACK VIEW
1
2
1. Headphone connector
2. Intra-aural ear coupling
DDM328 Eng R9 OP 5/9/05, 10:01 AM5
1. DC IN jack
2. FM pigtail antenna
5
Page 7

EN
SPEAKER DOCK LCD DISPLAY
1
23
4
5
6
78 9
1. LCD display (displays track length, track number,
directory number, ID3 Tag, etc.)
2. Battery indicator
3. Prog (Program)
4. Repeat 1
5. Repeat all
6. Repeat Folder / Directory (MP3 / WMA CDs only)
7. Random
8. Stereo
9. AM / FM indicator
NOTE
Do not use different types of batteries together
or mix new batteries with old ones. When any of the
batteries are depleted, replace all batteries with new
ones.
Your unit comes with 2 rechargeable NiMH 1400mAh
(1.2V) batteries that can be recharged directly from within
the player.
The rechargeable batteries should be recharged
TIP
before they are used for the first time or if they have not
been used for a long period of time.
GETTING STARTED
USING THE AC ADAPTOR
1. Plug the player's AC adaptor into an electrical power
outlet.
2. Plug the AC adaptor jack into the player's DC IN
4.5V jack. The player is in standby mode when the
AC adaptor is connected.
Using the AC adaptor will help to save on batteries.
TIP
NOTE
Turn the unit off before plugging or unplugging
the AC adaptor. Should you notice any abnormality in
the AC adaptor, disconnect it from the electrical socket
and player immediately.
Always use the supplied AC adaptor that is
NOTE
designed specifically for the player only. Using any other
AC power adaptor may cause the unit to malfunction
and increase the risk of fire or injury.
USING RECHARGEABLE BATTERIES
The option of using rechargeable batteries to operate
the player instead of the AC adaptor provides added
flexibility and portability to use the unit almost anywhere
without being restricted by cables.
In a non-controlled environment, many factors
NOTE
can affect battery life, such as volume, LCD backlight
and temperature. When batteries are not used for a long
period of time, remove them to save battery power.
To insert the rechargeable batteries into the player:
1. Push against the tab of the battery compartment
cover, then pull the battery cover upward to open.
2. Insert 2 NiMH batteries (supplied) into the
compartment according to the polarity indicators and
close the battery cover.
CHARGING THE BATTERIES
1. Slide the player's HOLD OFF CHG switch to the
CHG position. If the AC adaptor is already plugged
into the player, the batteries should begin charging
from the player and the charging LED indicator on
the unit lights up red.
2. Charging is complete after approximately 15 hours.
The LED indicator turns off to indicate the batteries
are finished charging. Unplug the AC adapter from
the power outlet and the DC IN 4.5V jack.
3. To take the rechargeable batteries out from the
compartment, press against the "-" end of each
battery. The "+" end of the batteries will lift up,
allowing you to easily pull out the batteries.
Playtime may be shorter than usual after
NOTE
recharging batteries for the first time or after they have
been unused for a long time. Repeatedly recharge and
discharge the batteries to restore them to normal.
However, do not continuously charge the batteries for
more than 24 hours. Doing so may cause battery
performance to deteriorate.
Only batteries especially designed for this unit
NOTE
(NiMH) can be recharged. Do not attempt to charge other
types of batteries. The LED indicator will not light up
when charging rechargeable batteries that are not
designed for use with player.
may not be displayed
if you are using rechargeable batteries that are not
designed for this player.
6
DDM328 Eng R9 OP 5/9/05, 10:01 AM6
Page 8

Rechargeable batteries have a service life of
NOTE
approximately 300 charge-discharge cycles. The
batteries have reached the end of their operational life if
they last for a noticeably shorter time after recharging.
USING AA BATTERIES (OPTIONAL)
21
1. External battery pack connector
2. Battery compartment cover
The supplied external battery case allows you to use
2 AA batteries (not supplied) and extend the use of the
unit when the rechargeable batteries have run out of
power.
To insert the batteries:
1. Open the battery case by pushing down on the top
part of battery case cover, then slide out to open.
2. Insert 2 AA batteries into the compartment according
to the polarity indicators. Close the battery case.
3. Plug the battery case connector to both the player's
EXT BATT and DC IN 4.5V jacks for power.
NOTE
If rechargeable batteries are inserted into the
player and AA batteries are connected via the external
battery case, the unit will use the AA batteries as the
power source. If connected, unplug the AC adaptor.
NOTE
Playback time (when using both rechargeable
and AA batteries) is up to 22 hours.
CONNECTING THE LINE REMOTE AND
HEADPHONES
1. Plug the line remote connector to the player's line
remote jack.
2. To use the supplied headphones, connect it to the
line remote headphone jack. Ensure that volume is
set at a moderate listening level.
Once the line remote is properly connected to the player
and the headphones connected to the line remote, you
are ready to operate the unit.
DOCKING THE PLAYER TO THE SPEAKER
DOCK
The Speaker Dock offers the convenience of listening
to music tracks or the radio from the home or office,
taking up minimal desk space. Once the player is docked
into the Speaker Dock, it plays back audio via its external
active speaker, and can also conveniently charge the
player's rechargeable batteries direct from within the
player.
INSERTING THE PLAYER
NOTE
Before inserting into the Speaker Dock's slot-in
mechanism, remember to check the following:
• The player should be powered off.
• The player's AC adaptor is not plugged in.
• The line remote and headphones are not connected
to the player.
1. Position the player so that the Oregon Scientific logo
on the device faces right-side up.
2. Align the player directly over the Speaker Dock's slotin mechanism, taking note to horizontally align the
player's logo with the Oregon Scientific logo on the
Speaker Dock.
3. Insert the player into the slot's 12-pin connector. It
should click into place.
EN
DDM328 Eng R9 OP 5/9/05, 10:01 AM7
7
Page 9

EN
Since the player's line-remote jack is fitted into
NOTE
the Speaker Dock's 12-pin connector, the line remote
that is supplied with the player and connected to the
line-remote jack cannot be used to control the player's
operations.
TIP
While inserted into the Speaker Dock, the player's
HOLD OFF CHG switch, Vol - / + button and
can still be accessed from the unit.
USING THE SPEAKER DOCK AC ADAPTOR
Plug one end of the AC adaptor into an electrical power
outlet and the other end into the Speaker Dock's DC IN
9V jack.
NOTE
Should you notice any abnormality in the
Speaker Dock AC adaptor, disconnect it from the
electrical socket immediately.
NOTE
Always use the supplied AC adaptor that is
designed specifically for the Speaker Dock only. Using
any other AC power adaptor may cause the unit to
malfunction and increase the risk of fire or injury.
button
Make sure the rechargeable batteries are placed in the
player's battery compartment. Once the unit is inserted
into the Speaker Dock and the Speaker Dock's AC
adaptor is plugged in, the batteries in the player
automatically begin recharging. There is no need to use
the player's AC adaptor.
appears on the Speaker Dock LCD to indicate
battery-charging status. Charging is complete after
approximately 15 hours, and
the batteries are finished charging.
NOTE
Only batteries especially designed for this unit
can be recharged. Do not attempt to charge or mix other
types of batteries. The LED indicator will not illuminate
when charging rechargeable batteries that are not
designed for use with the player.
disappears to indicate
BASIC OPERATIONS
NOTE
The use of the term "CD" refers to both audio
CDs and MP3 / WMA CDs unless specifically noted.
Both the player and line remote can be used to operate
the unit's basic functions. If docked, the player's functions
can also be controlled via the Speaker Dock buttons.
1. Slide the OPEN switch to the right to open the
player's lid, then insert a CD with the label facing
up.
2. Press the area near the center hole of the CD until it
clicks into position, then close the lid.
3. Connect the line remote to the player's line remote
jack, then connect the headphones to the headphone
jack on the line remote.
4. Make sure the HOLD OFF CHG switch on the player
and HOLD switch on the line remote is not on the
HOLD position.
5. To power on the player, press the
unit or line remote. The CD automatically begins
playing the first track with track number and elapsed
time showing on the LCD.
For more information on ESP, read section on "ESP
(ELECTRONIC SHOCK PROTECTION)".
6. If the player is docked into the Speaker Dock, press
the Speaker Dock
and the Speaker Dock
playback. The Speaker Dock automatically converts
audio signals from the player for playback via the
Speaker Dock's external speakers.
button to power on the unit
button on the
also a appears.
button to begin CD
CHARGING THE PLAYER'S BATTERIES
The Speaker Dock provides the option of recharging
the player's rechargeable NiMH 1400mAh (1.2V)
batteries if they are used to power the unit.
DDM328 Eng R9 OP 5/9/05, 10:02 AM8
If the player or line remote is left in stop mode
NOTE
for approx. 1 minute, the unit powers off automatically
to prevent the battery from running low. If the unit is
turned on but no CD is loaded, it powers off in about
30 seconds. When batteries are becoming low on power,
appears on the right side of the line remote LCD.
8
Page 10

During MP3 / WMA CD playback, the directory number
(e.g., 01), current track number (e.g. 001), and elapsed
playing time appears briefly on the LCD, then switches
to show "[MP3]", the current track number and file name.
With the exception of
, information such as track
number, elapsed track playing time, total track time,
battery indicator, and repeat / random playback that is
normally viewed on the player's line remote LCD can be
viewed directly from the Speaker Dock LCD. For MP3 /
WMA CD playback, information such as directory
number and ID3 tagging, if available, are also shown on
the LCD.
The player supports audio track ID3 tagging, which
contains information and data such as title, album or
artist that may be embedded in an MP3 track. Press the
INFO / PROG button on the player or Speaker Dock to
view the ID3 tag information. If there is no ID3 tag
information, "[MP3] No ID3-Tag" is shown on the LCD.
NOTE
When all tracks on the CD have finished playing,
the system will automatically stop. If the lid is opened at
anytime during playback, "DOOR OPEN" appears on
the LCD. If no CD is loaded, "NO DISC" appears on the
LCD.
ADJUSTING VOLUME
1. Adjust the volume using the - / + buttons on the
player, line remote or Speaker Dock.
2. Press and hold the - / + buttons to adjust volume
more quickly.
Volume level on the player ranges from 00 to
NOTE
32 (default volume level is 10). On the Speaker Dock,
volume level ranges from 00 (shown as "VOL MIN" on
the Speaker Dock LCD) to 40 ("VOL MAX"). Default
volume level is 20.
PAUSE / STOP / PLAY
1. Press the
button on the player, line remote or
Speaker Dock during audio playback to pause. The
elapsed time of the currently played track on the line
remote or Speaker Dock LCD will flash. MP3 / WMA
CDs will show the directory number in addition to
track number and elapsed time.
2. Press the
3. To stop playback, press the
line remote or Speaker Dock. The unit enters standby
mode with total number of tracks, total playing time
button again to resume playback.
button on the player,
and "CD" is displayed on the LCD (for MP3 / WMA
CDs, the total number of directories, total number of
tracks and "Track" appear on the LCD).
4. To turn off the player, press the
button on the unit
or line remote again. To power off the player, press
the Speaker Dock
appears on the LCD.
button. The system clock
SKIPPING TRACKS
1. In stop or playback mode, press the
or button
on the player, line remote or Speaker Dock to skip
the current track and go to the beginning of the
previous or next track.
2. During playback, press the
the beginning of the current track and repeat
button once to skip to
playback.
3. During playback, press and hold the
or button
to rewind or fast forward to a different location of the
currently played track. Playing time shown on the
line remote or Speaker Dock LCD changes rapidly.
SELECTING DIFFERENT DIRECTORIES
(MP3 / WMA CDs ONLY)
To select the previous or next directory on an MP3 / WMA
CD, press and hold the
or button until the desired
directory number (e.g., 10) and track number (e.g., 001)
appear on the line remote or Speaker Dock LCD.
REMOVING DISCS
1. If the player is playing a track, press the
button on
the player, line remote or Speaker Dock to stop
playback.
2. Once the disc stops spinning, slide the player's
OPEN switch to open the player's lid and remove
the CD.
3. If docked, press the
button to power off the
Speaker Dock and unplug its AC adaptor, then
detach the player from unit.
NOTE
To avoid damaging discs / player and incurring
electric shock, do not stop the CD by hand or try to
remove the player from the Speaker Dock before
powering off and unplugging the AC adaptor.
HOLD FUNCTION
PLAYER
The HOLD OFF CHG switch on the player is designed
to prevent accidental selection of an unwanted function
during playback or stop mode.
1. Slide the HOLD OFF CHG switch to the HOLD
position. "HOLD" is shown on the LCD for about
5 seconds. No buttons on the player function when
pressed.
2. To resume normal button operation, slide the HOLD
OFF CHG switch to the OFF position on the unit.
LINE REMOTE
The HOLD switch is also available on the line remote.
Slide HOLD to the right on the line remote to activate
and slide to the left to deactivate. "HOLD" is shown on
the LCD for about 5 seconds. No buttons on the line
remote function when pressed.
EN
DDM328 Eng R9 OP 5/9/05, 10:02 AM9
9
Page 11

EN
The hold function on the player works
NOTE
independently from the line remote. When the HOLD
OFF CHG switch on the unit is activated, no function
buttons on the player can be operated. However, this
will not affect the operation of the line remote buttons.
Similarly, when the HOLD switch on the line remote is
activated, no function buttons on the line remote can be
operated but function buttons on the unit are not affected.
NOTE
The HOLD OFF CHG switch does not affect
the Speaker Dock's buttons, which continue to function
when pressed.
ESP (ELECTRONIC SHOCK PROTECTION)
The player features an automatic 120-second anti-skip
electronic shock protection (ESP) feature using a special
electronic circuit to prevent sound from skipping when
the unit is subject to shocks and vibration (while walking
or riding in a car) during playback.
By default, ESP automatically turns on when audio CDs
are first played.
1. Press the ESP button on the line remote to cancel
the function.
2. Press the ESP button again to resume the function.
reappears on the LCD.
When the unit receives a physical shock that prevents
the laser pick-up from "reading" the CD, the player will
immediately start playing the sound stored in its memory.
Once the pick-up returns to its original position, new data
is stored in memory.
When playing MP3 / WMA discs, the ESP function is
also activated by default. The function cannot be
disabled.
ESP continues to function when the player is docked,
but
does not appear on the Speaker Dock LCD.
appears on the line remote LED.
disappears from the LCD.
CLOCK AND RADIO
The clock and radio functions are available on the
Speaker Dock only.
CLOCK
1. Make sure the Speaker Dock is in standby mode.
The clock time appears on the LCD. If the time is
being set for the first time, it will flash.
2. Press the INFO / PROG button. The clock hour
flashes on the LCD.
3. Use the TUNE+ or TUNE- button to decrease or
increase the hour value. Press and hold to adjust
the values more quickly.
4. Press the INFO / PROG button to store the desired
hour value. The clock minutes then flash on the LCD.
5. Repeat step 3-4 to set the clock minute values.
NOTE
The 24-hour clock format is available only on
European models of the Speaker Dock.
RADIO
1. During CD playback, stop mode or when the player
is powered off and in standby mode, press the
Speaker Dock FM / AM button to enter radio mode.
Press repeatedly to toggle between FM or AM
frequency.
2. Press the Speaker Dock TUNE+ or TUNE- button
once to manually tune a radio station. Press and
hold to auto-tune a station. Repeat manual or autotuning to search for other stations. Searching ends
each time a station of sufficient signal strength is
found, with "STEREO" appearing on the LCD for FM
stations. Radio stations with weak reception are
skipped automatically during auto-tuning.
3. To store a radio station into memory, press the
Speaker Dock INFO / PROG button. The radio
station preset number "00" flashes on the LCD.
4. Press the Speaker Dock
desired preset number appears (i.e., 1) and press
the INFO / PROG button to store the station for the
selected preset station number.
or button until your
If the unit is repeatedly subjected to shocks and
NOTE
vibrations, all data stored in memory will be used up
and sound will skip.
NOTE
When turned on, ESP consumes more battery
power because the player's memory circuit is activated.
Sound is interrupted for a short time when ESP is
switched on or off. This is normal. Noise may be heard
or sound skipping may occur under certain conditions:
• When the disc is dirty or scratched
• When the disc contains certain signals
• When the unit is subject to an extreme shock impact
In these conditions, try releasing the ESP function.
DDM328 Eng R9 OP 5/9/05, 10:02 AM10
5. To scroll through the preset stations, press the mem-
or mem+ button until the desired station
automatically begins broadcasting. The active station
and corresponding preset number appear on the
LCD.
PROGRAM PLAY MODE (PLAYLIST)
If you do not want to play all tracks on a CD, the player
can be programmed to playback only certain tracks on
a disc (up to 24 tracks). A playlist can be created in any
order chosen and then play them back in that sequence.
A track may be stored more than once.
10
Page 12

NOTE
A playlist can be programmed from the player
itself, or from the Speaker Dock when the player is
docked. The following screenshots below are examples
of what would appear on both the player and Speaker
Dock LCD.
AUDIO CDs
1. Make sure the player or Speaker Dock is in stop
mode. Press the INFO / PROG button on the line
remote or Speaker Dock to enter program mode.
"CD", "P-01", "PROG" and track number will appear
on the line remote or Speaker Dock LCD, with the
track number flashing. P-01 is the first designated
playlist number to be saved in memory for the
selected track. Each saved track is designated in
playlist number order of P-01, P-02, P-03, etc.
PROG
2. Press the
or button on the player, line remote
or Speaker Dock to select the desired track.
3. Press the INFO / PROG button to store the track
and proceed to your next selection ("00" appears
flashing as the track number each time a new track
is selected).
2. Press the
selected and press the INFO / PROG button to save
the newly selected track over the previous track.
or button until a desired track is
Repeat to replace more tracks.
If a new playlist is programmed, the previously
NOTE
saved playlist will no longer be saved in memory and is
replaced with the new playlist. Similarly, if the player or
Speaker Dock is turned off, the playlist will no longer be
saved in memory and will not be recognized when the
unit is powered on. When a playlist is being programmed
but no buttons are pressed for approx. 30 seconds, the
player or Speaker Dock will end the process
automatically and the playlist must be re-programmed
again.
MP3 / WMA CDs
1. Make sure the player or Speaker Dock is in stop
mode. Press the INFO / PROG button to enter
program mode. The directory number (e.g., 00)
flashes on the line remote LCD and "P-01", "PROG"
and track number (e.g., 000) will also appear. P-01
is the first designated playlist number to be saved in
memory for the selected track. Each saved track is
designated in playlist number order of P-01, P-02,
P-03, etc.
PROG
EN
PROG
4. Repeat steps 2-3 to program all the desired tracks.
5. Press
on the player, line remote or Speaker Dock
to begin playing the programmed tracks in the order
they were saved.
6. To scroll through and view the stored tracks and
corresponding playlist number, press the
button
on the player, line remote or Speaker Dock during
programmed playback and then press the
or
button repeatedly.
ADDING PROGRAMMED TRACKS
1. In stop mode, press the INFO / PROG button once.
A new playlist number appears on the LCD with "00"
(track number) flashing.
2. Press the
selected, then press INFO / PROG button to store.
Repeat to add more tracks.
or button until a desired track is
REPLACING PROGRAMMED TRACKS
1. In stop mode, press the INFO / PROG button
repeatedly until a track (which flashes) and playlist
number that you want to replace is shown on the
LCD.
2. Press the
directory, and press the INFO / PROG button to store
the selection into memory ("00" appears as the
or button to select the desired
directory each time a new directory is selected).
3. Press the
and press the INFO / PROG button to store the
or button to select the desired track,
selection into memory. ("000" appears as the track
number each time a new track is selected).
4. Repeat steps 1-3 to program all the desired tracks.
11
PROG
PROG
DDM328 Eng R9 OP 5/9/05, 10:02 AM11
Page 13

EN
5. Press the
programmed tracks in the order they were saved.
6. To scroll through and view the stored tracks and
corresponding playlist number, press the
during programmed playback and press the
button repeatedly.
ADDING PROGRAMMED TRACKS
1. In stop mode, press the INFO / PROG button once
("00" directory number flashes and a new playlist
number appears on the LCD).
2. Press the
selected, then press INFO / PROG button to store.
3. Repeat step 2 to select and store a track and steps
2-3 to add more directories and tracks to the playlist.
REPLACING PROGRAMMED TRACKS
1. In stop mode, press the INFO / PROG button
repeatedly until a directory (which flashes), track
number and playlist number that you want to replace
is shown on the LCD.
2. Press the
selected and press the INFO / PROG button to save
the newly selected directory over the previous directory.
3. Repeat step 2 to replace a previous track with a new
track and steps 2-3 to replace more directories and
tracks.
button to begin playing the
or button until a desired directory is
or button until a desired directory is
REPEAT AND RANDOM PLAYBACK
The player can be set to control how the tracks are to
be repeated during playback. Press the MODE button
on the line remote or Speaker Dock repeatedly to toggle
between different modes during normal playback and
during programmed playback of a playlist. The
corresponding icon appears on the line remote or
Speaker Dock LCD.
NOTE
The selected mode is cancelled if the player or
Speaker Dock is turned off or disconnected from the
power source.
button
or
NOTE
During playback, flashes to indicate random
playback option is selected, then stops flashing when
the next random track is played back.
The normal and programmed playback repeat modes
are the same for both audio CDs and MP3 / WMA CDs
with the exception of repeating tracks within a directory,
which is available only for MP3 / WMA CDs during normal
playback.
MP3 / WMA CDs
REPEAT
ICON
PATTERN
One MODE 1x Current track is
Directory
All MODE 3x All tracks are
INTRO Intro MODE 4x 10 seconds of
Random MODE 5x Tracks are
-- MODE 6x Repeat /
--
During playback, flashes to indicate random
NOTE
playback option is selected, then stops flashing when
the next random track is played back.
BUTTON
PRESS
MODE 2x
DESCRIPTION
repeated. Press
to skip to the
next track.
Tracks in a
directory are
repeated.
repeated.
each track is
played back in
sequence.
played back in
random order.
Random off.
NORMAL PLAYBACK
AUDIO CDs
REPEAT
ICON
PATTERN
One MODE 1x Current track is
All
INTRO Intro MODE 3x 10 seconds of
Random MODE 4x Tracks are played
-- MODE 5x Repeat / Random
--
DDM328 Eng R9 OP 5/9/05, 10:02 AM12
BUTTON
PRESS
MODE 2x
DESCRIPTION
repeated. Press
to skip to the next
track.
All tracks are
repeated.
each track is
played back in
sequence.
back in random
order.
off.
PROGRAMMED PLAYBACK OF PLAYLIST
(AUDIO AND MP3 / WMA DISCS)
REPEAT
ICON
PATTERN
One MODE 1x Current track is
All
INTRO Intro MODE 3x 10 seconds of
12
BUTTON
PRESS
MODE 2x
DESCRIPTION
repeated. Press
to skip to the
next track.
All tracks
programmed
into the playlist
are repeated.
each track is
played back in
sequence.
Page 14

REPEAT
ICON
PATTERN
-- MODE 4x Repeat /
--
BUTTON
PRESS
DESCRIPTION
Random off.
Why is the player not playing CDs?
The player's lid may not be closed properly or may be
raised slightly when LR6, AA, UM-3 batteries are inserted
in the battery compartment. Ensure the disc is secured
in place, changing to the right type of batteries if
necessary.
EN
EQUALIZER
The player is equipped with a 5-band equalizer that
allows you to experiment with different sound options
depending on the kind of music being played back.
Repeatedly press the
button on the Speaker Dock to toggle between the
different sound options shown on the display: Normal
(default), Classic, Pop, Jazz and Rock.
The last option chosen is automatically saved for
playback until a new option is selected.
button on the line remote or EQ
USING THE PLAYER WITH AN AUDIO
SYSTEM
Using a stereo connection cable (not supplied), you can
listen to CDs being played on the player through an audio
system.
1. Turn off the player and your audio system before
connection.
2. Connect the stereo connection cable from the lineout jack on the unit to the audio-in jack on the audio
system.
3. Use your player as normal. Since audio is broadcast
through the audio system's speakers, ensure that
volume level on your audio system is set to an
acceptable level.
The player may not be properly inserted into the Speaker
Dock. Reinsert the player, making sure it makes contact
with the 12-pin connector in the Speaker Dock's slot-in
mechanism.
The disc may be dirty. Clean it with a soft, lint-free cloth
and try playing the disc again. If it still does not play, this
may mean it is scratched or is not of the CDDA format
that is compatible with the player.
There may be excess moisture condensed inside the
player's lens, or on the 12-pin connector. Leave the
player turned off for a few hours until moisture
evaporates, then turn on.
The player is powered on but why is the player or
Speaker Dock emitting noisy background? Or why
is no sound being emitted at all?
Your headphones may be defected, or the volume level
on the external audio system or Speaker Dock may be
too low. Check to see that the headphones and the line
remote plugs have been inserted as far as they will go.
Data signal interference or static electricity may disrupt
the signal reception from the audio source. Power off
the player or Speaker Dock, wait a few seconds, and
turn the unit back on. Make sure the unit is not near any
mobile phones, TVs or tuners.
The external speakers of the Speaker Dock may be dirty
or damaged. Have the unit serviced by a qualified
Oregon Scientific dealer.
When the player is connected to an audio
NOTE
system, it cannot be docked into the Speaker Dock.
TROUBLESHOOTING
Use this troubleshooting guide to help you remedy any
difficulties you may be experiencing while using the
player or Speaker Dock. Should any problem persist after
you have checked these symptoms, consult your nearest
Oregon Scientific dealer.
Why does the unit not power on at all or the power
keeps turning off after turning on?
The plugs and jacks may be dirty, affecting the
connections. Ensure the AC adaptor is cleaned and
plugged into the power outlet and other connections are
firmly established.
The rechargeable or AA batteries in the player may have
run out of power or are not correctly aligned with their
polarity. Re-install batteries checking the polarity; if the
unit still does not operate, insert new batteries into the
unit.
DDM328 Eng R9 OP 5/9/05, 10:02 AM13
Why is the player or Speaker Dock not responding
when the buttons are pressed?
Check that the player or the line remote is in not in HOLD
mode. Keep in mind that the HOLD function for both
devices work independently of one another. While the
HOLD function is actively turned on for the player but is
not actively turned on for the line remote, you will be
able to control the player functions from the line remote.
Remove and reconnect the AC power plug or reinsert
new batteries and switch the player and / or Speaker
Dock on again, checking that the power is on. If there is
still no response, the buttons on the player, line remote
or Speaker Dock may be damaged. Take the unit to a
qualified Oregon Scientific dealer for servicing.
Why does the disc not play starting with the first
track?
The random play mode may be turned on. Ensure this
option is turned off.
13
Page 15

EN
Why does it take the player or Speaker Dock a longer
time to access and playback MP3 / WMA CDs?
MP3 / WMA CDs require a longer time to access tracks
than audio CDs due to the nature in which MP3 / WMA
files are stored on the CD and also by the number of
directories, if any. The more files and directories, the
longer the access time.
Why is the player or Speaker Dock not playing tracks
according the order in which they are programmed
to playback?
After selecting the tracks for playback, you may have
forgotten to press the INFO / PROG button (on the player
or Speaker Dock) to store the selected tracks (or
directory in the case of MP3 / WMA CDs). Or, the wrong
track may have been accidentally selected to save into
programmed memory. Repeat your selection of tracks.
Why is sound playback skipping even though the
ESP function is activated?
When the disc is dirty or scratched, contains certain
signals, or subject to an extreme shock impact, audio
playback may skip despite ESP function being turned
on. Under these circumstances, try releasing the ESP
function. Ensure the disc is clean, not scratched and
avoid subjecting the unit the extreme shock impact.
TYPE DESCRIPTION
Power
Supply
General
AC adaptor:
• European version:
Input 230V ~ 50Hz,
Output DC
• UK version:
Input 230V ~ 50 Hz,
Output DC
• Australian version:
Input 240V ~ 50 Hz,
Output DC
• U. S. version:
Input 120V ~ 60 Hz,
Output DC
Battery:
• Internal: 2 x NiMH
Rechargeable gum batteries
(included)
• External: 2 x 1.5V, Type IEC
LR6 / AM3 / AA Size Alkaline
batteries (not included)
Power consumption:
4W (when using AC adaptor)
Dimensions: 15.7 (H) x 136 (Dia.) mm
(0.62 (H) x 5.35 (Dia.) inches)
Weight: 225g (without batteries)
4.5V / 800mA
4.5V / 800mA
4.5V / 800mA
4.5V / 800mA
SPECIFICATIONS
MUSIC ORBIT PORTABLE MP3 / WMA / CD PLAYER
TYPE DESCRIPTION
System
Battery
No. of channels: 2 (left and right, stereo)Audio
Total harmonic distortion: 0.2% at
1kHz on headphone
Frequency response:
• +/- 1dB at 100Hz on headphone
• +/- 1dB at 10kHz on headphone
• +/- 3dB at 20kHz on headphone
Headphone output level:
RMS max. 18mW + 18mW / 16Ω
(adjustable)
Line output: 0.60V RMS (47KΩ)
Light source: semiconductor laser
Wavelength: 780nm
Total playback time (NiMH and AA
batteries combined):
• Up to 22 hours playback time
MUSIC STATION STEREO SPEAKER DOCK
TYPE DESCRIPTION
AM
tuning
range
FM
tuning
range
Presets
tuning
Clock
power
Dimension
522kHz to 1620kHz
(Europe and Australia)
530kHz to 1710kHz
(U.S.)
87.5MHz to 108MHz
(Europe and Australia)
87.5MHz to 107.9MHz
(U.S.)
40 preset stations (20-station memory
for AM, 20-station memory for FM)
Yes, by digital PLL tunerAuto
24-hour mode (Europe and
Australia)
12-hour mode (U.S.)
1W x 2Speaker
168 (diameter) x 215 mm (H)
(6.6 x 8.5 inches)
DDM328 Eng R9 OP 5/9/05, 10:02 AM14
14
Page 16

ABOUT OREGON SCIENTIFIC
Visit our website (www.oregonscientific.com) to learn
more about Oregon Scientific products such as digital
cameras; MP3 players; children's electronic learning
products and games; projection clocks; health and
fitness gear; weather stations; and digital and conference
phones. The website also includes contact information
for our customer care department in case you need to
reach us, as well as frequently asked questions and
customer downloads.
We hope you will find all the information you need on
our website, however if you're in the US and would like
to contact the Oregon Scientific Customer Care
department directly, please visit:
www2.oregonscientific.com/service/support
OR
Call 1-800-853-8883.
For international inquiries, please visit:
www2.oregonscientific.com/about/international/
default.asp
FCC STATEMENT
This device complies with Part 15 of the FCC Rules.
Operation is subject to the following two conditions: (1)
This device may not cause harmful interference, and
(2) This device must accept any interference received,
including interference that may cause undesired
operation.
DECLARATION OF CONFORMITY
The following information is not to be used as contact for
support or sales. Please call our customer service number
(listed on our website at
on the warranty card for this product for all inquiries
instead.
We
Name: Oregon Scientific, Inc.
Address: 19861 SW 95th Ave., Tualatin,
Telephone No.: 1-800-853-8883
Fax No.: 1-503-684-3332
is in conformity with Part 15 of the FCC Rules. Operation
is subject to the following two conditions: 1) This device
may not cause harmful interference. 2) This device must
accept any interference received, including interference
that may cause undesired operation.
www.oregonscientific.com), or
Oregon 97062 USA
EC-DECLARATION OF CONFORMITY
Hereby, Oregon Scientific, declares that this Music
Orbit + Music Station Portable MP3 / WMA / CD Player
with Stereo Speaker Dock model DDM328 is in
compliance with the essential requirements and other
relevant provisions of EMC directive 89 / 336 / CE and
LVD directive 73 / 23 / EC. A copy of the signed and
dated Declaration of Conformity is available on request
via our Oregon Scientific Customer Service.
EN
WARNING
approved by the party responsible for compliance could
void the user's authority to operate the equipment.
NOTE
comply with the limits for a Class B digital device,
pursuant to Part 15 of the FCC Rules. These limits are
designed to provide reasonable protection against
harmful interference in a residential installation.
This equipment generates, uses and can radiate radio
frequency energy and, if not installed and used in
accordance with the instructions, may cause harmful
interference to radio communications. However, there
is no guarantee that interference will not occur in a
particular installation. If this equipment does cause
harmful interference to radio or television reception,
which can be determined by turning the equipment off
and on, the user is encouraged to try to correct the
interference by one or more of the following measures:
• Reorient or relocate the receiving antenna.
• Increase the separation between the equipment and
• Connect the equipment into an outlet on a circuit
• Consult the dealer or an experienced radio / TV
DDM328 Eng R9 OP 5/9/05, 10:02 AM15
Changes or modifications not expressly
This equipment has been tested and found to
receiver.
different from that to which the receiver is connected.
technician for help.
COUNTRIES RTTE APPROVAL COMPLIED
All EC countries, Switzerland CH
and Norway N
15
 Loading...