

Page 1
CS1500 CHAINSAW
Quick Start Instructions
ATTENTION! Bar and chain oil
prevents premature wear. Never
operate the chainsaw if oil is not
visible in the inspection window.
Check oil level frequently and ll as
needed.
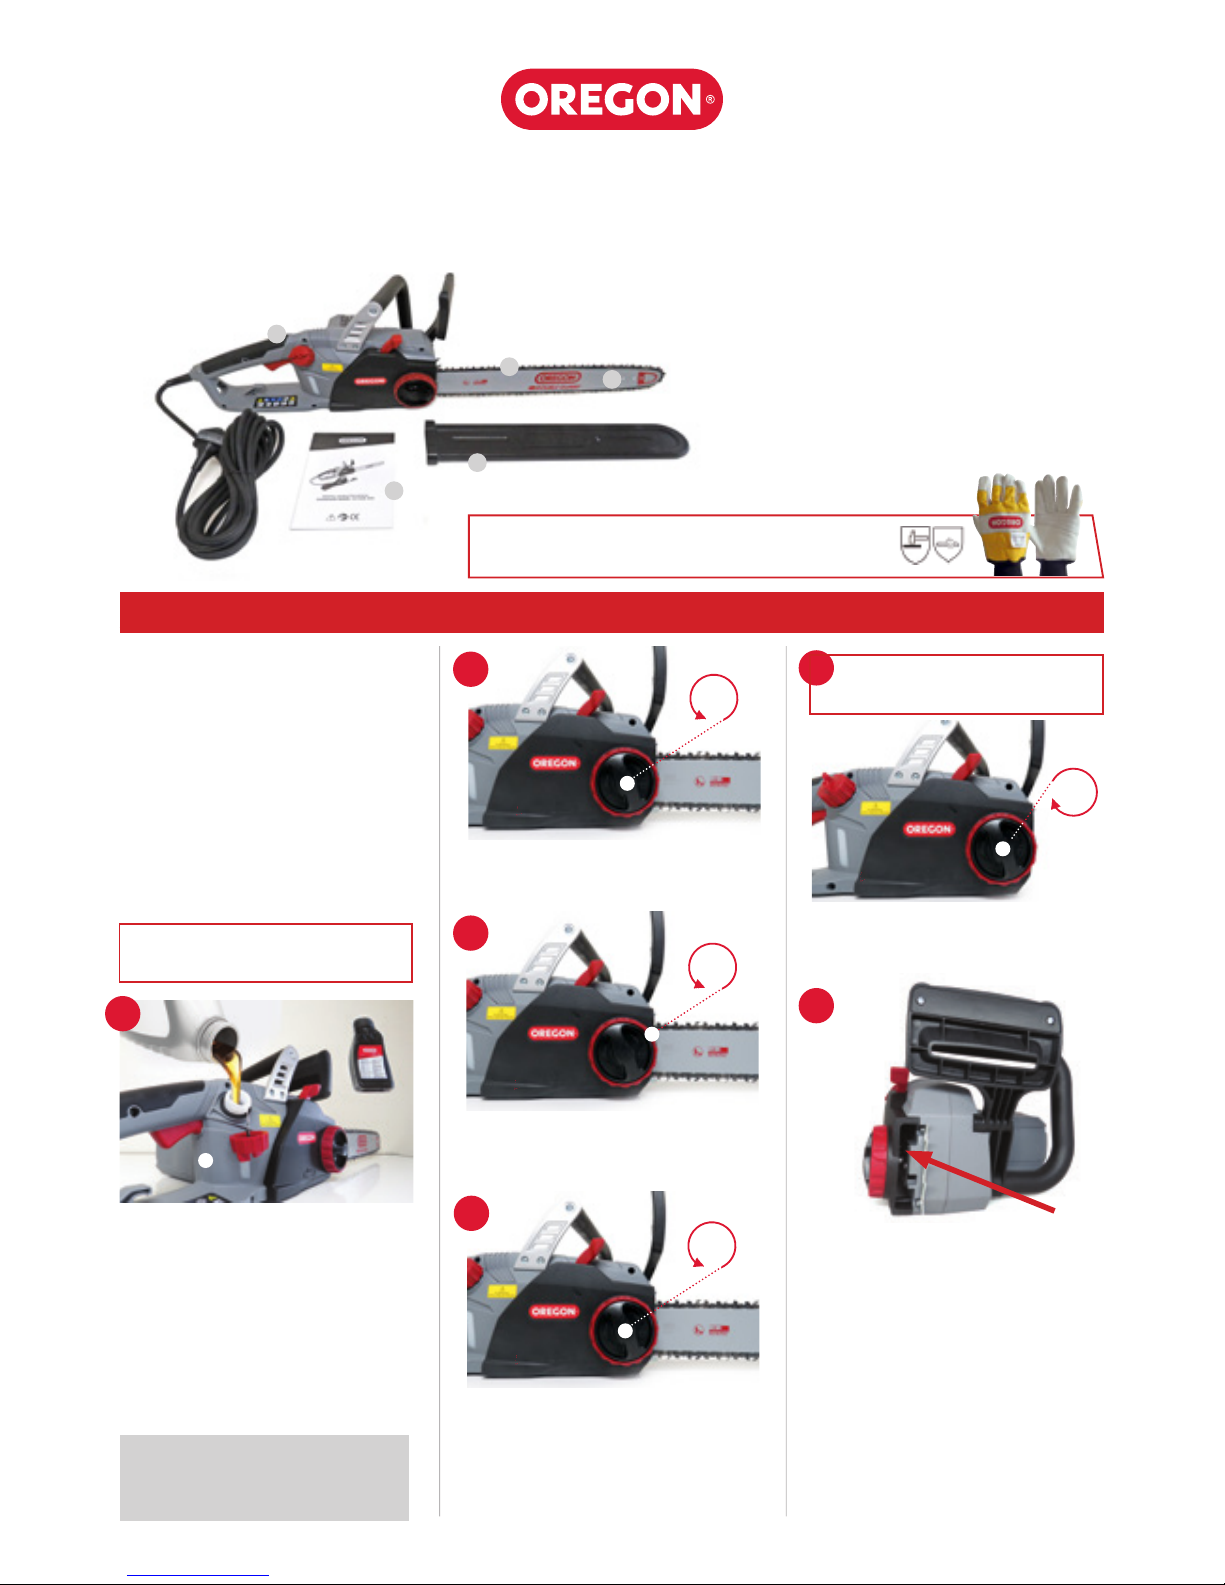
STEP 4: Fully loosen the side cover
release knob (A) and remove the side
cover. Remove the bar and saw chain.
ATTENTION! Chainsaw chain is sharp,
wear suitable gloves when handling.
4
STEP 2: Loosen the side cover release
knob (A) slightly. Do not fully remove
the side cover
BLACK
A
STEP 3: Loosen the chain tensioning
ring (B) by turning counter-clockwise
until it stops
BLACK
A
STEP 5: Re-t the side cover and fully
tighten the side cover release knob (A).
Note bar and chain removed.
RED
B
BLACK
A
5
ATTENTION! SAFETY NOTICE
Unplug the chainsaw
3
ATTENTION! SAFETY NOTICE
Plug in the chainsaw
2
STEP 6: Run the saw for around 2
minutes or until you see oil present on
the bar pad.
When the oil system has been primed
as per the above steps, unplug
the chainsaw and re-t the bar
and sawchain as described in the
instruction manual under “Maintaining
the guide bar”
Remember to top up your bar and
chain oil regularly.
6
IMPORTANT SAFETY NOTICE
Wear protective gloves when handling chainsaw chain.
After removing the chainsaw from the box, inspect it
carefully to ensure no damage has occurred during
shipping and that no parts are missing. If any parts
are damaged or missing, do not use the chainsaw.
Contact Oregon® to obtain replacement parts. For
country-specic telephone numbers, see “Customer
Service by Country”.
This sheet is meant to be a suppliment, not a replacement for your operator’s manual.
What’s in the Box?
These items ship with the chainsaw:
1) Chainsaw
2) Guide Bar
3) Saw Chain
4) Instruction Manual
5) Blade Cover
5
4
2
3
1
FILLING THE BAR AND CHAIN OIL
RESERVOIR
STEP 1: Place the chainsaw n a firm,
flat surface, so that the oil cap (A) is
on top.
• Clean any debris from the cap area.
• Remove the cap.
• Carefully pour 120 ml of bar and
chain oil into the reservoir.
A
If the reservoir is totally full on
initial startup, it can slow down
the prime. We suggest 90% full.
1
Page 2
CS1500 CHAINSAW
Quick Start Instructions
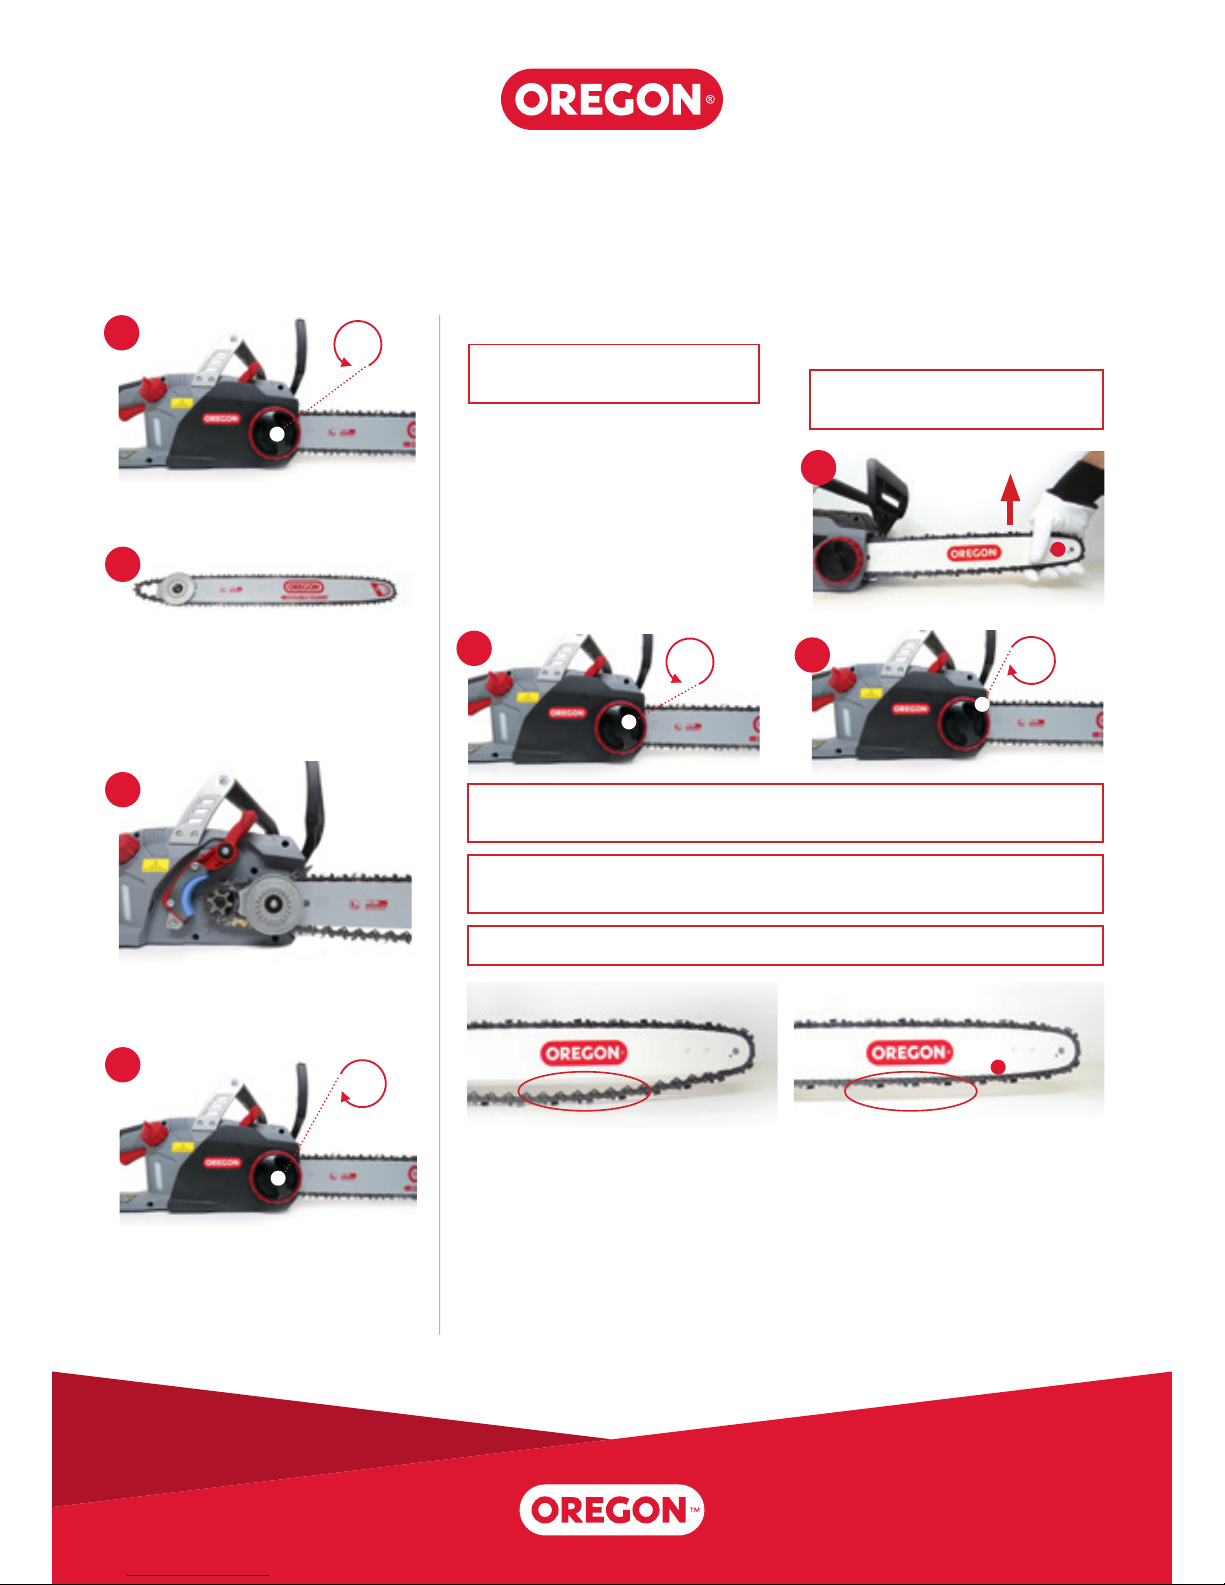
TENSIONING THE SAW CHAIN
STEP 11:
Loosen the side cover release
knob slightly, but do not remove the
side cover.
STEP 12:
Hold up the nose of the guide
bar (A) and turn the chain tensioning
ring clockwise.
STEP 13:
Tighten the chain tensioning
ring until the lowest cutters
underneath the bar solidly contact the
bar (B).
STEP 14:
Lightly pull on the chain. The tension is correct when the chain snaps back
after being pulled 3 mm away from the guide bar.
STEP 15:
After a short period of use, allow the chain to cool, unplug the chainsaw
and check the tension again. Watch tension carefully for the rst half-hour of use and
periodically throughout the life of the chain readjusting as required when the chain
and bar are cool to the touch. Never tension chain when it is hot.
Chain will stretch as a result of normal use, however, insucient oil, aggressive use,
or failure to perform recommended maintenance can lead to premature stretching.
INCORRECT
CORRECT
IMPORTANT: The saw chain must be
properly tensioned before using.
ATTENTION! SAFETY NOTICE
Wear Chainsaw Protective Gloves
B
WARNING An electric power tool that is plugged in can start accidentally.
Unplug the chainsaw before preparing for use or performing maintenance.
WARNING If the chain is still loose when the saw is at maximum tension, replace
the chain.
IMPORTANT Only tension the saw chain when the chain is cool.
A
12
ATTENTION! SAFETY NOTICE
Unplug the chainsaw
11
BLACK
B
13
RED
B
ASSEMBLING THE GUIDE BAR
AND SAW CHAIN
STEP 8: Loop the saw chain onto the
drive sprocket so that the cutting edges
of the teeth along the top of the bar
face the way from the powerhead.
8
STEP 9: Feed the chain into the groove of
the bar and slide the bar away from the
motor to remove slack from the chain.
9
STEP 10: Install the side cover,
making sure the chain catcher and side
cover tabs are seated in their proper
locations, then lightly tighten the side
cover knob (B).
10
BLACK
B
STEP 7: Fully loosen the side cover release
knob (A) and remove the side cover.
7
BLACK
B
 Loading...