

Page 1
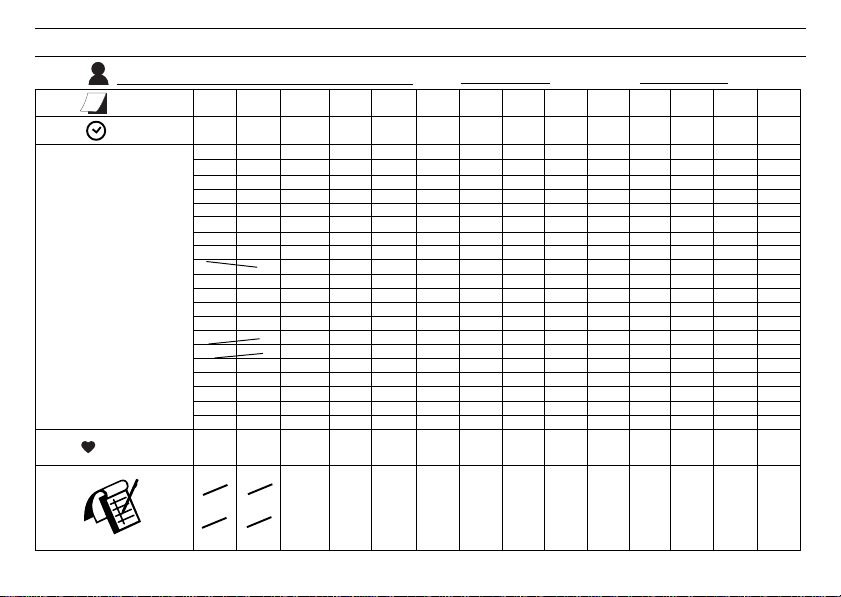
LOG BOOK
: Age: Weight: kg/lbs
1
mmHg
2
220
200
180
160
140
120
100
80
60
21.2
10:05
x
x
x
22.2
10:12
x
x
x
GB
/ min
85 90
158
155
92
110
93
112
1
Page 2

GB
GB
LEGEND : - FAST INCREMENT
- FLASHING
- PRESS BUTTON
BOLD
BOLD
- PRESS AND HOLD BUTTON
F
LEGENDE : - AUGMENTATON RAPIDE
- CLIGNOTEMENT
- APPUYER SUR LE BOUTON
BOLD
BOLD
- APPUYER SANS LACHER SUR LE BOUTON
ES
LEYENDA : - INCREMENTO RÁPIDO
- DESTELLANDO
- PULSAR BOTÓN
BOLD
BOLD
- PULSAR MANTENER OPRIMIDO EL BOTÓN
2
Page 3

WRIST TYPE BLOOD PRESSURE
MONITOR
MODEL: BPW128
USER’S MANUAL
INTRODUCTION
Thank you for purchasing the Wrist Blood-Pressure Monitor
(BPW128). This unit has been constructed using reliable circuitry
and durable materials. Used properly, this unit will provide years of
satisfactory use.
Before use please note:
- This device is intended for non-invasive measuring and
monitoring of arterial blood pressure. Designed for use on
the wrist, it is not intended for use on other extremities or
for other functions other than obtaining a blood-pressure
measurement.
- If the cuff pressure exceeds 300mmHg, this unit will
automatically deflate. Should the cuff not deflate when
pressures exceeds 300mmHg, the user is required to detach
the cuff from the wrist.
- Do not begin medical treatment based solely on obtained
measurement values from this device. Consult a physician
for treatment advice.
- To avoid measurement errors, read this manual carefully
before use.
GB
INFORMATION CONCERNING THE CE
SYMBOL
This device complies with the European regulations based on the
Medical Products Code, and bears the CE mark “CE0123”. The
device has been quality inspected according to EG guideline
93/42/EWG and tested in compliance to the EN1060-1
Non-invasive sphygmomanometers-Part 1, General requirements
and EN1060-3 Non-invasive sphygmomanometers-Part 3:
Supplementary requirements for electromechanical blood
pressure measuring systems. It is therefore not subject to
calibration regulations and does not bear a calibration stamp.
The CE mark further indicates that this blood pressure monitor
meets the general requirements for electronic products as regards
resistance to electromagnetic interference. Malfunctioning may
however occur in the proximity of extremely strong
electromagnetic fields.
In accordance with the “Ordinance for Operators of Medical
Products”, a technical inspection must be carried out if this
device is used for industrial or commercial purposes.
3
Page 4
GB
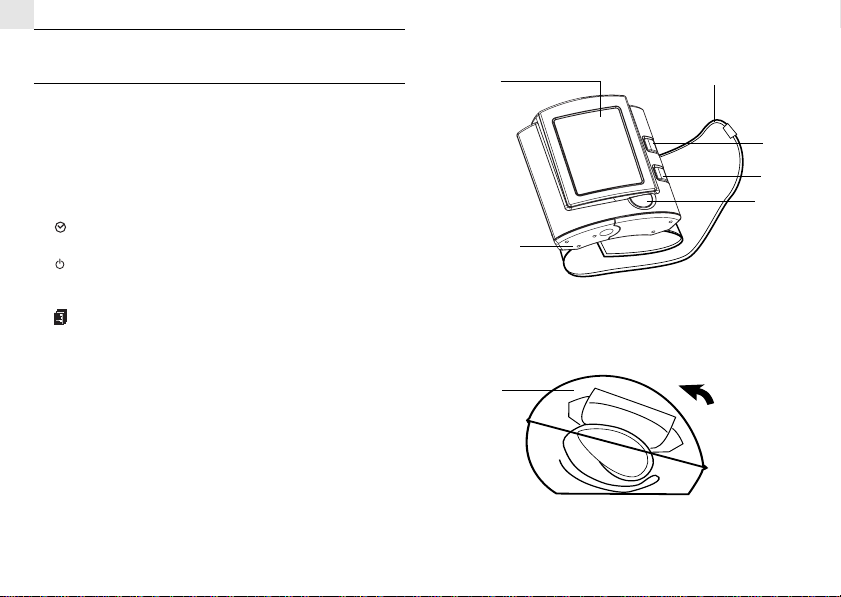
DESCRIPTION AND FUNCTION OF
PARTS
A. Liquid Crystal Display (LCD) and protective cover
- Large easy-reading display
- 5 functional symbols
- Systolic [SYS/mmHg], Diastolic [DIA/mmHg], Mean
[MAP/mmHg], Pulse [pul/min.]and date & time display.
B. Battery compartment
Houses two (2) LR03 /AAA/ UM4 size 1.5V batteries
Button
C.
- For time adjustment.
D.
Button
- Activates and deactivates the unit and initiates pressure
measuement process.
▲ ▲
/
▲ Button
E.
▲ ▲
- Recall memory or increases a value.
F. Wrist cuff
- For wrapping around the wrist.
G. Storage container
- Houses and neatly stores the unit.
A
B
G
4
F
E
C
D
Page 5
DISPLAY-SYMBOL DESCRIPTION
Symbol Description Explanation
Memory Mark
Weak Battery
Inflating Mark
Air releasing
Appears when
measurement value is
recalled from memory
Appears when batteries
should be replaced
Appears when inflating
until pressure is enough
Appears when cuff air is
exhausting
INSTALLING BATTERIES
1. Slide battery cover off.
2. Install batteries first. Ensure
correct polarity.
Battery Type:
2 Alkaline LR03 (AAA)size
3. Replace the cover.
Replace the batteries if:
1. the weak battery mark appears
in the display
2. nothing appears in the display
when the power is switched on.
If not disposed of properly, batteries can be harmful.
Protect the environment by taking exhausted batteries
to authorized disposal stations.
Note:
When battery power is low, replace all the batteries.
GB
AAA
AAA
Pulse Mark
Shows the pulse rate per
minute
5
Page 6

GB
PROPER EQUIPMENT SETUP
1. Remove all watches, jewelry, etc. prior to attaching the wrist monitor. Clothing sleeves should be rolled up and the cuff should be wrapped
on bare skin for correct measurements.
2. Apply cuff to left wrist with palm facing up.
3. Make sure the edge of the cuff is about 1 cm from the plam.
4. In order to ensure accurate measurements, fasten the velcro strap securely around your wrist so there is no extra space between the cuff
and the wrist. If the cuff is not wrapped tight enough, the measurement values will be inaccurate.
5. The measurement values will be correct even if you wrap the cuff askew.
6. If your physician has diagnosed you with poor circulation on your left arm, carefully place the cuff around your right wrist.
1cm
6
Page 7

BLOOD PRESURE DEFINITIONS
Information obtained from the World Health Organization (WHO)
Hypertension systolic over 160
(high pressure) diastolic over 95
95
Hypertonia systolic 140-159
(Border value) diastolic 90-94
90
Hypotension Normal
(low pressure) range
systolic under 90 systolic 139
diastolic (mmHg)
please note:
-Hypotension value is for reference only.
-Blood pressure is considered high when either the diastolic
or systolic blood pressure value exceeds normal range.
-Consult a medical professional when blood-pressure values
are outside of the normal range.
diastolic 89
90 140 160
Systolic (mmHg)
WHAT IS MEAN ARTERIAL PRESSURE
(MAP)
The Mean Arterial Pressure is the average pressure forcing blood
through the arteries. It is not the average of the systolic and diastolic
blood pressure. It corresponds to a state of balance between the
compressive and expansive forces acting on the arterial wall when
there is no distension of the arterial wall, either outward or inward.
MAP is an excellent way to evaluate the stress on the walls of the
vessels. It is useful to quickly evaluate excessive load on the
cardiovascular system. Show the history of the MAP to your doctor
may help providing more information for his reference to understand
your situation.
Important:
!
Consult your doctor on Mean Arterial Pressure.
OSCILLOMETRIC MEASURING METHOD
This device adopts the Oscillometric Measuring Method to provide
readings of not only Diastolic and Systolic blood pressure, but also,
unique, Mean Arterial Pressure. The Oscillometric Measuring Method
was first described by Marey in the late 1800s, several decades
before Korotkoffs description of the auscultatory method. The
Oscillometric Measuring Method is a good means to determine the
systolic / diastolic / mean blood pressure based on the measurement
of pressure oscillation during the cuff pressure deflation phase.
7
GB
Page 8

GB
MEASUREMENT
With the individual in a sitting position and with the cuff attached as
previously mentioned, a blood pressure reading can be obtained.
Note:
- For accurate pressure measurement, take blood-pressure
readings in a seated position. Avoid leaning back while
the measurement is being taken.
- Ensure that the lower arm is raised so that the upper edge
of the cuff is on the same level as the heart.
- Ideally, place the palm of the hand facing upwards.
+
+
- In order to ensure a proper measurement, sit quietly and
avoid talking and moving the fingers and hand. Rapid
movements or other activities may alter blood pressure
readings.
- At any time, to stop the pressurizing process, press the
"
"Button; the cuff will stop inflating and air will exhaust
from the unit.
8
Page 9

Refer to Fig1
GB
HOW TO TAKE MEASUREMENT
Fig1
2sec
Fig1
9
Page 10

GB
Note:
1. Remove all watches, jewelry, etc. prior to attaching the wrist
monitor. Clothing sleeves should be rolled up and the cuff should
be wrapped on bare skin for correct measurements.
2. Apply cuff to left wrist with palm facing up.
3. Make sure the edge of the cuff is about 1 cm from the plam.
4. In order to ensure accurate measurements, fasten the velcro strap
securely around your wrist so there is no extra space between the
cuff and the wrist. If the cuff is not wrapped tight enough, the
measurement values will be inaccurate.
5. Press the "
6. To interrupt the measurement, simply press
will deflate immediatey after the button is pressed.
7. Do not talk or move your arm or hand muscles. This monitor will
re-inflate automatically if the system detects that your body
needs higher pressure to measure your blood pressure.
8. Each reading will be saved to the memory automatically after
each measurement.
9. Up to 30 measurements can be stored to the memory.
" Button, to start the measurement process.
button. The cuff
HOW TO RECALL VALUES FROM
MEMORY
Refer to Fig2
2sec
Fig 2
Note:
a. The latest measurement will be shown first.
b. Every new press of the calls for one prior value stored.
c. The date & time of measurement will be shown in the memory of
the same time.
10
Page 11

Refer to Fig3
GB
HOW TO SET THE TIME
mode
Fig 3
11
Page 12

GB
Note:
1. Press and hold the [
]button for 2 seconds, the display will flash
12h or 24h.
2. Press the [
3. Press the [
4. The hour digits will flash. Press the [
5. Press the [
6. The minutes digits will flash. Press the [
▲ ▲
▲ ] button to select either 12 hour or 24 hour display.
▲ ▲
] button to accept
▲ ▲
▲ ] button to set the hour
▲ ▲
] button to accept
▲ ▲
▲ ] button to set the
▲ ▲
minutes
7. Press the [
] button to accept
8. Similarly, set the display for year, day / month or month / day
setting, month and date.
9. Press the [
] button to exit time date setting.
AUTOMATIC POWER OFF
The device will automatically switch off after about 1 minute.
However, to conserve battery power, press the button when
finished to turn the unit off.
ERROR MESSAGES
Description
12
Display
Err 1
Err 2, 8,
Incorrect measurement
12, 13,
14, 15
Cuff is not fastened
Err 3
Vigorous motion is being
Err 4
detected during
measurement
Err 5,
Measurement error
6, 7
Calibration error
Err 9,
10,11
Deflation period too long
Remedies
Do not move during deflation.
Check whether the unit is worn
well on wrist and measure
again.
Check if battery power is low.
Change all batteries and
measure again.
Fasten the cuff and measure
again.
Stay calm and easy then
measure again.
Stay calm and easy then
measure again.
Retry again, return the unit to
the manufacturer for repairing
if same symptom persists.
(Repairing/Replacement
charge free only if under the
valid warranty. Proof of
purchase is needed).
Page 13

MAINTENANCE, CLEANING AND CARE
When handled properly, this unit is engineered to give years of
satisfactory service.
Here are a few product care instructions:
- When not in use, store the unit in the protective plastic container
provided with your purchase.
- Do not immerse the unit in water. If the unit comes in contact with
water, dry it immediately with a soft lint-free cloth.
- The unit casing and the cuff may be carefully cleaned with a soft,
slightly moistened cloth. Do not use abrasive or corrosive
cleaning agents which might damage the device.
- Remove the batteries if the device will not be used for long
periods of time.
- When replacing batteries, use new batteries as specified in this
instruction manual. Do not mix new and old batteries.
- Do not place objects on the cuff, or the main unit.
- Do not subject the unit to excessive force, shock, dust, temperature,
or humidity. Such treatment may result in malfunction, a shorter
electronic life span, damaged batteries or distorted parts.
- Do not tamper with the unit’s internal components. Doing so will
terminate the unit’s warranty and may cause damage. The unit
contains no user-serviceable parts.
- If, one day, the device should not be required for further use,
protect the environment by bringing it to your dealer or designated
collection point for proper disposal.
GB
SPECIFICATIONS
Measuring method : Oscillometric / non-invasive
Application : Adults
Measurement location : Wrist section of lower arm
Circumference (approx. )
5.3"-7.7"(13.5-19.5cm)
Pressure Measuring range : 30 - 280mmHg
Pulse Measuring Range : 30 - 200 pulse/min
Accuracy : (Pressure) +/- 3mmHg
(Pulse) +/- 5%
Operating environment
Operation : 50°F ... 104°F (10°C...40°C)
(10% ... 83% rel. hum.)
Storage / Transport: -4°F...158°F (-20°C... 70°C)
(10% ... 83% rel.hum.)
Power supply : 3.V DC, two (2) LR03/AAA /UM4
size batteries
Dimensions : approx. 3.1"(H)x3.0"(W)x1.3"(D)
(80mm(H)x77mm(W)x34mm(D)
Weight : 4 oz (without battery)
13
Page 14

GB
SYMBOL DESCRIPTIONS
!
0 1 2 3
This device is complied to American National Standard:
ANSI/AAMI SP10-1992.
Manufacturer : IDT Technology Limited
Customer Assistance : Oregon Scientific, Inc.
Please observe user’s manual
Protection class BF
DC (Direct current)
9/F Kaiser Estate Phase 1
41 Man Yue Street
Hunghom, Kowloon
Hong Kong
19861 SW 95th Place
Tualatin, OR 97062
U.S.A.
website address:
www.oregonscientific.com
Should you require assistance regarding this product and its operation,
please contact our Customer Care Department at 1-800-853-8883 or
via email at helpme@oscientific.com.
WARRANTY
This product is warranted to be free of manufacturing defects for a
period of 12 months from date of retail purchase. Defective product
should be directed to the place of retail purchase for exchange.
Should this not be possible, contact our customer care department for
assistance and a return material authorization. No returns may be
made without a return authorization. Warranty exchanges require
proof of date of purchase (purchase receipt showing date, place and
product purchased).
This warranty does not cover product subjected to abuse, misuse,
accidental damage or tampering.
IMPORTANT ADVICE - RETAIN FOR
FUTURE REFERENCE
For meaningful comparisons, it is suggested to measure the blood
pressure under similar conditions. For example, daily measurements
should be taken at approximately the same time or as suggested by
a medical professional. Physical activity may affect blood pressure;
rest about 5 minutes before obtaining a blood pressure measurement.
Blood pressure measurements are not a treatment. Initiating treatment
or making changes to a treatment regime should not be implemented
without first consulting a physician.
Measurement error will be indicated on the display. Check the cuff
and tubing for possible kinks or air leaks. Before attempting a
14
Page 15

measurement again, ensure that the cuff is properly attached, the arm
is in the proper position and that movement has been minimized
during the measurement process.
If the device does not function:
- Check that the unit is on. After about 3 minutes of inactivity,
the unit will automatically turn off.
- Ensure that batteries are properly inserted. Batteries may be
exhausted and require replacement. A battery-low indicator
] will display to indicate that batteries are low and need
[
changing.
Measurement errors may occur in persons with very low blood
pressure or heart-rhythm irregularities. For individuals with special
health conditions consult a physician.
Note:
This device is intended for adult use only. Do not use
this unit on children without first consulting a physician.
GB
- The content of this manual is subject to change with-
CAUTION
out further notice.
- Due to printing limitation, the displays shown in this
manual may differ from the actual display.
- The contents of this manual may not be reproduced
without the permission of the manufacturer.
15
 Loading...