

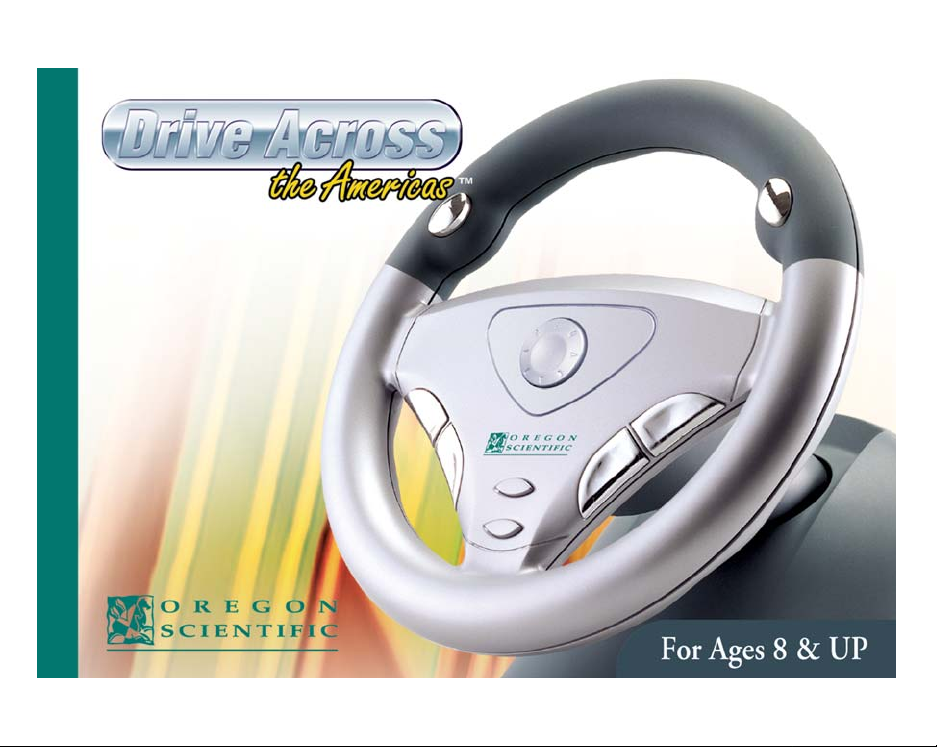
Page 1
Page 2

Chapter 1:
Set-up and Installation Procedure .............................................................................1-3
Chapter 2:
Welcome Explorer! ..................................................................................................... 3-5
Chapter 3:
Driving the Car ............................................................................................................6-9
Chapter 4:
The Activity Stops ......................................................................................................9-15
Appendix A:
Troubleshooting .......................................................................................................16-17
Appendix B:
License Agreement and Warranty ......................................................................... 18-20
Table of Contents
Page 3
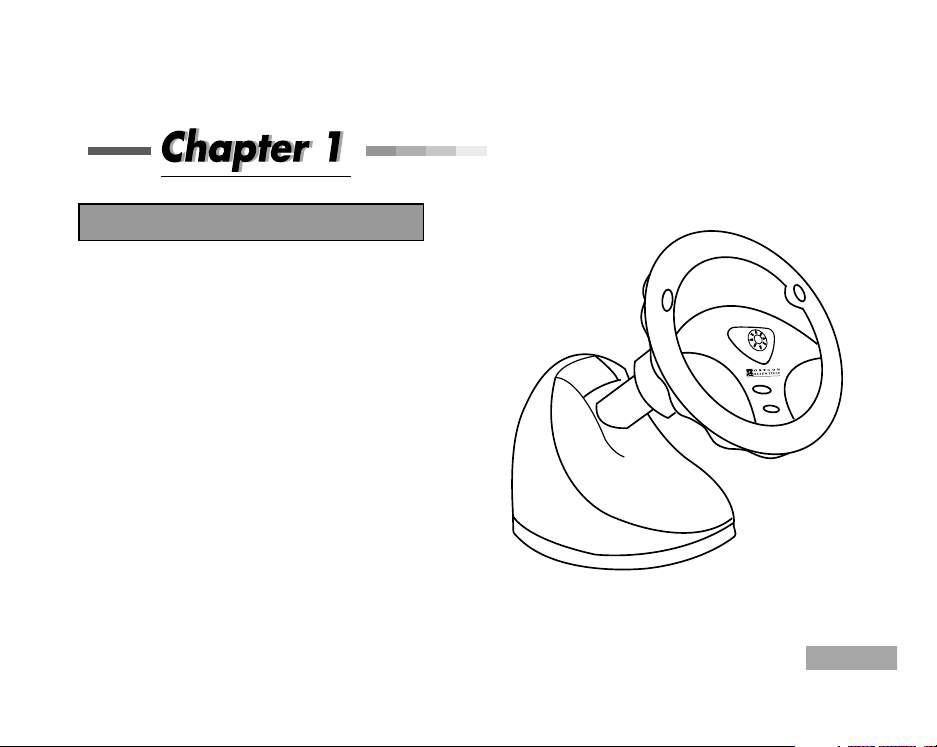
1
Set-up and Installation Procedure
Minimum system requirements
• Pentium II 266 MHz • 250 MB of hard drive space
• 64 MB RAM • Standard Sound card
• 3D display card with 8MB of RAM • Windows 98
• 8x CD-ROM • USB Port
Recommended system requirements
• Pentium II 350+ MHz
• 128 MB RAM
• 3D display card with 16MB of RAM
• 24x CD-ROM
• 400 MB of hard drive space
• Standard sound card
• Windows 98
• USB Port
Page 4

2
The Driving Wheel
1) Connect the wheel to one of the USB ports at the back of the PC. Windows will automatically detect the new hardware and launch the
new hardware wizard.
2) The Wizard will ask you where to look for the correct driver for the wheel. Choose the C drive (or the hard drive where Windows is
installed).
3) It should find the USB Human Interface Driver. Click Next and then Finish to complete the installation.
If the hardware installation wizard does not start automatically you can select the Start Menu/ Settings/ Control Panel/ Add Remove
Hardware option. You will need to select the USB Human Interface Device.
Once the driver has been installed it is advisable to calibrate the controller.
1) Open the Control Panel and double click the Game Controllers icon.
2) Click on Properties. Click the Settings tab and then click Calibrate. Follow the instructions to calibrate the controller. When you are
asked to move the handle in a complete circle you should turn the wheel as far as it goes from left to right and fully press the Gas and
Brake buttons several times. The controller does not have an axis 3 so please just click Next on that part.
Installing the Software
Insert the CD-ROM into the CD-ROM drive. The installation should start automatically but if it does not, double click the Setup.exe file in
the CD-ROM folder. The onscreen instructions will take you through the rest of the set-up. Please choose the “Install Direct X 8.0” option if
it is not already installed on your machine. Choose the minimum installation option if you only have 250 MB of hard drive space. Choose the
maximum installation option if you have 450 MB of hard drive space. If you choose the minimum installation option you must leave the CD
in the CD-R0M while playing as the machine will access the sound files directly from there. Loading times will be longer in this case.
The maximum option will install high-resoluion textures. The minimum option will install low-resolution textures. This refers to the quality
of the pictures that are placed on the 3D objects in the 3D cities. You should choose high-resolution textures if you have a high powered
machine with a lot of memory. You should choose low-resolution textures if your PC configuration is quite low. A PC with anything above the
minimum requirements for Drive Across the AmericasTM should be able to perform adequately with high resolution textures installed,
However, if you find that the performance is too slow or that the loading time for the 3D cities is very long then you should reinstall the
program with low-resolution textures.
The serial number is printed on a sticker on the inside front cover of the manual.
Page 5
3
The Web Page
There is a dedicated web site for Drive Across the AmericasTMat www.driveacross.net. Many of the features offered are only available when
you play the game. There are hotlinks embedded in the game in every city. These links will take you to the page for that city. To use these links
make sure that you have an account with an Internet Service Provider and that your computer is connected to the Internet.
When you use a link the PC will minimize Drive Across and launch your internet browser. Before it does this, you will be asked if you want
to save your game. When you have finished browsing quit the explorer and return to the game by clicking on the Drive Across the Americas
TM
button in the Windows Task Bar.
The city pages contain links to other web pages with more information about the city and other general learning pages. The 3D city pages also
have Internet postcards for you to send to friends. The links are updated from our server to ensure that they are always up to date and suitable
for young ages. Our web site provides a safe Internet environment that ensures young people will not encounter any unsuitable
material.
For best results we recommend using Internet Explorer 4.0 or above or Netscape Navigator 3.0 or above.
Welcome Explorer!
Drive Across the AmericasTMis a unique way to explore the Americas. You can drive around beautiful 3D cities and learn many interesting
facts about places all over the Americas. In the 3D cities you can stop and play fun learning activities that will reward you with points to spend
on gas (essential!) and new cars.
Before you can start exploring you should learn some basic navigation rules that will help you find your way around the virtual world of Drive
Across the Americas
TM
. This chapter will describe the screens that you will see after the introductory animation has finished. You can skip
the animation by pressing the space bar.
Chapter 2
Page 6
4
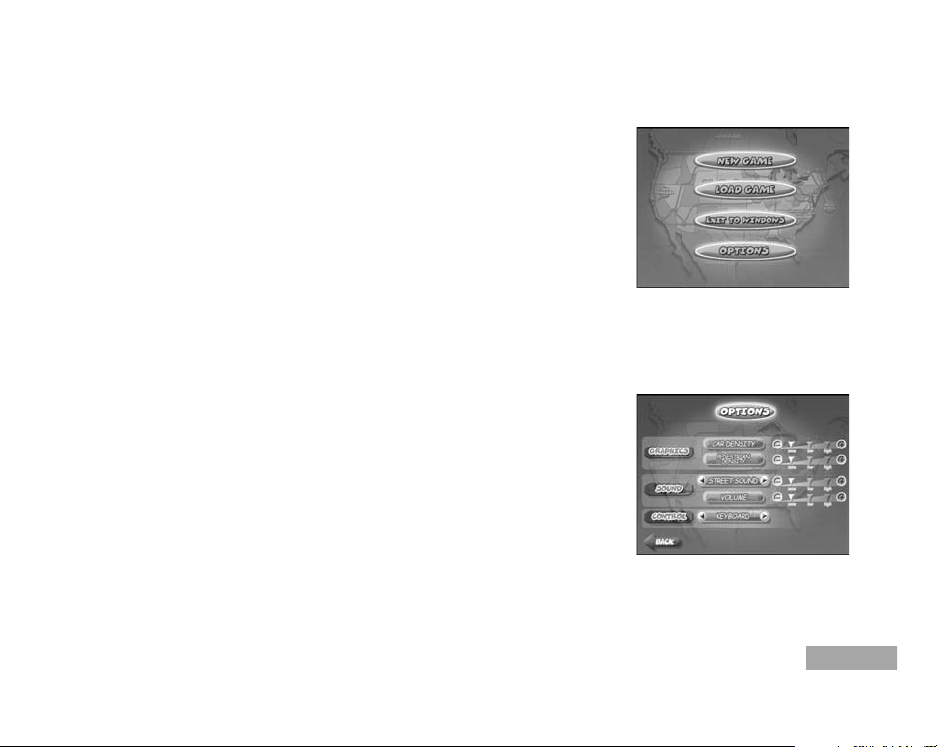
Title Screen
There are four options on the title screen: New, Continue, Options and Exit to Windows.
Clicking on New will start a new game. First you must select a character and enter your name. The
character you select will appear on your driver’s license but will not affect the game in any other way.
Use the left and right arrows to select a character, then type your name in the box. Press Enter or click
OK when you have finished and you will be taken to the Map Screen.
Click on Continue if you want to load a game that you were playing earlier. A dialogue box will open
up showing the names of all the previously saved games. Click on the name and then click Load to
load it. You will then be taken to the Map Screen.
You get the options screen by clicking on Options.
Options Screens
The options screen allows you to customize some of the game settings. Use the mouse in the options
screen to click on the buttons. The graphics options are useful if you find that the 3D driving is not
running very smoothly. Slower computers, computers with low memory or a low memory graphics
card might have problems processing the graphics in the cities. To speed things up try reducing the
number of pedestrians and reducing the number of cars. If that doesn’t work you could try using low
res textures (see the chapter on installation to find out about this) N.B.: If your computer
configuration is lower than the recommended requirements you will not get the smoothest results. If
your computer is below the minimum requirement then we do not guarantee that the game will play
at all.
Use the sound options to change the volume of the music and sound effects. You can also choose
whether you want to be able to listen to the in-game music tracks using the CD-Player (See chapter 3), or whether you want to have the ambient
street sounds while you drive.
You can also access the options screen from the map screens and 3D cities. The in-game options are slightly different, see chapter 3 for more
details.
Page 7
5
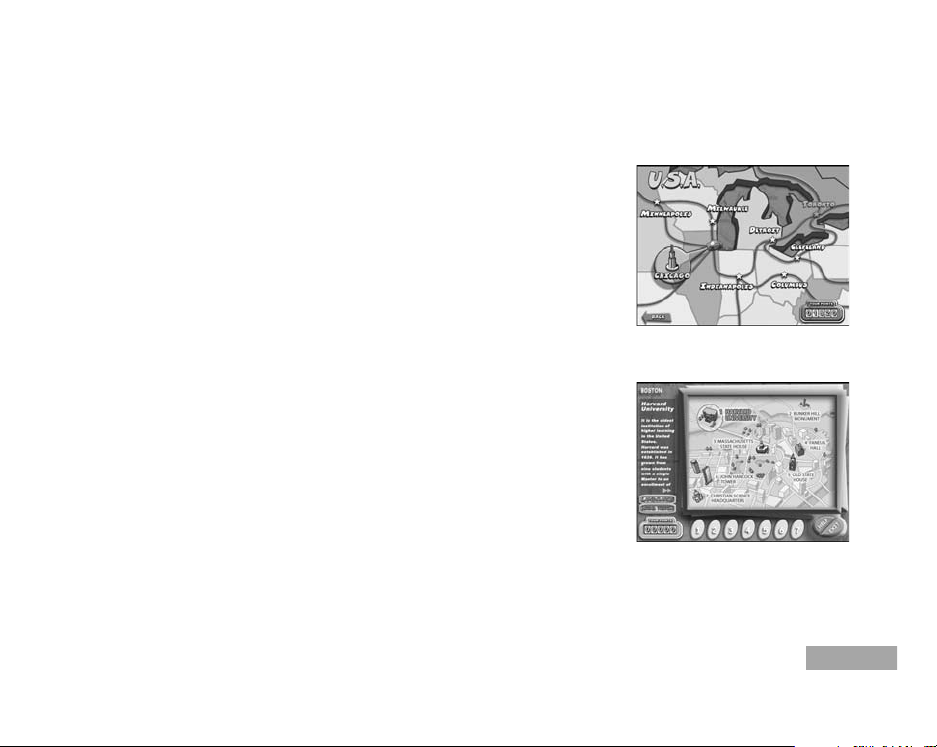
Map Screen
You can plan your route using the map page. The main map shows the whole of the Americas. By
clicking on one of the names (Canada, USA, Mexico and Central America or South America), the map
will zoom to show that area in more detail. The US is further divided up into four regions that can
be zoomed in on by clicking the mouse somewhere on the map, but not on a city. Click on the city
you want to Enter with the mouse, or press the Enter button on the wheel.
When you are looking at a small map, click on the Back button to zoom out and see the bigger map.
On the largest map screen there is an Options button and a “Back to Title” button that you can click
on. If you go back to the title page, your current game will end. The Options button will take you to
the in-game options screen. This is the same as the options available to you on the title page with the
addition of a Save game option. See Chapter 3 for more information about saving your game.
The Cities and Landmarks
There are two different types of city in Drive Across the AmericasTM, 3D cities and Picture Cities. The
3D cities are modeled cities for you to drive around and explore. There are five of these marked on
the map with a large city icon. They are Chicago, New York City, Toronto, Washington D.C. and San
Francisco. You can find out more about these in Chapter 3.
The Picture Cities are marked on the map with a small star. In a Picture City there are two option
buttons, Local Trivia and Landmarks. When you are in the Landmarks mode you will see a map of
the city with some landmarks marked on it. By clicking on the number buttons you will be able to
read about the different landmarks. In the Local Trivia mode the number buttons will give you
information about events, people or history from the State.
There are also some Remote Landmarks on the map that function like Picture Cities. You will see a picture of the landmark and you can read
some information about it.
The Web Link button will take you to the web page for that city. See Chapter 1 for more information about this. Exit the Picture City or Remote
Landmark by clicking on the Exit button.
Page 8

6
Chapter 3
Gas
Button
Navigator
Reverse Button
Music Player
Drive Button
Horn
Pause
Enter Button
Brake
Button
View change
Driving The Car
There are five 3D cities to explore, all with unique buildings. In each city there are many famous
landmarks that you can drive around and look at. To see the sights you need to get used to driving
the car.
Car Controls
Most standard PC driving wheels are compatible with Drive Across the AmericasTMbut the Oregon Scientific driving wheel has been designed
to work with the game.
Gas Button: Press and hold this to make the car move. It is analogue so the harder you push it the faster you will go.
Brake Button: This button makes the car stop.
Drive Button: Pressing this button puts the car into Drive. All the cars are automatic so you do not need to change gears while accelerating.
When you are in Drive pressing the Gas button will make the car move forwards.
Reverse Button: Press this button to put the car into reverse. When you are in Reverse
pressing the Gas button will make the car move backwards.
Enter Button: Press this button when you are outside an activity to enter it
Horn: While you are driving, this button will sound the car’s horn.
Music Player: Press this button while you are driving to start and stop the
music. (See below).
Navigator: Zoom in on the navigator view with this button. For more
information about the navigator, see below.
View Change: To change between the different views, press this button.
Pause: Press this button to pause and resume the game. It will bring up the
pause options screen.
Page 9
7
You can also use the keyboard to control the car:
Driving Wheel Keyboard Equivalent
Steering Wheel Left and right Cursor Arrow
Gas Button Up Cursor Arrow
Brake Button Down Cursor Arrow
Drive Button D
Reverse Button R
Enter Button Space Bar
Horn H
Navigator N
View Change V
Pause P or Escape
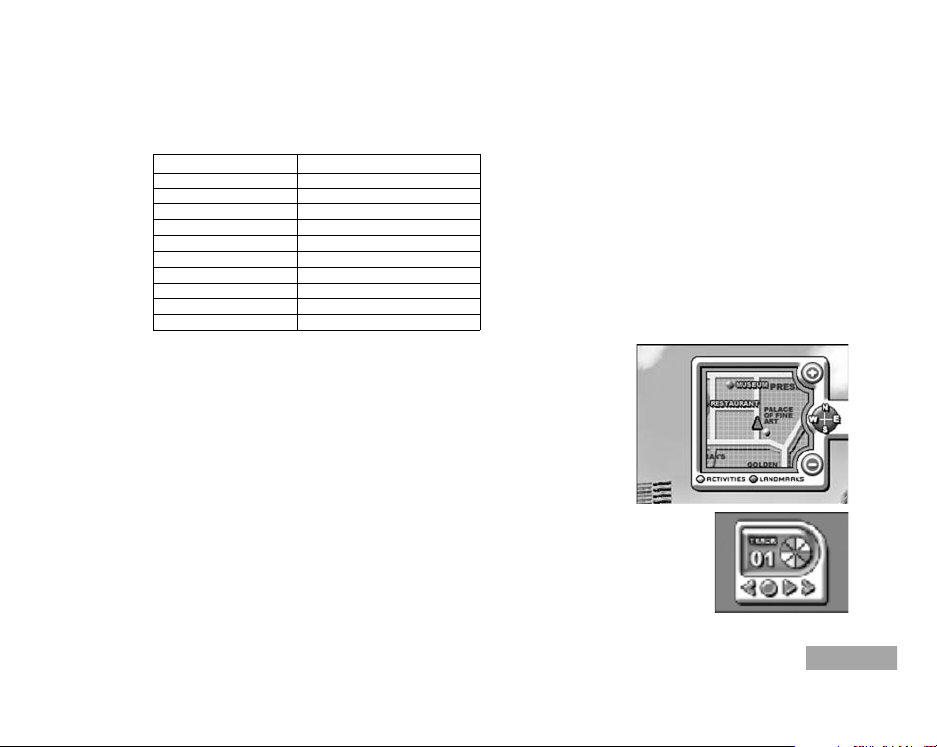
The Navigator
The navigator sits at the top right hand corner of the driving screen. It shows you the part of the city
that you are driving through. Your car is marked by the red arrow that moves around the map. The
activity buildings are marked by a red star and the landmarks are marked by a yellow star. Click the
+ and - buttons with the mouse to zoom in and out. You can also zoom in by pressing the driving
wheel navigator button or the N button. You must be stopped to zoom the navigator.
The Music Player
If you have chosen the music option in the Options Screen then you can select one of 6 different pieces of music to
listen to while you are driving. The buttons on the Player are the same as CD player buttons. From left to right you
can Skip back a tack. Stop, Play or Skip forward a track.
Make sure you are stopped when you change the music, you don’t want to have an accident!
Page 10

8
Driving Rules and the Police
As you drive around the cities you must be careful to obey the traffic rules. If you break a law you will get a warning message on the screen.
If it says Drive Carefully you should make sure you are not breaking any laws. If you see the policewoman’s head as well then you should be
very careful! The police will stop you if you drive very badly or if you keep getting warning messages. If you break a law the Police Activity
will start. The laws that are enforced by the Drive Across America police force are:
• Driving on the pavement • Running traffic lights • Driving across a park or other pedestrian area
• Hitting objects • Crashing into other cars • Driving on the wrong side of the road
• Smashing into buildings • Driving too fast
See the instructions for the Police Activity in Chapter 4 to find out more about this.
The Speedometer, the Fuel Gauge and the Car Damage Meter
In the bottom left hand corner of the screen is the speedometer, the fuel gauge and the car damage meter. The
speedometer shows you how fast you are travelling so keep an eye on this to avoid being caught by the police.
Keep an eye on the fuel gauge. Make sure you visit a Gas Station before you run out of fuel. If you do run out,
you will automatically go to the Gas Station. If you run out of points and fuel, the game is over.
The car damage meter shows the state of your car. Each time you hit something while driving you
will damage the car. This will be recorded on the meter. Big hits will do more damage than little hits.
To repair the damage you can drive to the Garage (see chapter 4). If your car damage reaches
maximum you will automatically be taken to the Garage since you can’t drive with a wrecked car!
Learning Activities
There are many activity stops in the cities, marked by a floating balloon. To enter the activities, stop
the car outside the building and press the Enter button on the driving wheel or the Space Bar. When
you leave an activity you will go back to your car in the place that you left it.
Page 11

9
Chapter 4
Changing Your Car
If you earn enough points in the learning activities you will be able to buy a new car or change the color of your current car. See the information
about the Garage activity in Chapter 4 to find out more about this.
In-Game Options: Exiting the 3D Cities and Saving the Game
In a 3D city, when you press the Pause button on the driving wheel or the P or Escape buttons you will get the Pause menu. This allows you
to return to the map screen if you want to leave the city, continue the game or get the in-game options screen.
Choose the options screen if you want to save your game. The in-game options screen is the same as the normal options screen (see Chapter
2), except that there is now a Save Game button, a Continue button to return to the game, and a Back to Title button. The Save Game button
will ask you to choose a save game slot to save your game.
To see the options screen when you are on one of the map screens you must go to the largest map page that shows all of the Americas. If you
are in a Picture City you must exit it and go to the Americas map to get the options screen.
Activities
General Activity Rules
You need to use the mouse when you enter an activity building. Whenever the instructions tell you to click on a button or on the screen, move
the mouse arrow over the screen and press the left mouse button.
Most activities have a help button at the bottom of the screen. If you are not sure what you have to do when you first visit an activity click
on the Help button. An animated character will tell you about the activity. For most activities you then have to click the Help button again
so that the Help function is disabled.
Page 12

10
Some activities also have help available while you are playing the game. This will give you a hint about how to answer the question. Don’t
use this type of help too much- often you will get a lower score if you do!
Most of the activities have different difficulty levels. You must choose a level before the game starts. Higher levels are more difficult but you
can score more points.
When you want to carry on driving you can leave by clicking on the Exit button.
The Local Museum
At the Local Museum you can learn about some famous people who were born in the State or
Province, some State/Province history and some statistics too. There are also two different types of
trivia game in the museum.
After you leave your car first of all you must click the left mouse button on the Museum door to enter.
In the Museum you can visit the Personalities section, the History section or the Statistics section by
clicking on the buttons at the bottom of the screen. When you are in the History or Personalities
sections you can see different entries by clicking on the numbered buttons that appear down the right
hand side of the screen. An arrow at the bottom of the text indicates that there is more text to read.
Click on the arrow to see the rest.
When you have read about the personalities and history you will be ready to play the Local Trivia Game. Click the Local Trivia Game button
and choose a question set. The multiple-choice questions are based on the information you have just read in the history and personalities
sections. Simply choose an answer by clicking in the box. If you get the answer wrong you can leave the trivia section and check the other
museum sections. Once you have answered a question correctly you will not be asked that question next time you play the game.
The General Trivia game asks random general knowledge questions in groups of 10. These questions cover a variety of topics and the answers
are not in the other museum sections so good luck!
Page 13

11
The Power Station
If you stop at the Power Station you can find out how electricity is generated. Each city has a different
Power Station to visit with a different power source.
Before the activity starts you must select either the Normal or Advanced level by clicking on the
corresponding button. The Advanced level goes into much more detail than the Normal level. It will
be very useful for helping you with your science homework!
The activity is very simple to play. The power station guide will tell you about the different parts that
make up a power station. When you click on one of the diagrams you can read the text and listen to
the explanation. The little arrows will allow you to see more of the text as you read it. If you read all the way through the text you will be
rewarded with some points. You won’t get any points for reading the same text twice, but it will help you learn some useful information.
The Police Activity
You won’t see this activity unless you drive very badly! The Police Activity will start automatically when you break a law. (See Chapter 3: Driving
the Car).
In the police activity you might have to pay fines for crimes you have committed or you might just get a warning. It depends on how bad your
crime was.
If you get a warning you will get a warning point added to your driver’s license. If you get three warnings you will have to pay a fine.
Every time you pay a fine you will get a penalty point added to your license. If you get 12 penalty points you will get a very large fine and any
souvenirs you have collected will be confiscated, so be careful!
If you have to pay a fine you are sometimes allowed to answer some trivia questions to reduce the amount. Make sure you have brushed up on
your local knowledge at the Museum! Oh, and remember, the real police will not let you do this!
When you are allowed to answer trivia questions you can click on the Trivia Game button. Each question you get right will reduce the fine you
have to pay by 10 points. When there are no more questions you will have to click on the Pay Fine button.
You can leave the activity by clicking on the Pay Fine button. You can do this without answering any questions if you want. If you cannot afford
the fine the policewoman might come to some other arrangement with you or your game might end so make sure you have lots of points.
Page 14

12
If you have just had a warning or if you have had to pay the fine for having 12 penalty points then you leave the activity when you click on
the “OK” button.
Grocery Store
There’s a chance to earn lots of points in this math activity. When you play the game you will see a
costs sheet. Farmers use sheets like this to help them work out how much they are spending and how
much they are earning.
To start the game, click on one of the level buttons at the bottom of the screen. You have to fill in the
missing number in the box that the arrow points to. All the information that you need is provided on
the sheet. When you think you know the answer type it in and press the Enter key. On the higher
levels it might help if you have a piece of paper and a pencil ready.
If you click the Help button before you have chosen a level then the store assistant will tell you how to play. In this game you can also click
the Help button if you get stuck on a question. The store assistant will tell you what you have to do to calculate the answer correctly. Help is
free for level 1 but on the other levels, clicking on the Help button will reduce the number of points that you score for that question.
Gas Station
Before you run out of fuel you will need to visit this activity. The gas station also sells souvenirs from
the State, which you will need to buy if you want to buy a new car (see The Garage below). There
are three types of souvenir, a model of the State/Province bird, a bumper sticker and the
State/Province flag.
If you want to buy a souvenir click on it and it will appear on the counter. After you have made your
selections click on the buy button and the Check Out sheet will appear.
Please note that you cannot buy more than one of each type of souvenir from any one city. This means
that if you already have the bird from Chicago you cannot buy another bird from Chicago but you can
buy the bumper sticker or the flag.
Page 15

13
The check out sheet shows which souvenirs you have selected (if any), and the cost of filling up the gas tank. Click the mouse in the check
boxes to confirm your purchases.
You can leave the activity by clicking on the Exit button. If you want to buy the gas or souvenirs you can leave by clicking on the Buy button
on the Check Out sheet. If you click on the Don’t Buy button then the sheet will disappear.
Remember that if you want to buy gas you must click the check box next to the gas picture on the Check Out sheet.
Restaurant
You can test your knowledge of cookery at the Restaurant but its mainly just for fun. The chef will
ask you to prepare a particular dish and he will give you many different ingredients to choose from.
You have to select the ingredients that you think make up that recipe. The chef will then judge your
“creation”!
Click on the “Play” button to start the game. The chef will tell you what to prepare and the ingredients
will appear on the table. There are more ingredients than you need so you must be careful to select
only the ones that you think go into the recipe. Ingredients are selected by clicking the mouse on the
picture.
Some of the ingredients can be used as flavorings. When you select certain ingredients you will be asked if you want to use it as a flavoring
or if you think that it is a basic part of dish. When you have done that the name of the ingredient will appear on the recipe list above the table.
You can remove a selected ingredient by clicking on it again. When you have chosen all the ingredients for the recipe click on the Cook button
that appears on the chef’s hat. The chef will then judge your creation and award you points based on what he thinks of your cookery. Click
the Next button that appears at the bottom of the screen to continue.
Please note: you may know a different way of cooking some of the recipes but the chef will only give you a good score if you get close to his
recipe. Cooking is an art, there is never only one way to prepare food. Just remember this is all a bit of fun!
Page 16

14
Warehouse
This building has two games for you to play, the Quick-Fire Math Game and the Packing Game.
To start the Quick-Fire Math Game click on the large box on the right of the screen or on the button
on the left marked “Quick-Fire Math Game”. The game starts when you choose a level. In this game
you have a time limit in which to answer the math question. Use the keyboard to type in the number.
As the time counts down the points you will receive for getting the question correct also count down.
You cannot answer the question after the time runs out. There are 10 questions in each game. There
is no Help in the Quick Fire Math game. Higher levels give more points but the questions are harder
and you have less time to answer them.
The Packing Game is a logic game. You are shown a 3D cube that you can rotate using the arrows next to it. Take a good look at it from
every direction and then see of you can work out which of the flattened cubes on the right would make the 3D cube if they were folded up.
There is only one correct answer so be careful. If you click on Help the computer will take away one or more of the incorrect answers to make
your decision easier but you will score fewer points. There are 10 questions in each game.
The Garage
You should visit the Garage if you want to buy a new car, change the color of your current car or if
you want to get your car repaired. There are two buttons on the main screen, one takes you to the Car
Dealer and the other takes you to the Repair Shop. If have so many crashes that your car is totally
damaged then you will be automatically taken to the repair shop.
At the Repair Shop the mechanic will take a look at your car and give you a bill based on the damage.
You are normally given two options, “Pay Bill” or “Exit Repair Shop”. If your car is on maximum
damage then you will not have the option to leave the repair shop. If you click on Pay Bill but do not
have enough money then the car is only partially repaired. If you car is totally damaged and you have
no money, don’t worry! You can still click on Pay Bill, the mechanic will probably be able to arrange
some kind of deal with you. If you click on the Exit Repair Shop button you will go back to the main
screen but no repairs will have been carried out on your car.
At the Car Dealer’s you can choose a new car. You must earn lots of points and have the correct number of souvenirs to buy a new car but
Page 17

15
you are free to browse at any time. You can look through the new cars by clicking on the left and right arrows next to the Buy button. You
can change the color of the cars by clicking on the color buttons on the left of the screen. The board at the top of the screen tells you some
information about the car. You can also change your car color by driving the same car with a different color.
If you click on the Buy button then the dealer will tell you how many souvenirs you need and how much you will need to pay after he takes
off the price of your old car. (When you buy a new car your old car is always traded in.) If you still want to buy it click on the “Okay, I’ll
take it”, button. If you don’t want it then click on the “I need time to think about it” button. If you click on the Exit Car Dealer’s button you
will go back to the main screen without buying a new car.
There are four cars to choose from, the basic car, the SUV, the custom car and the sports car. To buy them you need enough money and the
correct souvenirs. You need 2 flags for the SUV, 3 birds for the custom car and 5 bumper stickers for the sports car. See The Gas Station
instructions for information about buying souvenirs.
The Internet Café
See Chapter 1 for more details.
Page 18

16
Troubleshooting
While we make every effort to test as many different computer configurations as possible we cannot check every possible combination of
hardware. Before contacting an authorized service center at 1-800-853-8883, please check the following and look for updates on
www.driveacross.net:
Make sure Direct X 8.0 is installed.
The intro animation does not work properly.
Please re-install Direct X 8.0
When I drive into some parts of a city the game slows down.
The 3D city is very large and takes a lot of processor power to render it. Some parts of the city have many models onscreen and this takes
more processor power. Slower computers may have a problem with this.
The driving is very slow all the time.
Does your computer match the minimum requirements? If so and it is still very slow you could try the following: In the options check the
number of pedestrians in the city, you could reduce this number to make the game run faster. Also reduce the number of cars. If this does not
help then perhaps you need to install the game with low-resolution textures. See chapter 1 for details on how to do this.
Some parts of the screen display in the 2D activities or the driving are corrupted.
Please check that you are using the current driver for your display card and make sure that Direct X support is enabled (see your display card
manual for details). Also set your display to 16-bit color and at least 800*600 resolution.
I cannot hear the sound.
Is you sound card connected properly? Are the correct drivers installed? Have you changed the volume levels in the game options? Not all of
the text in the game has a speech file.
Appendix A
Page 19

17
The wheel stops working.
First try reloading the city. If this does not work check the connections and then test the wheel by clicking the Start Menu and choosing
Settings, Control Panel and Gaming Options. The status of the wheel should be OK. If it is not try re-installing the driver following the steps
in Chapter 1.
The car does not drive in a straight line or turn very well, or the acceleration and braking is unresponsive.
Check that your wheel is calibrated properly. See Chapter 1 for details.
Developing learning products is a responsibility that we at Oregon Scientific take very seriously. We make every effort to ensure the accuracy
and appropriateness of the information that forms the value of our products. However, errors sometimes occur. It is important for you to know
that we stand behind our products and we encourage you to call our Consumer Services Department at 1-800-853-8883 with any problems
and/or suggestions that you might have. Our service representative will be happy to help you.
In an effort to continually improve our products, the actual screen display may differ slightly from the pictures shown in the manual.
Conforms to safety requirements of ASTM F963
EN71 Parts 1, 2 and 3 and EN50088.
Warning: Changes or modifications to this unit not expressly approved by the party responsible for compliance could void the user’s
authority to operate the equipment.
NOTE: This equipment has been tested and found to comply with the limits for a Class B digital device, pursuant to Part 15 of the FCC
Rules. These limits are designed to provide reasonable protection against harmful interference in a residential installation. This
equipment generates, uses, and can radiate radio frequency energy and, if not installed and used in accordance with the instructions,
may cause harmful interference to radio communications. However, there is no guarantee that interference will not occur in a
particular installation. If this equipment does cause harmful interference to radio or television reception, which can be determinedby
turning the equipment off and on, the user is encouraged to try to correct the interference by one or more of the following measures:
• Reorient or relocate the receiving antenna.
• Increase the separation between the equipment and receiver.
• Connect the equipment into an outlet on a circuit different form that to which the receiver is connected.
• Consult the dealer or an experienced radio TV technician for help.
“ This Class B digital apparatus complies wit Canadian ICES-003.”
“ Cet appareil mumérique de la class B est conforme à la norme NMB-003 du Canada”
Page 20

18
License Agreement and Limited Warranty
PLEASE READ THIS LICENSE AGREEMENT CAREFULLY BEFORE USING THE PRODUCT. THIS DOCUMENT IS AN
AGREEMENT BETWEEN YOU AND OREGON SCIENTIFIC INTERNATIONAL LTD. THE SOFTWARE IS LICENSED TO YOU
ONLY ON THE CONDITION THAT YOU ACCEPT ALL THE TERMS IN THE LICENSE. BY USING THE SOFTWARE YOU ARE
AGREEING TO BE BOUND BY THE TERMS OF THE LICENSE AND ALL APPLICABLE COPYRIGHT LAWS. IF YOU DO NOT
AGREE TO ABIDE BY THESE TERMS PLEASE RETURN THE UNUSED SOFTWARE AND ALL PACKAGING WITH THE
ORIGINAL, DATED SALES RECEIPT FOR A FULL REFUND, WITHIN 90 DAYS OF PURCHASE.
The term “Software” refers to the original software and whole or partial copies of it and any or all audio, textual or pictorial content that forms
a part of the software with which this license agreement is provided. The term “Company” refers to Oregon Scientific International Ltd.
1. Ownership and License. The Company grants you a non-exclusive license for the Software. The Software is licensed to you and not
sold. You own the CD-ROM on which the Software is recorded but the Company retains title to the Software and all related
documentation. Your rights to use the Software are specified in this Agreement and the Company retains all rights not expressly granted
to you in this Agreement.
2. Use of the Software. You are granted the following rights to the Software:
(a) You may install and use the Software on only one computer at any one time.
(b) You may make and keep one copy of the Software for backup purposes only.
(c) You may transfer all your rights to the Software to another party provided that: 1) you transfer this Agreement, the complete Software
and any or all documentation provided with the Software to the other party; 2) you destroy all copies of the Software in your possession;
and 3) the other party reads and agrees to be bound by the terms of the License Agreement. It is your responsibility to ensure that in the
event of a License transfer all of these conditions are met. The rights granted to you by this License Agreement are then terminated with
respect to you and transferred to the other party, who, in order to be a valid user of the Software is then subject to all the terms and
conditions of this License Agreement.
Appendix B
Page 21

19
3. Prohibited Uses. You may NOT do any of the following:
(a) Use, copy or transfer the Software or accompanying documentation except as provided in this License Agreement.
(b) Use any backup copy of the Software except to replace the original in the event that it is destroyed or becomes defective.
(c) Alter, de-compile, disassemble or otherwise reverse engineer the Software.
(d) Create derivative works from the Software or documentation.
(e) Rent, lease or sublicense the Software.
(f) Upload or transmit the Software, in whole or part, to any network or multi-user computer system regardless of purpose.
(g) Include the Software in any commercial products intended for manufacture, distribution or sale.
(h) Remove or obscure any copyright or trademark notices in the Software or documentation.
4. Termination. You may terminate this License Agreement at any time by destroying and disposing of the software and all related
documentation. Your license will terminate automatically without any notice from the Company if you fail to comply with the provisions
of the License Agreement. Your license will terminate if you transfer the Software according to the terms in paragraph 2(c). Upon
termination you shall destroy all copies of the Software and any accompanying documentation in your possession. All provisions of this
Agreement as to warranties, limitation of liability, remedies or damages shall survive termination.
5. Copyright. The Company holds valid copyright in the Software. Nothing in this agreement constitutes a waiver of any rights under U.S.
or U.K. copyright laws or any other U.S. federal or state law or any other U.K. law. The laws applicable are determined by the country
where the product is used.
6. Miscellaneous. This Agreement shall be governed by the laws of the country where the product is used. If any part of this Agreement
is found to be unlawful, void, or for any reason unenforceable then that part shall be severed from, and in no way shall affect, the validity
or enforceability of the remaining provisions of the Agreement.
7. Limited Warranty and Disclaimer of Warranty. For a period of 90 days from the date on which you purchased the product
accompanying this Agreement, Oregon Scientific warrants that the media on which the Software is supplied will be free from defects in
material or workmanship under normal use. If the Software fails to conform to this warranty, you may, as your sole and exclusive remedy,
obtain a replacement free of charge if you return the defective Software with the original, dated sales receipt. The Company does not
warrant that the Software or its functions will meet your requirements, nor that the use thereof will be free from interruption or error.
Page 22

20
EXCEPT FOR THE EXPRESS WARRANTY SET FORTH IN PARAGRAPH 7, THE COMPANY DISCLAIMS ALL WARRANTIES,
EXPRESS OR IMPLIED, INCLUDING AND WITHOUT LIMITATION, THE IMPLIED WARRANTIES OF MERCHANTABILITY AND
FITNESS FOR A PARTICULAR PURPOSE. EXCEPT FOR THE EXPRESS WARRANTY SET FORTH IN PARAGRAPH 7, THE
COMPANY DOES NOT WARRANT, GUARANTEE OR MAKE ANY REPRESENTATION REGARDING THE USE OR THE RESULTS
OF THE USE OF THE SOFTWARE IN TERMS OF ITS CORRECTNESS, ACCURACY, RELIABILITY, OR OTHERWISE.
IN NO EVENT SHALL THE COMPANY OR ITS EMPLOYEES BE LIABLE FOR ANY INCIDENTAL, INDIRECT, SPECIAL OR
CONSEQUENTIAL DAMAGES ARISING OUT OF, OR IN CONNECTION WITH, THE LICENSE GRANTED UNDER THIS
AGREEMENT; INCLUDING AND WITHOUT LIMITATION, LOSS OF USE, LOSS OF DATE, LOSS OF INCOME OR PROFIT, OR
OTHER LOSS SUSTAINED AS A RESULT OF INJURY TO ANY PERSON, OR LOSS OF OR DAMAGE TO PROPERTY, OR CLAIMS
OF THIRD PARTIES, EVEN IF THE COMPANY OR AN AUTHORIZED REPRESENTATIVE OF THE COMPANY HAS BEEN
ADVISED OF THE POSSIBILITY OF SUCH DAMAGES. IN NO EVENT SHALL LIABILITY OF THE COMPANY FOR DAMAGES
WITH RESPECT TO THE SOFTWARE EXCEED THE AMOUNTS ACTUALLY PAID BY YOU, IF ANY, FOR THE SOFTWARE.
SOME JURISDICTIONS DO NOT ALLOW THE LIMITATION OF IMPLIED WARRANTIES OR LIABILITY FOR INCIDENTAL,
INDIRECT, SPECIAL OR CONSEQUENTIAL DAMAGES, SO THE ABOVE LIMITATIONS MAY NOT ALWAYS APPLY.
8. Acknowledgement. You acknowledge that you have read this agreement, understand it and agree to be bound by its terms and
conditions. You also agree that this Agreement is the complete and exclusive statement of the agreement between you and the company
and supersedes all proposals or prior endorsements, oral or written, and any other communications between you and the company or any
representative of the company relating to the subject matter of this Agreement.
Drive Across the Americas
TM
created through Nemo Creation/Dev development platform. Parts of the code are © Nemo SA 1998-1999.
Windows and Direct X are trademarks or registered trademarks of Microsoft Corporation. Pentium is a registered trademark of Intel
Corporation.
Page 23

NOTE:
Page 24

NOTE:
Page 25

NOTE:
Page 26

Dear Parent/Guardian,
Thank you for buying Drive Across the Americas. Using the latest technology, Oregon Scientific
aims to develop unparalleled learning products that make learning a lot more fun.
Designed by experts, our products are packed with unique interactive activities that make an
invaluable contribution to your child’s development.
As well as activities with specific objectives of furthering skills of mathematics,
comprehension, and logical reasoning, Drive Across the Americas teaches children
loads of fascinating facts about places all over the Americas.
When it comes to developing your child’s mind,
Oregon Scientific’s products will help them achieve their potential.
Serial number:
Page 27

Oregon Scientific, Inc.
19861 SW 95th Place
Tualatin, OR 97062
Tel: 503 639 8883
Fax: 503 684 8883
Email: info@oscientific.com
Look for us on the World Wide Web!
http://www.oregonscientific.com
http://www.driveacross.net
086-000553-021
Page 28

Electronic Learning Products
O
u
r
m
i
s
s
i
o
n
i
s
t
o
m
a
k
e
l
e
a
r
n
i
n
g
f
u
n
 Loading...