

Orcon GENIUS How To Install

1
HOW TO INSTALL

2
BEFORE YOU BEGIN
Please check the following items have been included.
Orcon Genius is super smart, so you don’t need to be
Einstein to set it up. Just follow the instructions below
and you will soon be up and running with high speed
internet and calling.
Orcon Genius Handset - in a
seperate box
(Not with Genius Lite)
Power Pack Ethernet Cable Phone Cable x2
THANK YOU FOR CHOOSING
ORCON GENIUS.
IMPORTANT:
You will know that your service is active when:
1. You receive a text and/or an email telling you that your Orcon Genius
connection is complete. This will be sent to the email and mobile
entered during sign-up.
2. Your regular phone loses dial tone.
This is when you can install your Orcon Genius (not before).

3
Choose a good location for Orcon Genius to be set up.
1. Near to the telephone wall socket that provides the broadband service.
2. Near to a power point.
3. Near to your computer(s).
Make sure there is adequate space around the modem for ventilation and
do not block the ventilation holes.
Keep the modem away from heat sources and out of direct sunlight.
The modem installation will take approximately 10 - 20 minutes as Orcon Genius
communicates with our systems.
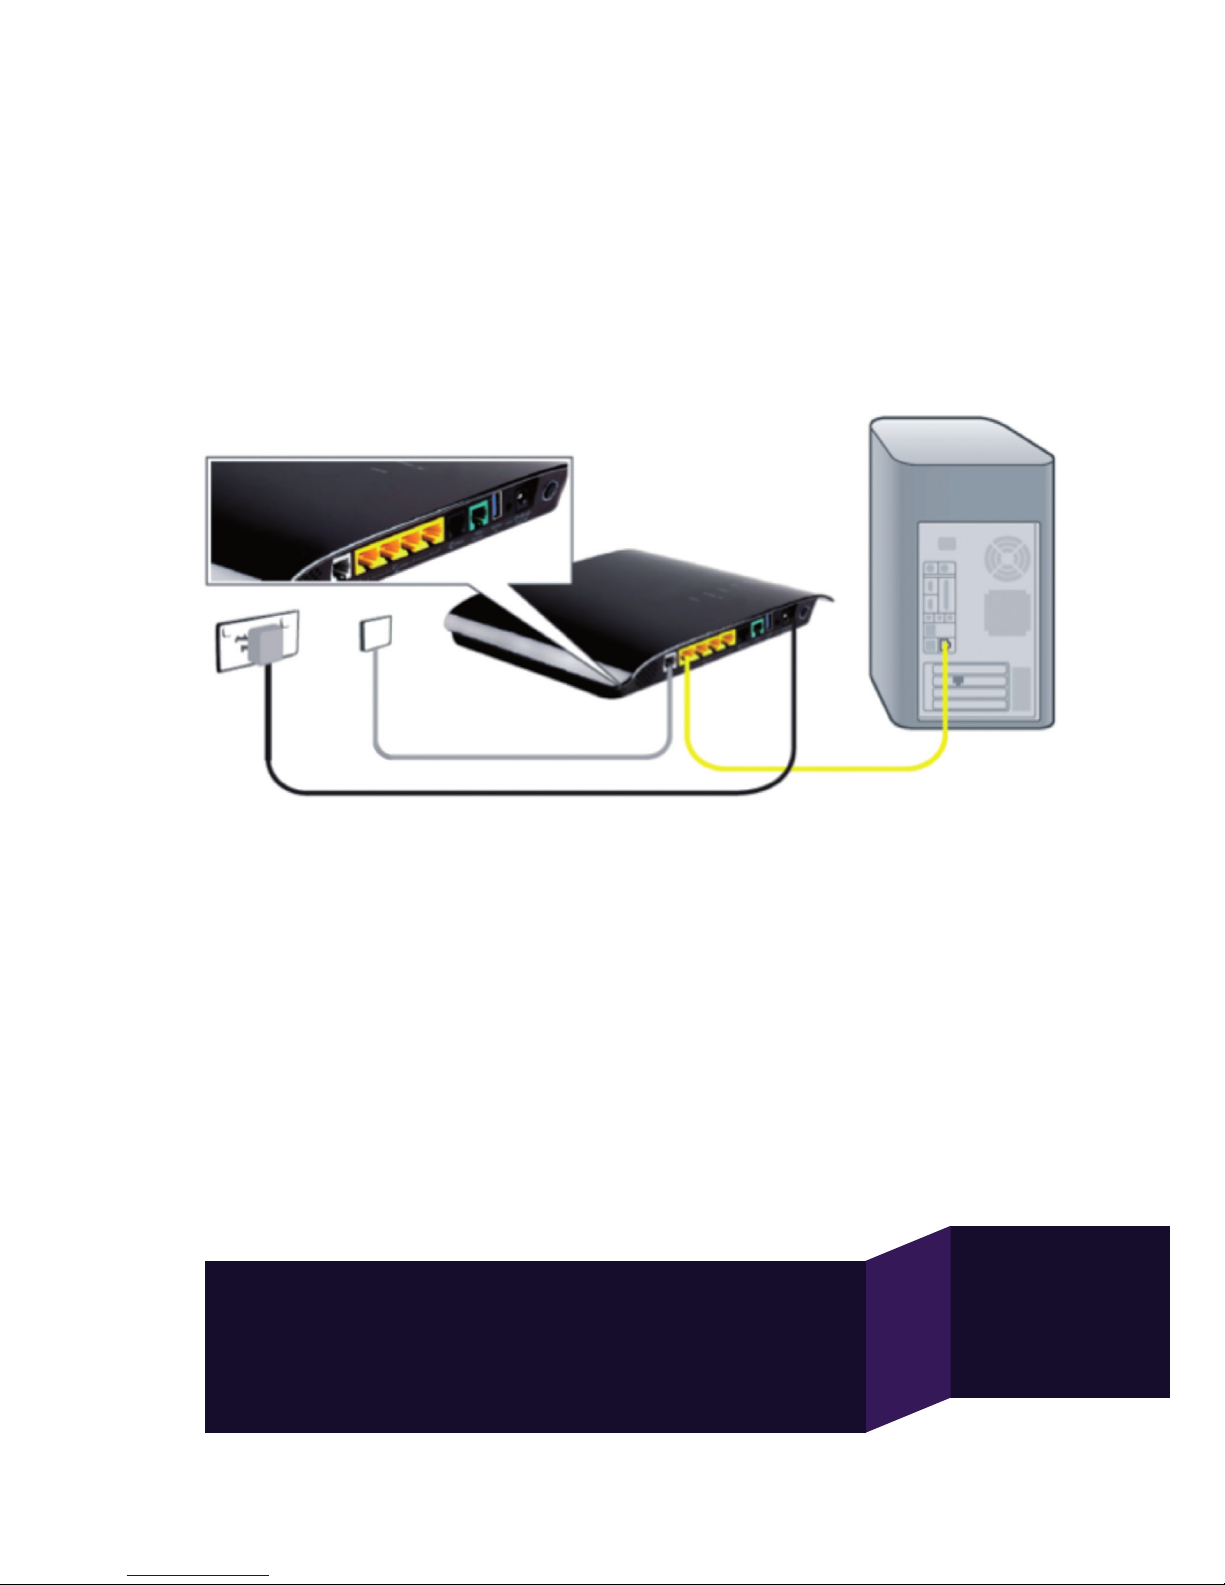
INSTALLING THE MODEM
1. Connect the power adaptor to the black power port on the device. Plug the power
adaptor into the wall socket. Turn the modem power button on and wait for the
green light to illuminate.
2. Plug one of the white phone cables (which can be found in your Orcon Genius box)
into the socket labelled ADSL on the right hand side of the modem. Plug the other
end straight into the phone socket on your wall.
Note: you don’t need a line filter like you may have been using with a previous
broadband setup.
3. Your setup should look like this:
PHONE CABLE
POWER CABLE
4
Connecting your computer to Orcon Genius
Locate the yellow Ethernet cable and connect one end of the Ethernet cable to
one of the four yellow Ethernet ports on the modem. Connect the other end to the
Ethernet port on the back of your PC or Laptop (please refer to PC user guide or PC
manufacturer if you are unsure where this is located).
PHONE CABLE
POWER CABLE
ETHERNET CABLE
To connect wirelessly please turn to
the wireless setup guide located in
the appendix on page 10.
5
GETTING ORCON GENIUS CONNECTED
Hooray!
You have successfully completed the physical set up process for Orcon Genius.
This is the first time you connect so you will need to wait 3-5 minutes to allow
Orcon Genius to download its configuration settings for broadband and voice.
We suggest you make yourself a cup of tea, and then have a crack at this
Sudoku puzzle.
By the time you’ve finished, the lights on the front of Orcon Genius should be
illuminated and solid blue as per below.
You should now be able access the internet… what will you do first? Email your mum?
Watch cat videos on YouTube? Or perhaps a spot of Facebook stalking?
To setup your Orcon Genius phone turn the page.
7 1
9 8 7
4 6
2
82
25
6
8 6
1 9
7 2 9
6
82 4
7
6 2
1 6
1 8
9 5
6 3
Having trouble setting up?
Call us on 0800 13 14 15.
adsl sync
wired
internet
wireless
phone
6
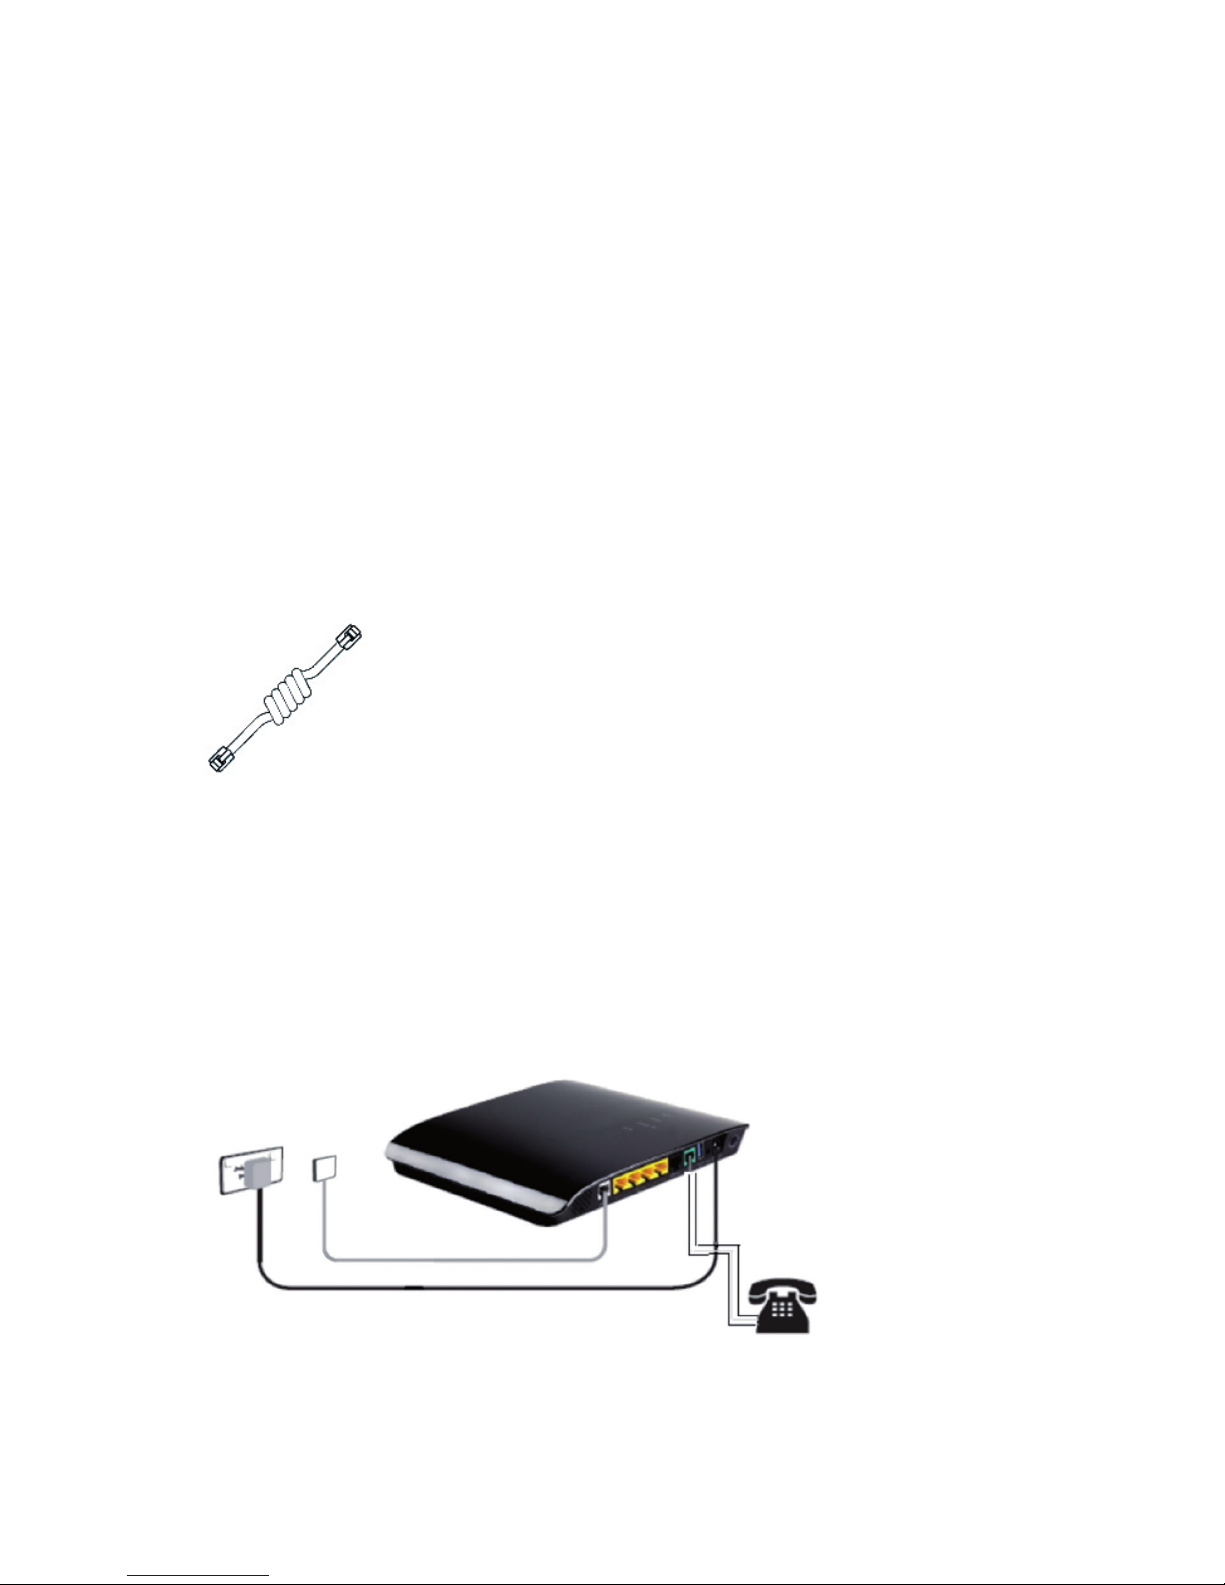
ORCON GENIUS PHONE
Now that you’re up and running on the internet, it’s time to set up your
Orcon Genius phone.
Your set up instructions will differ depending on the setup option you chose
during sign up.
A. Orcon Genius Lite – supply your own handset (see below).
B. Orcon Genius – with included Orcon Genius handset (turn the page).
A. Orcon Genius Lite – supply your own handset.
Locate the white phone cable supplied with your Orcon Genius Lite device
• Connect the white phone cable into the green port on Orcon Genius Lite.
• Connect the other end in the matching socket on your phone.
Note: some phones will not have the same socket type as this cable, in this case you
will need to source a new phone or correct cable from your local electronics store.
POWER CABLE

7
B. Genius device with included Orcon Genius handset
Before you start making calls, check you’ve received everything listed below:
1. Orcon Genius handset
2. Handset charger
3. Mains adapter for the charging cradle
4. Batteries (two)
5. One user guide
Setting up your Orcon Genius handset
Ok, it’s time to set up so you can start talking. Firstly, remove the protective film from
the Orcon Genius handset display screen.
Power up the Orcon Genius handset. Please only use the rechargeable batteries.
Using conventional (non-rechargeable) batteries could pose health risks and cause
damage to the handset.
Caution: risk of explosion if battery is replaced by an incorrect type. Dispose of used
batteries according to the instructions.
1. Insert the batteries as indicated in the battery compartment.
2. To close the battery cover, hold it at a slight angle and push it onto the handset,
bottom first.
3. Press the cover down until it clicks into place.
On the handset
The phone handset that arrived with Orcon Genius is already registered and paired
with the main device so is ready to go.
For additional information about your Orcon Genius handset such as customisation
please see the “Genius handset booklet.”
You should now be able to make and receive phone calls. We suggest you treat
yourself to takeaways tonight and call your friendly pizza shop to test it out.
Or you could call an aging relative. Or get pizza.

8
Note: we recommend you follow steps 3-5 to make sure your Orcon Genius is
super secure and safe.
CONTENTS
1. GET TO KNOW GENIUS
2. HOW TO SET UP WIRELESS
3. HOW TO ADMINISTER ORCON GENIUS MANUALLY
4. HOW TO CHANGE YOUR ORCON GENIUS WIRELESS PASSWORD
5. HOW TO CHANGE YOUR ORCON GENIUS DEVICE PASSWORD
6. HOW TO SET UP A FILE SERVER
7. HOW TO SHOW OFF ORCON GENIUS
ORCON GENIUS
– MORE DETAILED INFO
 Loading...