

Orcon DM11Pv2 Installation Manual

HOW TO INSTALL
YOUR NEW
BROADBAND
MODEM
orcon.net.nz
CONFIGURING THE MODEM
If you have trouble with
the setup process please
call us on 0800 13 14 15.
1. Turn the computer on and open up a web browser
(for example Internet Explorer).
2. In the ‘Address’ field type in 192.168.1.1
3. When prompted for a username and password type admin as the
username and admin as password (this username allows you to
access the routers interface).
4. This will take you to the ‘Quick Start’ page where you need to
enter your Orcon username and password. The Orcon username
needs to be in the format <username>@orcon.net.nz
5. Click Connect.
6. Once connected close the window and open up a new window to
start browsing.
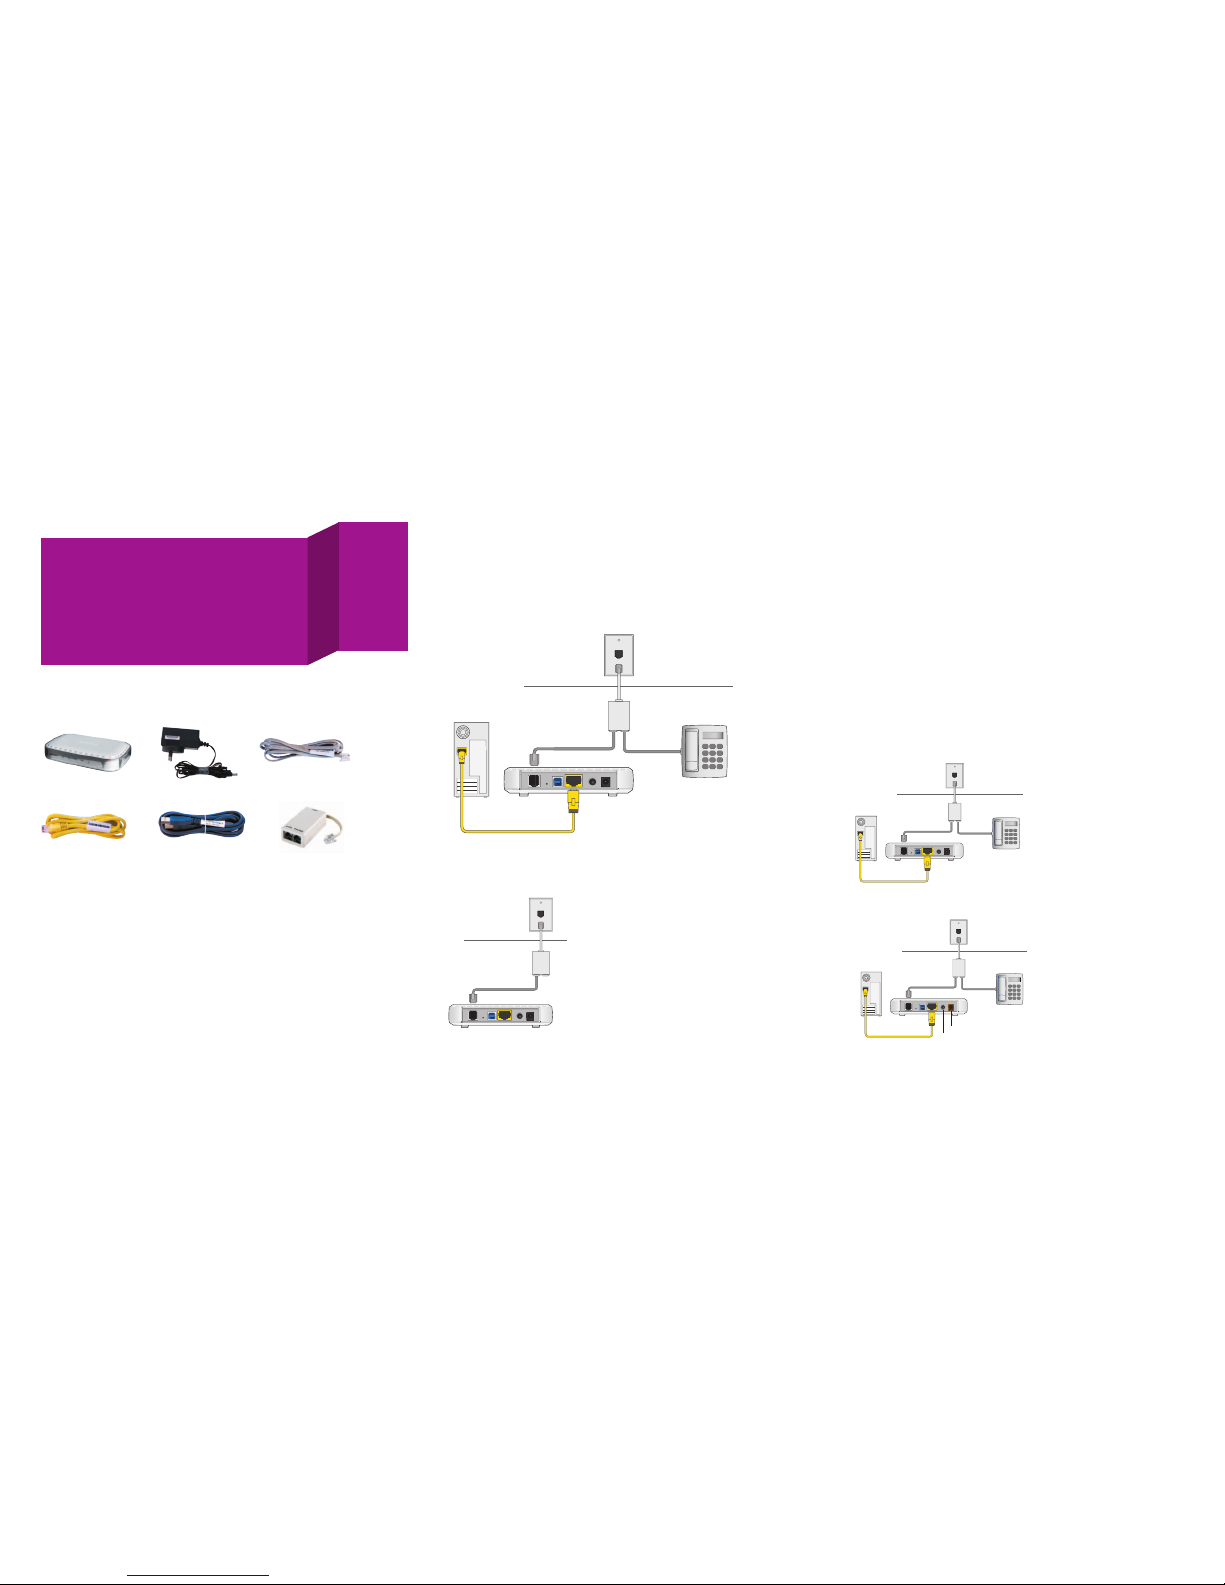
In this box you’ll find your new Netgear modem.
Just follow the instructions below and you will
soon be up and running with high speed Internet.
BEFORE YOU BEGIN
Please ensure you have the following contents.
Choose a good location for your router to be set up.
1. Near to the telephone wall socket that provides the ADSL service.
2. Near to a power point.
3. Near to your computer(s).
Make sure there is adequate space around the modem for ventilation
and do not block the ventilation holes.
Keep the modem away from heat sources and out of direct sunlight.
The modem installation will take approximately 10 – 20 minutes.
Important info: Ensure your internet service is active (you should receive
a text and/or an email upon the completion of your Orcon connection)
and you have the necessary username and password settings.
INSTALLING THE MODEM
The image shows what the end result will be upon the completion of the set-up.
View the label on the bottom of the modem. It identifies useful information such
as Ethernet port, USB port and LED legends and default login information.
ADSL filters prevent noise interference between
your telephone wiring and your modem.
You must connect an ADSL filter to every
device in your home/office that uses the
same telephone line as your DSL modem
e.g. phones, faxes, SKY and monitored alarms.
If you fail to install an ADSL filter on all devices,
you may experience noise while you are talking
on the telephone and your internet connection
may not work.
1) Connect ADSL filter to wall socket
DM11Pv2 Modem
Ethernet cable
Locate the yellow Ethernet
cable and connect one end of the
Ethernet cable to the Ethernet
port on the modem.
Connect the other end to the
Ethernet port on the back of your
PC (please refer to PC user guide
or PC manufacturer if you are
unsure where this is located).
Plug the modem power adapter
into the power point. Insert the
power cord into the power port of the
modem (as shown in the image).
Turn on the modem by pressing the
power switch button.
Note: Ensure you are using the power
adapter that comes with the modem.
5) Power on the modem
Power adapter
USB cable
Telephone cable
ADSL in-line filter/splitter
THANK YOU FOR
CHOOSING ORCON
4) Connecting your PC to your modem
3) Connecting your telephone to the ADSL filter
Connect your telephone in to the ‘Phone’ socket on your ADSL filter.
An ADSL filter is required for each telephone device plugged in to the same
line as your broadband connection at the premise.
2) Connect the router to the filter
Securely insert one end of the supplied phone cable into the filter port marked
‘ADSL’ and the other end of the cable in to the ADSL port on the router.
Note: Incorrectly connecting your modem to the phone socket prevents the
modem from connecting to the internet.
ETHERNET CABLE
PHONE
ADSL2
LINE
ETHERNET CABLE
PHONE
ADSL2
LINE
ADSL PORT
WALL SOCKET
PHONE CABLE
PHONE
ADSL2
LINE
POWER PORT
POWER SWITCH
PHONE
ADSL2
LINE
 Loading...